1
NOTE:
• If the transfer signal is pulled low (Active)
• All loads are enabled until an overload is detected
• When an overload is detected all loads are disabled
• After 5 minutes priority 1 loads are enabled.
• After another 30 seconds priority 2 loads are enabled
• After another 30 seconds priority 3 loads are enabled
• After another 30 seconds priority 4 loads are enabled
If an overload is detected within 30 seconds of a level being
enabled, all loads are disabled again and the sequence repeats.
However, the level that caused the overload and all levels higher
will not be enabled again for 30 minutes.
For specific AC control wire information, please refer to the
HVAC systems Owner’s/Operation Manual.
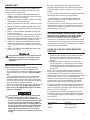
APPENDIX D – DIGITAL LOAD MANAGEMENT
(DLM) MODULES
The load controller can operate up to four separate DLM’s, each
one connected the same way as below.
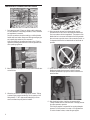
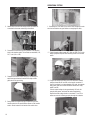
• The NEMA 3R Enclosure of the DLM module can be installed
indoors or outdoors. If mounting outdoors the enclosure MUST
be orientated with the drain hole at the bottom.
• The DLM module is fitted with conduit knockout locations.
These knockout locations are the only locations that conduit
should be attached to the enclosure. A grounding stud is
provided inside the enclosure in order to ground the conduit.
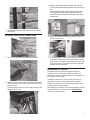
Control of Air Conditioner Load
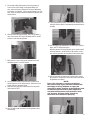
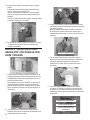
1. Route the thermostat cable (from the furnace/thermostat to
the outdoor air conditioner unit) to the transfer switch.
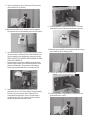
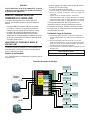
2. Connect the wire to the terminal strip terminals (Air 1) on
the LSM as shown in Figure 2.2. These are normally closed
contacts which open upon load shed conditions. Route
thermostat wire away from High voltage wires.
3. If required, connect the second air conditioner to the terminal
strip terminals (Air 2).
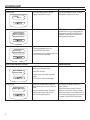
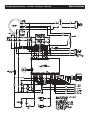
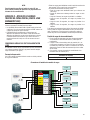
CONNECTING LOAD SHED MODULE (LSM) CONNECTIONS
The LSM can control an air conditioner (24 Vac) directly or
a separate contactor (120 Vac) which can control any load
connected to it (see Figure).
Contact Ratings
Sequence of Operation
Air 1 & 2
The 4 green status LEDs will indicate when a load priority level is
enabled.
24 VAC, 5.0 Amps Max
NOTE:
These instructions are for a typical air conditioner
installation. Control of heat pump and 2-stage air
conditioners will require special connections.
• All loads are enabled when the transfer signal is off. (ATS in
Utility position).
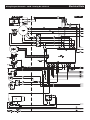
Load Shed Module Connections
Supply
0 Ground
Contactor #1
194 +12V
23 Transfer
Load #1
T1
NEUTRAL
AIR 1
Supply
CONTACTOR
1
AIR 2
CONTACTOR
Contactor #2
2
Priority 1
CONTACTOR
Priority 2
3
Priority 3
CONTACTOR
Priority 4
Load #2
Coil wires
Supply
4
Contactor #3
Load #3
Supply
Contactor #4
Load #4
19