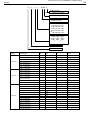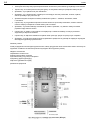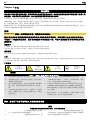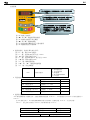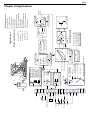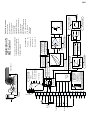
1
www.sds.ltd.uk | 0117 9381800 | [email protected] AC10 series HA502320U001 Issue 1 Product Manual aerospace climate control electromechanical filtration fluid & gas handling hydraulics pneumatics process control sealing & shielding ENGINEERING YOUR SUCCESS. www.sds.ltd.uk | 0117 9381800 | [email protected] AC10 Series Variable Speed Drive Safety & Quickstart Booklet HA 502319U100_01 Contents: Chapter 1 English........................................ 1-1 INSTRUKCJA SZYBKIEGO URUCHOMIENIA .....................5-3 SAFETY INFORMATION ...................................................... 1-1 KOMPATYBILNOŚĆ .............................................................5-8 QUICKSTART ....................................................................... 1-3 Chapter 6 Español ...................................... 6-1 COMPLIANCE ...................................................................... 1-8 INFORMACIÓN DE SEGURIDAD .........................................6-1 Chapter 2 Deutsch ...................................... 2-1 INICIO RÁPIDO .....................................................................6-3 SICHERHEITS INFORMATIONEN ....................................... 2-1 CUMPLIMIENTO ...................................................................6-8 SCHNELLSTARTANLEITUNG ............................................. 2-3 Chapter 7 Svenska...................................... 7-1 KONFORMITÄT .................................................................... 2-8 SÄKERHETSINFORMATION ................................................7-1 Chapter 3 Français ...................................... 3-1 SNABBSTART ......................................................................7-3 Informations de Sécurité..................................................... 3-1 INSTALLATIONSKRAV ........................................................7-8 DÉMARRAGE RAPIDE......................................................... 3-3 Chapter 8 中文 ............................................. 8-1 CONFORMITÉ ...................................................................... 3-8 安全须知.................................................................................8-1 Chapter 4 Italiano ........................................ 4-1 快速入门.................................................................................8-3 INFORMAZIONI SULLA SICUREZZA .................................. 4-1 变频器认证 .............................................................................8-8 GUIDA RAPIDA .................................................................... 4-3 CONFORMITÀ ...................................................................... 4-8 Chapter 5 Polski .......................................... 5-1 INFORMACJE DOTYCZĄCE BEZPIECZEŃSTWA.............. 5-1 Chapter 9 Dimensions for Installations .... 9-1 Chapter 10 Applications ........................... 10-1 www.sds.ltd.uk | 0117 9381800 | [email protected] 1-1 English Chapter 1 English SAFETY INFORMATION FAILURE OR IMPROPER SELECTION OR IMPROPER USE OF THE PRODUCTS DESCRIBED HEREIN OR RELATED ITEMS CAN CAUSE DEATH, PERSONAL INJURY AND PROPERTY DAMAGE. This document and other information from Parker-Hannifin Corporation, its subsidiaries and authorized distributors provide product or system options for further investigation by users having technical expertise. The user, through its own analysis and testing, is solely responsible for making the final selection of the system and components and assuring that all performance, endurance, maintenance, safety and warning requirements of the application are met. The user must analyze all aspects of the application, follow applicable industry standards, and follow the information concerning the product in the current product catalogue and in any other materials provided from Parker or its subsidiaries or authorized distributors. To the extent that Parker or its subsidiaries or authorized distributors provide component or system options based upon data or specifications provided by the user, the user is responsible for determining that such data and specifications are suitable and sufficient for all applications and reasonably foreseeable uses of the components or systems. Requirements IMPORTANT: Please read this information BEFORE installing the equipment. WARNING – Operation of this equipment requires detailed installation and operation instructions provided in the Installation/Operation manual intended for use with this product. This information is provided on the CD ROM, floppy diskette(s), or other storage devise included in the container this device was packaged in. It should be retained with this device at all times. A hard copy of this information may be ordered from the supplier indicated on the product label. Intended Users This leaflet is to be made available to all persons who are required to install, configure or service equipment described herein, or any other associated operation. The information given is intended to highlight safety issues, EMC considerations, and to enable the user to obtain maximum benefit from the equipment. Application Area The equipment described is intended for industrial motor speed control utilising, AC induction motors or AC synchronous machines. Personnel Installation, operation and maintenance of the equipment should be carried out by competent personnel. A competent person is someone who is technically qualified and familiar with all safety information and established safety practices; with the installation process, operation and maintenance of this equipment; and with all the hazards involved. Product Warnings DANGER Risk of electric shock Attention – hot surfaces Caution Refer to documentation Earth/Ground Protective Conductor Terminal Hazards 1. 2. 3. 4. 5. DANGER! - Ignoring the following may result in injury This equipment can endanger life by exposure to 6. Allow at least 5 minutes for the drive's capacitors to rotating machinery and high voltages. discharge to safe voltage levels (<50V). Use the specified meter capable of measuring up to 1000V The equipment must be permanently earthed due dc & ac rms to confirm that less than 50V is present to the high earth leakage current, and the drive between all power terminals and earth. motor must be connected to an appropriate safety 7. Unless otherwise stated, this product must NOT be earth. dismantled. In the event of a fault the drive must be Ensure all incoming supplies are isolated before returned. Refer to "Routine Maintenance and working on the equipment. Be aware that there Repair". may be more than one supply connection to the 8. WARNING – The opening of the branch-circuit drive. protective device may be an indication that a fault current has been interrupted. To reduce the risk of There may still be dangerous voltages present at fire or electric shock, current-carrying parts and other power terminals (motor output, supply input components of the controller should be examined phases, DC bus and the brake, where fitted) when and replaced if damaged. the motor is at standstill or is stopped. For measurements use only a meter to IEC 61010 (CAT III or higher). Always begin using the highest range. CAT I and CAT II meters must not be used on this product. www.sds.ltd.uk | 0117 9381800 | [email protected] English 1-2 WARNING! - Ignoring the following may result in injury or damage to equipment SAFETY Where there is conflict between EMC and Safety requirements, personnel safety shall always take precedence. • • • • Never perform high voltage resistance checks on the wiring without first disconnecting the drive from the circuit being tested. Whilst ensuring ventilation is sufficient, provide guarding and /or additional safety systems to prevent injury or damage to equipment. All control and signal terminals are SELV, i.e. protected by double insulation. Ensure all external wiring is rated for the highest system voltage. All exposed metalwork in the Inverter is protected by basic insulation and bonded to a safety earth. • When replacing a drive in an application and before returning to use, it is essential that all user defined parameters for the product’s operation are correctly installed. Thermal sensors contained within the motor must have at least basic insulation. RCDs are not recommended for use with this product but, where their use is mandatory, only Type B RCDs should be used. • • EMC • • In a domestic environment this product may cause radio interference in which case supplementary mitigation measures may be required. This equipment contains electrostatic discharge (ESD) sensitive parts. Observe static control precautions when handling, installing and servicing this product. • This is a product of the restricted sales distribution class according to IEC 61800-3. It is designated as “professional equipment” as defined in EN61000-3-2. Permission of the supply authority shall be obtained before connection to the low voltage supply. WARNING! – Control Unit Removal / Fitting Isolate supply before plugging or unplugging control unit to the power stack. CAUTION! APPLICATION RISK • The specifications, processes and circuitry described herein are for guidance only and may need to be adapted to the user’s specific application. We can not guarantee the suitability of the equipment described in this Manual for individual applications. RISK ASSESSMENT Under fault conditions, power loss or unintended operating conditions, the drive may not operate as intended. In particular: • Stored energy might not discharge to safe levels as quickly as suggested, and can still be present even though the drive appears to be switched off • • • The motor's direction of rotation might not be controlled The motor speed might not be controlled The motor might be energised A drive is a component within a drive system that may influence its operation or effects under a fault condition. Consideration must be given to: • Stored energy • Supply disconnects • Sequencing logic www.sds.ltd.uk | 0117 9381800 | [email protected] 1-3 English QUICKSTART BEFORE YOU START This document covers the steps necessary for a basic start up of the AC10 drive. Drive start ups should be performed by competent electrical technicians who are familiar with AC drives and their applications. For detailed installation, safety and applications refer to the Product Manual. Ensure that all local electric codes are met while installing the drive. Check that all live parts are covered to protect against electric shock and that unexpected rotation of the motor will not result in bodily harm or injury. This document expects that the drive is already installed in its intended location and that all relevant installation procedures have been followed. About this QuickStart This QuickStart will: • • • Familiarise you with the terminals and operation of the unit. Provide *basic installation details and a quick set-up procedure. Show you how to Autotune the drive and start the motor. This QuickStart assumes that: • You are a competent technician with experience of installing this type of equipment. • You are familiar with the relevant standards and Local Electric Codes (which take precedence). • You have read and understood the Safety Information provided at the front of this QuickStart. • You realise that this guide contains only basic information and that you may need to refer to the AC10 Product Manual to complete your installation. Product Overview www.sds.ltd.uk | 0117 9381800 | [email protected] English Product Code 10 G - 1 1 - 0015- B F F : Built- in filter N : without built-in filter B : Built- in braking unit Rated current(A): XXXX OOO.O Frame Size : 1: 80×135×138(153) 2: 106×150×180(195) 3: 138×152×235(250) 4: 156×170×265(280) 5: 205×196×340(355) Input voltage: 1: 230 V / 240V 1 phase 3: 230 V / 240V 3 phase 4 400 V / 480V 3 phase Industry Product model Supply Part number kW Input current (A) Output Current (A) Input protection current 10G-11-0015-XX 10G-11-0025-XX 0.2 0.37 0.55 4.0 6.1 8.9 1.5 2.5 3.5 6.0 10.0 14.0 0.75 1.1 1.5 2.2 0.2 0.37 0.55 0.75 1.1 1.5 2.2 0.2 0.37 0.55 0.75 1.1 1.5 2.2 3 4 5.5 7.5 11 15 11.4 16.1 16.8 21.0 2.2 4.3 6.1 7.6 11.8 12.0 14.3 1.2 2.2 3.6 4.1 6.0 6.9 9.6 11.6 13.6 18.8 22.1 30.9 52 4.5 5 7 10 1.5 2.5 3.5 4.5 5 7 10 0.6 1 1.5 2 3 4 6.5 7 9 12 17 23 32 18.1 10G-11-0035-XX 1Ph 220V 3Ph 220V 3Ph 400V 10G-11-0045-XX 10G-12-0050-XX 10G-12-0070-XX 10G-12-0100-XX 10G-31-0015-XX 10G-31-0025-XX 10G-31-0035-XX 10G-31-0045-XX 10G-32-0050-XX 10G-32-0070-XX 10G-32-0100-XX 10G-41-0006-XX 10G-41-0010-XX 10G-41-0015-XX 10G-42-0020-XX 10G-42-0030-XX 10G-42-0040-XX 10G-42-0065-XX 10G-43-0080-XX 10G-43-0090-XX 10G-43-0120-XX 10G-44-0170-XX 10G-44-0230-XX 10G-45-0320-XX 24.5 25.2 32.0 5.0 8.2 10.0 11.5 18.0 18.2 21.5 2.5 5.0 5.5 6.5 10.2 11.0 15.0 18.0 21.0 29.0 34.0 46.5 80.0 1-4 www.sds.ltd.uk | 0117 9381800 | [email protected] 1-5 English Drive Start-up • Read the Safety section at the front of the QuickStart. • Ensure that all local electric codes are met. • Check for damage to equipment. • Check for loose ends, clippings, filings, drilling swarf etc. lodged in the drive and system. • Check all external wiring circuits of the system - power, control, motor and earth connections. • Ensure that unexpected rotation of the motor in either direction will not result in damage, bodily harm or injury. Disconnect the load from the motor shaft, if possible. • Check external run contacts are open. Check external speed setpoints are all at zero. • Ensure that nobody is working on another part of the system which will be affected by powering up. • Ensure that other equipment will not be adversely affected by powering up. • Check motor stator connections are correctly wired for Star or Delta as necessary for drive output voltage. Drive Setup Before attempting to set up the drive, you will need some motor information. This is found on the motor nameplate. The information you will need is listed below: Base Volts Base frequency Base RPM Full load amps No load amps (mag current) Connection (star or delta) Basic Connections www.sds.ltd.uk | 0117 9381800 | [email protected] English 1-6 LED shows running frequency, flashing target frequency, function code, parameter value or fault code. Keypad 4 LEDs indicate working status. RUN while running. FWD running forward and FRQ when the MMI is showing frequency. Press “M” for function code, and “E” for original parameters.▲and▼keys can be used to select function codes and parameters. Press “E” again to confirm. In the mode of keypad control, ▲and▼keys can also be used for dynamic speed control. “I” and “O” keys control start and stop. Press “O” key to reset inverter in fault status. Press “M” key to display function code Press “Up” or “Down” to select required function code Press E to read data set in the function code Press “Up” or “Down” to modify data Press M to show corresponding target frequency by flashing after saving the set data Press E to display the current function code Set-Up Instructions • Select the application mode. See Chapter 9 for the application description. Press (M) until F100 is shown on the display Press (O) until only the FWD LED is illuminated (X O X X) Press (UP) to access parameter block F2xx Press (O) until both the FWD and DGT LEDs are illuminated (X O O X) Press (UP) until display shows F228 Press (E) to edit the application number Use the (UP) and (DOWN) keys to select the application Press (E) to confirm your selection F228 0: Invalid 1: Basic speed control 2: auto/manual control 3: Stage speed control 4: Terminal control; 5: PID control; Application selection • Set the Motor Paramaters F801 Rated power (kW) Setting range: 0.75~1000 F802 Rated voltage (V) Setting range: 1~460 F803 Rated current (A) Setting range: 0.1~6500 F804 Number of motor poles Setting range: 2~100 F805 Rated rotary speed (rmp/min) Setting range: 1~30000 F810 Motor rated frequency (Hz) Setting range: 1.0~650.0 4 50.00 • Select control mode The AC10 inverter has three control modes: sensorless vector control (F106=0), VVVF control (F106=2) and vector control 1 (F106=3). Under VVVF control mode, theAC10 inverter has four kinds of torque compensation modes: Linear compensation (F137=0); Square compensation (F137=1); User-defined multipoint compensation (F137=2); Auto torque compensation (F137=3) • Set the limits F111 Max Frequency (Hz) Setting range: F113~650.0 Mfr’s value: 50.00 F112 Min Frequency (Hz) Setting range: 0.00~F113 Mfr’s value: 0.50 F114 First Acceleration Time (S) F115 First Deceleration Time (S) F116 Second Acceleration Time (S) Setting range: 0.1~3000 Mfr’s value: subject to inverter model F117 Second Deceleration Time (S) Setting range: 0: 0~50.00Hz Mfr’s value: 0 1: 0~F111 When F119=0, acceleration/ deceleration time means the time for inverter to accelerate/ decelerate from 0Hz (50Hz) to 50Hz (0Hz). When F119=1, acceleration/ deceleration time F119 The reference of setting accel/decel time www.sds.ltd.uk | 0117 9381800 | [email protected] 1-7 English • Set the I/O control mode The channel for inverter to receive control commands (including start, stop and jogging, etc) contains 5 modes: 0. Keypad control; 1. Terminal control; 2. Keypad + terminal control 3. Modbus control; 4. Keypad + terminal +Modbus. The modes of control command can be selected through the function codes F200 and F201. 0: Keypad command; 1: Terminal command; 2: Keypad+Terminal; F200 Source of start command 3:MODBUS; 4: Keypad+Terminal+MODBUS 0: Keypad command; 1: Terminal command; 2: Keypad+Terminal; F201 Source of stop command 3:MODBUS; 4: Keypad+Terminal+MODBUS For terminal control please check the selector switiched for the analogue inputs. F203=2, channel AI2 is selected SW1 coding switch Coding Switch 1 Coding Switch 2 OFF OFF ON OFF ON ON F203=1, channel AI1 is selected Mode of Speed Control 0~5V voltage 0~10V voltage 0~20mA current 0~10V voltage Also check the NPN, PNP selector switches for the digital inputs. • Test run the inverter Test run the inverter from the keypad or the terminal control, checking all conditions are safe. • For advanced functions see the full manual. www.sds.ltd.uk | 0117 9381800 | [email protected] English 1-8 COMPLIANCE A comprehensive guide to product compliance is available in the AC10 Product Manual. Warning – Where there is a conflict between EMC and safety requirements personnel safety shall always take precedence. Operation of this equipment requires detailed installation and operation instructions provided in the product manual intended for use on this product. This information is provided on the cd rom included in the container this product was packaged in. It should be retained with the product at all times. Caution: This is a product of the restricted sales distribution class according to IEC 61800-3. It is designated as “professional equipment” as defined in EN61000-3. Permission of the supply authority shall be obtained before connection to the low voltage supply. In a domestic environment this product may cause radio interference in which case supplementary mitigation measures may be required. This equipment contains electrostatic discharge (ESD) sensitive parts. Observe static control precautions when handling, installing and servicing this product. EMC Emissions Radiated Emissions comply with EN61800-3 category C1, C2 and C3 when installed in accordance with instructions. Conducted Emissions comply with EN61800-3 category C3 external filter . Immunity complies with the requirement of EN61800-3, for equipment intended for use in the second environment. Planning Cable Runs Use the shortest possible motor cable lengths. Use a single length of cable to a star junction point to feed multiple motors. Keep electrically noisy and sensitive cables apart. If this is not possible parallel cable runs should be separated by at least 0.25metres, for runs longer than 10 meters, separation should be increased proportionally. o Sensitive cables should cross noisy cables at 90 angle. Never run sensitive cables close or parallel to the motor, dc link and braking chopper circuit for any distance. Never run supply, dc link or motor cables in the same bundle as the signal/control and feedback cables, even if they are screened. Ensure EMC filter input and output cables are separately routed and do not couple across the filter. 2-1 Deutsch Chapter 2 Deutsch SICHERHEITS INFORMATIONEN FEHLERHAFTE ODER UNSACHGEMÄSSE AUSWAHL bzw. VERWENDUNG DER HIER BESCHRIEBENEN PRODUKTE KANN ZU TOD, VERLETZUNGEN ODER SACHSCHADEN FÜHREN. • Dieses Dokument und andere Informationen von der Parker-Hannifin Corporation, seinen Tochtergesellschaften und Vertragshändlern enthalten Produkt- oder Systemoptionen zur weiteren Verwendung durch Anwender mit technischen Kenntnissen. • Der Anwender ist durch eigene Untersuchung und Prüfung allein dafür verantwortlich, die endgültige Auswahl des Systems und der Komponenten zu treffen und sich zu vergewissern, dass alle Leistungs-, Dauerfestigkeits-, Wartungs-, Sicherheits- und Warnanforderungen der Anwendung erfüllt werden. Der Anwender muss alle Aspekte der Anwendung genau untersuchen, geltenden Industrienormen folgen und die Informationen in Bezug auf das Produkt im aktuellen Produktkatalog sowie alle anderen Unterlagen, die von Parker oder seinen Tochtergesellschaften oder Vertragshändlern bereitgestellt werden, zu beachten. • Soweit Parker oder seine Tochtergesellschaften oder Vertragshändler Komponenten oder Systemoptionen basierend auf technischen Daten oder Spezifikationen liefern, die vom Anwender beigestellt wurden, ist der Anwender dafür verantwortlich festzustellen, dass diese technischen Daten und Spezifikationen für alle Anwendungen und vernünftigerweise vorhersehbaren Verwendungszwecke der Komponenten oder Systeme geeignet sind und ausreichen. Allgemeines WICHTIG: Bitte lesen Sie die folgenden Informationen, BEVOR Sie mit der Installation des Geräts beginnen. Diese Anleitung sollte allen Personen zugänglich sein, die den beschriebenen Antrieb installieren, konfigurieren, oder andere mit dem Antrieb zusammenhängende Tätigkeiten durchführen. Die folgenden Informationen enthalten Sicherheitsaspekte und EMV Betrachtungen, die es dem Anwender ermöglichen, den größtmöglichen Nutzen aus dem Antrieb zu erzielen. – Der Umgang mit dem in diesem Lieferumfang enthaltenen Gerät, erfordert spezifische Kenntnisse. Diese können der Installations- / Bedienungsanleitung des Gerätes entnommen werden. Diese Informationen befinden sich auf CD ROM, Diskette oder auf anderen Speichermedien, und sind ebenfalls in diesem Lieferumfang enthalten. Die Installations- / Bedienungsanleitung sollte jedem Nutzer des Gerätes zugänglich gemacht werden. Einsatzgebiet Das beschriebene Gerät dient zur Drehzahlreglung von industriellen, AC- Asynchron oder ACSynchronmotoren. Personal Die Installation, Bedienung und Instandhaltung des Geräts sollte nur von einem Fachmann durchgeführt werden, der technisch kompetent und mit allen Sicherheitsvorschriften und lokalen Bestimmungen vertraut ist. Produkt Warnhinweise Achtung: heiße Oberflächen VORSICHT Schockgefahr Achtung Dokumentation beachten Erdung Schutzleiterklemme Gefahr! – Missachtung der folgenden Anweisungen kann zu Schäden führen 1. Bestimmte Teile des Antriebs stehen unter gefährlichen Spannungen. Bei Berührung dieser Teile oder auch rotierender Maschinenteile besteht die Gefahr von Tod, schweren gesundheitlichen oder materiellen Schäden. 2. Das Gerät muss permanent geerdet sein. Der Motor muss an einem angemessenen Schutzleiter angeschlossen sein. 3. Sämtliche Signal- und Steuerklemmen sind durch doppelte Isolierung geschützt (Schutzkleinspannung). Stellen Sie sicher, dass sämtliche Leitungen für die maximal mögliche Spannung ausgelegt sind. 4. Es können gefährliche Spannungen an den Leistungsklemmen (Einspeisung, Motorabgang, DC Zwischenkreis und der Bremse, sofern eingebaut) anliegen, auch wenn der Motor stillsteht oder gestoppt hat. 5. Benutzen Sie zu Messzwecken nur Messgeräte nach IEC 61010 (Kat. III oder höher) und beginnen Sie die Messungen immer im höchsten Messbereich. Warten Sie 5 Minuten bis sich die Zwischenkreiskondensatoren auf ein sicheres Level entladen haben (<50V). Benutzen Sie Messleitungen, die bis1000V DC & AC effektiv spezifiziert sind, um sicherzustellen, dass eine ungefährliche Spannung <50V zwischen allen Leistungsklemmen und Erde anliegt. 2-2 Deutsch 6.Ein Öffnen oder Zerlegen des Antriebs ist aus Sicherheits- und Gewährleistungsgründen nicht zulässig. Im Fehlerfall muss das Gerät zur Überprüfung und gegebenenfalls zur Reparatur eingeschickt werden. Gerätefehler, hinweisen. Um das Risiko von Verletzungen oder Sachschäden durch z. B. Brand oder Stromschlag zu minimieren, prüfen Sie, ob spannungsführende Teile oder andere Komponenten des Gerätes beschädigt sind. Im Falle einer Beschädigung, müssen diese Teile fachgerecht ausgetauscht werden. 7.WARNUNG – Das Auslösen der Gerätesicherung kann auf einen Fehlerstrom, bedingt durch einen WARNUNG! – Missachtung der folgenden Anweisungen kann Verletzungen verursachen oder zu Beschädigungen am Gerät führen. SICHERHEIT Bei einem Konflikt zwischen EMV- und Sicherheitsbestimmungen, haben die personenbezogenen Sicherheitsbestimmungen immer Vorrang. • Führen Sie niemals Hochspannungs-Festigkeitsüberprüfungen an der Verdrahtung durch, ohne vorher überprüft zu haben, dass der Antrieb spannungslos und vom Stromkreis sicher getrennt ist. • Vergewissern Sie sich, dass die Belüftung ausreichend ist und installieren Sie zusätzliche Sicherheitssysteme, um Beschädigungen des Geräts vorzubeugen. • Beim Austauschen eines Antriebs in einer Applikation ist darauf zu achten, dass vor dem Einschalten alle anwendungs-spezifischen Parameter korrekt installiert wurden. • • • • Alle Steuer- und Signalanschlussklemmen sind sicherheitskleinspannungsfest, durch doppelte Isolation geschützt. Stellen Sie sicher, dass alle externen Leitungen für die höchste Systemspannung ausgelegt sind. Im Motor vorhandene Temperatursensoren müssen mindestens basisisoliert sein. Alle berührbaren metallischen Teile des Geräts sind durch eine Basisisolierung und Anschluss an einen Schutzleiter abgesichert. Der Einsatz von FI-Schutzschaltern wird nicht empfohlen. Ist ihre Verwendung dennoch vorgeschrieben, verwenden Sie FI-Schalter Typ B (EN61009). EMV • Im Betrieb kann dieses Gerät EMV- STÖRUNGEN hervorrufen, gegen die der Betreiber gegebenenfalls die erforderlichen Gegenmaßnahmen treffen muss. • Das Gerät enthält Bauteile, die für elektrostatische Entladung anfällig sind. Treffen Sie entsprechende Schutzmaßnahmen, wenn Sie das Gerät installieren, bedienen und warten. • Das Produkt ist für den professionellen Einsatz gemäß EN61000-3-2 bestimmt. Sofern vorgeschrieben, muss eine Betriebserlaubnis vom Netzbetreiber vorliegen, bevor das Gerät an das örtliche Niederspannungsnetz angeschlossen werden kann. WARNUNG! – Aus- und Einbauen des Steuergerätes Trennen Sie das Gerät vom Netz, ehe Sie das Steuergerät vom Leistungsteil abziehen oder in diesen einstecken. ACHTUNG! ANWENDUNGSRISIKO • Die Spezifikationen, Beispiele und Schaltungen, wie sie in diesem Handbuch beschrieben sind, dienen nur als Richtlinie und bedürfen gegebenenfalls einer kundenspezifischen Anpassung. Das Anpassen an anwenderspezifische Anlagen oder Systeme liegt außerhalb des Verantwortungsbereichs von Parker Hannifin. RISIKOBEURTEILUNG Bei Störungen, Netzspannungsausfall, Gerätefehlern oder sonstigen unbeabsichtigten Betriebsbedingungen besteht die Möglichkeit, dass das Gerät nicht spezifikationsgemäß funktioniert. Im Einzelnen bedeutet dies: • • • • die im Gerät gespeicherte Energie ist nicht abgebaut worden und es können noch gefährliche Spannungen anliegen, auch wenn das Gerät ausgeschaltet ist. die Motordrehrichtung lässt sich nicht steuern die Motordrehzahl kann nicht geregelt werden der Motor steht unter Spannung Ein Umrichter/Stromrichter ist eine Komponente in einem System, die im Fehlerfall die Funktion der Anlage beeinflussen kann. Auf folgendes ist besonders zu achten: • • • • ungewolltes Schalten gespeicherte Energie im Antrieb unkontrolliertes Drehen Ablauflogik im System 2-3 Deutsch SCHNELLSTARTANLEITUNG ERSTE SCHRITTE In diesem Dokument werden die Schritte beschrieben, die Sie zur Vorbereitung der Inbetriebnahme des AC10-Antriebs durchführen müssen. Die Inbetriebnahme des Antriebs sollte von qualifizierten Elektrotechnikern vorgenommen werden, die mit AC-Antrieben und deren Anwendungen vertraut sind. Ausführliche Informationen zu Aufstellung, Sicherheit und Anwendungen finden Sie im AC10 Produkthandbuch. Bei der Installation des Antriebs müssen alle geltenden örtlichen elektrischen Vorschriften beachtet werden. Vergewissern Sie sich, dass alle unter Spannung stehenden Bauteile zum Schutz vor elektrischen Schlägen abgedeckt sind und dass eine unerwartete Rotation des Motors keine Körperverletzungen verursachen kann. In diesem Dokument wird davon ausgegangen, dass der Antrieb bereits am Einsatzort installiert wurde und alle relevanten Installationsprozeduren abgeschlossen sind. Zu dieser Schnellstartanleitung Diese Schnellstartanleitung: • • • Macht Sie mit den Anschlüssen der Bedienung des Gerätes vertraut. Enthält *grundlegende Informationen zur Installation und eine Anleitung zur Schnelleinrichtung. Zeigt, wie der Selbstabgleich (Autotune) des Antriebs durchgeführt und der Motor gestartet wird. Diese Schnellstartanleitung setzt Folgendes voraus: • Sie sind ein qualifizierter Techniker mit Erfahrung in der Installation von Geräten dieser Art. • Sie sind mit den einschlägigen Normen und den über diese hinaus zu beachtenden lokalen Vorschriften für Elektroinstallationen vertraut. • Sie haben die Sicherheitsinformationen auf der Vorderseite dieser Schnellstartanleitung gelesen und verstanden. • Sie wissen, dass diese Anleitung nur grundlegende Informationen enthält und Sie zum Abschluss der Installation möglicherweise das AC10 Produkthandbuch heranziehen müssen. Produktübersicht 2-4 Deutsch Produkt-Code 10 G - 1 1 - 0015- B F F : Built- in filter N : without built-in filter B : Built- in braking unit Rated current(A): XXXX OOO.O Frame Size : 1: 80×135×138(153) 2: 106×150×180(195) 3: 138×152×235(250) 4: 156×170×265(280) 5: 205×196×340(355) Input voltage: 1: 230 V / 240V 1 phase 3: 230 V / 240V 3 phase 4 400 V / 480V 3 phase Industry Product model Supply 1Ph 220V 3Ph 220V 3Ph 400V Part number kW Input current (A) Output Current (A) Input protection current 10G-11-0015-XX 0.2 4.0 1.5 6.0 10G-11-0025-XX 0.37 6.1 2.5 10.0 10G-11-0035-XX 0.55 8.9 3.5 14.0 10G-11-0045-XX 0.75 11.4 4.5 18.1 10G-12-0050-XX 1.1 16.1 5 24.5 10G-12-0070-XX 1.5 16.8 7 25.2 10G-12-0100-XX 2.2 21.0 10 32.0 10G-31-0015-XX 0.2 2.2 1.5 5.0 10G-31-0025-XX 0.37 4.3 2.5 8.2 10G-31-0035-XX 0.55 6.1 3.5 10.0 10G-31-0045-XX 0.75 7.6 4.5 11.5 10G-32-0050-XX 1.1 11.8 5 18.0 10G-32-0070-XX 1.5 12.0 7 18.2 10G-32-0100-XX 2.2 14.3 10 21.5 10G-41-0006-XX 0.2 1.2 0.6 2.5 10G-41-0010-XX 0.37 2.2 1 5.0 10G-41-0015-XX 0.55 3.6 1.5 5.5 10G-42-0020-XX 0.75 4.1 2 6.5 10G-42-0030-XX 1.1 6.0 3 10.2 10G-42-0040-XX 1.5 6.9 4 11.0 10G-42-0065-XX 2.2 9.6 6.5 15.0 10G-43-0080-XX 3 11.6 7 18.0 10G-43-0090-XX 4 13.6 9 21.0 10G-43-0120-XX 5.5 18.8 12 29.0 10G-44-0170-XX 7.5 22.1 17 34.0 10G-44-0230-XX 11 30.9 23 46.5 10G-45-0320-XX 15 52 32 80.0 2-5 Deutsch Inbetriebnahme des Antriebs • Lesen Sie die Sicherheitsanweisungen auf der Vorderseite der Schnellstartanleitung. • Stellen Sie sicher, dass alle örtlichen elektrischen Vorschriften beachtet werden. • Prüfen Sie das Gerät auf Beschädigungen. • Prüfen Sie das Gerät auf lose Enden, Verschnitt, Schleif- und Bohrspäne usw. im Antrieb und im System. • Prüfen Sie alle externen Stromkreise des Systems: Stromversorgungs-, Steuerungs-, Motor- und Erdungsverbindungen • Stellen Sie sicher, dass durch die Rotation des Motors in beide Richtungen keine Schäden oder Verletzungen entstehen können. Trennen Sie wenn möglich die Last von der Motorwelle. • Stellen Sie sicher, dass die externen Laufkontakte offen sind. Stellen Sie sicher, dass alle externen Drehzahlsollwerte Null sind. • Stellen Sie sicher, dass niemand an einem anderen Teil des Systems arbeitet, auf das sich das Einschalten auswirkt. • Stellen Sie sicher, dass das Einschalten keine negativen Auswirkungen auf andere Geräte hat. • Überprüfen Sie, ob die Motorstator-Anschlüsse entsprechend den Erfordernissen für die Ausgangsspannung des Antriebs korrekt für Stern- oder Dreiecksschaltung verkabelt sind. Motordaten Für die Konfiguration des Antriebs werden die Motordaten benötigt. Diese finden Sie auf dem Typenschild des Motors. Sie benötigen die im Folgenden aufgeführten Informationen: Base Volts (Basisspannung) Base frequency (Basisfrequenz) Base RPM (Basisdrehzahl) Full load amps (Volllaststrom) No load amps (mag current) (Nulllaststrom) Anschluss (Stern- oder Dreiecksschaltung) Grundlegende Verbindungen 2-6 Deutsch Keypad LED zeigt Lauffrequenz, blinkende Zielfrequenz, Funktionscode, Parameterwert oder Fehlercode. 4 LEDs zeigen Betriebsstatus. RUN beim Laufen. FWD läuft vorwärts und FRQ wenn die MMI zeigt Frequenz. Drücken Sie "M" für Funktionscode, und "E" für die ursprünglichen Parameter. ▲ und ▼ Tasten können verwendet werden, um die Funktionscodes und Parameter wählen. Drücken Sie "E" wieder zu bestätigen. Im Modus Tastatursteuerung, ▲ und ▼ Tasten können auch für dynamische Drehzahlregelung eingesetzt werden. "I" und Tasten "O" steuern starten und stoppen. Drücken Sie auf "O", um Wechselrichter im Fehlerzustand zurückgesetzt. Drücken Sie die "M"-Taste, um den Funktionscode angezeigt Drücken Sie die "Up" oder "Down"-Funktion erforderlich Code wählen Drücken Sie E, um Daten in der Funktionscode zu lesen Drücken Sie die "Up" oder "Down", um Daten zu ändern Drücken Sie M, um zu zeigen, entsprechende Zielfrequenz durch Blinken nach dem Speichern der eingestellten Daten Drücken Sie E, um den aktuellen Funktionscode angezeigt Set-Up Anweisungen • Wählen Sie den Anwendungsmodus. Siehe Abschnitt 9 für (M) drücken, bis F100 auf dem Display Drücken Sie (O), bis nur noch der FWD-LED leuchtet (XOXX) Press (UP) für den Zugriff auf Parameter-Block F2xx Drücken Sie (O) bis beide LEDs FWD und DGT beleuchtet werden (XOOX) Press (UP), bis die Anzeige F228 Drücken Sie (E), um die Anwendung Nummer bearbeiten Verwenden Sie den (UP) und (DOWN) Tasten, um die Anwendung auszuwählen Drücken Sie (E) die Auswahl zu bestätigen F228 • die Anwendungsbeschreibung. 0: Invalid 1: Basic speed control 2: auto/manual control 3: Stage speed control 4: Terminal control; 5: PID control; Application selection Stellen Sie den Motor Paramaters F801 Rated power (kW) Setting range: 0.75~1000 F802 Rated voltage (V) Setting range: 1~460 F803 Rated current (A) Setting range: 0.1~6500 F804 Number of motor poles Setting range: 2~100 F805 Rated rotary speed (rmp/min) Setting range: 1~30000 F810 Motor rated frequency (Hz) Setting range: 1.0~650.0 4 50.00 • Wählen Sie Steuermodus Die AC10-Wechselrichter verfügt über drei Betriebsarten: sensorlose Vektorregelung (F106 = 0), Umrichter-Steuerung (F106 = 2) und Vektorregelung ein (F106 = 3). Unter VVVF Steuermodus hat theAC10 Wechselrichter vier Arten von Drehmomentausgleich Arten: Lineare Kompensation (F137 = 0); Platz Kompensation (F137 = 1); Benutzerdefinierte Mehrvergütung (F137 = 2), Auto Drehmomentausgleich (F137 = 3) • Stellen Sie die Grenzen F111 Max Frequency (Hz) Setting range: F113~650.0 Mfr’s value: 50.00 F112 Min Frequency (Hz) Setting range: 0.00~F113 Mfr’s value: 0.50 F114 First Acceleration Time (S) F115 First Deceleration Time (S) F116 Second Acceleration Time (S) Setting range: 0.1~3000 Mfr’s value: subject to inverter model F117 Second Deceleration Time (S) Setting range: 0: 0~50.00Hz Mfr’s value: 0 1: 0~F111 When F119=0, acceleration/ deceleration time means the time for inverter to accelerate/ decelerate from 0Hz (50Hz) to 50Hz (0Hz). When F119=1, acceleration/ deceleration time F119 The reference of setting accel/decel time 2-7 Deutsch • Stellen Sie den I / O-Steuerungsmodus Der Kanal für die Wechselrichter-Steuerbefehle (einschliesslich Start-, Stopp-und Jogging, etc.) erhalten enthält 5 Modi: 0. Tastatursteuerung; ein. Klemmensteuerung; 2. Tastatur + Terminal-Steuerung 3. Modbus Kontrolle; 4. Tastatur + Klemme + Modbus. Die Modi der Steuerbefehl kann über die Funktionscodes F200 und F201 ausgewählt werden. F200 Source of start command 0: Keypad command; 1: Terminal command; 2: Keypad+Terminal; 3:MODBUS; F201 Source of stop command 4: Keypad+Terminal+MODBUS 0: Keypad command; 1: Terminal command; 2: Keypad+Terminal; 3:MODBUS; 4: Keypad+Terminal+MODBUS Für Terminal-Steuer überprüfen Sie bitte die Wahl für die analogen Eingänge switiched. F203=2, channel AI2 is selected SW1 coding switch Coding Switch 1 Coding Switch 2 OFF OFF ON OFF ON ON F203=1, channel AI1 is selected Mode of Speed Control 0~5V voltage 0~10V voltage 0~20mA current 0~10V voltage Überprüfen Sie auch die Wahlschalter NPN-, PNP für die digitalen Eingänge. • Testlauf des Wechselrichters Testlauf des Umrichters von der Tastatur oder der Terminal-Steuerung, Kontrolle alle Bedingungen sicher sind. • Für erweiterte Funktionen finden Sie in der umfassenden Anleitung geliefert. 2-8 Deutsch KONFORMITÄT Im vollständigen AC30V Produkthandbuch ist ein umfassender Führer zur Produktkonformität enthalten. Warnung – Wenn EMV- und Sicherheitsbestimmungen nicht vereinbar sind, erhält die Sicherheit des Personals stets Priorität. Voraussetzung für den Betrieb dieses Geräts ist die detaillierte Kenntnis der Installations- und Betriebsanweisungen des Produkthandbuchs. Diese Informationen finden sich auf der im Lieferumfang des Produkts enthaltenen CDROM. Diese sollte stets bei dem Produkt aufbewahrt werden. Achtung: Dieses Gerät gehört der Produktklasse für beschränkte Verteilung gemäß IEC 61800-3 an. Es ist als „professionelles Gerät“ nach EN61000-3 ausgewiesen. Vor dem Anschluss an eine Niederspannungsversorgung ist die Genehmigung des Stromversorgers einzuholen. Im Wohnbereich kann dieses Produkt Funkstörungen verursachen. In diesem Fall sind zusätzliche Schutzmaßnahmen zu ergreifen. Dieses Gerät enthält Teile, die empfindlich auf elektrostatische Entladungen (ESD) reagieren. Es sind deshalb Vorkehrungen zu treffen, die bei der Handhabung, Installation und Wartung dieses Produkts die Bildung elektrostatischer Ladung begrenzen. EMV-Emissionen Wenn das Gerät entsprechend den Anweisungen in Kapitel 4, Abschnitt „Anbringen des Gerätes“ installiert wird, entspricht die Abstrahlung dem Standard EN61800-3, Kategorie C1, C2 und C3. Leitungsgeführte Emissionen entsprechen EN61800-3, Kategorie C3 und C2 ohne externen Filter und Kategorie 1 mit dem angegebenen externen Filter. Die Störfestigkeit entspricht den Anforderung von EN61800-3 für Geräte, die zur Verwendung in der zweiten Umgebung vorgesehen sind. EMV-Anschlüsse Um die Konformität mit den EMV-Anforderungen zu gewährleisten, muss die Klemme „0V/signal ground“ (0V/Signalerde) separat geerdet werden. Wenn mehrere Geräte in einem System zum Einsatz kommen, müssen diese Klemmen an einem zentralen, lokalen Erdungspunkt miteinander verbunden werden. Für Steuer- und Signalanschlüsse müssen geschirmte Kabel verwendet werden, wobei die Abschirmung nur am VSD-Ende angeschlossen wird. Wenn jedoch nach wie vor Hochfrequenzrauschen auftritt, erden Sie die Abschirmung am anderen Ende (nicht VSD) über einen 0,1-Kondensator. Hinweis: Die Steuer- und Signalabschirmungen (am VSD-Ende) sind mit der VSD-Schutzerde und nicht mit den Klemmen an der Schalttafel zu verbinden. o Die Motorkabel sollten über eine 360 -Verbindung verfügen, damit ein niederohmiger Anschluss gewährleistet werden kann (siehe nebenstehende Abbildung). Planung der Kabelführungen Verwenden Sie möglichst kurze Motorkabel. Verwenden Sie eine einzige Kabellänge zu einem Sternverbindungspunkt für die Versorgung mehrerer Motoren. Elektrische Störgeräusche verursachende Kabel und besonders empfindliche Kabel sollten separat verlegt werden. Wenn das nicht möglich ist, muss bei parallelen Kabelführungen ein Mindestabstand von 0,25 Meter eingehalten werden, bei Kabellängen über 10 Meter muss die Entfernung proportional vergrößert werden. o Empfindliche Kabel müssen rauschintensive Kabel im 90 -Winkel kreuzen. Empfindliche Kabel sind niemals in der Nähe des Motors, der Gleichstromleitung und der Brems-SchopperSchaltung bzw. parallel dazu, auch nicht über kurze Strecken zu verlegen. Niemals dürfen Versorgungs-, Gleichstrom- oder Motorkabel im gleichen Kabelstrang wie die Signal-/Steuer- und Rückleitungskabel geführt werden, auch wenn sie über eine Abschirmung verfügen. Erdeund kein Kontakt am Es ist sicherzustellen, dass EMV-Filterein- und -Filterausgangskabel separat verlegt werden Filter entsteht. 3-1 Français Chapter 3 Français Informations de Sécurité LA DEFAILLANCE OU L’UTILISATION DE MANIERE INCORRECTE OU NON CONFORME A SA DESTINATION DU PRODUIT DECRIT DANS CE DOCUMENT PEUT CAUSER UN RISQUE DE BLESSURE OU DE MORT POUR L’UTILISATEUR OU DE DOMMAGE MATERIEL Ce document et autres informations, de Parker-Hannifin Corporation ses filiales et distributeurs autorisés, contient les informations produits ou systèmes pour de plus amples investigations de l’utilisateur ayant une expertise technique. L’utilisateur, à l’aide de sa propre analyse et de ses tests, est seul responsable de la sélection des composants et du système et assume que toutes les performances, l’endurance, la maintenance, la sécurité et les précautions requises par l’application sont atteintes. L’utilisateur doit analyser tous les aspects de l’application, suivre les standards industriels applicables, et suivre les informations contenues dans le catalogue courant du produit et dans toutes les autres informations fournies par Parker ou ses filiales ou ses distributeurs autorisés. Dans la mesure ou Parker ou ses filiales ou ses distributeurs autorisés fournissent des composants ou des options basées sur des données ou des spécifications fournies par l’utilisateur, l’utilisateur est responsable afin de déterminer que les données et spécifications sont appropriées et suffisantes pour toutes les applications et les utilisations raisonnablement prévisibles des composants ou du système. Exigence IMPORTANT:Veuillez lire ces consignes de sécurité avant de mettre en service le variateur. Attention – L’utilisation de cet équipement nécessite le suivi et l’utilisation des instructions fournies dans le manuel d’installation/d’utilisation de ce produit. Ces informations sont fournies sur le CD ROM, disquettes ou autre moyen de stockage inclus dans le colis où ce composant est reçu. Elles doivent être conservées avec le produit pour toute utilisation. Une copie de ces informations peut être commandée aux fournisseurs indiqués sur l’étiquette du produit. Utilisateurs Ce manuel doit être mis à la disposition des personnes chargées d’installer, configurer ou réparer le variateur ou qui doivent y intervenir pour toute autre raison. Les informations données rappellent les consignes de sécurité, des considérations CEM, et permettent de tirer le meilleur parti du produit. Domaine d’application Le variateur décrit est destiné au pilotage de moteurs AC à induction ou moteurs AC synchrones triphasés. Personnel L’installation, la mise en service et la maintenance de cet équipement doivent être effectuées par du personnel qualifié. Est considérée comme qualifiée toute personne techniquement compétente et familière des consignes de sécurité, des procédures d’installation, de mise en service et de maintenance du variateur, ainsi que tous les risques inhérents à son utilisation.et installation. Avertissments du produit Attention – surfaces chaudes DANGER Risque de choc électrique Attention se référer à la documentation Terre/Masse Borne du conducteur de protection Risques DANGER! – Ne pas prendre en compte ces recommandations peut entraîner blessures ou dommages matériels 1. Cet équipement peut entraîner des dangers de Toujours commencer avec le calibre de mesure le plus dommages corporels par exposition à des parties en important.Les multimètres CAT I et CAT 2 ne doivent mouvement ou tournantes et à la présence de parties pas être utilisés sur ce produit sous tension. 6. Attendre au moins 5 minutes que les condensateurs du 2. L’équipement doit être mis à la Terre de façon variateur se déchargent à des niveaux non dangereux permanente à cause des forts courants de fuite. Le (< 50V). Utiliser le multimètre spécifié capable de variateur et le moteur doivent être connectés à une mesurer des tensions de 1000V dc et ac pour vérifier Terre. que la tension est bien inférieure à 50V entre les 3. Avant d’intervenir sur le variateur, il est nécessaire bornes de puissance et la Terre. d’isoler l’alimentation des bornes L1, L2 et L3. 7. Sans aucune autre consigne, ce produit ne peut être Prendre en compte le fait qu’il peut y avoir plus d’une démonté. Dans le cas ou il serait en défaut, le variateur alimentation connectée sur le variateur. doit être retourné. Se referrer à ‘"Routine Maintenance 4. Il peut encore y avoir la présence des tensions and Repair". dangereuses (Bornes d’alimentation, bornes moteur, 8. ATTENTION - l’ouverture du circuit de protection peut bus continu (bornes DC+ et DC-), résistance de être une indication qu’un défaut est apparu. Pour freinage) lorsque le moteur est à l’arrêt ou n’est pas réduire les risques d’incendie ou de choc électrique, les en mouvement. parties actives en courant et autres composants 5. Pour effectuer des mesures, utiliser un multimètre doivent être examinées et remplacées si détériorées. IEC 61010 (CAT III ou supérieure). 3-2 Français ATTENTION! - Ne pas prendre en compte ces recommandations peut entraîner blessures ou dommages matériels SECURITE Quand il y a un conflit entre Sécurité et CEM, la sécurité du personnel est toujours prioritaire • • • • Ne jamais effectuer de contrôle au mégohmmètre sans déconnecter le variateur du circuit testé. Tout en assurant une ventilation suffisante, prévoir des dispositifs de sécurité additionnels afin de prévenir toute blessures ou dommages matériels. Lors du remplacement du variateur, veiller à bien re-régler tous les paramètres du variateur avant son utilisation. Toutes les connections sont SELV, i.e. protégées par une double isolation. S’assurer que toutes les connections externes sont dimensionnés pour la tension système la plus haute. • Les sondes thermiques moteurs doivent être au minimum en isolation simple. • Toutes les parties métalliques exposées du variateur sont protégées par une isolation simple et une mise à la terre. • Les détecteurs de défaut à la terre ne sont pas recommandés avec ce variateur. Si leur utilisation est obligatoire, il est conseillé d’utiliser des détecteurs de défaut d’isolement de type B. CEM • • • L’appareil correspond à la norme IEC 61800-3, i.e. il est soumis à une distribution limitée. Il est désigné comme ‘équipement professionnel’ comme défini dans EN 61300-3-2. L’autorisation de l’autorité est requise pour le connecter à une alimentation basse tension. Dans un environnement domestique, ce produit peut causer des interférences radio. Dans ce cas, des mesures complémentaires peuvent être nécessaires. Ce produit contient des composants sensibles aux décharges électrostatiques (DES). Observer des précautions de manipulations lors de la manutention, l’installation et la mise en route du produit. ATTENTION ! – Installation/démontage de l'unité de commande Coupez la source d'alimentation avant de brancher ou de débrancher l'unité sur la pile d'alimentation. ATTENTION! RISQUES DE L’APPLICATION Les spécifications, processus et câblages décrits ci-après sont donnés à titre indicatif. Il peut être nécessaire de les adapter pour répondre aux besoins spécifiques d’un utilisateur. Nous ne pouvons garantir que le variateur présenté convient à toutes les applications envisageables. ESTIMATION DES RISQUES En cas de défaut, perte accidentelle d’alimentation ou de certaines conditions de fonctionnement, le variateur peut ne pas fonctionner comme prévu. En particulier : • L’énergie stockée peut ne pas être à des niveaux non dangereux comme prévu, et peut toujours être présente même si le variateur n’est plus alimenté. • Le sens de rotation du moteur peut ne pas être contrôlé. • La vitesse du moteur peut ne plus être contrôlée. • Le moteur peut être sous tension. Un variateur est un composant d’un système qui peut influencer son fonctionnement et ses effets lorsqu’il est en défaut. Il faut prendre en considération : • L’énergie stockée • La déconnexion des alimentations • la séquence logique 3-3 Français DÉMARRAGE RAPIDE AVANT DE DÉMARRER Ce document couvre les étapes nécessaires pour un démarrage de base du variateur AC10. Les démarrages du variateur doivent être effectués par des techniciens électriques qualifiés qui connaissent parfaitement les variateurs CA et leurs applications. Pour obtenir plus d'informations sur l'installation, la sécurité et les applications, consultez le manuel du produit AC10. Lors de l'installation du variateur, assurez-vous que toutes les normes électriques locales sont respectées. Vérifiez que toutes les parties sous tension sont couvertes pour vous protéger contre les chocs électriques et que la rotation accidentelle du moteur n'entraînera ni dommages corporels ni blessures. À propos de ce guide de démarrage rapide Ce guide de démarrage rapide vise à : • • • vous familiariser avec les bornes et le fonctionnement de l'unité. fournir des informations d'installation de base* et indiquer la procédure de réglage rapide. vous indiquer comment régler automatiquement le variateur et démarrer le moteur. Ce guide de démarrage rapide suppose que : • vous êtes un technicien qualifié et expérimenté dans l'installation de ce type d'équipements ; • vous avez une bonne connaissance des normes en vigueur et des codes électriques locaux (qui prévalent) ; • vous avez lu et compris les informations de sécurité fournies au début de ce guide ; • vous avez conscience que ce guide ne contient que des informations de base et qu'il peut s'avérer nécessaire de consulter le manuel du produit AC10 pour réaliser votre installation ; Présentation du produit 3-4 Français Code de produit 10 G - 1 1 - 0015- B F F : Built- in filter N : without built-in filter B : Built- in braking unit Rated current(A): XXXX OOO.O Frame Size : 1: 80×135×138(153) 2: 106×150×180(195) 3: 138×152×235(250) 4: 156×170×265(280) 5: 205×196×340(355) Input voltage: 1: 230 V / 240V 1 phase 3: 230 V / 240V 3 phase 4 400 V / 480V 3 phase Industry Product model Supply 1Ph 220V 3Ph 220V 3Ph 400V Part number kW Input current (A) Output Current (A) Input protection current 10G-11-0015-XX 0.2 4.0 1.5 6.0 10G-11-0025-XX 0.37 6.1 2.5 10.0 10G-11-0035-XX 0.55 8.9 3.5 14.0 10G-11-0045-XX 0.75 11.4 4.5 18.1 10G-12-0050-XX 1.1 16.1 5 24.5 10G-12-0070-XX 1.5 16.8 7 25.2 10G-12-0100-XX 2.2 21.0 10 32.0 10G-31-0015-XX 0.2 2.2 1.5 5.0 10G-31-0025-XX 0.37 4.3 2.5 8.2 10G-31-0035-XX 0.55 6.1 3.5 10.0 10G-31-0045-XX 0.75 7.6 4.5 11.5 10G-32-0050-XX 1.1 11.8 5 18.0 10G-32-0070-XX 1.5 12.0 7 18.2 10G-32-0100-XX 2.2 14.3 10 21.5 10G-41-0006-XX 0.2 1.2 0.6 2.5 10G-41-0010-XX 0.37 2.2 1 5.0 10G-41-0015-XX 0.55 3.6 1.5 5.5 10G-42-0020-XX 0.75 4.1 2 6.5 10G-42-0030-XX 1.1 6.0 3 10.2 10G-42-0040-XX 1.5 6.9 4 11.0 10G-42-0065-XX 2.2 9.6 6.5 15.0 10G-43-0080-XX 3 11.6 7 18.0 10G-43-0090-XX 4 13.6 9 21.0 10G-43-0120-XX 5.5 18.8 12 29.0 10G-44-0170-XX 7.5 22.1 17 34.0 10G-44-0230-XX 11 30.9 23 46.5 10G-45-0320-XX 15 52 32 80.0 3-5 Français Démarrage du variateur • Lisez les informations de sécurité au début de ce guide de démarrage rapide. • Vérifiez que l'ensemble des normes électriques sont respectées. • Vérifiez l'absence de dégâts apparents sur l'équipement. • Vérifiez que les connexions ne sont pas desserrées et assurez-vous qu'aucune coupure ni particule ne soit logée dans le variateur ou le système. • Vérifiez tous les circuits externes du système (puissance, commande, moteur et mise à la terre). • Vérifiez que toute rotation inattendue du moteur, dans les deux directions, n'entraîne aucun dommage ou blessure. Débranchez la charge de l'arbre du moteur, si possible. • Vérifiez que les contacts externes de marche sont ouverts. Vérifiez que toutes les consignes externes de vitesse sont réglées sur zéro. • Vérifiez que personne ne travaille sur une autre partie du système pouvant être endommagée par la mise sous tension du variateur. • Vérifiez qu'aucun équipement ne sera endommagé par la mise sous tension du variateur. • Vérifiez que les raccordements des stators du moteur sont correctement effectués pour Star et Delta en fonction de la tension de sortie du variateur. Données du moteur Avant de configurer le variateur, certaines informations sur le moteur sont requises. Vous les trouverez sur la plaque signalétique du moteur. Les informations dont vous avez besoin sont les suivantes : Volts de base Fréquence de base Tr/min de base Amps - Pleine charge Amps - Pas de charge (courant mag) Connexion (star ou delta) Connexions de base 3-6 Français Keypad LED indique fréquence de fonctionnement, fréquence de clignotement de cible, le code de fonction, la valeur de paramètre ou le code d'erreur. 4 LED indiquent l'état de marche. RUN lors de l'exécution. Traction avant la course en avant et FRQ quand l'IHM affiche la fréquence. Appuyez sur "M" pour le code de la fonction, et «E» pour les paramètres d'origine. Touches ▲ et ▼ permettent de sélectionner les codes de fonction et des paramètres. Appuyez sur "E" pour confirmer. Dans le mode de contrôle du clavier, touches ▲ et ▼ peut également être utilisé pour le contrôle dynamique de la vitesse. Touches "O" "I" et contrôler le démarrage et l'arrêt. Appuyez sur la touche "O" pour réinitialiser l'onduleur en état de défaut. Appuyez sur la touche "M" pour afficher le code de la fonction Appuyez sur "Up" ou "Down" pour sélectionner requis code de fonction Appuyez sur E pour lire fixés dans le code de la fonction données Appuyez sur "Up" ou "Down" pour modifier les données Appuyez sur M pour afficher la fréquence cible correspondant en clignotant après avoir sauvegardé les données de jeu Appuyez sur E pour afficher le code de la fonction en cours Set-Up Instructions • Sélectionnez le mode d'application. Voir la Chapter 9 pour la description de l'application. Appuyez sur (M) jusqu'à F100 est affiché à l'écran Appuyez sur (O) jusqu'à ce que le voyant est allumé FWD (XOXX) Appuyez sur (HAUT) pour accéder à bloc de paramètres F2xx Appuyez sur (O) jusqu'à ce que les deux LEDs FWD et la DGT sont allumés (XOOX) Appuyez sur (UP) jusqu'à ce que l'affichage montre F228 Appuyez sur (E) pour modifier le numéro de la demande Utilisez les touches (DOWN) (UP) et de sélectionner l'application Appuyez sur (E) pour confirmer votre sélection F228 • 0: Invalid 1: Basic speed control 2: auto/manual control 3: Stage speed control 4: Terminal control; 5: PID control; Application selection Réglez le Paramaters moteur F801 Rated power (kW) Setting range: 0.75~1000 F802 Rated voltage (V) Setting range: 1~460 F803 Rated current (A) Setting range: 0.1~6500 F804 Number of motor poles Setting range: 2~100 F805 Rated rotary speed (rmp/min) Setting range: 1~30000 F810 Motor rated frequency (Hz) Setting range: 1.0~650.0 4 50.00 • Sélectionnez le mode de commande L'onduleur AC10 dispose de trois modes de contrôle: contrôle vectoriel sans capteur (F106 = 0), le contrôle VVVF (F106 = 2) et le contrôle de vecteur 1 (F106 = 3). En mode de commande VVVF, theAC10 onduleur dispose de quatre types de modes de compensation de couple: compensation linéaire (F137 = 0); compensation Carré (F137 = 1); compensation multipoint défini par l'utilisateur (F137 = 2); compensation de couple automatique (F137 = 3) • Définir les limites F111 Max Frequency (Hz) Setting range: F113~650.0 Mfr’s value: 50.00 F112 Min Frequency (Hz) Setting range: 0.00~F113 Mfr’s value: 0.50 F114 First Acceleration Time (S) F115 First Deceleration Time (S) F116 Second Acceleration Time (S) Setting range: 0.1~3000 Mfr’s value: subject to inverter model F117 Second Deceleration Time (S) Setting range: 0: 0~50.00Hz Mfr’s value: 0 1: 0~F111 When F119=0, acceleration/ deceleration time means the time for inverter to accelerate/ decelerate from 0Hz (50Hz) to 50Hz (0Hz). When F119=1, acceleration/ deceleration time F119 The reference of setting accel/decel time 3-7 Français • Réglez le mode de commande d'E / S Le canal de l'onduleur pour recevoir des commandes de contrôle (y compris démarrage, d'arrêt et de jogging, etc) contient 5 modes: 0. Contrôle du clavier; 1. Contrôle du terminal 2. Clavier + contrôle du terminal 3. Contrôle de Modbus; 4. Clavier + borne + Modbus. Les modes de commande de contrôle peuvent être sélectionnés par le code de la fonction F200 et F201. 0: Keypad command; 1: Terminal command; 2: Keypad+Terminal; F200 Source of start command 3:MODBUS; 4: Keypad+Terminal+MODBUS 0: Keypad command; 1: Terminal command; 2: Keypad+Terminal; F201 Source of stop command 3:MODBUS; 4: Keypad+Terminal+MODBUS Pour borne de commande s'il vous plaît vérifier le sélecteur switiched pour les entrées analogiques. F203=2, channel AI2 is selected SW1 coding switch Coding Switch 1 Coding Switch 2 OFF OFF ON OFF ON ON F203=1, channel AI1 is selected Mode of Speed Control 0~5V voltage 0~10V voltage 0~20mA current 0~10V voltage Also check the NPN, PNP selector switches for the digital inputs. • essai de fonctionnement du variateur Essai de fonctionnement de l'onduleur à partir du clavier ou de la borne de commande, en vérifiant toutes les conditions sont sécuritaires. • Pour les fonctions avancées, voir le manuel complet. 3-8 Français CONFORMITÉ Un guide complet de la conformité du produit est disponible dans le manuel du produit AC30V. Avertissement – En cas de conflit entre les exigences de CEM et de sécurité, la sécurité du personnel doit toujours primer. Le fonctionnement de cet équipement nécessite le respect des instructions détaillées d'installation et de fonctionnement figurant dans le manuel du produit prévu à cet effet. Ces informations figurent sur le cd-rom inclus dans l'emballage de ce produit. Il doit être conservé en permanence avec le produit. Attention : Il s'agit d'un produit classé pour vente et distribution limitées au titre de la norme CEI 61800-3. Au titre de la norme EN61000-3, il s'agit d'un « équipement professionnel ». Avant de raccorder l'équipement à l'alimentation basse tension, vous devez obtenir l'autorisation de l'autorité compétente. Dans un environnement domestique, ce produit peut causer des interférences radio, ce qui peut nécessiter des mesures d'atténuation supplémentaires. Cet appareil contient des pièces sensibles aux décharges électrostatiques. Respectez les précautions de contrôle statique lors de la manipulation, l'installation et l'entretien de ce produit. Émissions CEM Les émissions de radiations sont conformes à la norme EN61800-3 catégorie C1, C2 et C3 si les instructions du chapitre 4 « Montage de l'unité » sont respectées. Les émissions conduites sont conformes à la norme EN61800-3 catégorie C3 et C2 sans filtre externe et catégorie C1 si l'appareil est équipé d'un filtre externe spécifique. L'immunité est conforme à la norme EN61800-3 pour les équipements destinés à être utilisés dans le second environnement. Connexions CEM Pour assurer la conformité aux exigences CEM, le « 0 V/référence signal » doit être séparément mis à la terre. Quand plusieurs unités sont installées dans le système, ces bornes doivent être reliées ensemble en un point unique de mise à la terre. Les connexions de commande et de signal doivent être faites avec des câbles blindés, le blindage étant relié uniquement à l’extrémité du variateur. Toutefois, si le bruit à haute fréquence pose toujours problème, mettez l'autre extrémité du câble à la terre par un condensateur de 0,1 μF. Remarque : Connectez les câbles blindés de commande et de signal (à l’extrémité variateur) à la mise à la terre de protection et non aux bornes de la carte de commande. o Les câbles du moteur doivent avoir un lien à 360 pour assurer une connexion de faible impédance, comme indiqué à la figure ci-dessous. Cheminement des câbles Utilisez les longueurs de câbles les plus courtes possible pour connecter le moteur. Utilisez une seule longueur de câble à un point de jonction pour alimenter plusieurs moteurs. Séparez les câbles sensibles des câbles électriquement bruyants. Si cela n'est pas possible, les parcours de câbles parallèles doivent être séparés d'au moins 0,25 mètre; pour les parcours de plus de 10 mètres, la séparation doit être augmentée proportionnellement. o Les câbles sensibles doivent croiser les câbles bruyants électriquement à angle de 90 . Ne jamais faire cheminer des câbles sensibles en parallèle avec ceux du moteur, à quelque distance que ce soit. Ne jamais faire cheminer des câbles d'alimentation ou de moteur dans le même conduit que les câbles de signaux même s'ils sont blindés. Assurez-vous que les câbles d'entrée et de sortie du filtre CEM cheminent séparément et ne sont pas couplés au sein du filtre. 4-1 Italiano Chapter 4 Italiano INFORMAZIONI SULLA SICUREZZA LA SCELTA O L’UTILIZZO IMPROPRIO DEI PRODOTTI ED ACCESSORI DI SEGUITO DESCRITTI POSSONO PROVOCARE MORTE, GRAVI LESIONI PERSONALI O DANNI ALLE COSE. Il presente documento ed altre informazioni provenienti da Parker Hannifin Corporation, società affiliate e distributori autorizzati forniscono opzioni, prodotti e/o sistemi il cui utilizzo deve essere valutato da utenti in possesso di adeguate competenze tecniche. L’utente con le proprie valutazioni ed i propri test è l’unico responsabile nella scelta finale di componenti o sistemi nonché della garanzia che tutti i requisiti di prestazioni, di sicurezza e normativi dell’applicazione siano soddisfatti. L’utente deve analizzare tutti gli aspetti dell’applicazione, seguendo le normative industriali applicabili e tenere in considerazione le informazioni riguardanti il prodotto contenute in questo opuscolo e in ogni altro materiale fornito da Parker, società affiliate e distributori autorizzati. In estensione a quanto sopra, se Parker, le società affiliate oppure i distributori autorizzati forniscono componenti, sistemi od opzioni sulla base di dati o specifiche fornite dall’utente, l’utente è egli stesso responsabile nel valutare che tali dati e specifiche sono adatti e sufficienti per tutte le applicazioni ed usi, ragionevolmente prevedibili, dei componenti o sistemi. Requisiti Leggere queste informazioni PRIMA di installare l’apparecchio. ATTENZIONE – L’impiego di questo apparecchio richiede che vengano scrupolosamente seguite le istruzioni di installazione/funzionamento contenute nel manuale prodotto. Queste informazioni sono contenute nel CD ROM, dischetto o altro sistema di archiviazione presente nell’imballo del prodotto. Le informazioni devono essere sempre conservate con il prodotto. E’ possibile ordinare una copia aggiuntiva del manuale presso il fornitore indicato sulla targhetta prodotto. Utilizzatori dell’apparecchio Questo opuscolo deve essere disponibile per tutte le persone che devono installare, configurare o mettere in servizio l’apparecchio qui descritto oppure eseguire qualsiasi altra operazione ad esso associata. Le informazioni fornite evidenziano i requisiti di sicurezza, leconsiderazioni EMC ed i suggerimenti che permettono all’utilizzatore di ottenere il funzionamento ottimale. Campi applicativi L’apparecchiatura di seguito descritta è stata progettata per il controllo industriale della velocità di macchine che utilizzano motori CC, CA ad induzione o macchine sincrone CA. Personale addetto L’installazione, l’operatività e la manutenzione dell’apparecchio devono essere eseguite da personale qualificato. La persona qualificata è colui che risulta competente dal punto di vista tecnico, conosce tutte le informazioni sulla sicurezza e mette in atto pratiche finalizzate a garantirla durante l’installazione, la gestione e la manutenzione di questo apparecchio e delle pericolosità che lo coinvolgono. Indicazioni prodotto Attenzione – superfici calde PERICOLO Rischio di shock elettrico Attenzione Vedere documentazione Terra Morsetto terra di protezione Rischi PERICOLO! – Ignorare le seguenti regole potrebbe causare incidenti 1. Questo apparecchio può mettere in pericolo la vita per l’esposizione a corpi rotanti ed alte tensioni. 2. L’apparecchio deve avere una messa a terra permanente a causa delle alte correnti di dispersione, il motore comandato deve essere connesso ad un’appropriata connessione alla terra di protezione. 6. 3. Assicurarsi che tutte le alimentazioni di ingresso siano state rimosse prima di operare sull’apparecchio. Considerare la possibilità che ci possa essere più di una sorgente di alimentazione collegata all’apparecchio. 7. 4. Quando il motore è in arresto o fermo potrebbero esserci comunque dei valori di tensione pericolosi presenti nei morsetti di potenza (uscita motore, fase ingresso alimentazione, DC bus e freno dove presenti). 8. 5. Per le misurazioni utilizzare solo apparecchi conformi alla norma IEC 61010 (CAT III o superiore). Iniziare utilizzando sempre la scala più alta. Non possono essere utilizzate per questo apparecchio strumenti in CAT I e CAT II. Attendere almeno 5 minuti per permettere ai condensatori di ridurre la tensione ai loro capi a valori non pericolosi (<50V). Utilizzare strumenti in grado di misurare tensioni fino a 1000V cc ed ac rms per garantire che sia presente una tensione inferiore a 50V tra tutti i morsetti di potenza e la terra. Salvo diverse indicazioni, questo prodotto NON deve essere smantellato. In caso di guasto il convertitore deve essere restituito. Fare riferimento alla voce “Manutenzione e Riparazioni”. ATTENZIONE – L’apertura di un qualunque dispositivo di protezione del prodotto potrebbe indicare che è stato rilevato un guasto. Al fine di ridurre il rischio di incendio e shock elettrico, le parti in tensione ed i componenti del prodotto dovrebbero essere esaminati e sostituiti se danneggiati. 4-2 Italiano ATTENZIONE! - Ignorare le seguenti regole potrebbe causare incidenti o danneggiare il convertitore SICUREZZA In caso di discordanza le norme di sicurezza del personale hanno la precedenza nei confronti delle norme EMC • • • Non effettuare test di resistenza ad alto tensione senza aver prima scollegato il convertitore. Per quanto la ventilazione sia sufficientemente assicurata, provvedere a salvaguardare e/o utilizzare sistemi di sicurezza addizionali per prevenire incidenti o danni all’apparecchio. In caso di sostituzione di un convertitore all’interno di un sistema, prima della marcia, è essenziale ripristinare correttamente tutti i valori dei parametri. • • • • Tutti i morsetti di controllo e segnale sono SELV, quindi a doppio isolamento. Assicurarsi che i cablaggi siano dimensionati per la maggiore delle tensioni utilizzate nel sistema. I sensori termici all’interno del motore devono disporre di un minimo isolamento. Tutte le parti metalliche accessibili sono protette mediante isolamento e collegate a terra. Non è raccomandato l’utilizzo di interruttori differenziali con questo apparecchio, ma dove sia inevitabile la loro installazione si raccomanda di utilizzare solamente differenziali di tipo B. EMC • • In ambiente domestico l’apparecchio può causare interferenze radio. In tal caso l’utente deve ricorrere ad ulteriori misure di schermatura. Questo apparecchio contiene componenti sensibili alle scariche elettrostatiche. E’ necessario quindi prendere precauzioni durante la sua messa in servizio e manutenzione. • Questo è un prodotto concepito per distribuzione di vendita limitata secondo la normative IEC 61800-3. E’ progettato come “equipaggiamento professionale” secondo quanto precisato nella normativa EN610003-2. Laddove richiesto si devono ottenere i permessi necessari dalle autorità competenti prima di collegarlo ad alimentazioni a bassa tensione. AVVERTENZA. – Rimozione/montaggio unità di controllo Interrompere l’alimentazione prima di collegare o scollegare l’unità di controllo dallo stack di potenza. ATTENZIONE! RISCHI LEGATI ALL’USO • Le specifiche tecniche, i processi e gli schemi circuitali descritti all’interno del presente manuale sono di carattere generale e potrebbero necessitare di adattamenti a specifiche richieste applicative. Non è possibile garantire l’adattabilità dell’apparecchiatura per applicazioni individuali. SITUAZIONI A RISCHIO In condizioni di guasto, mancanza rete ovvero condizioni operative impreviste, il convertitore potrebbe non funzionare come descritto nel manuale. In particolare: • L’energia immagazzinata potrebbe non portarsi a livelli di sicurezza così velocemente come suggerito e potrebbe essere ancora presente nonostante il convertitore appaia spento. • La direzione di rotazione del motore potrebbe non essere controllata • La velocità del motore potrebbe non essere controllata • Il motore potrebbe essere alimentato Il convertitore è un componente all’interno di un sistema e pertanto potrebbe influenzare il suo funzionamento o causarne danni. Tenere quindi in considerazione: • Energia immagazzinata • Interruzioni dell’alimentazione • Sequenza logica 4-3 Italiano GUIDA RAPIDA PRIMA DI INIZIARE Questo documento descrive i passaggi fondamentali per mettere in funzione l’inverter AC10. La messa in funzione di un inverter deve essere affidata ad elettricisti qualificati, che conoscano gli inverter AC e le relative applicazioni. Per maggiori informazioni su installazione, sicurezza ed applicazioni consultare il Manuale del prodotto AC10. Durante l’installazione dell’inverter accertarsi di rispettare tutte le norme elettrotecniche in vigore. Verificare che tutte le parti sotto tensione siano coperte, per evitare il rischio di scariche elettriche, e che un’accidentale rotazione del motore non possa provocare infortuni. Informazioni su questa guida rapida Scopo di questa guida rapida è: • • • approfondire la conoscenza dei terminali e del funzionamento dell’unità. Fornire informazioni *sull’installazione di base e sulla procedura di configurazione veloce. Illustrare come regolare automaticamente l’inverter ed avviare il motore. Questa guida rapida presuppone che: • siate tecnici qualificati in grado di installare questo tipo di apparecchiature. • Conosciate gli standard pertinenti e le norme elettrotecniche locali ( che hanno la priorità). • Abbiate letto e compreso le informazioni di sicurezza fornite nella prima pagina della presente guida rapida. • Abbiate compreso che questa guida contiene solo le informazioni di base e che occorre consultare il manuale del prodotto AC10 per completare l’installazione. Descrizione del prodotto 4-4 Italiano Codice prodotto 10 G - 1 1 - 0015- B F F : Built- in filter N : without built-in filter B : Built- in braking unit Rated current(A): XXXX OOO.O Frame Size : 1: 80×135×138(153) 2: 106×150×180(195) 3: 138×152×235(250) 4: 156×170×265(280) 5: 205×196×340(355) Input voltage: 1: 230 V / 240V 1 phase 3: 230 V / 240V 3 phase 4 400 V / 480V 3 phase Industry Product model Supply 1Ph 220V 3Ph 220V 3Ph 400V Part number kW Input current (A) Output Current (A) Input protection current 10G-11-0015-XX 0.2 4.0 1.5 6.0 10G-11-0025-XX 0.37 6.1 2.5 10.0 10G-11-0035-XX 0.55 8.9 3.5 14.0 10G-11-0045-XX 0.75 11.4 4.5 18.1 10G-12-0050-XX 1.1 16.1 5 24.5 10G-12-0070-XX 1.5 16.8 7 25.2 10G-12-0100-XX 2.2 21.0 10 32.0 10G-31-0015-XX 0.2 2.2 1.5 5.0 10G-31-0025-XX 0.37 4.3 2.5 8.2 10G-31-0035-XX 0.55 6.1 3.5 10.0 10G-31-0045-XX 0.75 7.6 4.5 11.5 10G-32-0050-XX 1.1 11.8 5 18.0 10G-32-0070-XX 1.5 12.0 7 18.2 10G-32-0100-XX 2.2 14.3 10 21.5 10G-41-0006-XX 0.2 1.2 0.6 2.5 10G-41-0010-XX 0.37 2.2 1 5.0 10G-41-0015-XX 0.55 3.6 1.5 5.5 10G-42-0020-XX 0.75 4.1 2 6.5 10G-42-0030-XX 1.1 6.0 3 10.2 10G-42-0040-XX 1.5 6.9 4 11.0 10G-42-0065-XX 2.2 9.6 6.5 15.0 10G-43-0080-XX 3 11.6 7 18.0 10G-43-0090-XX 4 13.6 9 21.0 10G-43-0120-XX 5.5 18.8 12 29.0 10G-44-0170-XX 7.5 22.1 17 34.0 10G-44-0230-XX 11 30.9 23 46.5 10G-45-0320-XX 15 52 32 80.0 4-5 Italiano Messa in funzione dell’inverter • Leggere la sezione Sicurezza nella prima pagina della guida rapida. • Accertarsi che tutte le norme elettrotecniche locali siano rispettate. • Controllare l’eventuale presenza di danni. • Controllare che l’inverter e l’impianto non presentino collegamenti allentati, tagli, residui di limatura, sfridi ecc. • Controllare tutti i circuiti esterni dell’impianto, ovvero alimentazione, comando, motore e collegamenti a terra. • Assicurarsi che una rotazione accidentale del motore in qualsiasi direzione non possa provocare danni o infortuni. Scollegare il carico dall’albero motore, se possibile. • Controllare che i contatti di marcia esterni siano aperti. Controllare che i setpoint di velocità esterni siano uguali a zero. • Assicurarsi che nessuno stia lavorando su un’altra parte di impianto che potrebbe essere interessata in caso di accensione. • Accertarsi che l’accensione non provochi danni ad altre apparecchiature. • Controllare che i collegamenti dello statore motore siano cablati correttamente a stella o triangolo, come richiesto per la tensione di uscita dell'inverter. Dati motore Per poter configurare l’inverter occorre conoscere alcune informazioni sul motore, reperibili sulla targhetta dei dati nominali. Le informazioni necessarie sono elencate di seguito: Tensione di base Frequenza di base Giri/min di base Ampere a pieno carico Ampere a vuoto (corrente mag.) Collegamento (a stella o triangolo) Collegamenti di base 4-6 Italiano Keypad LED indica frequenza di marcia, frequenza infiammante bersaglio, codice funzione, il valore del parametro o il codice di errore. 4 LED indicano lo stato di lavoro. RUN durante l'esecuzione. FWD correre avanti e FRQ quando la MMI sta mostrando frequenza. Premere il tasto "M" per il codice funzione e "E" per i parametri originali. ▲ e ▼ tasti possono essere utilizzati per selezionare codici funzione e dei parametri. Premere il tasto "E" per confermare. Nella modalità di controllo da tastiera, tasti ▲ e ▼ può essere utilizzato anche per il controllo della velocità dinamica. "I" tasti "O" comando di start e stop. Premere il tasto "O" per ripristinare inverter in stato di errore. Premere il tasto "M" per visualizzare il codice funzione Premere "Up" o "Down" per selezionare il codice funzione desiderata Premere E per leggere i dati impostati nel codice funzione Premere "Up" o "Down" per modificare i dati Premere M per visualizzare corrispondente frequenza di riferimento facendo lampeggiare dopo aver salvato il set di dati Premere E per visualizzare il codice funzione corrente Set-Up Istruzioni • Selezionare la modalità di applicazione. Vedere la Sezione 9 per la descrizione dell'applicazione. Premere (M) fino F100 viene visualizzato sul display Premere (O) fino a quando solo il LED FWD è acceso (XOXX) Premere (UP) per accedere blocco di parametri F2xx Premere (O) fino a quando entrambi i LED FWD e DGT sono illuminate (XOOX) Premere (UP) finché il display mostra F228 Premere (E) per modificare il numero della domanda Utilizzare l'(UP) e tasti (giù) per selezionare l'applicazione Premere (E) per confermare la selezione F228 • 0: Invalid 1: Basic speed control 2: auto/manual control 3: Stage speed control 4: Terminal control; 5: PID control; Application selection Impostare il motore Paramaters F801 Rated power (kW) Setting range: 0.75~1000 F802 Rated voltage (V) Setting range: 1~460 F803 Rated current (A) Setting range: 0.1~6500 F804 Number of motor poles Setting range: 2~100 F805 Rated rotary speed (rmp/min) Setting range: 1~30000 F810 Motor rated frequency (Hz) Setting range: 1.0~650.0 4 50.00 • Selezionare la modalità di controllo L'inverter AC10 ha tre modalità di controllo: il controllo vettoriale senza sensori (F106 = 0), il controllo VVVF (F106 = 2) e controllo vettoriale 1 (F106 = 3). In modalità di controllo VVVF, theAC10 inverter dispone di quattro tipi di modalità di compensazione di coppia: compensazione lineare (F137 = 0); compensazione Square (F137 = 1); compensazione multipunto definito dall'utente (F137 = 2); compensazione di coppia automatico (F137 = 3) • Impostare i limiti F111 Max Frequency (Hz) Setting range: F113~650.0 Mfr’s value: 50.00 F112 Min Frequency (Hz) Setting range: 0.00~F113 Mfr’s value: 0.50 F114 First Acceleration Time (S) F115 First Deceleration Time (S) F116 Second Acceleration Time (S) Setting range: 0.1~3000 Mfr’s value: subject to inverter model F117 Second Deceleration Time (S) Setting range: 0: 0~50.00Hz Mfr’s value: 0 1: 0~F111 When F119=0, acceleration/ deceleration time means the time for inverter to accelerate/ decelerate from 0Hz (50Hz) to 50Hz (0Hz). When F119=1, acceleration/ deceleration time F119 The reference of setting accel/decel time 4-7 Italiano • Impostare la modalità di controllo I / O Il canale di inverter per ricevere i comandi di controllo (tra cui l'avviamento, arresto e jogging, etc) contiene 5 modalità: 0. Controllo da tastiera; 1. Controllo Terminal 2. Tastiera + controllo del terminale 3. Comando Modbus, 4. Tastiera + terminale + Modbus. Le modalità di comando di controllo possono essere selezionate attraverso la F200 codici funzione e F201. F200 Source of start command 0: Keypad command; 1: Terminal command; 2: Keypad+Terminal; 3:MODBUS; F201 Source of stop command 4: Keypad+Terminal+MODBUS 0: Keypad command; 1: Terminal command; 2: Keypad+Terminal; 3:MODBUS; 4: Keypad+Terminal+MODBUS Per il controllo del terminale si prega di consultare il selettore switiched per gli ingressi analogici. F203=2, channel AI2 is selected SW1 coding switch Coding Switch 1 Coding Switch 2 OFF OFF ON OFF ON ON F203=1, channel AI1 is selected Mode of Speed Control 0~5V voltage 0~10V voltage 0~20mA current 0~10V voltage Controllare anche selettori NPN, PNP per gli ingressi digitali. • Test di eseguire l'inverter Test eseguito l'inverter da tastiera o il controllo del terminale, controllando tutte le condizioni sono al sicuro. • Per le funzioni avanzate, consultare il manuale completo. 4-8 Italiano CONFORMITÀ Nel manuale del prodotto AC30V è disponibile una guida completa alla conformità del prodotto. Attenzione – In caso di conflitto tra i requisiti EMC e di sicurezza, la sicurezza del personale deve sempre prevalere. L’uso di questa apparecchiatura richiede istruzioni dettagliate di installazione e funzionamento, fornite nel manuale del prodotto. Queste informazioni sono contenute nel CD-ROM accluso al prodotto. È necessario conservarle sempre insieme al prodotto. Avvertenza: questo prodotto fa parte della classe di distribuzione limitata secondo la norma IEC 61800-3. È definito “apparecchiatura professionale" in base alla norma EN61000-3. Prima di effettuare il collegamento a una fonte di alimentazione a bassa tensione occorre l’autorizzazione dall’autorità competente. In un ambiente domestico il prodotto può causare interferenze radio; in tal caso potrebbe essere necessario adottare misure di attenuazione supplementari. L’apparecchiatura contiene parti sensibili alle scariche elettrostatiche (ESD). Durante la movimentazione, l’installazione e la manutenzione del prodotto è necessario attenersi alle precauzioni di controllo delle cariche elettrostatiche. Emissioni EMC Se le apparecchiature sono installate secondo le istruzioni fornite nel Capitolo 4, “montaggio dell’unità”, le emissioni irradiate sono conformi alla norma EN61800-3 categoria C1, C2 e C3. Se le apparecchiature sono equipaggiate con filtro esterno le emissioni condotte sono conformi alla norma EN61800-3 categoria C3 e C2 senza filtro esterno e categoria C1. L’immunità è conforme ai requisiti della norma EN61800-3 per le apparecchiature destinate all’uso in ambiente 2. Collegamenti EMC Per soddisfare i requisiti EMC la "terra di segnale/0V” è da collegare a terra separatamente. Quando in un ipianto vengono utilizzate varie unità questi morsetti devono essere collegati insieme, in un unico punto di messa a terra locale. I collegamenti di comando e segnale richiedono cavi schermati, con la schermatura collegata esclusivamente all’estremità VSD. Se il rumore ad alta frequenza rappresenta ancora un problema, collegare a terra la schermatura all'estremità non VSD tramite un condensatore da 0,1 μF. collegare le schermature di comando e segnale (all’estremità VSD) al punto di terra di protezione VSD e non ai morsetti della scheda di controllo. o I cavi motore devono avere un ponticello a 360 per assicurare un collegamento a bassa impedenza, come indicato nella figura. Disposizione dei cavi I cavi motore devono essere il più corti possibile. Per alimentare più motori usare un cavo singolo diretto a un punto di giunzione a stella. Tenere separati i cavi sensibili da quelli che possono generare interferenze elettriche. Se questo non è possibile, separare i cavi paralleli di almeno 25 cm per i tratti superiori ai 10 metri, aumentando la distanza proporzionalmente. o I cavi sensibili devono incrociare i cavi che possono generare interferenze elettriche a 90 l’angolo. Non posare i cavi sensibili vicino o paralleli al circuito di motore, DC link e chopper di frenatura. Non posare i cavi di alimentazione, motore o DC link nello stesso fascio dei cavi di segnale/comando e di retroazione, anche se schermati. Assicurarsi che i cavi di ingresso e uscita del filtro EMC siano separati e che non siano accoppiati attraverso il filtro. 5-1 Polski Chapter 5 Polski INFORMACJE DOTYCZĄCE BEZPIECZEŃSTWA NIESTOSOWANIE SIĘ JAK RÓWNIEŻ NIEWŁAŚCIWY DOBÓR LUB KORZYSTANIE Z PRODUKTÓW OPISANYCH W NINIEJSZYM DOKUMENCIE LUB Z NIMI POWIĄZANYCH MOŻE SPOWODOWAĆ ŚMIERĆ, OBRAŻENIA CIAŁA ORAZ USZKODZENIE MIENIA. Niniejszy dokument oraz inne informacje dołączone przez firmę Parker-Hannifin Corporation, jej podmioty zależne oraz autoryzowanych dystrybutorów zawierają opisy opcji produktu lub systemu, które są przewidziane dla użytkowników posiadających odpowiednią wiedzę techniczną. Użytkownik, na podstawie własnych analiz i badań, jest wyłącznie odpowiedzialny za ostateczny wybór systemu i komponentów oraz zapewnienie, że spełnione są wszystkie związane z przewidywanym zastosowaniem wymagania dotyczące parametrów pracy, odporności, konserwacji, bezpieczeństwa i sygnalizacji ostrzegawczej. Do obowiązku użytkownika należy analiza wszystkich aspektów danego zastosowania, przestrzeganie odnośnych norm branżowych oraz stosowanie się do informacji dotyczących produktu podanych w aktualnym katalogu produktowym jak również wszelkich innych materiałów dostarczonych przez firmę Parker lub jej podmioty zależne bądź autoryzowanych dystrybutorów. W odniesieniu do opcji komponentów lub systemu dostarczanych przez firmę Parker lub jej spółki zależne lub autoryzowanych dystrybutorów na podstawie danych lub specyfikacji dostarczonych przez użytkownika, użytkownik jest odpowiedzialny za zapewnienie, że takie dane i specyfikacje są właściwe i wystarczające dla wszystkich zastosowań i możliwych do przewidzenia przypadków użycia tych komponentów lub systemów. Wymagania IMPORTANT: WAŻNE: Prosimy o zapoznanie się z poniższymi informacjami PRZED montażem urządzenia. OSTRZEŻENIE – Obsługa niniejszego urządzenia wymaga zapoznania się ze szczegółowymi zasadami montażu i obsługi podanymi w Instrukcji montażu i obsługi przewidzianej do stosowania z niniejszym produktem. Instrukcja ta znajduje się na płycie CD-ROM, dyskietce (ach) lub innym nośniku danych dołączonym do opakowania, w którym niniejsze urządzenie zostało dostarczone. Instrukcja ta musi być przez cały czas przechowywana z niniejszym urządzeniem. Papierową kopię tej instrukcji można zamówić u dostawcy, który jest wskazany na etykiecie produktu. Docelowi użytkownicy Niniejsza broszura musi być dostępna dla wszystkich osób odpowiedzialnych za montaż, konfigurację lub serwisowanie opisanego urządzenia lub wszelkie inne związane z nimi czynności. Przedstawione informacje mają na celu zwrócenie uwagi na kwestie związane z bezpieczeństwem, kompatybilnością EMC oraz umożliwienie użytkownikom optymalnego korzystania z urządzenia. Zakres zastosowań Opisane wyposażenie jest przeznaczone do regulacji prędkości obrotowej przemysłowych silników indukcyjnych lub synchronicznych prądu przemiennego. Personel Czynności montażu, obsługi i konserwacji urządzenia powinny być wykonywane przez kompetentny personel. Kompetentny pracownik to osoba, która posiada odpowiednie kwalifikacje techniczne i jest zaznajomiona ze wszystkimi informacjami dotyczącymi bezpieczeństwa i uznanymi praktykami bezpieczeństwa, przebiegiem montażu, obsługą i konserwacją niniejszego urządzenia oraz świadomy występujących zagrożeń. Ostrzeżenia umieszczone na produkcie ZAGROŻENIE Ryzyko porażenia prądem Zagrożenia 1. 2. 3. 4. 5. Uwaga – gorące powierzchnie Ostrzeżenie Patrz dokumentacja Uziemienie Zacisk przewodu ochronnego ZAGROŻENIE! – zignorowanie poniższych informacji może skutkować powstaniem obrażeń ciała Niniejsze urządzenie może stanowić zagrożenie dla 6. Odczekać co najmniej 5 minut, aby umożliwić życia związane z kontaktem z maszynami rozładowanie się kondensatorów napędu do wirnikowymi i wysokimi napięciami. bezpiecznej wartości napięcia (< 50 V). Przy pomocy odpowiedniego miernika przystosowanego do pomiaru Urządzenie musi być uziemione na stałe z uwagi na napięcia stałego i zmiennego (wartość skuteczna) do wysoki prąd upływowy a silnik napędowy musi być 1000 V upewnić się, że napięcie pomiędzy wszystkimi połączony do odpowiedniego uziemienia. zaciskami zasilania a uziemieniem jest mniejsze niż 50 V. Przed rozpoczęciem pracy z urządzeniem upewnić się, że wszelkie doprowadzone zasilanie jest 7. O ile nie określono inaczej, NIE jest dozwolone izolowane. Należy pamiętać, że do napędu może być demontowanie niniejszego produktu. W przypadku podłączone więcej niż jedno źródło zasilania. usterki napęd musi zostać zwrócony do producenta. Patrz punkt „Konserwacja okresowa i naprawy”. Przy nie pracującym lub zatrzymanym silniku mogą 8. NIEBEZPIECZEŃSTWO – zadziałanie wyłącznika wciąż występować niebezpieczne napięcia na zabezpieczającego w obwodzie może wskazywać na zaciskach elektrycznych (wyjścia silnika, faz napięcia wystąpienie prądu zwarciowego. Aby zmniejszyć wejściowego, magistrali DC i hamulca, jeśli jest ryzyko pożaru lub porażenia prądem elektrycznym, zainstalowany). należy sprawdzić części będące pod napięciem oraz Do pomiarów należy używać tylko miernika zgodnego pozostałe elementy sterownika kontrolera i wymienić z normą IEC 61010 (kategorii CAT III lub wyższej). w razie ich uszkodzenia. Zawsze rozpoczynać pomiary przy użyciu najwyższego zakresu wartości. Zabronione jest stosowanie z niniejszym produktem mierników w kategorii CAT I i CAT II. 5-2 Polski NIEBEZPIECZEŃSTWO! – zignorowanie poniższych informacji może skutkować powstaniem obrażeń ciała lub uszkodzeniem urządzenia BEZPIECZE STWO W przypadku wykluczających się wymogów dotyczących kompatybilności EMC i bezpieczeństwa, pierwszeństwo mają zawsze wymogi dotyczące bezpieczeństwa personelu. • • • • Przed wykonywaniem pomiaru rezystancji izolacji na okablowaniu wysokiego napięcia należy zawsze odłączyć najpierw napęd od sprawdzanego obwodu. Aby uniknąć obrażeń lub uszkodzeń urządzenia, należy zapewnić osłony i/lub dodatkowe środki bezpieczeństwa, które zapewniają jednocześnie odpowiednią wentylację. Napięcia na wszystkich zaciskach sterowniczych i sygnałowych mają bezpieczne wartości niskie (SELV), tj. są chronione izolacją podwójną. Wszystkie elementy zewnętrznego okablowania muszą mieć parametry znamionowe odpowiadające najwyższemu napięciu systemu. Wszystkie metalowe elementy obudowy przemiennika są zabezpieczone przez izolację podstawową i podłączone do uziemienia. • • • W przypadku wymiany napędu konieczne jest przed ponownym rozpoczęciem użytkowania prawidłowe zainstalowanie wszystkich parametrów zdefiniowanych przez użytkownika dla określonego zastosowania produktu. Czujniki temperatury umieszczone w silniku muszą posiadać przynajmniej izolację podstawową. Nie jest zalecane stosowanie z tym produktem wyłączników różnicowoprądowych, w przypadku gdy ich użycie jest wymagane, należy stosować wyłącznie wyłączniki typu B. KOMPATYBILNOŚĆ EMC • • W środowiskach mieszkalnych niniejszy produkt może powodować zakłócenia fal radiowych, wymagające od użytkownika podjęcia dodatkowych środków zaradczych. To urządzenie zawiera części wrażliwe na wyładowania elektrostatyczne (ESD). Przestrzegać zaleceń ochrony elektrostatycznej podczas obchodzenia się, montażu i serwisowania tego produktu. • Zgodnie z wymaganiami normy IEC 61800-3 jest to produkt przeznaczony do ograniczonej dystrybucji. Zgodnie z definicją zawartą w normie EN 61000-3-2 produkt jest określony jako „profesjonalne urządzenie”. Przed podłączeniem do sieci zasilania niskiego napięcia należy uzyskać zezwolenie zakładu energetycznego. NIEBEZPIECZE STWO! – Demonta / monta modułu sterowania Odłączyć zasilanie przed podłączeniem lub odłączeniem modułu sterowania od zespołu głównego przemiennika. UWAGA! RYZYKO ZWIĄZANE Z UŻYTKOWANIEM • Zamieszczone w niniejszym dokumencie specyfikacje, procesy i obwody elektryczne są podane jedynie jako przykładowe i mogą wymagać dostosowania do określonej aplikacji użytkownika. Nie możemy zagwarantować przydatności opisanego w niniejszej instrukcji urządzenia do poszczególnych aplikacji. OCENA RYZYKA W przypadku wystąpienia usterki, utraty zasilania lub nieprzewidzianych warunków pracy napęd może działać niezgodnie z oczekiwaniem. W szczególności: • Czas rozładowania nagromadzonej energii do bezpiecznego poziomu może trwać dłużej niż sugerowane, a energia ta może występować w układzie nawet mimo to, że napęd jest wyłączony. • • • Możliwa jest utrata kontroli kierunku obrotów silnika Możliwa jest utrata kontroli prędkości obrotowej silnika Możliwy jest zanik zasilania silnika Napęd jest elementem układu napędowego, który w warunkach awarii może wpływać na jego działanie lub parametry pracy. W takich sytuacjach należy uwzględnić: • Ilość nagromadzonej energii • Odłączenia zasilania • Logikę działania 5-3 Polski INSTRUKCJA SZYBKIEGO URUCHOMIENIA PRZED ROZPOCZĘCIEM Niniejszy dokument opisuje czynności niezbędne do pierwszego uruchomienia przemiennika serii AC10. Pierwsze uruchomienie przemiennika powinno być wykonywane przez kompetentnych techników elektryków, którzy są zaznajomieni z przemiennikami prądu zmiennego oraz ich zastosowaniem. Szczegółowe informacje na temat montażu, bezpieczeństwa i zastosowań znajdują się w Instrukcji produktu AC10. Upewnić się, że montaż przemiennika jest wykonywany zgodnie ze wszystkimi lokalnymi przepisami elektrycznymi. Upewnić się, że wszystkie części będące pod napięciem posiadają osłony zabezpieczające przed porażeniem prądem elektrycznym a nieoczekiwane włączenie obrotów silnika nie spowoduje uszczerbku na zdrowiu lub obrażeń ciała. Niniejszy dokument zakłada, że przemiennik jest już zamontowany w przewidzianym położeniu zgodnie ze wszystkimi odnośnymi procedurami montażu. O NINIEJSZEJ INSTRUKCJI SZYBKIEGO URUCHOMIENIA Niniejsza instrukcja szybkiego uruchomienia zawiera: • • • Opis zacisków i działania urządzenia. *Podstawowe informacje dotyczące montażu i procedurę szybkiej konfiguracji. Opis sposobu automatycznego dostrojenia przemiennika i uruchomienia silnika. Niniejsza instrukcja szybkiego uruchomienia zakłada, że jej użytkownik: • jest kompetentnym technikiem posiadającym doświadczenie w montażu tego typu urządzeń. • posiada znajomość właściwych norm i obowiązujących lokalnie przepisów elektrycznych (które mają pierwszeństwo). • Przeczytał i zrozumiał informacje dotyczące bezpieczeństwa umieszczone przed niniejszą instrukcją szybkiego uruchomienia. • Jest świadomy, że niniejsza instrukcja zawiera jedynie podstawowe informacje i do zakończenia procedury montażu może być konieczne użycie Instrukcji produktu AC10. Informacje o produkcie 5-4 Polski Produkcie Code 10 G - 1 1 - 0015- B F F : Built- in filter N : without built-in filter B : Built- in braking unit Rated current(A): XXXX OOO.O Frame Size : 1: 80×135×138(153) 2: 106×150×180(195) 3: 138×152×235(250) 4: 156×170×265(280) 5: 205×196×340(355) Input voltage: 1: 230 V / 240V 1 phase 3: 230 V / 240V 3 phase 4 400 V / 480V 3 phase Industry Product model Supply 1Ph 220V 3Ph 220V 3Ph 400V Output Current (A) Input protection current 4.0 1.5 6.0 6.1 2.5 10.0 8.9 3.5 14.0 0.75 11.4 4.5 18.1 10G-12-0050-XX 1.1 16.1 5 24.5 10G-12-0070-XX 1.5 16.8 7 25.2 10G-12-0100-XX 2.2 21.0 10 32.0 10G-31-0015-XX 0.2 2.2 1.5 5.0 10G-31-0025-XX 0.37 4.3 2.5 8.2 10G-31-0035-XX 0.55 6.1 3.5 10.0 10G-31-0045-XX 0.75 7.6 4.5 11.5 10G-32-0050-XX 1.1 11.8 5 18.0 10G-32-0070-XX 1.5 12.0 7 18.2 10G-32-0100-XX 2.2 14.3 10 21.5 10G-41-0006-XX 0.2 1.2 0.6 2.5 10G-41-0010-XX 0.37 2.2 1 5.0 10G-41-0015-XX 0.55 3.6 1.5 5.5 10G-42-0020-XX 0.75 4.1 2 6.5 10G-42-0030-XX 1.1 6.0 3 10.2 10G-42-0040-XX 1.5 6.9 4 11.0 10G-42-0065-XX 2.2 9.6 6.5 15.0 10G-43-0080-XX 3 11.6 7 18.0 10G-43-0090-XX 4 13.6 9 21.0 10G-43-0120-XX 5.5 18.8 12 29.0 10G-44-0170-XX 7.5 22.1 17 34.0 10G-44-0230-XX 11 30.9 23 46.5 10G-45-0320-XX 15 52 32 80.0 Part number kW 10G-11-0015-XX 0.2 10G-11-0025-XX 0.37 10G-11-0035-XX 0.55 10G-11-0045-XX Input current (A) 5-5 Polski Uruchomienie przemiennika • Przeczytać informacje dotyczące bezpieczeństwa umieszczone przed instrukcją szybkiego uruchomienia. • Upewnić się, że montaż przemiennika jest zgodny ze wszystkimi lokalnymi przepisami elektrycznymi. • Sprawdzić, czy urządzenie nie jest uszkodzone. • Sprawdzić, czy w przemienniku i instalacji nie ma obciętych końców przewodów, ścinków, opiłków, wiórów powstałych przy wierceniu itp. • Sprawdź wszystkie zewnętrzne obwody okablowania systemu – zasilania, sterowania, silnika i uziemienia. • Upewnić się, że przypadkowe włączenie obrotów silnika nie spowoduje uszkodzeń, obrażeń ciała lub urazów. Odłączyć obciążenie od wału silnika, jeśli to możliwe. • Sprawdzić, czy zaciski zdalnego sterowania są otwarte. Sprawdzić, czy wartości zdalnych nastaw prędkości mają wartości zerowe. • Upewnić się, że żaden z pracowników nie znajduje się w obszarze instalacji, w którym powstanie zagrożenie po włączeniu zasilania. • Upewnić się, że włączenie zasilania nie będzie miało ujemnego wpływu na pracę innych urządzeń. • Sprawdzić, czy połączenia stojana silnika są prawidłowo podłączone w gwiazdę lub trójkąt jak wymagane dla napięcia wyjściowego przemiennika. Parametry silnika Przed przystąpieniem do konfiguracji przemiennika, należy przygotować dane znamionowe silnika. Informacje te są podane na tabliczce znamionowej silnika. Wymagane dane są podane poniżej: Napięcie znamionowe Częstotliwość znamionowa Znamionowa prędkość obrotowa Prąd znamionowy przy pełnym obciążeniu Prąd jałowy (prąd magnesujący) Połączenie (gwiazda lub trójkąt) podstawowe połączenia 5-6 Polski Keypad Pokazy LED działa częstotliwość, migające częstotliwości docelowej, kod funkcji, wartość parametru lub kod błędu. 4 diody LED sygnalizujące stan pracy. RUN podczas jazdy. FWD działa do przodu i FRQ gdy MMI pokazuje częstotliwość. Naciśnij "M" dla kodu funkcji, a "E" do oryginalnych parametrów. ▲ i ▼ może być używany do wyboru kody funkcji i parametrów. Ponownie nacisnąć przycisk "E", aby potwierdzić. W trybie sterowania klawiaturą, ▲ i ▼ może być również używany do kontroli dynamicznej prędkości. "I" i "O" klawisze sterowania start i stop. Naciśnij klawisz "O", aby zresetować falownik w stanie błędu. Naciśnij przycisk "M", aby wyświetlić kod funkcji Naciśnij przycisk "w górę" lub "w dół", aby wybrać żądany kod funkcji Naciśnij E, aby odczytać dane wymienione w kodzie funkcji Naciśnij przycisk "w górę" lub "w dół", aby zmodyfikować dane Naciśnij M, aby wyświetlić odpowiadający częstotliwości docelowej poprzez miganie po zapisaniu zbioru danych Naciśnij E, aby wyświetlić aktualny kod funkcji Instrukcja konfiguracji • Wybierz tryb aplikacji. Patrz rozdział 9 w odniesieniu Naciśnij przycisk (M) aż F100 jest pokazany na wyświetlaczu Naciśnij (O) aż tylko FWD dioda LED (XOXX) Naciśnij (UP), aby uzyskać dostęp do bloku parametrów F2xx Naciśnij (O) aż obie diody FWD i DGT są oświetlone (XOOX) Naciśnij (UP), aż wyświetlacz pokazuje F228 Naciśnij przycisk (E), aby zmienić liczbę aplikacji Użyj przycisku (w górę) i (w dół), aby wybrać aplikację Naciśnij przycisk (E), aby potwierdzić wybór F228 • do opisu aplikacji. 0: Invalid 1: Basic speed control 2: auto/manual control 3: Stage speed control 4: Terminal control; 5: PID control; Application selection Ustawić silnik paramaters F801 Rated power (kW) Setting range: 0.75~1000 F802 Rated voltage (V) Setting range: 1~460 F803 Rated current (A) Setting range: 0.1~6500 F804 Number of motor poles Setting range: 2~100 F805 Rated rotary speed (rmp/min) Setting range: 1~30000 F810 Motor rated frequency (Hz) Setting range: 1.0~650.0 4 50.00 • Wybierz tryb sterowania Przetwornica AC10 ma trzy tryby sterowania: Sterowanie wektorowe (F106 = 0), kontrola VVVF (F106 = 2) oraz sterowanie wektorowe 1 (F106 = 3). W trybie sterowania VVVF, falownik theAC10 ma cztery rodzaje trybów kompensacji momentu obrotowego: Kompensacja liniowa (F137 = 0); odszkodowanie Square (F137 = 1), zdefiniowane przez użytkownika kompensacja wielopunktowa (F137 = 2), kompensacja momentu Auto (F137 = 3) • Ustaw limity F111 Max Frequency (Hz) Setting range: F113~650.0 Mfr’s value: 50.00 F112 Min Frequency (Hz) Setting range: 0.00~F113 Mfr’s value: 0.50 F114 First Acceleration Time (S) F115 First Deceleration Time (S) F116 Second Acceleration Time (S) Setting range: 0.1~3000 Mfr’s value: subject to inverter model F117 Second Deceleration Time (S) Setting range: 0: 0~50.00Hz Mfr’s value: 0 1: 0~F111 When F119=0, acceleration/ deceleration time means the time for inverter to accelerate/ decelerate from 0Hz (50Hz) to 50Hz (0Hz). When F119=1, acceleration/ deceleration time F119 The reference of setting accel/decel time 5-7 Polski • Ustaw tryb sterowania I / O Kanał dla falownika otrzymywać polecenia sterujące (w tym start, stop i joggingu, itp.) zawiera 5 trybów: 0. Sterowanie z klawiatury; 1. Sterowanie zaciskami; 2. Sterowanie klawiatura + zacisk 3. Sterującego Modbus; 4. Klawiatura + zacisk + Modbus. Tryby sterowania ruchem może być wybrany przez F200 i F201 Kody funkcji. F200 Source of start command 0: Keypad command; 1: Terminal command; 2: Keypad+Terminal; 3:MODBUS; F201 Source of stop command 4: Keypad+Terminal+MODBUS 0: Keypad command; 1: Terminal command; 2: Keypad+Terminal; 3:MODBUS; 4: Keypad+Terminal+MODBUS F203=2, channel AI2 is selected SW1 coding switch Coding Switch 1 Coding Switch 2 OFF OFF ON OFF ON ON F203=1, channel AI1 is selected Mode of Speed Control 0~5V voltage 0~10V voltage 0~20mA current 0~10V voltage Sprawdź również przełączniki NPN, PNP dla wejść cyfrowych. • test przetwornicy Próba uruchomienia falownika z klawiatury lub sterowania zaciskami, sprawdzając wszystkie warunki są bezpieczne. • Dla zaawansowanych funkcji zobaczyć pełną instrukcję. 5-8 Polski KOMPATYBILNOŚĆ Szczegółowe wytyczne dotyczące zapewnienia kompatybilności produktu są podane w Instrukcji produktu AC30V. Niebezpieczeństwo - w przypadku wykluczających się wymogów dotyczących kompatybilności EMC i bezpieczeństwa, pierwszeństwo mają zawsze wymogi dotyczące bezpieczeństwa personelu. Praca z niniejszym urządzeniem wymaga dokładnych instrukcji montażu i obsługi podanych w instrukcji przewidzianej do stosowania z niniejszym produktem. Instrukcja ta znajduje się na płycie CD-ROM dołączonej do opakowania, w którym niniejszy produkt został dostarczony. Instrukcja powinna być przez cały czas przechowywana razem z produktem. Uwaga: Zgodnie z wymaganiami normy IEC 61800-3 jest to produkt przeznaczony do ograniczonej dystrybucji. Zgodnie z definicją zawartą w normie EN 61000-3-2 produkt jest określony jako „profesjonalne urządzenie”. Przed podłączeniem do sieci zasilania niskiego napięcia należy uzyskać zezwolenie zakładu energetycznego. W środowiskach mieszkalnych niniejszy produkt może powodować zakłócenia fal radiowych, wymagające od użytkownika podjęcia dodatkowych środków zaradczych. To urządzenie zawiera części wrażliwe na wyładowania elektrostatyczne (ESD). Przestrzegać zaleceń ochrony elektrostatycznej podczas obchodzenia się, montażu i serwisowania tego produktu. Emisje zakłóceń EMC Urządzenie spełnia wymagania kategorii C1, C2 i C3 normy PN-EN 61800-3 dotyczące emisji promieniowanych w przypadku zamontowania zgodnie z instrukcjami podanymi w rozdziale 4 w punkcie „Montaż urządzenia”. Urządzenie bez filtra zewnętrznego spełnia wymagania kategorii C3 i C2 normy PN-EN 61800-3 dotyczące emisji przewodzonych oraz kategorii C1, gdy jest wyposażone w podany filtr zewnętrzny. Urządzenie spełnia wymagania normy PN-EN 61800-3 dotyczące odporność na zakłócenia dla urządzeń przeznaczonych do stosowania w środowisku drugim. Połączenia EMC Aby spełnić wymagania EMC zacisk „0V/signal ground” musi być osobno uziemiony. W przypadku użycia w instalacji większej liczby przemienników zaciski te należy podłączyć do wspólnego, lokalnego punktu uziemienia. Połączenia sterownicze i sygnałowe należy wykonać przy użyciu ekranowanych przewodów, z ekranem podłączonym wyłącznie od strony przemiennika. Jednakże w przypadku występowania zakłóceń wysokiej częstotliwości należy uziemić ekranowanie przewodu również z drugiej strony poprzez kondensator o pojemności 0,1 μF. Uwaga: podłączyć ekranowanie przewodów sterowniczychh i sygnałowych (od strony przemiennika) do punktu uziemienia ochronnego przemiennika, a nie do zacisków listwy sterowniczej. Połączenie ekranowania przewodów silnikowe należy wykonać na całym swoim obwodzie (360 ), jak pokazane na rysunku obok, aby zapewnić niską impedancję połączenia. o Ułożenie okablowania Stosować możliwie jak najkrótsze przewody silnikowe. Przy połączeniu w gwiazdę użyć jednego przewodu do zasilania wielu silników. Układać osobno przewody emitujące zakłócenia elektryczne i wrażliwe na zakłócenia. Jeśli nie jest to możliwe przy równoległym ułożeniu przewody powinny być rozdzielone od siebie z odstępem co najmniej 0,25 metra. Przy długościach ułożenia większych niż 10 metrów odstęp ten powinien być proporcjonalnie zwiększony. Przewody wrażliwe na zakłócenia powinny być układane prostopadle do przewodów emitujących zakłócenia pod o kątem w halaśliwych katem 90 . Nigdy nie układać przewodów wrażliwych na zakłócenia w pobliżu lub równolegle do silnika, obwodu pośredniego DC i obwodu rezystora hamowania. Nigdy nie układać przewodów zasilania, obwodu pośredniego DC lub przewodów silnikowych w tej samej wiązce co przewody sygnałowe/sterownicze lub przewody sprzężenia zwrotnego, nawet jeśli są one ekranowane. Upewnić się, że przewody wejściowe i wyjściowe filtra EMC są ułożone osobno i nie krzyżują się wzdłuż filtra. 6-1 Español Chapter 6 Español INFORMACIÓN DE SEGURIDAD FALLAS, USOS O SELECCIÓN INADECUADA DEL PRODUCTO DESCRITO EN EL PRESENTE O LOS ARTÍCULOS RELACIONADOS PUEDEN CAUSAR LA MUERTE, LESIONES PERSONALES O DAÑOS A LA PROPIEDAD. Este documento y otra información de Parker-Hannifin Corporation, sus filiales y distribuidores autorizados proporcionan opciones de productos o sistemas para su posterior investigación por parte de usuarios con idoneidad técnica. El usuario a través de su propio análisis y evaluación, es responsable exclusivamente de realizar la selección final del sistema y los componentes, y de asegurar que se cumplan todos los requerimientos de rendimiento, resistencia, mantenimiento, seguriad y advertencia. El usuario debe analizar todos los aspectos de la aplicación, seguir los estándares de la industria pertinentes, y seguir la información concerniente al producto en el catálogo de productos actual y en cualquier otro material proporcionado por Parker o sus filiales o distribuidores autorizados. En la medida en que Parker o sus filiales o distribuidores asociados proporcionen opciones de componentes o sistemas basándose en datos o especificaciones proporcionadas por el usuario, el usuario es responsable de determinar que dichos datos o especificaciones sean adecuados y suficientes para todas las aplicaciones y los usos previsibles razonables de los componentes o sistemas. Requerimientos IMPORTANTE: Lea esta Información de seguridad ANTES de instalar el equipo. ADVERTENCIA: El funcionamiento de este equipo requiere las instrucciones detalladas de instalación y funcionamiento proporcionadas en el manual de Instalación/Funcionamiento elaborado para utilizar con este producto. Esta información se proporciona en el CD ROM, disquete(s), u otro dispositivo de almacenamiento que se incluyen en el envase de este dispositivo. El envase se debe conservar junto con este dispositivo en todo momento. Se puede solicitar una copia impresa de esta información al proveedor indicado en la etiqueta del producto. Usuarios al que va dirigido Este folleto deberá ponerse a disposición de todas las personas que deban instalar, configurar o arreglar el equipo descrito en el presente, o cualquier otra operación asociada. La información proporcionada tiene como finalidad detallar problemas de seguridad y consideraciones de EMC, y permitir al usuario obtener el máximo beneficio del equipo. Área de aplicación El equipo descrito está diseñado para el control de velocidad de motores industriales utilizando, motores de inducción de CA o máquinas sincrónicas de CA. Personal La instalación, la operación y el mantenimiento del equipo deben ser realizados por personal competente. Una persona competente es alguien que está técnicamente calificada y familiarizada con toda la información de seguridad y prácticas de seguridad establecidas; con el proceso de instalación, operación y mantenimiento de este equipo, y con todos los peligros involucrados. Advertencias sobre el producto PELIGRO Riesgo de descarga eléctrica Atención: superficies de temperatura elevada Precaución Consulte la documentación Tierra/Suelo Terminal del conductor de protección Peligros AVISO Si se ignora lo siguiente se pueden producir lesiones 1. Este equipo puede poner en peligro la vida mediante la exposición a la maquinaria rotatoria y los altos voltajes. 2. El equipo debe estar permanentemente conectado a tierra debido a corrientes intensas de fuga a tierra, y el motor del dispositivo debe estar conectado a tierra de forma segura y adecuada. 3. 4. Asegúrese de que todos los suministros de entrada estén aislados antes de trabajar en el equipo. Tenga en cuenta que puede haber más de una conexión de suministro a la unidad. Aún puede haber voltajes peligrosos presentes en las terminales eléctricas (salida del motor, fases de entrada de suministro eléctrico, bus de CC y el freno, donde estén colocados) cuando el motor está detenido o parado. 6. 7. 8. Deje pasar al menos 5 minutos para que los capacitores de la unidad descarguen a niveles de voltaje seguros (<50V). Utilice el medidor específico capaz de medir hasta 1000V cc y ca rms para confirmar que hay menos de 50V entre todas las terminales eléctricas y la tierra. Excepto que se especifique lo contrario, este producto NO se debe desmontar. En el caso de una falla se debe devolver la unidad. Consulte "Mantenimiento de rutina y reparación". ADVERTENCIA: La apertura del dispositivo de protección del circuito ramal puede ser una indicación de que se ha interrumpido una corriente de falla. Para reducir el riesgo de incendio o descarga eléctrica, las partes de transporte de corriente y otros componentes del controlador se deben examinar y reemplazar si estuvieran dañadas. 6-2 Español 5. Para mediciones utilice solamente un medidor que cumpla con IEC 61010 (CAT III o superior). Comience siempre utilizando el rango más alto. Los medidores que cumplen con CAT I y CAT II no se deben utilizar en este producto. ADVERTENCIA - Ignorar lo siguiente puede resultar en lesiones o daños al equipo SEGURIDAD Cuando exista un conflicto entre EMC y los requerimientos de seguridad, la seguridad del personal siempre tendrá prioridad. • • • • Nunca realice verificaciones de resistencia de alto voltaje en el cableado sin desconectar primero la unidad del circuito que se está probado. Mientras se asegura de que la ventilación sea suficiente, proporcione protección y/o sistemas de seguridad adicionales para prevenir lesiones o daños en el equipo. Todas las terminales de controles y señal son SELV, es decir, están protegidas mediante doble aislamiento. Asegúrese de que todo el cableado externo esté calificado para el voltaje más alto del sistema. Todo metal expuesto en el inversor está protegido por aislamiento básico y conectado a tierra de forma segura. Al reemplazar una unidad en una aplicación y antes de volver a utilizarla, es fundamental que todos los parámetros definidos por el usuario para el funcionamiento del producto estén correctamente instalados. Los sensores térmicos dentro del motor deben tener al menos aislamiento básico. No se recomienda el uso de dispositivos de corriente residual (RCD) para este producto pero, cuando su uso sea obligatorio, solo se deben utilizar RCD de tipo B. • • • EMC • • En un entorno doméstico este producto puede causar interferencia radial, en cuyo caso se requerirán medidas de mitigación complementarias. Este equipo contiene partes sensibles a descargas electroestáticas (ESD). Observe las precauciones de control estático al manipular, instalar y arreglar • este producto. Este es un producto de distribución de venta restringida de acuerdo con IEC 61800-3. Se designa como “equipo profesional” según se define en EN61000-3-2. Se debe obtener el permiso de la autoridad de suministro de energía antes de conectarlo a un suministro eléctrico de bajo voltaje. ADVERTENCIA – Extracción/instalación de la unidad de control Aísle el suministro antes de conectar o desconectar la unidad de control a la pila de alimentación. PRECAUCIÓN RIESGO DE APLICACIÓN • Las especificaciones, procesos y sistemas de circuitos descritos en el presente se brindan solo a modo de orientación y pueden tener que adaptarse a la aplicación específica del usuario. No podemos garantizar la adecuación del equipo descrito en este Manual para aplicaciones individuales. EVALUACIÓN DEL RIESGO En condiciones de falla, pérdida de energía o condiciones operativas imprevistas, la unidad puede no funcionar según lo previsto. En particular: • La energía almacenada puede no descargarse a niveles seguros tan rápido como se sugiere, e incluso puede estar presente aun cuando la unidad parece estar apagada. • • • La dirección del motor de rotación puede no estar controlada. La velocidad del motor puede no estar controlada. El motor puede estar conectado a la corriente. Una unidad es un componente dentro de un sistema de propulsión que puede influenciar su funcionamiento o efectos en una condición de falla. Se debe considerar lo siguiente: • Energía almacenada • Desconexiones del suministro de energía • Lógica de distribución 6-3 Español INICIO RÁPIDO ANTES DE COMENZAR En este documento se tratan los pasos necesarios para la puesta en funcionamiento básica de la unidad AC10. Las puestas en funcionamiento de la unidad deben ser llevadas a cabo por técnicos en electricidad competentes que estén familiarizados con las unidades AC y sus aplicaciones. Para obtener información detallada acerca de la instalación, la seguridad y las aplicaciones, consulte el manual del producto AC10. Asegúrese de cumplir con todos los códigos eléctricos locales durante la instalación de la unidad. Compruebe que todas las piezas con tensión estén cubiertas para protegerse contra descargas eléctricas y para que la rotación inesperada del motor no provoque daños corporales o lesiones. En este documento se espera que la unidad ya se encuentre instalada en su ubicación deseada y que se hayan seguido todos los procedimientos de instalación correspondientes. Acerca de este manual de inicio rápido Este manual de inicio rápido: • • • Le permitirá familiarizarse con los terminales y el funcionamiento da la unidad. Le proporciona información detallada acerca de la instalación *básica y un procedimiento de configuración rápida. Le muestra cómo ajustar la unidad automáticamente y sobre cómo poner en marcha el motor. En este manual de inicio rápido se dan por hecho los siguientes aspectos: • Que es usted un técnico competente que dispone de experiencia en la instalación de este tipo de equipos. • Que está familiarizado con los estándares correspondientes y con los códigos eléctricos locales (que tienen prioridad). • Que ha leído y comprendido la información de seguridad proporcionada en la parte frontal de este manual de inicio rápido. • Que comprende que esta guía solamente contiene información básica y que es posible que necesite consultar el manual del producto AC10 para completar la instalación. Descripción del producto 6-4 Español Código producto 10 G - 1 1 - 0015- B F F : Built- in filter N : without built-in filter B : Built- in braking unit Rated current(A): XXXX OOO.O Frame Size : 1: 80×135×138(153) 2: 106×150×180(195) 3: 138×152×235(250) 4: 156×170×265(280) 5: 205×196×340(355) Input voltage: 1: 230 V / 240V 1 phase 3: 230 V / 240V 3 phase 4 400 V / 480V 3 phase Industry Product model Supply 1Ph 220V 3Ph 220V 3Ph 400V Part number kW Input current (A) Output Current (A) Input protection current 10G-11-0015-XX 0.2 4.0 1.5 6.0 10G-11-0025-XX 0.37 6.1 2.5 10.0 10G-11-0035-XX 0.55 8.9 3.5 14.0 10G-11-0045-XX 0.75 11.4 4.5 18.1 10G-12-0050-XX 1.1 16.1 5 24.5 10G-12-0070-XX 1.5 16.8 7 25.2 10G-12-0100-XX 2.2 21.0 10 32.0 10G-31-0015-XX 0.2 2.2 1.5 5.0 10G-31-0025-XX 0.37 4.3 2.5 8.2 10G-31-0035-XX 0.55 6.1 3.5 10.0 10G-31-0045-XX 0.75 7.6 4.5 11.5 10G-32-0050-XX 1.1 11.8 5 18.0 10G-32-0070-XX 1.5 12.0 7 18.2 10G-32-0100-XX 2.2 14.3 10 21.5 10G-41-0006-XX 0.2 1.2 0.6 2.5 10G-41-0010-XX 0.37 2.2 1 5.0 10G-41-0015-XX 0.55 3.6 1.5 5.5 10G-42-0020-XX 0.75 4.1 2 6.5 10G-42-0030-XX 1.1 6.0 3 10.2 10G-42-0040-XX 1.5 6.9 4 11.0 10G-42-0065-XX 2.2 9.6 6.5 15.0 10G-43-0080-XX 3 11.6 7 18.0 10G-43-0090-XX 4 13.6 9 21.0 10G-43-0120-XX 5.5 18.8 12 29.0 10G-44-0170-XX 7.5 22.1 17 34.0 10G-44-0230-XX 11 30.9 23 46.5 10G-45-0320-XX 15 52 32 80.0 6-5 Español Puesta en marcha de la unidad • Lea la sección Seguridad que se encuentra en la parte frontal del manual de inicio rápido. • Asegúrese de cumplir con todos los códigos eléctricos locales. • Compruebe los posibles daños del equipo. • Asegúrese de que no haya extremos sueltos, recortes, limaduras, virutas de perforación, etc. ni en la unidad ni en el sistema. • Compruebe todos los circuitos de los cables externos del sistema, conexiones de alimentación, control, motor y tierra. • Asegúrese de que la rotación inesperada del motor en alguna de las direcciones no provoque daños ni lesiones corporales. Si es posible, desconecte la carga del eje del motor. • Asegúrese de que los contactos de ejecución externos están abiertos. Asegúrese de que todos los puntos de ajuste de velocidad externos están a cero. • Asegúrese que de nadie trabaja en piezas del sistema que puedan verse afectadas por el encendido. • Asegúrese de que cualquier otro equipamiento no se verá afectado negativamente por el encendido. • Compruebe que las conexiones del estator del motor estén correctamente establecidas para conexiones en estrella o delta según sea necesario para la tensión de salida de la unidad. Datos del motor Antes de intentar configurar la unidad, necesitará cierta información acerca del motor. Dicha información puede encontrarse en la placa de características del motor. A continuación se indica la información que necesitará: Voltios básicos Frecuencia base RPM base Amperios a plena carga Ningún amperio de carga (corriente de magnetización) Conexión (en estrella o delta) Conexiones básicas 6-6 Español Keypad LED muestra corriendo frecuencia, intermitente frecuencia objetivo, el código de la función, el valor de parámetro o el código de fallo. 4 LEDs indican el estado de trabajo. RUN mientras se ejecuta. FWD corriendo hacia adelante y FRQ cuando el MMI está mostrando la frecuencia. Pulse el botón "M" para el código de función, y "E" para los parámetros originales. ▲ y ▼ se pueden utilizar para seleccionar los códigos de función y parámetros. Pulse el botón "E" de nuevo para confirmar. En el modo de control del teclado, ▲ y ▼ también se puede utilizar para el control dinámico de la velocidad. "I" y las teclas "O" de control de arranque y parada. Pulse la tecla "O" para restablecer convertidor en estado de fallo. Presione la tecla "M" para mostrar el código de función Pulse el botón "Up" o "Down" para seleccionar el código de función requerida Presione E para leer establecidos en el código de función de datos Pulse el botón "Up" o "Down" para modificar datos Pulse M para mostrar correspondiente frecuencia de destino mediante el parpadeo después de guardar los datos de conjunto Presione E para visualizar el código de función actual Conjunto de Instrucciones • Seleccione el modo de aplicación. Ver Sección 9 para la descripción de la aplicación. Pulse (M) hasta F100 se muestra en la pantalla Presione (O) hasta que sólo se ilumina el LED FWD (XOXX) Presione (UP) para acceder bloque de parámetros F2xx Presione (O) hasta que se iluminan los LED FWD y la DGT (XOOX) Presione (UP) hasta que la pantalla muestra F228 Presione (E) para modificar el número de solicitud Utilice las teclas (DOWN) (UP) y para seleccionar la aplicación Presione (E) para confirmar su selección F228 • 0: Invalid 1: Basic speed control 2: auto/manual control 3: Stage speed control 4: Terminal control; 5: PID control; Application selection Ajuste el motor Paramaters F801 Rated power (kW) Setting range: 0.75~1000 F802 Rated voltage (V) Setting range: 1~460 F803 Rated current (A) Setting range: 0.1~6500 F804 Number of motor poles Setting range: 2~100 F805 Rated rotary speed (rmp/min) Setting range: 1~30000 F810 Motor rated frequency (Hz) Setting range: 1.0~650.0 4 50.00 • Seleccione el modo de control El inversor AC10 tiene tres modos de control: control vectorial sin sensor (F106 = 0), el control VVVF (F106 = 2) y el control de vectores 1 (F106 = 3). En el modo de control VVVF, theAC10 inversor dispone de cuatro tipos de modos de compensación de par: Compensación Lineal (F137 = 0), la compensación Square (F137 = 1), la compensación multipunto definido por el usuario (F137 = 2), la compensación de par automático (F137 = 3) • Establecer los límites F111 Max Frequency (Hz) Setting range: F113~650.0 Mfr’s value: 50.00 F112 Min Frequency (Hz) Setting range: 0.00~F113 Mfr’s value: 0.50 F114 First Acceleration Time (S) F115 First Deceleration Time (S) F116 Second Acceleration Time (S) Setting range: 0.1~3000 Mfr’s value: subject to inverter model F117 Second Deceleration Time (S) Setting range: 0: 0~50.00Hz Mfr’s value: 0 1: 0~F111 When F119=0, acceleration/ deceleration time means the time for inverter to accelerate/ decelerate from 0Hz (50Hz) to 50Hz (0Hz). When F119=1, acceleration/ deceleration time F119 The reference of setting accel/decel time 6-7 Español Ajuste el modo de control de E / S El canal para el inversor a recibir órdenes de control (incluidas las de marcha, paro y de footing, etc) contiene 5 modos: 0. Teclado de membrana; 1. Control de la Terminal 2. Teclado + control de la terminal 3. Control Modbus; 4. Teclado terminal + + Modbus. Los modos de comando de control se pueden seleccionar a través de la F200 y F201 códigos de función. F200 Source of start command 0: Keypad command; 1: Terminal command; 2: Keypad+Terminal; 3:MODBUS; F201 Source of stop command 4: Keypad+Terminal+MODBUS 0: Keypad command; 1: Terminal command; 2: Keypad+Terminal; 3:MODBUS; 4: Keypad+Terminal+MODBUS Para el control de la terminal por favor revise el selector switiched para las entradas analógicas. F203=2, channel AI2 is selected SW1 coding switch Coding Switch 1 Coding Switch 2 OFF OFF ON OFF ON ON F203=1, channel AI1 is selected Mode of Speed Control 0~5V voltage 0~10V voltage 0~20mA current 0~10V voltage También puedes ver los selectores NPN, PNP para las entradas digitales. • Pruebe el inversor Pruebe el variador desde el teclado o el control de la terminal, comprobando todas las condiciones son seguras. • Para funciones avanzadas, consultar el manual completo. 6-8 Español CUMPLIMIENTO En el manual del producto AC30V se encuentra disponible una guía completa acerca del cumplimiento del producto. Advertencia: cuando exista un conflicto entre EMC y los requisitos de seguridad, la seguridad del personal tendrá prioridad en todo momento. Para poder utilizar este equipo, es necesario disponer de instrucciones detalladas acerca de la instalación y el funcionamiento que se proporcionan en el manual del producto destinado a utilizarse con este producto. Esta información se proporciona en el CD-ROM incluido en el embalaje en el que se ha empaquetado este producto. Deberá conservarse con el producto en todo momento. Precaución: este es un producto de clase de distribución de venta restringida de acuerdo con el estándar IEC 61800-3. Está diseñado como “equipo profesional” tal y como se define en la normativa EN61000-3. Es necesario obtener el permiso correspondiente de las autoridades de suministro antes de efectuar la conexión al suministro de baja tensión. En entornos domésticos, es posible que este producto provoque interferencias de radio, en cuyo caso, es posible que resulte necesario tomar medidas de mitigación complementarias. Este equipo contiene piezas sensibles a descargas electrostáticas. Tenga en cuenta las precauciones de control estático a la hora de manipular, instalar y reparar este producto. Emisiones de compatibilidad electromagnética Las emisiones radiadas cumplen con la categoría C1, C2 y C3 de la normativa EN61800-3 cuando se instala de acuerdo con las instrucciones facilitadas en el Capítulo 4 (consulte la sección “montaje de la unidad”). Las emisiones conducidas cumplen con la categoría C3 y C2 de la normativa EN61800-3 sin filtro externo y con la categoría C1 cuando se encuentra instalada con un filtro externo especificado. La inmunidad cumple con los requisitos de la normativa EN61800-3 para equipos destinados a utilizarse en el segundo entorno. Conexiones de compatibilidad electromagnética Para cumplir los requisitos de compatibilidad electromagnética, “conexión a tierra de 0V/señal” debe conectarse a tierra por separado. Cuando se utiliza un número determinado de unidades en un sistema, estos terminales deben conectarse juntos en un punto de conexión a tierra único y local. Las conexiones de control y de señal deben establecerse mediante cables blindados, con el blindaje conectado únicamente al extremo de la VSD. No obstante, si el ruido de alta frecuencia continúa siendo un problema, conecte el blindaje a tierra en el extremo distinto de la VSD a través de un condensador de capacidad de 0,1μF. Nota: Conecte los blindajes de control y de señal (en el extremo de la VSD) al punto de conexión a tierra de protección de la VSD, y no a los terminales de la placa de control. o Los cables del motor deben disponer de un enlace de 360 para garantizar la obtención de una conexión de baja impedancia, de acuerdo con el opuesto de la ilustración; Planificación de la colocación de los cables Utilice cables de motor de longitud lo más corta posible. Utilice una sola longitud de cable para establecer la conexión con un punto de intersección en forma de estrella para alimentar a varios motores. Mantenga los cables que generan ruido eléctrico y los sensibles a la electricidad separados. Si esto no es posible, los cables paralelos deben separarse en al menos 0,25 metros, con cables de más de 10 metros, la separación debe incrementarse de manera proporcional. o Los cables sensibles a la electricidad deberán cruzarse con los que generan ruido eléctrico formando un ángulo de 90 . No instale nunca cables sensibles cerca de ni en paralelo al motor, a la conexión de CC ni al circuito de corte de frenada a ninguna distancia. No instale nunca cables de suministro, de conexión de CC ni del motor dentro del mismo conjunto que los cables de señal/control y retroalimentación, aunque estén blindados. Asegúrese de que los cables de entrada y salida del filtro de compatibilidad electromagnética estén instalados por separado y que no se unan en el filtro. 7-1 Svenska Chapter 7 Svenska SÄKERHETSINFORMATION MISSTAG ELLER FELAKTIGA VAL ELLER OLÄMPLIG ANVÄNDNING AV DEN PRODUKT SOM BESKRIVS HÄR ELLER NÄRLIGGANDE UTRUSTNING KAN ORSAKA DÖDSFALL, PERSONSKADA OCH SKADA AV EGENDOM. Det här dokumentet och annan information från Parker-Hannifin Corporation, dess dotterbolag och auktoriserade distributörer tillhandahåller produkt- eller systemalternativ för vidare undersökning av användare med tekniska expertkunskaper. Användaren är, genom sin egen analys och testning, ensamt ansvarig för att göra det slutgiltiga valet av system och komponenter och för att alla krav vad avser tillämpningens prestanda, uthållighet, underhåll, säkerhet och varningar uppfylls. Användaren måste analysera alla aspekter av tillämpningen samt följa såväl tillämpbara branschnormer som produktinformation i aktuell produktkatalog och i annat material som Parker, dess dotterbolag eller godkända distributörer tillhandahåller. Såvida Parker, dess dotterbolag, eller auktoriserade distributörer tillhandahåller komponent- eller systemalternativ baserade på data eller specifikationer från användaren, är det användarens ansvar att avgöra om sådana data och specifikationer är lämpliga och tillräckliga för alla tillämpningar och användningsområden som komponenterna eller systemen rimligtvis kan komma att användas för. Krav VIKTIGT! Läs den här information INNAN du installerar utrustningen. IMPORTANT: VARNING! – Användningen av den här utrustningen kräver detaljerade installations- och driftsanvisningar som återfinns i den installations-/driftshandbok som är avsedd att användas tillsammans med produkten. Informationen tillhandahålls på CD-ROM, eller andra lagringsmedier som medföljer i enhetens förpackning. Informationen ska alltid förvaras tillsammans med enheten. En utskrift av informationen kan beställas från den leverantör som anges på produktetiketten. Avsedda användare Den här broschyren ska finnas tillgänglig för alla personer som ska installera, konfigurera eller serva den utrustning som beskrivs här eller utföra en närliggande åtgärd. Avsikten med informationen är att belysa frågor som rör säkerhet och EMC samt att hjälpa användaren att få ut mesta möjliga av utrustningen. Tillämpningsområde Den utrustning som beskrivs här är avsedd att användas för att styra hastigheten på industrimotorer, asynkronmotorer och synkrona servomotorer. permanetmagnetiserade. Personal Installation, drift och underhåll av utrustningen måste utföras av kompetent personal. Kompetent personal är någon som har de erforderliga tekniska kvalifikationerna och känner till all säkerhetsinformation och alla vedertagna säkerhetsrutiner som rör installationsprocessen, driften och underhållet av utrustningen samt alla risker som sådant arbete medför. Produktvarningar FARA Risk för elektrisk stöt Obs! Heta ytor Försiktighet Se dokumentationen Jord Skyddande ledningsterminal Faror 1. 2. 3. 4. 5. FARA! - Om du inte beaktar följande kan det orsaka skador Utrustningen kan sätta liv i fara genom exponering 6. Ge enhetens kondensatorer minst 5 minuter för för roterande maskindelar och hög spänning. urladdning till säkra spänningsnivåer (<50 V). Använd angiven mätare med mätkapacitet på Utrustningen måste alltid vara jordad pga. den upp till 1000 V DC & AC RMS för att bekräfta höga jordläckageströmmen. Enhetens motor att spänningen är lägre än 50 V mellan alla måste vara ansluten till lämplig säkerhetsjord. strömterminaler och jorden. Se till att alla inkommande strömförsörjningar är 7. Om inte annat anges får produkten INTE tas isär. väl isolerade innan utrustningen tas i bruk. Tänk Om ett fel skulle inträffa måste enheten returneras. på att fler än en strömförsörjning kan vara ansluten Se “repair and maintainance”. till enheten. 8. VARNING – Om säkringen före enheten har löst ut skall enheten undersökas eller helt bytas ut. Det kan finnas farlig spänning kvar vid strömterminaler (motorutgång, strömingångsfaser, likströmsbuss och -bromschopper, i förekommande fall) även när motorn står still eller har stoppats. För mätningar ska endast mätare som uppfyller IEC 61010 användas (CAT III eller högre). Börja alltid med den högsta klassningen. CAT I- och CAT II-mätare får inte användas. 7-2 Svenska VARNING! - Om du inte beaktar följande kan det orsaka personskador eller skador på utrustningen SÄKERHET Om det finns en konflikt mellan EMC- och säkerhetskraven ska den personliga säkerheten alltid prioriteras. • • • • Kontrollera aldrig högspänningsmotståndet i kablaget utan att först koppla bort enheten från den krets som testas. Se till att ventilationen är fullgod och använd skydds- och säkerhetssystem för att förhindra att personer eller utrustningen skadas. Alla styr- och signalterminaler uppfyller SELV, dvs. är dubbelt isolerade. Se till att allt externt kablage är klassat för systemets högsta spänning. All exponerad metall i växelriktaren skyddas av grundisolering och är ansluten till säkerhetsjord. • När du byter ut en enhet i en tillämpning och innan den tas i bruk igen måste alla användardefinierade parametrar för driften ställas in korrekt. Termalsensorerna i motorn måste ha minst grundisolering. Vi rekommenderar inte att jordfelsbrytare (RCD) användas med produkten, om det är ett krav får bara (RCD) typ B användas. • • EMC • • I en bostadsmiljö kan produkten orsaka radiostörningar; i så fall måste särskilda åtgärder vidtas. Utrustningen innehåller delar som är känsliga för elektrostatisk urladdning. Använd antistatiska skyddsåtgärder när produkten hanteras, installeras och servas. • Det här är en produkt som ingår i klassen varor med begränsad försäljningsdistribution enligt IEC 61800-3. Den klassas som ”professionell utrustning” enligt definitionen i SS-EN 61000-3-2. Tillstånd från behörig myndighet ska inhämtas innan utrustningen ansluts till lågspänningsförsörjning. VARNING! – Borttagning/montering av kontrollenhet Isolera försörjningen innan du ansluter eller kopplar bort kontrollenheten från nätaggregatet. VARNING! RISK VID OLIKA TILLÄMPNINGAR • De specifikationer, processer och kretsar som beskrivs här är endast för vägledning och kan behöva anpassas till den aktuella tillämpningen. Vi kan inte garantera att den utrustning som beskrivs här är lämplig för den aktuella tillämpningen. RISKBEDÖMNING I samband med fel, strömförlust eller oönskade driftsförhållanden kanske inte enheten fungerar som avsett. Det gäller i synnerhet följande: • Lagrad energi kanske inte urladdas till säkra nivåer så snabbt som angetts och kan finnas kvar även sedan enheten verkar vara avstängd • • • Motorns rotationsriktning kanske inte kan styras Motorns hastighet kanske inte kan styras Motorn kan ha blivit strömförande En enhet är en komponent i enhetssystemet som kan påverka dess drift eller effekter när ett fel inträffat. Man måste ta med följande i beräkningen: • Lagrad energi • Bortkopplingar av strömförsörjningen • Logisk ordningsföljd 7-3 Svenska SNABBSTART INNAN DU STARTAR I det här dokumentet beskrivs de steg som ingår i en normal start av AC10-enheten. Enheten ska startas av en kvalificerad eltekniker som behärskar frekvensomoriktare och hur de kan användas. Detaljerad information om installation, säkerhet och tillämpningar finns i produkthandboken för AC10. Se till att alla lokala elnormer uppfylls under installationen. Kontrollera att alla strömförande delar är täckta för att skydda mot elektriska stötar och se till att motorn inte oavsiktligt börjar rotera, vilket kan orsaka skador. I detta dokument utgår vi från att enheten redan är installerad på avsedd plats och att alla relevanta installationsrutiner har fullföljts. OM DENNA SNABBSTART Denna Snabbstart är till för att: • • • Bekanta dig med enhetens terminaler och drift. Tillhandahålla *grundläggande installationsinformation och en rutin för snabbinställning av enheten. Visa hur du använder funktionen för automatjustering (Autotune) och startar motorn. I denna Snabbstart görs följande antaganden: Produktöversikt • Du är behörig tekniker med erfarenhet av att installera den här typen av utrustning. • Du är förtrogen med relevanta standarder och lokala elnormer (som äger företräde). • Du har läst och förstått den säkerhetsinformation som inleder denna Snabbstart. • Du inser att den här broschyren bara innehåller information på grundnivå och att du kan behöva använda produktmanualen för AC10 för att fullfölja installationen. 7-4 Svenska Produktkod 10 G - 1 1 - 0015- B F F : Built- in filter N : without built-in filter B : Built- in braking unit Rated current(A): XXXX OOO.O Frame Size : 1: 80×135×138(153) 2: 106×150×180(195) 3: 138×152×235(250) 4: 156×170×265(280) 5: 205×196×340(355) Input voltage: 1: 230 V / 240V 1 phase 3: 230 V / 240V 3 phase 4 400 V / 480V 3 phase Industry Product model Supply 1Ph 220V 3Ph 220V 3Ph 400V Part number kW Input current (A) Output Current (A) Input protection current 10G-11-0015-XX 0.2 4.0 1.5 6.0 10G-11-0025-XX 0.37 6.1 2.5 10.0 10G-11-0035-XX 0.55 8.9 3.5 14.0 10G-11-0045-XX 0.75 11.4 4.5 18.1 10G-12-0050-XX 1.1 16.1 5 24.5 10G-12-0070-XX 1.5 16.8 7 25.2 10G-12-0100-XX 2.2 21.0 10 32.0 10G-31-0015-XX 0.2 2.2 1.5 5.0 10G-31-0025-XX 0.37 4.3 2.5 8.2 10G-31-0035-XX 0.55 6.1 3.5 10.0 10G-31-0045-XX 0.75 7.6 4.5 11.5 10G-32-0050-XX 1.1 11.8 5 18.0 10G-32-0070-XX 1.5 12.0 7 18.2 10G-32-0100-XX 2.2 14.3 10 21.5 10G-41-0006-XX 0.2 1.2 0.6 2.5 10G-41-0010-XX 0.37 2.2 1 5.0 10G-41-0015-XX 0.55 3.6 1.5 5.5 10G-42-0020-XX 0.75 4.1 2 6.5 10G-42-0030-XX 1.1 6.0 3 10.2 10G-42-0040-XX 1.5 6.9 4 11.0 10G-42-0065-XX 2.2 9.6 6.5 15.0 10G-43-0080-XX 3 11.6 7 18.0 10G-43-0090-XX 4 13.6 9 21.0 10G-43-0120-XX 5.5 18.8 12 29.0 10G-44-0170-XX 7.5 22.1 17 34.0 10G-44-0230-XX 11 30.9 23 46.5 10G-45-0320-XX 15 52 32 80.0 7-5 Svenska Starta enheten • Läs avsnittet om säkerhet i början av Snabbstarten. • Se till att alla lokala elektriska normer följs. • Kontrollera att utrustningen inte är skadad. • Sök efter lösa kabeländar, filspån, rester från borrning etc. i enheten och systemet. • Kontrollera systemets alla ledningskretsar: ström, kontroll, motor och jord. • Se till att inte motorrotation i någon riktning kan orsaka skador på utrustning eller personer. Koppla bort belastningen från motoraxeln, om möjligt. • Kontrollera att alla externa startsignaler är frånslagna. Kontrollera att alla externa hastighetsinställningar står på noll. • Kontrollera att ingen arbetar med någon annan del av systemet som påverkas av starten. • Kontrollera att annan utrustning inte påverkas negativt av starten. • Kontrollera att motor-/statoranslutningarna är korrekt gjorda för kopplingar av typen stjärna eller delta, beroende på vad som krävs för enhetens utgående spänning. Motordata Innan du konfigurerar enheten behöver du en del motorinformation. Du hittar den på motorns märkplåt. Den information som du behöver hittar du nedan: Märkspänning Märkfrekvens Märkvarvtal-RPM Ström vid full belastning Ström utan belastning (magnetiseringsström) Anslutning (stjärna eller delta) Grundläggande anslutningar 7-6 Svenska Keypad LED visar kör frekvens, blinkande målfrekvens, funktionskod, parametervärdet eller fel code. 4 lysdioder indikerar sysselsättningsstatus. KÖR medan du kör. FWD kör framåt och FRQ när MMI visar frekvensen. Tryck på "M" för kod för funktionen, och "E" för original parametrar. ▲ och ▼ knapparna kan användas för att välja funktions koder och parametrar. Tryck på "E" igen för att bekräfta. I det läget av knappsatsen kontroll, ▲ och ▼ knapparna kan också användas för dynamisk hastighetskontroll. "I" och "O" nycklar styr start och stopp. Tryck på "O" för att återställa omriktaren i feltillstånd. Tryck på "M" för att visa funktionskod Tryck på "Up" eller "Down" för att välja önskad funktion kod Tryck på E för att läsa data som i funktionskoden Tryck på "Up" eller "Down" för att ändra data Tryck på M för att visa motsvarande mål frekvens genom att blinka efter att ha sparat den inställda uppgifter Tryck på E för att visa aktuell funktionskod Set-Up Instruktioner • Välj programläge. Se avsnitt 9 för tillämpningen beskrivning. Tryck (M) tills F100 visas på displayen Tryck (O) tills bara FWD är tänd (XOXX) Tryck (UP) för att komma parameterblock F2xx Tryck (O) tills både FWD och DGT lysdioder lyser (XOOX) Tryck (UP) tills displayen visar F228 Tryck på (E) för att redigera ansökningsnummer Använd (UPP) och (NED) för att välja programmet Tryck på (E) för att bekräfta din selectionUse på (UP) och (NED) för att välja programmet F228 • • 0: Invalid 1: Basic speed control 2: auto/manual control 3: Stage speed control 4: Terminal control; 5: PID control; Application selection Ställ in motor paramaters F801 Rated power (kW) Setting range: 0.75~1000 F802 Rated voltage (V) Setting range: 1~460 F803 Rated current (A) Setting range: 0.1~6500 F804 Number of motor poles Setting range: 2~100 F805 Rated rotary speed (rmp/min) Setting range: 1~30000 F810 Motor rated frequency (Hz) Setting range: 1.0~650.0 4 50.00 Välj inställning Den AC10 inverter har tre styrlägen: Sensorlös vektorstyrning (F106 = 0), VVVF kontroll (F106 = 2) och vektorstyrning 1 (F106 = 3). Under VVVF styrsätt, har theAC10 inverter fyra typer av kompensationsmomentlägen : Linjär ersättning (F137 = 0); Square ersättning (F137 = 1), Användardefinierad flerpunktskompensation (F137 = 2), kompensation Auto vridmoment (F137 = 3) • Sätter gränserna F111 Max Frequency (Hz) Setting range: F113~650.0 Mfr’s value: 50.00 F112 Min Frequency (Hz) Setting range: 0.00~F113 Mfr’s value: 0.50 F114 First Acceleration Time (S) F115 First Deceleration Time (S) F116 Second Acceleration Time (S) Setting range: 0.1~3000 Mfr’s value: subject to inverter model F117 Second Deceleration Time (S) Setting range: 0: 0~50.00Hz Mfr’s value: 0 1: 0~F111 When F119=0, acceleration/ deceleration time means the time for inverter to accelerate/ decelerate from 0Hz (50Hz) to 50Hz (0Hz). When F119=1, acceleration/ deceleration time F119 The reference of setting accel/decel time 7-7 Svenska - Kanalen för växelriktaren att ta emot styrkommandon (inklusive start, stopp och jogging, etc.) innehåller fem lägen: 0. Panelstyrning, 1. Terminal kontroll, 2. Tangentbord + terminal kontroll 3. Modbus kontroll, 4. Tangentbord + terminal + Modbus. Lägena för kommandokontroll kan väljas via funktionskoder F200 och F201. F200 Source of start command 0: Keypad command; 1: Terminal command; 2: Keypad+Terminal; 3:MODBUS; F201 Source of stop command 4: Keypad+Terminal+MODBUS 0: Keypad command; 1: Terminal command; 2: Keypad+Terminal; 3:MODBUS; 4: Keypad+Terminal+MODBUS För terminalkontroll kontrollera väljaren switiched för de analoga ingångarna. F203=2, channel AI2 is selected SW1 coding switch Coding Switch 1 Coding Switch 2 OFF OFF ON OFF ON ON F203=1, channel AI1 is selected Mode of Speed Control 0~5V voltage 0~10V voltage 0~20mA current 0~10V voltage Kontrollera även brytare NPN, PNP väljaren för de digitala ingångarna. • Provkör omriktaren Provkör omriktaren från knappsatsen eller terminal kontroll, kontrollera alla villkor är säkra. • För avancerade funktioner se hela manualen. 7-8 Svenska INSTALLATIONSKRAV Heltäckande information om produktens installation finns i produktmanualen för AC30V. Varning! – Om det finns en konflikt mellan EMC- och säkerhetskraven ska den personliga säkerheten alltid prioriteras. För att kunna använda den här utrustningen krävs de detaljerade anvisningar om installation och drift som finns i produktmanualen. Du hittar informationen på den CD-ROM som medföljer i produktförpackningen. Den ska alltid förvaras tillsammans med produkten. Försiktighet!: Det här är en produkt som ingår i klassen varor med begränsad försäljningsdistribution enligt IEC 61800-3. Den klassas som ”professionell utrustning” enligt definitionen i SS-EN 61000-3. Tillstånd från behörig myndighet ska inhämtas innan utrustningen ansluts till lågspänningsförsörjning. I en bostadsmiljö kan produkten orsaka radiostörningar; i så fall måste särskilda åtgärder vidtas. Utrustningen innehåller delar som är känsliga för elektrostatisk urladdning. Använd antistatiska skyddsåtgärder när produkten hanteras, installeras och servas. EMC-emissioner Strålningsemissionerna uppfyller SS-EN 61800-3-kategorierna C1, C2 och C3 vid installation enligt anvisningarna i kapitel 4; se avsnittet om montering av enheten. Ledningsemissionerna uppfyller SS-EN 61800-3-kategorierna C3 och C2 utan externt filter och kategori C1 med specificerat externt filter. Immuniteten uppfyller kraven i SS-EN 61800-3 för utrustning avsedd för den andra miljön. EMC-anslutningar För att uppfylla EMC-kraven ska ”0 V/signal jord” jordas separat. Om flera enheter används i ett system ska dessa terminaler anslutas tillsammans till en enda jordanslutning. Kontroll- och signalanslutningar ska göras med skärmade kablar, där avskärmningen ansluts bara i VSDänden. Vid fortsatta problem med högfrekvent brus kan dock avskärmningen i den andra änden jordas med en kondensator på 0,1 μF. Obs! Anslut avskärmningen för kontroll- och signalanslutningarna (VSD-änden) till skyddsjordspunkten för VSD. o Motorkablarna ska ha vara fästa i 360 för att säkerställa att anslutningarna får en låg impedans; se figuren på här intill ; Planera kabeldragningen Använd kortast möjliga motorkablar. Separera elektriskt brusiga och känsliga kablar. Om detta inte är möjligt ska avståndet mellan parallella kablar vara minst 25 cm i dragningar som överstiger 10 meter; öka sedan avståndet proportionerligt. Känsliga kablar ska dras vinkelrätt över kablar med brus. Känsliga kablar får aldrig dras nära kretsarna för motorn, likströmskopplingen eller bromschoppern. Kablarna för strömförsörjningen, likströmskopplingen eller motorn får inte dras tillsammans med signal-/kontrollkablar och återkopplingskablar även om de är skärmade. Se till att ut- och ingående kablar för EMC-filter dras separat och inte korsas över filtret. 中文 8-1 Chapter 8 中文 安全须知 本章介绍了在对变频器进行安装、操作和维护时必须遵守的安全须知。如果忽视这些安全须知可能会造成人身伤亡或 者变频器、电机或者执行机构的损坏。在对变频器进行操作前请阅读安全须知。 本手册适用于所有对本手册所描述的产品进行安装,调试,维修或其他相关操作的人员使用。 设备的安装,操作,和维修应由资质合格的人员承担。资质合格的人员应技术胜任,熟悉安全信息并且具有安全实践经 验:包括设备的安装,操作,维修以及所有相关风险。 Parker 或其子公司,或者授权的经销商根据用户提供具体应用的数据和技术规格提供给客户零配件或者系统选项,用户对 提供的应用数据和技术规格应付相应的责任。 要求 IMPORTANT: 注意:在安装设备以前,请阅读本安全信息。 警告-操作该设备需要阅读随机附带的详细的安装和操作指南说明。详细说明书包含在设备包装盒内, 可能是 CD,软盘或其他设备。说明书应该随时与设备放在一起。可以产品标签所示的供应商处订购纸 质说明书。 目标用户 本手册供对这里讲述的对设备需要进行安装、配置或者操作的所有人员使用。 在这里给出的信息主要涉及安全问题,以便使用户从设备中获得最大的效益。 应用范围 本产品用于驱动工业应用中速度控制的直流电机,交流感应电机和交流同步电机。 人员 设备的安装、操作和维修应当由具有资格的人员进行。具有资格的人员是指在技术上有能力,熟悉所有的安全信息并具有安全方面的经 验,熟悉设备的安装过程、操作和维修,熟悉相关的危险性。 产品警示 注意 电击危险 注意 注意 接地保护 表面高温 参考手册 导线端子 危险性 危险!-忽视下面信息会导致以为发生 1. 设备的旋转电机和高压可能危及人员生命。 2. 对地漏典电流强,设备必须永久接地。驱动电机必 须连接合适的外接地。 3. 4. 5. 测量时,仅使用一个经过IEC61010 认证的仪表 (CATIII或更高级别)。开始时,应使用最高档。在此 产品上不得使用CAT I和CAT II仪表。 6. 允许驱动电机的电容有至少 5 分钟时间放电至安全电 保证在连接到设备前,所有供电设备均采取绝缘措 施。注意,变频器可能有两个或两个以上供电电 源。 当电机处在待机或停止状态时,电源端子(电机输 出端,电源输入相位,直流汇流条和电闸)可能存 在危险电压。 压(<50V). 使用最大测量值至少为1000V 直流或交流 rms 的特殊仪表,确定在所有电源段子和地面之间的电 压小于50V. 7. 除另行说明外,本产品不得拆卸。如果发生故障,必须 召回驱动电机,参见“日常保养和维修”. 警告! -忽略以下内容可能导致人员伤害或设备受损 安全 电磁兼容和安全要求之间如有冲突,以人员安全为重 • 在对线路进行耐高电压测试 前,应先将变频器与被测电路断开。 • 在确保通风良好的同时,提 • 所有的控制接线端子和信号端 子都为 SELV , 也就是双重绝缘保护。确保所有的配线 都符合系统最高额定电压的要求。 中文 • 8-2 供监控和/或额外的安全系统以避免人员伤害或设备 受损. • 如更换变频器,在投入使用 前,确保已正确设置所有适用于该产品运行的用户 自定义 • 电机所包含的温度传感器必须 至少有基本绝缘。 变频器中所有的金属件都应当 使用基本的绝缘进行保护,并且焊接到一个安全接地点. 不推荐本产品同 RCD 一起使用,但在强制使用 RCD 的情况下,仅可以使用 B 型 RCD 电磁兼容 • 在内部环境中,本产品会产 生电磁干扰,用户可能需要采取相应的防范措施. • 本设备装有静电放电(ESD )感应配件。操作,安装和维修时,注意观察静电 控制预警装置. • 根据 IEC 61800-3,本产品属 于限制性销售级别。根据 EN61000-3-2 定义,本产品 设计为“专业设备”。连接至低压电源前,须取得供电局 许可。 注意! 使用风险 • 本文档所述规范、流程和电路仅供参考,用户需根据具体应用作相应调整。我们对于本手 册所述产品在个别应用时的适配性不作担保。 风险评估 遇到故障、功率损耗或误操作,设备将可能不按预定模式运转。特别是在以下情况下: • 储存的电能不能在建议的时间内快速放电至安全电 平,并且可能在电机在关机后依然存在 • 电机旋转方向失控 • 电机速度失控 • 电机可能会被通电短路 变频器是驱动系统的一个组成部分,发生故障时可能影响到驱动系统的运行或功能。 • 储存电能 • 电源断开 • 先后顺序 中文 8-3 快速入门 运行变频器之前 此手册包含运行 AC10 变频器的基本步骤。变频器须由熟悉产品和应用的工程师进行操作。请在说明书中查找 详细的安装,安全和应用信息。 安装变频器时,需确保其符合所有的电气规范。确保现场所有器件不会产生电击以及电机突然旋转不会引发人 员伤害。 安装人员应该按照安装步骤,将变频器安装在正确的地方。 关于快速入门 本手册可提供: • • • 你将对变频器端子和操作有足够的认识。 提供基本的安装信息和快速使用步骤。 展示如何学习电机参数。 本手册供如下人员使用: 产品外观 • 有丰富安装经验的专业技术人员。 • 充分了解相关标准和电气规范的人员。 • 充分阅读并了解本手册提供的安全信息。 • 本手册只提供最基本信息,详细信息请参考 AC10 说明书。 中文 8-4 产品型号命名规则 10 G – 1 1 - 0015 B F F: 内置滤波器 N:不带滤波器 B: 内置制动单元 额定电流 (A): XXXXOOO.O 结构代号: 1: 80 × 135 × 138(153) 2: 106 × 150 × 180(195) 3: 138 × 152 × 235(250) 4: 156 × 170 × 265(280) 5: 205 × 196 × 340(355) 输入电压: 1: 22 0V / 240V 单相 3 : 22 0V / 240V 三相 4 : 400V / 480V 三相 工业级 产品型号 电源 1Ph 220V 3Ph 220V 3Ph 400V 规格型号 适配电机功率(kW) 额定输入电流 (A) 额定输出电流 (A) 输入保护电流(A) 10G-11-0015-XX 0.2 4.0 1.5 6.0 10G-11-0025-XX 0.37 6.1 2.5 10.0 10G-11-0035-XX 0.55 8.9 3.5 14.0 10G-11-0045-XX 0.75 11.4 4.5 18.1 10G-12-0050-XX 1.1 16.1 5 24.5 10G-12-0070-XX 1.5 16.8 7 25.2 10G-12-0100-XX 2.2 21.0 10 32.0 10G-31-0015-XX 0.2 2.2 1.5 5.0 10G-31-0025-XX 0.37 4.3 2.5 8.2 10G-31-0035-XX 0.55 6.1 3.5 10.0 10G-31-0045-XX 0.75 7.6 4.5 11.5 10G-32-0050-XX 1.1 11.8 5 18.0 10G-32-0070-XX 1.5 12.0 7 18.2 10G-32-0100-XX 2.2 14.3 10 21.5 10G-41-0006-XX 0.2 1.2 0.6 2.5 10G-41-0010-XX 0.37 2.2 1 5.0 10G-41-0015-XX 0.55 3.6 1.5 5.5 10G-42-0020-XX 0.75 4.1 2 6.5 10G-42-0030-XX 1.1 6.0 3 10.2 10G-42-0040-XX 1.5 6.9 4 11.0 10G-42-0065-XX 2.2 9.6 6.5 15.0 10G-43-0080-XX 3 11.6 7 18.0 10G-43-0090-XX 4 13.6 9 21.0 10G-43-0120-XX 5.5 18.8 12 29.0 10G-44-0170-XX 7.5 22.1 17 34.0 10G-44-0230-XX 11 30.9 23 46.5 10G-45-0320-XX 15 52 32 80.0 中文 8-5 变频器启动 • 请阅读快速入门的安全须知。 • 确保符合所有电气规范。. • 检查设备是否受损。 • 检查接头、夹环是否有松动,调速器及系统内有无碎屑等。 • 检查所有外部接线电路---电源电路,控制电路,电机电路与接地连接电路。 • 确保电机在任何一个方向上的旋转均不会造成破坏。如果可能,断开电机轴的负载。 • 检查外部运行接触点是否已经打开。检查外部速度设定值是否均为零。 • 确保通电时没有其他人在系统的其他部分上工作,以免其受通电的影响。 • 确保通电操作不会对其他设备造成不良影响。 安装变频器 尝试安装变频器之前,你需要了解电机信息。您可以通过电机铭牌查到以下信息: 额定电压 额定频率 额定转速 满载电流 空载电流 (励磁电流) 接线方式(星接或角接) 基础接线图 中文 8-6 控制面板 LED 显示运行频率、闪烁的目标频率、功能码、参数值或故障 代码。 4 个发光二极管指示工作状态。运行时 RUN 亮,正转时 FWD 亮,功能码区间内切换 DGT 亮,FRQ 亮表示显示频率。 按“M”键调出功能码,按“E”键调出原参数。▲和▼ 键可选择功能码和参数,再按“E”键可确认。在控制 面板控制方式下,▲和▼键还可动态调速。“I”、“O ”键控制起停。在故障状态下,按“O”键可使变频器 复位。 按“M”键显示功能码 按“▲”或“▼”键选择所需功能码 按“E”键读取功能码中设定数据 按“▲”或“▼”键修改数据 按“E”键存储设置数据后显示当前功能码 按“M”键切换至显示目标频率 • 选择宏模式。请参考第九章宏介绍。 按”M” 键,调出 F100 功能码。 按”O” 键, 直到仅 FWD 指示灯亮(XOXX) 按” ▲”键,调出功能码 F2XX 按”O” 键,直到 FWD 和 DGT 指示灯亮(XOOX) 按 “▲”键,调出功能码 F228 按 ”E” 键,编辑功能码值 按 “▲” 或 “▼” 键选择功能码值 按 ”E” 键,设定参数值。 F228 0:无效 1:基本速度控制 2:自动手动控制 3:段速控制 4:端子控制频率加减 5:PID 控制 应用程序选择 • 设置电机参数。 F801 额定功率(kW) 设置范围:0.75~1000 F802 额定电压(V) 设置范围:1~460 F803 额定电流(A) 设置范围:0.1~6500 F804 电机极数 设置范围:2~100 F805 额定转速(rmp/min) 设置范围:1~30000 F810 电机的额定频率(Hz) 设置范围:1.0~650.0Hz 4 50.00 • 选择控制模式 AC10 系列变频器有三种控制方式:无速度传感器矢量控制(F106=0)、 VVVF 控制方式(F106=2)以及矢量控制 1( F106=3). 在 VVVF 控制方式下,AC10 系列变频器转矩补偿方式有四种:直线式补偿(F137=0)、次方式补偿( F137=1)、自定义多点式补偿(F137=2)及自动转矩补偿(F137=3) F111 上限频率 (Hz) 设置范围:F113~650.0 出厂值:50.00 F112 下限频率 (Hz) 设置范围:0.00~F113 出厂值:0.50 F114 第一加速时间(S) 设置范围: 出厂值:根据机型 中文 8-7 F115 F116 F117 第一减速时间(S) 第二加速时间(S) 第二减速时间(S) 0.1~3000 设置范围:0:0~50.00Hz; 出厂值:0 1:0~F111 ·F119=0 时,加速时间是指从 0Hz 加速到 50.00Hz 所用的时间;减速时间指从 50.00Hz 减速到 0Hz 所用的时间; F119 加减速时间的参考值 ·F119=1 时,加速时间是指从 0Hz 加速到 F111 所用的时间;减速时间指从 F111 减速到 0Hz 所用的时间。 • 设定控制模式 变频器控制命令(包括启动,停机,点动)来源有 5 种模式:0:控制面板指令 1:端子指令 2:控制面板+端子 3:Modbus 4:控制面板+端子+Modbus。F200、F201 选择变频器控制命令的来源。 F200 起动指令来源 F201 停机指令来源 设置范围:0:控制面板指令;1:端子指令; 2:控制面板+端子;3:Modbus; 4:控制面板+端子+Modbus 设置范围:0:控制面板指令;1:端子指令; 2:控制面板+端子;3:Modbus; 4:控制面板+端子+Modbus 当选择端子指令时,请注意拨码开关的设置。 拨码开关 1 OFF OFF ON F203=2,选择 AI2 通道 SW1 拨码开关 拨码开关 2 调速方式 OFF 0~5V 电压 ON 0~10V 电压 ON 0~20mA 电流 F203=1,选择 AI1 通道 0~10V 电压 同样注意查看选择 NPN 和 PNP 模式的开关。 • 变频器运行 通过面板或者端子控制,运行变频器,检测变频器运行是否正常。 • 请参考说明书查看详细功能。 中文 变频器认证 8-8 警告 –电磁兼容和安全要求之间如有冲突,以人员安全为重。 操作该设备需要阅读随机附带的详细的安装和操作指南说明。详细说明书包含在设备包装盒 内,可能是 CD,软盘或其他设备。说明书应该随时与设备放在一起。 注意:根据 IEC 61800-3,本产品属于限制性销售级别。根据 EN61000-3-2 定义,本产品设计为“专业设 备”。连接至低压电源前,须取得供电局许可。 在内部环境中,本产品会产生电磁干扰,用户可能需要采取相应的防范措施。 本设备装有静电放电(ESD)感应配件。操作,安装和维修时,注意观察静电控制预警装置。. EMC Emissions Radiated Emissions comply with EN61800-3 category C1, C2 and C3 when installed in accordance with instructions. Conducted Emissions comply with EN61800-3 category C3 external filter . Immunity complies with the requirement of EN61800-3, for equipment intended for use in the second environment. 线缆要求 电机线应尽可能短。 使用单根电缆连接到给多个电机供电的星形接点。 保持电噪声和敏感电缆分开。将平行走线的电缆分开至少 0.25 米。 走线长度大于 10 米时,分开的距离应当 按比例的增加。 敏感电缆和噪声电缆应当交叉 90°走线。 敏感电缆的走线决不能靠近(无论多大距离)或者平行于电机、直流连接电路和制动斩波回路。 决不能将电源、直流连接或电机电缆与信号/控制和反馈电缆在同一个线扎中走线,即使都进行了屏蔽也不允 许。 确保 EMC 滤波器的输入和输出电缆分开走线并且不得跨越滤波器连接。 9-1 Chapter 9 Dimensions for Installations Inverter should be installed vertically, Sufficient ventilation space should be ensured . Clearance Dimensions A Clearance Dimensions B Inverter A≥150mm Hanging B≥50mm B A Instalation Dimensions External Dimension [A×B×H (H1) Frame Mounting Size(W×L) Mounting Bolt 1 80×135×138 (153) 70×128 M4 2 106×150×180 (195) 94×170 M4 3 138×152 ×235 (250) 126×225 M5 4 156×170×265 (280) 146×255 M5 5 205×196 ×340 (355) 194×330 M5 Run Direction Jog Stop Coast stop Speed tri m TA TB TC DO1 24V CM DI1 DI2 DI3 DI4 DI5 10V REF AI 1 AI 2 GND AO1 A+ B− 1 2 3 4 5 6 7 8 9 10 11 12 13 14 15 16 17 18 0 Running frequency 1 Running current 2 Running voltage 3 Analog input AI1 4 Analog input AI2 5 Output torque 6 PC/PLC control 7 Target frequency R TA TC + 14 At speed 2 Over latent frequency 1 3 Over latent frequency 2 0 None 1 Fault protection F300 Relay VT F V/ F SHAPING CT VT F810 Motor rated frequency 50/ 60 Hz Current li mit F137 V/F compensation 0=Linear compensation 1=Square compensation V F FWD/REV F803 Rated current I FEBK V F Reference select Motor current A DC link Volts V DIAGNOSTICS Hz Frequency Analog input V Basic speed control F124 Jog setpoint F138 Linear compensation Square compensation V F111 Max frequency Max/ Min frequency 40 High-fre performance switchover User relay AI 1Analog input range 0 0- 10V 1 0- 5V + F112 Min frequency CT Linear compensatio 0-10V 0-5V 0-20mA 4-20mA AI 2 Analog input range 0 1 2 3 F431 Analog output select Spe e d Application 1: Standard parameters PWM control F114 Acc el ti me RAMP F115 Decel ti me Speed demand F228 Application F111 Max frequency F112 Min frequency F114 Accel ti me F115 Decel ti me F803 Motor rated current F810 Motor rated frequency F124 Jog setpoint F209 Stop mode F137 Torque compensation F138 Linear compensation F108 Password 10-1 Chapter 10 Applications TA TB TC DO1 24V CM DI1 DI2 DI3 DI4 DI5 10V REF AI 1 AI 2 1 2 3 4 5 6 7 8 9 10 11 12 13 14 15 16 17 18 R TA TC Run select Linear compensatio Square compensation F V/ F SHAPING CT VT F810 Motor rated frequency 50/ 60 Hz Current li mit F137 V/F compensation 0=Linear compensation 1=Square compensation V F FWD/REV F803 Rated current I FEBK V F F111 Max frequency Max/ Min frequency F112 Min frequency Application 2: Auto/ Manual control F138 Linear compensation V 40 High-fre perfor mance switchover 14 At speed 2 Over latent frequency 1 3 Over latent frequency 2 0 None 1 Fault protection F300 Relay User relay Sequencing logic AI1 Analog input range 0 0-10V 1 0-5V AI2Analog input range 0 0-10V 1 0-5V 2 0-20mA 3 4-20mA Auto / Manual Sel ector Pu mp CT : VT : Auto run Direction Auto/ manual select Manual run Coast stop Manual/auto select GND AO1 A+ B− Auto Spe e d Refere nce AUTOMATI C LEVEL CONTROL Standard parameters PWM control F114 Accel ti me RAMP F115 Decel ti me Speed demand F228 Application F111 Max frequency F112 Min frequency Level Sens or F114 Accel ti me Ideal for automatic control applications F115 Decel ti me with li mit switches or proxi mity transducers Level F803 Motor rated current Li mit DIAGNOSTICS F810 Motor rated frequency Switch F124 Jog setpoint Hz Frequency F209 Stop mode Speed setpt % F137 Torque compensation DC link Volts V F138 Linear compensation Motor current A F108 Password 10-2 Run forward Present select 3 Present select 2 Present select 1 TA 1 2 3 4 5 6 7 8 9 10 11 12 13 14 15 16 17 18 R 14 At speed 2 Over latent frequency 1 3 Over latent frequency 2 0 None 1 Fault protection F300 Relay 24V Sequencing logic F510 Present 7 F511 Present 8 F508 Present 5 F509 Present 6 F506 Present 4 F505 Present 2 F506 Present 3 F504 Present 1 24V 24V SCALABLE 8 7 6 24V 0V 24V 0V 5 0V 0V 24V 24V F137 V/F compensation 4 24V 24V 0V 24V 1=Square compensation 3 0V 24V 0V V % VT V/F SHAPING CT F111 Max frequency Max/Min frequency F112 Min frequency VT: Square compensation F Motor current A DC link Volts V Speed setpt DIAGNOSTICS Hz Frequency Ideal for applications requiring multiple discrete speed levels Application 3: Presets CT: Linear compensatio 0=linear compensation F138 Linear compensation 0V 0V 0V 0V F810 Motor rated frequency 0V 1 24V 2 50/60 Hz 40 High-fre performance switchover F209 Stop mode + TB TC DO1 24V CM DI1 DI2 DI3 DI4 DI5 10V Speed trim REF AI1 AI 2 GND AO1 A+ + Coast stop User relay B− TA TC Preset Speeds V F F114 Accel time RAMP F115 Decel time F803 Rated current Current limit FWD/REV I FEBK V F Standard parameters Speed demand F228 Application F111 Max frequency F112 Min frequency F114 Acc el time F115 Decel time F803 Motor rated current F810 Motor rated frequency F124 Jog setpoint F209 Stop mode F137 Torque compensation F138 Linear compensation F108 Password PWMcontrol 10-3 Run forward Speed raise Speed lower Reset Coast stop TA TB TC DO1 24V CM DI1 DI2 DI3 DI4 DI5 10V AI1 AI 2 GND AO1 A+ B− 1 2 3 4 5 6 7 8 9 10 11 12 13 14 15 16 17 18 TA R TC 14 At speed 2 Over latent frequency 1 3Over latent frequency 2 0 None 1 Fault protection F300 Relay F138 Linear compensation F810 Rated frequency 50/60 Hz Raise/lower Sequencing logic F113 Target frequency F112 Min frequency F111 Max frequency V VT V/F SHAPING CT F111 Max frequency Max/Min frequency F112 Min frequency F V F Current limit FWD/REV F114 Acce l time RAMP F115 Decel time V F Speed demand F228 Application F111 Max frequency F112 Min frequency F114 Accel time F115 Decel time F803 Motor rated current F810 Motor rated frequency F124 Jog setpoint F209 Stop mode F137 Torque compensation F138 Linear compensation F108 Password Standard parameters F803 Rated current I FEBK Motor current A Frequency Hz DC link Volts V DIAGNOSTICS CT: Linear compensatio VT: Square compensation F137 V/F compensation 0=linear compensation 40High-fre performance switchover 1=Square compensation User relay Ideal for applications requiring speed control from multiple locations Application 4: Raise/lower trim PWMcontrol 10-4 Run Direction Jog Stop Coast stop Feedback source User relay TA TB TC DO1 24V CM DI1 DI2 DI3 DI4 DI5 10V Given source REF AI1 AI 2 GND AO1 A+ B− 1 2 3 4 5 6 7 8 9 10 11 12 13 14 15 16 17 18 * 0 Running frequency 1 Output current 2 Output voltage 3 Analog AI1 4 Analog AI2 5 Output torque 6 PC/PLC control 7 Target frequency F431 Analog output signal select Sequence logic V F111 Max frequency Max/ Min frequency F112 Min frequency F I FEBK V Reference select Standard parameters V F F114 Accel time RAMP Speed command F115 Dece l time PWM control F420 PGAIN F419 IGAIN F228 Application F111 Max frequency F112 Min frequency F114 Acce l ti me F115 Decel ti me F803 Motor rated current F810 Motor rated frequency F124 Jog setpoint F209 Stop mode F137 Torque compensation F138 Linear compensation F108 Password FWD/REV F803 Rated current Current limit F137 V/F compensation F124 Jogging frequency VT V/F SHAPING CT Motor current A DC link Volts V 0=linear compensation 1=square compensation F Hz Speed setpoint % Frequency DIAGNOSTICS Easy tuning for setpoint/feedback control applications regulating volume or pressure, such as air handling or pumping. F138 Linear compensation F810 Rated frequency CT: Linear compensation VT: Square compensation FA19 I FA20 P 40 High-freq performance switchover 14 At speed 2Over latent frequency 1 3Over latent frequency 2 50/60 Hz Tr ans ducer 0None 1Fault protection PID control R F300 Relay Pr es s ur e or Volu me Fe edback Spe ed Set point TC TA Application 5: PID Cont ro l 10-5 Parker Worldwide AE – UAE, Dubai Tel: +971 4 8127100 [email protected] FI – Finland, Vantaa Tel: +358 (0)20 753 2500 [email protected] PT – Portugal, Leca da Palmeira Tel: +351 22 999 7360 [email protected] AR – Argentina, Buenos Aires Tel: +54 3327 44 4129 FR – France, Contamine s/Arve Tel: +33 (0)4 50 25 80 25 [email protected] RO – Romania, Bucharest Tel: +40 21 252 1382 [email protected] GR – Greece, Athens Tel: +30 210 933 6450 [email protected] RU – Russia, Moscow Tel: +7 495 645-2156 [email protected] HK – Hong Kong Tel: +852 2428 8008 SE – Sweden, Spånga Tel: +46 (0)8 59 79 50 00 [email protected] AT – Austria, Wiener Neustadt Tel: +43 (0)2622 23501-0 [email protected] AT – Eastern Europe, Wiener Neustadt Tel: +43 (0)2622 23501 900 [email protected] AU – Australia, Castle Hill Tel: +61 (0)2-9634 7777 HU – Hungary, Budapest Tel: +36 1 220 4155 [email protected] AZ – Azerbaijan, Baku Tel: +994 50 2233 458 [email protected] IE – Ireland, Dublin Tel: +353 (0)1 466 6370 [email protected] SK – Slovakia, Banská Bystrica Tel: +421 484 162 252 [email protected] BE/LU – Belgium, Nivelles Tel: +32 (0)67 280 900 [email protected] IN – India, Mumbai Tel: +91 22 6513 7081-85 SL – Slovenia, Novo Mesto Tel: +386 7 337 6650 [email protected] IT – Italy, Corsico (MI) Tel: +39 02 45 19 21 [email protected] BR – Brazil, Cachoeirinha RS Tel: +55 51 3470 9144 BY – Belarus, Minsk Tel: +375 17 209 9399 [email protected] JP – Japan, Tokyo Tel: +81 (0)3 6408 3901 KR – South Korea, Seoul Tel: +82 2 559 0400 CA – Canada, Milton, Ontario Tel: +1 905 693 3000 KZ – Kazakhstan, Almaty Tel: +7 7272 505 800 [email protected] CH – Switzerland, Etoy Tel: +41 (0)21 821 87 00 [email protected] MX – Mexico, Apodaca Tel: +52 81 8156 6000 CL – Chile, Santiago Tel: +56 2 623 1216 MY – Malaysia, Shah Alam Tel: +60 3 7849 0800 CN – China, Shanghai Tel: +86 21 2899 5000 CZ – Czech Republic, Klecany Tel: +420 284 083 111 [email protected] NL – The Netherlands, Oldenzaal Tel: +31 (0)541 585 000 [email protected] DE – Germany, Kaarst Tel: +49 (0)2131 4016 0 [email protected] NO – Norway, Asker Tel: +47 66 75 34 00 [email protected] DK – Denmark, Ballerup Tel: +45 43 56 04 00 [email protected] NZ – New Zealand, Mt Wellington Tel: +64 9 574 1744 SG – Singapore Tel: +65 6887 6300 TH – Thailand, Bangkok Tel: +662 717 8140 TR – Turkey, Istanbul Tel: +90 216 4997081 [email protected] TW – Taiwan, Taipei Tel: +886 2 2298 8987 UA – Ukraine, Kiev Tel +380 44 494 2731 [email protected] UK – United Kingdom, Warwick Tel: +44 (0)1926 317 878 [email protected] US – USA, Cleveland Tel: +1 216 896 3000 VE – Venezuela, Caracas Tel: +58 212 238 5422 ZA – South Africa, Kempton Park Tel: +27 (0)11 961 0700 [email protected] PL – Poland, Warsaw Tel: +48 (0)22 573 24 00 [email protected] ES – Spain, Madrid Tel: +34 902 330 001 [email protected] European Product Information Centre Free phone: 00 800 27 27 5374 (from AT, BE, CH, CZ, DE, EE, ES, FI, FR, IE, IL, IS, IT, LU, MT, NL, NO, PT, SE, SK, UK) © 2012 Parker Hannifin Corporation. All rights reserved. Parker Hannifin Manufacturing Limited Automation Group, SSD Drives Europe, New Courtwick Lane Littlehampton, West Sussex BN17 7RZ United Kingdom Tel.: +44 (0) 1903 737000 Fax:+44 (0) 1903 737100 *HA502320U001_01* www.parker.com/ssd