1
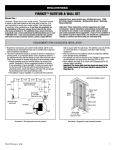
Wall Set Installation 1. Prepare for Plumbing Fixtures Y 2. Assemble Panels Drill holes from back. Backside of panels Y X M5 Nut X M5 Washer M5 x 20 mm Panhead screw ◘ Measure and mark location for plumbing fixtures on back of side panel. CAUTION: Drill chuck can damage panel. Drill holes from back side of side panel. APPLY SEALANT to corner of panels as shown. ◘ Using adjustable wrench, secure panels with M5 x 20 mm panhead screw, M5 nut, and M5 washers. ◘ Using proper size hole saw, cut out plumbing fixture holes from back side of panel. 3. Dry Fit Panels 4. Install Support Boards 2" x 3" x 25" lumber (not povided) Mark stud locations. 10" 1-3/4" 2" x 4" x 68" lumber (not provided) #6 x 2" screw (not provided) ◘ Position assembled panels onto base. ◘ Mark a pencil line on wall around panels. ◘ Using stud finder, mark stud locations for support board 2" x 3" x 18" lumber (not provided) 1-3/4" #6 x 2-1/2" screw (not provided) Pencil line 1" x 3" x 71-1/2" lumber (not provided) ◘ Install support boards to finished wall at stud locations as shown. TIP: Re-position assembled panels on base to confirm fit before continuing. installation. ◘ Remove panels. 10 P/N 27766 03/12