1
9. Use only the supplied charger when charging your tool. The use of any other charger
could damage the battery or create a hazardous condition.
10. Use only one charger when charging.
11. Do not attempt to open the charger. There are no customer serviceable parts inside.
Return to any authorized Black & Decker service center.
12. DO NOT incinerate the battery packs even if they are severely damaged or completely
worn out. The batteries can explode in a fire.
13. A small leakage of liquid from the battery cells may occur under extreme usage, charging or temperature conditions. This does not indicate a failure. However, if the outer seal
is broken and this leakage gets on your skin:
a. Wash quickly with soap and water.
b. Neutralize with a mild acid such as lemon juice or vinegar.
c. If the battery liquid gets in your eyes, flush them with clean water for a minimum of 10
minutes and seek immediate medical attention. MEDICAL NOTE: The liquid is a 25-35%
solution of potassium hydroxide.
CHARGING THE POWER PACK
THE BATTERIES IN YOUR POWER PACK ARE NOT FULLY CHARGED AT THE
FACTORY. BEFORE ATTEMPTING TO CHARGE THEM, THOROUGHLY READ ALL OF
THE SAFETY INSTRUCTIONS.
The 3 hour charger is designed to use standard household 120 volt 60 Hz power.
1. Plug the charger into any standard 120 Volt 60 Hz electrical outlet.
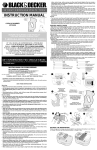
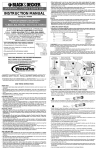
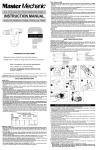
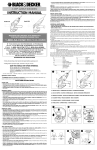
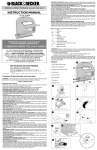
2. Insert the power pack into the charger as shown in Figure 1. While charging, your battery
pack may become warm to the touch; this is normal.
3. Remove pack from the charger and place in tool as shown in Fig. 2. NOTE: To remove
the battery from the tool, press in on the release buttons on both sides of the battery and
pull out.
IMPORTANT CHARGING NOTES
1. After normal usage, your power pack should be fully charged in 3 hours or less. If the
power pack is run-down completely, it may take up to 6 hours to become fully charged.
Your power pack was sent from the factory in an uncharged condition. Before attempting
to use it, it must be charged for at least 3 hours.
2. DO NOT charge the power pack in an air temperature below 40°F or above 105°F. This
is important and will prevent serious damage to the power pack. Longest life and best performance can be obtained if the power pack is charged when the air temperature is about
75°F.
3. While charging, the charger may hum and become warm to touch. This is a normal condition and does not indicate a problem.
4. If the power pack does not charge properly—(1) Check current at receptacle by plugging
in a lamp or other appliance. (2) Check to see if receptacle is connected to a light switch
which turns power off when you turn out the lights. (3) Move charger and power pack to
a surrounding air temperature of 40°F to 105°F. (4) If the receptacle and temperature are
OK, and you do not get proper charging, take or send the power pack and charger to your
local Black & Decker service center. See Tools Electric in yellow pages.
5. The power pack should be recharged when it fails to produce sufficient power on jobs
which were easily done previously. DO NOT CONTINUE using saw with its power pack
in a depleted condition.O
6. To prolong power pack life, avoid leaving the power pack on charge for more than 8 hours.
Although overcharging is not a safety concern, it can significantly reduce overall power
pack life.
7. When the battery is inserted into the charger, the red “Charging Indicator” light will come
on indicating that there is contact between the battery and charger. The light will stay on
as long as the battery is in the charger and the charger is plugged into a working outlet. It
WILL NOT flash, go out or change to a different color when the charging cycle is
complete.PERATION
OPERATION
FITTING AND REMOVING INTERCHANGEABLE TOOL HEADS
Note: Ensure the forward / reverse switch is in the center (lock off) position.
To install a tool head, align the arrows on both the tool head and the power unit and insert
the head until it clicks into place as shown in Fig. 3. To remove, press the release button and
pull the tool head off. Remove battery from power unit and all accessories from tool
heads before removing or installing.
VARIABLE SPEED CONTROL
The power unit has a variable speed switch. The more the trigger switch is depressed the
higher the speed of the attached head. Note: Trigger does not work when there is no head
attached.
TRIGGER SWITCH & FORWARD / REVERSE / LOCK BUTTON
A forward / reverse control button determines the direction of the tool and also serves as a
lock off button. To select forward rotation, release the trigger switch and depress the forward
/ reverse control button as shown in Figure 4. To select reverse, depress the forward /
reverse control button the opposite direction. The center position of the control button locks
the tool in the off position. Note: For greatest efficiency, always use sander and saw in forward position.
DRILLING
Note: Ensure the forward / reverse switch is in the center (lock off) position.
KEYLESS CHUCK
To insert a drill bit or other accessory:
1. Grasp the rear half of the chuck with one hand and use your other hand to rotate the front
half in the counterclockwise direction, (Fig. 5).
2. Insert the bit or other accessory fully into the chuck, and tighten securely by holding the
rear half of the chuck and rotating the front portion in the clockwise direction as viewed from
the chuck end.
WARNING: Do not attempt to tighten drill bits (or any other accessory) by gripping the front
part of the chuck and turning the tool on. Damage to the chuck and personal injury may occur
when changing accessories.
TORQUE CONTROL
The torque adjustment collar shown in Fig. 4 has 24 settings. There are 23 screwdriving settings and a drilling setting which is represented by the drill bit symbol. For screwdriving proceed as follows:
Set the torque adjustment to position “1”. Fit and tighten the first screw. If the clutch of your
drill starts to ratchet before the screw is correctly seated, rotate the adjustment collar as necessary, until the clutch slips when the head of the screw is flush with the surface of the material. Use this torque setting for the rest of the screws.
DRILLING TIPS
Always remove batteries from drill when attaching or removing accessories. When using a
keyless chuck, hand tighten firmly.
• Use sharp drill bits only.
• Support and secure work properly, as instructed in the Safety Instructions.
• Use appropriate and required safety equipment, as instructed in the Safety Instructions.
• Secure and maintain work area, as instructed in Safety Instructions.
• Run the drill very slowly, using light pressure, until the hole is started enough to keep the drill
bit from slipping out of it.
• Apply pressure in a straight line with the bit. Use enough pressure to keep the bit biting but
not so much as to stall the motor or deflect the bit.
• Hold the drill firmly to control its twisting action..
• DO NOT CLICK THE TRIGGER OF A STALLED DRILL OFF AND ON IN AN ATTEMPT TO
START IT. DAMAGE TO THE DRILL CAN RESULT.
• Minimize stalling on breakthrough by reducing pressure and slowly drilling through the last
part of the hole.
• Keep the motor running while pulling the bit out of a drilled hole. This will help reduce jamming.
• Use a cutting lubricant when drilling metals. The exceptions are cast iron and brass which
should be drilled dry. The lubricants that work best are sulphurized cutting oil or lard oil.
Bacon grease will also serve.
• When using twist drill bits to drill holes in wood, it will be necessary to pull the bits out frequently to clear chips from the flutes.
• Make sure switch turns drill on and off.
WARNING: It is important to support the work properly and to hold the drill firmly to prevent loss of control which could cause personal injury.
SAWING
Note: Ensure the forward / reverse switch is in the center (lock off) position.
INSTALLING BLADES
Your jig saw uses the Quick Clamp™ blade changing system. To install a blade, lift the Quick
Clamp™ lever (Figure 6). Insert the saw blade shank fully into the blade clamp. Release the
lever and the blade will be clamped securely in place. The back of the blade should be just
touching the roller support guide. Ensure the blade teeth are facing forward.
ROLLER SUPPORT GUIDE
The roller support guide on your jig saw improves its performance when cutting tough materials by adding support to the blade. Lubricating the guide roller with a drop of oil from time
to time will extend the roller life.
USING THE JIG SAW
The jig saw is equipped with a lock off switch. To start the saw, first depress the lock off button shown in Fig. 7 followed by the trigger switch (Fig.4) You can then release the lock off
button.
SHOE ADJUSTMENT FOR ANGLE CUTTING
The shoe plate can be angled to 45º on one side. To do this, first loosen the screw at the base
of the saw head until the shoe can freely move. The shoe should then be repositioned in the
forward slot and the screw retightened. To reset the shoe to a square cut, loosen the clamp
screw and move the shoe so that the clamp screw is against the rear of the slot. Retighten
clamp screw.
GENERAL CUTTING
Be sure material is firmly secured. Don’t attempt to turn on the unit when blade is against
material to be cut. This could stall the motor. Place front of shoe on material to be cut and
hold jig saw shoe down firmly against the work surface while cutting. Don’t force the tool; let
the blade cut at its own speed. Whenever possible, clamp or support work close to the line
of cut; when the cut is completed, shut off power and lay the tool aside before loosening the
work.
METAL & PLASTIC CUTTING
In cutting thin gauge sheet metals, it is best to clamp wood or plywood to the bottom of the
metal sheet; this will insure a clean cut without the danger of vibration or tearing of metal.
Use a fine-tooth blade for ferrous metals (for those that have an iron content); and use a
coarser blade for nonferrous metals (those that do not have an iron content).
Cutting thin metal will take longer than cutting relatively thick wood so do not be tempted to
speed up the process by forcing the saw. Spread a thin film of cutting lubricant along the cutting line, (any light weight oil). Use low speeds for cutting metals, plastics and composition
tile. When cutting laminated plastic, place the finished side down and use a fine tooth hollow
ground blade.
POCKET CUTTING
• Measure the surface to be cut and mark clearly with a pencil. Next tip the saw forward until
the front edge of the shoe sits firmly on the work surface.
• Switch the tool on and allow it to attain maximum speed.
• Grip the handle firmly and lower the back edge of tool until the blade cuts smoothly into
material. Always be sure blade reaches its complete depth before starting to cut.
SANDING
Note: Ensure the forward / reverse switch is in the center (lock off) position.
ATTACHING SANDPAPER
The sander uses pre-cut nylon backed sheets of abrasive of a specific size. To fit the abrasive, align the it with the sanding pad and press it firmly in place.
Ensure the abrasive evenly overlaps the base. Never use your sander without an abrasive or
accessory. The abrasive supplied with your tool has two replacement tips. This design allows
you to interchange and or rotate the diamond tips. To rotate the tip, remove it from the pad,
rotate it 180º and press it back on the hook base. Note: Remove the two replacement tips
from the abrasive before use, these can be used later when the original diamond tip wears.
SANDING LEAD BASED PAINT
Sanding of lead based paint is NOT RECOMMENDED due to the difficulty of controlling the
contaminated dust. The greatest danger of lead poisoning is to children and pregnant
women.
Since it is difficult to identify whether or not a paint contains lead without a chemical analysis, we recommend the following precautions when sanding any paint:
PERSONAL SAFETY
• No children or pregnant women should enter the work area where the paint sanding is
being done until all cleanup is completed.
• A dust mask or respirator should be worn by all persons entering the work area. The filter
should be replaced daily or whenever the wearer has difficulty breathing.
• Note: Only those dust masks suitable for working with lead paint dust and fumes should be
used. Ordinary painting masks do not offer this protection. See your local hardware dealer
for the proper (NIOSH approved) mask.
• NO EATING, DRINKING or SMOKING should be done in the work area to prevent ingesting
contaminated paint particles. Workers should wash and clean up BEFORE eating, drinking
or smoking. Articles of food, drink, or smoking should not be left in the work area where dust
would settle on them.
ENVIRONMENTAL SAFETY
• Paint should be removed in such a manner as to minimize the amount of dust generated.
• Areas where paint removal is occurring should be sealed with plastic sheeting of 4 mils
thickness.
• Sanding should be done in a manner to reduce tracking of paint dust outside the work area.
CLEANING AND DISPOSAL
• All surfaces in the work area should be vacuumed and thoroughly cleaned daily for the
duration of the sanding project. Vacuum filter bags should be changed frequently.
• Plastic drop cloths should be gathered up and disposed of along with any dust chips or
other removal debris. They should be placed in sealed refuse receptacles and disposed of
through regular trash pick-up procedures. During cleanup, children and pregnant women
should be kept away from the immediate work area.
• All toys, washable furniture and utensils used by children should be washed thoroughly
before being used again.
ACCESSORIES
Recommended accessories for use with your tool are available from your local dealer or
authorized service center. If you need assistance regarding accessories, please call:
1-800-54-HOW-TO. (800-544-6986)
WARNING: The use of any accessory not recommended for use with this tool could be
hazardous.
IMPORTANT: To assure product SAFETY and RELIABILITY, repairs, maintenance and
adjustment should be performed by authorized service centers or other qualified service
organizations, always using identical replacement parts
THE RBRC™ SEAL
The RBRC™ (Rechargeable Battery Recycling Corporation)
Seal on the nickel-cadmium battery (or battery pack) indicates that the costs to recycle the battery (or battery pack) at the end of its useful life have already been paid
by Black & Decker. In some areas, it is illegal to place spent nickel-cadmium batteries in the trash or municipal solid waste stream and the RBRC program provides an environmentally conscious alternative.
RBRC in cooperation with Black & Decker and other battery users, has established programs
in the United States and Canada to facilitate the collection of spent nickel-cadmium batteries. Help protect our environment and conserve natural resources by returning the spent
nickel-cadmium battery to an authorized Black & Decker service center or to your local retailer for recycling. You may also contact your local recycling center for information on where to
drop off the spent battery, or call 1-800-8-BATTERY.
SERVICE INFORMATION
Black & Decker offers a full network of company-owned and authorized service locations
throughout North America. All Black & Decker Service Centers are staffed with trained personnel to provide customers with efficient and reliable power tool service.
Whether you need technical advice, repair, or genuine factory replacement parts, contact the