1
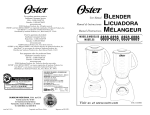
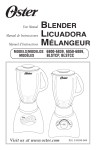
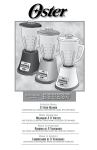
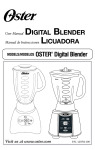
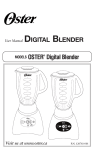
User Manual Digital Blender Licuadora Manual de Instrucciones MODELS/MODELOS OSTER Digital Blender Visit us at www.oster.com ® P.N. 120761-100 IMPORTANT SAFEGUARDS When using electrical appliances, basic safety precautions should be followed, including the following: Read all instructions before use • Unplug cord from outlet when not in use or before cleaning. • To protect against risk of electrical shock, do not immerse the cord, plug or motor base in water or any other liquids. • Do not let cord hang over edge of table or counter or touch hot surfaces. • Never leave appliance unattended when in use. • Close supervision is necessary when used near children. • Avoid contact with moving parts. Keep hands and utensils out of jar while blending to prevent personal injury or damage to the blender. A rubber spatula may be used only when the blender is not running. • The blade is sharp. Handle with care. • A lways put the lid on the jar before operating the blender. • Do not blend boiling liquids in the blender. • Do not operate any appliance with a damaged cord or plug, or after the appliance malfunctions or is dropped or damaged in any manner. Return the appliance to the nearest Authorized Sunbeam Appliance Service center for examination, repair or electrical or mechanical adjustment. • Do not use outdoors or for commercial purposes; this appliance is for household use only. • Use this appliance for its intended use as described in this manual. Do not use attachments that are not recommended by the manufacturer; they may cause injury. • A lways operate on a flat surface. • Unplug the blender when it is not in use, before taking off or putting on parts and before cleaning. • The use of attachments not made by Oster®, including canning or ordinary jar and processing assembly parts, is not recommended by Sunbeam Products, Inc., and may cause injury to persons. This Product Is for Household Use Only The maximum rating marked on the product is based on the attachment that draws the greatest load. Other attachments may draw less power. Power Cord Instructions Please follow the instructions below to ensure the safe use of the power cord. • This appliance is equipped with a polarized plug. This type of plug has one blade that is wider than the other. This plug will fit in a polarized outlet only one way. This is a safety feature intended to help reduce the risk of electrical shock. If you are unable to insert the plug into the outlet, contact a qualified electrician to replace the obsolete outlet. Do not attempt to defeat the safety purpose of the polarized plug by modifying the plug in any way. • You may use an extension cord, if necessary, but be certain to follow these guidelines: – The marked electrical rating of the extension cord must be at least 120/127 volt, 60 Hz, 10A. – T he extension must be arranged so that it will not drape over the countertop or tabletop, will not be within the reach of children and will not be tripped over. • Do not pull, twist or otherwise abuse the power cord. SAVE THESE INSTRUCTIONS 2 Welcome Congratulations on your purchase of an Oster® Digital Blender! To learn more about OSTER® products, please visit us at www.oster.com Features of Your Blender A.Filler Cap to add ingredients while blending B.Blender Lid C.Jar – Your Oster® Blender includes one of the following: • 5-Cup Dishwasher-Safe/Scratch-Resistant Glass Jar • 6-Cup Dishwasher-Safe/Scratch-Resistant Glass Jar • 6-Cup Break-Resistant plastic jar D. Sealing Ring for tight seal E.Ice Crush Blade pulverizes ice for smooth frozen drinks *F.Threaded Jar Nut (unit will include Jar Nut OR Jar Skirt) *G.Threaded Jar Skirt (unit will include Jar Nut OR Jar Skirt) H.Powerful Motor with All Metal Drive System for extra durability I. Control Panel J.Mode Adjuster – Increase/decrease “TIMER, SPEEDS” and “PULSE” with directional arrows K. “PULSE” for precise blending control L. “SPEED” Selection M. “T IMER” mode - Set blender for up to 60 seconds for easy hands free operation N. “CRUSH ICE” Mode - is the blender’s highest setting A B H C I J L M K N L D M H E *F K N I *G * Note: Blender models will feature a threaded jar nut (F) OR a threaded jar skirt (G). 3 J Using Your Blender 18 Speeds PULSE 1 2 3 4 5 6 7 EASY CLEAN SOUP BABY FOOD VEGGIE SALSA NUTS BATTER 8 PULSE JUICE 9 10 11 12 13 14 15 16 17 18 WHIP CREAM SAUCES/DIPS CHEESE DRESSING MILKSHAKE COFFEE BEANS SMOOTHIE FROZEN DRINK POWDER DRINK ICE CRUSH Clean blender according to the instructions in the “Cleaning and Storing Your Blender” section. Jar assembly: 1. Turn jar upside down so the small opening is at the top. (Figure 1) 2. Place sealing ring over jar opening. (Figure 1) 3. Place blade into jar. (Figure 2) Figure 1 Figure 2 Figure 3 Figure 4 4. Place threaded jar nut or threaded jar skirt over blade and jar. (Note: If there are slots on top of collar, line them up with notches on jar.) Place the threaded jar nut or threaded jar skirt on jar and turn it clockwise to tighten. (Figure 3) 5. Place jar assembly onto base. (Figure 4) 6. Place ingredients into jar according to your recipe. For best results always add liquids when blending. 7. Place lid with filler cap on jar. 8. Plug the power cord into a 120 Volt AC electrical outlet. 4 Digital Controls To use the “SPEED” mode: 1. Press the POWER button to turn the product on. 2. Confirm the Blender is set to the “SPEED” Mode - the red indicator light next to “SPEED” will be lit. 3. Press the Arrow “▲– (Up)”“ ▼– (Down)” to switch between speeds. 4. Put the ingredients into the jar. 5. Secure the lid and filler cap. 6. Press the START/STOP button to blend as desired, or you can use the TIMER for up to 60 seconds (see below). Pressing the POWER button stops the motor and turns the blender off. (Note: This blender is programmed to turn the power off automatically if not used for a period of several minutes.) To use the “TIMER” mode: 1. Press the POWER button to turn the product on. 2. Set to desired speed, then press the MODE function button until the red indicator light next to “TIMER” is lit. 3. Press the Arrow “▲– (Up)”“ ▼– (Down)” to switch to desired time (in seconds). TIMER goes up to 60 seconds and is in increments of 5 seconds. 4. Press START/STOP to begin blending. 5. Once the program is finished, the product AUTOMATICALLY stops. Please note: You may press the “START/STOP” button to cancel the program at any time. To use the “PULSE” mode: 1. Press the POWER button to turn the product on. 2. Press MODE until PULSE red indicator light is lit. 3. Press the Arrow “▲– (Up)”“▼– (Down)” to switch to desired Pulse level. 4. Press and hold down START/STOP button for desired length of time. Release and allow blade to stop. Repeat cycle as desired. To use the “CRUSH ICE” mode: 1. Press the POWER button to turn the product on. 2. Press MODE until the red indicator light next to “CRUSH ICE” is lit. 3. Press the Arrow “▲– (Up)”“ ▼– (Down)” to switch to desired ice-crushing level. 4. Crush 6 ice cubes or approximately 2 cups of ice at a time. 5. Secure the lid and filler cap. 5 6. Press the START/STOP button to crush ice as desired. (Note: This blender is programmed to turn the power off automatically if not used for a period of several minutes.) Blending Tips Working with hot foods or liquids: (!!) WARNING: When you work with HOT FOODS, remove the filler cap from the jar lid to vent steam. Partially cover the opening keeping hands and other exposed skin away from the lid opening to prevent possible burns. (!!) WARNING: When you work with HOT LIQUIDS, remove the filler cap from the jar lid and start at a low speed, and gradually increase to a faster speed. Do not add liquid over the 4 cup (1L) level. Always keep hands and exposed skin away from steam. • Put liquids in the jar first, unless a recipe says otherwise. • C rushing ice: Crush 6 ice cubes or approximately 2 cups of ice at a time. • D o not remove the lid while in use. Remove filler cap to add smaller ingredients. (Figure 6) • C ut all firm fruits and vegetables, cooked meats, fish and seafood into pieces no larger than 1/2 inch (1.8 cm) to 1 inch (2.5 cm). Cut all kinds of cheeses into pieces no larger than 1/2 inch (1.8 cm). • T his blender has been designed to gently process foods when operating at low speeds. If blades do not rotate during operation, simply choose a higher speed. • T his blender will not mash potatoes, whip egg whites or substitute dairy toppings, mix stiff dough or grind raw meat. 6 Figure 6 Processing Foods in Blender Food ProcessedUnprocessedSpecial Quantity Quantity Instructions Breadcrumbs 1/2 cup (125 ml) 1 slice, torn in 8 pieces Pulse 1 – 4 times Celery 3/4 cup (200 ml) 1 cup (250 ml) of 1 inch (2.5 cm) pieces Pulse 2 – 3 times Cheese, Cheddar 1 cup (250 ml) 1 cup (250 ml) of 1 inch (2.5 cm) pieces Pulse 2 times Cheese, Swiss 1 cup (250 ml) 1 cup (250 ml) of 1 inch (2.5 cm) pieces Pulse 5 times Cheese, Hard or Semi-Hard 1 cup (250 ml) 1 cup (250 ml) of 1 inch (2.5 cm) pieces Chop continuously Coffee Beans 1 cup (250 ml) 1 cup (250 ml) Grind 45 seconds for percolators and 60 seconds for drip Cookies, Wafer 1/2 cup (125 ml) 10 wafers Pulse 3 times Crackers, Graham 1/2 cup (125 ml) 8 crackers Pulse 3 times Peppers 2/3 cup (150 ml) 1 cup (250 ml) Pulse 1 time Meat, Boneless, Cooked 1 cup (250 ml) 1 cup (250 ml) of 1 inch (2.5 cm) pieces Chop continuously Nuts, almonds, peanuts, pecans, walnuts 1 cup (250 ml) 1 cup (250 ml) Pulse 2 – 4 times Cleaning and Storing Your Blender IMPORTANT: UNPLUG BEFORE CLEANING BASE and DO NOT IMMERSE THE BLENDER BASE IN WATER OR ANY OTHER LIQUIDS. Use a damp, soft sponge with mild detergent to clean the outside of the blender base. All parts except for the blender base are dishwasher safe. Threaded jar bottom is top rack dishwasher safe ONLY. Place sealing ring in bottom basket of dishwasher. You can also wash the parts in warm, soapy water. Rinse well and dry. Storing Your Blender After cleaning, reassemble blade to jar with sealing ring and threaded jar bottom. Store blender with cover ajar to prevent container odor. 7 1 Year Limited Warranty Sunbeam Products, Inc. doing business as Jarden Consumer Solutions or if in Canada, Sunbeam Corporation (Canada) Limited doing business as Jarden Consumer Solutions (collectively “JCS”) warrants that for a period of one year from the date of purchase, this product will be free from defects in material and workmanship. JCS, at its option, will repair or replace this product or any component of the product found to be defective during the warranty period. Replacement will be made with a new or remanufactured product or component. If the product is no longer available, replacement may be made with a similar product of equal or greater value. This is your exclusive warranty. Do NOT attempt to repair or adjust any electrical or mechanical functions on this product. Doing so will void this warranty. This warranty is valid for the original retail purchaser from the date of initial retail purchase and is not transferable. Keep the original sales receipt. Proof of purchase is required to obtain warranty performance. JCS dealers, service centers, or retail stores selling JCS products do not have the right to alter, modify or any way change the terms and conditions of this warranty. This warranty does not cover normal wear of parts or damage resulting from any of the following: negligent use or misuse of the product, use on improper voltage or current, use contrary to the operating instructions, disassembly, repair or alteration by anyone other than JCS or an authorized JCS service center. Further, the warranty does not cover: Acts of God, such as fire, flood, hurricanes and tornadoes. What are the limits on JCS’s Liability? JCS shall not be liable for any incidental or consequential damages caused by the breach of any express, implied or statutory warranty or condition. Except to the extent prohibited by applicable law, any implied warranty or condition of merchantability or fitness for a particular purpose is limited in duration to the duration of the above warranty. JCS disclaims all other warranties, conditions or representations, express, implied, statutory or otherwise. JCS shall not be liable for any damages of any kind resulting from the purchase, use or misuse of, or inability to use the product including incidental, special, consequential or similar damages or loss of profits, or for any breach of contract, fundamental or otherwise, or for any claim brought against purchaser by any other party. Some provinces, states or jurisdictions do not allow the exclusion or limitation of incidental or consequential damages or limitations on how long an implied warranty lasts, so the above limitations or exclusion may not apply to you. This warranty gives you specific legal rights, and you may also have other rights that vary from province to province, state to state or jurisdiction to jurisdiction. How to Obtain Warranty Service In the U.S.A. If you have any question regarding this warranty or would like to obtain warranty service, please call 1-800-334-0759 and a convenient service center address will be provided to you. In Canada If you have any question regarding this warranty or would like to obtain warranty service, please call 1-800-667-8623 and a convenient service center address will be provided to you. In the U.S.A., this warranty is offered by Sunbeam Products, Inc. doing business as Jarden Consumer Solutions located in Boca Raton, Florida 33431. In Canada, this warranty is offered by Sunbeam Corporation (Canada) Limited, located at 20 B Hereford Street, Brampton, Ontario L6Y 0M1. If you have any other problem or claim in connection with this product, please write to the Consumer Service Department. PLEASE DO NOT RETURN THIS PRODUCT TO ANY OF THESE ADDRESSES OR TO THE PLACE OF PURCHASE. Printed in U.S.A. 8 Notes/Notas 9 PRECAUCIONES IMPORTANTES Cuando use algún aparato eléctrico siempre deben seguirse precauciones básicas de‑seguridad incluyendo las siguientes: Lea todas las instrucciones antes de usar • D esenchufe el cable del tomacorriente cuando no lo use o antes de efectuar la limpieza. • P ara protegerse contra el riesgo de descargas eléctricas no sumerja el cable, enchufe o base del motor en agua ni en ningún otro líquido. • N o deje que el cable cuelgue sobre el borde de la mesa o superficie de trabajo ni que toque superficies calientes. • Jamás deje el electrodoméstico desatendido mientras lo esté usando. • Es necesaria una estricta supervisión cuando el electrodoméstico se use cerca de niños. • Evite el contacto con partes móviles. Mantenga las manos y los utensilios fuera del vaso durante el mezclado para evitar heridas corporales o daño al electrodoméstico. Puede usar una espátula de goma sólo cuando la licuadora no esté funcionando. • La cuchilla es filosa. Manipule con cuidado. • Siempre coloque la tapa sobre el vaso antes de operar la licuadora. • No licue líquidos hirviendo en la licuardora. • N o opere ningún electrodoméstico que tenga un cable o enchufe dañado, después de mal funcionamiento de la unidad o si se cae o daña de cualquier otra manera. Retorne el artefacto al Centro de Servicios Sunbeam Autorizado más cercano para examinarlo, repararlo o ajustarlo eléctrica o mecánicamente. • N o lo use en exteriores o para propósitos comerciales; este electrodoméstico es para uso doméstico solamente. • U se este electrodoméstico para el uso para el cual fue diseñado, según se describe en este manual. No use accesorios no recomendados por el fabricante; podrían causar heridas corporales. 10 • Siempre opere el electrodoméstico en una superficie plana. • D esenchufe la licuadora cuando no la use, antes de quitar o poner partes y antes de efectuar la limpieza. • S unbeam Products, Inc., no recomienda el uso de accesorios no fabricados por Oster®, incluidos recipientes o el vaso común y partes de ensamblado para‑procesamiento de alimentos, pueden causar heridas corporales. Este Producto Es Sólo para Uso Doméstico El rango máximo de potencia marcado en la unidad está basado según el aditamento que necesita más potencia. Otros aditamentos recomendados podrían necesitar menos potencia. Instrucciones Sobre el Cable de Tensión Siga las instrucciones que se enumeran a continuación para el uso seguro del cable de tensión. • Este electrodoméstico posee un enchufe de dos espigas. Este es un dispositivo de seguridad diseñado para reducir el riesgo de una descarga eléctrica. Si no puede introducir el enchufe en el tomacorriente, comuníquese con un electricista calificado para que cambie el tomacorriente obsoleto. No intente anular la función de seguridad del enchufe de dos espigas, efectuando modificaciones al enchufe. • P uede usar un cable de extensión, si fuera necesario, pero siga estas indicaciones: – L a clasificación de potencia del cable de extensión debe ser al menos de 120/127 voltios, 60 Hz, 10 A. – L a extensión debe colocarse de manera que no cuelgue sobre la mesa o mostrador y fuera del alcance de los niños para evitar tropezarse con el cable. • No tire, retuerza ni maltrate el cable. GUARDE ESTAS INSTRUCCIONES 11 Bienvenidos ¡Felicitaciones por su compra de una Licuadora OSTER.® Para aprender más sobre productos OSTER,® por favor visítenos en www.oster.com! Características de Su Licuadora A.Copa de alimentación para agregar ingredientes durante el mezclado B.Tapa sellada C.El Vaso – La Licuadora Oster® incluye uno de los siguientes elementos: • Vaso de vidrio resistente, seguro para‑lavado en lavaplatos con capacidad para 5 tazas • Vaso de vidrio resistente, seguro para‑lavado en lavaplatos con capacidad para 6 tazas • Vaso de plastico resistente a roturas con capacidad para 6 tazas D. Aro de Sellado Hermético E.La cuchilla para picar hielo pulveriza el hielo para las bebidas congeladas *F.Disco de Fondo Roscado (solamente algunos modelos incluyen el disco de fondo roscado) *G.Aro para estabilidad en la mesa y el refrigerador (solamente algunos modelos incluyen el Aro) H.Potente motor con A ll M etal Drive para una mayor durabilidad I.Panel de Controles J.Botón de slección: Presione el botón de “la flecha hacia arriba” ó “la flecha hacia abajo” para aumentar ó disminuir las opciones de tiempo, velocidad ó pulso. K.Función de pulsar para un control de mezclado preciso L.Selección de velocidad M.Medidor de tiempo con conteo de 60 segundos con Apaque Automático N.El modo “CRUSH ICE” A B H C I J L M K N L D M H E *F K N I *G * Ciertos modelos incluyen el aro (G) para estabilidad en la mesa y el refrigerador. Otros modelos solamente incluyen el disco de fondo resscado (F) 12 J Cómo Usar Su Licuadora 18 Velocidades 1 PULSO 2 LIMPIEZA RÁPIDA SOPA 3 4 ALIMENTOS PARA BEBÉS 5 6 7 VEGETALES SALSA NUECES MASAS 8 PULSO 9 JUGO CREMA BATIDA 10 SALSAS/BAÑOS 11 12 13 QUESO ADEREZO 14 15 16 17 18 BATIDO DE LECHE GRANOS DE CAFÉ BATIDO BEBIDA CONGELADA BEBIDA EN POLVO TRITURAR HIELO Limpie la licuadora de acuerdo a las instrucciones indicadas en la sección “Cómo Limpiar y Guardar la Licuadora”. Ensamblado del vaso: 1. Ponga el vaso al revés, de manera tal que la pequeña abertura se encuentre hacia arriba. (Figura 1) 2. Coloque el aro de sellado sobre la abertura del vaso. (Figura 1) 3. Coloque la cuchilla dentro del vaso. (Figura 2) Figura 1 Figura 2 Figura 3 Figura 4 4. Junte hasta trabar el disco de fondo roscado con el aro. Coloque el aro sobre la cuchilla y el vaso. (Nota: Si hay ranuras en la parte superior del aro, alinéelas con las muescas del vaso.) Coloque el aro sobre el vaso y gire el disco con fondo roscado en sentido horario para apretar. (Figura 3) 5. Coloque el vaso ensamblado sobre la base. (Figura 4) 6. Coloque ingredientes en el vaso. 7. Coloque la tapa con la copa de alimentacieon sobre el vaso. 8. Enchufe el cable de alimentación en un tomacorriente eléctrico de AC de 120 Voltios. 13 Modelo Digital Para utilizar el modo “SPEED” (Selección de velocidad): 1. Presione el botón POWER (Encendido) para encender el producto. 2. La licuadora se coloca en la función “SPEED” que se encuentra debajo de la función MODE (Modo). 3. Presione el botón de la flecha hacia arriba ▲ y el botón de la flecha hacia abajo ▼ para seleccionar la velocidad. 4. Coloque los ingredientes en la jarra. 5. Fije la tapa y la tapa para llenar. 6. Presione el botón START/STOP para licuar, o utilice el temporizador por un tiempo de hasta 60 segundos (ver a continuación). (Si presiona el botón POWER nuevamente el motor parará y la licuadora se apagará). (Nota: esta licuadora está programada para apagarse automáticamente si no se utiliza por varios minutos). Para utilizar el modo “TIMER” (Temporizador): 1. Presione el botón POWER para encender el producto. 2. Seleccione la velocidad deseada y presione el botón de la función MODE hasta que la luz del temporizador se encienda. 3 Presione el botón de la flecha hacia arriba ▲ y el botón de la flecha hacia abajo ▼ para seleccionar el tiempo deseado (en segundos). El temporizador tiene hasta 60 segundos y los mismos se aumentan de a 5 segundos. Presione START/STOP (Encendido/Apagado). 4. Una vez que el programa haya finalizado, el producto se detendrá AUTOMÁTICAMENTE. Tenga en cuenta: puede presionar el botón “START/STOP” para cancelar el programa en cualquier momento. Para utilizar el modo “PULSE” (Pulso): 1. Presione el botón POWER para encender el producto. 2. Presione MODE hasta que la luz de PULSE a la izquierda se encienda. 3. Presione el botón de la flecha hacia arriba ▲ y el botón de la flecha hacia abajo ▼ para seleccionar el nivel de PULSE deseado. Presione y mantenga presionado el botón START/STOP el tiempo deseado. Libere el botón y permita que la hoja se detenga. Repita el ciclo según sea necesario. Para utilizar el modo “CRUSH ICE” (Triturar hielo): 1. Presione el botón POWER para encender el producto. 2. Presione MODE hasta que la luz de CRUSH ICE a la izquierda se encienda. 3. Presione el botón de la flecha hacia arriba ▲ y el botón de la flecha hacia abajo ▼ para seleccionar el nivel de triturado de hielo deseado. 4. Para picar hielo: Pique 6 cubes de hielo aproximadamente 2 tazas de hielo por vez. 5. Fije la tapa y la tapa para llenar. 6. Presione el botón START/STOP para triturar hielo según sea necesario. 14 (Nota: esta licuadora está programada para apagarse automáticamente si no se utiliza por varios minutos). Consejos para el Licuado Uso de la licuadora con alimentos o líquidos calientes: (!!) ADVERTENCIA: Al usar la licuadora con ALIMENTOS CALIENTES, retire la apertura para alimentos de la tapa de la jarra para dejar escapar el vapor. Incline la tapa para alejarla de usted y cubrir parcialmente la apertura. Mantenga las manos y otras partes del cuerpo expuestas lejos de la apertura de la tapa para evitar posibles quemaduras. (!!) ADVERTENCIA: Al usar la licuadora con LÍQUIDOS CALIENTES, retire la apertura para alimentos de la tapa de la jarra y comience con una velocidad baja e incremente gradualmente a una velocidad más rápida. No agregue líquidos por encima del nivel de 4 tazas (1 litro). Siempre mantenga las manos lejos del vapor. • Coloque primero los líquidos en el vaso, a menos que la receta indique lo contrario. • Para picar hielo: Pique 6 cubos de hielo o aproximadamente 2 tazas de hielo por vez. • No retire la tapa con el electrodoméstico en funcionamiento. Retire la copa de alimentación para agregar ingredientes más pequeños. (Figura 6) • Corte todas las frutas y vegetales firmes, carnes cocidas, pescado y frutos de mar en trozos de no más de 1/2 pulg. (1,8 cm) a 1 pulg. (2,5 cm). Corte todo tipo de quesos en trozos d e no más de 1/2 pulg. (1,8 cm). • Esta licuadora fue diseñada para mezclar suavemente los alimentos cuando funciona a bajas velocidades. Si las hojas no giran durante el funcionamiento, simplemente seleccione una velocidad más alta. Figura 6 • Esta licuadora no hace puré de papas, no bate claras de huevo ni sustituye lácteos para untar, mezcla masas duras ni pica carne cruda. 15 Cómo Procesar Alimentos en la Licuadora Alimentos Cantidad Cantidad Instrucciones ProcesadaNo ProcesadaEspeciales Pan Rallado 1/2 taza (125 ml) 1 rodaja, cortada en 8 partes Pulsar 1 – 4 veces Apio 3/4 taza (200 ml) 1 taza (250 ml) de trozos de 1 pulg. (2,5 cm) Pulsar 2 – 3 veces Queso, Amarillo 1 taza (250 ml) 1 taza (250 ml) de trozos de 1 pulg. (2,5 cm) Pulsar 2 veces Queso, Suizo 1 taza (250 ml) 1 taza (250 ml) de trozos de 1 pulg. (2,5 cm) Pulsar 5 veces Queso, Duro o Semiduro Granos de Café 1 taza (250 ml) 1 taza (250 ml) 1 taza (250 ml) de trozos de 1 pulg. (2,5 cm) 1 taza (250 ml) Picar continuamente Bizcochitos, Oblea 1/2 taza (125 ml) 10 obleas Pulsar 3 veces Galletitas, Graham 1/2 taza (125 ml) 8 galletitas Pulsar 3 veces Pimienta 2/3 taza (150 ml) 1 taza (250 ml) Pulsar 1 vece Carne, Sin Hueso, Cocida 1 taza (250 ml) 1 taza (250 ml) de trozos de 1 pulg. (2,5 cm) Picar continuamente Nueces, almendras, maní, nueces lisas, nueces de nogal 1 taza (250 ml) Pulsar 2 – 4 veces 1 taza (250 ml) oler durante M 45 seg. para colador y durante 60 seg. para‑filtro Cómo Limpiar y Guardar Su Licuadora IMPORTANTE: DESENCHUFE ANTES DE LIMPIAR LA BASE y NO SUMERJA LA LICUADORA EN AGUA NI EN NINGÚN OTRO LÍQUIDO. Utilice un paño o una esponja suave con detergente suave para limpiar el exterior de la base de la licuadora. Todas las partes, a excepción de la base de la licuadora, pueden colocarse en el lavavajillas sin riesgos. Para lavar la parte inferior roscada de la jarra use SOLAMENTE el estante superior del lavavajillas. Coloque el anillo sellador en la canasta inferior del lavavajillas. También puede lavar las piezas con agua tibia y detergente. Enjuague y seque bien. Cómo Guardar Su Licuadora Después de limpiar la hoja, vuelva a colocarla en la jarra con el anillo sellador y la parte inferior roscada. 16 Garantía Limitada de 1 Año Sunbeam Products, Inc., haciendo negocios como Jarden Consumer Solutions, o si en Canadá, Sunbeam Corporation (Canadá) Limited, haciendo negocios como Jarden Consumer Solutions (colectivamente “Sunbeam”) garantiza que este producto estará libre de defectos en material o mano de obra por un período de un año a partir de la fecha de la compra. Sunbeam, a su elección, reparará o reemplazará este producto o cualquier componente del producto que se encuentre defectuoso durante el período de garantía. El reemplazo será efectuado por un producto o componente nuevo o remanufacturado. Si el producto ya no está disponible, el reemplazo podrá ser efectuado con un producto similar de igual o mayor valor. Esta es su garantía exclusiva. Esta garantía es válida para el comprador original al detalle desde la fecha de compra original al detalle y no es transferible. Guarde el recibo de venta original. Se requiere prueba de compra para obtener la garantía. Los concesionarios Sunbeam, centros de servicio, o almacenes de ventas al detalle de productos Sunbeam no tienen el derecho de alterar, modificar o cambiar, de manera alguna, los términos y condiciones de esta garantía. Esta garantía no cubre el desgaste normal de las piezas o daños resultantes de cualquiera de los siguientes: uso negligente o mal uso del producto, uso en voltaje o corriente inapropiada, uso contrario a las instrucciones de operación, desarme, reparación o alteración por cualquier persona que no sea Sunbeam o de un centro de servicio autorizado Sunbeam. Además, esta garantía no cubre: Actos de la naturaleza, tales como incendios, inundaciones, huracanes o tornados. ¿Cuáles Son los Límites de Responsabilidad de Sunbeam? Sunbeam no será responsable por ningún daño incidental o consecuente causados por el incumplimiento de la garantía o condición expresa, implícita o reglamentaria. Excepto hasta donde lo prohíben las leyes aplicables, cualquier garantía implícita o condición de comerciabilidad o aptitud para un propósito particular, está limitada en duración a la duración de la garantía descrita arriba. Sunbeam niega cualquier otra garantía, condición o representación, expresa, implícita, reglamentaria o de otra manera. Sunbeam no será responsable por ningún tipo de daño que resulte de la compra, uso o mal uso, o inhabilidad de usar el producto incluyendo daños incidentales, especiales, consecuentes o similares o pérdida de lucro, o por cualquier incumplimiento de contrato, fundamental o de otra manera, o por cualquier reclamo contra el comprador iniciado por cualquier otra tercera persona. Algunas provincias, estados o jurisdicciones no permiten la exclusión o la limitación de daños incidentales o consecuentes, o limitaciones sobre cuánto dura una garantía implícita, de modo que las limitaciones o exclusiones mencionadas arriba pueda que no le aplique a usted. Esta garantía le otorga derechos legales específicos, y pueda que usted tenga otros derechos, los cuales varían de provincia a provincia, de estado a estado o de jurisdicción a jurisdicción. Cómo Obtener Servicio de Garantía En los Estados Unidos – Si usted tiene alguna pregunta relacionada con esta garantía o quisiera obtener servicio de garantía, por favor llame al teléfono 1.800.334.0759 y le proporcionaremos la dirección del centro de servicio más conveniente para usted. En Canadá – Si usted tiene alguna pregunta rela cionada con esta garantía o quisiera obtener servicio de garantía, por favor llame al teléfono 1.800.667.8623 y le proporcionaremos la dirección del centro de servicio más conveniente para usted. En los Estados Unidos, esta garantía es ofrecida por Sunbeam Products, Inc., situada en Boca Ratón, Florida 33431. En Canadá, esta garantía es ofrecida por Sunbeam Corporation (Canadá) Limited, situada en el 5975 Falbourne Street, Mississauga, Ontario L5R 3V8. POR FAVOR, NO REGRESE ESTE PRODUCTO A NINGUNA DE ESTAS DIRECCIONES NI AL LUGAR DONDE LO COMPRÓ. 17 Notes/Notas 18 Notes/Notas 19 For product questions contact: Sunbeam Consumer Service USA : 1.800.334.0759 Canada : 1.800.667.8623 www.oster.com ©2008 Sunbeam Products, Inc., doing business as Jarden Consumer Solutions. All rights reserved. In the U.S., distributed by Sunbeam, Products, Inc., doing business as Jarden Consumer Solutions, Boca Raton, FL 33431 In Canada, imported and distributed by Sunbeam Corporation (Canada) Limited, doing business as Jarden Consumer Solutions, Brampton (Ontario) L6Y 0M1. YMI-103107 Para preguntas sobre los productos llame: Sunbeam Consumer Service EE.UU. : 1.800.334.0759 Canadá : 1.800.667.8623 www.oster.com ©2008 Sunbeam Products, Inc., operando bajo el nombre de Jarden Consumer Solutions. Todos los derechos reservados. En los EE. UU., distribuido por Sunbeam Products, Inc., operando bajo el nombre de Jarden Consumer Solutions, Boca Raton, FL 33431 En Canadá, importado y distribuido por Sunbeam Corporation (Canada) Limited, operando bajo el nombre de Jarden Consumer Solutions, Brampton (Ontario) L6Y 0M1. Printed in U.S.A. Impreso en EE.UU