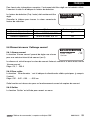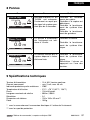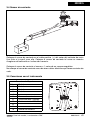
1
Bedieningshandleiding en
installatieinstructies
2
Operation manual and
installation instructions
16
Bedienungshandbuch und
Einbauanleitung
30
Manuel d’utilisation et
instructions d’installation
44
Manual de manejo y
instrucciones de instalación
58
Manuale per l’uso e
istruzioni per l’installazione
72
Bedieningspaneel / kettingteller
Control panel / chain counter
Kontrollpaneel / Meterzähler
Tableau de commande / compteur métrique
Panel de mando / cuentametros
Pannello di controllo / contametri
CCM
C o p y r i g h t © 2 0 0 6 Ve t u s d e n O u d e n n . v. S c h i e d a m H o l l a n d
Inhoud
1 Inleiding . . . . . . . . . . . . . . . . . . . . . . . . . . . . . . . . . . . . . . . . . . . . . . .3
2 Leveringsomvang . . . . . . . . . . . . . . . . . . . . . . . . . . . . . . . . . . . . . . . .3
3 Installatie . . . . . . . . . . . . . . . . . . . . . . . . . . . . . . . . . . . . . . . . . . . . . .3
3.1
3.2
3.3
3.4
3.5
Algemeen . . . . . . . . . . . . . . . . . . . . . . . . . . . . . . . . . . . . . . . . . . . . . . . . . . . .3
Instrument . . . . . . . . . . . . . . . . . . . . . . . . . . . . . . . . . . . . . . . . . . . . . . . . . . .3
Elektrische installatie . . . . . . . . . . . . . . . . . . . . . . . . . . . . . . . . . . . . . . . . . . .4
Stroomsensor . . . . . . . . . . . . . . . . . . . . . . . . . . . . . . . . . . . . . . . . . . . . . . . .5
Aansluitingen instrument . . . . . . . . . . . . . . . . . . . . . . . . . . . . . . . . . . . . . . . .5
4 Inschakelen . . . . . . . . . . . . . . . . . . . . . . . . . . . . . . . . . . . . . . . . . . . .6
4.1 Algemeen . . . . . . . . . . . . . . . . . . . . . . . . . . . . . . . . . . . . . . . . . . . . . . . . . . . .6
4.2 Inschakelen . . . . . . . . . . . . . . . . . . . . . . . . . . . . . . . . . . . . . . . . . . . . . . . . . .7
5 Setup-menu . . . . . . . . . . . . . . . . . . . . . . . . . . . . . . . . . . . . . . . . . . . .8
5.1
5.2
5.3
5.4
5.5
5.6
5.7
Menu
Menu
Menu
Menu
Menu
Menu
Menu
item
item
item
item
item
item
item
‘Measure . . . . . . . . . . . . . . . . . . . . . . . . . . . . . . . . . . . . . . . . . . .8
‘Alarms & Functions’ . . . . . . . . . . . . . . . . . . . . . . . . . . . . . . . . . .9
‘Settings’ . . . . . . . . . . . . . . . . . . . . . . . . . . . . . . . . . . . . . . . . . . .9
‘Language’ . . . . . . . . . . . . . . . . . . . . . . . . . . . . . . . . . . . . . . . .10
‘Sensor Calibration’ . . . . . . . . . . . . . . . . . . . . . . . . . . . . . . . . . .10
‘Current Calibration’ . . . . . . . . . . . . . . . . . . . . . . . . . . . . . . . . .11
‘Tests’ . . . . . . . . . . . . . . . . . . . . . . . . . . . . . . . . . . . . . . . . . . . . .12
6 Calibratie . . . . . . . . . . . . . . . . . . . . . . . . . . . . . . . . . . . . . . . . . . . . .13
7 Gebruik . . . . . . . . . . . . . . . . . . . . . . . . . . . . . . . . . . . . . . . . . . . . . . .13
7.1 Algemeen . . . . . . . . . . . . . . . . . . . . . . . . . . . . . . . . . . . . . . . . . . . . . . . . . . .13
7.2 Kettingteller resetten . . . . . . . . . . . . . . . . . . . . . . . . . . . . . . . . . . . . . . . . . .14
7.3 Automatisch uitvieren van het anker . . . . . . . . . . . . . . . . . . . . . . . . . . . . . .14
8 Storingen . . . . . . . . . . . . . . . . . . . . . . . . . . . . . . . . . . . . . . . . . . . . .15
9 Technische gegevens . . . . . . . . . . . . . . . . . . . . . . . . . . . . . . . . . . .15
Aansluitschema . . . . . . . . . . . . . . . . . . . . . . . . . . . . . . . . . . . . . . . .86
2
060123.01
Bedieningspaneel / kettingteller CCM
NEDERLANDS
1 Inleiding
Het Vetus instrument CCM is een gecombineerd bedieningspaneel/ kettingteller, bestemd
voor de Vetus elektrische ankerlier Napoleon.
Waarschuwing
Het instrument is alléén geschikt om aan te sluiten op gelijkstroom.
2 Leveringsomvang
-
Instrument
Pakking
Beschermkap
4 bevestigingsschroeven (lengte 13 mm)
Stroomsensor
10 polige connector, met kabel
Handleiding
3 Installatie
3.1 Algemeen
Het Vetus instrument CCM is alléén geschikt om aan te sluiten op de Vetus elektrische
ankerlier Napoleon. Het instrument dient op de reeds in de Vetus elektrische ankerlier
Napoleon geïnstallerde kettingsensor te worden aangesloten.
De stroomsensor dient nog te worden geïnstalleerd op de hoofdstroomkabel naar de
ankerliermotor.
3.2 Instrument
Waarschuwing
Zorg er altijd voor dat de accu is losgekoppeld wanneer het instrument wordt aangesloten.
• Het instrument dient zodanig te worden geïnstalleerd dat het beeldscherm goed is af te
lezen. Installeer het instrument niet in direct zonlicht.
• De achterzijde van het instrument dient te worden afgeschermd tegen vocht (water).
Bedieningspaneel / kettingteller CCM
060123.01
3
• Het instrument kan ingebouwd
worden in een instrumentenpaneel of in een schot van elke
dikte. Toe te passen schroeven: Zelf-tappende schroeven
ø 2,9 mm.
Maximale lengte schroeven:
10 mm + dikte van het paneel.
Met de meegeleverde schroeven kan het instrument in een
paneel tot circa 8 mm dikte
worden ingebouwd.
• Maak, met behulp van de meegeleverde mal, de gaten in het
instrumentenpaneel of in een
schot. Monteer het instrument
met 4 schroeven. Overtuig U
ervan dat de pakking zich op
de juiste wijze tussen het
instrument en het paneel of het
schot bevindt.
3.3 Elektrische installatie
Voor het aansluitschema zie blz. 86.
Neem in de plus (+) draad een zekering op van 4 A (‘snel’). Gebruik niet de startaccu’s om het
instrument van stroom te voorzien.
Monteer het instrument op een minimale afstand van:
- 30 cm van een kompas
- 50 cm van radio apparatuur
- 2 meter van een zender
- 2 meter van een radar
4
060123.01
Bedieningspaneel / kettingteller CCM
NEDERLANDS
3.4 Stroomsensor
Monteer de stroomsensor op de plus (+) kabel naar de ankerliermotor. Gebruik hiervoor
bijvoorbeeld tape of ty-raps®. Monteer de stroomsensor zoals is aangegeven. Let op de
richting.
Monteer de stroomsensor minimaal 1 meter verwijderd van een magnetisch veld.
Monteer de stroomsensor niet in de buurt van andere hoge stroom voerende elektrische
kabels.
3.5 Aansluitingen instrument
Nr.
1
2
3
4
5
6
7
8
9
10
10-polige connector
Signaal
+ accu
– accu
– accu
10
9
8
7
6
stroomsensor
commando ‘UP’
commando ‘DOWN’
5
kettingsensor
Bedieningspaneel / kettingteller CCM
1
4
3
2
060123.01
5
4 Inschakelen
4.1 Algemeen
Het instrument bevat 3 toetsen:
‘UP’
toets
‘ON’
toets
‘DOWN’
toets
Het instrument bevat tevens een zoemer,
die aangeeft dat een toets wordt ingedrukt,
of die aangeeft dat er een in bepaalde
gevallen een alarmsituatie is.
De ‘ON’
UP
ON
DOWN
toets activeert de achtergrond-
verlichting en zorgt ervoor dat de ‘UP’
toets en de ‘DOWN’
nen worden.
toets gebruikt kun-
De ‘ON’ toets wordt ook gebruikt om in de setup mode te komen.
De achtergrondverlichting zal 30 seconden na het laatste commando automatisch uitschakelen (deze tijdsduur is te wijzigen).
Bij normaal gebruik worden de ‘UP’ toets en de ‘DOWN’ toets gebruikt om het anker op te
halen of uit te vieren.
6
060123.01
Bedieningspaneel / kettingteller CCM
NEDERLANDS
4.2 Inschakelen
Schakel het instrument in met een externe schakelaar (er bevindt zich geen AAN/UIT-schakelaar op
het instrument).
Gedurende een aantal seconden verschijnt het
opstartscherm.
Na het opstartscherm verschijnt het hoofdscherm.
vetus
Chain Counter
1
Stop
7
1 Statusbalk - Toont de status van het instrument
2
0.0
mt/m
3
en een eventuele foutmelding.
2 Kettingsnelheid - Toont de kettingsnelheid tij- 4
5
dens het ophalen of uitvieren.
V=11.6
I=0.0
3 Eenheid kettingsnelheid,
6
mt/m - meter per minuut
ft/m - voet per minuut
4 Kettingteller - Toont de lengte uitgevierde ketting.
5 Eenheid kettingteller,
m
- meter
ft
- voet
6 Controlebalk - Toont de voedingsspanning (V = .. V) en de stroom (I = .. A).
7 Icoontjes - Tonen het ophalen of het uitvieren van het anker, of toont een foutmelding.
0.0 m
Wanneer het instrument voor de eerste maal in gebruik wordt genomen, zijn de volgende
fabrieksinstellingen ingesteld:
Engels
Nederlands
Reset Meas.
Units
Rope-Chain
Up Alarm
Auto Down
Lite Time
Keyb. Beep
Language
Sensor Detect
Barb. Circ.
Overcurrent
Wire Diam.
Work Hours
Reset kettingteller
Eenheid
NIET GEBRUIKEN
Alarm ‘omhoog’
Automatisch uitvieren
Achtergrondverlichting aan
Zoemer
Schermtaal
Detectie van sensor
NIET GEBRUIKEN
Alarm voor stroom
Kabeldiameter
Draaiuren ankerlier
Bedieningspaneel / kettingteller CCM
Default
0,0 meter
meter/centimeter
Off (Uit)
3,0 meter
Off (Uit)
30 seconden
Yes (ja)
Italiaans
onbekend
30 cm
Off (Uit)
1,20 cm
0 uur
Wijzigen,
resetten
zie 5.1.1
zie 5.1.2
zie 5.1.3
zie 5.2.1
zie 5.2.2
zie 5.3.3
zie 5.3.4
zie 5.4.1
zie 5.5.1
zie 5.5.2
zie 5.6.1
zie 5.6.2
zie 5.7.4
060123.01
7
5 Setup-menu
Menu
Druk op de ‘ON’ toets en houd deze 6 seconden ingedrukt. Het menu verschijnt op het scherm.
Gebruik de ‘UP’ toets en de ‘DOWN’ toets om door het
menu heen te lopen.
M e a sur e
A l a r m s & Func t i ons
S e t t i ng s
L a ng ua g e
S e nsor C a l i b r a t i on
Menu
L a ng ua g e
S e nsor C a l i b r a t i on
C ur r e nt C a l .
Te st s
Ex i t
• Wanneer het gewenste menu-item geselecteerd is, druk op de ‘ON’ toets om het item
te bevestigen.
• Gebruik de ‘UP’ toets en de ‘DOWN’ toets om door de parameters heen te lopen.
• Wanneer de gewenste parameter geselecteerd is, druk op de ‘ON’ toets om de parameter te bevestigen.
• Gebruik de ‘UP’ toets en de ‘DOWN’ toets om de waarde te verhogen/ verlagen, of om
de functie in/ uit te schakelen, afhankelijk van het type parameter.
• Wanneer de wijziging is uitgevoerd, druk op de ‘ON’ toets om te bevestigen.
• Gebruik de ‘DOWN’ toets om de ‘Exit’ functie te selecteren, en druk op de ‘ON’ toets
om weer terug te keren naar het menu. Herhaal dit om weer terug te keren naar het
hoofdscherm.
5.1 Menu item ‘Measure’
5.1.1 Reset measurement
Met de functie ‘Reset measurement’ kan de kettingteller
naar 0 (nul) worden teruggezet.
Measure
R e se t M e a s.
Uni t s
R op e C ha i n
Ex i t
No
Meters
Off
Gebruiken van de functie tijdens normaal gebruik:
Druk de ‘ON’
toets en de ‘UP’
De kettingteller wordt gereset.
toets gelijktijdig in gedurende tenminste 3 seconden.
5.1.2 Units
Met de functie ‘Units’ kan de meeteenheid worden gekozen:
• Meters: meter/centimeter
• Feet: voet/inches
5.1.3 Rope Chain
Niet gebruiken! Staat ingesteld op ‘Off’.
5.1.4 Exit
Met de functie ‘Exit’ kan worden teruggekeerd naar het menu.
8
060123.01
Bedieningspaneel / kettingteller CCM
NEDERLANDS
5.2 Menu item ‘Alarms & Functions’
5.2.1 Up Alarm
Met de functie ‘Up Alarm’ kan een alarm ingesteld worden
voor de lengte binnengehaalde ketting.
Bereik: Off, 0 - 20 meter, 0 - 20 voet
Alarms & Functi
Up A l a r m
A ut o D ow n
L oa d D e fa ul t
Ex i t
3.0
Off
No
5.2.2 Auto Down
Met de functie ‘Auto Down’ kan automatisch een vooraf ingestelde lengte ketting worden
uitgevierd. Bereik: Off, 5 - 250 meter, 5 - 250 voet
Gebruiken van de functie tijdens normaal gebruik:
Druk de ‘ON’
toets en de ‘DOWN’
toets gelijktijdig in gedurende tenminste 3 seconden. De ingestelde lengte ketting wordt uitgevierd.
5.2.3 Load Default
Met de functie ‘Load Default’ kunnen alle instellingen worden teruggezet naar de fabriekinstellingen. Gebruik deze functie alléén wanneer er fouten optreden tijdens calibratie.
5.2.4 Exit
Met de functie ‘Exit’ kan worden teruggekeerd naar het menu.
5.3 Menu item ‘Settings’
5.3.1 Contrast
Met de functie ‘Contrast’ kan het contrast van het beeldscherm worden ingesteld.
Settings
C ont r a st
Lite
L i t e Ti m e
Ke y b . B e e p
Ex i t
30
Ye s
5.3.2 Lite
Met de functie ‘Lite’ kan de intensiteit van de achtergrondverlichting van het beeldscherm
worden ingesteld.
5.3.3 Lite Time
Met de functie ‘Lite Time’ kan de tijdsduur worden ingesteld waarbinnen de achtergrondverlichting na het laatst gegeven commando blijft branden.
Bereik: 1 - 180 seconden
5.3.4 Keyb. Beep
Met de functie ‘Keyb. Beep’ kan worden gekozen voor het wel of niet laten klinken van een
piep nadat een toets is bediend.
5.3.5 Exit
Met de functie ‘Exit’ kan worden teruggekeerd naar het menu.
Bedieningspaneel / kettingteller CCM
060123.01
9
5.4 Menu item ‘Language’
Language
5.4.1 Language
Met de functie ‘Language’ kan de schermtaal worden
ingesteld.
Bereik: Italiaans, Engels, Frans, Duits, Spaans
L a ng ua g e
Ex i t
Eng l i sh
5.4.2 Exit
Met de functie ‘Exit’ kan worden teruggekeerd naar het menu.
5.5 Menu item ‘Sensor Calibration’
Sensor Calibrat
5.5.1 Sensor Detect
Met de functie ‘Sensor Detect’ kan de geïnstalleerde sensor worden herkend.
S e nsor D e t e c t
Barb. Circ.
Ex i t
33.0
5.5.2 Barb. Circ.
De functie ‘Barb. Circ.’ heeft geen functie in combinatie met de Vetus ankerlier Napoleon.
5.5.3 Sensor Detect, vervolg
Druk op de ‘UP’ of de ‘DOWN’ toets om kortstondig de
ankerliermotor te laten draaien.
De geïnstalleerde sensor zal worden herkend.
Sensor Detect.
Pr e ss Up / D ow n Ke y
t o r un t he m ot or
Sensor Detect.
De geïnstalleerde sensor is nu herkend.
Sensor type: Project.
De ‘UP’ of de ‘DOWN’ toets hebben nu tijdelijk geen functie meer. Druk nu op de ‘ON’ toets.
Pr e ss Up / D ow n Ke y
t o r un t he m ot or
0 . 4 0 0 se c .
S e nsor : Pr oj .
Het ‘normale’ ‘Sensor Calibration’ menu verschijnt weer.
Selecteer ‘Exit’ en druk op de ‘ON’ toets om terug te
keren naar het menu.
S e nsor D e t e c t
Barb. Circ.
Ex i t
Sensor Calibrat
33.0
Keer terug naar menu item ‘Sensor Calibration’.
10
060123.01
Bedieningspaneel / kettingteller CCM
NEDERLANDS
Om een juiste aanwijzing te verkrijgen, dient het instrument te worden afgesteld op de toegepaste kettingschijf. Hiertoe dient de reductiefactor te worden ingegeven.
De reductiefactor (Proj. factor) moet nu worden ingesteld.
Raadpleeg de tabel om de juiste waarde van de reductiefactor te vinden.
Napoleon kettingschijf 1
Napoleon kettingschijf 2
Napoleon kettingschijf 3
Ketting
8 mm
10 mm DIN766, 3/8” BBB
10 mm ISO4565, 3/8” HT
Sensor Calibrat
Pr oj . Fa c t or
Ex i t
57.0
Reductiefactor
57
59
5.6 Menu item ‘Current calibration’
Current Calib.
5.6.1 Overcurrent
Met de functie ‘Overcurrent’ kan een alarm voor een
bepaalde hoeveelheid stroom (in A) worden ingesteld.
Ov e r c ur r e nt
Wire Diam.
Ex i t
Off
1.20
Wanneer de ingestelde stroomwaarde wordt bereikt, zal de zoemer klinken en de statusbalk zal ‘Overcurrent’ weergeven.
Bereik: Off, 1 - 200 A
5.6.2 Wire diameter
Met de functie ‘Wire diameter’ kan de kabeldiameter van de hoofdstroomkabels (inclusief
isolatie) worden ingegeven.
Bereik: 0.01 - 0.02 - 0.03 - .. - 6.00 cm
Deze functie is noodzakelijk om de stroomsensor op de juiste manier te laten werken.
5.6.3 Exit
Met de functie ‘Exit’ kan worden teruggekeerd naar het menu.
Bedieningspaneel / kettingteller CCM
060123.01
11
5.7 Menu item ‘Tests’
Tests
5.7.1 Sensor check
Met de functie ‘Sensor check’ kan de status van de sensor worden bepaald.
S e ns. C he c k
L C D Te st
S w. Ve r si on
Wor k H our s
Ex i t
1.06
0
Sensor Test
Contact open
Sensor Test
Contact gesloten
5.7.2 LCD Test
Met de functie ‘LCD Test’ worden alle pixels in het scherm
geactiveerd.
5.7.3 Software version
Toont de geïnstalleerde software versie.
5.7.4 Work hours
Toont het aantal draaiuren van de ankerlier.
5.7.5 Exit
Met de functie ‘Exit’ kan worden teruggekeerd naar het menu.
12
060123.01
Bedieningspaneel / kettingteller CCM
NEDERLANDS
6 Calibratie
Voordat het instrument gebruikt kan worden, dienen ten minste de volgende parameters
te worden ingesteld:
•
•
•
•
keuze van meeteenheid (zie 5.1.2)
detectie van de sensor en ingeven van reductiefactor (zie 5.5.3)
alarm voor een bepaalde hoeveelheid stroom (zie 5.6.1)
draaddoorsnede, voor een juiste werking van de stroomsensor (zie 5.6.2)
7 Gebruik
7.1 Algemeen
Druk op de ‘ON’
toets om de bediening te activeren en om de achtergrondverlichting
van het beeldscherm te activeren.
De achtergrondverlichting van het beeldscherm wordt 30 seconden (default waarde) nadat
het laatste commando is gegeven, uitgeschakeld.
Druk op de ‘UP’
toets om het anker op te halen.
Chain Up
28.5 mt/m
8.3 m
V=11.6
Druk op de ‘DOWN’
toets om het anker uit te vieren.
I=39.1
Chain Down
39.6 mt/m
9.7 m
V=11.6
Wanneer de ‘UP’
actie gestopt.
toets of de ‘DOWN’
toets wordt losgelaten, wordt de betreffende
Wanneer de achtergrondverlichting niet geactiveerd is, hebben de ‘UP’
‘DOWN’
de ‘ON’
I=39.1
toets en de
toets geen functie. Activeer dan de achtergrondverlichting door éénmaal op
toets te drukken.
Bedieningspaneel / kettingteller CCM
060123.01
13
7.2 Kettingteller resetten (op 0 zetten)
Er zijn 2 manieren om de kettingteller te resetten.
Manier 1:
Druk de ‘ON’
toets en de ‘UP’
toets gelijktijdig in gedurende tenminste 3 seconden.
Manier 2:
In het menu, functie ‘reset measurement’ (zie 5.1.1)
7.3 Automatisch uitvieren van het anker
Om deze functie te gebruiken, moet de functie geactiveerd zijn (zie 5.2.2).
Automatisch uitvieren van het anker:
Druk de ‘ON’
toets en de ‘DOWN’
toets gelijktijdig in gedurende tenminste 3 seconden. De ingestelde lengte ketting wordt uitgevierd.
Om veiligheidsredenen is het altijd mogelijk om het automatisch uitvieren te onderbreken door één van toetsen in te drukken.
14
060123.01
Bedieningspaneel / kettingteller CCM
NEDERLANDS
8 Storingen
Storing
No Sensor
0.0 mt/m
0.0 m
V=11.6
I=0.0
Low Voltage
0.0 mt/m
0.0 m
V=7.9
Oplossing
Ondanks dat de ‘UP’ toets
of de ‘DOWN’ toets wordt
ingedrukt, ontvangt het
instrument
gedurende
meer dan 5 seconden
geen signaal van de sensor.
Controleer de aansluitingen van de sensor.
Controleer of de sensor
defect is.
Controleer de werking van
het elektrisch systeem.
Controleer de werking van
de ankerlier.
De voedingsspanning van
het instrument is lager dan
10 Volt.
Controleer de accu.
De stroom gemeten door
de stroomsensor overschrijdt de ingestelde
alarmwaarde.
Controleer de werking van
het elektrisch systeem.
Controleer de werking van
het elektrisch systeem.
I=0.0
Overcurrent
0.0 mt/m
0.0 m
V=11.6
Oorzaak
I=300.0
Reset het alarm door één
van de toetsen in te drukken.
9 Technische gegevens
Voedingsspanning
Opgenomen stroom
Bescherming voorzijde
Gebruikstemperatuur
Beeldscherm
Maximale lengte ketting
Resolutie
Afmetingen paneel
Gewicht
:
:
:
:
:
:
:
:
:
10 tot 30 V gelijkspanning
min. 5 mA, max. 40 mA
IP65*
0˚C / +70˚C (32˚F / 158˚F)
128 x 64 pixels
999 m / 999 ft
0,1
100 x 100 x 32 mm**
160 g
* exclusief het gebied rond de kabelaansluiting aan de achterzijde van het instrument
** exclusief beschermkap
Bedieningspaneel / kettingteller CCM
060123.01
15
Contents
1 Introduction . . . . . . . . . . . . . . . . . . . . . . . . . . . . . . . . . . . . . . . . . . .17
2 Included in delivery . . . . . . . . . . . . . . . . . . . . . . . . . . . . . . . . . . . . .17
3 Installing . . . . . . . . . . . . . . . . . . . . . . . . . . . . . . . . . . . . . . . . . . . . . .17
3.1
3.2
3.3
3.4
3.5
General . . . . . . . . . . . . . . . . . . . . . . . . . . . . . . . . . . . . . . . . . . . . . . . . . . . .17
Instrument . . . . . . . . . . . . . . . . . . . . . . . . . . . . . . . . . . . . . . . . . . . . . . . . . .17
Electrical installation . . . . . . . . . . . . . . . . . . . . . . . . . . . . . . . . . . . . . . . . . .18
Current sensor . . . . . . . . . . . . . . . . . . . . . . . . . . . . . . . . . . . . . . . . . . . . . . .19
Connections to instrument . . . . . . . . . . . . . . . . . . . . . . . . . . . . . . . . . . . . .19
4 Switching on . . . . . . . . . . . . . . . . . . . . . . . . . . . . . . . . . . . . . . . . . . .20
4.1 General . . . . . . . . . . . . . . . . . . . . . . . . . . . . . . . . . . . . . . . . . . . . . . . . . . . .20
4.2 Switching on . . . . . . . . . . . . . . . . . . . . . . . . . . . . . . . . . . . . . . . . . . . . . . . .21
5 Setup menu . . . . . . . . . . . . . . . . . . . . . . . . . . . . . . . . . . . . . . . . . . .22
5.1
5.2
5.3
5.4
5.5
5.6
5.7
Menu
Menu
Menu
Menu
Menu
Menu
Menu
item
item
item
item
item
item
item
‘Measure . . . . . . . . . . . . . . . . . . . . . . . . . . . . . . . . . . . . . . . . . .22
‘Alarms & Functions’ . . . . . . . . . . . . . . . . . . . . . . . . . . . . . . . . .23
‘Settings’ . . . . . . . . . . . . . . . . . . . . . . . . . . . . . . . . . . . . . . . . . .23
‘Language’ . . . . . . . . . . . . . . . . . . . . . . . . . . . . . . . . . . . . . . . .24
‘Sensor Calibration’ . . . . . . . . . . . . . . . . . . . . . . . . . . . . . . . . . .24
‘Current Calibration’ . . . . . . . . . . . . . . . . . . . . . . . . . . . . . . . . .25
‘Tests’ . . . . . . . . . . . . . . . . . . . . . . . . . . . . . . . . . . . . . . . . . . . . .26
6 Calibration . . . . . . . . . . . . . . . . . . . . . . . . . . . . . . . . . . . . . . . . . . . .27
7 Use . . . . . . . . . . . . . . . . . . . . . . . . . . . . . . . . . . . . . . . . . . . . . . . . . .27
7.1 General . . . . . . . . . . . . . . . . . . . . . . . . . . . . . . . . . . . . . . . . . . . . . . . . . . . .27
7.2 Resetting chain counter . . . . . . . . . . . . . . . . . . . . . . . . . . . . . . . . . . . . . . .28
7.3 Automatic lowering of anchor . . . . . . . . . . . . . . . . . . . . . . . . . . . . . . . . . . .28
8 Faults . . . . . . . . . . . . . . . . . . . . . . . . . . . . . . . . . . . . . . . . . . . . . . . .29
9 Technical details . . . . . . . . . . . . . . . . . . . . . . . . . . . . . . . . . . . . . . . .29
Wiring diagram . . . . . . . . . . . . . . . . . . . . . . . . . . . . . . . . . . . . . . . . .86
16
060123.01
Control panel / chain counter CCM
ENGLISH
1 Introduction
The Vetus instrument CCM is a combined control panel / chain counter for use with the
Vetus electrical anchor windlass Napoleon.
Warning
The instrument is only suitable for use with direct current.
2 Included in delivery
-
Instrument
Gasket
Protective cover
4 fixing screws (length 13 mm)
Current sensor
10-pole connector, with cable
Instruction manual
3 Installing
3.1 General
The Vetus instrument CCM is only suitable for connecting to the Vetus electrical anchor
windlass Napoleon. The instrument must be connected to the chain sensor already fitted
in the Vetus electrical anchor windlass Napoleon.
The current sensor still needs to be fitted on the main current cable to the anchor windlass motor.
3.2 Instrument
Warning
Make sure that the battery is disconnected when the instrument is connected.
• The instrument must be installed in such a way that the screen can be read easily. Do
not install the instrument in direct sunlight.
• The back of the instrument must be protected from moisture (water).
Control panel / chain counter CCM
060123.01
17
• The instrument can be built in
to an instrument panel or into a
partition of any thickness.
Screws to be used: self-tapping screws ø 2.9 mm.
Maximum length of screws: 10
mm + thickness of the panel.
The instrument can be built
into a partition of up to about 8
mm thickness using the
screws supplied.
• Use the template to drill holes
in the instrument panel or partition. Use 4 screws to fit the
instrument. Make sure that the
gasket is fitted properly
between the instrument and
the panel or partition.
3.3 Electrical installation
See page 86 for the wiring diagram.
Fit a 4A fast fuse in the plus (+) wire. Do not use the starter batteries to provide power to
the instrument.
Position the instrument at the following minimum distances as shown:
- 30 cm from a compass
- 50 cm from radio equipment
- 2 metres from a transmitter
- 2 metres from a radar
18
060123.01
Control panel / chain counter CCM
ENGLISH
3.4 Current sensor
Fit the current sensor to the plus (+) cable to the anchor windlass motor. Use tape or tyraps® for this. Fit the current sensor as shown. Make sure that it is fitted in the correct direction.
Position the current sensor at least 1 metre from a magnetic field.
Do not position the current sensor in the vicinity of other electric wires carrying a high current.
3.5 Connections to instrument
No.
1
2
3
4
5
6
7
8
9
10
10-pole connector
Signal
+ battery
– battery
– battery
10
9
8
7
6
current sensor
command ‘UP’
command ‘DOWN’
5
chain sensor
Control panel / chain counter CCM
1
4
3
2
060123.01
19
4 Switching on
4.1 General
The instrument has 3 keys:
‘UP’ key
‘ON’ key
‘DOWN’ key
The instrument also has a beeper that
sounds when a key has been pressed or
gives an alarm in certain situations.
UP
ON
DOWN
The ‘ON’ key switches on the background
lighting and allows the ‘UP’ and ‘DOWN’
keys to be used.
The ‘ON’ key is also used to enter setup
mode.
The background lighting will switch off automatically 30 seconds after the last command
has been given (this time can be changed).
In normal use the ‘UP’ and ‘DOWN’ keys are used to raise or lower the anchor.
20
060123.01
Control panel / chain counter CCM
ENGLISH
4.2 Switching on
Switch on the instrument using an external switch
(there is no ON/OFF switch on the instrument).
The start up screen will be displayed for a few seconds.
vetus
Chain Counter
The main screen will be displayed after the start up
screen.
1
Stop
1 Status bar - displays the status of the instrument
2
0.0 mt/m
and any error message.
2 Chain speed - displays the chain speed while 4
raising or lowering.
V=11.6
I=0.0
3 Units for chain speed,
6
mt/m - metres per minute
ft/m - feet per minute
4 Chain counter - displays the length of chain paid out.
5 Units of chain counter,
m
- metres
ft
- feet
6 Control bar - displays the voltage (V = .. V) and current (I = .. A).
7 Icons - show raising or lowering the anchor, or an error message.
0.0 m
7
3
5
The following factory settings are made when the instrument is used for the first time:
Default
English
Reset Meas.
Units
Rope-Chain
Up Alarm
Auto Down
Lite Time
Keyb. Beep
Language
Sensor Detect
Barb. Circ.
Overcurrent
Wire Diam.
Work Hours
DO NOT USE
DO NOT USE
Control panel / chain counter CCM
0.0 metres
meter/centimeter
Off
3.0 metres
Off
30 seconds
Yes
Italian
onknown
30 cm
Off
1.20 cm
0 hours
Change, reset
see
see
see
see
see
see
see
see
see
see
see
see
see
5.1.1
5.1.2
5.1.3
5.2.1
5.2.2
5.3.3
5.3.4
5.4.1
5.5.1
5.5.2
5.6.1
5.6.2
5.7.4
060123.01
21
5 Setup menu
Press the ‘ON’ key and hold it down for 6 seconds. The
menu will be displayed on screen.
Use the ‘UP’ and ‘DOWN’ keys to move through the
menu.
Menu
M e a sur e
A l a r m s & Func t i ons
S e t t i ng s
L a ng ua g e
S e nsor C a l i b r a t i on
Menu
L a ng ua g e
S e nsor C a l i b r a t i on
C ur r e nt C a l .
Te st s
Ex i t
•
•
•
•
Press the ‘ON’ key to confirm when the required menu item has been selected.
Use the ‘UP’ and ‘DOWN’ keys to move through the parameters.
Press the ‘ON’ key to confirm when the required parameter has been selected.
Use the ‘UP’ and ‘DOWN’ keys to increase/decrease the value, or to switch a function
on/off depending on the type of parameter.
• Press the ‘ON’ key to confirm when the change has been made.
• Use the ‘DOWN’ key to select ‘Exit’ and press ‘ON’ to return to the menu. Repeat this to
return to the main screen.
5.1 Menu item ‘Measure’
5.1.1 Reset measurement
The function ‘Reset measurement’ is used to reset the
chain counter to 0 (zero).
Use of the function during normal operation:
Press the ‘ON’ and ‘UP’ keys simultaneously for at least 3
seconds. This resets the chain counter.
Measure
R e se t M e a s.
Uni t s
R op e C ha i n
Ex i t
No
Meters
Off
5.1.2 Units
The function ‘Units’ allows the measurement unit to be selected:
• Metres: metres/centimetres
• Feet: feet/inches
5.1.3 Rope Chain
Do not use! Is set to ‘Off’.
5.1.4 Exit
Function ‘Exit’ is used to return to the menu.
22
060123.01
Control panel / chain counter CCM
ENGLISH
5.2 Menu item ‘Alarms & Functions’
5.2.1 Up Alarm
The function ‘Up Alarm’ is used to set an alarm according
to the length of chain raised.
Range: Off, 0 - 20 metres, 0 - 20 feet
Alarms & Functi
Up A l a r m
A ut o D ow n
L oa d D e fa ul t
Ex i t
3.0
Off
No
5.2.2 Auto Down
The function ‘Auto Down’ is used to pay out a preset length of chain automatically.
Range: Off, 5 - 250 metres, 5 - 250 feet.
Use of the function during normal operation:
Press the ‘ON’ and ‘DOWN’ keys simultaneously for at least 3 seconds. The preset length
of chain will be paid out.
5.2.3 Load Default
The function ‘Load Default’ resets all settings to the factory default values. Use this function only if faults occur during calibration.
5.2.4 Exit
Function ‘Exit’ is used to return to the menu.
5.3 Menu item ‘Settings’
5.3.1 Contrast
The function ‘Contrast’ is used to set the contrast on the
screen display.
5.3.2 Lite
The function ‘Lite’ is used to set the intensity of the background lighting on the screen.
Settings
C ont r a st
Lite
L i t e Ti m e
Ke y b . B e e p
Ex i t
30
Ye s
5.3.3 Lite Time
The function ‘Lite Time’ is used to set the length of time the background lighting remains
on after the last command has been made.
Range: 1 - 180 seconds
5.3.4 Keyb. Beep
The function ‘Keyb. Beep’ is used to select whether or not a beep will be given after a key
has been operated.
5.3.5 Exit
Function ‘Exit’ is used to return to the menu.
Control panel / chain counter CCM
060123.01
23
5.4 Menu item ‘Language’
5.4.1 Language
The function ‘Language’ is used to set the language used
on the display.
Range: Italian, English, French, German, Spanish
Language
L a ng ua g e
Ex i t
Eng l i sh
5.4.2 Exit
Function ‘Exit’ is used to return to the menu.
5.5 Menu item ‘Sensor Calibration’
Sensor Calibrat
5.5.1 Sensor Detect
The function ‘Sensor Detect’ is used to recognise the sensor installed.
S e nsor D e t e c t
Barb. Circ.
Ex i t
33.0
5.5.2 Barb. Circ.
The function ‘Barb. Circ.’ has no function in combination with the Vetus anchor windlass
Napoleon.
5.5.3 Sensor Detect, continued
Press the ‘UP’ or ‘DOWN’ key to run the anchor windlass
motor for a brief period.
The sensor installed will be recognised.
Sensor Detect.
Pr e ss Up / D ow n Ke y
t o r un t he m ot or
Sensor Detect.
The sensor installed has now been recognised.
Sensor type: Project.
The ‘UP’ and ‘DOWN’ keys temporarily have no function.
Now press the ‘ON’ key.
Pr e ss Up / D ow n Ke y
t o r un t he m ot or
0 . 4 0 0 se c .
S e nsor : Pr oj .
The normal ‘Sensor Calibration’ menu will be displayed
again. Select ‘Exit’ and press the ‘ON’ key to return to the
menu.
S e nsor D e t e c t
Barb. Circ.
Ex i t
Sensor Calibrat
33.0
Return to menu item ‘Sensor Calibration’.
24
060123.01
Control panel / chain counter CCM
ENGLISH
In order to obtain a correct reading the instrument must be set for the gipsy used. The
reduction factor must be entered in order to do this.
The reduction factor (Proj. factor) must now be set.
See the table for the correct reduction factor to use.
Napoleon gipsy 1
Napoleon gipsy 2
Napoleon gipsy 3
Chain
8 mm
10 mm DIN766, 3/8” BBB
10 mm ISO4565, 3/8” HT
Sensor Calibrat
Pr oj . Fa c t or
Ex i t
57.0
Reduction factor
57
59
5.6 Menu item ‘Current calibration’
5.6.1 Overcurrent
The function ‘Overcurrent’ is used to set an alarm for a
particular current value (in A).
Current Calib.
Ov e r c ur r e nt
Wire Diam.
Ex i t
Off
1.20
The beep will sound and the status bar will show
‘Overcurrent’ when the set current value is reached.
Range: Off, 1 - 200 A
5.6.2 Wire diameter
The function ‘Wire diameter’ is used to enter the diameter of the main power cables (including insulation).
Range: 0.01 - 0.02 - 0.03 - .. - 6.00 cm
This function is necessary to allow the current sensor to work properly.
5.6.3 Exit
Function ‘Exit’ is used to return to the menu.
Control panel / chain counter CCM
060123.01
25
5.7 Menu item ‘Tests’
Tests
5.7.1 Sensor check
The function ‘Sensor check’ is used to determine the status of the sensor.
S e ns. C he c k
L C D Te st
S w. Ve r si on
Wor k H our s
Ex i t
1.06
0
Sensor Test
Contact open
Sensor Test
Contact closed
5.7.2 LCD Test
The function ‘LCD Test’ activates all pixels in the screen.
5.7.3 Software version
Displays the software version installed.
5.7.4 Work hours
Displays the number of hours the anchor windlass has worked.
5.7.5 Exit
Function ‘Exit’ is used to return to the menu.
26
060123.01
Control panel / chain counter CCM
ENGLISH
6 Calibration
The following parameters at least must be set before the instrument can be used:
•
•
•
•
select units (see 5.1.2)
detection of sensor and the reduction factor (see 5.5.3)
alarm for a particular current value (see 5.6.1)
wire thickness, for correct working of the current sensor (see 5.6.2)
7 Use
7.1 General
Press the ‘ON’ key to activate the controls and to switch on the background lighting on the
screen.
The background lighting will be switched off 30 seconds (default value) after the last command has been given.
Press the ‘UP’ key to raise the anchor.
Chain Up
28.5 mt/m
8.3 m
V=11.6
Press the ‘DOWN’ key to lower the anchor.
I=39.1
Chain Down
39.6 mt/m
9.7 m
V=11.6
I=39.1
The appropriate action will be stopped when the ‘UP’ or ‘DOWN’ key is released.
If the background lighting is not on the ‘UP’ and ‘DOWN’ keys have no function. The background lighting must then be activated by pressing the ‘ON’ key once.
Control panel / chain counter CCM
060123.01
27
7.2 Resetting the chain counter (to 0)
There are 2 methods of resetting the chain counter.
Method 1:
Press the ‘ON’ and ‘UP’ keys simultaneously for at least 3 seconds.
Method 2:
Use the function ‘reset measurement’ in the menu (see 5.1.1).
7.3 Automatic lowering of the anchor
This function must be activated in order to use it (see 5.2.2).
Automatic lowering of the anchor:
Press the ‘ON’ and ‘DOWN’ keys simultaneously for at least 3 seconds. The preset length
of chain will be paid out.
For safety reasons it is always possible to interrupt the automatic lowering of the
anchor by pressing any one of the keys.
28
060123.01
Control panel / chain counter CCM
ENGLISH
8 Faults
Fault
No Sensor
0.0 mt/m
0.0 m
V=11.6
I=0.0
Low Voltage
0.0 mt/m
0.0 m
V=7.9
Solution
The instrument does not
receive any signal from
the sensor for more than 5
seconds even though the
‘UP’ or ‘DOWN’ key is
pressed.
Check the connections to
the sensor.
Check whether the sensor
is faulty.
Check the electrical circuit.
Check the working of the
anchor windlass.
The voltage supplied to
the instrument is less than
10 Volts.
Check the battery.
The current measured by
the
current
sensor
exceeds the preset alarm
value.
Check the electrical circuit.
Check the electrical circuit.
I=0.0
Overcurrent
0.0 mt/m
0.0 m
V=11.6
Cause
I=300.0
Reset the alarm by pressing one of the keys.
9 Technical details
Power supply
Current taken
Safety class of front
Working temperature
Screen
Maximum length of chain
Resolution
Dimensions of panel
Weight
:
:
:
:
:
:
:
:
:
10 to 30 V direct current
min. 5 mA, max. 40 mA
IP65*
0˚C / +70˚C (32˚F / 158˚F)
128 x 64 pixels
999 m / 999 ft
0.1
100 x 100 x 32 mm**
160 g
* excluding the area around the cable connections at the back of the instrument
** excluding the protective cover
Control panel / chain counter CCM
060123.01
29
Inhalt
1 Einleitung . . . . . . . . . . . . . . . . . . . . . . . . . . . . . . . . . . . . . . . . . . . . .31
2 Lieferumfang . . . . . . . . . . . . . . . . . . . . . . . . . . . . . . . . . . . . . . . . . .31
3 Installation . . . . . . . . . . . . . . . . . . . . . . . . . . . . . . . . . . . . . . . . . . . .31
3.1
3.2
3.3
3.4
3.5
Allgemeines . . . . . . . . . . . . . . . . . . . . . . . . . . . . . . . . . . . . . . . . . . . . . . . . .31
Gerät . . . . . . . . . . . . . . . . . . . . . . . . . . . . . . . . . . . . . . . . . . . . . . . . . . . . . .31
Elektrischer Anschluss . . . . . . . . . . . . . . . . . . . . . . . . . . . . . . . . . . . . . . . .32
Stromsensor . . . . . . . . . . . . . . . . . . . . . . . . . . . . . . . . . . . . . . . . . . . . . . . .33
Geräteanschlüsse . . . . . . . . . . . . . . . . . . . . . . . . . . . . . . . . . . . . . . . . . . . .33
4 Einschalten . . . . . . . . . . . . . . . . . . . . . . . . . . . . . . . . . . . . . . . . . . . .34
4.1 Allgemeines . . . . . . . . . . . . . . . . . . . . . . . . . . . . . . . . . . . . . . . . . . . . . . . . .34
4.2 Einschalten . . . . . . . . . . . . . . . . . . . . . . . . . . . . . . . . . . . . . . . . . . . . . . . . .35
5 Setup-Menü . . . . . . . . . . . . . . . . . . . . . . . . . . . . . . . . . . . . . . . . . . .36
5.1
5.2
5.3
5.4
5.5
5.6
5.7
Menü-Item
Menü-Item
Menü-Item
Menü-Item
Menü-Item
Menü-Item
Menü-Item
‘Mess’ . . . . . . . . . . . . . . . . . . . . . . . . . . . . . . . . . . . . . . . . . . . .36
‘Funktionen’ . . . . . . . . . . . . . . . . . . . . . . . . . . . . . . . . . . . . . . . .37
‘Pers. Einstellungen’ . . . . . . . . . . . . . . . . . . . . . . . . . . . . . . . . .37
‘Sprache’ . . . . . . . . . . . . . . . . . . . . . . . . . . . . . . . . . . . . . . . . . .38
‘Kalibrierung’ . . . . . . . . . . . . . . . . . . . . . . . . . . . . . . . . . . . . . . .38
‘Stromkalibrierung’ . . . . . . . . . . . . . . . . . . . . . . . . . . . . . . . . . .39
‘Kontrolle’ . . . . . . . . . . . . . . . . . . . . . . . . . . . . . . . . . . . . . . . . .40
6 Kalibrieren . . . . . . . . . . . . . . . . . . . . . . . . . . . . . . . . . . . . . . . . . . . .41
7 Betrieb . . . . . . . . . . . . . . . . . . . . . . . . . . . . . . . . . . . . . . . . . . . . . . .41
7.1 Allgemeines . . . . . . . . . . . . . . . . . . . . . . . . . . . . . . . . . . . . . . . . . . . . . . . . .41
7.2 Meterzähler rückstellen . . . . . . . . . . . . . . . . . . . . . . . . . . . . . . . . . . . . . . . .42
7.3 Automatisches Fieren des Ankers . . . . . . . . . . . . . . . . . . . . . . . . . . . . . . .42
8 Störungen . . . . . . . . . . . . . . . . . . . . . . . . . . . . . . . . . . . . . . . . . . . . .43
9 Technische Daten . . . . . . . . . . . . . . . . . . . . . . . . . . . . . . . . . . . . . . .43
Schaltplan . . . . . . . . . . . . . . . . . . . . . . . . . . . . . . . . . . . . . . . . . . . . .86
30
060123.01
Kontrollpaneel / Meterzähler CCM
DEUTSCH
1 Einleitung
Der CCM von Vetus ist eine Kombination aus Kontrollpaneel und Meterzähler, bestimmt für
die elektrische Ankerwinde Napoleon von Vetus.
Achtung
Das Gerät kann ausschließlich an Gleichstrom angeschlossen werden.
2 Lieferumfang
-
Gerät
Dichtung
Schutzkappe
4 Befestigungsschrauben (Länge 13 mm)
Stromsensor
10-poliger Steckverbinder mit Kabel
Gebrauchsanweisung
3 Installation
3.1 Allgemeines
Der CCM von Vetus eignet sich nur für den Anschluss an die elektrische Ankerwinde
Napoleon von Vetus. Das Gerät muss auf den in der elektrischen Ankerwinde Napoleon
installierten Kettensensor angeschlossen werden.
Der Stromsensor muss noch am Hauptstromkabel zum Ankerwindenmotor angebracht
werden.
3.2 Gerät
Achtung
Immer darauf achten, dass der Akku abgekoppelt ist, wenn das Gerät angeschlossen
wird.
• Das Gerät muss so eingebaut werden, dass der Bildschirm gut sichtbar ist. Das Gerät
nicht an einer Stelle einbauen, die direktem Sonnenlicht ausgesetzt ist.
• Die Rückseite des Geräts muss gegen Feuchtigkeit (Wasser) geschützt werden.
Kontrollpaneel / Meterzähler CCM
060123.01
31
• Das Gerät kann in eine
Schalttafel oder in ein beliebig
dickes
Schott
eingebaut
werden.
Folgende Schrauben müssen
verwendet
werden:
selbstschneidende Schrauben
ø 2,9 mm.
Maximale Schraubenlänge: 10
mm + Schalttafeldicke.
Mit den zum Lieferumfang
gehörenden Schrauben kann
das Gerät in eine maximal 8
mm
dicke
Schalttafel
eingebaut werden.
• Mit Hilfe der mitgelieferten
Schablone Löcher in der
Schalttafel oder im Schott
anbringen. Das Gerät mit 4
Schrauben
befestigen.
Überprüfen, ob die Dichtung
an der richtigen Stelle
zwischen Schalttafel und
Schott eingesetzt wurde.
3.3 Elektrischer Anschluss
Siehe Schaltplan Seite 86.
In das Pluskabel (+) eine 4 A-Sicherung (‘schnell’) einbauen. Nicht die Startakkus zur
Stromversorgung des Gerätes verwenden.
Beim Einbau des Geräts folgende Mindestabstände beachten:
- 30 cm zum Kompass
- 50 cm zum Funkgerät
- 2 m zum Sender
- 2 m zum Radar
32
060123.01
Kontrollpaneel / Meterzähler CCM
DEUTSCH
3.4 Stromsensor
Den Stromsensor am Pluskabel (+) zum Ankerwindenmotor anbringen. Dazu z. B. Tape
oder ty-raps®. Den Stromsensor gemäß den Angaben einbauen.
Die Richtung beachten. Im Umkreis von 1 Meter darf sich beim Stromsensor kein
magnetisches Feld befinden.
Den Stromsensor nicht in der Nähe anderer Hochstromelektrokabel installieren.
3.5 Geräteanschlüsse
10-poliger Steckverbinder
Nr.
Signal
1
+ Akku
2
– Akku
3
– Akku
4
5
Stromsensor
6
Kommando ‘UP’
7
Kommando ‘DOWN’
8
9
10
Kettensensor
Kontrollpaneel / Meterzähler CCM
10
5
9
8
7
6
1
4
3
2
060123.01
33
4 Einschalten
4.1 Allgemeines
Das Gerät hat 3 Tasten:
‘UP’-Taste
‘ON’-Taste
‘DOWN’-Taste
Das Gerät ist außerdem mit einem Summer
ausgestattet, der eine eingedrückte Taste
oder bestimmte Alarmsituationen anzeigt.
UP
ON
DOWN
Die ‘ON’-Taste aktiviert die Hintergrundbeleuchtung und sorgt dafür, dass die ‘UP’Taste und die ‘DOWN’-Taste benutzt
werden können.
Mit der ‘ON’-Taste gelangt man darüber
hinaus in den Setup-Modus.
Die Hintergrundbeleuchtung schaltet sich 30 Minuten nach dem letzten Kommando
automatisch aus (die Zeitspanne kann verändert werden).
Bei normalem Gebrauch die ‘UP’- oder ‘DOWN’-Taste drücken, um den Anker einzuholen
oder zu fieren.
34
060123.01
Kontrollpaneel / Meterzähler CCM
DEUTSCH
4.2 Einschalten
Das Gerät mit einem externen Schalter einschalten
(das Gerät ist nicht mit einem EIN/AUS-Schalter
ausgestattet).
Innerhalb weniger Sekunden erscheint das
Startmenü.
Nach
dem
Startmenü
Hauptbildschirm.
erscheint
vetus
Chain Counter
der
1
Stop
0.0 mt/m
1 Statusbalken – gibt den Status des Geräts und 2
eine eventuelle Fehlermeldung an
4
2 Kettengeschwindigkeit – gibt die KettengeV=11.6
I=0.0
schwindigkeit während des Einholens und
6
Fierens an
3 Einheit Kettengeschwindigkeit
mt/m - Meter pro Minute
ft/m - Fuß pro Minute
4 Meterzähler - gibt die Länge der gefierten Kette an
5 Einheit Meterzähler
m
- Meter
ft
- Fuß
6 Kontrollbalken – gibt die Netzspannung (V = .. V) und den Strom (I = .. A) an
7 Ikonen – geben das Einholen oder Fieren des Ankers oder eine Fehlermeldung an
0.0 m
7
3
5
Beim Erstgebrauch des Geräts sind vom Hersteller folgende Einstellungen vorgenommen:
Englisch
Deutsch
Reset Meas.
Units
Rope-Chain
Up Alarm
Auto Down
Lite Time
Keyb. Beep
Language
Sensor Detect
Barb. Circ.
Overcurrent
Wire Diam.
Work Hours
Rückstellen Meterzähler
Einheiten
NICHT BENUTZEN
Alarm ‘hoch’
Automatisch fieren
Hintergrundbeleuchtung ein
Summer
Bildschirmsprache
Ortung des Sensor
NICHT BENUTZEN
Stromalarm
Kabeldurchmesser
Betriebsstunden Ankerwinde
Kontrollpaneel / Meterzähler CCM
Default (Standard)
0,0 Meter
Meter/Zentimeter
Aus
3,0 Meter
Aus
30 Sekunden
Ja
Italienisch
unbekannt
30 cm
Aus
1,20 cm
0 Stunden
Ändern,
Rückstellen
siehe 5.1.1
siehe 5.1.2
siehe 5.1.3
siehe 5.2.1
siehe 5.2.2
siehe 5.3.3
siehe 5.3.4
siehe 5.4.1
siehe 5.5.1
siehe 5.5.2
siehe 5.6.1
siehe 5.6.2
siehe 5.7.4
060123.01
35
5 Setup-Menü
Menu
Die ‘ON’-Taste drücken und 6 Sekunden eingedrückt
halten. Das Menü erscheint auf dem Bildschirm.
Die ‘UP’- oder ‘DOWN’-Taste drücken, um durch das
Menü zu laufen.
Mab
Func t i one n
Pe r s. Ei nst e l
S p r a c he
K a l i b r i e r ung
Menu
S p r a c he
K a l i b r i e r ung
S t r om ka l i b r i e r
Kont r ol l e
A usg a ng
• Wenn das gewünschte Menü-Item ausgewählt wurde, die ‘ON’-Taste drücken, um das
Item zu bestätigen.
• Die ‘UP’- oder ‘DOWN’-Taste drücken, um durch die Parameter zu laufen.
• Wenn der gewünschte Parameter ausgewählt wurde, die ‘ON’-Taste drücken, um den
Parameter zu bestätigen.
• Die ‘UP’- oder ‘DOWN’-Taste drücken, um den Wert zu erhöhen oder zu vermindern,
oder um die Funktion ein-/auszuschalten, abhängig vom Parametertyp.
• Wenn die Änderung ausgeführt wurde, zur Bestätigung die ‘ON’-Taste drücken.
• Die ‘DOWN’-Taste benutzen, um die ‘Ausgang’-Funktion auszuwählen, und die ‘ON’Taste drücken, um wieder ins Menü zurückzukehren. Den Vorgang wiederholen, um
zum Hauptbildschirm zurückzukehren.
5.1 Menü-Item ‘Mess’
5.1.1 Massnulleinstellung
Mit der Funktion ‘Massnulleinstellung’ kann
Meterzähler auf 0 (Null) rückgestellt werden.
der
Mab
M a ssnul l e i nst
M a sse i nhe i t
Ta u Ke t t e
A usg a ng
Nein
Meter
Off
Gebrauch der Funktion bei normaler Benutzung:
Die ‘ON’- und ‘UP’-Taste gleichzeitig mindestens 3
Sekunden eingedrückt halten. Der Meterzähler wird rückgestellt.
5.1.2 Masseinheit
Mit der Funktion ‘Masseinheit’ kann die Messeinheit gewählt werden:
• Meter: Meter/Zentimeter
• Feet: Fuß/Inch
5.1.3 Tau Kette
Nicht benutzen! Ist eingestellt auf ‘Off’.
5.1.4 Ausgang
Mit der Funktion ‘Ausgang’ kann zum Menü zurückgekehrt werden.
36
060123.01
Kontrollpaneel / Meterzähler CCM
DEUTSCH
5.2 Menü-Item ‘Functionen’
5.2.1 Fierenalarm
Mit der Funktion ‘Fierenalarm’ kann ein Alarm für die
Länge der eingeholten Kette eingestellt werden.
Bereich: Off, 0 - 20 Meter, 0 - 20 Fuß
Functionen
F i e r e na l r m
A ut om . A b st i e g
Fa b r i kd a t e n
A usg a ng
3.0
Off
Nein
5.2.2 Autom. Abstieg
Mit der Funktion ‘Autom. Abstieg’ kann automatisch eine vorher eingestellte Kettenlänge
gefiert werden. Bereich: Off, 5 - 250 Meter, 5 - 250 Fuß
Gebrauch der Funktion während normaler Benutzung:
Die ‘ON’- und ‘UP’-Taste gleichzeitig mindestens 3 Sekunden eingedrückt halten. Die
eingestellte Kettenlänge wird gefiert.
5.2.3 Fabrikdaten
Mit der Funktion ‘Fabrikdaten’ kann der Meterzähler auf die herstellerseitigen
Einstellungen zurückgestellt werden. Diese Funktion nur benutzen, wenn während des
Kalibrierens Fehler auftreten.
5.2.4 Ausgang
Mit der Funktion ‘Ausgang’ kann zum Menü zurückgekehrt werden.
5.3 Menü-Item ‘Pers. Einstellungen’
5.3.1 Kontrast
Mit der Funktion ‘Kontrast’ kann der Bildschirmkontrast
eingestellt werden.
Pers.Einstel
L C D Kont r a st
LCDLitch
B kL i g ht Z e i t
Ta st e nt on
A usg a ng
30
Ja
5.3.2 Licht
Mit der Funktion ‘Licht’ kann die Intensität der Hintergrundbeleuchtung des Bildschirms
eingestellt werden.
5.3.3 Backlight Zeit
Mit der Funktion ‘Backlight Zeit’ kann eingestellt werden,
Hintergrundbeleuchtung nach dem letzten Kommando noch an bleibt.
Bereich: 1 - 180 Sekunden
wie
lange
die
5.3.4 Tastenton
Mit der Funktion ‘Tastenton’ kann eingestellt werden, ob nach der Bedienung einer Taste
ein Signalton erklingt oder nicht.
5.3.5 Ausgang
Mit der Funktion ‘Ausgang’ kann zum Menü zurückgekehrt werden.
Kontrollpaneel / Meterzähler CCM
060123.01
37
5.4 Menü-Item ‘Sprache’
5.4.1 Sprache
Mit der Funktion ‘Sprache’ kann die Bildschirmsprache
eingestellt werden.
Bereich: Italienisch, Englisch, Französisch, Deutsch,
Spanisch
Sprache
S p r a c he
A usg a ng
D e ut sc h
5.4.2 Ausgang
Mit der Funktion ‘Ausgang’ kann zum Menü zurückgekehrt werden.
5.5 Menü-Item ‘Kalibrierung’
Kalibrierung
5.5.1 Sensormessung
Mit der Funktion ‘Sensormessung’ kann der eingebaute
Sensor erkannt werden.
S e nsor m e ssung
Ke t t e nusskr e i s
A usg a ng
33.0
5.5.2 Kettenusskreis
Die Funktion ‘Kettenusskreis’ hat keine Funktion in Kombination mit der Napoleon
Ankerwinde von Vetus.
Sensormessung
5.5.3 Sensormessung, Fortsetzung
Die ‘UP’- oder ‘DOWN’-Taste drücken, um kurz den
Ankerwindenmotor zu starten.
Der eingebaute Sensor wird erkannt werden.
UP o. D OWN d r uc ke n
M ot or e i nst e l l e n
Der eingebaute Sensor wurde erkannt.
Sensortyp: Project.
Die ‘UP’- oder ‘DOWN’-Taste hat vorläufig keine Funktion
mehr. Jetzt die ‘ON’-Taste drücken.
UP o. D OWN d r uc ke n
M ot or e i nst e l l e n
0 . 4 0 0 se c .
Pr oj e c t se nsor
Das normale ‘Kalibrierung’-Menü erscheint wieder. Die
‘Ausgang’-Funktion auswählen und die ‘ON’-Taste
drücken, um wieder ins Menü zurückzukehren.
S e nsor m e ssung
Ke t t e nusskr e i s
A usg a ng
Sensormessung
Kalibrierung
33.0
Zurückkehren zum Menü-Item ‘Kalibrierung’.
38
060123.01
Kontrollpaneel / Meterzähler CCM
DEUTSCH
Für eine korrekte Anzeige muss das Gerät auf die verwendetet Kettenrolle eingestellt
werden. Dazu den Reduktionsfaktor eingegeben.
Anschließend den Reduktionsfaktor (Proj.factor)
einstellen.
Die Tabelle zu Rate ziehen, um den richtigen Wert des
Reduktionsfaktors zu bestimmen.
Napoleon Kettenrolle 1
Napoleon Kettenrolle 2
Napoleon Kettenrolle 3
Kette
8 mm
10 mm DIN766, 3/8” BBB
10 mm ISO4565, 3/8” HT
Kalibrierung
Pr oj . Fa kt or
A usg a ng
57.0
Reduktionsfaktor
57
59
5.6 Menü-Item ‘Stromkalibrierung’
5.6.1 Stromalarm
Mit der Funktion ‘Stromalarm’ kann ein Alarm für eine
bestimmt Strommenge (in A) eingestellt werden.
Wenn der eingestellte Stromwert erreicht ist, erklingt der
Summer und gibt der Statusbalken ‘Overcurrent’ an.
Bereich: Off, 1 - 200 A
Kalibrierung
S t r om a l a r m
D r a ht d ur c hm e s
A usg a ng
Off
1.20
5.6.2 Drahtdurchmesser
Mit der Funktion ‘Drahtdurchmesser’ kann der Kabeldurchmesser des Hauptstromkabels
(inklusive Isolierung) eingestellt werden.
Bereich: 0,01 - 0,02 - 0,03 - .. - 6,00 cm
Diese Funktion ist notwendig, um den Stromsensor ordnungsgemäß funktionieren zu
lassen.
5.6.3 Ausgang
Mit der Funktion ‘Ausgang’ kann zum Menü zurückgekehrt werden.
Kontrollpaneel / Meterzähler CCM
060123.01
39
5.7 Menü-Item ‘Kontrolle’
Kontrolle
5.7.1 Sensor Test
Mit der Funktion ‘Sensor Test’ kann der Status des Sensor
bestimmt werden.
S e nsor Te st
L C D Te st
S w. Ve r si on
B e t r i e b sz e i t
A usg a ng
1.06
0
Sensor Test
Kontakt offen
Sensor Test
Kontakt geschlossen
5.7.2 LCD Test
Mit der Funktion ‘LCD Test’ werden alle Pixels im
Bildschirm aktiviert.
5.7.3 Software version
Gibt die installierte Softwareversion an.
5.7.4 Betriebszeit
Gibt die Betriebsstunden der Ankerwinde an.
5.7.5 Ausgang
Mit der Funktion ‘Ausgang’ kann zum Menü zurückgekehrt werden.
40
060123.01
Kontrollpaneel / Meterzähler CCM
DEUTSCH
6 Kalibrieren
Vor Benutzung des Geräts müssen folgende Parameter eingestellt werden:
•
•
•
•
Wahl der Messeinheit (siehe 5.1.2)
Ortung des Sensor und Eingabe des Reduktionsfaktors (siehe 5.5.3)
Alarm bei einer bestimmten Stromstärke (siehe 5.6.1)
Kabelquerschnitt für das ordnungsgemäße Funktionieren des Stromsensor (siehe 5.6.2)
7 Betrieb
7.1 Allgemeines
Die ‘ON’-Taste drücken, um die Bedienung und die Hintergrundbeleuchtung des
Bildschirms zu aktivieren.
Die Hintergrundbeleuchtung des Bildschirms wird 30 Sekunden (Standardwert) nach dem
letzten Kommando ausgeschaltet.
Die ‘UP’-Taste drücken, um den Anker einzuholen.
Aufholen
28.5 mt/m
8.3 m
V=11.6
Die ‘DOWN’-Taste drücken, um den Anker zu fieren.
I=39.1
Fieren
39.6 mt/m
9.7 m
V=11.6
I=39.1
Wenn die ‘UP’- oder ‘DOWN’-Taste losgelassen wird, stoppt der betreffende Vorgang.
Wenn die Hintergrundbeleuchtung nicht aktiviert wurde, hat die ‘UP’- und ‘DOWN’-Taste
keine Funktion. Die Hintergrundbeleuchtung kann aktiviert werden, indem die ‘ON’-Taste
einmal gedrückt wird.
Kontrollpaneel / Meterzähler CCM
060123.01
41
7.2 Meterzähler rückstellen (auf 0 stellen)
Der Meterzähler kann auf 2 Arten rückgestellt werden.
Möglichkeit 1:
Die ‘ON’- und ‘UP’-Taste gleichzeitig mindestens 3 Sekunden eingedrückt halten.
Möglichkeit 2:
Im Menü, Funktion ‘reset measurement’ (siehe 5.1.1)
7.3 Automatisches Fieren des Ankers
Um diese Funktion benutzen zu können, muss sie aktiviert sein (siehe 5.2.2).
Automatisches Fieren des Ankers:
Die ‘ON’- und ‘DOWN’-Taste gleichzeitig mindestens 3 Sekunden eingedrückt halten. Die
eingestellte Kettenlänge wird gefiert.
Aus Sicherheitsgründen ist es immer möglich, das Fieren durch Eindrücken einer der
Tasten automatisch zu unterbrechen.
42
060123.01
Kontrollpaneel / Meterzähler CCM
DEUTSCH
8 Störungen
Störung
Kein Sensor
0.0 mt/m
0.0 m
V=11.6
I=0.0
Schwach Span
0.0 mt/m
Ursache
Lösung
Obwohl die ‘UP’- oder
‘DOWN’-Taste eingedrückt
wird, empfängt das Gerät
länger als 5 Sekunden
kein Signal vom Sensor.
Die Anschlüsse des
Sensors prüfen.
Prüfen, ob der Sensor
defekt ist.
Das ordnungsgemäße
Funktionieren des elektrischen Systems prüfen.
Das ordnungsgemäße
Funktionieren der
Ankerwinde prüfen.
Die Netzspannung des
Geräts liegt unter 10 Volt.
Den Akku überprüfen.
Das
ordnungsgemäße
Funktionieren
des
elektrischen
Systems
prüfen.
0.0 m
V=7.9
I=0.0
Der vom Stromsensor
gemessene
Strom
überschreitet
den
eingestellten Alarmwert.
Stromalarm
0.0 mt/m
0.0 m
V=11.6
I=300.0
Das
ordnungsgemäße
Funktionieren
des
elektrischen
Systems
prüfen.
Den Alarm rückstellen,
indem eine der Tasten
eingedrückt wird.
9 Technische Daten
Netzspannung
Stromverbrauch
Sicherung Vorderseite
Betriebstemperatur
Bildschirm
Maximale Kettenlänge
Auflösung
Kontrollpaneelgröße
Gewicht
:
:
:
:
:
:
:
:
:
10 bis 30 Volt Gleichspannung
min. 5 mA, max. 40 mA
IP65*
0ºC / +70ºC (32ºF / 158ºF)
128 x 64 Pixels
999 m / 999 ft
0,1
100 x 100 x 32 mm**
160 g
* exklusiv der Fläche um den Kabelanschluss auf der Rückseite des Geräts
** exklusiv Schutzkappe
Kontrollpaneel / Meterzähler CCM
060123.01
43
Table des matières
1 Introduction . . . . . . . . . . . . . . . . . . . . . . . . . . . . . . . . . . . . . . . . . . .45
2 Contenu de l’emballage . . . . . . . . . . . . . . . . . . . . . . . . . . . . . . . . . .45
3 Installation . . . . . . . . . . . . . . . . . . . . . . . . . . . . . . . . . . . . . . . . . . . .45
3.1
3.2
3.3
3.4
3.5
Généralités . . . . . . . . . . . . . . . . . . . . . . . . . . . . . . . . . . . . . . . . . . . . . . . . . .45
Instrument . . . . . . . . . . . . . . . . . . . . . . . . . . . . . . . . . . . . . . . . . . . . . . . . . .45
Installation électrique . . . . . . . . . . . . . . . . . . . . . . . . . . . . . . . . . . . . . . . . .46
Capteur de courant . . . . . . . . . . . . . . . . . . . . . . . . . . . . . . . . . . . . . . . . . . .47
Raccordements de l’instrument . . . . . . . . . . . . . . . . . . . . . . . . . . . . . . . . .47
4 Mise en marche . . . . . . . . . . . . . . . . . . . . . . . . . . . . . . . . . . . . . . . .48
4.1 Généralités . . . . . . . . . . . . . . . . . . . . . . . . . . . . . . . . . . . . . . . . . . . . . . . . . .48
4.2 Mise en marche . . . . . . . . . . . . . . . . . . . . . . . . . . . . . . . . . . . . . . . . . . . . . .49
5 Menu de paramétrage . . . . . . . . . . . . . . . . . . . . . . . . . . . . . . . . . . .50
5.1
5.2
5.3
5.4
5.5
5.6
5.7
Élément
Élément
Élément
Élément
Élément
Élément
Élément
de
de
de
de
de
de
de
menu
menu
menu
menu
menu
menu
menu
‘Élément de menu ‘Mesures’’ . . . . . . . . . . . . . . . . . . . .50
‘A. et Fonctions’ . . . . . . . . . . . . . . . . . . . . . . . . . . . . . . .51
‘Affich.personn’ . . . . . . . . . . . . . . . . . . . . . . . . . . . . . . .51
‘Langue’ . . . . . . . . . . . . . . . . . . . . . . . . . . . . . . . . . . . . .52
‘Calibrage capte’ . . . . . . . . . . . . . . . . . . . . . . . . . . . . . .52
‘Calibrage courant’ . . . . . . . . . . . . . . . . . . . . . . . . . . . .53
‘Controles’ . . . . . . . . . . . . . . . . . . . . . . . . . . . . . . . . . . .54
6 Étalonnage . . . . . . . . . . . . . . . . . . . . . . . . . . . . . . . . . . . . . . . . . . . .55
7 Utilisation . . . . . . . . . . . . . . . . . . . . . . . . . . . . . . . . . . . . . . . . . . . . .55
7.1 Généralités . . . . . . . . . . . . . . . . . . . . . . . . . . . . . . . . . . . . . . . . . . . . . . . . . .55
7.2 Remise à zéro du compteur métrique . . . . . . . . . . . . . . . . . . . . . . . . . . . .56
7.3 Largage automatique de l’ancre . . . . . . . . . . . . . . . . . . . . . . . . . . . . . . . . .56
8 Pannes . . . . . . . . . . . . . . . . . . . . . . . . . . . . . . . . . . . . . . . . . . . . . . .57
9 Spécifications techniques . . . . . . . . . . . . . . . . . . . . . . . . . . . . . . . .57
Schéma électrique . . . . . . . . . . . . . . . . . . . . . . . . . . . . . . . . . . . . . .86
44
060123.01
Tableau de commande / compteur métrique CCM
FRANÇAIS
1 Introduction
L’instrument CCM de Vetus est un tableau de commande/ compteur métrique combiné,
destiné au guindeau électrique Napoleon de Vetus.
Avertissement
L’instrument doit être uniquement raccordé à une source de courant continu.
2 Contenu de l’emballage
-
Instrument
Garniture
Capot de protection
4 vis de fixation (longueur 13 mm)
Capteur de courant
Connecteur 10 pôles avec câble
Mode d’emploi
3 Installation
3.1 Généralités
L’instrument CCM de Vetus doit être uniquement raccordé au guindeau électrique
Napoleon de Vetus. Raccorder l’instrument au capteur de chaîne déjà installé sur le guindeau électrique Napoleon de Vetus.
Vous devez encore installer le capteur de courant sur le câble principal conduisant au
moteur du guindeau.
3.2 Instrument
Avertissement
Veiller à ce que la batterie soit toujours déconnectée lors du raccordement de l’instrument.
• Installer l’instrument de façon à permettre une bonne lecture de l’écran. Ne pas installer l’instrument directement à la lumière solaire.
• Protéger la partie arrière de l’instrument contre l’humidité (eau).
Tableau de commande / compteur métrique CCM
060123.01
45
• L’instrument peut être encastré dans un panneau d’instruments ou dans une cloison
d’épaisseur quelconque.
Type de vis à utiliser : Vis
auto-taraudeuses ø 2,9 mm.
Longueur maximale des vis :
10 mm + épaisseur du panneau.
Les vis fournies permettent
d’encastrer l’instrument dans
un panneau d’environ 8 mm
maximum d’épaisseur.
• À l’aide du gabarit fourni, faire
les trous dans le panneau
d’instruments ou une cloison.
Monter l’instrument avec 4 vis.
Vérifier que la garniture est
correctement placée entre
l’instrument et le panneau ou
la cloison.
3.3 Installation électrique
Pour le schéma électrique, voir p. 86.
Prévoir dans le fil positif (+) un fusible de 4 A (‘ rapide ‘). Ne pas utiliser les batteries de
démarrage pour fournir du courant à l’instrument.
Monter l’instrument à une distance minimale de :
- 30 cm d’un compas
- 50 cm d’un appareil radio
- 2 mètres d’un émetteur
- 2 mètres d’un radar
46
060123.01
Tableau de commande / compteur métrique CCM
FRANÇAIS
3.4 Capteur de courant
Monter le capteur de courant dans le câble positif (+) conduisant au moteur du guindeau.
Utiliser à cette fin par exemple un ruban adhésif ou du ty-raps®. Monter le capteur de courant comme indiqué. Veiller à ce que le sens soit correct.
Monter le capteur de courant à 1 mètre au moins de tout champ magnétique.
Ne pas monter le capteur de courant à proximité d’autres câbles électriques à courant
élevé.
3.5 Raccordements de l’instrument
No
1
2
3
4
5
6
7
8
9
10
Connecteur à 10 pôles
Signal
+ batterie
– batterie
– batterie
10
9
8
7
6
capteur de courant
commande ‘UP’
commande ‘DOWN’
5
capteur de chaîne
Tableau de commande / compteur métrique CCM
1
4
3
2
060123.01
47
4 Mise en marche
4.1 Généralités
L’instrument comporte 3 touches :
Touche ‘UP’
Touche ‘ON’
Touche ‘DOWN’
L’instrument est équipé en outre d’un
vibreur qui indique si une touche est enfoncée ou signale l’existence d’une situation
d’alarme dans certains cas.
UP
ON
DOWN
La touche ‘ON’ active l’éclairage de fond et
permet l’utilisation des touches ‘UP’ et
‘DOWN’.
La touche ‘ON’ est aussi utilisée pour accéder au mode de paramétrage.
L’éclairage de fond s’éteint automatiquement 30 secondes après la dernière commande
(ce laps de temps peut être modifié).
En usage normal, les touches ‘UP’ et ‘DOWN’ sont utilisées pour relever et larguer l’ancre.
48
060123.01
Tableau de commande / compteur métrique CCM
FRANÇAIS
4.2 Mise en marche
Mettre l’instrument en marche avec un interrupteur
externe (l’instrument ne comporte pas d’interrupteur
MARCHE/ARRÊT).
L’écran initial s’affiche pendant quelques secondes.
vetus
Chain Counter
L’écran principal apparaît ensuite.
1 Barre d’état - Indique l’état de l’instrument et un 1
Arret
7
message d’erreur éventuel.
0.0 mt/m
2 Vitesse de chaîne - Indique la vitesse de chaîne 2
3
pendant le relevage ou le largage de l’ancre.
4
5
3 Unité de vitesse de chaîne,
V=11.6
I=0.0
mt/m - mètre par minute
6
ft/m - pied par minute
4 Compteur métrique - Indique la longueur de la chaîne larguée.
5 Unité du compteur métrique,
m
- mètre
ft
- pied
6 Barre de contrôle - Indique la tension d’alimentation (V = .. V) et le courant (I = .. A).
7 Icônes - Indiquent le relevage ou le largage de l’ancre, ou affiche un message d’erreur.
0.0 m
Lorsque l’instrument est utilisé pour la première fois, les réglages d’usine sont les suivants:
Par défaut
Anglais
Français
Reset Meas.
Units
Rope-Chain
Up Alarm
Auto Down
Lite Time
Keyb. Beep
Language
Sensor Detect
Barb. Circ.
Overcurrent
Wire Diam.
Work Hours
Remise à zéro du compteur métrique
0,0 mètre
Unité
mètre/centimètre
NE PAS UTILISER
Off (arrêt)
Alarme ‘ en haut ‘
3,0 mètres
Largage automatique
Off (arrêt)
Éclairage de fond allumé
30 secondes
Vibreur
Yes (oui)
Langue
Italien
Détection de capteur
inconnu
NE PAS UTILISER
30 cm
Alarme pour courant
Off (arrêt)
Diamètre de câble
1,20 cm
Heures de fonctionnement guindeau
0 heure
Tableau de commande / compteur métrique CCM
Modifier, remettre à zéro
voir
voir
voir
voir
voir
voir
voir
voir
voir
voir
voir
voir
voir
5.1.1
5.1.2
5.1.3
5.2.1
5.2.2
5.3.3
5.3.4
5.4.1
5.5.1
5.5.2
5.6.1
5.6.2
5.7.4
060123.01
49
5 Menu de paramétrage
Menu
Maintenir la touche ‘ON’ enfoncée pendant 6 secondes.
Le menu s’affiche sur l’écran.
Utiliser les touches ‘UP’ et ‘DOWN’ pour parcourir le
menu.
M e sur e s
A . e t Fonc t i ons
A ffi c h. p e r sonne l s
L a ng ue
C a l i b r a g e c a p t e ur
Menu
L a ng ue
C a l i b r a g e c a p t e ur
C a l i b r a g e c our a nt
C ont r ol e s
Qui t t e r
• Après avoir sélectionné l’élément de menu souhaité, appuyer sur la touche ‘ON’ pour
confirmer.
• Utiliser les touches ‘UP’ et ‘DOWN’ pour parcourir les paramètres.
• Après avoir sélectionné le paramètre souhaité, appuyer sur la touche ‘ON’ pour confirmer.
• Utiliser les touches ‘UP’ et ‘DOWN’ pour augmenter/ diminuer la valeur, ou pour mettre
la fonction en ou hors circuit, selon le type de paramètre.
• Après avoir effectué la modification, appuyer sur la touche ‘ON’ pour confirmer.
• Utiliser la touche ‘DOWN’ pour sélectionner la fonction ‘Quitter’, et appuyer sur la
touche ‘ON’ pour revenir au menu. Répéter cette opération pour revenir à l’écran principal.
5.1 Élément de menu ‘Mesures’
5.1.1 Zerot. mesure
La fonction ‘Zerot. mesure’ permet de remettre le compteur métrique à zéro.
Mesures
Z e r ot . m e sur e
Uni t e m e sur e
B out c ha i ne
Qui t t e r
No
Metres
Off
Utilisation de la fonction en usage normal :
Appuyer simultanément sur les touches ‘ON’ et ‘UP’ pendant au moins 3 secondes. Le
compteur métrique est remis à zéro.
5.1.2 Unite mesure
La fonction ‘Unite mesure’ sert à choisir l’unité de mesure :
• Mètres : mètre/centimètre
• Feet : pied/pouces
5.1.3 Bout chaine
Ne pas utiliser ! Est réglé sur ‘Off’.
5.1.4 Quitter
La fonction ‘Quitter’ est utilisée pour revenir au menu.
50
060123.01
Tableau de commande / compteur métrique CCM
FRANÇAIS
5.2 Élément de menu ‘A. et Fonctions’
5.2.1 Alarme montee
La fonction ‘Alarme montee’ permet de régler une alarme
pour la longueur de chaîne relevée.
Plage: Off, 0 - 20 mètres, 0 - 20 pieds
A. et Fonctions
A l a r m e m ont e e
D e sc e nt e a ut .
I nfo fa b r i q ue
Qui t t e r
3.0
Off
No
5.2.2 Descente aut.
La fonction ‘Descente aut.’ permet de dérouler automatiquement une longueur de chaîne
définie au préalable. Plage: Off, 5 - 250 mètres, 5 - 250 pieds
Utilisation de la fonction en usage normal :
Appuyer simultanément sur les touches ‘ON’ et ‘DOWN’ pendant au moins 3 secondes. La
longueur définie de chaîne est déroulée.
5.2.3 Info fabrique
La fonction ‘Info fabrique’ est utilisée pour remettre tous les réglages sur les valeurs
réglées d’usine. Utiliser cette fonction uniquement si des erreurs se produisent pendant l’étalonnage.
5.2.4 Quitter
La fonction ‘Quitter’ est utilisée pour revenir au menu.
5.3 Élément de menu ‘Affich.personn’
5.3.1 Contraste
La fonction ‘Contraste’ sert à régler le contraste de
l’écran.
Affich.personn
C ont r a st e
Ec l a i r a g e
Te m p s B kL i g ht
B i p t ouc he s
Qui t t e r
30
Oui
5.3.2 Eclairage
La fonction ‘Eclairage’ permet de modifier l’intensité de l’éclairage de fond de l’écran.
5.3.3 Temps BKLight
La fonction ‘Temps BKLight’ est utilisée pour régler le laps de temps pendant lequel l’éclairage de fond reste allumé après la dernière commande.
Plage: 1 - 180 secondes
5.3.4 Bip touches
La fonction ‘Bip touches’ permet de faire entendre ou non un bip après l’utilisation d’une
touche.
5.3.5 Quitter
La fonction ‘Quitter’ est utilisée pour revenir au menu.
Tableau de commande / compteur métrique CCM
060123.01
51
5.4 Élément de menu ‘Langue’
Langue
5.4.1 Langue
La fonction ‘Langue’ sert à choisir la langue souhaitée.
Choix: Italien, Anglais, Français, Allemand, Espagnol
L a ng ue
Qui t t e r
Fr a nc a i s
5.4.2 Quitter
La fonction ‘Quitter’ est utilisée pour revenir au menu.
5.5 Élément de menu ‘Calibrage capte’
5.5.1 Detect. Capt.
La fonction ‘Detect. Capt.’ sert à reconnaître le capteur
installé.
Calibrage capte
Detect. Capt.
C i r c . B a r b ot i n
Qui t t e r
33.0
5.5.2 Circ. Barbotin
La fonction ‘Circ. Barbotin’ n’a pas de fonction en combinaison avec le guindeau
Napoleon de Vetus.
5.5.3 Detect. Capt., suite
Appuyer sur la touche ‘UP’ ou ‘DOWN’ pour faire tourner
brièvement le moteur de guindeau.
Le capteur installé sera reconnu.
A p p uy e r UP ou D OWN
Pour a c t i onn. m ot e ur
Le capteur installé est maintenant reconnu.
Type de capteur: Project.
Les touches ‘UP’ ou ‘DOWN’ n’ont maintenant temporairement plus de fonction. Appuyer maintenant sur la
touche ‘ON’.
A p p uy e r UP ou D OWN
Pour a c t i onn. m ot e ur
0 . 4 0 0 se c .
C a p t e ur Pr oj .
Detect. Capt.
Detect. Capt.
Calibrage capte
Le menu ‘Calibrage capte’ ‘habituel’ s’affiche de nouveau.
Sélectionner ‘Quitter’ et appuyer sur la touche ON’ pour
revenir au menu.
Detect. Capt.
C i r c . B a r b ot i n
Qui t t e r
33.0
Revenir à l’élément de menu ‘Calibrage capte’.
52
060123.01
Tableau de commande / compteur métrique CCM
FRANÇAIS
Pour fournir des informations correctes, l’instrument doit être réglé sur le barbotin utilisé.
Il convient à cette fin d’indiquer le facteur de réduction.
Le facteur de réduction (Proj. factor) doit maintenant être
réglé.
Consulter le tableau pour trouver la valeur correcte du
facteur de réduction.
Barbotin Napoleon 1
Barbotin Napoleon 2
Barbotin Napoleon 3
Chaîne
8 mm
10 mm DIN766, 3/8” BBB
10 mm ISO4565, 3/8” HT
Calibrage capte
Fa kt e ur Pr oj .
Qui t t e r
57.0
Facteur de réduction
57
59
5.6 Élément de menu ‘Calibrage courant’
Calibrage coura
5.6.1 Alarme courant
La fonction ‘Alarme courant’ permet de régler une alarme
pour une certaine intensité de courant (en A).
A l a r m e c our a nt
Diam. cable
Qui t t e r
Off
1.20
Le vibreur est activé lorsque la valeur de courant fixée est atteinte et la barre d’état affiche
‘Alarme courant’.
Plage: Off, 1 - 200 A
5.6.2 Diam. cable
La fonction ‘ Wire diameter ‘ sert à indiquer le diamètre des câbles principaux (y compris
l’isolant).
Plage: 0.01 - 0.02 - 0.03 - .. - 6.00 cm
Cette fonction est nécessaire pour un fonctionnement correct du capteur de courant.
5.6.3 Quitter
La fonction ‘Quitter’ est utilisée pour revenir au menu.
Tableau de commande / compteur métrique CCM
060123.01
53
5.7 Élément de menu ‘Controles’
Controles
5.7.1 Verif. capt.
La fonction ‘Verif. capt.’ sert à définir le statut du capteur.
Ve r i f. C a p t .
Ve r i f. L C D
Ve r si on S w.
H e ur e s fonc t .
Qui t t e r
1.06
0
Test Capteur
Contact ouvert
Test Capteur
Contact fermé
5.7.2 Verif. LCD
La fonction ‘Verif. LCD’ active tous les pixels dans l’écran.
5.7.3 Version Sw.
Affiche la version de logiciel installée.
5.7.4 Heures fonct.
Affiche le nombre d’heures de fonctionnement du guindeau.
5.7.5 Quitter
La fonction ‘Quitter’ est utilisée pour revenir au menu.
54
060123.01
Tableau de commande / compteur métrique CCM
FRANÇAIS
6 Étalonnage
Avant d’utiliser l’instrument, il convient de régler au moins les paramètres suivants:
•
•
•
•
choix de l’unité de mesure (voir 5.1.2)
détection du capteur et indication du facteur de réduction (voir 5.5.3)
alarme pour une intensité de courant spécifique (voir 5.6.1)
section de fil, pour un fonctionnement correct du capteur de courant (voir 5.6.2)
7 Utilisation
7.1 Généralités
Appuyer sur la touche ‘ON’ pour activer la commande et l’éclairage de fond de l’écran.
L’éclairage de fond de l’écran s’éteint 30 secondes (valeur par défaut) après la dernière
commande.
Appuyer sur la touche ‘UP’ pour relever l’ancre.
Montee
28.5 mt/m
8.3 m
V=11.6
Appuyer sur la touche ‘DOWN’ pour larguer l’ancre.
I=39.1
Descente
39.6 mt/m
9.7 m
V=11.6
I=39.1
Si les touches ‘UP’ ou ‘DOWN’ sont relâchées, l’action en question est arrêtée.
Lorsque l’éclairage de fond n’est pas activé, les touches ‘UP’ et ‘DOWN’ n’ont pas de fonction. Activer alors l’éclairage de fond en appuyant une fois sur la touche ‘ON’.
Tableau de commande / compteur métrique CCM
060123.01
55
7.2 Remise à zéro du compteur métrique
La remise à zéro du compteur métrique peut être effectuée de 2 manières.
Manière 1 :
Appuyer simultanément sur les touches ‘ON’ et ‘UP’ pendant au moins 3 secondes.
Manière 2 :
Dans le menu, la fonction ‘Zerot. mesure’ (voir 5.1.1)
7.3 Largage automatique de l’ancre
Pour pouvoir être utilisée, cette fonction doit être activée (voir 5.2.2).
Largage automatique de l’ancre :
Appuyer simultanément sur les touches ‘ON’ et ‘DOWN’ pendant au moins 3 secondes. La
longueur de chaîne fixée est larguée.
Pour des raisons de sécurité, il est toujours possible d’interrompre le largage automatique de l’ancre en appuyant sur l’une des touches.
56
060123.01
Tableau de commande / compteur métrique CCM
FRANÇAIS
8 Pannes
Panne
Pas de capt.
0.0 mt/m
0.0 m
V=11.6
I=0.0
Basse Tens.
0.0 mt/m
0.0 m
V=7.9
Solution
Bien que la touche ‘UP’ ou
‘DOWN’ soit enfoncée,
l’instrument ne reçoit pas
de signal du capteur pendant plus de 5 secondes.
Contrôler les raccordements du capteur.
Contrôler si le capteur est
défectueux.
Contrôler le fonctionnement du système électrique.
Contrôler le fonctionnement du guindeau.
La tension d’alimentation
de l’instrument est inférieure à 10 volts.
Contrôler la batterie.
I=0.0
Alarme cour.
0.0 mt/m
0.0 m
V=11.6
Cause
Le courant mesuré par le
capteur dépasse la valeur
d’alarme fixée.
I=300.0
Contrôler le fonctionnement du système électrique.
Contrôler le fonctionnement du système électrique.
Réinitialiser l’alarme en
appuyant sur l’une des
touches.
9 Spécifications techniques
Tension d’alimentation
Courant consommé
Indice de protection partie antérieure
Température d’utilisation
Écran
Longueur maximale de chaîne
Résolution
Dimensions du tableau
Poids
:
:
:
:
:
:
:
:
:
10 à 30 V tension continue
min. 5 mA, max. 40 mA
IP65*
0˚C / +70˚C (32˚F / 158˚F)
128 x 64 pixels
999 m / 999 ft
0,1
100 x 100 x 32 mm**
160 g
* sans la zone entourant la connexion électrique à l’arrière de l’instrument
** sans le capot de protection
Tableau de commande / compteur métrique CCM
060123.01
57
Índice
1 Introducción . . . . . . . . . . . . . . . . . . . . . . . . . . . . . . . . . . . . . . . . . . .59
2 Incluido en la entrega . . . . . . . . . . . . . . . . . . . . . . . . . . . . . . . . . . .59
3 Instalación . . . . . . . . . . . . . . . . . . . . . . . . . . . . . . . . . . . . . . . . . . . .59
3.1
3.2
3.3
3.4
3.5
General . . . . . . . . . . . . . . . . . . . . . . . . . . . . . . . . . . . . . . . . . . . . . . . . . . . .59
Instrumento . . . . . . . . . . . . . . . . . . . . . . . . . . . . . . . . . . . . . . . . . . . . . . . . .59
Instalación eléctrica . . . . . . . . . . . . . . . . . . . . . . . . . . . . . . . . . . . . . . . . . . .60
Sensor de corriente . . . . . . . . . . . . . . . . . . . . . . . . . . . . . . . . . . . . . . . . . . .61
Conexiones con el instrumento . . . . . . . . . . . . . . . . . . . . . . . . . . . . . . . . .61
4 Conexión . . . . . . . . . . . . . . . . . . . . . . . . . . . . . . . . . . . . . . . . . . . . . .62
4.1 General . . . . . . . . . . . . . . . . . . . . . . . . . . . . . . . . . . . . . . . . . . . . . . . . . . . .62
4.2 Conexión . . . . . . . . . . . . . . . . . . . . . . . . . . . . . . . . . . . . . . . . . . . . . . . . . . .63
5 Menú configuración . . . . . . . . . . . . . . . . . . . . . . . . . . . . . . . . . . . . .64
5.1
5.2
5.3
5.4
5.5
5.6
5.7
Elemento
Elemento
Elemento
Elemento
Elemento
Elemento
Elemento
de
de
de
de
de
de
de
menú
menú
menú
menú
menú
menú
menú
‘Medida’ . . . . . . . . . . . . . . . . . . . . . . . . . . . . . . . . . . . .64
‘Funciones’ . . . . . . . . . . . . . . . . . . . . . . . . . . . . . . . . .65
‘Ajuste Pers.’ . . . . . . . . . . . . . . . . . . . . . . . . . . . . . . . .65
‘Lenguaje’ . . . . . . . . . . . . . . . . . . . . . . . . . . . . . . . . . .66
‘Calibrac. Sens.’ . . . . . . . . . . . . . . . . . . . . . . . . . . . . .66
‘Calibrac. Cor.’ . . . . . . . . . . . . . . . . . . . . . . . . . . . . . . .67
‘Controles’ . . . . . . . . . . . . . . . . . . . . . . . . . . . . . . . . . .68
6 Calibración . . . . . . . . . . . . . . . . . . . . . . . . . . . . . . . . . . . . . . . . . . . .69
7 Uso . . . . . . . . . . . . . . . . . . . . . . . . . . . . . . . . . . . . . . . . . . . . . . . . . .69
7.1 General . . . . . . . . . . . . . . . . . . . . . . . . . . . . . . . . . . . . . . . . . . . . . . . . . . . .69
7.2 Restablecimiento del cuentametros . . . . . . . . . . . . . . . . . . . . . . . . . . . . . .70
7.3 Soltado automático del ancla . . . . . . . . . . . . . . . . . . . . . . . . . . . . . . . . . . .70
8 Fallos . . . . . . . . . . . . . . . . . . . . . . . . . . . . . . . . . . . . . . . . . . . . . . . .71
9 Especificaciones técnicas . . . . . . . . . . . . . . . . . . . . . . . . . . . . . . .71
Esquema de conexión . . . . . . . . . . . . . . . . . . . . . . . . . . . . . . . . . . .86
58
060123.01
Panel de mando / cuentametros CCM
ESPAÑOL
1 Introducción
El instrumento CCM de Vetus es un panel de mando/cuentametros combinado para usar
con el molinete de ancla eléctrico Napoleón de Vetus.
Precaución
Este instrumento sólo puede usarse con corriente continua.
2 Incluido en la entrega
-
Instrumento
Embalaje
Cubierta protectora
4 tornillos de fijación (13 mm de longitud)
Sensor de corriente
Conector de 10 polos, con cable
Manual de instrucciones
3 Instalación
3.1 General
El instrumento CCM de Vetus sólo se puede conectar con el molinete de ancla eléctrico
Napoleón de Vetus. El instrumento se debe conectar al sensor de la cadena ya instalado
en el molinete de ancla eléctrico Napoleón de Vetus.
El sensor de corriente debe instalarse en el cable de corriente principal del motor del molinete de ancla.
3.2 Instrumento
Precaución
Asegúrese de que la batería esté desconectada cuando conecte el instrumento.
• El instrumento se debe instalar de modo que la pantalla se pueda leer fácilmente. No
instale el instrumento expuesto a la luz solar directa.
• La parte posterior del instrumento se debe proteger de la humedad (agua).
Panel de mando / cuentametros CCM
060123.01
59
• El instrumento se puede incorporar a un panel de instrumentos o en una partición de cualquier grosor.
Tornillos que deben usarse:
tornillos autorroscantes ø 2,9
mm.
Longitud máxima de los tornillos: 10 mm + grosor del
panel.
El instrumento se puede incorporar a una partición de hasta
unos 8 mm de grosor mediante los tornillos suministrados.
• Use la plantilla para taladrar
los agujeros en el panel de instrumentos o partición. Use 4
tornillos para colocar el instrumento. Asegúrese de que el
embalaje se coloca adecuadamente entre el instrumento y el
panel o partición.
3.3 Instalación eléctrica
Vea en la página 86 el esquema de conexión.
Coloque un fusible rápido de 4A en el cable positivo (+). No use las baterías de arranque
para proporcionar alimentación al instrumento.
Coloque el instrumento a las siguientes distancias mínimas indicadas:
- A 30 cm de la brújula
- A 50 cm del equipo de radio
- A 2 metros del transmisor
- A 2 metros del radar
60
060123.01
Panel de mando / cuentametros CCM
ESPAÑOL
3.4 Sensor de corriente
Coloque el sensor de corriente en el cable positivo (+) del motor del molinete de ancla.
Use cinta o ty-raps® para ello. Coloque el sensor de corriente tal como se muestra.
Asegúrese de colocarlo en la dirección correcta.
Coloque el sensor de corriente al menos a 1 metro de un campo magnético.
No coloque el sensor de corriente cerca de otros cables eléctricos que lleven corriente elevada.
3.5 Conexiones con el instrumento
Núm.
1
2
3
4
5
6
7
8
9
10
Conector de 10 polos
Señal
Batería +
Batería Batería -
10
9
8
7
6
Sensor de corriente
Accionamiento ‘ARRIBA’
Accionamiento ‘ABAJO’
5
Sensor de cadena
Panel de mando / cuentametros CCM
1
4
3
2
060123.01
61
4 Conexión
4.1 General
El instrumento tiene 3 teclas:
Tecla ‘UP’
Tecla ‘ON’
Tecla ‘DOWN’
El instrumento también dispone de un zumbador que suena al pulsar una tecla o emite
una alarma en determinadas situaciones.
UP
ON
DOWN
La tecla ‘ON’ conecta la luz de fondo y permite usar las teclas ‘UP’ y ‘DOWN’.
La tecla ‘ON’ también sirve para introducir
el modo de ajustes.
La luz de fondo se apagará automáticamente 30 segundos después de introducir la última acción (este tiempo se puede modificar).
En uso normal, las teclas ‘UP’ y ‘DOWN’ se usan para levar o soltar el ancla.
62
060123.01
Panel de mando / cuentametros CCM
ESPAÑOL
4.2 Conexión
Conecte el instrumento mediante un interruptor
externo (el instrumento no dispone de interruptor de
ENCENDIDO/APAGADO).
La pantalla de inicio se mostrará durante unos
segundos.
La pantalla principal se mostrará después de la pantalla de inicio.
vetus
Chain Counter
1
7
3
Apagado
0.0 mt/m
1 Barra de estado - muestra el estado del instru- 2
mento y cualquier mensaje de error.
4
2 Velocidad de cadena - muestra la velocidad de
V=11.6
I=0.0
la cadena al levarla o soltarla.
6
3 Unidades de velocidad de la cadena,
mt/m - metros por minuto
ft/m - pies por minuto
4 Cuentametros - muestra la longitud de cadena soltada.
5 Unidades del cuentametros,
m
- metros
ft
- pies
6 Barra de control - muestra el voltaje (V = .. V) y la corriente (I = .. A).
7 Iconos - muestran si se leva o suelta el ancla o cualquier mensaje de error.
0.0 m
5
Cuando se usa el instrumento por primera vez se realizan los siguientes ajustes de fábrica:
Inglés
Español
Reset Meas.
Units
Rope-Chain
Up Alarm
Auto Down
Lite Time
Keyb. Beep
Language
Sensor Detect
Barb. Circ.
Overcurrent
Wire Diam.
Work Hours
Puesta a cero del cuentametros
Unidades
NO USAR
Alarma ‘levado’
Soltado automático
Tiempo iluminación
Sonido teclas
Idioma
Detección de sensor
NO SE USA
Sobrecorriente
Diámetro cables
Tiempo en funcionamiento
Panel de mando / cuentametros CCM
Predeterminado
0,0 metros
metros/centímetros
Off (desactivado)
3,0 metros
Off (desactivado)
30 segundos
Sí
Italiano
desconocido
30 cm
Off (desactivado)
1,20 cm
0 horas
Cambio,
restablecer
vea 5.1.1
vea 5.1.2
vea 5.1.3
vea 5.2.1
vea 5.2.2
vea 5.3.3
vea 5.3.4
vea 5.4.1
vea 5.5.1
vea 5.5.2
vea 5.6.1
vea 5.6.2
vea 5.7.4
060123.01
63
5 Menú configuración
Menu
Pulse la tecla ‘ON’ y manténgala pulsada 6 segundos. El
menú se mostrará en la pantalla.
Use las teclas ‘UP’ y ‘DOWN’ para desplazarse por el
menú.
Medida
Fonc i one s
A j ust e . Pe r s.
L a ng ua j e
C a l i b r a c . S e ns.
Menu
L e ng ua j e
C a l i b r a c . S e ns.
C a l i b r a c . C or.
C ont r ol e s
Salida
• Pulse la tecla ‘ON’ para confirmar cuando haya seleccionado el elemento de menú
deseado.
• Use las teclas ‘UP’ y ‘DOWN’ para desplazarse por los parámetros.
• Pulse la tecla ‘ON’ para confirmar cuando haya seleccionado el parámetro deseado.
• Use las teclas ‘UP’ y ‘DOWN’ para aumentar/disminuir el valor, o para cambiar una función activada/desactivada según el tipo de parámetro.
• Pulse la tecla ‘ON’ para confirmar cuando haya realizado el cambio.
• Use la tecla ‘DOWN’ para seleccionar ‘Salida’ y pulse ‘ON’ para volver al menú. Repítalo
para volver a la pantalla principal.
5.1 Elemento de menú ‘Medida’
5.1.1 Res. Medida
La función ‘Res. Medida’ se usa par restablecer el cuentametros a 0 (cero).
Uso de la función durante el funcionamiento normal:
Pulse las teclas ‘ON’ y ‘UP’ simultáneamente durante al
menos 3 segundos. Así se restablece el cuentametros.
Medida
R e s. M e d i d a
Unidad de med
C . C a d e na
Salida
No
M e t r os
Off
5.1.2 Unidad de medida
La función ‘Unidad de medida’ permite seleccionar la unidad de medida:
• Metres: metros/centímetros
• Feet: pies/pulgadas
5.1.3 C. Cadena
¡No lo use! Está ajustado en ‘Off’.
5.1.4 Salida
La función ‘Salida’ se usa para volver al menú.
64
060123.01
Panel de mando / cuentametros CCM
ESPAÑOL
5.2 Elemento de menú ‘Funciones’
5.2.1 Al. Subida
La función ‘Al. Subida’ se usa para ajustar una alarma
según la longitud de la cadena levada.
Rango: Off, 0 - 20 metres, 0 - 20 feet
Funciones
A l . S ub i d a
A ut o B a j a d a
D a t o d e Fa b
Salida
3.0
Off
No
5.2.2 Auto Bajada
La función ‘Auto Bajada’ se usa para soltar automáticamente una determinada longitud de
cadena. Rango: Off, 5 - 250 metres, 5 - 250 feet.
Uso de la función durante el funcionamiento normal:
Pulse las teclas ‘ON’ y ‘DOWN’ simultáneamente durante al menos 3 segundos. Se soltará la longitud de cadena predeterminada.
5.2.3 Dato de Fab.
La función ‘Dato de Fab.’ restablece todos los ajustes a los valores predeterminados de
fábrica. Use esta función sólo si ocurren fallos durante la calibración.
5.2.4 Salida
La función ‘Salida’ se usa para volver al menú.
5.3 Elemento de menú ‘Ajuste Pers.’
5.3.1 Contraste
La función ‘Contraste’ se usa para establecer el contraste
de la pantalla.
Ajuste Pers.
C ont r a st e
I l um i na c i on
Ti e m p o I l um .
A l . S onor a
Salida
30
Si
5.3.2 Iluminacion
La función ‘Iluminacion’ se usa para establecer la intensidad de la luz de fondo de la pantalla.
5.3.3 Tiempo Ilum.
La función ‘Tiempo Ilum.’ se usa para establecer el tiempo que la luz de fondo permanecerá encendida después de realizar el último accionamiento.
Rango: 1 - 180 seconds
5.3.4 Al. Sonora
La función ‘Al. Sonora’ se usa para seleccionar si se oirá o no un pitido después de pulsar una tecla.
5.3.5 Salida
La función ‘Salida’ se usa para volver al menú.
Panel de mando / cuentametros CCM
060123.01
65
5.4 Elemento de menú ‘Lenguaje’
Lenguaje
5.4.1 Lenguaje
La función ‘Lenguaje’ se usa para establecer el idioma de
la pantalla.
Rango: Italian, English, French, German, Spanish
L e ng ua j e
Salida
Esp a nol
5.4.2 Salida
La función ‘Salida’ se usa para volver al menú.
5.5 Elemento de menú ‘Calibrac. Sens.’
5.5.1 Encuentra Sen.
La función ‘Encuentra Sen.’ se usa para reconocer el sensor instalado.
Calibrac. Sens.
Enc ue nt r a S e n
Vue . M ol i ne t e
Salida
33.0
5.5.2 Vue Molinete.
La función ‘Vue Molinete.’ no tiene ninguna función en combinación con el molinete de
ancla Napoleón de Vetus.
5.5.3 Encuentra Sen., continued
Pulse las teclas ‘UP’ o ‘DOWN’ para hacer funcionar el
motor del molinete de ancla un breve espacio de tiempo.
Se reconocerá el sensor instalado.
El sensor instalado se ha reconocido.
Tipo de sensor: Proyecto.
Las teclas ‘UP’ y ‘DOWN’ temporalmente no tienen ningún función. Ahora pulse la tecla ‘ON’.
Se volverá a mostrar el menú ‘Calibrac. Sens.’ normal.
Seleccione ‘Salida’ y pulse ‘ON’ para volver al menú.
Encuentra Sen.
Pr e si on S ub i d a / B a j a d a
p a r a a c c i ona r e l m ot
Encuentra Sen.
Pr e si on S ub i d a / B a j a d a
p a r a a c c i ona r e l m ot
0 . 4 0 0 se c .
Pr oj . S e nsor
Calibrac. Sens.
Enc ue nt r a S e n
Vue . M ol i ne t e
Salida
33.0
Vuelta al elemento de menú ‘Calibrac. Sens.’.
66
060123.01
Panel de mando / cuentametros CCM
ESPAÑOL
Para obtener lecturas correctas el instrumento debe ajustarse según el piñón de cadena
usado. Se debe introducir el factor de reducción para ello.
Ahora debe ajustar el factor de reducción (Proj. factor).
Consulte la tabla para ver el factor de reducción correcto.
Piñón de cadena Napoleon 1
Piñón de cadena Napoleon 2
Piñón de cadena Napoleon 3
Cadena
8 mm
10 mm DIN766, 3/8” BBB
10 mm ISO4565, 3/8” HT
Calibrac. Sens.
Fa c t or Pr oj .
Salida
57.0
Factor de reducción
57
59
5.6 Elemento de menú ‘Calibrac. Cor.’
5.6.1 Al. Corriente
La función ‘Overcurrent’ se usa para establecer una alarma para un valor de corriente determinado (en A).
Calibrac. Cor.
A l . C or r i e nt e
Diam Cable
Salida
Off
1.20
El pitido sonará y la barra de estado mostrará
‘Overcurrent’ cuando se alcance el valor de corriente establecido.
Rango: Off, 1 - 200 A
5.6.2 Diam. Cable
La función ‘Wire diameter’ se usa para introducir el diámetro de los cables de alimentación
principales (incluido el aislante).
Rango: 0.01 - 0.02 - 0.03 - .. - 6,00 cm
Esta función es necesaria para que el sensor de corriente funcione correctamente.
5.6.3 Salida
La función ‘Salida’ se usa para volver al menú.
Panel de mando / cuentametros CCM
060123.01
67
5.7 Elemento de menú ‘Controles’
Controles
5.7.1 Test sensor
La función ‘Test sensor’ se usa para determinar el estado
del sensor.
Te st se nsor
Te st L C D
Ve r si on S w.
Ti e m p o Func .
Salida
1.06
0
Test Sensor
Contacto abierto
Test Sensor
Contacto cerrado
5.7.2 Test LCD
La función ‘Test LCD’ activa todos los píxeles de la pantalla.
5.7.3 Version Sw
Muestra la versión del software instalado.
5.7.4 Tiempo Func.
Muestra el número de horas que ha estado funcionando el molinete de ancla.
5.7.5 Salida
La función ‘Salida’ se usa para volver al menú.
68
060123.01
Panel de mando / cuentametros CCM
ESPAÑOL
6 Calibración
Como mínimo se deben ajustar los siguientes parámetros para poder usar el instrumento:
•
•
•
•
selección de unidades (vea 5.1.2)
detección del sensor y factor de reducción (vea 5.5.3)
alarma para un valor de corriente determinado (vea 5.6.1)
anchura de cable, para un correcto funcionamiento del sensor de corriente (vea 5.6.2)
7 Uso
7.1 General
Pulse la tecla ‘ON’ para activar los controles y encender la luz de fondo de la pantalla.
La luz de fondo de la pantalla se apagará 30 segundos (valor predeterminado) después
de introducir la última acción.
Pulse la tecla ‘UP’ para levar el ancla.
Chain Up
28.5 mt/m
8.3 m
V=11.6
Pulse la tecla ‘DOWN’ para soltar el ancla.
I=39.1
Chain Down
39.6 mt/m
9.7 m
V=11.6
I=39.1
La acción correspondiente se detendrá cuando suelte el botón ‘UP’ o ‘DOWN’.
Si no está encendida la luz de fondo, las teclas ‘UP’ y ‘DOWN’ no funcionan. La luz de
fondo debe activarse pulsando una vez la tecla ‘ON’.
Panel de mando / cuentametros CCM
060123.01
69
7.2 Restablecimiento del cuentametros (a 0)
Hay 2 formas de restablecer el cuentametros.
Forma 1:
Pulse las teclas ‘ON’ y ‘UP’ simultáneamente durante al menos 3 segundos.
Forma 2:
Use la función ‘Res. Medida’ del menú (vea 5.1.1).
7.3 Soltado automático del ancla
Esta función se debe activar para poder usarla (vea 5.2.2).
Soltado automático del ancla:
Pulse las teclas ‘ON’ y ‘DOWN’ simultáneamente durante al menos 3 segundos. Se soltará la longitud de cadena predeterminada.
Por razones de seguridad siempre es posible interrumpir el soltado automático del
ancla pulsando cualquier tecla.
70
060123.01
Panel de mando / cuentametros CCM
ESPAÑOL
8 Fallos
Fallo
Sin Sensor
0.0 mt/m
0.0 m
V=11.6
I=0.0
Tension Baja
0.0 mt/m
0.0 m
V=7.9
Solución
El instrumento no recibe
ninguna señal del sensor
durante más de 5 segundos aunque se pulsen las
teclas ‘UP’ o ‘DOWN’ .
Compruebe las conexiones del sensor.
Compruebe si es un fallo
del sensor.
Compruebe el circuito
eléctrico.
Compruebe el funcionamiento del molinete de
ancla.
El voltaje suministrado al
instrumento es menor de
10 voltios.
Compruebe la batería.
Compruebe
eléctrico.
el
circuito
La corriente medida por el
sensor de corriente excede el valor de alarma predeterminado.
Compruebe
eléctrico.
el
circuito
I=0.0
Al. Corriente
0.0 mt/m
0.0 m
V=11.6
Causa
I=300.0
Restablezca la alarma pulsando una de las teclas.
9 Especificaciones técnicas
Fuente de alimentación
Corriente tomada
Nivel de seguridad frontal
Temperatura de funcionamiento
Pantalla
Longitud máxima de cadena
Resolución
Dimensiones del panel
Peso
:
:
:
:
:
:
:
:
:
10 a 30 V de corriente continua
mín. 5 mA, máx. 40 mA
IP65*
0˚C / +70˚C (32˚F / 158˚F)
128 x 64 píxeles
999 m / 999 pies
0.1
100 x 100 x 32 mm**
160 g
* excluida el área alrededor de las conexiones de cables de la parte posterior del instrumento
** excluido la cubierta protectora
Panel de mando / cuentametros CCM
060123.01
71
Contenuto
1 Introduzione . . . . . . . . . . . . . . . . . . . . . . . . . . . . . . . . . . . . . . . . . . .73
2 Contenuto della fornitura . . . . . . . . . . . . . . . . . . . . . . . . . . . . . . . .73
3 Installazione . . . . . . . . . . . . . . . . . . . . . . . . . . . . . . . . . . . . . . . . . . .73
3.1
3.2
3.3
3.4
3.5
Generale . . . . . . . . . . . . . . . . . . . . . . . . . . . . . . . . . . . . . . . . . . . . . . . . . . .73
Strumento . . . . . . . . . . . . . . . . . . . . . . . . . . . . . . . . . . . . . . . . . . . . . . . . . .73
Impianto elettrico . . . . . . . . . . . . . . . . . . . . . . . . . . . . . . . . . . . . . . . . . . . . .74
Sensore di corrente . . . . . . . . . . . . . . . . . . . . . . . . . . . . . . . . . . . . . . . . . . .75
Collegamenti dello strumento . . . . . . . . . . . . . . . . . . . . . . . . . . . . . . . . . . .75
4 Accensione . . . . . . . . . . . . . . . . . . . . . . . . . . . . . . . . . . . . . . . . . . . .76
4.1 Generale . . . . . . . . . . . . . . . . . . . . . . . . . . . . . . . . . . . . . . . . . . . . . . . . . . .76
4.2 Accensione . . . . . . . . . . . . . . . . . . . . . . . . . . . . . . . . . . . . . . . . . . . . . . . . .77
5 Menu impostazioni . . . . . . . . . . . . . . . . . . . . . . . . . . . . . . . . . . . . . .78
5.1
5.2
5.3
5.4
5.5
5.6
5.7
Voce
Voce
Voce
Voce
Voce
Voce
Voce
di
di
di
di
di
di
di
menu ‘Misurazione’ . . . . . . . . . . . . . . . . . . . . . . . . . . . . . . . . . . . .78
menu ‘Allarmi e Funzioni’ . . . . . . . . . . . . . . . . . . . . . . . . . . . . . . . .79
menu ‘Impostazioni’ . . . . . . . . . . . . . . . . . . . . . . . . . . . . . . . . . . . .79
menu ‘Lingua’ . . . . . . . . . . . . . . . . . . . . . . . . . . . . . . . . . . . . . . . . .80
menu ‘Calibratura sensore’ . . . . . . . . . . . . . . . . . . . . . . . . . . . . . .80
menu ‘Calibratura corrente’ . . . . . . . . . . . . . . . . . . . . . . . . . . . . . .81
menu ‘Verifiche’ . . . . . . . . . . . . . . . . . . . . . . . . . . . . . . . . . . . . . . .82
6 Calibratura . . . . . . . . . . . . . . . . . . . . . . . . . . . . . . . . . . . . . . . . . . . .83
7 Uso . . . . . . . . . . . . . . . . . . . . . . . . . . . . . . . . . . . . . . . . . . . . . . . . . .83
7.1 Generale . . . . . . . . . . . . . . . . . . . . . . . . . . . . . . . . . . . . . . . . . . . . . . . . . . .83
7.2 Azzeramento del contametri . . . . . . . . . . . . . . . . . . . . . . . . . . . . . . . . . . . .84
7.3 Filatura automatica dell’ancora . . . . . . . . . . . . . . . . . . . . . . . . . . . . . . . . . .84
8 Guasti . . . . . . . . . . . . . . . . . . . . . . . . . . . . . . . . . . . . . . . . . . . . . . . .85
9 Dati tecnici . . . . . . . . . . . . . . . . . . . . . . . . . . . . . . . . . . . . . . . . . . . .85
Schema di collegamento . . . . . . . . . . . . . . . . . . . . . . . . . . . . . . . . .86
72
060123.01
Pannello di controllo / contametri CCM
ITALIANO
1 Introduzione
Lo strumento Vetus CCM è una combinazione pannello di controllo/contametri, appositamente progettato per l’argano elettrico Napoleon.
Importante
Lo strumento può essere collegato unicamente alla corrente continua.
2 Contenuto della fornitura
-
Strumento
Guarnizione
Copertura protettiva
4 viti di fissaggio (lunghezza 13 mm)
Sensore di corrente
Connettore a 10 poli
Manuale d’uso
3 Installazione
3.1 Generale
Lo strumento Vetus CCM è indicato unicamente per essere collegato all’argano elettrico
Vetus Napoleon. Lo strumento deve essere collegato al sensore di catena già installato sull’argano elettrico Vetus Napoleon.
Il sensore di corrente deve essere collegato al cavo di alimentazione principale del motore dell’argano.
3.2 Strumento
Importante
Assicurarsi sempre che la batteria sia scollegata quando si collega lo strumento.
• Lo strumento deve essere installato in maniera tale da potere leggere bene lo schermo.
Non installate lo strumento in una posizione esposta alla luce diretta del sole.
• Il lato posteriore dello strumento deve essere protetto dall’umidità (acqua).
Pannello di controllo / contametri CCM
060123.01
73
• Lo strumento può essere
incassato in un pannello strumenti in un tramezzo di qualsivoglia spessore.
Viti di fissaggio: Viti autofilettanti di ø 2,9 mm.
Lunghezza massima delle viti:
10 mm + spessore del pannello.
Con le viti in dotazione lo strumento può essere incassato in
un pannello di spessore fino a
8 mm.
• Con l’aiuto della sagoma in
dotazione, praticate i fori nel
panello degli strumenti o in un
tramezzo. Montate lo strumento con 4 viti. Assicurarsi di
avere correttamente applicato
la guarnizione tra lo strumento
ed il pannello degli strumenti o
il tramezzo.
3.3 Impianto elettrico
Per lo schema di collegamento si rimanda a pag. 86.
Installate un fusibile da 4 A (‘rapido’) nel cavo positivo (+). Non utilizzate le batterie di
accensione per alimentare lo strumento.
Montate lo strumento ad una distanza minima di:
- 30 cm da una bussola
- 50 cm da apparecchiature radio
- 2 metri da un trasmettitore
- 2 metri da un radar
74
060123.01
Pannello di controllo / contametri CCM
ITALIANO
3.4 Sensore di corrente
Montate il sensore di corrente sul cavo positivo (+) che va al motore dell’argano. A tal fine
usate del nastro isolante o del ty-raps®. Montate il sensore di corrente come indicato.
Rispettare la direzione indicata.
Montate il sensore di corrente ad una distanza minima di 1 metro da eventuali campi
magnetici. Non montate il sensore di corrente in prossimità di altri cavi di alimentazione ad
alta tensione.
3.5 Collegamenti dello strumento
N˚
1
2
3
4
5
6
7
8
9
10
connettore a 10 poli
Segnalatore
+ batteria
– batteria
– batteria
10
9
8
7
6
sensore di corrente
comando ‘UP’
comando ‘DOWN’
5
sensore di catena
Pannello di controllo / contametri CCM
1
4
3
2
060123.01
75
4 Accensione
4.1 Generale
Lo strumento è dotato di 3 pulsanti:
pulsante ‘UP’
pulsante ‘ON’
pulsante ‘DOWN’
Lo strumento è, inoltre dotato di un segnalatore acustico, che indica la pressione di
un pulsante o, in determinate condizioni, la
presenza di una situazione d’allarme.
UP
ON
DOWN
Il pulsante ‘ON’ accende la retroilluminazione dello schermo ed attiva il funzionamento
dei pulsanti ‘DOWN’ e ‘UP’.
Il pulsante ‘ON’ permette di accedere anche alla funzione di impostazione.
La retroilluminazione si spegne automaticamente 30 secondi dopo l’ultimo comando (tale
durata può essere modificata).
Durante il normale utilizzo, i pulsanti ‘UP’ e ‘DOWN’ vengono impiegati per recuperare o
filare l’ancora.
76
060123.01
Pannello di controllo / contametri CCM
ITALIANO
4.2 Accensione
Accendere lo strumento con l’interruttore esterno (lo
strumento non è dotato di interruttore
ACCESO/SPENTO integrato).
La schermata di avvio compare entro alcuni secondi.
Dopo la schermata di avvio compare la schermata
principale.
vetus
Chain Counter
1
7
Arresto
0.0 mt/m
1 Barra di stato – Indica lo stato dello strumento 2
3
ed un eventuale messaggio d’errore.
4
5
2 Velocità della catena – Indica la velocità della
V=11.6
I=0.0
catena mentre l’ancora viene recuperata o filata.
6
3 Unità di misura della velocità della catena,
mt/m - metri al minuto
ft/m - piedi al minuto
4 Contametri – Indica la lunghezza della catena filata.
5 Unità di misura del contametri,
m
- metri
ft
- piedi
6 Barra di controllo – Indica la tensione di alimentazione (V= .. V) e la corrente (I = .. A).
7 Icone – Indicano se l’ancora viene recuperata o filata, oppure indicano un errore.
0.0 m
Quando lo strumento viene usato per la prima volta, presenta le seguenti impostazioni di
fabbrica:
Inglese
Italiano
Reset Meas.
Units
Rope-Chain
Up Alarm
Auto Down
Lite Time
Keyb. Beep
Language
Sensor Detect
Barb. Circ.
Overcurrent
Wire Diam.
Work Hours
Azzeramento misurazione
Unità di misura
NON UTILIZZARE
Allarme ‘su’
Svolgimento automatico
Retroilluminazione accesa
Avvisatore acustico
Lingua usata sullo schermo
Rilecamento sensore
NON UTILIZZARE
Allarme di sovracorrente
Diametro del cavo
Ore di esercizio dell’argano
Pannello di controllo / contametri CCM
Standard
0,0 metri
metri/centimetri
Off (Spento)
3,0 metri
Off (Spento)
30 secondi
Yes (si)
Italiano
sconosciuto
30 cm
Off (Spento)
1,20 cm
0 ore
Modifica,
azzeramento
vedi 5.1.1
vedi 5.1.2
vedi 5.1.3
vedi 5.2.1
vedi 5.2.2
vedi 5.3.3
vedi 5.3.4
vedi 5.4.1
vedi 5.5.1
vedi 5.5.2
vedi 5.6.1
vedi 5.6.2
vedi 5.7.4
060123.01
77
5 Menu impostazioni
Menu
Premere il pulsante ‘ON’ e tenerlo premuto per 6 secondi. Il menu compare sullo schermo.
Utilizzare i pulsanti ‘UP’ e ‘DOWN’ per scorrere il menu.
M i sur a
A l a r m i e Funz i oni
I m p ost a z i oni
L i ng ua
C a l i b . S e nsor e
Menu
L i ng ua
C a l i b . S e nsor e
C a l i b r. C or r e nt e
Ve r i fi c he
Usc i t a
• Una volta selezionata la voce di menu desiderata, premere il pulsante ‘ON’ per confermare.
• Utilizzare i pulsanti ‘UP’ e ‘DOWN’ per scorrere i parametri.
• Una volta selezionato il parametro desiderato, premere il pulsante ‘ON’ per confermare.
• Utilizzate i pulsanti ‘UP’ e ‘DOWN’ per aumentare/abbassare il valore, o per attivare/disattivare la funzione, a seconda del tipo di parametro.
• Una volta effettuata la modifica desiderata, premere il pulsante ‘ON’ per confermare.
• Utilizzare il pulsante ‘DOWN’ per selezionare la funzione ‘Uscita’, e premere il pulsante
‘ON’ per ritornare al menu. Premere nuovamente ‘ON’ per tornare alla schermata principale.
5.1 Voce di menu ‘Misurazione’
5.1.1 Azzeramento misurazione
La funzione di ‘Azzeramento misurazione’ permette di
azzerare (0) il contametri.
Misura
A z z e r a M i sur a
Uni t a ' M i sur a
C i m a _ C a t e na
Usc i t a
No
Metri
Off
Uso della funzione durante il normale impiego:
Tenere premuti contemporaneamente i pulsanti ‘ON’ e ‘UP’ per almeno 3 secondi. Il contametri viene azzerato.
5.1.2 Unità di misura
La funzione ‘Unità’ permette di impostare l’unità di misura desiderata:
• Metri: metri/centimetri
• Piedi: piedi/pollici
5.1.3 Cima Catena
Non utilizzare! Impostato su ‘Off’.
5.1.4 Uscita
La unzione ‘Uscita’ permette di ritornare al menu.
78
060123.01
Pannello di controllo / contametri CCM
ITALIANO
5.2 Voce di menu ‘Allarmi e Funzioni’
5.2.1 Allarme Up
La funzione ‘Allarme Up’ permette di importare un allarme
per la lunghezza della catena avvolta.
Escursione: Off, 0 - 20 metri, 0 - 20 piedi
Allarmi e Funzi
Alm Salita
D i sc e sa A ut .
D a t i Fa b b r i c a
Usc i t a
3.0
Off
No
5.2.2 Discese automatico
La funzione di ‘Discese automatico’ permette di filare automaticamente una lunghezza di
catena preimpostata. Escursione: Off, 5 -250 metri, 5 -250 piedi
Uso della funzione durante il normale impiego:
Tenere premuti contemporaneamente i pulsanti ‘ON’ e ‘DOWN’ per almeno 3 secondi. La
lunghezza di catena preimpostata viene filata.
5.2.3 Dati Fabbrica
La funzione ‘Load Default’ (Dati Fabbrica) permette di ripristinare tulle le impostazioni di
fabbrica. Usate questa funzione unicamente in caso di errori durante la calibratura.
5.2.4 Uscita
La unzione ‘Uscita’ permette di ritornare al menu.
5.3 Voce di menu ‘Impostazioni’
5.3.1 Contrasto
La funzione ‘Contrasto’ permette di regolare il contrasto
dello schermo.
Impostazioni
C ont r a st o
L uc e L C D
Te m p o B kL i g ht
B e e p Ta st i
Usc i t a
30
Si
5.3.2 Luce LCD
La funzione ‘Luce LCD’ permette di regolare l’intensità della retroilluminazione dello schermo.
5.3.3 Tempo BKLight
La funzione ‘Tempo BKLight’ permette di impostare la durata di accensione della retroilluminazione dopo l’ultimo comando.
Escursione: 1 - 180 secondi
5.3.4 Beep Tasti
La funzione ‘Beep Tasti’ permette di attivare o disattivare la segnalazione acustica alla
pressione dei pulsanti.
5.3.5 Uscita
La unzione ‘Uscita’ permette di ritornare al menu.
Pannello di controllo / contametri CCM
060123.01
79
5.4 Voce di menu ‘Lingua’
Lingua
5.4.1 Lingua
La funzione ‘Lingua’ permette di impostare la lingua desiderata.
Lingue disponibili: Italiano, inglese, francese, tedesco,
spagnolo
L i ng ua
Usc i t a
I t a l i a no
5.4.2 Uscita
La unzione ‘Uscita’ permette di ritornare al menu.
5.5 Voce di menu ‘Calibratura sensore’
Calib. Sensore
5.5.1 Rilevamento sensore
La funzione di ‘Rilevamento sensore’ permette il rilevamento del sensore installato.
R i l e v. S e ns.
C . B a r b ot i n
Usc i t a
33.0
5.5.2 C. Barbotin
La funzione ‘C. Barbotin’ non ha alcuna funzione collegata all’argano elettrico Vetus
Napoleon.
Rilev. Sens.
5.5.3 Rilevamento sensore, segue
Premere il pulsante ‘UP’ o ‘DOWN’ per fare girare il motore dell’argano per un istante.
Il sensore installato verrà rilevato.
Pr e m i S a l i t a / D i sc e sa
p e r a z i ona r e m ot or e
Il sensore installato è ora rilevato.
Tipo di sensore: Proj.
I pulsanti ‘UP’ e ‘DOWN’ non hanno più alcuna funzione
in questa voce di menu. Premere il pulsante ‘ON’.
Pr e m i S a l i t a / D i sc e sa
p e r a z i ona r e m ot or e
0 . 4 0 0 se c .
S e nsor e Pr oj .
Sullo schermo ricompare la schermata ‘normale’ di
‘Calibratura sensore’. Selezionare ‘Uscita’ e premete ‘ON’
per ritornare al menu.
R i l e v. S e ns.
C . B a r b ot i n
Usc i t a
Rilev. Sens.
Calib. Sensore
33.0
Tornare alla voce di menu ‘Calibratura sensore’.
80
060123.01
Pannello di controllo / contametri CCM
ITALIANO
Per un’indicazione corretta, lo strumento deve essere calibrato per la puleggia utilizzata. A
tal fine è necessario impostare il fattore di riduzione.
Inserire ora il fattore di riduzione (Proj. Factor) adeguato.
Consultare la tabella per determinare il fattore di riduzione da inserire.
Napoleon puleggia 1
Napoleon puleggia 2
Napoleon puleggia 3
Catena
8 mm
10 mm DIN766, 3/8” BBB
10 mm ISO4565, 3/8” HT
Calib. Sensore
Fa t t or e Pr oj .
Usc i t a
57.0
Fattore di riduzione
57
59
5.6 Voce di menu ‘Calibratura Corrente’
5.6.1 Alm. Corrente
La funzione ‘Alm. Corrente’ permette di impostare un
allarme per una determinata intensità di corrente (in A).
Calib. Corrente
A l m . C or r e nt e
Diam. Filo
Usc i t a
Off
1.20
Quando l’intensità di corrente impostata viene raggiunta,
viene emesso un segnale acustico e la barra di stato indica lo stato di ‘Sovracorrente’.
Escursione: Off, 1 - 200 A
5.6.2 Diam. filo
La funzione ‘Diam. filo’ permette di impostare il diametro dei cavi di alimentazione (compresa la guaina isolante).
Escursione: 0.01 - 0.02 - 0.03 - .. -6.00 cm
Questa funzione è indispensabile ai fini del corretto funzionamento del sensore di corrente.
5.6.3 Uscita
La unzione ‘Uscita’ permette di ritornare al menu.
Pannello di controllo / contametri CCM
060123.01
81
5.7 Voce di menu ‘Verifiche’
Verifiche
5.7.1 Test sensore
La funzione di ‘Test sensore’ permette di determinare lo
stato del sensore.
Te st S e nsor e
Te st L C D.
Ve r si one S w.
Or e Funz .
Usc i t a
1.06
0
Stato Sensore
Contatto aperto
Stato Sensore
Contatto chiuso
5.7.2 Test LCD
La funzione ‘Test LCD’ permette di attivare tutti i pixel dello
schermo.
5.7.3 Versione del software
Indica la versione del software installato.
5.7.4 Ore Funz.
Indica il numero di ore di esercizio dell’argano.
5.7.5 Uscita
La unzione ‘Uscita’ permette di ritornare al menu.
82
060123.01
Pannello di controllo / contametri CCM
ITALIANO
6 Calibratura
Prima di potere utilizzare lo strumento, è necessario impostare i seguenti parametri:
•
•
•
•
unità di misura (vedi 5.1.2)
rilevamento del sensore e inserimento del fattore di riduzione (vedi 5.5.3)
intensità di corrente alla quale si attiva l’allarme (vedi 5.6.1)
sezione dei fili, per un corretto funzionamento del sensore di corrente (vedi 5.6.2)
7 Uso
7.1 Generale
Premere il pulsante ‘ON’ per attivare i comandi e per illuminare lo schermo.
La retroilluminazione dello schermo si spegne automaticamente 30 secondi dopo l’ultimo
comando (durata standard).
Premere il pulsante ‘UP’ per recuperare l’ancora.
Salita
28.5 mt/m
8.3 m
V=11.6
Premere il pulsante ‘DOWN’ per filare l’ancora.
I=39.1
Discesa
39.6 mt/m
9.7 m
V=11.6
I=39.1
Al rilascio dei pulsanti ‘UP’ o ‘DOWN’ la relativa funzione viene interrotta.
Quando l’illuminazione dello schermo è spenta, i pulsanti ‘UP’ e ‘DOWN’ non hanno alcuna funzione. Attivare la retroilluminazione dello schermo premendo una volta il pulsante
‘ON’.
Pannello di controllo / contametri CCM
060123.01
83
7.2 Azzeramento (0) del contametri
Esistono diversi metodi per azzerare il contametri.
Modo 1:
Tenere premuti contemporaneamente i pulsanti ‘ON’ e ‘UP’ per almeno 3 secondi.
Modo 2:
Dal menu, mediante la funzione ‘azzeramento misurazione’ (vedi 5.1.1).
7.3 Filatura automatica dell’ancora
Per potere utilizzare questa funzione è necessario che essa sia attivata (vedi 5.2.2).
Filatura automatica dell’ancora:
Tenere premuti contemporaneamente i pulsanti ‘ON’ e ‘DOWN’ per almeno 3 secondi. La
lunghezza di catena preimpostata viene filata.
Per motivi di sicurezza è sempre possibile interrompere la filatura automatica dell’ancora, premendo uno qualunque dei pulsanti.
84
060123.01
Pannello di controllo / contametri CCM
ITALIANO
8 Guasti
Guasto
Manca Sens.
0.0 mt/m
0.0 m
V=11.6
I=0.0
Tens. Bassa
0.0 mt/m
0.0 m
V=7.9
Rimedio
Nonostante di prema il
pulsante ‘UP’ o ‘DOWN’,
lo strumento non riceve il
segnale dal sensore entro
5 secondi.
Controllare i collegamenti
del sensore.
Verificare che il sensore
non sia guasto.
Verificare il corretto funzionamento del sistema elettrico.
Verificare il corretto funzionamento dell’argano.
La tensione di alimentazione dello strumento è
minore di 10 Volt.
Controllare la batteria.
La corrente misurata dal
sensore è superiore al
valore di attivazione dell’allarme impostato.
Verificare il corretto funzionamento del sistema elettrico.
I=0.0
Alm. Corrente
0.0 mt/m
0.0 m
V=11.6
Causa
Verificare il corretto funzionamento del sistema elettrico.
Resettare l’allarme premendo uno dei pulsanti.
I=300.0
9 Dati tecnici
Tensione di alimentazione
Assorbimento
Protezione anteriore
Temperatura di esercizio
Schermo
Lunghezza massima della catena
Risoluzione
Dimensioni pannello
Peso
:
:
:
:
:
:
:
:
:
da 10 a 30 V corrente continua
min. 5 mA, max. 40 mA
IP65*
0°C / +70°C (32°F / 158°F)
128 x 64 pixels
999 m / 999 ft
0,1
100 x 100 x 32 mm**
160 g
* esclusa la parte che circonda l’allacciamento del cavo, sul retro dello strumento
** esclusa la copertura protettiva
Pannello di controllo / contametri CCM
060123.01
85
Aansluitschema
Schéma électrique
Wiring diagram
Esquema de conexión
Schaltplan
Schema di collegamento
8
1 (Up)
2 (+)
3 (Down)
4 (-)
7
5 (Sn)
6
5
Green (Sn)
White (- Batt)
Brown (+ Batt)
CCM
3
2
+
86
060123.01
1
–
4
Control panel / chain counter CCM
1
2
3
4
5
Accu
Hoofdzekering
Hoofdschakelaar
Zekering 4 A
Bedieningspaneel/ kettingteller
6 Stroomsensor
7 Ankerliermotor Napoleon
8 Schakelaar noodbediening (moet geschikt voor
de maximale stroom!)
1
2
3
4
5
6
7
Battery
Main fuse
Main switch
Fuse 4 A
Control panel/ chain counter
Current sensor
Anchor windlass motor
Napoleon
8 Emergency operating
switch (must be suitable
for the maximum current!)
1
2
3
4
5
6
7
Kleurcode bedrading
Napoleon ankerlier:
1 Grijs
(ophalen)
2 Bruin
(+)
3 Zwart
(uitvieren)
4 Geel/ groen (–)
5 Blauw
(sensor)
Wiring colour code
Napoleon anchor windlass:
1 Grey
(up)
2 Brown
(+)
3 Black
(down)
4 Yellow/ green (–)
5 Blue
(sensor)
Farbkode für die
Bedrahtung:
1 Grau
(einholen)
2 Braun
(+)
3 Schwarz
(fieren)
4 Gelb/ grün (-)
5 Blau
(Sensor)
Kleurcode bedrading
stroomsensor:
• Bruin
(+)
• Wit
(–)
• Groen
(sensor)
Wiring colour code
current sensor:
• Brown
(+)
• White
(–)
• Green
(sensor)
Farbkode für die
Bedrahtung Stromsensor:
• Braun
(+)
• Weiß
(–)
• Grün
(Sensor)
1
2
3
4
5
Batterie
Fusible principal
Interrupteur principal
Fusible 4 A
Tableau de commande /
compteur métrique
6 Capteur de courant
7 Moteur du guindeau
Napoleon
8 Interrupteur de la commande d’urgence (doit
être prévu pour le courant
max.!)
1
2
3
4
5
Batería
Fusible principal
Interruptor principal
Fusible 4 A
Panel de mando /
cuentametros
6 Sensor de corriente
7 Motor del torno de ancla
Napoleon
8 Interruptor de funcionamiento de emergencia
(¡debe ser compatible con
la
corriente máx.!).
1
2
3
4
5
Code couleur
des câbles:
1 Gris
2 Brun
3 Noir
4 Jaune/ vert
5 Bleu
Código de color de
los cables:
1 Gris
(levar)
2 Marrón
(+)
3 Negro
(soltar)
4 Amarillo/ verde (-)
5 Azul
(sensor)
Codice colori cavi:
1 Grigio (recupero)
2 Marrone (+)
3 Nero (filatura)
4 Giallo/ verde (-)
5 Blu (sensore)
(relever)
(+)
(larguer)
(-)
(capteur)
Code couleur du câblage du Código de color de
los cables del sensor:
capteur de courant:
• Marrón
(+)
• Brun
(+)
• Blanco
(–)
• Blanc
(–)
• Verde
(sensor)
• Vert
(capteur)
Control panel / chain counter CCM
Batterie
Hauptsicherung
Hauptschalter
Sicherung 4 A
Kontrollpaneel/ Meterzähler
Stromsensor
Ankerwinden-motor
Napoleon
8 Schalter Notbedienung
(muss für den maximalen
Strom geeignet sein!)
Batteria
Fusibile principale
Interruttore principale
Fusibile 4 A
Pannello di controllo /
contametri
6 Sensore di corrente
7 Motore del verricello da
ancora Napoleon
8 Interruttore di comando
d’emergenza (deve essere
indicato per la corrente
massima!)
Codice colore cavi del sensore di corrente:
• Marrone
(+)
• Bianco
(–)
• Verde
(sensore)
060123.01
87
Dit produkt voldoet aan de vereisten van EG-richtlijn 89/336/EEC (EMC).
This product complies to the requirements of EC Directive 89/336/EEC
(EMC).
Dieses Produkt genügt den Anforderungen der EG-Richtlinie 89/336/EEC
(EMC).
Ce produit est conforme aux normes de la directive européenne
89/336/CEE (EMC).
Este producto cumple las normas de la directiva comunitaria
89/336/EEC (EMC).
Questo prodotto è in conformità le disposizione della direttiva
89/336/CEE (EMC).
FOKKERSTRAAT 571 - 3125 BD SCHIEDAM - HOLLAND - TEL.: +31 10 4377700 - TELEX: 23470
TELEFAX: +31 10 4372673 - 4621286 - E-MAIL: [email protected] - INTERNET: http://www.vetus.com
Printed in the Netherlands
060123.01 01-06