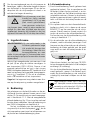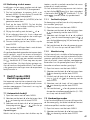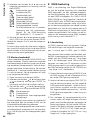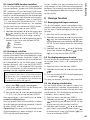
1
LED Moving Head WASH-50LED Bestell-Nr. • Order no. 38.7480 BEDIENUNGSANLEITUNG INSTRUCTION MANUAL MODE D’EMPLOI ISTRUZIONI PER L’USO GEBRUIKSAANWIJZING MANUAL DE INSTRUCCIONES INSTRUKCJA OBSŁUGI SIKKERHEDSOPLYSNINGER SÄKERHETSFÖRESKRIFTER TURVALLISUUDESTA ELECTRONICS FOR SPECIALISTS ELECTRONICS FOR SPECIALISTS ELECTRONICS FOR SPECIALISTS ELECTRONICS FOR SPECIALISTS Deutsch . . . . . . . . . . . Seite 4 English . . . . . . . . . . . Page 14 Français . . . . . . . . . . . Page 24 Italiano . . . . . . . . . . . Pagina 34 Nederlands . . . . . . . . Pagina 44 Español . . . . . . . . . . . Página 54 Polski . . . . . . . . . . . . . Strona 64 Dansk . . . . . . . . . . . . Sida 74 Svenska . . . . . . . . . . . Sidan 75 Suomi . . . . . . . . . . . . Sivulta 76 ELECTRONICS FOR SPECIALISTS ELECTRONICS FOR SPECIALISTS ELECTRONICS FOR SPECIALISTS ELECTRONICS FOR SPECIALISTS 2 REMOTE ➀ DMX SLAVE PAN TILT FADE/ ZOOM SOUND GOBO UP SHOW STROBE DOWN 1 2 3 4 5 W 6 7 8 9 R G 2 3 2 3 2 DMX IN 3 1 DMX OUT B ➂ 8 3 1 1 ➁ ➃ ENTER POWER MENU 4 5 6 9 7 Deutsch Inhalt 1 Übersicht der Anschlüsse und Bedienelemente . . . . . . . . . . . . 4 1.1 Infrarot-Fernbedienung . . . . . . . . . . . 5 2 Hinweise für den sicheren Gebrauch . . . 5 3 Einsatzmöglichkeiten . . . . . . . . . . 5 4 Montage . . . . . . . . . . . . . . . . 5 5 Inbetriebnahme . . . . . . . . . . . . . 6 6 Bedienung . . . . . . . . . . . . . . . 6 6.1 Fernbedienung . . . . . . . . . . . . . . 6 6.2 Bedienung über das Menü . . . . . . . . . 7 7 Betrieb ohne DMX‑Steuergerät . . . . . 7 Diese Anleitung richtet sich an Benutzer mit Grundkenntnissen in der DMX-Steuerung. Bitte lesen Sie die Anleitung vor dem Betrieb gründlich durch und heben Sie sie für ein späteres Nachlesen auf. Auf der ausklappbaren Seite 3 finden Sie alle beschriebenen Bedienelemente und Anschlüsse. 1 Übersicht der Anschlüsse und Bedienelemente 1 Infrarotsensor für die Fernbedienung 2 Bedientasten 7.1.1 Geschwindigkeit ändern . . . . . . . . . 7 MENU Aufrufen des Menüs, Wahl eines Menüpunkts oder Verlassen eines Untermenüs 7.1.2 Musiksteuerung . . . . . . . . . . . . 7 , 7.1 Automatikbetrieb . . . . . . . . . . . . . 7 7.2 Manueller Betrieb . . . . . . . . . . . . . 8 7.3 Master/Slave-Betrieb . . . . . . . . . . . . 8 8 DMX-Steuerung . . . . . . . . . . . . . 8 8.1 Anschluss . . . . . . . . . . . . . . . . 8 8.2 Anzahl der DMX-Kanäle einstellen . . . . . . 9 8.3 Startadresse einstellen . . . . . . . . . . . 9 9 Weitere Funktionen . . . . . . . . . . . 9 9.1 Bewegungsrichtungen umkehren . . . . . . 9 9.2 Anzeige drehen . . . . . . . . . . . . . 10 9.3 Anzeige ausschalten . . . . . . . . . . . 10 9.4 Farbbalance . . . . . . . . . . . . . . . 10 9.5 Verhalten ohne DMX-Signal . . . . . . . . 10 Wahl eines Menüpunkts oder Ändern einer Einstellung ENTER Untermenü aufrufen, Speichern einer geänderten Einstellung 3 Display 4 DMX-Eingang (XLR) zum Anschluss eines DMX-Lichtsteuergeräts oder zum Anschluss an den DMX-Ausgang eines anderen DMX-gesteuerten Geräts 5 DMX-Ausgang (XLR) zum Anschluss an den DMX-Eingang eines weiteren DMX- gesteuerten Geräts 6 Netzbuchse zum Anschluss an eine Steckdose (230 V~/50 Hz) über das beiliegende Netzkabel 9.7 Funktionstest . . . . . . . . . . . . . . 10 7 Halterung für die Netzsicherung Eine geschmolzene Sicherung nur durch eine gleichen Typs ersetzen. 9.8 Systeminformationen anzeigen . . . . . . . 10 8 Montagebügel 10 Reinigung des Geräts . . . . . . . . . . 11 9 Öffnungen zur Befestigung des Montagebügels (8) 9.6 Referenzfahrt durchführen . . . . . . . . . 10 11 Technische Daten . . . . . . . . . . . . 11 11.1 DMX-Funktionen . . . . . . . . . . . . . 11 11.1.1 1-Kanal-Betrieb . . . . . . . . . . . . 11 11.1.2 9-Kanal-Betrieb . . . . . . . . . . . . 12 11.1.3 16-Kanal-Betrieb . . . . . . . . . . . . 12 11.2 Menüstruktur . . . . . . . . . . . . . . 13 4 Kopfbewegter Scheinwerfer (Abb. 2) Taste DMX SLAVE PAN, TILT FADE / ZOOM SOUND GOBO SHOW STROBE R, G, B, W 1, 2, 3, 4, 6 Funktion alle LEDs aus-/einschalten DMX-Startadresse eingeben: Tasten 1 – 9, SHOW = 0 Tasten unmittelbar nacheinander drücken Slave-Betrieb ein-/ausschalten manuelles Schwenken und Neigen des Kopfes Automatikbetrieb mit Farbüberblendungen Musiksteuerung ein-/ausschalten für SHOW, FADE / ZOOM ohne Funktion Automatikbetrieb 1 – 4, wählen mit UP/ DOWN Stroboskop / Strob.-Salven / Dunkel Taste gedrückt halten Rot, Grün, Blau, Weiß Mischfarben: RGBW-Weiß, Gelb, Cyan, Magenta, Violett Wichtig: Die Funktion der Taste DMX ist nur verfügbar, wenn ein DMX-Signal empfangen wird. Alle anderen Funktionen der Fernbedienung sind dagegen nur verfügbar, wenn kein DMX-Signal empfangen wird. 2 Hinweise für den sicheren Gebrauch Das Gerät entspricht allen relevanten Richtlinien der EU und ist deshalb mit gekennzeichnet. WARNUNG Das Gerät wird mit lebensgefährlicher Netzspannung versorgt. Nehmen Sie deshalb niemals selbst Eingriffe am Gerät vor und stecken Sie nichts durch die Lüftungsöffnungen! Es besteht die Gefahr eines elektrischen Schlages. • Verwenden Sie das Gerät nur im Innenbereich und schützen Sie es vor Tropf- und Spritzwasser, hoher Luftfeuchtigkeit und Hitze (zulässiger Einsatztemperaturbereich 0 – 40 °C). • Stellen Sie keine mit Flüssigkeit gefüllten Gefäße, z. B. Trinkgläser, auf das Gerät. • Nehmen Sie das Gerät nicht in Betrieb oder ziehen Sie sofort den Netzstecker aus der Steckdose, 1.wenn sichtbare Schäden am Gerät oder am Netzkabel vorhanden sind, 2.wenn nach einem Sturz oder Ähnlichem der Verdacht auf einen Defekt besteht, 3.wenn Funktionsstörungen auftreten. Geben Sie das Gerät in jedem Fall zur Reparatur in eine Fachwerkstatt. • Ziehen Sie den Netzstecker nie am Kabel aus Deutsch 1.1 Infrarot-Fernbedienung der Steckdose, fassen Sie immer am Stecker an. • Wird das Gerät zweckentfremdet, nicht sicher montiert, nicht richtig angeschlossen, falsch bedient oder nicht fachgerecht repariert, kann keine Haftung für daraus resultierende Sachoder Personenschäden und keine Garantie für das Gerät übernommen werden. Soll das Gerät endgültig aus dem Betrieb genommen werden, übergeben Sie es zur umweltgerechten Entsorgung einem ört lichen Recyclingbetrieb. 3 Einsatzmöglichkeiten Der Moving-Head-Scheinwerfer WASH-50LED dient zur Effektbeleuchtung, z. B. auf Bühnen und in Diskotheken. Als Lichtquelle sind 4 besonders helle 15-W-RGBW-LEDs eingesetzt. Mit den LEDs kann farbiges Licht in den drei Grundfarben (Rot, Grün und Blau) und Weiß abgestrahlt werden sowie deren Mischfarben. Außerdem sind Farbüberblendungen und Stroboskop-Effekte möglich. Der Scheinwerfer ist für die Steuerung über ein DMX-Lichtsteuergerät ausgelegt (wahlweise 1, 9 oder 16 DMX-Steuerkanäle). Er kann aber auch ohne Steuergerät allein oder im Verbund mehrerer WASH-50LED (Master/ Slave-Modus) betrieben werden. Dabei kann der Scheinwerfer bequem über die mitgelieferte Infrarotfernbedienung bedient werden. Zusätzlich ermöglicht das integrierte Mikrofon musiksynchrone Effekte. 4 Montage Platzieren Sie das Gerät immer so, dass im Betrieb eine ausreichende Luftzirkulation gewährleistet ist. Die Lüftungsöffnungen am Gehäuse dürfen auf keinen Fall abgedeckt werden. Der WASH-50LED kann auf einer festen, ebenen Fläche aufgestellt werden. Das Gerät lässt sich aber auch kopfüber z. B. an einer Traverse montieren. Zu diesem Zweck den Montagebügel (8) mit einer stabilen Montageschraube 5 Deutsch oder einer Lichtstrahler-Halterung (C-Haken) an die Traverse montieren. Zur Befestigung des Montagebügels am Scheinwerfer die beiden Flügelschrauben des Bügels in die Öffnungen (9) der Bodenplatte des Scheinwerfers stecken und im Uhrzeigersinn bis zum Anschlag drehen. WARNUNG Der Scheinwerfer muss fachgerecht und sicher montiert werden. Wird er an einer Stelle installiert, unter der sich Personen aufhalten können, muss er zusätzlich gesichert werden (z. B. durch ein Fangseil am Montagebügel; das Fangseil so befestigen, dass der Fallweg des Geräts nicht mehr als 20 cm betragen kann). 5 Inbetriebnahme WARNUNG Blicken Sie nicht für längere Zeit direkt in die Lichtquelle, das kann zu Augenschäden führen. Beachten Sie, dass sehr schnelle Lichtwechsel bei fotosensiblen Menschen und Epileptikern epileptische Anfälle auslösen können! Das beiliegende Netzkabel zuerst in die Netzbuchse (6) stecken und dann in eine Steckdose (230 V~ / 50 Hz). Danach ist das Gerät betriebsbereit und lässt sich über ein DMX-Lichtsteuergerät bedienen (☞ Kap. 8) oder führt das eingestellte Show-Programm aus (☞ Kap. 7). Zum Ausschalten den Netzstecker aus der Steckdose ziehen. Vorsicht: Das Gerät darf nicht über einen Dimmer an die Netzspannung angeschlossen werden! 6 Bedienung Das Auswählen des Betriebsmodus und der verschiedenen Funktionen erfolgt über ein Menü im Display (3). Die Menüstruktur ist in Kapitel 11.2 dargestellt. Mit der beiliegenden Fernbedienung (Abb. 2) lassen sich aber auch viele Funktionen direkt anwählen. Zur Bedienung über ein DMX-Lichtsteuergerät siehe Kapitel 8. Nach dem Einschalten der Stromversorgung zeigt das Display zunächst und der Scheinwerferkopf führt zum Positionsabgleich eine Referenzfahrt durch. 6 6.1 Fernbedienung 1) Die Fernbedienung wird mit einer eingesetzten Batterie geliefert. Damit sich die Batterie während der Lagerung nicht entlädt, befindet sich eine Isolierfolie zwischen der Batterie und den Batteriekontakten. Vor dem ersten Betrieb die Folie aus dem Batteriehalter auf der Rückseite der Fernbedienung herausziehen. 2) Beim Betätigen einer Taste die Infrarot-Fernbedienung auf den Sensor REMOTE (1) an der Vorderseite des Scheinwerfers richten. Dabei muss Sichtverbindung zwischen der Fernbedienung und dem Gerät bestehen. Die Funktionen der Fernbedienung sind in Kapitel 1.1 aufgeführt. 3) Lässt die Reichweite der Fernbedienung nach, die Batterie auswechseln. Dazu auf der Rückseite der Fernbedienung den kleinen Riegel mit der Kerbe nach rechts drücken und gleichzeitig den Batteriehalter herausziehen: 1. 2. Eine Batterie vom Typ CR 2025 verwenden. Beim Einsetzen der Batterie in den Batteriehalter auf die Polung achten (⊕ nach oben). Bei längerem Nichtgebrauch die Batterie herausnehmen, damit die Fernbedienung bei einem eventuellen Auslaufen der Batterie nicht beschädigt wird. Verbrauchte Batterien dürfen nicht in den Hausmüll geworfen werden. Geben Sie sie zur umweltgerechten Entsorgung nur in den Sondermüll (z. B. Sammel behälter bei Ihrem Fachhändler). Hinweise: Einstellungen über das Menü erfolgen mit den Tasten MENU, , und ENTER (2). Zwischen den Tastendrücken nicht zu lange warten, da nach einigen Sekunden das Menü automatisch verlassen wird. 1) Zum Aufrufen des Einstellmenüs die Taste MENU drücken. Das Display (3) zeigt den Menüpunkt . 2) Mit der Taste (oder MENU) oder den gewünschten Menüpunkt anwählen. 3) Die Taste ENTER drücken. Das Display zeigt jetzt die aktuelle Einstellung des gewählten Menüpunkts an. 4) Mit der Taste oder die Einstellung ändern. 5) Wenn Untermenüpunkte vorhanden sind, können diese mit der Taste ENTER aufgerufen und deren Einstellungen mit der Taste oder geändert werden. 6) Zum Speichern einer Einstellung die Taste ENTER drücken. 7) Für weitere Einstellungen mit der Taste MENU auf eine höhere Menüebene zurückspringen. Wird einige Sekunden lang keine Taste gedrückt, wird das Menü automatisch verlassen. Abhängig von einer Menüeinstellung erlischt das Display nach einigen weiteren Sekunden (☞ Kap. 9.3). Beim nächsten Tastendruck leuchtet es wieder. Anhand der Kapitel 7 bis 9 die gewünschten Einstellungen für den jeweiligen Betriebsmodus vornehmen. 7 Betrieb ohne DMX‑Steuergerät Das Gerät verfügt über vier automatisch ablaufende Show-Programme, die auch musikgesteuert ablaufen können. Zusätzlich gibt es einen manuellen Betrieb. 7.1 Automatikbetrieb 1) Mit der Taste MENU das Menü aufrufen. 2) Mit der Taste oder den Menüpunkt wählen und mit der Taste ENTER bestätigen. 3) Mit der Taste oder das gewünschte Show-Programm ( … ) wählen und mit der Taste ENTER speichern. Deutsch 6.2 Bedienung über das Menü Wenn das automatische Programm nicht startet und das Display anzeigt, den Menüpunkt überprüfen (☞ Kap. 7.3). Es muss die Option (Master) gewählt sein. 7.1.1 Geschwindigkeit ändern Die Bewegungsgeschwindigkeit des Scheinwerferkopfs kann geändert werden. 1) Mit der Taste MENU das Menü aufrufen. 2) Mit der Taste oder den Menüpunkt wählen und mit der Taste ENTER bestätigen. 3) Mit der Taste oder die Geschwindigkeit für die Schwenkbewegung (pan) oder für die Neigbewegung (tilt) wählen und mit der Taste ENTER bestätigen. 4) Mit der Taste oder den gewünschten Wert (0 – 9) einstellen und mit der Taste ENTER speichern. 7.1.2 Musiksteuerung Über das Menü kann eingestellt werden, ob die Bewegungen und Farbwechsel der Automatikprogramme schallabhängig, d. h. synchron zur Musik ablaufen sollen. Zudem lässt sich die Empfindlichkeit für das interne Mikrofon ändern. 1) Mit der Taste MENU das Menü aufrufen. 2) Mit der Taste oder den Menüpunkt wählen und mit der Taste ENTER bestätigen. 3) Mit der Taste oder die Musiksteuerung ) und mit der ein- ( ) oder ausschalten ( Taste ENTER bestätigen. 4) Mit der Taste den Menüpunkt wählen und mit der Taste ENTER bestätigen. 5) Mit der Taste oder den gewünschten Wert für die Mikrofonempfindlichkeit einstellen (0 – 100) und mit der Taste ENTER speichern. 7 Deutsch 7.2 Manueller Betrieb Im manuellen Betrieb können die Kopfposition, die Farbmischung, die Gesamthelligkeit und ein Stroboskopeffekt eingestellt werden. 1) Mit der Taste MENU das Menü aufrufen. 2) Mit der Taste oder den Menüpunkt wählen und mit der Taste ENTER bestätigen. 3) Mit der Taste oder einen der folgenden Parameter wählen und mit der Taste ENTER bestätigen. Schwenkpostion (pan) Neigpositon (tilt) Rotanteil (red) Grünanteil (green) Blauanteil (blue) Weißanteil (white) Gesamthelligkeit (dimmer) Stroboskopeffekt (strobe) die Effektvarianten entsprechen dem Stroboskop-Kanal bei der DMX-Steuerung (☞ Kap. 11.1.2, Kanal 4) 4) Mit der Taste oder den gewünschten Wert (0 – 255) einstellen und mit der Taste ENTER speichern. Die Schritte 3 und 4 für die anderen Parameter wiederholen. Dieser Menüpunkt wird nicht automatisch beendet, sondern bleibt aktiv, bis er über die Taste MENU verlassen wird oder bis das Gerät von der Stromversorgung getrennt wird. 3) Mit der Taste oder die gewünschte Betriebsart einstellen und mit der Taste ENTER speichern. Master-Gerät Slave-Gerät Slave-Gerät (mit gegensätzlichen Bewegungen) Das Umschalten zwischen Master- und Slave-Betrieb kann alternativ auch über die Taste SLAVE der IR-Fernbedienung durchgeführt werden. Am Master-Gerät ein automatisches (musikgesteuertes) Programm aufrufen oder eine manuelle Einstellung vornehmen. Das Display der Slave-Geräte zeigt an. 8 DMX-Steuerung DMX ist die Abkürzung für Digital Multiplex und ermöglicht die digitale Steuerung von mehreren DMX-Geräten über eine gemeinsame Steuerleitung. Zur Bedienung über ein DMX-Lichtsteuergerät (z. B. DMX-1440 oder DMX-510USB von „img Stage Line“) verfügt der WASH-50LED über 16 DMX-Steuerkanäle. Werden nicht alle Steueroptionen benötigt oder sind am Steuergerät nicht so viele Kanäle verfügbar, kann der Scheinwerfer auch auf 9 DMX-Steuerkanäle oder nur einen Kanal umgeschaltet werden. Die Funktionen der Kanäle und die entsprechenden DMX-Werte finden Sie in Kapitel 11.1. 8.1 Anschluss Als DMX-Schnittstelle besitzt das Gerät 3-polige XLR-Anschlüsse mit folgender Kontaktbelegung: Pin 1 = Masse, Pin 2 = DMX−, Pin 3 = DMX+ 7.3 Master/Slave-Betrieb Mehrere Geräte WASH-50LED können synchron betrieben werden. Dabei übernimmt ein Gerät (Master-Gerät) die Steuerung der übrigen Geräte (Slave-Geräte). Die Geräte miteinander zu einer Kette verbinden. Siehe dazu Kapitel 8.1, jedoch ohne den Bedienschritt 1 zu beachten. Die Geräte folgendermaßen auf den gewünschten Betrieb einstellen: 1) Mit der Taste MENU das Menü aufrufen. 2) Mit der Taste oder den Menüpunkt wählen und mit der Taste ENTER bestätigen. Das Display zeigt die aktuelle Einstellung an. 8 Zum Anschluss sollten spezielle Kabel für die DMX-Signalübertragung verwendet werden (z. B. Kabel der CDMXN-Serie von „img Stage Line“). Bei Leitungslängen ab 150 m oder bei der Steuerung von mehr als 32 Geräten über einen DMX-Ausgang wird grundsätzlich das Zwischenschalten eines DMX-Aufholverstärkers empfohlen (z. B. SR-103DMX von „img Stage Line“). 1) Den Steuereingang DMX IN (4) mit dem DMX-Ausgang des Lichtsteuergeräts oder eines anderen DMX-gesteuerten Geräts verbinden. 2) Den Steuerausgang DMX OUT (5) mit dem Steuereingang des nächsten DMX-gesteu- 3) Um Störungen bei der Signalübertragung auszuschließen, sollte bei langen Leitungen oder bei einer Vielzahl von hintereinandergeschalteten Geräten der Steuerausgang des letzten DMX-Geräts der Kette mit einem 120-Ω-Widerstand (> 0,3 W) abgeschlossen werden: In die Ausgangsbuchse einen entsprechenden Abschlussstecker (z. B. DLT-123 von „img Stage Line“) stecken. 8.2 Anzahl der DMX-Kanäle einstellen Um den Scheinwerfer mit einem Lichtsteuergerät bedienen zu können, müssen die DMXStartadresse (☞ Kap. 8.3) und die Anzahl der DMX-Kanäle eingestellt werden. Die Anzahl der DMX-Kanäle hängt von den benötigten Funk tionen ab und eventuell auch von der Anzahl der verfügbaren Steuerkanäle am Lichtsteuergerät. Informieren Sie sich im Kapitel 11.1 über die Funktionen, die jeweils im 1-, 9- und 16-Kanal-Betrieb zur Verfügung stehen, und wählen Sie danach die Anzahl der DMX-Kanäle aus: 1) Mit der Taste MENU das Menü aufrufen. 2) Mit der Taste oder den Menüpunkt wählen und mit der Taste ENTER bestätigen. Das Display zeigt die aktuelle Einstellung an. 3) Mit der Taste oder die gewünschte Kanalanzahl einstellen und mit der Taste ENTER speichern. 1 Kanal 9 Kanäle 16 Kanäle 8.3 Startadresse einstellen Um alle am Lichtsteuergerät angeschlossenen DMX-Geräte separat bedienen zu können, muss jedes Gerät eine eigene Startadresse erhalten. Soll der erste DMX-Kanal des Scheinwerfers vom Lichtsteuergerät z. B. über die DMX-Adresse 5 gesteuert werden, am WASH-50LED die Startadresse 5 einstellen. Die weiteren DMX-Kanäle des Scheinwerfers sind dann automatisch den folgenden Adressen zugeordnet. Beispiel: Bei Startadresse 5 für Kanal 1 sind bei 16 Steuerkanälen die Kanäle 2 bis 16 den Adressen 6 bis 20 zugeordnet; die Adresse 21 ist die nächstmögliche freie Startadresse für das folgende DMX-gesteuerte Gerät. Deutsch erten Geräts verbinden. Dessen Ausgang wieder mit dem Eingang des nachfolgenden Geräts verbinden usw., bis alle DMX-gesteuerten Geräte in einer Kette angeschlossen sind. 1) Mit der Taste MENU das Menü aufrufen. Der Menüpunkt wird angezeigt. 2) Die Taste ENTER drücken. Das Display zeigt die aktuelle Startadresse an. 3) Mit der Taste oder die gewünschte Adresse (1 – 512) einstellen und mit der Taste ENTER speichern. Noch einfacher ist die Einstellung über die IR-Fernbedienung: Die Taste DMX drücken und unmittelbar aufeinanderfolgend die Ziffern für die gewünschte Startadresse. Für eine „0“ die Taste SHOW benutzen. Hinweis: Die Eingabe der Startadresse über die Fernbedienung ist nur möglich, während ein DMX-Signal empfangen wird. Nach dem Einstellen der Startadresse lässt sich der Scheinwerfer über das DMX-Steuergerät bedienen. Der Empfang von Steuersignalen wird durch die aktuelle Startadresse im Display angezeigt. 9 Weitere Funktionen 9.1 Bewegungsrichtungen umkehren Wenn der Scheinwerfer gemeinsam mit anderen Scheinwerfern gesteuert werden soll, kann es sinnvoll sein, eine oder beide Bewegungsrichtungen umzukehren. 1) Mit der Taste MENU das Menü aufrufen. 2) Mit der Taste oder den Menüpunkt für die Schwenkbewegung oder für die Neigbewegung wählen und mit der Taste ENTER bestätigen. Das Display zeigt die aktuelle Einstellung an. 3) Mit der Taste oder wählen, ob die Bewegung umgekehrt werden soll ( ) oder nicht ( ) und mit der Taste ENTER speichern. 9 Deutsch 9.2 Anzeige drehen 9.5 Verhalten ohne DMX-Signal Damit das Display bei hängender Montage besser gelesen werden kann, lässt sich die Anzeige um 180° drehen. Über die folgende Einstellung kann gewählt werden, ob der Scheinwerfer bei Fehlen eines DMX-Signals das Licht ausschalten oder in den Automatikbetrieb wechseln soll. 1) Mit der Taste MENU das Menü aufrufen. 2) Mit der Taste oder den Menüpunkt wählen. 3) Die Taste ENTER drücken. Die Anzeige ist jetzt gedreht ( ). Zum Zurückdrehen den Vorgang wiederholen. 9.3 Anzeige ausschalten Stört das Display während des Betriebs, kann die Anzeige automatisch ausgeschaltet werden, wenn einige Sekunden keine Taste gedrückt wird. Zum Wiedereinschalten der Anzeige eine Taste drücken. 1) Mit der Taste MENU das Menü aufrufen. 2) Mit der Taste oder den Menüpunkt wählen und mit der Taste ENTER bestätigen. Das Display zeigt die aktuelle Einstellung an. 3) Mit der Taste oder wählen, ob die Anzeige immer eingeschaltet bleiben soll ( ) oder sich automatisch ausschalten soll ( ) und mit der Taste ENTER speichern. 9.4 Farbbalance Wird der WASH-50LED zusammen mit anderen Scheinwerfern gesteuert, kann es erforderlich sein, die Balance zwischen den Grundfarben anzupassen. 1) Mit der Taste MENU das Menü aufrufen. 2) Mit der Taste oder den Menüpunkt wählen und mit der Taste ENTER bestätigen. 3) Mit der Taste oder die einzustellende Grundfarbe wählen und mit der Taste ENTER bestätigen. Rot (red) Grün (green) Blau (blue) 4) Den gewünschten Maximalwert (125 – 255) für die gewählte Farbe einstellen und mit der Taste ENTER speichern. Bei Bedarf die Schritte 3 und 4 für die anderen Grundfarben wiederholen. 10 1) Mit der Taste MENU das Menü aufrufen. 2) Mit der Taste oder den Menüpunkt wählen und mit der Taste ENTER bestätigen. Das Display zeigt die aktuelle Einstellung an. 3) Mit der Taste oder wählen, ob das Licht bei Fehlen eines DMX-Signals ausgeschaltet werden soll ( ) oder der Scheinwerfer in den Automatikbetrieb wechseln soll ( ) und mit der Taste ENTER speichern. 9.6 Referenzfahrt durchführen Wurde der Scheinwerferkopf im Betrieb manuell verdreht oder seine Bewegung behindert, ist es gut, die Referenzfahrt (die bei jedem Einschalten der Stromversorgung automatisch durchgeführt wird) zu wiederholen. 1) Mit der Taste MENU das Menü aufrufen. 2) Mit der Taste oder den Menüpunkt wählen. 3) Die Taste ENTER drücken. Die Referenzfahrt wird durchgeführt und das Display zeigt dabei an. 9.7 Funktionstest Für den Funktionstest kann ein Testprogramm gestartet werden. 1) Mit der Taste MENU das Menü aufrufen. 2) Mit der Taste oder den Menüpunkt wählen. 3) Die Taste ENTER drücken. Das Testprogramm wird durchgeführt und das Display blinkt. 4) Zum Beenden des Testprogramms die Taste ENTER oder MENU drücken. 9.8 Systeminformationen anzeigen 1) Mit der Taste MENU das Menü aufrufen. 2) Mit der Taste oder den Menüpunkt wählen und mit der Taste ENTER bestätigen. 4) Die Taste ENTER drücken und mit Schritt 3 fortfahren, um eine andere Information anzeigen zu lassen. 10 Reinigung des Geräts Die Kunststoffscheibe sollte je nach Verschmutzung in regelmäßigen Abständen gereinigt werden. Nur dann kann das Licht in maximaler Helligkeit abgestrahlt werden. Vor dem Reinigen den Netzstecker aus der Steckdose ziehen. Nur ein weiches, sauberes Tuch und ein mildes Reinigungsmittel verwenden. Zum Reinigen der anderen Gehäuseteile nur ein trockenes, weiches Tuch benutzen. Auf keinen Fall Chemikalien oder eine Flüssigkeit verwenden, diese könnte in das Gerät laufen und es beschädigen. 11 Technische Daten Datenprotokoll:����������������� DMX 512 Anzahl der DMX-Kanäle:��� 1, 9 oder 16 Anschlüsse:����������������������� XLR, 3-polig Leuchtmittel:��������������������� 4 × 15-W-RGBW-LED Abstrahlwinkel:����������������� 8° Schwenkbereich (pan):������� 540° Neigbereich (tilt):��������������� 180° Stromversorgung: ������������� 230 V~ / 50 Hz Leistungsaufnahme:���������� max. 60 VA Fernbedienungsbatterie: ��� 3-V-Lithium-Knopfzelle Typ CR 2025 Einsatztemperatur:������������ 0 – 40 °C Abmessungen:������������������ 160 × 130 × 240 mm Gewicht:��������������������������� 3,4 kg 11.1 DMX-Funktionen 11.1.1 1-Kanal-Betrieb DMX-Wert 0–3 4–7 8 – 11 12 – 15 16 – 19 20 – 23 24 – 27 28 – 31 32 – 35 36 – 39 40 – 43 44 – 47 48 – 51 52 – 55 56 – 59 60 – 63 64 – 67 68 – 71 72 – 75 76 – 79 80 – 83 84 – 87 88 – 91 92 – 95 96 – 99 100 – 103 104 – 107 108 – 111 112 – 115 116 – 119 120 – 123 124 – 127 128 – 131 132 – 135 136 – 139 140 – 143 144 – 147 148 – 151 152 – 155 156 – 159 160 – 163 164 – 167 168 – 171 172 – 175 176 – 179 180 – 183 184 – 187 188 – 191 192 – 195 196 – 199 200 – 203 204 – 208 209 – 255 Deutsch 3) Mit der Taste oder die gewünschte Information wählen und mit der Taste ENTER aufrufen. Betriebsstunden Version der Geräte-Firmware Temperatur im Gerät in °C Funktion Dunkel Rot Grün Blau Mischfarbe 1 (Gelb) Mischfarbe 2 (Cyan) Mischfarbe 3 (Magenta) Weiß Mischfarbe 4 Mischfarbe 5 Mischfarbe 6 Mischfarbe 7 Mischfarbe 8 Mischfarbe 9 (RGBW-Weiß) Mischfarbe 10 Mischfarbe 11 Mischfarbe 12 Mischfarbe 13 Mischfarbe 14 Mischfarbe 15 Mischfarbe 16 Mischfarbe 17 Mischfarbe 18 Mischfarbe 19 Mischfarbe 20 Mischfarbe 21 Mischfarbe 22 Mischfarbe 23 Mischfarbe 24 Mischfarbe 25 Mischfarbe 26 Mischfarbe 27 Mischfarbe 28 Mischfarbe 29 Mischfarbe 30 Mischfarbe 31 Mischfarbe 32 Mischfarbe 33 Mischfarbe 34 Mischfarbe 35 Mischfarbe 36 Mischfarbe 37 Mischfarbe 38 Mischfarbe 39 Mischfarbe 40 Mischfarbe 41 Mischfarbe 42 Mischfarbe 43 Mischfarbe 44 Mischfarbe 45 Mischfarbe 46 Mischfarbe 47 zufällige Farbwechsel 11 Deutsch 11.1.2 9-Kanal-Betrieb Kanal 1 2 3 4 5 6 7 8 9 DMXWert 0 – 255 0 – 255 0 – 255 0–7 8 – 15 16 – 131 132 – 139 140 – 181 182 – 189 190 – 231 232 – 239 240 – 247 248 – 255 0 – 255 0 – 255 0 – 255 0 – 255 0 – 69 70 – 79 80 – 199 200 – 209 210 – 239 240 – 255 11.1.3 16-Kanal-Betrieb Funktion Kanal Schwenken (pan) Neigen (tilt) Dimmer (Gesamthelligkeit) Dunkel kein Stroboskopeffekt Stroboskop: langsam schnell kein Stroboskopeffekt Einblenden/Ausschalten: langsam schnell kein Stroboskopeffekt Einschalten/Ausblenden: langsam schnell kein Stroboskopeffekt zufällige Stroboskopeffekte kein Stroboskopeffekt Helligkeit Rot Helligkeit Grün Helligkeit Blau Helligkeit Weiß keine Funktion Dunkel bei Bewegung über Kanal 1 und 2 keine Funktion Reset (Referenzfahrt) keine Funktion musikgesteuertes Programm 1 2 3 4 5 6 7 8 9 10 11 12 13 14 15 16 DMXWert 0 – 255 0 – 255 0 – 255 0 – 255 0 – 255 0 – 15 16 – 35 36 – 55 56 – 75 76 – 95 96 – 115 116 – 135 136 – 155 156 – 175 176 – 195 196 – 215 216 – 235 236 – 255 0 – 255 0 – 255 0–7 8 – 15 16 – 131 132 – 139 140 – 181 182 – 189 190 – 231 232 – 239 240 – 247 248 – 255 0 – 255 0 – 255 0 – 255 0 – 255 0–7 8 – 127 128 – 191 192 – 255 0 – 255 0 – 69 70 – 79 80 – 199 200 – 209 210 – 239 240 – 255 Funktion Schwenken (pan) grob Schwenken (pan) fein Neigen (tilt) grob Neigen (tilt) fein Geschwindigkeit für Kanal 1 und 3 schnell langsam kein Bewegungsprogramm Bewegungsprogramm 1 Bewegungsprogramm 2 Bewegungsprogramm 3 Bewegungsprogramm 4 Bewegungsprogramm 5 Bewegungsprogramm 6 Bewegungsprogramm 7 Bewegungsprogramm 8 Bewegungsprogramm 9 Bewegungsprogramm 10 Bewegungsprogramm 11 Bewegungsprogramm 12 Geschwindigkeit für Kanal 6 schnell langsam Dimmer (Gesamthelligkeit) Dunkel kein Stroboskopeffekt Stroboskop: langsam schnell kein Stroboskopeffekt Einblenden/Ausschalten: langsam schnell kein Stroboskopeffekt Einschalten/Ausblenden: langsam schnell kein Stroboskopeffekt zufällige Stroboskopeffekte kein Stroboskopeffekt Helligkeit Rot Helligkeit Grün Helligkeit Blau Helligkeit Weiß Farbmischung über Kanal 10 – 13 32 Farben automatische Farbwechsel automatische Farbüberblendungen Geschwindigkeit für Kanal 14 langsam schnell keine Funktion Dunkel bei Bewegung über Kanal 1 – 4 keine Funktion Reset (Referenzfahrt) keine Funktion musikgesteuertes Programm Änderungen vorbehalten. Diese Bedienungsanleitung ist urheberrechtlich für MONACOR ® INTERNATIONAL GmbH & Co. KG geschützt. Eine Reproduktion für eigene kommerzielle Zwecke – auch auszugsweise – ist untersagt. 12 Menüstruktur MENU Anzeige drehen Neigrichtung umkehren Schwenkrichtung umkehren Referenzfahrt ja System informationen Mikrofon empfindlichkeit Firmware-Version Stroboskop immer ein automatisch aus Ohne DMX-Signal Temperatur Testprogramm nein Display ENTER Betriebsstunden nein ja Deutsch 11.2 Dimmer Dunkel Automatikbetrieb Helligkeit Weiß Helligkeit Blau Musiksteuerung ein Manueller Betrieb aus Master/Slave- Betrieb Helligkeit Grün Slave-Betrieb 2 Slave-Betrieb 1 Helligkeit Rot Master-Betrieb Neigposition Automatik betrieb Schwenkposition Auto 1 – 4 Geschwindigkeit SP1/2 (pan/tilt) Anzahl der DMX-Kanäle 16 Kanäle 9 Kanäle DMX-Start adresse Maximum Blau Farbbalance Maximum Grün 1 Kanal Maximum Rot 13 English Contents 1 Operating Elements and Connections . . 14 1.1 Infrared remote control . . . . . . . . . . 15 2 Safety Notes . . . . . . . . . . . . . . 15 3 Applications . . . . . . . . . . . . . . 15 4 Installation . . . . . . . . . . . . . . . 15 5 Setting the Spotlight into Operation . . 16 6 Operating the Spotlight . . . . . . . . 16 These instructions are intended for users with basic knowledge in DMX control. Please read these instructions carefully prior to operating the unit and keep them for later reference. All operating elements and connections described can be found on the fold-out page 3. 1 Operating Elements and Connections 6.1 Remote control . . . . . . . . . . . . . . 16 1 Infrared sensor for remote control 6.2 Operation via the menu . . . . . . . . . . 16 2 Control buttons 7 Operation without DMX Controller . . . 17 7.1 Automatic mode . . . . . . . . . . . . . 17 MENU to call up the menu, to select a menu item or to exit a submenu 7.1.1 Changing the speed . . . . . . . . . . 17 , 7.1.2 Music control . . . . . . . . . . . . . 17 7.2 Manual mode . . . . . . . . . . . . . . 17 7.3 Master/slave mode . . . . . . . . . . . . 18 8 DMX Control . . . . . . . . . . . . . . 18 8.1 Connection . . . . . . . . . . . . . . . 18 8.2 Setting the number of DMX channels . . . . 18 8.3 Setting the start address . . . . . . . . . . 19 9 Additional Functions . . . . . . . . . . 19 9.1 Reversing movement directions . . . . . . . 19 9.2 Rotating the display . . . . . . . . . . . . 19 9.3 Switching off the display . . . . . . . . . . 19 9.4 Colour balance . . . . . . . . . . . . . . 19 9.5 Behaviour without DMX signal . . . . . . . 20 9.6 Making a reference move . . . . . . . . . 20 9.7 Functional test . . . . . . . . . . . . . . 20 9.8 Showing system information . . . . . . . . 20 10 Cleaning the Unit . . . . . . . . . . . . 20 11 Specifications . . . . . . . . . . . . . 20 11.1 DMX functions . . . . . . . . . . . . . . 21 11.1.1 1-channel mode . . . . . . . . . . . . 21 11.1.2 9-channel mode . . . . . . . . . . . . 21 11.1.3 16-channel mode . . . . . . . . . . . 22 11.2 Menu structure . . . . . . . . . . . . . . 23 14 LED Moving Head to select a menu item or to change a setting ENTER to call up a submenu, to save a setting changed 3 Display 4 DMX input (XLR) for connection of a DMX light controller or for connection to the DMX output of a different DMX-controlled unit 5 DMX output (XLR) for connection to the DMX input of another DMX-controlled unit 6 Mains jack for connection to a socket (230 V~/ 50 Hz) via the mains cable supplied 7 Support for the mains fuse Always replace a blown fuse by one of the same type. 8 Mounting bracket 9 Holes for attaching the mounting bracket (8) (fig. 2) Button DMX SLAVE PAN, TILT FADE / ZOOM SOUND GOBO SHOW STROBE R, G, B, W 1, 2, 3, 4, 6 Function to switch all LEDs on /off to enter the DMX start address: buttons 1 – 9, SHOW = 0 press the buttons directly one after the other to switch the slave mode on /off to pan and tilt the head manually automatic mode with colour crossfading to switch music control on / off for SHOW, FADE / ZOOM without function automatic mode 1 – 4, select the mode with UP/ DOWN stroboscope /stroboscope salvos /dark keep the button pressed red, green, blue, white mixed colours: RGBW white, yellow, cyan, magenta, purple Important: The function of the button DMX will only be available while a DMX signal is being received. The other functions of the remote control will only be available while no DMX signal is being received. 2 Safety Notes The unit corresponds to all relevant directives of the EU and is therefore marked with . WARNING The unit uses dangerous mains voltage. Leave servicing to skilled personnel and do not insert anything into the air vents; inexpert handling may result in electric shock. • The unit is suitable for indoor use only. Protect it against dripping water and splash water, high air humidity and heat (admissible ambient temperature range 0 – 40 °C). • Never pull the mains cable to disconnect the mains plug from the mains socket, always seize the plug. • No guarantee claims for the unit and no li- English 1.1 Infrared remote control ability for any resulting personal damage or material damage will be accepted if the unit is used for other purposes than originally intended, if it is not safely mounted, if it is not correctly connected or operated, or if it is not repaired in an expert way. If the unit is to be put out of operation definitively, take it to a local recycling plant for a disposal which is not harmful to the environment. 3 Applications The moving head WASH-50LED can be used to create effect illumination, e. g. on stage or in discotheques. The spotlight features 4 super bright 15 W RGBW LEDs as a light source. The LEDs can emit light in the three primary colours (red, green and blue) and in white as well as coloured light created from additive colour mixing. Crossfading from one colour to another and stroboscope effects are also supported. The spotlight is designed for control by means of a DMX light controller (1, 9 or 16 DMX control channels available) but may also be operated on its own or in combination with multiple spotlights WASH-50LED (master/slave mode) without a controller. The spotlight can be conveniently controlled by means of the infrared remote control supplied. In addition, the integrated microphone provides effects in sync with the music. • Do not place any vessels filled with liquid, e. g. drinking glasses, on the unit. • Do not set the unit into operation or imme- diately disconnect the mains plug from the mains socket if 1.the unit or the mains cable is visibly damaged, 2.a defect might have occurred after the unit was dropped or suffered a similar accident, 3.malfunctions occur. In any case the unit must be repaired by skilled personnel. 4 Installation Always place the unit at a location where sufficient air circulation is ensured during operation. Never cover the air vents of the housing. Set up the WASH-50LED on a solid and even surface. Alternatively, install it upside down on a crossbar, for example: Use a stable mounting screw or a support for light effect units (C hook) to fasten the mounting bracket (8) to the crossbar. To fasten the mounting bracket to 15 English the spotlight, insert the two wing screws of the bracket into the holes (9) of the base plate and then turn them clockwise to the stop. WARNING The spotlight must be installed in a safe and expert manner. If the spotlight is installed at a place where people may walk or sit under it, additionally secure the spotlight (e. g. by means of a safety rope at the mounting bracket; fasten the safety rope in such a way that the maximum falling distance of the unit will not exceed 20 cm). 5 Setting the Spotlight into Operation WARNING To prevent damage to your eyes, never look directly into the light source for any length of time. Please note that fast changes in lighting may trigger epileptic seizures with photosensitive persons or person with epilepsy! Connect the mains cable provided to the mains jack (6) and to a socket (230 V~/ 50 Hz): The unit can then be operated via the DMX light controller (☞ chapter 8) or will run the show program set (☞ chapter 7). To switch off the unit, disconnect the mains plug from the socket. Caution: Never connect the unit to the mains voltage via a dimmer! 6 Operating the Spotlight The operating mode and the different functions are selected via a menu shown on the display (3). The menu structure can be found in chapter 11.2. The remote control supplied (fig. 2) also allows you to select many functions directly. Please refer to chapter 8 for information on how to operate the spotlight via a DMX controller. When the power supply is switched on, will first appear on the display and the spotlight head will make a reference move for position adjustment. 16 6.1 Remote control 1) The remote control is supplied with a battery inserted. To prevent the battery from discharging during storage, there is a protective film between the battery and the battery contacts. Prior to initial operation, remove the protective film from the battery support on the rear side of the remote control 2) When pressing a button, always point the infrared remote control to the sensor REMOTE (1) on the front side of the spotlight. Make sure that there are no obstacles between the remote control and the unit. The functions of the remote control can be found in chapter 1.1. 3) When the operating range of the remote control decreases, the battery must be replaced: On the rear side of the remote control, push the small latch with the groove to the right and remove the battery support: 1. 2. Use a battery of the type CR 2025. When inserting the battery in the battery support, observe the polarity (⊕ facing upwards). If the remote control is not used for a longer time, remove the battery as a precaution so that the remote control will not be damaged in case the battery should leak. Never put discharged batteries in the household waste. To protect the environment, always take them to a special waste disposal, e. g. collection container at your retailer. 6.2 Operation via the menu Use the buttons MENU, , and ENTER (2) to make settings via the menu. 1) To call up the setting menu, press the button MENU. The menu item will appear on the display (3). 2) Select the menu item desired with the button (or MENU) or . 3) Press the button ENTER. The display will indicate the current setting of the menu item selected. 5) When submenu items are available: Call them up with the button ENTER and then change their settings with the button or . 6) Press the button ENTER to save a setting. 7) For additional settings, use the button MENU to return to a higher menu level. The menu will be automatically exited after a few seconds if no button is pressed. Depending on a menu setting, the display may extinguish after a few more seconds (☞ chapter 9.3). It will be illuminated again when a button is pressed. Refer to chapters 7 to 9 and make the desired settings for the corresponding operating mode. 7 Operation without DMX Controller The unit provides four automatic show programs that can also be run by music control. In addition, a manual mode is available. 7.1 Automatic mode for the tilt movement and then press ENTER to confirm. 4) Use the button or to set the value desired (0 – 9) and then press ENTER to save it. 7.1.2 Music control The menu can be used to define if the movements and colour changes of the automatic programs are to be sound-dependent, i. e. in sync with the music. In addition, it is possible to change the sensitivity of the internal microphone. 1) Call up the menu with the button MENU. 2) Select the menu item with the button or and then press ENTER to confirm. 3) Use the button or to switch music control on ( ) or off ( ) and then press ENTER to confirm. 4) Select the menu item with the button and then press ENTER to confirm. 5) Use the button or to set the microphone sensitivity value desired (0 – 100) and then press ENTER to save it. 1) Call up the menu with the button MENU. 7.2 Manual mode 2) Select the menu item with the button or and then press ENTER to confirm. 3) Use the button or to select the show program desired ( … ) and then press ENTER to save it. In the manual mode, the head position, the colour mix, the total brightness and a stroboscope effect can be set. Notes: Do not wait too long before pressing the next button; the menu will be exited automatically after a few seconds if no button is pressed. If the automatic program fails to start and if appears on the display, check the menu item (☞ chapter 7.3). The option (Master) must be selected. 7.1.1 Changing the speed To change the movement speed of the spotlight head: 1) Call up the menu with the button MENU. 2) Select the menu item with the button or and then press ENTER to confirm. 3) Use the button or to select the speed for the pan movement or the speed English 4) Use the button or to change the setting. 1) Call up the menu with the button MENU. 2) Select the menu item with the button or and then press ENTER to confirm. 3) Use the button or to select one of the following parameters and then press ENTER to confirm. pan position tilt position red component green component blue component white component total brightness (dimmer) stroboscope effect the effect variants correspond to the stroboscope channel for DMX control (☞ chapter 11.1.2, channel 4) 4) Use the button or to set the value desired (0 – 255) and then press ENTER to save it. 17 English Repeat steps 3 and 4 for the other parameters. 8.1 Connection This menu item will not be exited automatically; it will remain active until the button MENU is pressed or the unit is disconnected from the power supply. As a DMX interface, the unit offers 3-pole XLR connectors with the following pin configurations: 7.3 Master/slave mode Multiple units WASH-50LED can be operated in sync. In this mode, a unit (master unit) will control the other units (slave units). Connect the units in a chain. Please refer to chapter 8.1, skipping step 1. To set the units to the mode desired: 1) Call up the menu with the button MENU. 2) Call up the menu item with the button or and then press ENTER to confirm. The display will indicate the current setting. 3) Use the button or to set the operating mode desired and then press ENTER to save it. master unit slave unit slave unit (with movements in opposite directions) As an alternative, use the button SLAVE on the IR remote control to switch between master mode and slave mode. At the master unit, call up an automatic (music-controlled) program or make a manual setting. will appear on the display of the slave units. 8 DMX Control DMX stands for Digital Multiplex and allows for digital control of multiple DMX units via a common control cable. For operation via a DMX light controller (e. g. DMX-1440 or DMX510USB from “img Stage Line”), the WASH50LED is equipped with 16 DMX control channels. However, the spotlight may be switched to 9 DMX channels or to a single DMX channel if not all control options are required or if less than 16 channels are available at the controller. The functions of the channels and the corresponding DMX values can be found in chapter 11.1. 18 Pin 1 = ground, 2 = DMX−, 3 = DMX+ For connection, special cables for DMX signal transmission are recommended (e. g. cables of the CDMXN series from “img Stage Line”). For cable lengths exceeding 150 m or when controlling more than 32 units via a single DMX output, it is generally recommended to insert a DMX level matching amplifier (e. g. SR-103DMX from “img Stage Line”). 1) Connect the control input DMX IN (4) to the DMX output of the light controller or of a different DMX-controlled unit. 2) Connect the control output DMX OUT (5) to the control input of the second DMX-controlled unit. Proceed in the same way to connect the output of the second unit to the input of the third unit etc. until all DMX-controlled units have been connected in a chain. 3) To prevent interference in signal transmission, in case of long cables or a multitude of units connected in series, terminate the control output of the last DMX unit in the chain with a 120 Ω resistor (> 0.3 W): Connect a corresponding terminating plug (e. g. DLT-123 from “img Stage Line”) to the output jack. 8.2 Setting the number of DMX channels To operate the spotlight by means of a light controller, set the DMX start address (☞ chapter 8.3) and the number of DMX channels. The number of DMX channels depends on the functions required and, if applicable, also on the number of the control channels available at the light controller. Please refer to chapter 11.1 for the functions available with the different channel modes (1, 9, 16 channels) and then select the appropriate number of DMX channels: 1) Call up the menu with the button MENU. 2) Select the menu item with the button or and then press ENTER to confirm. The display will indicate the current setting. 8.3 Setting the start address For separate control of all DMX units connected to the light controller, each unit requires a start address of its own. Example: If the first DMX channel of the spotlight is to be controlled by DMX address 5, set the start address on the WASH-50LED to 5. The other DMX channels of the spotlight will then be automatically assigned to the subsequent addresses. Example: With 16 control channels and the start address for channel 1 set to 5, the channels 2 to 16 will be assigned to the addresses 6 to 20; the address 21 will be the next possible start address available for the subsequent DMX-controlled unit. 1) Call up the menu with the button MENU. The menu item will appear on the display. 2) Press the button ENTER. The display will indicate the current start address. 3) Use the button or to set the address desired (1 – 512) and then press ENTER to save it. With the IR remote control, the setting can be made even more conveniently: Press the button DMX and then enter the digits for the start address desired directly one after the other. To enter “0”, use the button SHOW. Note: The start address can only be entered via the remote control while a DMX signal is being received. Once the start address has been set, the spotlight can be operated via the DMX controller. The current start address will be shown on the display to indicate reception of control signals. 9 Additional Functions 9.1 Reversing movement directions If the spotlight is to be operated together with other spotlights, it may be reasonable to reverse one or both movement directions. 1) Call up the menu with the button MENU. 2) Use the button or to call up the menu item for the pan movement or for the tilt movement and then press ENTER to confirm. The display will indicate the current setting. English 3) Use the button or to set the number of channels desired and then press ENTER to save it. 1 channel 9 channels 16 channels 3) Use the button or to define if the movement is to be reversed ( ) or not ( ); then press ENTER to save the setting. 9.2 Rotating the display When the spotlight is suspended, the display can be rotated by 180° so that it is more convenient to read. 1) Call up the menu with the button MENU. 2) Select the menu item or . with the button 3) Press the button ENTER. The display will be rotated ( ). Repeat this procedure to reset the display to its previous position. 9.3 Switching off the display To make sure that the display does not disturb during operation, it can be automatically switched off after a few seconds if no button is pressed. To switch the display on again, press any button. 1) Call up the menu with the button MENU. 2) Select the menu item with the button or and then press ENTER to confirm. The display will indicate the current setting. 3) Use the button or to define if the display is always to remain switched on ( ) or if it is to be switched off automatically ( ); then press ENTER to save the setting. 9.4 Colour balance When the WASH-50LED is controlled together with other spotlights, it may be necessary to adjust the balance between the primary colours. 1) Call up the menu with the button MENU. 2) Select the menu item with the button or and then press ENTER to confirm. 3) Use the button or to select the primary colour to be adjusted and then press ENTER to confirm. 19 English red green blue 4) Set the maximum value desired (125 – 255) for the colour selected and then press ENTER to save it. If required, repeat steps 3 and 4 for the other primary colours. 9.5 Behaviour without DMX signal Proceed as follows to define if the spotlight is to switch off the light when no DMX signal is available or if the spotlight is to change to the automatic mode: 1) Call up the menu with the button MENU. 2) Select the menu item with the button or and then press ENTER to confirm. The display will indicate the current setting. 3) Use the button or to define if the spotlight is to switch the light off ( ) when no DMX signal is available or if the spotlight is to change to the automatic mode ( ); then press ENTER to save the setting. 9.6 Making a reference move When the spotlight head has been manually misadjusted during operation or when its movement has been obstructed, the reference move (which is automatically made every time the power supply is switched on) should be repeated. 1) Call up the menu with the button MENU. 2) Select the menu item with the button or . 3) Press the button ENTER. The reference move will be made and will appear on the display. 9.7 Functional test A test program can be started for the functional test. 1) Call up the menu with the button MENU. 2) Select the menu item with the button or . 3) Press the button ENTER. The test program will be carried out and the display will start flashing. 20 4) To exit the test program, press the button ENTER or MENU. 9.8 Showing system information 1) Call up the menu with the button MENU. 2) Select the menu item with the button or and then press ENTER to confirm. 3) Use the button or to select the information desired and then call it up with the button ENTER. operating hours version of the unit firmware temperature inside the unit (in °C) 4) Press the button ENTER and then proceed with step 3 to show a different type of information. 10 Cleaning the Unit Clean the plastic pane at regular intervals depending on impurities. This is the only way to ensure that light will be emitted at maximum brightness. Before cleaning, disconnect the mains plug from the socket. Only use a soft, clean cloth and a mild detergent. For cleaning the other parts of the housing, only use a dry, soft cloth. Never use fluids or chemicals; they may leak into the unit and damage it. 11 Specifications Data protocol:������������������� DMX 512 Number of DMX channels:� 1, 9 or 16 Connections:��������������������� XLR, 3 poles Light source:��������������������� 4 × 15 W RGBW LED Beam angle:��������������������� 8° Pan range:������������������������� 540° Tilt range:������������������������� 180° Power supply:������������������� 230 V~ / 50 Hz Power consumption:��������� 60 VA max. Remote control battery:����� 3 V lithium button cell, type CR 2025 Ambient temperature:������� 0 – 40° C Dimensions: ��������������������� 160 × 130 × 240 mm Weight:����������������������������� 3.4 kg DMX functions 11.1.1 1-channel mode DMX value 0–3 4–7 8 – 11 12 – 15 16 – 19 20 – 23 24 – 27 28 – 31 32 – 35 36 – 39 40 – 43 44 – 47 48 – 51 52 – 55 56 – 59 60 – 63 64 – 67 68 – 71 72 – 75 76 – 79 80 – 83 84 – 87 88 – 91 92 – 95 96 – 99 100 – 103 104 – 107 108 – 111 112 – 115 116 – 119 120 – 123 124 – 127 128 – 131 132 – 135 136 – 139 140 – 143 144 – 147 148 – 151 152 – 155 156 – 159 160 – 163 164 – 167 168 – 171 172 – 175 176 – 179 180 – 183 184 – 187 188 – 191 192 – 195 196 – 199 200 – 203 204 – 208 209 – 255 Function dark red green blue mixed colour 1 (yellow) mixed colour 2 (cyan) mixed colour 3 (magenta) white mixed colour 4 mixed colour 5 mixed colour 6 mixed colour 7 mixed colour 8 mixed colour 9 (RGBW white) mixed colour 10 mixed colour 11 mixed colour 12 mixed colour 13 mixed colour 14 mixed colour 15 mixed colour 16 mixed colour 17 mixed colour 18 mixed colour 19 mixed colour 20 mixed colour 21 mixed colour 22 mixed colour 23 mixed colour 24 mixed colour 25 mixed colour 26 mixed colour 27 mixed colour 28 mixed colour 29 mixed colour 30 mixed colour 31 mixed colour 32 mixed colour 33 mixed colour 34 mixed colour 35 mixed colour 36 mixed colour 37 mixed colour 38 mixed colour 39 mixed colour 40 mixed colour 41 mixed colour 42 mixed colour 43 mixed colour 44 mixed colour 45 mixed colour 46 mixed colour 47 random colour changes 11.1.2 9-channel mode Chan‑ DMX nel value 0 – 255 1 0 – 255 2 0 – 255 3 0–7 8 – 15 16 – 131 132 – 139 140 – 181 4 182 – 189 190 – 231 232 – 239 240 – 247 248 – 255 0 – 255 5 0 – 255 6 0 – 255 7 0 – 255 8 0 – 69 70 – 79 80 – 199 9 200 – 209 210 – 239 240 – 255 Function English 11.1 pan tilt dimmer (total brightness) dark no stroboscope effect stroboscope: slow fast no stroboscope effect fade-in/switch-off: slow fast no stroboscope effect switch-on/fade-out: slow fast no stroboscope effect random stroboscope effects no stroboscope effect brightness of red brightness of green brightness of blue brightness of white no function dark for movement via channels 1 and 2 no function reset (reference move) no function music-controlled program 21 English 11.1.3 16-channel mode Chan‑ nel 1 2 3 4 5 6 7 8 9 10 11 12 13 14 15 16 DMX value 0 – 255 0 – 255 0 – 255 0 – 255 0 – 255 0 – 15 16 – 35 36 – 55 56 – 75 76 – 95 96 – 115 116 – 135 136 – 155 156 – 175 176 – 195 196 – 215 216 – 235 236 – 255 0 – 255 0 – 255 0–7 8 – 15 16 – 131 132 – 139 140 – 181 182 – 189 190 – 231 232 – 239 240 – 247 248 – 255 0 – 255 0 – 255 0 – 255 0 – 255 0–7 8 – 127 128 – 191 192 – 255 0 – 255 0 – 69 70 – 79 80 – 199 200 – 209 210 – 239 240 – 255 Function pan, coarse pan, fine tilt, coarse tilt, fine speed for channels 1 and 3 fast slow no motion program motion program 1 motion program 2 motion program 3 motion program 4 motion program 5 motion program 6 motion program 7 motion program 8 motion program 9 motion program 10 motion program 11 motion program 12 speed for channel 6 fast slow dimmer (total brightness) dark no stroboscope effect stroboscope: slow fast no stroboscope effect fade-in/switch-off: slow fast no stroboscope effect switch-on/fade-out: slow fast no stroboscope effect random stroboscope effects no stroboscope effect brightness of red brightness of green brightness of blue brightness of white colour mixing via channels 10 – 13 32 colours automatic colour changes automatic colour crossfading speed for channel 14 slow fast no function dark for movement via channels 1 – 4 no function reset (reference move) no function music-controlled program Subject to technical modification. All rights reserved by MONACOR ® INTERNATIONAL GmbH & Co. KG. No part of this instruction manual may be reproduced in any form or by any means for any commercial use. 22 Menu structure MENU Rotate display Reverse tilt direction Reverse pan direction Reference move yes System information Without DMX signal Microphone sensitivity temperature firmware version Test program no Display ENTER operating hours no yes English 11.2 stroboscope always on automatically off dimmer dark automatic mode brightness of white brightness of blue Music control on Manual mode off Master/slave mode brightness of green slave mode 2 slave mode 1 brightness of red master mode tilt position pan position Automatic mode auto 1 – 4 speed SP1/ 2 (pan/tilt) Number of DMX channels 16 channels 9 channels DMX start address maximum of blue Colour balance maximum of green 1 channel maximum of red 23 Français Table des matières 1 Eléments et branchements . . . . . . . 24 1.1 Télécommande infrarouge . . . . . . . . . 25 2 Conseils d’utilisation et de sécurité . . . . . . . . . . . . . 25 3 Possibilités d’utilisation . . . . . . . . 25 4 Montage . . . . . . . . . . . . . . . . 26 5 Fonctionnement . . . . . . . . . . . . 26 6 Utilisation . . . . . . . . . . . . . . . 26 6.1 Télécommande . . . . . . . . . . . . . . 26 6.2 Utilisation via le menu . . . . . . . . . . . 27 7 Fonctionnement sans contrôleur DMX . 27 7.1 Fonctionnement automatique . . . . . . . 27 7.1.1 Modifier la vitesse . . . . . . . . . . . 27 7.1.2 Gestion par la musique . . . . . . . . . 27 7.2 Mode manuel . . . . . . . . . . . . . . 28 7.3 Mode Master/Slave . . . . . . . . . . . . 28 8 Gestion DMX . . . . . . . . . . . . . . 28 8.1 Branchement . . . . . . . . . . . . . . 28 8.2 Réglage du nombre de canaux DMX . . . . . 29 8.3 Réglage de l’adresse de démarrage . . . . . 29 9 Autres fonctions . . . . . . . . . . . . 29 9.1 Inversion du sens de mouvement . . . . . . 29 9.2 Rotation de l’affichage . . . . . . . . . . 30 9.3 Extinction de l‘affichage . . . . . . . . . . 30 9.4 Balance des couleurs . . . . . . . . . . . 30 9.5 Comportement sans signal DMX . . . . . . 30 9.6 Mouvement de référence . . . . . . . . . 30 9.7 Test de fonctionnement . . . . . . . . . . 30 9.8 Affichage des informations du système . . . 30 10 Nettoyage de l‘appareil . . . . . . . . 31 11 Caractéristiques techniques . . . . . . 31 11.1 Fonctions DMX . . . . . . . . . . . . . . 31 11.1.1 Mode 1 canal . . . . . . . . . . . . . 31 11.1.2 Mode 9 canaux . . . . . . . . . . . . 32 11.1.3 Mode 16 canaux . . . . . . . . . . . . 32 11.2 Structure du menu . . . . . . . . . . . . 33 24 Projecteur lyre Cette notice s‘adresse aux utilisateurs avec des connaissances de base dans la gestion DMX. Veuillez lire la présente notice avec attention avant le fonctionnement et conservez-la pour pouvoir vous y reporter ultérieurement. Vous trouverez sur la page 3, dépliable, les éléments et branchements décrits. 1 Eléments et branchements 1 Capteur infrarouge pour la télécommande 2 Touches de commande MENU appel du menu, sélection d‘un point du menu ou quitter un sous-menu , sélection d‘un point du menu ou modification d‘un réglage ENTER appel d‘un sous-menu, mémorisation d‘un réglage modifié 3 Affichage 4 Entrée DMX (XLR) pour brancher un contrôleur DMX ou pour brancher à la sortie DMX d‘un autre appareil géré par DMX 5 Sortie DMX (XLR) pour brancher à l’entrée DMX d‘un autre appareil géré par DMX 6 Prise secteur pour brancher, via le cordon secteur livré, à une prise 230 V~/50 Hz 7 Porte fusible Tout fusible fondu doit impérativement être remplacé par un fusible de même type 8 Etrier de montage 9 Ouvertures pour fixer l’étrier de montage (8) (schéma 2) Touche DMX SLAVE PAN, TILT FADE / ZOOM SOUND GOBO SHOW STROBE R, G, B, W 1, 2, 3, 4, 6 Fonction pour allumer/éteindre toutes les LEDs saisie de l‘adresse de démarrage DMX : touches 1 – 9, SHOW = 0 appuyez sur les touches les unes après les autres directement pour activer/désactiver le mode Slave inclinaison et rotation manuelle de la tête mode automatique avec transitions de couleurs pour activer/désactiver la gestion par la musique pour SHOW, FADE / ZOOM sans fonction mode automatique 1 – 4, sélection avec UP/ DOWN stroboscope/salves stroboscope/sombre maintenez la touche enfoncée rouge, vert, bleu, blanc couleurs de mixage : RGBW blanc, jaune, cyan, magenta, violet Important : la fonction de la touche DMX n‘est disponible que si un signal DMX est reçu. Toutes les autres fonctions de la télécommande ne sont, en revanche, disponibles que si aucun signal DMX n‘est reçu. 2 Conseils d’utilisation et de sécurité L’appareil répond à toutes les directives nécessaires de l’Union européenne et porte donc le symbole . AVERTISSEMENT L’appareil est alimenté par une tension dangereuse. Ne touchez jamais l‘intérieur de l‘appareil ! Risque de décharge électrique et n‘insérez rien dans les ouïes de ventilation ! • L’appareil n’est conçu que pour une utilisa- tion en intérieur. Protégez-le de tout type de projections d‘eau, des éclaboussures, d‘une humidité élevée de l‘air et de la chaleur (plage de température de fonctionnement autorisée : 0 – 40 °C). • En aucun cas, vous ne devez poser d’objet contenant du liquide, ou un verre, sur l’appareil. 2.après une chute ou un cas similaire, vous avez un doute sur l‘état de l‘appareil, 3.des dysfonctionnements apparaissent. Dans tous les cas, les dommages doivent être réparés par un technicien spécialisé. Français 1.1 Télécommande infrarouge • Ne débranchez jamais l‘appareil en tirant sur le cordon secteur ; retirez toujours le cordon secteur en tirant la fiche. • Nous déclinons toute responsabilité en cas de dommages matériels ou corporels résultants si l’appareil est utilisé dans un but autre que celui pour lequel il a été conçu, s’il n’est pas monté d’une manière sûre, s’il n’est pas correctement branché ou utilisé ou s’il n’est pas réparé par une personne habilitée, en outre, la garantie deviendrait caduque. Lorsque l’appareil est définitivement retiré du service, vous devez le déposer dans une usine de recyclage adaptée pour contribuer à son élimination non polluante. CARTONS ET EMBALLAGE PAPIER À TRIER 3 Possibilités d’utilisation Le projecteur WASH-50LED permet des éclairages avec effets p. ex. sur scène ou dans des discothèques. Comme source de lumière, l’appareil possède 4 LEDs RGBW 15 W très claires. Avec les LEDs, on peut diffuser une lumière de couleur dans les trois couleurs primaires (rouge, vert et bleu) et blanc et ainsi que les couleurs mixées. De plus, des transitions de couleurs et des effets stroboscope sont possibles. Le projecteur est conçu pour une gestion via un contrôleur DMX (1, 9 ou 16 canaux DMX). Il peut également fonctionner seul ou combiné avec plusieurs WASH-50LED (mode Master/ Slave) sans contrôleur. Le projecteur peut être utilisé via la télécommande infrarouge livrée. De plus, le microphone interne permet des effets synchronisés avec la musique. • Ne faites pas fonctionner l’appareil ou débranchez-le immédiatement du secteur lorsque : 1.des dommages visibles apparaissent sur l‘appareil ou sur le cordon secteur, 25 Français 4 Montage 6 Utilisation Placez l‘appareil toujours de telle sorte que, pendant le fonctionnement, une circulation d‘air suffisante soit assurée. Les ouïes de ventilation du boîtier ne doivent en aucun cas être obturées. La WASH-50LED peut être posée sur une surface fixe et plane. Elle peut également être montée, tête en bas, sur une traverse, par exemple. Dans ce cas, montez l’étrier de montage (8) avec une vis de montage solide ou un support pour projecteur (crochet C) sur une traverse. Pour fixer l’étrier sur le projecteur, mettez les deux vis papillon de l’étrier dans les ouvertures (9) de la base du projecteur et tournez dans le sens des aiguilles d‘une montre jusqu‘à la butée. La sélection du mode de fonctionnement et des différentes fonctions se fait via un menu sur l‘affichage (3). La structure du menu est présentée dans le chapitre 11.2. Avec la télécommande livrée (schéma 2), vous pouvez sélectionner directement plusieurs fonctions. Voir chapitre 8 pour l‘utilisation via un contrôleur DMX. Une fois l‘alimentation allumé, l‘affichage indique et la tête du projecteur fait un mouvement de référence pour régler la position. AVERTISSEMENT L‘appareil doit être monté de manière professionnelle et sûre. Si l’appareil est installé à un endroit sous lequel des personnes peuvent se trouver, il doit en plus être assuré (p. ex. par une élingue de sécurité sur l’étrier de montage ; fixez-la de telle sorte que la chute de l‘appareil ne puisse pas être supérieure à 20 cm). 5 Fonctionnement AVERTISSEMENT Ne regardez jamais directement la source de lumière, cela pourrait causer des troubles de la vision. N‘oubliez pas que des changements très rapides de lumière peuvent déclencher des crises d‘épilepsie chez les personnes photosensibles et épileptiques. Reliez le cordon secteur livré à la prise secteur (6) et à une prise secteur 230 V~/50 Hz, le projecteur est alors prêt à fonctionner et peut être utilisé via un contrôleur DMX (☞ chapitre 8) ou exécute de manière indépendante le programme Show réglé (☞ chapitre 7). Pour éteindre, débranchez la prise du secteur. Attention : l’appareil ne doit pas être relié à la tension d’alimentation via un dimmer. 26 6.1 Télécommande 1) La télécommande est livrée avec une batterie. Pour éviter que la batterie ne se décharge pendant le stockage, une feuille de protection est placée entre la batterie et les contacts. Avant la première utilisation, retirez la feuille du support sur la face arrière de la télécommande. 2) Lorsque vous activez une touche, orientez la télécommande infrarouge vers le capteur REMOTE (1) sur la face avant du projecteur. Il ne doit pas y avoir d‘obstacle entre la télécommande et l‘appareil. Les fonctions de la télécommande sont présentées dans le chapitre 1.1. 3) Si la portée de la télécommande diminue, il faut remplacer la batterie. Pour ce faire, poussez, sur la face arrière de la télécommande, la petite languette avec l‘encoche vers la droite et simultanément retirez le support de batterie : 1. 2. Utilisez une batterie de type CR 2025. Veillez à respecter la polarité (⊕ vers le haut) lorsque vous placez la batterie. En cas de non utilisation prolongée, retirez la batterie, elle pourrait couler et endommager la télécommande. Ne jetez pas les batteries usagées dans la poubelle domestique. Déposez-les dans un container spécifique, par exemple, chez votre revendeur, pour leur élimination non polluante. Les réglages via le menu se font avec les touches MENU, , et ENTER (2). 1) Pour appeler le menu de réglage, appuyez sur la touche MENU. L‘affichage (3) indique le point de menu . 2) Avec la touche (ou MENU) ou , sélectionnez le point de menu souhaité. 3) Appuyez sur la touche ENTER. L‘affichage indique le réglage actuel du point de menu sélectionné. 4) Avec la touche ou , modifiez le réglage. 5) S‘il existe des points de sous-menu, vous pouvez les appeler avec la touche ENTER et modifier leurs réglages avec la touche ou . 6) Pour mémoriser un réglage, appuyez sur la touche ENTER. 7) Pour d‘autres réglages, revenez au niveau supérieur du menu avec la touche MENU. Si aucune touche n‘est activée pendant quelques secondes, le menu est automatiquement quitté. Selon le réglage du menu, l‘affichage s‘éteint après quelques secondes supplémentaires (☞ chapitre 9.3). A la prochaine pression sur une touche, il se rallume. Selon les chapitres 7 et 9, effectuez les réglages voulus pour chaque mode de fonctionnement. 7 Fonctionnement sans contrôleur DMX L’appareil dispose de 4 programmes Show à déroulement automatique et pouvant être gérés selon la musique. Un mode manuel existe aussi. 7.1 Fonctionnement automatique 1) Avec la touche MENU, appelez le menu. 2) Avec la touche ou , sélectionnez le point de menu et confirmez avec la touche ENTER. Si le programme automatique ne démarre pas et si l‘affichage indique , vérifiez le point de menu (☞ chapitre 7.3). L‘option (Master) doit être sélectionnée. Français 6.2 Utilisation via le menu 7.1.1 Modifier la vitesse La vitesse de mouvement de la tête peut être modifiée. 1) Avec la touche MENU, appelez le menu. 2) Avec la touche ou , sélectionnez le point de menu et confirmez avec la touche ENTER. 3) Avec la touche ou , sélectionnez la vitesse pour la rotation (pan) ou pour l‘inclinaison (tilt) et confirmez avec la touche ENTER. 4) Avec la touche ou , réglez la valeur souhaitée (0 – 9) et mémorisez avec la touche ENTER. 7.1.2 Gestion par la musique Via le menu, on peut régler si les mouvements et changements de couleurs des programmes automatiques doivent dépendre du son, c‘està-dire être synchronisés avec la musique. De plus, la sensibilité pour le microphone interne peut être modifiée. 1) Avec la touche MENU, appelez le menu. 2) Avec la touche ou , sélectionnez le point de menu et confirmez avec la touche ENTER. 3) Avec la touche ou , activez ( ) ou désactivez ( ) la gestion par la musique et confirmez avec la touche ENTER. 4) Avec la touche , sélectionnez le point de menu et confirmez avec la touche ENTER. 5) Avec la touche ou , réglez la valeur souhaitée pour la sensibilité du microphone (0 – 100) et mémorisez avec la touche ENTER. 3) Avec la touche ou , sélectionnez le programme Show voulu ( … ) et mémorisez avec la touche ENTER. Conseils : N‘attendez pas trop longtemps entre chaque pression de touche puisque le menu est automatiquement quitté après quelques secondes. 27 Français 7.2 Mode manuel En mode manuel, on peut régler la position de la tête, le mixage des couleurs, la luminosité totale et un effet stroboscope. 1) Avec la touche MENU, appelez le menu. 2) Avec la touche ou , sélectionnez le point de menu et confirmez avec la touche ENTER. 3) Avec la touche ou , sélectionnez un des paramètres suivants et confirmez avec la touche ENTER. position de rotation (pan) position d’inclinaison (tilt) composant rouge (red) composant vert (green) composant bleu (blue) composant blanc (white) luminosité totale (dimmer) effet stroboscope (strobe) Les variantes d‘effets correspondent au canal stroboscope pour la gestion par DMX (☞ chapitre 11.1.2, canal 4) 4) Avec la touche ou , réglez la valeur souhaitée (0 – 255) et mémorisez avec la touche ENTER. Répétez les points 3 et 4 pour les autres paramètres. Ce point de menu ne se quitte pas automatiquement, il reste actif jusqu‘à ce que la touche ENTER soit activée ou jusqu‘à ce que l‘appareil soit débranché. 7.3 Mode Master/Slave Plusieurs WASH-50LED peuvent fonctionner de manière synchrone. Un appareil (appareil Master) prend en charge la gestion des appareils restants (appareils Slave). Reliez les appareils ensemble en une chaîne. Reportez-vous au chapitre 8.1 sans tenir compte du point 1. Réglez les appareils comme suit sur le mode voulu : 1) Avec la touche MENU, appelez le menu. 2) Avec la touche ou , sélectionnez le point de menu et confirmez avec la touche ENTER. L‘affichage indique le réglage actuel. 28 3) Avec la touche ou , réglez le mode de fonctionnement souhaité et mémorisez avec la touche ENTER. appareil Master appareil Slave appareil Slave (avec mouvements inverses) La commutation entre le mode Master et Slave peut se faire aussi avec la touche SLAVE de la télécommande infrarouge. Sur l‘appareil Master, appelez un programme automatique (géré par la musique) ou faites un réglage manuel. L‘affichage des appareils Slave indique . 8 Gestion DMX DMX est l‘abréviation de Digital Multiplex et signifie gestion digitale de plusieurs appareils DMX via un câble commun de commande. Pour une gestion via un contrôleur DMX (p. ex. DMX-1440 ou DMX-510USB de «img Stage Line»), la WASH-50LED dispose de 16 canaux de commande DMX. Si toutes les options de commande ne sont pas nécessaires ou s’il y a moins de 16 canaux sur le contrôleur, le projecteur peut être commutée sur 9 canaux de commande DMX ou sur un seul canal. Vous trouverez les fonctions des canaux et les valeurs DMX dans le chapitre 11.1. 8.1 Branchement Comme interface DMX, l‘appareil possède des branchements XLR 3 pôles avec la configuration suivante : Pin 1 = masse, Pin 2 = DMX−, Pin 3 = DMX+ Pour le branchement, il est recommandé d‘utiliser des câbles spécifiques pour la transmission de signaux DMX (p. ex. câbles des séries CDMXN de «img Stage Line»). Pour des longueurs de liaison à partir de 150 m ou si plus de 32 appareils doivent être gérés via une seule sortie DMX, il est recommandé d‘insérer un amplificateur répétiteur DMX (p. ex. SR-103DMX de «img Stage Line»). l’adresse de démarrage 5. Les autres canaux DMX du projecteur sont automatiquement attribués aux adresses suivantes. 2) Reliez la sortie DMX OUT (5) à l’entrée contrôleur du prochain appareil DMX. Reliez sa sortie à l’entrée de l’appareil DMX suivant et ainsi de suite de manière à ce que tous les appareils gérés par DMX forment une chaîne. Exemple : Avec 16 canaux et l‘adresse de démarrage 5 pour le canal 1, les canaux 2 à 16 sont attribués aux adresses 6 à 20 : l’adresse 21 est la prochaine adresse de démarrage libre possible pour l’appareil suivant géré par DMX. 3) Pour éviter les perturbations lors de la transmission du signal, il convient, pour de longs câbles ou pour une multitude d’appareils branchés les uns derrière les autres, de terminer la sortie contrôleur du dernier appareil DMX de la chaîne avec une résistance 120 Ω (> 0,3 W) : mettez un bouchon (par exemple DLT-123 de «img Stage Line») dans la prise de sortie DMX. 8.2 Réglage du nombre de canaux DMX Pour pouvoir utiliser le projecteur avec un contrôleur, il faut régler l’adresse de démarrage DMX (☞ chapitre 8.3) et le nombre de canaux DMX. Le nombre de canaux DMX dépend des fonctions nécessaires et éventuellement du nombre de canaux disponibles sur le contrôleur. Retrouvez dans le chapitre 11.1 les fonctions disponibles respectivement en mode 1, 9 et 16 canaux et sélectionnez le nombre de canaux DMX : 1) Avec la touche MENU, appelez le menu. Le point de menu est affiché. 2) Appuyez sur la touche ENTER. L‘affichage indique l‘adresse de démarrage actuelle. 3) Avec la touche ou , réglez l‘adresse souhaitée (1 – 512) et mémorisez avec la touche ENTER. Le réglage avec la télécommande infrarouge est encore plus simple : Appuyez sur la touche DMX, et tapez les chiffres pour l‘adresse de démarrage souhaitée les uns après les autres. Pour «0», utilisez la touche SHOW. Conseil : la saisie de l‘adresse de démarrage via la télécommande n‘est possible que si un signal DMX est reçu. 1) Avec la touche MENU, appelez le menu. Une fois l‘adresse de démarrage réglée, vous pouvez utiliser le projecteur avec le contrôleur DMX. La réception de signaux de commande est indiquée par l‘adresse de démarrage actuelle sur l‘affichage. 2) Avec la touche ou , sélectionnez le point de menu et confirmez avec la touche ENTER. L‘affichage indique le réglage actuel. 9 Autres fonctions 3) Avec la touche ou , réglez le nombre de canaux souhaité et mémorisez avec la touche ENTER. 1 canal 9 canaux 16 canaux 8.3 Réglage de l’adresse de démarrage Pour pouvoir utiliser séparément tous les appareils DMX reliés à un contrôleur, il faut que chaque appareil reçoive une adresse de démarrage propre. Si le premier canal DMX du projecteur doit être géré par le contrôleur par exemple via l’adresse DMX 5, réglez sur la WASH-50LED Français 1) Reliez l’entrée DMX IN (4) à la sortie DMX du contrôleur ou d’un autre appareil géré par DMX. 9.1 Inversion du sens de mouvement Si le projecteur doit être géré avec d‘autres projecteurs, il peut être intéressant d‘inverser un ou deux sens de mouvement. 1) Avec la touche MENU, appelez le menu. 2) Avec la touche ou , sélectionnez le point de menu pour la rotation ou pour l‘inclinaison et confirmez avec la touche ENTER. L‘affichage indique le réglage actuel. 3) Avec la touche ou , sélectionnez si le mouvement doit être inversé ( ) ou pas ( ) et mémorisez avec la touche ENTER. 29 Français 9.2 Rotation de l’affichage 9.5 Comportement sans signal DMX Pour que l’affichage puisse être lu si l’appareil est suspendu, il peut être inversé de 180°. Via le réglage suivant, on peut choisir si le projecteur doit éteindre la lumière ou passer en mode automatique en cas d‘absence de signal DMX. 1) Avec la touche MENU, appelez le menu. 2) Avec la touche ou , sélectionnez le point de menu . 3) Appuyez sur la touche ENTER. L‘affichage est inversé ( ). Pour inverser à nouveau, répétez le processus. 9.3 Extinction de l‘affichage Si l‘affichage perturbe pendant le fonctionnement, il peut être éteint automatiquement si aucune touche n‘est activée pendant quelques secondes. Pour rallumer l‘affichage, appuyez sur une touche. 1) Avec la touche MENU, appelez le menu. 2) Avec la touche ou , sélectionnez le point de menu et confirmez avec la touche ENTER. L‘affichage indique le réglage actuel. 3) Avec la touche ou , sélectionnez si l‘affichage doit être toujours allumé ( ) ou être éteint automatiquement ( ) ; mémorisez avec la touche ENTER. 9.4 Balance des couleurs Si la WASH-50LED doit être gérée avec d‘autres projecteurs, il peut être nécessaire d‘adapter la balance entre les couleurs primaires. 1) Avec la touche MENU, appelez le menu. 2) Avec la touche ou , sélectionnez le point de menu et confirmez avec la touche ENTER. L‘affichage indique le réglage actuel. 3) Avec la touche ou , sélectionnez si le projecteur doit être éteint ( ) en cas d‘absence de signal DMX ou si le projecteur doit commuter en mode automatique ( ) ; mémorisez avec la touche ENTER. 9.6 Mouvement de référence Lorsque le projecteur a été mal réglé manuellement pendant le fonctionnement ou si son mouvement a été empêché, il est bon de répéter le mouvement de référence (qui est automatiquement effectué à chaque mise sous tension). 1) Avec la touche MENU, appelez le menu. 2) Avec la touche ou , sélectionnez le point de menu . 3) Appuyez sur la touche ENTER ; le mouvement de référence est effectué, l‘affichage indique . 9.7 Test de fonctionnement Pour le test de fonctionnement, on peut démarrer un programme de test : 2) Avec la touche ou , sélectionnez le point de menu et confirmez avec la touche ENTER. 1) Avec la touche MENU, appelez le menu. 3) Avec la touche ou , sélectionnez la couleur primaire à régler et confirmez avec la touche ENTER. rouge (red) vert (green) bleu (blue) 3) Appuyez sur la touche ENTER ; le programme de test est effectué, l‘affichage clignote. 4) Réglez la valeur maximale souhaitée (125 – 255) pour la couleur choisie et mémorisez avec la touche ENTER. Si besoin, répétez les points 3 et 4 pour les autres couleurs primaires. 30 1) Avec la touche MENU, appelez le menu. 2) Avec la touche ou , sélectionnez le point de menu . 4) Pour quitter le programme de test, appuyez sur la touche ENTER ou MENU. 9.8 Affichage des informations du système 1) Avec la touche MENU, appelez le menu. 2) Avec la touche ou , sélectionnez le point de menu et confirmez avec la touche ENTER. 4) Appuyez sur la touche ENTER et poursuivez avec le point 3 pour afficher une autre information. 10 Nettoyage de l‘appareil La vitre plastique devrait être nettoyée à intervalles réguliers de toute salissure. C’est ainsi que la lumière pourra être émise avec une luminosité maximale. Pour le nettoyage, débranchez la fiche secteur. Utilisez un chiffon doux et propre et un produit de nettoyage doux. Pour nettoyer les autres éléments du boîtier, utilisez un chiffon doux et sec. En aucun cas, vous ne devez utiliser de liquide ou produit chimique ; il pourrait couler dans l’appareil et l’endommager. 11 Caractéristiques techniques Protocole données :����������� DMX 512 Nombre de canaux DMX :� 1, 9 ou 16 Branchements :����������������� XLR, 3 pôles Lampes :��������������������������� 4 × LED 15 W RGBW Angle de rayonnement :����� 8° Plage de rotation (pan) :��� 540° Plage d’inclinaison (tilt) :��� 180° Alimentation :������������������� 230 V~/50 Hz Consommation :��������������� 60 VA max. Batterie télécommande :��� pile bouton 3 V lithium type CR 2025 Température fonc. :����������� 0 – 40° C Dimensions :��������������������� 160 × 130 × 240 mm Poids :������������������������������� 3,4 kg 11.1 Fonctions DMX 11.1.1 Mode 1 canal Valeur DMX 0–3 4–7 8 – 11 12 – 15 16 – 19 20 – 23 24 – 27 28 – 31 32 – 35 36 – 39 40 – 43 44 – 47 48 – 51 52 – 55 56 – 59 60 – 63 64 – 67 68 – 71 72 – 75 76 – 79 80 – 83 84 – 87 88 – 91 92 – 95 96 – 99 100 – 103 104 – 107 108 – 111 112 – 115 116 – 119 120 – 123 124 – 127 128 – 131 132 – 135 136 – 139 140 – 143 144 – 147 148 – 151 152 – 155 156 – 159 160 – 163 164 – 167 168 – 171 172 – 175 176 – 179 180 – 183 184 – 187 188 – 191 192 – 195 196 – 199 200 – 203 204 – 208 209 – 255 Fonction sombre rouge vert bleu couleur de mixage 1 (jaune) couleur de mixage 2 (cyan) couleur de mixage 3 (magenta) blanc couleur de mixage 4 couleur de mixage 5 couleur de mixage 6 couleur de mixage 7 couleur de mixage 8 couleur de mixage 9 (RGBW blanc) couleur de mixage 10 couleur de mixage 11 couleur de mixage 12 couleur de mixage 13 couleur de mixage 14 couleur de mixage 15 couleur de mixage 16 couleur de mixage 17 couleur de mixage 18 couleur de mixage 19 couleur de mixage 20 couleur de mixage 21 couleur de mixage 22 couleur de mixage 23 couleur de mixage 24 couleur de mixage 25 couleur de mixage 26 couleur de mixage 27 couleur de mixage 28 couleur de mixage 29 couleur de mixage 30 couleur de mixage 31 couleur de mixage 32 couleur de mixage 33 couleur de mixage 34 couleur de mixage 35 couleur de mixage 36 couleur de mixage 37 couleur de mixage 38 couleur de mixage 39 couleur de mixage 40 couleur de mixage 41 couleur de mixage 42 couleur de mixage 43 couleur de mixage 44 couleur de mixage 45 couleur de mixage 46 couleur de mixage 47 changements de couleurs aléatoires Français 3) Avec la touche ou , sélectionnez l‘information souhaitée et appelez-la avec la touche ENTER. heures de fonctionnement version du firmware température dans l‘appareil (en °C) 31 Français 11.1.2 Mode 9 canaux Canal 1 2 3 4 5 6 7 8 9 Valeur DMX 0 – 255 0 – 255 0 – 255 0–7 8 – 15 16 – 131 132 – 139 140 – 181 182 – 189 190 – 231 232 – 239 240 – 247 248 – 255 0 – 255 0 – 255 0 – 255 0 – 255 0 – 69 70 – 79 80 – 199 200 – 209 210 – 239 240 – 255 11.1.3 Mode 16 canaux Fonction Canal rotation (pan) inclinaison (tilt) dimmer (luminosité totale) sombre pas d‘effet stroboscope stroboscope: lent rapide pas d‘effet stroboscope entrée/arrêt : lent rapide pas d‘effet stroboscope marche/sortie : lent rapide pas d‘effet stroboscope effets stroboscope aléatoires pas d‘effet stroboscope luminosité rouge luminosité vert luminosité bleu luminosité blanc aucune fonctionn sombre pour mouvements via canaux 1 et 2 aucune fonction reset (mouvement de référence) aucune fonction programme géré par la musique 1 2 3 4 5 6 7 8 9 10 11 12 13 14 15 16 Valeur DMX 0 – 255 0 – 255 0 – 255 0 – 255 0 – 255 0 – 15 16 – 35 36 – 55 56 – 75 76 – 95 96 – 115 116 – 135 136 – 155 156 – 175 176 – 195 196 – 215 216 – 235 236 – 255 0 – 255 0 – 255 0–7 8 – 15 16 – 131 132 – 139 140 – 181 182 – 189 190 – 231 232 – 239 240 – 247 248 – 255 0 – 255 0 – 255 0 – 255 0 – 255 0–7 8 – 127 128 – 191 192 – 255 0 – 255 0 – 69 70 – 79 80 – 199 200 – 209 210 – 239 240 – 255 Fonction rotation (pan) réglage grossier rotation (pan) réglage fin inclinaison (tilt) réglage grossier inclinaison (tilt) réglage fin vitesse pour canal 1 et 3 rapide lent pas de programme de mouvement programme de mouvement 1 programme de mouvement 2 programme de mouvement 3 programme de mouvement 4 programme de mouvement 5 programme de mouvement 6 programme de mouvement 7 programme de mouvement 8 programme de mouvement 9 programme de mouvement 10 programme de mouvement 11 programme de mouvement 12 vitesse pour canal 6 rapide lent dimmer (luminosité totale) sombre pas d‘effet stroboscope stroboscope : lent rapide pas d‘effet stroboscope entrée/arrêt : lent rapide pas d‘effet stroboscope marche/sortie : lent rapide pas d‘effet stroboscope effets stroboscope aléatoires pas d‘effet stroboscope luminosité rouge luminosité vert luminosité bleu luminosité blanc mixage couleur via canal 10 – 13 32 couleurs changements automatiques de couleurs transitions automatiques de couleurs vitesse pour canal 14 lent rapide aucune fonction sombre pour mouvement via canal 1 – 4 aucune fonction reset (mouvement de référence) aucune fonction programme géré par la musique Tout droit de modification réservé. . Notice d’utilisation protégée par le copyright de MONACOR ® INTERNATIONAL GmbH & Co. KG. Toute reproduction même partielle à des fins commerciales est interdite. 32 Structure du menu MENU Rotation affichage Inversion sens inclinaison Inversion sens rotation Mouvement de référence oui non oui Informations système Sensibilité microphone Gestion par la musique version Firmware stroboscope toujours activé dimmer sombre mode automatique luminosité blanc luminosité bleu marche Mode manuel arrêt Mode Master/Slave température nombre d‘heures de fonctionnement désactivation automatique Sans signal DMX ENTER Programme de test non Affichage Français 11.2 luminosité vert mode Slave 2 mode Slave 1 luminosité rouge mode Master position inclinaison Mode automatique position rotation auto 1 – 4 vitesse SP1/2 (pan/tilt) Nombre de canaux DMX 16 canaux 9 canaux Adresse de démarrage DMX maximum bleu Balance des couleurs maximum vert 1 canal maximum rouge 33 Italiano Indice 1 Elementi di comando e collegamenti . . . . . . . . . . . . . 34 1.1 Telecomando a infrarossi . . . . . . . . . 35 2 Avvertenze di sicurezza . . . . . . . . . 35 3 Possibilità d‘impiego . . . . . . . . . . 35 4 Montaggio . . . . . . . . . . . . . . . 36 5 Messa in funzione . . . . . . . . . . . 36 6 Funzionamento . . . . . . . . . . . . . 36 1 Elementi di comando e collegamenti 6.1 Telecomando . . . . . . . . . . . . . . . 36 1 Sensore infrarosso per il telecomando 6.2 Funzionamento tramite il menu . . . . . . . 37 2 Tasti funzione MENU Apertura del menu, scelta di una voce del menu oppure uscita da un sottomenu , Scelta di una voce del menu oppure modifica di un‘impostazione ENTER Apertura di un sottomenu, memorizzazione di un‘impostazione modificata 7 Funzionamento senza unità di comando DMX . . . . . . . . . 37 7.1 Funzionamento automatico . . . . . . . . 37 7.1.1 Modificare la velocità . . . . . . . . . . 37 7.1.2 Comando tramite la musica . . . . . . . 37 7.2 Funzionamento manuale . . . . . . . . . 37 7.3 Funzionamento master/slave . . . . . . . . 38 8 Comando DMX . . . . . . . . . . . . . 38 8.1 Collegamento . . . . . . . . . . . . . . 38 8.2 Impostare il numero dei canali DMX . . . . . 38 8.3 Impostare l’indirizzo di start . . . . . . . . 39 9 Ulteriori funzioni . . . . . . . . . . . . 39 9.1 Invertire le direzioni del movimento . . . . . 39 9.2 Girare il display . . . . . . . . . . . . . . 39 9.3 Disattivare il display . . . . . . . . . . . . 39 9.4 Bilanciamento dei colori . . . . . . . . . . 39 3 Display 4 Ingresso DMX (XLR) per il collegamento di un‘unità di comando luce oppure per il collegamento con l‘uscita DMX di un altro apparecchio con comando DMX 5 Uscita DMX (XLR) per il collegamento con l‘ingresso DMX di un ulteriore apparecchio con comando DMX 6 Presa per il collegamento con una presa di rete (230 V~/50 Hz) per mezzo del cavo in dotazione 9.6 Eseguire un giro di riferimento . . . . . . . 40 7 Portafusibile Sostituire un fusibile difettoso solo con uno dello stesso tipo 9.7 Test funzionale . . . . . . . . . . . . . . 40 8 Staffa di montaggio 9.5 Comportamento senza segnale DMX . . . . 40 9.8 Indicare informazioni sul sistema . . . . . . 40 10 Pulizia dell‘apparecchio . . . . . . . . 40 11 Dati tecnici . . . . . . . . . . . . . . . 41 11.1 Funzioni DMX . . . . . . . . . . . . . . 41 11.1.1 Funzionamento a 1 canale . . . . . . . . 41 11.1.2 Funzionamento a 9 canali . . . . . . . . 42 11.1.3 Funzionamento a 16 canali . . . . . . . 42 11.2 Stuttura del menu . . . . . . . . . . . . 43 34 Proiettore a testa mobile Queste istruzioni sono rivolte a utenti con conoscenze base dei comandi DMX. Vi preghiamo di leggerle attentamente prima della messa in funzione e di conservarle per un uso futuro. A pagina 3, se aperta completamente, vedrete tutti gli elementi di comando e i collegamenti descritti. 9 Aperture per fissare la staffa di montaggio (8) (Fig. 2) Tasto DMX SLAVE PAN, TILT FADE / ZOOM SOUND GOBO SHOW STROBE R, G, B, W 1, 2, 3, 4, 6 Funzione accendere/spegnere tutti i LED digitare l‘indirizzo di start DMX: tasti 1 – 9, SHOW = 0 premere i tasti immediatamente una dopo l‘altra dis/attivare il funzionamento slave orientamento e inclinazione manuale della testa funzionamento automatico con dissolvenze di colori dis/attivare il comando musica per SHOW, FADE / ZOOM senza funzione funzionamento automatico 1 – 4, selezionare con UP/ DOWN stroboscopio / salve dello strob/scuro tener premuto il tasto rosso, verde, blu, bianco colori miscelati: bianco RGBW, giallo, ciano, magenta, violett Importante: La funzione del tasto DMX è disponibile solo se si riceve un segnale DMX. Tutte le altre funzioni del telecomando invece sono disponibili solo se non si riceve nessun segnale DMX. 1.se l’apparecchio o il cavo rete presentano dei danni visibili, 2.se dopo una caduta o dopo eventi simili sussiste il sospetto di un difetto, 3.se l’apparecchio non funziona correttamente. Per la riparazione rivolgersi sempre ad un’officina competente. • Staccare il cavo rete afferrando la spina, senza tirare il cavo. • Nel caso d’uso improprio, di montaggio non sicuro, di collegamenti sbagliati, d’impiego scorretto o di riparazione non a regola d’arte dell‘apparecchio, non si assume nessuna responsabilità per eventuali danni consequenziali a persone o a cose e non si assume nessuna garanzia per l‘apparecchio. Se si desidera eliminare l‘apparecchio definitivamente, consegnarlo per lo smaltimento ad un‘istituzione locale per il riciclaggio. 2 Avvertenze di sicurezza 3 Possibilità d‘impiego L’apparecchio è conforme a tutte le direttive rilevanti dell’UE e pertanto porta la sigla . Il proiettore a testa mobile WASH-50LED serve per l‘illuminazione ad effetto, p. es. per spettacoli o in discoteche. Come fonti di luce sono integrati 4 LED RGBW di 15 W, particolarmente luminosi. Con i LED si può irradiare la luce nei tre colori fondamentali (rosso, verde e blu) e in bianco nonché nei colori miscelati. Inoltre sono possibili dissolvenze di colori e effetti stroboscopici. Il proiettore è previsto per il comando tramite un‘unità DMX di comando luce (1, 9 o 16 canali DMX a scelta). Tuttavia può essere comandato anche senza unità di comando sia da solo che insieme a più WASH-50LED (modo master/ slave). Il proiettore può essere comandato comodamente per mezzo del telecomando a infrarossi in dotazione. Oltre a ciò, il microfono integrato permette degli effetti di sincronia con la musica. AVVERTIMENTO L’apparecchio è alimentato con pericolosa tensione di rete. Non intervenire mai personalmente al suo interno e non inserire niente nelle fessure di aerazione! Esiste il pericolo di una scarica elettrica. • Usare l’apparecchio solo all’interno di locali e proteggerlo dall‘acqua gocciolante e dagli spruzzi d‘acqua, da alta umidità dell‘aria e dal calore (temperatura d’impiego ammessa fra 0 e 40 °C). • Non depositare sull‘apparecchio dei contenitori riempiti di liquidi, p. es. bicchieri. • Non mettere in funzione l’apparecchio e staccare subito la spina rete Italiano 1.1 Telecomando a infrarossi 35 Italiano 4 Montaggio 6 Funzionamento Posizionare l‘apparecchio sempre in modo che durante il funzionamento sia garantita una circolazione sufficiente dell‘aria. Non coprire in nessun caso le aperture di ventilazione dell‘apparecchio. La scelta del modo di funzionamento e delle varie funzioni avviene per mezzo di un menu sul display (3). La struttura del menu è rappresentata nel capitolo 11.2. Tuttavia, con il telecomando (fig. 2) in dotazione, molte funzioni possono essere scelte direttamente. Per il comando tramite un‘unità DMX di comando luce, vedi capitolo 8. Dopo l‘accensione dell‘alimentazione, il display visualizza dapprima e la testa del proiettore esegue un giro di riferimento per tarare la posizione. Il WASH-50LED può essere collocato su un piano solido. Può essere montato anche a testa in giù, p. es. a una traversa. A tale scopo montare la staffa di montaggio (8) alla traversa, p. es. con una vite robusta di montaggio oppure con un supporto per proiettori (gancio a C). Per fissare la staffa di montaggio al proiettore, inserire le due viti ad alette della staffa nelle aperture (9) della base del proiettore e girarle in senso orario fino all‘arresto. AVVERTIMENTO Il proiettore deve essere montato a regola d‘arte e in modo sicuro. Se viene installato in un punto sotto il quale si possono trattenere delle persone, occorre prevedere un sistema di sicurezza supplementare (p. es. per mezzo di una fune di trattenuta sulla staffa di montaggio; fissare la fune in modo tale che la caduta dell‘apparecchio non possa superare i 20 cm). 5 Messa in funzione AVVERTIMENTO Non guardare direttamente e a lungo nella fonte di luce, per escludere possibili danni agli occhi. Tenete presente che i veloci cambi di luce possono provocare attacchi d‘epilessia presso persone fotosensibili o epilettici! Inserire il cavo rete in dotazione dapprima nella presa (6) e quindi in una presa di rete (230 V~ / 50 Hz). A questo punto, l‘apparecchio è pronto e può essere comandato da un‘unità DMX di comando luce (☞ Cap. 8) oppure svolge autonomamente il programma impostato (☞ Cap. 7). Per spegnerlo staccare la spina dalla presa di rete. Attenzione: L‘apparecchio non deve essere collegato con la tensione di rete per mezzo di un dimmer! 36 6.1 Telecomando 1) Il telecomando viene consegnato con la batteria inserita. Per evitare che questa si scarichi durante il magazzinaggio, fra la batteria e i contatti si trova una pellicola isolante. Prima dell‘uso sfilare tale pellicola dal portabatteria sul retro del telecomando. 2) Mentre si aziona un tasto, orientare il telecomando a infrarossi sempre verso il sensore REMOTE (1) sul lato anteriore del proiettore. Fra il telecomando e l‘apparecchio non ci devono essere degli ostacoli. Le funzioni del telecomando sono illustrate nel capitolo 1.1. 3) Se la portata del telecomando diminuisce, occorre sostituire la batteria. Sul retro del telecomando, spingere a destra le piccola levetta con la tacca e nello stesso tempo tirare fuori il portabatteria: 1. 2. Usare una batteria del tipo CR 2025. Quando si inserisce la batteria nel portabatteria, rispettare la corretta polarità (⊕ verso l‘alto). In caso di mancato uso prolungato conviene togliere la batteria per escludere che perdendo posa danneggiare il telecomando. Non gettare le batterie scariche o difettose nelle immondizie di casa bensì negli appositi contenitori (p. es. presso il vostro rivenditore). Le impostazioni tramite il menu si fanno con i tasti MENU, , e ENTER (2). 1) Per aprire il menu delle impostazioni premere il tasto MENU. Il display (3) indica la voce del menu. 2) Con il tasto (o MENU) oppure scegliere la voce del menu. 3) Premere il tasto ENTER. Il display indica ora l‘impostazione attuale della voce scelta del menu. 4) Con il tasto o modificare l‘impostazione. 5) Se esistono delle voci di un sottomenu, è possibile aprirle con il tasto ENTER e modificare le loro impostazioni con il tasto o . 6) Per memorizzare un‘impostazione premere il tasto ENTER. 7) Per ulteriori impostazioni, con il tasto MENU tornare a un livello superiore del menu. Se per alcuni secondi, non si preme nessun tasto, si esce automaticamente dal menu. A seconda dell‘impostazione del menu, il display si spegne dopo alcune ulteriori secondi (☞ Cap. 9.3). Con la pressione successiva di un tasto, si riaccende. Seguendo i capitoli 7 a 9, effettuare le impostazioni per il relativo modo di funzionamento. 7 Funzionamento senza unità di comando DMX L‘apparecchio dispone di quattro programmi show a svolgimento automatico che possono svolgersi anche comandati dalla musica. In più esiste il funzionamento manuale. 7.1 Funzionamento automatico 1) Con il tasto MENU aprire il menu. 2) Con il tasto o scegliere la voce del menu e confermare con il tasto ENTER. 3) Con il tasto o scegliere il programma … ) e salvare con il tasto show ( ENTER. N. B.: Non aspettare troppo fra le pressioni di un tasto, dato che dopo alcuni secondi si esce automaticamente dal menu. Se non si avvia il programma automatico e il display indica , controllare la voce del menu (☞ Cap. 7.3). Dev’essere scelta l’opzione (Master). Italiano 6.2 Funzionamento tramite il menu 7.1.1 Modificare la velocità La velocità di movimento della testa del proiettore può essere modificata. 1) Con il tasto MENU aprire il menu. 2) Con il tasto o scegliere la voce del menu e confermare con il tasto ENTER. 3) Con il tasto o scegliere la velocità per l’orientamento (pan) oppure per l‘inclinazione (tilt) e confermare con il tasto ENTER. 4) Con il tasto o impostare il valore (0 – 9) e salvare con il tasto ENTER. 7.1.2 Comando tramite la musica Tramite il menu è possibile decidere se i movimenti e il cambio colori dei programmi automatici devono svolgersi secondo il suono, cioè in sincronia con la musica. Inoltre si può modificare la sensibilità del microfono interno. 1) Con il tasto MENU aprire il menu. 2) Con il tasto o scegliere la voce del menu e confermare con il tasto ENTER. 3) Con il tasto o attivare ( ) o disattivare ( ) il comando tramite la musica e confermare con ENTER. 4) Con il tasto scegliere la voce del menu e confermare con il tasto ENTER. 5) Con il tasto o impostare il valore per la sensibilità del microfono (0 – 100) e salvare con il tasto ENTER. 7.2 Funzionamento manuale Nel funzionamento manuale è possibile impostare la posizione della testa, la miscela dei colori, la luminosità globale e l’effetto stroboscopico. 1) Con il tasto MENU aprire il menu. 2) Con il tasto o scegliere la voce del menu e confermare con il tasto ENTER. 3) Con il tasto o scegliere uno dei parametri seguenti e confermare con il tasto ENTER. posizione di orientamento (pan) posizione d’inclinazione (tilt) componente rosso (red) componente verde (green) 37 Italiano componente blu (blue) componente bianco (white) luminosità globale (dimmer) effetto stroboscopico (strobe) le varianti dell’effetto corrispondono al canale stroboscopico in caso di comando DMX (☞ Cap. 11.1.2, Canale 4) 4) Con il tasto o impostare il valore (0 – 255) e salvare con il tasto ENTER. Ripetere i punti 3 e 4 per gli altri parametri. Questa voce del menu non si chiude automaticamente, ma rimane attiva finché non si esce tramite il tasto MENU oppure finché l’apparecchio non viene staccato dall‘alimentazione. 7.3 Funzionamento master/slave È possibile gestire più WASH-50LED in modo sincrono. In questo caso, il primo apparecchio (apparecchio master) si assume il comando degli altri apparecchi (apparecchi slave). Collegare questi ultimi formando una catena, vedi il capitolo 8.1, tralasciando il punto 1. Per impostare il funzionamento richiesto degli apparecchi: 1) Con il tasto MENU aprire il menu. 2) Con il tasto o scegliere la voce del menu e confermare con il tasto ENTER. Il display indica l’impostazione attuale. 3) Con il tasto o impostare il modo di funzionamento e salvare con il tasto ENTER. Apparecchio master Apparecchio slave Apparecchio slave (con movimenti opposti) Il cambio fra funzionamento master e slave è possibile, in alternativa, anche tramite il tasto SLAVE del telecomando IR. Sull’apparecchio master aprire un programma automatico (comandato dalla musica) oppure procedere a un’impostazione manuale. Il display degli apparecchi slave indica . 8 Comando DMX DMX è l‘abbreviazione per Digital Multiplex e permette il comando digitale di più apparecchi DMX tramite una sola linea di comando. Per il comando tramite un‘unità DMX di comando 38 luce (p. es. DMX-1440 o DMX-510USB di “img Stage Line”), il WASH-50LED dispone di 16 canali di comando DMX. Se non sono richieste tutte le opzioni di comando oppure se sull’unità di comando non è disponibile un numero sufficiente di canali, sul proiettore si possono impostare 9 canali DMX oppure anche un solo canale. Le funzioni dei canali e i relativi valori DMX si trovano nel capitolo 11.1. 8.1 Collegamento Per il collegamento DMX, sono disponibili dei contatti XLR a 3 poli con la seguente piedinatura: pin 1 = massa, 2 = DMX−, 3 = DMX+ Per il collegamento si dovrebbero usare cavi speciali per la trasmissione di segnali DMX (p. es. cavi della serie CDMXN di “img Stage Line”). Nel caso di lunghezze oltre i 150 m o di uso di più di 32 apparecchi tramite una sola uscita DMX si consiglia per principio l’impiego di un amplificatore DMX (p. es. SR-103DMX di “img Stage Line”). 1) Collegare l‘ingresso DMX IN (4) con l‘uscita DMX dell‘unità di comando luce o di un altro apparecchio con comando DMX. 2) Collegare l‘uscita DMX OUT (5) con l‘ingresso di comando dell‘apparecchio DMX successivo e la sua uscita con l‘ingresso dell‘apparecchio DMX seguente ecc., finché tutti gli apparecchi con comando DMX sono collegati formando una catena. 3) Per escludere interferenze durante la trasmissione dei segnali, nel caso di linee lunghe o di un gran numero di apparecchi collegati in serie, l‘uscita DMX dell‘ultimo apparecchio DMX della catena dovrebbe essere terminata con una resistenza di 120 Ω (> 0,3 W): Inserire nella presa d‘uscita DMX un terminatore (p. es. DLT-123 di “img Stage Line”). 8.2 Impostare il numero dei canali DMX Per poter comandare il proiettore con un’unità di comando luce, occorre impostare l’indirizzo di start DMX (☞ Cap. 8.3) e il numero dei canali DMX. Il numero dei canali DMX dipende dalle funzioni richieste e eventualmente anche dal numero dei canali di comando disponibili sull’unità di comando luce. Il capitolo 11.1 presenta 9 Ulteriori funzioni 1) Con il tasto MENU aprire il menu. Se il proiettore deve essere comandato insieme ad altri proiettori, può essere conveniente invertire una o entrambe le direzioni di movimento. 2) Con il tasto o scegliere la voce del menu e confermare con il tasto ENTER. Il display indica l’impostazione attuale. 3) Con il tasto o impostare il numero dei canali e salvare con il tasto ENTER. 1 canale 9 canali 16 canali 8.3 Impostare l’indirizzo di start Per poter comandare separatamente tutti gli apparecchi DMX collegati con l‘unità per comando luce, ogni apparecchio deve avere il suo indirizzo di start. Se il primo canale DMX del proiettore deve essere comandato dall‘unità per comando luce p. es. tramite l‘indirizzo DMX 5, impostare sul WASH-50LED l‘indirizzo di start 5. I rimanenti canali DMX del proiettore saranno assegnati automaticamente agli indirizzi successivi. Esempio: Con l’indirizzo di start 5 per il canale 1 e con 16 canali di comando DMX, ai canali 2 a 16 sono assegnati gli indirizzi 6 a 20; l’indirizzo 21 è il prossimo indirizzo di start possibile per l‘apparecchio DMX successivo. 1) Con il tasto MENU aprire il menu. Si vede la voce del menu. 2) Premere il tasto ENTER. Il display indica l’indirizzo di start attuale. 3) Con il tasto o impostare l’indirizzo (1 – 512) e salvare con il tasto ENTER. L’impostazione tramite il telecomando IR è ancora più semplice: Premere il tasto DMX e premere quindi, una dopo l’altra, le cifre per l’indirizzo di start desiderato. Per lo “0” usare il tasto SHOW. N. B.: La digitazione dell’indirizzo di start è possibile solo mentre si riceve un segnale DMX. Dopo l’impostazione degli indirizzi di start, il proiettore può essere comandato tramite l’unità di comando DMX. La ricezione di segnali di comando è visualizzata con l’indirizzo attuale sul display. 9.1 Invertire le direzioni del movimento Italiano informazioni sulle funzioni disponibili nel funzionamento a 1, 9 e 16 canali; quindi scegliere il numero dei canali DMX: 1) Con il tasto MENU aprire il menu. 2) Con il tasto o scegliere la voce del menu per l’orientamento oppure per l‘inclinazione e confermare con il tasto ENTER. Il display indica l‘impostazione attuale. 3) Con il tasto o decidere se il movimento deve essere invertito ( ) o non ( ) e salvare con il tasto ENTER. 9.2 Girare il display Per maggiore comodità di lettura in caso di montaggio sospeso, il display può essere girata di 180°. 1) Con il tasto MENU aprire il menu. 2) Con il tasto o scegliere la voce del menu. 3) Premere il tasto ENTER. A questo punto, il display è girato ( ). Per ritornare alla stadio originale ripetere la procedura. 9.3 Disattivare il display Se il display disturba durante il funzionamento, può essere disattivato automaticamente, se per alcuni secondi non si preme nessun tasto. Per riattivare il display, premere un tasto. 1) Con il tasto MENU aprire il menu. 2) Con il tasto o scegliere la voce del menu e confermare con il tasto ENTER. Il display indica l’impostazione attuale. 3) Con il tasto o decidere se il display deve essere attivato sempre ( ) oppure se si deve disattivare automaticamente ( ), e salvare con il tasto ENTER. 9.4 Bilanciamento dei colori Se il WASH-50LED viene comandato insieme ad altri proiettori, può essere necessario adattare il bilanciamento fra i colori fondamentali. 39 Italiano 1) Con il tasto MENU aprire il menu. 9.7 Test funzionale 2) Con il tasto o scegliere la voce del menu e confermare con il tasto ENTER. Per il test funzionale è possibile avviare un programma di test. 3) Con il tasto o scegliere il colore fondamentale da impostare e confermare con ENTER. rosso (red) verde (green) blu (blue) 1) Con il tasto MENU aprire il menu. 4) Impostare il valore massimo voluto (125 – 255) per il colore scelto e salvare con il tasto ENTER. 4) Per terminare il programma di test premere il tasto ENTER o MENU. Se necessario ripetere i punti 3 e 4 per gli altri colori fondamentali. 9.8 Indicare informazioni sul sistema 9.5 Comportamento senza segnale DMX Con l’impostazione che segue si può decidere se il proiettore deve spegnere la luce se manca un segnale DX oppure se deve passare al funzionamento automatico. 1) Con il tasto MENU aprire il menu. 2) Con il tasto o scegliere la voce del menu e confermare con il tasto ENTER. Il display indica l’impostazione attuale. 3) Premere il tasto ENTER. Il programma di test viene eseguito e il display lampeggia. 1) Con il tasto MENU aprire il menu. 2) Con il tasto o scegliere la voce del menu e confermare con il tasto ENTER. 3) Con il tasto o scegliere l’informazione desiderata e aprirla con il tasto ENTER. Ore di funzionamento Versione del firmware degli apparecchi Temperatura nell’apparecchio in °C 3) Con il tasto o decidere se la luce deve essere spenta se manca un segnale DMX ( ) oppure se il proiettore deve passare al funzionamento automatico ( ), e salvare con il tasto ENTER. 4) Premere il tasto ENTER e proseguire con il punto 3 per visualizzare un’altra informazione. 9.6 Eseguire un giro di riferimento Ad intervalli regolari, a seconda della presenza di sporco, conviene pulire il disco di plastica. Solo allora la luce può essere irradiata alla massima luminosità. Prima di aprire l’apparecchio, staccare la spina dalla presa. Per la pulizia usare un panno morbido, pulito e un detergente delicato. Per pulire le altri parti del contenitore, usare solo un panno morbido asciutto. Non usare in nessun caso prodotti chimici o un liquido che potrebbe penetrare nell’apparecchio danneggiandolo. Se durante il funzionamento, la testa del proiettore è stata girata manualmente o se è stato bloccato un suo movimento, è opportuno ripetere il giro di riferimento (che viene eseguito automaticamente con ogni accensione). 1) Con il tasto MENU aprire il menu. 2) Con il tasto o scegliere la voce del menu. 3) Premere il tasto ENTER. Si esegue un giro di riferimento mentre il display visualizza . 40 2) Con il tasto o scegliere la voce del menu. 10 Pulizia dell‘apparecchio Protocollo dati:����������������� DMX 512 Numero dei canali DMX:��� 1, 9 o 16 Contatti:��������������������������� XLR, 3 poli Lampadine:����������������������� 4 × LED RGBW di 15 W Angolo d‘irradiazione:������� 8° Orientamento (pan): ��������� 540° Inclinazione (tilt):��������������� 180° Alimentazione: ����������������� 230 V~ / 50 Hz Potenza assorbita:������������� max. 60 VA Batteria del telecomando:� batteria bottone al litio di 3 V tipo CR 2025 Temperatura d‘esercizio: ��� 0 – 40 °C Dimensioni:����������������������� 160 × 130 × 240 mm Peso:��������������������������������� 3,4 kg 11.1 Funzioni DMX 11.1.1 Funzionamento a 1 canale Valore DMX 0–3 4–7 8 – 11 12 – 15 16 – 19 20 – 23 24 – 27 28 – 31 32 – 35 36 – 39 40 – 43 44 – 47 48 – 51 52 – 55 56 – 59 60 – 63 64 – 67 68 – 71 72 – 75 76 – 79 80 – 83 84 – 87 88 – 91 92 – 95 96 – 99 100 – 103 104 – 107 108 – 111 112 – 115 116 – 119 120 – 123 124 – 127 128 – 131 132 – 135 136 – 139 140 – 143 144 – 147 148 – 151 152 – 155 156 – 159 160 – 163 164 – 167 168 – 171 172 – 175 176 – 179 180 – 183 184 – 187 188 – 191 192 – 195 196 – 199 200 – 203 204 – 208 209 – 255 Funzione Scuro Rosso Verde Blu Colore miscelato 1 (giallo) Colore miscelato 2 (ciano) Colore miscelato 3 (magenta) Bianco Colore miscelato 4 Colore miscelato 5 Colore miscelato 6 Colore miscelato 7 Colore miscelato 8 Colore miscelato 9 (bianco RGBW) Colore miscelato 10 Colore miscelato 11 Colore miscelato 12 Colore miscelato 13 Colore miscelato 14 Colore miscelato 15 Colore miscelato 16 Colore miscelato 17 Colore miscelato 18 Colore miscelato 19 Colore miscelato 20 Colore miscelato 21 Colore miscelato 22 Colore miscelato 23 Colore miscelato 24 Colore miscelato 25 Colore miscelato 26 Colore miscelato 27 Colore miscelato 28 Colore miscelato 29 Colore miscelato 30 Colore miscelato 31 Colore miscelato 32 Colore miscelato 33 Colore miscelato 34 Colore miscelato 35 Colore miscelato 36 Colore miscelato 37 Colore miscelato 38 Colore miscelato 39 Colore miscelato 40 Colore miscelato 41 Colore miscelato 42 Colore miscelato 43 Colore miscelato 44 Colore miscelato 45 Colore miscelato 46 Colore miscelato 47 Cambi colore casuali Italiano 11 Dati tecnici 41 Italiano 11.1.2 Funzionamento a 9 canali Canale 1 2 3 4 5 6 7 8 9 Valore DMX 0 – 255 0 – 255 0 – 255 0–7 8 – 15 16 – 131 132 – 139 140 – 181 182 – 189 190 – 231 232 – 239 240 – 247 248 – 255 0 – 255 0 – 255 0 – 255 0 – 255 0 – 69 70 – 79 80 – 199 200 – 209 210 – 239 240 – 255 11.1.3 Funzionamento a 16 canali Funzione Canale Orientamento pan) Inclinazione (tilt) Dimmer (luminosità globale) Scuro Nessun effetto stroboscopico Stroboscopio: lento veloce Nessun effetto stroboscopico Dissolvenza in/spegnimento: lento veloce Nessun effetto stroboscopico Accendere/dissolvenza out: lento veloce Nessun effetto stroboscopico Effetti stroboscopici casuali Nessun effetto stroboscopico Luminosità rosso Luminosità verde Luminosità blu Luminosità bianco Nessuna funzione scuro in caso di movimento tramite canale 1 e 2 Nessuna funzione Reset (giro di riferimento) Nessuna funzione Programma comandato dalla musica 1 2 3 4 5 6 7 8 9 10 11 12 13 14 15 16 Valore DMX 0 – 255 0 – 255 0 – 255 0 – 255 0 – 255 0 – 15 16 – 35 36 – 55 56 – 75 76 – 95 96 – 115 116 – 135 136 – 155 156 – 175 176 – 195 196 – 215 216 – 235 236 – 255 0 – 255 0 – 255 0–7 8 – 15 16 – 131 132 – 139 140 – 181 182 – 189 190 – 231 232 – 239 240 – 247 248 – 255 0 – 255 0 – 255 0 – 255 0 – 255 0–7 8 – 127 128 – 191 192 – 255 0 – 255 0 – 69 70 – 79 80 – 199 200 – 209 210 – 239 240 – 255 Funzione Orientamento (pan) grossolano Orientamento (pan) fine Inclinazione (tilt) grossolana Inclinazione (tilt) fine Velocità per canali 1 e 3 veloce lento Nessun programma di movimento Programma di movimento 1 Programma di movimento 2 Programma di movimento 3 Programma di movimento 4 Programma di movimento 5 Programma di movimento 6 Programma di movimento 7 Programma di movimento 8 Programma di movimento 9 Programma di movimento 10 Programma di movimento 11 Programma di movimento 12 Velocità per canale 6 veloce lento Dimmer (luminosità globale) Scuro Nessun effetto stroboscopico Stroboscopio: lento veloce Nessun effetto stroboscopico Dissolvenza in/spegnimento: lento veloce Nessun effetto stroboscopico Accendere/dissolvenza out: lento veloce Nessun effetto stroboscopico Effetti stroboscopici casuali Nessun effetto stroboscopico Luminosità rosso Luminosità verde Luminosità blu Luminosità bianco Miscela colori tramite canali 10 – 13 32 colori Cambi colore automatici Dissolvenze automatiche di colori Velocità per canale 14 lento veloce Nessuna funzione Scuro in caso di movimento tramite i canali 1 – 4 Nessuna funzione Reset (giro di riferimento) Nessuna funzione Programma comandato dalla musica Con riserva di modifiche tecniche. La MONACOR ® INTERNATIONAL GmbH & Co. KG si riserva ogni diritto di elaborazione in qualsiasi forma delle presenti istruzioni per l’uso. La riproduzione – anche parziale – per propri scopi commerciali è vietata. 42 Stuttura del menu MENU Giro di riferimento Girare il display Invertire direzio‑ ne d’inclinazione Invertire direzione d’orientamento Sì No Sì Informazioni sul sistema Senza segnale DMX Sensibilità microfono ENTER Temperatura Versione Firmware Ore di funzionamento Programma di test No Display Italiano 11.2 Stroboscopio Sempre acceso Automaticamente spento Dimmer Scuro Funzionamento automatico Luminosità bianco Luminosità blu Comando musica On Funzionamento manuale Off Funzionamento master/slave Luminosità verde Funzionamento slave 2 Funzionamento slave 1 Luminosità rosso Funzionamento master Posizione d‘inclinazione Posizione d‘orientamento Funzionamento automatico Auto 1 – 4 Velocità SP1/2 (pan/tilt) Numero canali DMX 16 canali 9 canali Indirizzo di start DMX Massimo blu Bilanciamento dei colori Massimo verde 1 canale Massimo rosso 43 Nederlands Inhoudsopgave 1 Overzicht van de aansluitingen en bedieningselementen . . . . . . . . . 44 1.1 Infraroodafstandsbediening . . . . . . . . 45 2 Veiligheidsvoorschriften . . . . . . . . 45 3 Toepassingen . . . . . . . . . . . . . 45 4 Montage . . . . . . . . . . . . . . . . 45 5 Ingebruikname . . . . . . . . . . . . . 46 6 Bediening . . . . . . . . . . . . . . . 46 6.1 Afstandsbediening . . . . . . . . . . . . 46 6.2 Bediening via het menu . . . . . . . . . . 47 7 Bedrijf zonder DMX Besturingsapparaat 47 7.1 Automatisch bedrijf . . . . . . . . . . . . 47 7.1.1 Snelheid wijzigen . . . . . . . . . . . . 47 7.1.2 Muzieksturing . . . . . . . . . . . . . 47 7.2 Handmatige modus . . . . . . . . . . . . 47 7.3 Master-slavebedrijf . . . . . . . . . . . . 48 8 DMX-besturing . . . . . . . . . . . . . 48 8.1 Aansluiting . . . . . . . . . . . . . . . 48 8.2 Aantal DMX-kanalen instellen . . . . . . . 49 8.3 Startadres instellen . . . . . . . . . . . . 49 9 Overige functies . . . . . . . . . . . . 49 9.1 Bewegingsrichtingen omkeren . . . . . . . 49 9.2 De displayweergave draaien . . . . . . . . 49 9.3 Het display uitschakelen . . . . . . . . . . 49 9.4 Kleurbalans . . . . . . . . . . . . . . . 50 Deze handleiding is bedoeld voor gebruikers met basiskennis van de DMX-besturing. Lees de handleiding grondig door, alvorens het apparaat in gebruik te nemen, en bewaar ze voor latere raadpleging. Op de uitklapbare pagina 3 vindt u een overzicht van alle bedieningselementen en aansluitingen. 1 Overzicht van de aansluitingen en bedieningselementen 1 Infraroodsensor voor de afstandsbediening 2 Bedieningstoetsen MENU Het menu oproepen, een menu-item selecteren of een submenu verlaten , Een menu-item selecteren of een instelling wijzigen ENTER Een submenu oproepen, een gewijzigde instelling opslaan 3 Display 4 DMX-ingang (XLR) voor aansluiting van een DMX-lichtregelaar of voor aansluiting van een ander DMX-gestuurd apparaat op de DMX-uitgang 5 DMX-uitgang (XLR) voor aansluiting op de DMX-ingang van een ander DMX-gestuurd apparaat 6 POWER-jack voor aansluiting op een stopcontact (230 V~/50 Hz) met behulp van het bijgeleverde netsnoer 9.5 In geval van ontbrekend DMX-signaal . . . . . . . . . . . . . . . 50 7 Houder voor de netzekering Vervang een gesmolten zekering uitsluitend door een zekering van hetzelfde type. 9.6 Referentiebeweging uitvoering . . . . . . . 50 8 Montagebeugel 9.7 Werkingstest . . . . . . . . . . . . . . . 50 9 Openingen voor de bevestiging van de montagebeugel (8) 9.8 Systeeminformatie weergeven . . . . . . . 50 10 Het apparaat reinigen . . . . . . . . . 50 11 Technische gegevens . . . . . . . . . . 51 11.1 DMX-functies . . . . . . . . . . . . . . 51 11.1.1 1-kanaalbedrijf . . . . . . . . . . . . . 51 11.1.2 9-kanaalbedrijf . . . . . . . . . . . . . 52 11.1.3 16-kanaalbedrijf . . . . . . . . . . . . 52 11.2 Menustructuur . . . . . . . . . . . . . . 53 44 Schijnwerper met bewegende kop (figuur 2) Toets DMX SLAVE PAN, TILT FADE / ZOOM SOUND GOBO SHOW STROBE R, G, B, W 1, 2, 3, 4, 6 Functie alle leds uit-/inschakelen DMX-startadres invoeren: Toetsen 1 – 9, SHOW = 0 Toetsen onmiddellijk na elkaar indrukken Slavebedrijf in-/uitschakelen handmatig zwenken en kantelen van de kop Automatisch bedrijf met kleurovergangen Muzieksturing in-/uitschakelen voor SHOW, FADE / ZOOM zonder functie Automatisch bedrijf 1 – 4, kiezen met UP/ DOWN Stroboscoop / strob.-salvo‘s /donker Toets ingedrukt houden rood, groen, blauw, wit Mengkleuren: RGBW-wit, geel, cyaan, magenta, violet Belangrijk: De functie van de toets DMX is alleen beschikbaar, als er een DMX-signaal wordt ontvangen. Alle andere functies van de afstandsbediening zijn daarentegen alleen beschikbaar, als er geen DMX-signaal wordt ontvangen. 2 Veiligheidsvoorschriften Het apparaat is in overeenstemming met alle relevante EU-Richtlijnen en draagt daarom de -markering. WAARSCHUWING De netspanning van het apparaat is levensgevaarlijk. Open het apparaat niet, en zorg dat u niets in de ventilatieopeningen steekt! U loopt immers het risico van een elektrische schok. • Het apparaat is enkel geschikt voor gebruik binnenshuis; vermijd druip- en spatwater, plaatsen met een hoge vochtigheid en uitzonderlijk warme plaatsen (toegestaan omgevingstemperatuurbereik: 0 – 40 °C). • Plaats geen bekers met vloeistof zoals drinkglazen etc. op het apparaat. • Schakel het apparaat niet in of trek onmiddellijk de stekker uit het stopcontact, 1.wanneer het apparaat of het netsnoer zichtbaar beschadigd is, 2.wanneer er een defect zou kunnen optreden nadat het apparaat bijvoorbeeld is gevallen, 3.wanneer het apparaat slecht functioneert. Het apparaat moet in elk geval worden hersteld door een gekwalificeerd vakman. • Trek de stekker nooit met het snoer uit het stopcontact, maar met de stekker zelf. • In geval van ongeoorloofd of verkeerd gebruik, Nederlands 1.1 Infraroodafstandsbediening onveilige montage, verkeerde aansluiting, foutieve bediening of van herstelling door een niet-gekwalificeerd persoon vervalt de garantie en de verantwoordelijkheid voor hieruit resulterende materiële of lichamelijke schade. Wanneer het apparaat definitief uit bedrijf wordt genomen, bezorg het dan voor milieuvriendelijke verwerking aan een plaatselijk recyclagebedrijf. 3 Toepassingen De schijnwerper met bewegende kop WASH50LED dient als effectverlichting, bv. voor podia en in discotheken. Als lichtbron worden 4 bijzonder heldere RGBW-leds van 15 W gebruikt. Met de leds kan gekleurd licht in de drie basiskleuren (rood, groen en blauw) en wit uitgestraald worden evenals in de mengkleuren ervan. Bovendien zijn er kleurovergangen en stroboscoopeffecten mogelijk. De schijnwerper is ontworpen voor het besturen via een DMX-lichtregelaar (naar keuze 1, 9 of 16 DMX-besturingskanalen). Hij kan echter ook autonoom of in verbinding met andere WASH-50LED-apparaten (master‑/ slavemodus) worden gebruikt. Daarbij kunt u de schijnwerper via de meegeleverde infraroodbediening handig bedienen. Bovendien zijn met de ingebouwde microfoon muzieksynchrone effecten mogelijk. 4 Montage Plaats het apparaat steeds zo, dat bij gebruik voldoende ventilatie is gegarandeerd. De ventilatieopeningen in de behuizing mogen in geen geval zijn afgedekt. De WASH-50LED kan op een stevige, vlakke ondergrond worden opgesteld. U kunt het apparaat echter ook ondersteboven aan een traverse monteren. Monteer de montagebeugel (8) hiervoor met een stabiele montageschroef of een schijnwerperhouder (C-haak) aan de traverse. 45 Nederlands Om de montagebeugel aan de schijnwerper te bevestigen, steekt u de beide vleugelschroeven van de beugel in de openingen (9) van de bodemplaat van de schijnwerper en draait u ze rechtsom tot tegen de aanslag. WAARSCHUWING De schijnwerper moet deskundig en veilig worden gemonteerd. Als hij op een plek wordt geïnstalleerd, waar personen onder kunnen komen staan, moet hij extra worden beveiligd (bv. door een hijskabel aan de montagebeugel; bevestig de hijskabel zo dat het apparaat niet meer dan 20 cm diep kan vallen). 5 Ingebruikname WAARSCHUWING Kijk niet rechtstreeks in de lichtbron gedurende lange tijd, omdat dit de ogen kan beschadigen. Weet dat stroboscoopeffecten en zeer snelle lichtwisselingen bij fotosensibele mensen en epileptici epileptische aanvallen kunnen veroorzaken! Verbind het meegeleverde netsnoer eerst met de jack (6) en plug de stekker vervolgens in een stopcontact (230 V~/50 Hz). Daarna is het apparaat gebruiksklaar en kunt u het via een DMX-lichtregelaar bedienen (☞ hoofdstuk 8) of voert het apparaat het ingestelde showprogramma uit (☞ hoofdstuk 7). Om uit te schakelen, trekt u de netstekker uit het stopcontact. Opgelet: Het apparaat mag niet via een dimmer op de netspanning worden aangesloten! 6 Bediening Het selecteren van de bedrijfsmodus en de verschillende functies gebeurt via een menu in het display (3). De menustructuur wordt weergegeven in hoofdstuk 11.2. Met de meegeleverde afstandsbediening (fig. 2) kunt u echter ook veel functies direct selecteren. Voor de bediening via een DMX-lichtregelaar zie hoofdstuk 8. Na het inschakelen van de voedingsspanning verschijnt op het display eerst , en de schijnwerperkop voert voor het afstemmen van de positie een referentiebeweging door. 46 6.1 Afstandsbediening 1) De afstandsbediening wordt geleverd met geplaatste batterij. Om te voorkomen dat de batterij tijdens opslag ontlaadt, is er tussen de batterij en de batterijcontacten een isolatiefolie voorzien. Alvorens u de afstandsbediening een eerste keer in gebruik neemt, trekt u de folie uit de batterijhouder aan de achterzijde. 2) Als u op een toets van de infraroodafstandsbediening drukt, richt u deze op de sensor REMOTE (1) op de voorzijde van de schijnwerper. Daarbij moet er visueel contact zijn tussen de sensor en de afstandsbediening. De functies van de afstandsbediening vindt u terug in hoofdstuk 1.1. 3) Als de reikwijdte van de afstandsbediening afneemt, moet u de batterij vervangen. Duw hiervoor aan de achterzijde van de afstandsbediening de kleine grendel met de groef naar rechts en trek de batterijhouder er tegelijk uit: 1. 2. Gebruik een batterij van het type CR 2025. Let op de correcte polariteit als u de batterijen aanbrengt (⊕ omhoog). Als de afstandsbediening langere tijd niet wordt gebruikt, neemt u de batterij eruit, zodat de afstandsbediening niet wordt beschadigd bij eventueel uitlopen van de batterij. Lege batterijen horen niet in het huisvuil. Verwijder ze voor milieuvriendelijke verwerking uitsluitend als KGA (bv. de inzamelbox in de detailhandel). Instellingen via het menu worden met de toetsen MENU, , en ENTER (2) doorgevoerd. 1) Om het instelmenu te openen, drukt u op de toets MENU. Op het display (3) wordt het menu-item weergegeven. 2) Selecteer met de toets (of MENU) of het gewenste menu-item. 3) Druk op de toets ENTER. Op het display verschijnt nu de huidige instelling van het geselecteerde menu-item. 4) Wijzig de instelling met de toets of . 5) Als er submenu-items zijn, kunt u deze met de toets ENTER opvragen en de instellingen ervan met de toets of wijzigen. 6) Om een instelling op te slaan, drukt u op de toets ENTER. 7) Voor verdere instellingen keert u met de toets terug naar een menuniveau. toetsen, omdat na enkele seconden het menu automatisch wordt verlaten. Als het automatische programma niet start en op het display verschijnt, dan controleert u het menu-item (☞ hoofdstuk 7.3). De optie (master) moet zijn geselecteerd. 7.1.1 Snelheid wijzigen De bewegingssnelheid van de schijnwerperkop kan worden gewijzigd. 1) Open het menu met de toets MENU. 2) Selecteer met de toets of het menu-item en bevestig met de toets ENTER. 3) Selecteer met de toets of de snelheid voor de zwenkbeweging pan) of voor de kantelbeweging (tilt) en bevestig met de toets ENTER. 4) Stel met de toets of de gewenste waarde (0 – 9) in en sla op met de toets ENTER. Als gedurende enkele seconden niet op een toets wordt gedrukt, wordt het menu automatisch verlaten. Afhankelijk van een menu-instelling gaat het display na nog eens enkele seconden uit (☞ hoofdstuk 9.3). Door nog eens op een toets te drukken, licht het display opnieuw op. Aan de hand van de hoofdstukken 7 tot 9 voert u de gewenste instellingen voor de respectieve bedrijfsmodus in. 7.1.2 Muzieksturing Via het menu kunt u instellen of de bewegingen en kleurwisselingen van het automatische programma geluidsafhankelijk, d.w.z. synchroon met de muziek, moet worden weergegeven. Bovendien kan de gevoeligheid voor de ingebouwde microfoon worden gewijzigd. 7 Bedrijf zonder DMX Besturingsapparaat 3) Schakel met de toets of de muziekstu) en bevestig met de ring in ( ) of uit ( toets ENTER. Het apparaat voorziet vier automatische showprogramma‘s, die ook muziekgestuurd kunnen worden weergegeven. Daarnaast is er nog het handmatige bedrijf. 7.1 Automatisch bedrijf Nederlands 6.2 Bediening via het menu 1) Open het menu met de toets MENU. 2) Selecteer met de toets of het menu-item en bevestig met de toets ENTER. 4) Selecteer met de toets het menu-item en bevestig met de toets ENTER. 5) Stel met de toets of de gewenste waarde voor de microfoongevoeligheid in (0 – 100) en sla op met de toets ENTER. 1) Open het menu met de toets MENU. 2) Selecteer met de toets of het menu-item en bevestig met de toets ENTER. 3) Selecteer met de toets of het gewenste showprogramma ( … ) en sla op met de toets ENTER. Opmerkingen: Wacht niet te lang tussen het drukken op de 7.2 Handmatige modus In het handmatige bedrijf kunnen de koppositie, de kleurovergang, de totale helderheid en een stroboscoopeffect worden ingesteld. 1) Open het menu met de toets MENU. 2) Selecteer met de toets of het menu-item en bevestig met de toets ENTER. 47 Nederlands 3) Selecteer met de toets of een van de volgende parameters en bevestig met de toets ENTER. Zwenkpositie (pan) Kantelpositie (tilt) Roodaandeel (red) Groenaandeel (green) Blauwaandeel (blue) Witaandeel (white) Totale helderheid (dimmer) Stroboscoopeffect (strobe) De effectvarianten zijn in overeenstemming met het stroboscoopkanaal bij de DMX-besturing (☞ hoofdstuk 11.1.2, kanaal 4) 4) Stel met de toets of de gewenste waarde (0 – 255) in en sla op met de toets ENTER. Herhaal de stappen 3 en 4 voor de andere parameters. Dit menu-item wordt niet automatisch afgesloten, maar blijft actief tot het via de toets MENU wordt verlaten of tot het apparaat van de voedingsspanning wordt gekoppeld. 7.3 Master-slavebedrijf U kunt meerdere apparaten WASH-50LED synchroon bedienen. Daarbij neemt een apparaat (masterapparaat) de besturing over van de overige apparaten (slaveapparaten). Verbind de apparaten met elkaar tot een ketting. Zie hiervoor hoofdstuk 8.1, evenwel zonder bedieningsstap 1 in acht te nemen. Stel de apparaten als volgt in op het gewenste bedrijf: 1) Open het menu met de toets MENU. 2) Selecteer met de toets of het menu-item en bevestig met de toets ENTER. Op het display verschijnt de huidige instelling. 3) Stel met de toets of de gewenste bedrijfsmodus in en sla op met de toets ENTER. Masterapparaat Slaveapparaat Slaveapparaat (met tegengestelde bewegingen) De omschakeling tussen master- en slavebedrijf kan alternatief ook via de toets SLAVE van de infraroodafstandsbediening gebeuren. Open op het masterapparaat een automatisch (muziekgestuurd) programma of stel handmatig in. Het display van de slaveapparaten geeft aan. 48 8 DMX-besturing DMX is de afkorting van Digital Multiplex, en laat de digitale besturing van meerdere DMX-apparaten via één gemeenschappelijke besturingsleiding toe. Voor de bediening via een DMX-lichtregelaar (bv. DMX-1440 of DMX-510USB van “img Stage Line”) beschikt de WASH-50LED over 16 DMX-besturingskanalen. Als niet alle besturingsopties nodig zijn of als er op het besturingsapparaat niet zoveel kanalen beschikbaar zijn, kan de schijnwerper ook op 9 DMX-besturingskanalen of slechts één kanaal worden omgeschakeld. De functies van de kanalen en de overeenkomstige DMX-waarden vindt u terug in het hoofdstuk 11.1. 8.1 Aansluiting Als DMX-interface heeft het apparaat 3-polige XLR-aansluitingen met volgende contacten: pen 1 = massa, pen 2 = DMX–, pen 3 = DMX+ Voor het aansluiten moeten speciale kabels voor de DMX-signaaloverdracht worden gebruikt (bv. kabels van de CDMXN-serie van “img Stage Line”). Bij kabellengtes vanaf 150 m of bij het besturen van meer dan 32 apparaten via een DMX-uitgang wordt in principe het gebruik van een DMX-ophaalversterker (bv. SR-103DMX van “img Stage Line”) aanbevolen). 1) Verbind de besturingsingang DMX IN (4) met de DMX-uitgang van de lichtregelaar of van een ander DMX-gestuurd apparaat. 2) Verbind de besturingsuitgang DMX OUT (5) met de besturingsingang van het volgende DMX-gestuurde apparaat. Verbind de uitgang hiervan opnieuw met de ingang van het nageschakelde apparaat etc., tot alle DMX-gestuurde apparaten in een kring zijn aangesloten. 3) Om storingen bij signaaloverdracht uit te sluiten, moet u bij lange leidingen of bij een groot aantal aaneengesloten apparaten de besturingsuitgang van het laatste DMX-apparaat in de ketting afsluiten met een weerstand van 120 Ω (> 0,3 W): Steek een geschikte afsluitstekker (bv. DLT-123 van “img Stage Line”) in de uitgangsbus. Om de schijnwerper met een lichtregelaar te kunnen bedienen, moeten het DMX-startadres (☞ hoofdstuk 8.3) en het aantal DMX-kanalen worden ingesteld. Het aantal DMX-kanalen hangt af van de benodigde functies en eventueel ook van het aantal beschikbare besturingskanalen op de lichtregelaar. Lees in hoofdstuk 11.1 over de functies die telkens bij het 1-, 9 en 16-kanaalbedrijf beschikbaar zijn, en selecteer aan de hand hiervan het aantal DMX-kanalen: 1) Open het menu met de toets MENU. 2) Selecteer met de toets of het menu-item en bevestig met de toets ENTER. Op het display verschijnt de huidige instelling. 3) Stel met de toets of het gewenste aantal kanalen in en sla op met de toets ENTER. 1 kanaal 9 kanalen 16 kanalen 8.3 Startadres instellen Om alle op de lichtregelaar aangesloten DMX-apparaten afzonderlijk te kunnen bedienen, moet elk apparaat een eigen startadres krijgen. Als het eerste DMX-kanaal van de schijnwerper van de lichtregelaar bv. via het DMX-adres 5 moet worden gestuurd, stelt u op de WASH-50LED het startadres 5 in. De volgende DMX-kanalen van de schijnwerper zijn dan automatisch toegewezen aan de volgende adressen. Voorbeeld: Bij het startadres 5 voor kanaal 1 zijn bij 16 besturingskanalen de kanalen 2 tot 16 toegewezen aan de adressen 6 tot 20; adres 21 is het volgende vrije startadres voor het volgende DMX-gestuurde apparaat. 1) Open het menu met de toets MENU. Het menu-item wordt weergegeven. 2) Druk op de toets ENTER. Op het display verschijnt het huidige startadres. 3) Stel met de toets of het gewenste adres (1 – 512) in en sla op met de toets ENTER. Nog eenvoudiger is de instelling via de infraroodafstandsbediening: Druk op de toets DMX en onmiddellijk na elkaar de cijfers voor het gewenste startadres. Gebruik de toets SHOW voor een “0”. Opmerking: De invoer van het startadres via de afstandsbediening is alleen mogelijk, als er een DMX-signaal wordt ontvangen. Na het instellen van het startadres kunt u de schijnwerper via het DMX-besturingsapparaat bedienen. De ontvangst van besturingssignalen wordt weergegeven door het huidige startadres op het display. Nederlands 8.2 Aantal DMX-kanalen instellen 9 Overige functies 9.1 Bewegingsrichtingen omkeren Als de schijnwerper samen met andere schijnwerpers moet worden bestuurd, kan het nuttig zijn om een of beide bewegingsrichtingen om te keren. 1) Open het menu met de toets MENU. 2) Selecteer met de toets of het menu-item voor de zwenkbeweging of voor de kantelbeweging en bevestig met de toets ENTER. Op het display verschijnt de huidige instelling. 3) Selecteer met de toets of of de bewe) of niet ging moet worden omgekeerd ( ( ) en sla op met de toets ENTER. 9.2 De displayweergave draaien Om het display bij opgehangen montage beter te kunnen lezen, kunt u de weergave 180° draaien. 1) Open het menu met de toets MENU. 2) Selecteer met de toets of het menu-item . 3) Druk op de toets ENTER. De displayweergave is nu gedraaid ( ). Om terug te draaien, herhaalt u de procedure. 9.3 Het display uitschakelen Als het display tijdens het gebruik stoort, kan het automatisch worden uitgeschakeld, als gedurende enkele seconden niet op een toets wordt gedrukt. Om de weergave opnieuw in te schakelen, drukt u op een toets. 1) Open het menu met de toets MENU. 2) Selecteer met de toets of het menu-item en bevestig met de toets ENTER. Op het display verschijnt de huidige instelling. 3) Selecteer met de toets of of de weergave steeds ingeschakeld moet blijven ( ) ) en of automatisch moet uitschakelen ( sla op met de toets ENTER. 49 Nederlands 9.4 Kleurbalans 9.7 Werkingstest Als de WASH-50LED samen met andere schijnwerpers wordt bestuurd, kan het nodig zijn om de balans tussen de basiskleuren aan te passen. Voor de werkingstest kan een testprogramma worden gestart. 1) Open het menu met de toets MENU. 2) Selecteer met de toets of het menu-item . 2) Selecteer met de toets of het menu-item en bevestig met de toets ENTER. 3) Selecteer met de toets of de in te stellen basiskleur en bevestig met de toets ENTER. Rood (red) Groen (green) Blauw (blue) 4) Stel de gewenste maximumwaarde (125 – 255) voor de geselecteerde kleur in en sla op met de toets ENTER. Herhaal zo nodig de stappen 3 en 4 voor de andere basiskleuren. 9.5 In geval van ontbrekend DMX-signaal Met de volgende instelling kunt u bepalen of de schijnwerper bij ontbreken van een DMX-signaal het licht moet uitschakelen of naar automatisch bedrijf moet omschakelen. 3) Druk op de toets ENTER. Het testprogramma wordt doorgevoerd en het display knippert. 4) Om het testprogramma te beëindigen, drukt u op de toets ENTER of MENU. 9.8 Systeeminformatie weergeven 1) Open het menu met de toets MENU. 2) Selecteer met de toets of het menu-item en bevestig met de toets ENTER. 3) Selecteer met de toets of de gewenste informatie en open met de toets ENTER. Bedrijfsuren Versie van de apparaatfirmware Temperatuur in het apparaat in °C 4) Druk op de toets ENTER en ga voort met stap 3 om andere informatie weer te geven. 1) Open het menu met de toets MENU. 10 Het apparaat reinigen 2) Selecteer met de toets of het menu-item en bevestig met de toets ENTER. Op het display verschijnt de huidige instelling. Het kunststofplaatje moet na verontreiniging regelmatig worden gereinigd. Alleen dan kan het licht met maximale helderheid worden uitgestraald. Trek de stekker uit het stopcontact, alvorens het filter te reinigen. Gebruik alleen een zachte, schone doek en een mild reinigingsmiddel. Om de andere behuizingsonderdelen te reinigen, gebruikt u alleen een droge, zachte doek. Gebruik in geen geval chemicaliën of een vloeistof; deze kunnen immers in het apparaat indringen en schade veroorzaken. 3) Selecteer met de toets of of het licht bij ontbreken van een DMX-signaal moet worden uitgeschakeld ( ) of dat het de schijnwerper naar automatische bedrijf moet omschakelen ( ) en sla op met de toets ENTER. 9.6 Referentiebeweging uitvoering Als de schijnwerper tijdens het gebruik met de hand verdraaid of in zijn beweging gehinderd wordt, is het nuttig om de referentiebeweging (die telkens bij het inschakelen van de voedingsspanning automatisch wordt doorgevoerd) te herhalen. 1) Open het menu met de toets MENU. 2) Selecteer met de toets of het menu-item . 3) Druk op de toets ENTER. De referentiebeweging wordt doorgevoerd en op het display verschijnt . 50 1) Open het menu met de toets MENU. Gegevensprotocol:������������� DMX 512 Aantal DMX-kanalen: ������� 1, 9 of 16 Aansluitingen:������������������� XLR, 3-polig Verlichting:����������������������� 4 × 15-W-RGBW-led Uitstralingshoek:��������������� 8° Zwenkbereik (pan):����������� 540° Kantelbereik (tilt):������������� 180° Voedingsspanning: ����������� 230 V~ / 50 Hz Vermogensopname:����������� max. 60 VA Afstandsbedieningsbatterij: Li-knoopcel van 3 V Type CR 2025 Omgevingstemperatuurbereik:����������� 0 – 40 °C Afmetingen: ��������������������� 160 × 130 × 240 mm Gewicht:��������������������������� 3,4 kg 11.1 DMX-functies 11.1.1 1-kanaalbedrijf DMX-waarde 0–3 4–7 8 – 11 12 – 15 16 – 19 20 – 23 24 – 27 28 – 31 32 – 35 36 – 39 40 – 43 44 – 47 48 – 51 52 – 55 56 – 59 60 – 63 64 – 67 68 – 71 72 – 75 76 – 79 80 – 83 84 – 87 88 – 91 92 – 95 96 – 99 100 – 103 104 – 107 108 – 111 112 – 115 116 – 119 120 – 123 124 – 127 128 – 131 132 – 135 136 – 139 140 – 143 144 – 147 148 – 151 152 – 155 156 – 159 160 – 163 164 – 167 168 – 171 172 – 175 176 – 179 180 – 183 184 – 187 188 – 191 192 – 195 196 – 199 200 – 203 204 – 208 209 – 255 Functie Donker Rood Groen Blauw Mengkleur 1 (geel) Mengkleur 2 (cyaan) Mengkleur 3 (magenta) Wit Mengkleur 4 Mengkleur 5 Mengkleur 6 Mengkleur 7 Mengkleur 8 Mengkleur 9 (RGBW-wit) Mengkleur 10 Mengkleur 11 Mengkleur 12 Mengkleur 13 Mengkleur 14 Mengkleur 15 Mengkleur 16 Mengkleur 17 Mengkleur 18 Mengkleur 19 Mengkleur 20 Mengkleur 21 Mengkleur 22 Mengkleur 23 Mengkleur 24 Mengkleur 25 Mengkleur 26 Mengkleur 27 Mengkleur 28 Mengkleur 29 Mengkleur 30 Mengkleur 31 Mengkleur 32 Mengkleur 33 Mengkleur 34 Mengkleur 35 Mengkleur 36 Mengkleur 37 Mengkleur 38 Mengkleur 39 Mengkleur 40 Mengkleur 41 Mengkleur 42 Mengkleur 43 Mengkleur 44 Mengkleur 45 Mengkleur 46 Mengkleur 47 toevallige kleurwisseling Nederlands 11 Technische gegevens 51 Nederlands 11.1.2 9-kanaalbedrijf Kanaal 1 2 3 4 5 6 7 8 9 DMXwaarde 0 – 255 0 – 255 0 – 255 0–7 8 – 15 16 – 131 132 – 139 140 – 181 182 – 189 190 – 231 232 – 239 240 – 247 248 – 255 0 – 255 0 – 255 0 – 255 0 – 255 0 – 69 70 – 79 80 – 199 200 – 209 210 – 239 240 – 255 11.1.3 16-kanaalbedrijf Functie Kanaal Zwenken (pan) Kantelen (tilt) Dimmer (totale helderheid) Donker geen stroboscoopeffect Stroboscoop: langzaam snel geen stroboscoopeffect Inmengen/uitschakelen: langzaam snel geen stroboscoopeffect Inschakelen/uitmengen: langzaam snel geen stroboscoopeffect toevallige stroboscoopeffecten geen stroboscoopeffect Helderheid rood Helderheid groen Helderheid blauw Helderheid wit geen functie Donker bij beweging via kanaal 1 en 2 geen functie Reset (referentiebeweging) geen functie muziekgestuurd programma 1 2 3 4 5 6 7 8 9 10 11 12 13 14 15 16 DMXwaarde 0 – 255 0 – 255 0 – 255 0 – 255 0 – 255 0 – 15 16 – 35 36 – 55 56 – 75 76 – 95 96 – 115 116 – 135 136 – 155 156 – 175 176 – 195 196 – 215 216 – 235 236 – 255 0 – 255 0 – 255 0–7 8 – 15 16 – 131 132 – 139 140 – 181 182 – 189 190 – 231 232 – 239 240 – 247 248 – 255 0 – 255 0 – 255 0 – 255 0 – 255 0–7 8 – 127 128 – 191 192 – 255 0 – 255 0 – 69 70 – 79 80 – 199 200 – 209 210 – 239 240 – 255 Functie Zwenken (pan) grof Zwenken (pan) fijn Kantelen (tilt) grof Kantelen (tilt) fijn Snelheid voor kanaal 1 en 3 snel langzaam geen bewegingsprogramma Bewegingsprogramma 1 Bewegingsprogramma 2 Bewegingsprogramma 3 Bewegingsprogramma 4 Bewegingsprogramma 5 Bewegingsprogramma 6 Bewegingsprogramma 7 Bewegingsprogramma 8 Bewegingsprogramma 9 Bewegingsprogramma 10 Bewegingsprogramma 11 Bewegingsprogramma 12 Snelheid voor kanaal 6 snel langzaam Dimmer (totale helderheid) Donker geen stroboscoopeffect Stroboscoop: langzaam snel geen stroboscoopeffect Inmengen/uitschakelen: langzaam snel geen stroboscoopeffect Inschakelen/uitmengen: langzaam snel geen stroboscoopeffect toevallige stroboscoopeffecten geen stroboscoopeffect Helderheid rood Helderheid groen Helderheid blauw Helderheid wit Kleurmenging via kanaal 10 – 13 32 kleuren automatische kleurwisseling automatische kleurovergangen Snelheid voor kanaal 14 langzaam snel geen functie Donker bij beweging via kanaal 1 – 4 geen functie Reset (referentiebeweging) geen functie muziekgestuurd programma Wijzigingen voorbehouden. Deze gebruiksaanwijzing is door de auteurswet beschermd eigendom van MONACOR ® INTERNATIONAL GmbH & Co. KG. Een reproductie – ook gedeeltelijk – voor eigen commerciële doeleinden is verboden. 52 Menustructuur MENU Displayweergave draaien Kantelrichting omkeren Zwenkrichting omkeren Referentiebeweging ja Systeem informatie Zonder DMX-signaal Microfoon gevoeligheid Temperatuur Firmwareversie Testprogramma nee Display ENTER Bedrijfsuren nee ja Nederlands 11.2 Stroboscoop steeds aan automatisch uit Dimmer Donker Automatisch bedrijf Helderheid wit Helderheid blauw Muzieksturing aan Handmatige modus uit Masterslavebedrijf Helderheid groen Slavebedrijf 2 Slavebedrijf 1 Helderheid rood Masterbedrijf Kantelpositie Automatisch bedrijf Zwenkpositie Auto 1 – 4 Snelheid SP1/2 (pan/tilt) Aantal DMX-kanalen Maximaal blauw 16 kanalen 9 kanalen Kleurbalans Maximaal groen 1 kanaal DMX-startadres Maximaal rood 53 Español Contenidos 1 Elementos de Funcionamiento y Conexiones . . . . . . . . . . . . . . 54 1.1 Control remoto IR . . . . . . . . . . . . 55 2 Notas de Seguridad . . . . . . . . . . 55 3 Aplicaciones . . . . . . . . . . . . . . 55 4 Instalación . . . . . . . . . . . . . . . 55 5 Puesta en Marcha del Proyector . . . . 56 6 Funcionamiento del Proyector . . . . . 56 1 Elementos de Funcionamiento y Conexiones 6.1 Control remoto . . . . . . . . . . . . . . 56 1 Sensor IR para el control remoto 6.2 Funcionamiento mediante el menú . . . . . 57 7.2 Modo manual . . . . . . . . . . . . . . 58 2 Botones de control MENU Para activar el menú, para seleccionar un objeto de menú o para salir de algún submenú , Para seleccionar un objeto de menú o para cambiar un ajuste ENTER Para activar un submenú, para guardar un ajuste modificado 7.3 Modo Master/Slave . . . . . . . . . . . . 58 3 Visualizador 8 4 Entrada DMX (XLR) para la conexión a un controlador de luces DMX o para la conexión a la salida DMX de un aparato controlado por DMX diferente 7 Funcionamiento sin controlador DMX . . 57 7.1 Modo automático . . . . . . . . . . . . 57 7.1.1 Cambiar la velocidad . . . . . . . . . . 57 7.1.2 Control por música . . . . . . . . . . . 57 Control DMX . . . . . . . . . . . . . . 58 8.1 Conexión . . . . . . . . . . . . . . . . 58 8.2 Ajustar el número de canales DMX . . . . . 59 8.3 Ajustar la dirección de inicio . . . . . . . . 59 9 Funciones Adicionales . . . . . . . . . 59 9.1 Invertir las direcciones de movimiento . . . . 59 9.2 Rotación del visualizador . . . . . . . . . 60 9.3 Apagar el visualizador . . . . . . . . . . . 60 9.4 Compensación de color . . . . . . . . . . 60 9.5 Comportamiento sin señal DMX . . . . . . 60 9.6 Realizar un movimiento de referencia . . . . 60 9.7 Test funcional . . . . . . . . . . . . . . 60 9.8 Mostrar la información del sistema . . . . . 61 10 Limpieza del Aparato . . . . . . . . . . 61 11 Especificaciones . . . . . . . . . . . . 61 11.1 Funciones DMX . . . . . . . . . . . . . 61 11.1.1 Modo 1 canal . . . . . . . . . . . . . 61 11.1.2 Modo 9 canales . . . . . . . . . . . . 62 11.1.3 Modo 16 canales . . . . . . . . . . . . 62 11.2 Estructura del menú . . . . . . . . . . . . 63 54 Cabeza Móvil LED Estas instrucciones van dirigidas a usuarios con conocimientos básicos en control DMX. Lea atentamente estas instrucciones antes de utilizar el aparato y guárdelas para usos posteriores. Todos los elementos de funcionamiento y las conexiones que aquí se describen aparecen en la página 3 desplegable. 5 Salida DMX (XLR) para conectar a la entrada DMX de otro aparato controlado por DMX 6 Toma de corriente para la conexión a un enchufe (230 V~/50 Hz) mediante el cable de corriente entregado 7 Soporte para el fusible de corriente Cambie siempre un fusible fundido sólo por otro del mismo tipo. 8 Soporte de montaje 9 Agujeros para fijar el soporte de montaje (8) (fig. 2) Botón DMX SLAVE PAN, TILT FADE / ZOOM SOUND GOBO SHOW STROBE R, G, B, W 1, 2, 3, 4, 6 Función Para encender/apagar todos los LEDs Para entrar la dirección de inicio DMX: Botones 1 – 9, SHOW = 0 Pulse los botones directamente uno tras el otro Para activar/desactivar el modo Slave Para orientar e inclinar la cabeza manualmente Modo automático con fundido de colores Para activar/desactivar el control por música Para SHOW, FADE / ZOOM Sin función Modo automático 1 – 4 Seleccione el modo con UP/ DOWN Estroboscopio/salvas de estroboscopio/oscuro Mantenga el botón pulsado Rojo, verde, azul, blanco Colores mezclados: RGBW blanco, amarillo, cyan, magenta, púrpura Importante: La función del botón DMX sólo estará disponible mientras se reciba una señal DMX. Las otras funciones del control remoto sólo estarán disponibles cuando no se reciba ninguna señal DMX. 2 Notas de Seguridad El aparato cumple con todas las directivas relevantes de la UE y por lo tanto está marcado con el símbolo . ADVERTENCIA El aparato utiliza un voltaje peligroso. Deje el mantenimiento para el personal cualificado y no inserte nunca nada en las rejillas de ventilación; el manejo inexperto puede producir una descarga eléctrica. • El aparato está adecuado sólo para utilizarlo en interiores. Protéjalo de goteos y salpicaduras, elevada humedad del aire y calor (temperatura ambiente admisible: 0 – 40 ºC). • No coloque ningún recipiente lleno de líquido encima del aparato, como por ejemplo un vaso. • No ponga el aparato en funcionamiento o desconecte inmediatamente el enchufe de la toma de corriente si: 1.El aparato o el cable de corriente están visiblemente dañados. 2.El aparato ha sufrido daños después de una caída o accidente similar. 3.No funciona correctamente. Sólo el personal cualificado puede reparar el aparato bajo cualquier circunstancia. • No tire nunca del cable de corriente para des- Español 1.1 Control remoto IR conectar el enchufe de la toma de corriente, tire siempre del enchufe. • No podrá reclamarse garantía o responsabi- lidad alguna por cualquier daño personal o material resultante si el aparato se utiliza para otros fines diferentes a los originalmente concebidos, si no se monta con seguridad, no se conecta o no se utiliza adecuadamente, o no se repara por expertos. Si va a poner el aparato fuera de servicio definitivamente, llévelo a la planta de reciclaje más cercana para que su eliminación no perjudique el medioambiente. 3 Aplicaciones La cabeza móvil WASH-50LED se utiliza para crear efectos de iluminación, p. ej. en escenarios o discotecas. El proyector contiene 4 LEDs RGBW de 15 W y de gran brillo como fuente de luz. Los LEDs pueden emitir luz en los tres colores primarios (rojo, verde, azul) y en blanco pero también luz coloreada creada a partir de la mezcla de los colores. También se pueden hacer fundidos de un color a otro y efectos estroboscópicos. El proyector está diseñado para controlarse mediante un controlador de luces DMX (1, 9 ó 16 canales de control DMX disponibles), pero también puede funcionar por sí mismo o en combinación con varios proyectores WASH50LED sin controlador (modo Master/ Slave). El proyector se puede controlar según convenga mediante el control remoto IR entregado. Además, el micrófono integrado ofrece efectos sincronizados con la música. 4 Instalación Coloque el aparato en un lugar en el que exista una ventilación suficiente durante el funcionamiento. No cubra nunca las rejillas de ventilación de la carcasa. Ponga la WASH-50LED en una superficie sólida y plana. Como alternativa, instálela bocabajo en un travesaño, por ejemplo: Utilice un 55 Español tornillo de montaje estable o un soporte para juegos de luces (gancho C) para fijar el soporte de montaje (8) en una barra transversal. Para fijar el soporte de montaje en el proyector, inserte los dos tornillos mariposa del soporte en los agujeros (9) de la base y luego gírelos en sentido horario hasta el tope. ADVERTENCIA El proyector tiene que instalarse de un modo seguro y mediante expertos. Cuando se instale el proyector en un lugar en el que la gente puede pasar o sentarse bajo él, asegúrelo adicionalmente (p. ej. con un cable de seguridad en el soporte de montaje; fije el cable de modo que la distancia máxima de caída del aparato no supere los 20 cm). 5 Puesta en Marcha del Proyector ADVERTENCIA Para prevenir daños oculares, no mire nunca directamente hacia la fuente de luz durante un tiempo prolongado. ¡Tenga en cuenta que los cambios rápidos de iluminación pueden provocar ataques epilépticos en personas fotosensibles o con epilepsia! Conecte el cable de corriente entregado a la toma de corriente (6) y luego a un enchufe (230 V~ / 50 Hz): A continuación el aparato está listo para funcionar mediante el controlador de luces DMX (☞ apartado 8) o ejecutará el programa de muestra ajustado (☞ apartado 7). Para apagar el aparato, desconecte el enchufe de la toma. Advertencia: No conecte nunca el aparato a la corriente mediante un dimmer. 6 Funcionamiento del Proyector El modo de funcionamiento y las diversas funciones se seleccionan mediante un menú que aparece en el visualizador (3). La estructura del menú puede encontrarse en el apartado 11.2. El control remoto entregado (fig. 2) también permite seleccionar directamente muchas funciones. Ver apartado 8 para la información sobre 56 como utilizar el proyector con un controlador DMX. Cuando el alimentador esté conectado, primero aparecerá en el visualizador y luego la cabeza del proyector hará un movimiento de referencia para ajustar la posición. 6.1 Control remoto 1) El control remoto se entrega con una batería insertada. Para prevenir que la batería se descargue mientras el almacenamiento, hay una película de protección entre la batería y los contactos de batería. Antes del primer funcionamiento, quite la película de protección del soporte de la batería, en la parte posterior del control remoto. 2) Cuando pulse un botón, dirija siempre el control remoto IR hacia el sensor REMOTE (1) de la parte frontal del proyector. Asegúrese de que no hay obstáculos entre el control remoto y el aparato. Las funciones del control remoto se pueden encontrar en el apartado 1.1. 3) Cuando el rango de funcionamiento del control remoto disminuye, significa que hay que cambiar la batería: En la parte posterior del control remoto, presione la pequeña pestaña con la ranura hacia la derecha y extraiga el soporte de la batería: 1. 2. Utilice una batería del tipo CR 2025. Cuando inserte la batería en el soporte de la batería, preste atención a la polaridad (⊕ mirando arriba). Si el control remoto no se va a utilizar durante un largo periodo de tiempo, quite la batería como precaución para que el control remoto no se dañe si se derrama la batería. No deposite nunca las baterías gastadas en el contenedor normal. Para proteger el medioambiente, llévelas siempre a un contenedor especializado (p. ej. el contenedor selectivo de su tienda). Notas: Utilice los botones MENU, , y ENTER (2) para realizar ajustes mediante el menú. No tarde mucho en pulsar el siguiente botón, se saldrá automáticamente del menú en unos segundos si no se pulsa ningún botón. 1) Para activar el menú de ajuste, pulse el botón MENU. Aparecerá el objeto de menú en el visualizador (3). 2) Seleccione el objeto de menú deseado con el botón (o MENU) o . 3) Pulse el botón ENTER. El visualizador indicará el ajuste actual del objeto de menú seleccionado. Si el programa automático no empieza y si aparece en el visualizador, compruebe el objeto de menú (☞ apartado 7.3). Tiene que seleccionarse la opción (Master). 7.1.1 Cambiar la velocidad Para cambiar la velocidad de movimiento de la cabeza del proyector: 4) Utilice el botón o para cambiar el ajuste. 1) Abra el menú con el botón MENU. 5) Cuando hay objetos de submenú disponibles: Actívelos con el botón ENTER y luego cambie sus ajustes con el botón o . 2) Seleccione el objeto de menú con el botón o y luego pulse ENTER para confirmar. 6) Pulse el botón ENTER para guardar un ajuste. 7) Para ajustes adicionales, utilice el botón MENU para volver a un nivel de menú superior. Se saldrá automáticamente del menú si no se pulsa ningún botón en unos segundos. Dependiendo de uno de los ajustes del menú, el visualizador puede apagarse unos segundos después (☞ apartado 9.3). Se iluminará de nuevo cuando se pulse un botón. Consulte los apartados 7 a 9 y haga los ajustes deseados para el modo de funcionamiento correspondiente. 7 Funcionamiento sin controlador DMX El aparato ofrece cuatro programas de muestra automáticos que también se pueden ejecutar mediante el control por música. Además, hay un modo manual disponible. 7.1 Modo automático 1) Abra el menú con el botón MENU. 2) Seleccione el objeto de menú con el botón o y luego pulse ENTER para confirmar. 3) Utilice el botón o para seleccionar el programa de muestra seleccionado ( … ) y luego pulse ENTER para guardarlo. Español 6.2 Funcionamiento mediante el menú 3) Utilice el botón o para seleccionar la velocidad del movimiento de orientación (pan) o la velocidad para el movimiento de inclinación (tilt) y luego pulse ENTER para confirmar. 4) Utilice el botón o para ajustar el valor deseado (0 – 9) y luego pulse ENTER para guardarlo. 7.1.2 Control por música El menú se puede utilizar para definir si los movimientos y los cambios de color de los programas automáticos tienen que depender del sonido, es decir, estar sincronizados con la música. Además, se puede cambiar la sensibilidad del micrófono interno. 1) Abra el menú con el botón MENU. 2) Seleccione el objeto de menú con el botón o y luego pulse ENTER para confirmar. 3) Utilice el botón o para activar ( ) o desactivar ( ) el control por música y luego pulse ENTER para confirmar. 4) Seleccione el objeto de menú con el botón y luego pulse ENTER para confirmar. 5) Utilice el botón o para ajustar el valor deseado (0 – 100) de la sensibilidad del micrófono y luego pulse ENTER para guardarlo. 57 Español 7.2 Modo manual En el modo manual se puede ajustar la posición de la cabeza, la mezcla de colores, el brillo total y el efecto estroboscopio. 1) Abra el menú con el botón MENU. 2) Seleccione el objeto de menú con el botón o y luego pulse ENTER para confirmar. 3) Utilice el botón o para seleccionar uno de los siguientes parámetros y luego pulse el botón ENTER para confirmar. Posición orientación (pan) Posición inclinación (tilt) Componente rojo (red) Componente verde (green) Componente azul (blue) Componente blanco (white) Brillo total (dimmer) Efecto estroboscopio (strobe) las variantes de efecto corresponden al canal de estroboscopio para el control DMX (☞ apartado 11.1.2, canal 4) 4) Utilice el botón o para ajustar el valor deseado (0 – 255) y luego pulse ENTER para guardarlo. Repita los pasos 3 y 4 para los otros parámetros. De este objeto de menú no se sale automáticamente; permanecerá activo hasta que se pulse el botón MENU o se desconecte el aparato de la alimentación. 7.3 Modo Master/Slave Se pueden utilizar varios WASH-50LED sincronizados. En este modo, un aparato (aparato Master) controlará los otros aparatos (aparatos Slave). Conecte los aparatos en una cadena. Consulte el apartado 8.1, ignorando el paso 1. Para ajustar los aparatos en el modo deseado: 1) Abra el menú con el botón MENU. 2) Seleccione el objeto de menú con el botón o y luego pulse ENTER para confirmar. El visualizador indicará el ajuste actual. 58 3) Utilice el botón o para ajustar el modo de funcionamiento deseado y luego pulse ENTER para guardarlo. Aparato Master Aparato Slave Aparato Slave (con movimientos en direcciones opuestas) Como alternativa, utilice el botón SLAVE del control remoto IR para conmutar entre modo Master y modo Slave. En el aparato Master, active un programa automático (controlado por música) o haga un ajuste manual. Aparecerá en el visualizador de los aparatos Slave. 8 Control DMX DMX es la abreviatura de Digital Multiplex y significa control digital de varios aparatos DMX mediante un cable de control común. Para el funcionamiento mediante un controlador DMX (p. ej. DMX-1440 o DMX-510USB de “img Stage Line”), la WASH-50LED está equipada con 16 canales de control DMX. Sin embargo, el proyector puede cambiar a 9 canales DMX o a un canal DMX si no se necesitan todas las funciones de control o si hay menos de 16 canales disponibles. Las funciones de los canales y los correspondientes valores DMX pueden encontrarse en el apartado 11.1. 8.1 Conexión Como interfaz DMX, el aparato ofrece conexiones XLR de 3 polos con la siguiente configuración de pines: Pin 1 = masa, Pin 2 = DMX−, Pin 3 = DMX+ Para la conexión, se recomienda el uso de cables especiales para la transmisión de la señal DMX (p. ej. cables de la gama CDMXN de “img Stage Line”). Para cableados de más de 150 m y para el control de más de 32 aparatos mediante una única salida DMX, se recomienda insertar un amplificador de nivel DMX adecuado (p. ej. SR-103DMX de “img Stage Line”). 2) Conecte la salida de control DMX OUT (5) a la entrada de control del segundo aparato controlado por DMX. Proceda del mismo modo para conectar la salida del segundo aparato a la entrada del tercero, etc. hasta que todos los aparatos controlados por DMX estén conectados en cadena. 3) Para prevenir interferencias en la transmisión de señal en cableados largos o para un gran número de aparatos conectados en serie, termine la salida de control del último aparato DMX de la cadena con un resistor de 120 Ω (> 0,3 W): Conecte el tapón correspondiente (p. ej. el DLT-123 de “img Stage Line”) a la toma de salida. 8.2 Ajustar el número de canales DMX Para utilizar el proyector con un controlador de luces, ajuste la dirección de inicio DMX (☞ apartado 8.3) y el número de canales DMX. El número de canales DMX depende de las funciones necesarias y, si procede, del número de canales de control disponibles en el controlador. Consulte el apartado 11.1 para las funciones disponibles con los diferentes modos de canal (1, 9, 16 canales) y luego seleccione el número apropiado de canales DMX: asignarán automáticamente a las direcciones posteriores. Ejemplo: Con 16 canales de control y la dirección de inicio del canal 1 en 5, los canales 2 a 16 se asignarán a las direcciones 6 a 20; la dirección 21 sería la siguiente dirección de inicio disponible para el siguiente aparato controlado por DMX. Español 1) Conecte la entrada de control DMX IN (4) a la salida DMX del controlador de luces o de otro aparato controlado por DMX. 1) Abra el menú con el botón MENU. Aparecerá el objeto de menú en el visualizador. 2) Pulse el botón ENTER. El visualizador indicará la dirección de inicio actual. 3) Utilice el botón o para ajustar el valor deseado (1 – 512) y luego pulse ENTER para guardarlo. Con el control remoto IR, se puede realizar el ajuste de un modo más sencillo: Pulse el botón DMX y luego entre los dígitos para la dirección de inicio deseada directamente uno tras otro. Para entrar el “0”, pulse el boton SHOW. Nota: La dirección de inicio sólo puede entrarse mediante el control remoto mientras se recibe una señal DMX. Después de ajustar la dirección de inicio, el proyector puede funcionar mediante el controlador DMX. La dirección de inicio actual se mostrará en el visualizador para indicar la recepción de las señales de control. 1) Abra el menú con el botón MENU. 2) Seleccione el objeto de menú con el botón o y luego pulse ENTER para confirmar. El visualizador indicará el ajuste actual. 3) Utilice el botón o para ajustar el número de canales deseado y luego pulse ENTER para guardarlo. 1 canal 9 canales 16 canales 8.3 Ajustar la dirección de inicio Para el control separado de todos los aparatos DMX conectados al controlador de luces, cada aparato debe tener su propia dirección de inicio. Ejemplo: Si hay que controlar el primer canal DMX del proyector con la dirección DMX 5, ajuste la dirección de inicio del WASH-50LED en 5. Los otros canales DMX del proyector se 9 Funciones Adicionales 9.1 Invertir las direcciones de movimiento Si el proyector tiene que funcionar junto con otros proyectores, puede ser que haya que invertir una o ambas direcciones de movimiento. 1) Abra el menú con el botón MENU. 2) Utilice el botón o para seleccionar el objeto de menú para el movimiento de orientación o para el movimiento de inclinación y luego pulse ENTER para confirmar. El visualizador indicará el ajuste actual. 3) Utilice el botón o para definir si el movimiento tiene que invertirse ( ) o no ( ); luego pulse ENTER para guardar el ajuste. 59 Español 9.2 Rotación del visualizador 9.5 Comportamiento sin señal DMX Cuando el proyector está suspendido, el visualizador puede rotar 180º para que se pueda leer correctamente. Proceda del siguiente modo para definir si el proyector tiene que apagar la luz cuando no haya ninguna señal DMX disponible o si el proyector tiene que cambiar al modo automático: 1) Abra el menú con el botón MENU. 2) Seleccione el objeto de menú con el botón o . 3) Pulse el botón ENTER. Se girará el visualizador ( ). Repita este procedimiento para reajustar el visualizador en su posición previa. 9.3 Apagar el visualizador Para asegurarse de que el visualizador no moleste durante el funcionamiento, puede apagarse automáticamente después de unos segundos si no se pulsa ningún botón. Para conectar el visualizador de nuevo, pulse cualquier botón. 1) Abra el menú con el botón MENU. 2) Seleccione el objeto de menú con el botón o y luego pulse ENTER para confirmar. El visualizador indicará el ajuste actual. 3) Utilice el botón o para definir si el visualizador siempre tiene que permanecer conectado ( ) o si debe desconectarse automáticamente ( ); luego pulse ENTER para guardar el ajuste. 9.4 Compensación de color Cuando la WASH-50LED se controla junto con otros proyectores, puede ser necesario ajustar el balance entre los colores primarios. 1) Abra el menú con el botón MENU. 2) Seleccione el objeto de menú con el botón o y luego pulse ENTER para confirmar. 3) Utilice el botón o para seleccionar el color primario que hay que ajustar y luego pulse ENTER para confirmar. Rojo (red) Verde (green) Azul (blue) 4) Ajuste el valor máximo deseado (125 – 255) para el color seleccionado y luego pulse ENTER para guardarlo. Si es necesario, repita los pasos 3 y 4 para los otros colores primarios. 60 1) Abra el menú con el botón MENU. 2) Seleccione el objeto de menú con el botón o y luego pulse ENTER para confirmar. El visualizador indicará el ajuste actual. 3) Utilice el botón o para definir si el pro) cuando yector tiene que apagar la luz ( no haya ninguna señal DMX disponible o si el proyector tiene que cambiar al modo automático ( ); luego pulse ENTER para guardar el ajuste. 9.6 Realizar un movimiento de referencia Cuando la cabeza del proyector se haya desajustado manualmente durante el funcionamiento o cuando su movimiento se haya obstruido, debería repetirse el movimiento de referencia (que se hace automáticametne cada vez que se desconecta la corriente). 1) Abra el menú con el botón MENU. 2) Seleccione el objeto de menú botón o . con el 3) Pulse el botón ENTER. Se realizará el movien el miento de referencia y aparecerá visualizador. 9.7 Test funcional Se puede iniciar un programa de test para el test funcional. 1) Abra el menú con el botón MENU. 2) Seleccione el objeto de menú botón o . con el 3) Pulse el botón ENTER. Se llevará a cabo el programa de test y el visualizador empezará a parpadear. 4) Para salir del programa de test, pulse el botón ENTER o MENU. 1) Abra el menú con el botón MENU. 2) Seleccione el objeto de menú con el botón o y luego pulse ENTER para confirmar. 3) Utilice el botón o para seleccionar la información deseada y luego actívela con el botón ENTER. Horas de funcionamiento Versión del Firmware del aparato Temperatura dentro del aparato (en °C) 4) Pulse el botón ENTER y luego proceda con el paso 3 para mostrar una información diferente. 10 Limpieza del Aparato Limpie el panel de plástico en intervalos regulares, dependiendo de las impurezas. Este es el único modo para asegurar que la luz se emita con su máximo brillo. Antes de la limpieza, desconecte el enchufe de la toma de corriente. Utilice sólo un paño suave y limpio y un detergente no agresivo. Para la limpieza de las otras partes de la carcasa, utilice sólo un paño suave y seco. No utilice ningún líquido o producto químico; podrían penetrar en el aparato y dañarlo. 11 Especificaciones Protocolo de datos:����������� DMX 512 Número de canales DMX: � 1, 9 ó 16 Conexiones: ��������������������� XLR, 3 polos Fuente de luz:������������������� 4 LEDs RGBW de 15 W Ángulo del haz:����������������� 8° Rango de orientación (pan): 540° Rango de inclinación (tilt):� 180° Alimentación:������������������� 230 V~ / 50 Hz Consumo:������������������������� 60 VA máx. Batería del control remoto:� Pila botón de litio de 3 V, tipo CR 2025 Temperatura ambiente:����� 0 – 40 °C Dimensiones:��������������������� 160 × 130 × 240 mm Peso:��������������������������������� 3,4 kg 11.1 Funciones DMX 11.1.1 Modo 1 canal Valor DMX 0–3 4–7 8 – 11 12 – 15 16 – 19 20 – 23 24 – 27 28 – 31 32 – 35 36 – 39 40 – 43 44 – 47 48 – 51 52 – 55 56 – 59 60 – 63 64 – 67 68 – 71 72 – 75 76 – 79 80 – 83 84 – 87 88 – 91 92 – 95 96 – 99 100 – 103 104 – 107 108 – 111 112 – 115 116 – 119 120 – 123 124 – 127 128 – 131 132 – 135 136 – 139 140 – 143 144 – 147 148 – 151 152 – 155 156 – 159 160 – 163 164 – 167 168 – 171 172 – 175 176 – 179 180 – 183 184 – 187 188 – 191 192 – 195 196 – 199 200 – 203 204 – 208 209 – 255 Función Oscuro Rojo Verde Azul Color mezclado 1 (amarillo) Color mezclado 2 (cyan) Color mezclado 3 (magenta) Blanco Color mezclado 4 Color mezclado 5 Color mezclado 6 Color mezclado 7 Color mezclado 8 Color mezclado 9 (RGBW blanco) Color mezclado 10 Color mezclado 11 Color mezclado 12 Color mezclado 13 Color mezclado 14 Color mezclado 15 Color mezclado 16 Color mezclado 17 Color mezclado 18 Color mezclado 19 Color mezclado 20 Color mezclado 21 Color mezclado 22 Color mezclado 23 Color mezclado 24 Color mezclado 25 Color mezclado 26 Color mezclado 27 Color mezclado 28 Color mezclado 29 Color mezclado 30 Color mezclado 31 Color mezclado 32 Color mezclado 33 Color mezclado 34 Color mezclado 35 Color mezclado 36 Color mezclado 37 Color mezclado 38 Color mezclado 39 Color mezclado 40 Color mezclado 41 Color mezclado 42 Color mezclado 43 Color mezclado 44 Color mezclado 45 Color mezclado 46 Color mezclado 47 Cambios de colores aleatorios Español 9.8 Mostrar la información del sistema 61 Español 11.1.2 Modo 9 canales Canal 1 2 3 4 5 6 7 8 9 Valor Función DMX 0 – 255 Orientación (pan) 0 – 255 Inclinación (tilt) 0 – 255 Dimmer (brillo total) 0–7 Oscuro 8 – 15 Sin efecto estroboscópico 16 – 131 Estroboscopio: lento rápido 132 – 139 Sin efecto estroboscópico 140 – 181 Fundido de entrada / apagado: lento rápido 182 – 189 Sin efecto estroboscópico 190 – 231 Conectado / fundido de salida: lento rápido 232 – 239 Sin efecto estroboscópico 240 – 247 Efectos estroboscópicos aleatorios 248 – 255 Sin efecto estroboscópico 0 – 255 Brillo del rojo 0 – 255 Brillo del verde 0 – 255 Brillo del azul 0 – 255 Brillo del blanco 0 – 69 Sin función 70 – 79 Oscuro para movimiento mediante canales 1 y 2 80 – 199 Sin función 200 – 209 Reajuste (movimiento de referencia) 210 – 239 Sin función 240 – 255 Programa controlado por música 11.1.3 Modo 16 canales Canal 1 2 3 4 5 6 7 8 9 10 11 12 13 14 15 16 Valor DMX 0 – 255 0 – 255 0 – 255 0 – 255 0 – 255 0 – 15 16 – 35 36 – 55 56 – 75 76 – 95 96 – 115 116 – 135 136 – 155 156 – 175 176 – 195 196 – 215 216 – 235 236 – 255 0 – 255 0 – 255 0–7 8 – 15 16 – 131 132 – 139 140 – 181 182 – 189 190 – 231 232 – 239 240 – 247 248 – 255 0 – 255 0 – 255 0 – 255 0 – 255 0–7 8 – 127 128 – 191 192 – 255 0 – 255 0 – 69 70 – 79 80 – 199 200 – 209 210 – 239 240 – 255 Función Orientación (pan), tosca Orientación (pan), fina Inclinación (tilt), tosca Inclinación (tilt), fina Velocidad para canales 1 y 3 rápido lento Sin programa de movimiento Programa de movimiento 1 Programa de movimiento 2 Programa de movimiento 3 Programa de movimiento 4 Programa de movimiento 5 Programa de movimiento 6 Programa de movimiento 7 Programa de movimiento 8 Programa de movimiento 9 Programa de movimiento 10 Programa de movimiento 11 Programa de movimiento 12 Velocidad para el canal 6 rápido lento Dimmer (brillo total) Oscuro Sin efecto estroboscópico Estroboscopio: lento rápido Sin efecto estroboscópico Fundido de entrada / apagado: lento rápido Sin efecto estroboscópico Conectado / fundido de salida: lento rápido Sin efecto estroboscópico Efectos estroboscópicos aleatorios Sin efecto estroboscópico Brillo del rojo Brillo del verde Brillo del azul Brillo del blanco Mezcla de colores mediante canales 10 – 13 32 colores Cambios automáticos de colores Fundido de colores automático Velocidad para el canal 14 lento rápido Sin función Oscuro para movimiento mediante canales 1–4 Sin función Reajuste (movimiento de referencia) Sin función Programa controlado por música Sujeto a modificaciones técnicas. Manual de instrucciones protegido por el copyright de MONACOR ® INTERNATIONAL GmbH & Co. KG. Toda reproducción mismo parcial para fines comerciales está prohibida. 62 Estructura del menú MENU Rotar visualizador Dirección de in‑ clinación inversa Dirección de orien‑ tación inversa Información del sistema Sí Sensibilidad del micrófono Control por música Estroboscopio Siempre conectado Dimmer Oscuro Modo automático Brillo del blanco Brillo del azul ON Modo manual OFF Modo Master/ Slave Versión del Firmware Programa de test Apagado automático Sin señal DMX Temperatura Horas de funcionamiento No No Visualizador ENTER Movimiento de referencia Sí Español 11.2 Brillo del verde Modo Slave 2 Modo Slave 1 Brillo del rojo Modo Master Posición de inclinación Posición de orientación Modo automático Auto 1 – 4 Velocidad SP1/2 (pan/tilt) Número de canales DMX 16 canales 9 canales Dirección de inicio DMX Máximo de azul Balance de color Máximo de verde 1 canal Máximo de rojo 63 Polski Spis treści 1 Elementy operacyjne i połączeniowe . . . . . . . . . . . . 64 1.1 Pilot sterujący . . . . . . . . . . . . . . 65 2 Środki bezpieczeństwa . . . . . . . . . 65 3 Zastosowanie . . . . . . . . . . . . . 65 4 Montaż . . . . . . . . . . . . . . . . 65 5 Przygotowanie do pracy . . . . . . . . 66 6 Obsługa . . . . . . . . . . . . . . . . 66 6.1 Pilot sterujący . . . . . . . . . . . . . . 66 6.2 Sterowanie poprzez menu . . . . . . . . . 66 1 Elementy operacyjne i połączeniowe 1 Czujnik podczerwieni do sterowania pilotem 7.3 Tryb master/slave . . . . . . . . . . . . . 68 2 Przyciski sterujące MENU do wywoływania menu, aktywacji poleceń menu oraz wychodzenia z podmenu , do wyboru poleceń menu oraz zmiany ustawień ENTER do wywoływania podmenu oraz zapisywania ustawień 8 3 Wyświetlacz 7 Praca bez kontrolera DMX . . . . . . . 67 7.1 Tryb automatyczny . . . . . . . . . . . . 67 7.1.1 Zmiana prędkości . . . . . . . . . . . 67 7.1.2 Sterowanie muzyką . . . . . . . . . . . 67 7.2 Tryb manualny . . . . . . . . . . . . . . 67 Sterowanie DMX . . . . . . . . . . . . 68 8.1 Podłączanie . . . . . . . . . . . . . . . 68 8.2 Ustawianie liczby kanałów DMX . . . . . . 68 8.3 Ustawianie adresu startowego . . . . . . . 69 9 Dodatkowe funkcje . . . . . . . . . . 69 9.1 Przeciwny kierunek ruchu . . . . . . . . . 69 9.2 Obrót wyświetlacza . . . . . . . . . . . . 69 9.3 Wygaszanie wyświetlacza . . . . . . . . . 69 9.4 Balans kolorów . . . . . . . . . . . . . 69 9.5 Zachowanie urządzenia w przypadku utraty sygnału DMX . . . . . . . . . . . . . . 70 9.6 Powrót głowicy do pozycji wyjściowej . . . . 70 9.7 Test funkcjonalności . . . . . . . . . . . . 70 9.8 Wyświetlanie informacji o systemie . . . . . 70 10 Czyszczenie urządzenia . . . . . . . . . 70 11 Specyfikacja . . . . . . . . . . . . . . 71 11.1 Funkcje kanałów DMX . . . . . . . . . . 71 11.1.1 Tryb 1-kanałowy . . . . . . . . . . . . 71 11.1.2 Tryb 9-kanałowy . . . . . . . . . . . . 72 11.1.3 Tryb 16-kanałowy . . . . . . . . . . . 72 11.2 Struktura menu . . . . . . . . . . . . . . 73 64 Ruchoma głowa diodowa Niniejsza instrukcja przeznaczona jest dla użytkowników posiadających co najmniej podstawową wiedzę na temat sterowania DMX. Przed rozpoczęciem pracy z urządzeniem, prosimy zapoznać się z instrukcją obsługi, a następnie zachować ją do wglądu. Na stronie 3 pokazano wszystkie elementy sterujące i połączeniowe. 4 Wejście sterujące DMX (XLR) do podłączania kontrolera DMX lub wyjścia poprzedniego urządzenia DMX 5 Wyjście sterujące DMX (XLR) do podłączania wejścia DMX kolejnego urządzenia 6 Gniazdo zasilania łączone z gniazdkiem sieciowym (230 V~/50 Hz) za pomocą dołączonego kabla zasilającego 7 Oprawka bezpiecznika Spalony bezpiecznik wymieniać na nowy o identycznych parametrach. 8 Uchwyt montażowy 9 Otwory do montażu uchwytu (8) (rys. 2) Przycisk DMX SLAVE PAN, TILT FADE / ZOOM SOUND GOBO SHOW STROBE R, G, B, W 1, 2, 3, 4, 6 Funkcja do włączania/wyłączania wszystkich diod do ustawiania adresu startowego DMX: przyciski 1 – 9, SHOW = 0 kolejne przyciski wciskać jeden po drugim do włączania/wyłączania trybu slave do manualnego sterowania obrotem głowicy w poziomie i w pionie tryb automatyczny ze zmianą kolorów do włączania/wyłączania sterowania muzyką dla trybów SHOW, FADE / ZOOM bez funkcji tryb automatyczny 1 – 4, wybór za pomocą przycisków UP/ DOWN stroboskop/salwy stroboskopowe/wygaszenie przytrzymać wciśnięty przycisk czerwony, zielony, niebieski, biały zmiksowane kolory: biel RGBW, żółty, turkusowy, karmazynowy, purpurowy Ważne: Przycisk DMX jest aktywny tylko wówczas, gdy na wejście DMX podawany jest sygnał sterujący. Pozostałe przyciski są aktywne tylko wówczas, gdy do urządzenia nie jest podawany sygnał sterujący DMX. 2 Środki bezpieczeństwa Urządzenie spełnia wszystkie wymagania norm UE dzięki czemu zostało oznaczone symbolem . UWAGA Urządzenie jest zasilane wysokim napięciem. Wszelkie naprawy należy zlecić przeszkolonemu personelowi. Nie wolno umieszczać niczego w otworach wentylacyjnych! Nieprawi dłowa obsługa może spowodować porażenie prądem elektrycznym. • Urządzenie jest przeznaczone tylko do użyt- ku wewnątrz pomieszczeń. Należy chronić je przed działaniem wody, dużej wilgotności powietrza oraz wysokiej temperatury (dopuszczalny zakres 0 – 40 °C). 3.stwierdzono nieprawidłowe działanie. W każdym przypadku, naprawę urządzenia należy zlecić specjaliście. Polski 1.1 Pilot sterujący • Nie wolno odłączać zasilania ciągnąc za kabel, należy zawsze chwytać za wtyczkę. • Producent ani dostawca nie ponoszą odpo- wiedzialności za wynikłe szkody: uszkodzenie sprzętu lub obrażenia użytkownika, jeśli urządzenie było używane niezgodnie z ich przeznaczeniem, nieprawidłowo zamontowane, podłączone lub obsługiwane bądź poddane nieautoryzowanej naprawie. Po całkowitym zakończeniu eksploatacji, urządzenie należy oddać do punktu recyklingu, aby nie zaśmiecać środowiska. 3 Zastosowanie Ruchoma głowa WASH-50LED przeznaczona jest do celów oświetleniowych np. na scenie lub w dyskotece. Wyposażona jest w cztery 15W diody RGBW o dużej sile światła, pozwalające na emisję światła w kolorach podstawowych (czerwonym, zielonym i niebieskim), białym oraz w zmiksowanych barwach. Ponadto, wytwarza efekty płynnego przechodzenia między kolorami oraz stroboskopu. Urządzenie jest przystosowane do sterowania przez kontroler DMX (za pomocą 1, 9 lub 16 kanałów DMX), ale może pracować również bez kontrolera, pracując niezależnie lub w połączeniu z innymi ruchomymi głowami WASH-50LED (tryb master/slave). Poszczególne funkcje urządzenia mogą być także sterowane za pomocą dołączonego pilota. Dodatkowo, możliwa jest synchronizacja efektów z rytmem muzyki, dzięki wbudowanemu mikrofonowi. • Na urządzeniu nie wolno stawiać żadnych 4 Montaż pojemników z cieczą np. szklanek. • Nie należy włączać lub natychmiast odłączyć urządzenie od zasilania w przypadku gdy 1.stwierdzono widoczne uszkodzenie urządzenia lub kabla zasilającego, 2.urządzenie mogło ulec uszkodzeniu na skutek upadku lub podobnego zdarzenia, Urządzenie należy zamontować w takim miejscu, aby zapewnić dobrą cyrkulację powietrza wokół niego. Nie wolno zasłaniać otworów wentylacyjnych w obudowie. Urządzenie WASH-50LED można ustawiać na płaskiej powierzchni. Dodatkowo, istnieje możliwość mocowania urządzenia w pozycji 65 Polski odwróconej np. na rampie oświetleniowej (za pomocą uchwytu C); w tym celu, na środku dolnej strony urządzenia należy przykręcić dołączony uchwyt montażowy (8). W tym celu, wsunąć obie śruby w otwory (9) i przekręcić je w prawo do końca. UWAGA Urządzenie musi być zamontowane w sposób bezpieczny i fachowy. Jeśli ma pracować ponad ludźmi, należy je dodatkowo zabezpieczyć przed upadkiem np. wykorzystując linki zabezpieczające. Długość takich linek należy tak dobrać, aby w przypadku ich wykorzystania urządzenie maksymalnie spadło o 20 cm. 6.1 Pilot sterujący 1) Pilot sterujący dostarczany jest wraz z baterią. Przed rozpoczęciem użytkowania należy wyjąć folię izolującą z komory bateryjnej na tylnej stronie pilota. 2) Podczas wciskania przycisku, należy zawsze kierować pilot na czujnik REMOTE (1). Pomiędzy pilotem a urządzeniem nie mogą znajdować się żadne przeszkody. Funkcje poszczególnych przycisków pilota opisano w rozdz. 1.1. 3) Jeżeli zasięg działania pilota zmniejszy się, należy wymienić baterię: Wcisnąć mały pasek na tylnej stronie pilota i zsunąć pokrywę komory bateryjnej: 5 Przygotowanie do pracy UWAGA Nie należy patrzeć bezpośrednio na diody, silne światło może uszkodzić wzrok. Efekt stroboskopu i szybkie zmiany światła mogą być groźne dla osób wrażliwych na światło oraz chorych na epilepsję! Połączyć gniazdo zasilania (6) z gniazdkiem sieciowym (230 V~/50 Hz) za pomocą dołączonego kabla zasilającego. Urządzenie jest już włączone i może być sterowane za pomocą kontrolera DMX (☞ rozdz. 8) lub pracować zgodnie z ustawionym programem show (☞ rozdz. 7). Aby wyłączyć urządzenie, należy odłączyć je od zasilania. 2. Wyjąć rozładowaną baterię i zastąpić ją nową baterią pastylkową typu CR 2025, dodatni biegun ⊕ musi być skierowany w górę. Jeżeli pilot nie będzie przez dłuższy czas używany, należy wyjąć z niego baterię, aby zapobiec jego uszkodzeniu na skutek wylania baterii. Zużyte baterie należy wyrzucać do specjalnie oznaczonych pojemników, nie do zwykłych koszy na śmieci. 6.2 Sterowanie poprzez menu Uwaga: Nie wolno podłączać urządzenia do zasilania poprzez ściemniacz (dimmer)! Do poruszania się po menu oraz wprowadzania ustawień służą przyciski MENU, , oraz ENTER (2). 6 Obsługa 1) Aby wywołać menu sterujące, wcisnąć przycisk MENU. Na wyświetlaczu (3) pojawi się . Wybór trybu pracy oraz poszczególnych ustawień odbywa się za pomocą menu pokazywanego na wyświetlaczu (3). Struktura menu sterującego została pokazana w rozdz. 11.2. Dołączony pilot (rys. 2) umożliwia bezpośrednie sterowanie niektórymi funkcjami. Sposób sterowania urządzeniem za pomocą kontrolera DMX opisano w rozdz. 8. Po podłączeniu zasilania, na wyświetlaczu pojawi się najpierw , następnie głowica ustawi się w punkcie wyjściowym. 66 1. 2) Przejść do żądanego polecenia przyciskiem (lub MENU) lub . 3) Wcisnąć przycisk ENTER. Na wyświetlaczu pokazane zostanie bieżące ustawienie dla danego polecenia. 4) Zmienić ustawienie przyciskami oraz . 5) Jeżeli dostępne są polecenia podmenu: wcisnąć przycisk ENTER i dokonać zmiany ich ustawień przyciskami oraz . 7) W celu dokonania dalszych ustawień, powrócić do wyższego poziomu menu za pomocą przycisku MENU. Jeżeli przez kilka sekund nie zostanie wciśnięty żaden przycisk, menu zostanie automatycznie zamknięte. Zależnie od ustawienia, wyświetlacz pozostaje włączony lub gaśnie po kilku sekundach (☞ rozdz. 9.3). Zapala się ponownie po wciśnięciu dowolnego przycisku. Dokonać odpowiednich ustawień dla wybranych trybów pracy, zgodnie z opisem w rozdz. 7 do 9. 7 Praca bez kontrolera DMX Podczas pracy bez kontrolera dostępne są cztery automatyczne lub sterowane muzyką programy show oraz tryb manualny. 7.1 Tryb automatyczny 1) Wywołać menu sterujące przyciskiem MENU. 2) Wybrać polecenie przyciskami oraz i wcisnąć przycisk ENTER aby zatwierdzić wybór. 3) Za pomocą przycisków oraz wybrać żądany program show ( … ) i wcisnąć przycisk ENTER aby zatwierdzić. Uwagi: Kolejne przyciski wciskać w niezbyt dużym odstępie czasowym, po kilku sekundach od wciśnięcia przycisku menu zostaje wyłączone. Jeżeli automatyczny program nie startuje i na wyświetlaczu pojawia się , sprawdzić ustawienia dla polecenia (☞ rozdz. 7.3). Musi być wybrana opcja (Master). 7.1.1 Zmiana prędkości Aby zmienić prędkość ruchu głowicy: 1) Wywołać menu sterujące przyciskiem MENU. 2) Wybrać polecenie przyciskami oraz i wcisnąć przycisk ENTER aby zatwierdzić wybór. 3) Za pomocą przycisków oraz wybrać prędkość dla ruchu w poziomie (pan) lub prędkość dla ruchu w pionie (tilt) i wcisnąć przycisk ENTER. 4) Za pomocą przycisków oraz ustawić wartość (0 – 9) i zatwierdzić przyciskiem ENTER. Polski 6) Wcisnąć przycisk ENTER aby zapisać ustawienia. 7.1.2 Sterowanie muzyką Możliwa jest synchronizacja ruchu głowicy oraz zmiany kolorów w automatycznych programach z rytmem muzyki, oraz regulacja czułości wbudowanego mikrofonu. 1) Wywołać menu sterujące przyciskiem MENU. 2) Wybrać polecenie przyciskami oraz i wcisnąć przycisk ENTER aby zatwierdzić wybór. 3) Za pomocą przycisków oraz włączyć ( ) lub wyłączyć ( ) sterowanie muzyką i wcisnąć przycisk ENTER aby zatwierdzić. 4) Wybrać polecenie przyciskiem twierdzić przyciskiem ENTER. i za- 5) Za pomocą przycisków oraz ustawić czułość mikrofonu (0 – 100) i zatwierdzić przyciskiem ENTER. 7.2 Tryb manualny W trybie manualnym, możliwe jest ustawienie pozycji głowicy, zmiksowanego koloru, całkowitej jasności oraz wybór efektu stroboskopu. 1) Wywołać menu sterujące przyciskiem MENU. 2) Wybrać polecenie przyciskami oraz i wcisnąć przycisk ENTER aby zatwierdzić wybór. 3) Za pomocą przycisków oraz wybrać jeden z poniższych parametrów i wcisnąć przycisk ENTER. ustawienie w poziomie (pan) ustawienie w pionie (tilt) jasność czerwonego (red) jasność zielonego (green) jasność niebieskiego (blue) jasność białego (white) całkowita jasność (dimmer) efekt stroboskopu (strobe) warianty poszczególnych efektów są zgodne z kanałem DMX do sterowania stroboskopem (☞ rozdz. 11.1.2, kanał 4) 4) Za pomocą przycisków oraz ustawić żądaną wartość (0 – 255) i zatwierdzić przyciskiem ENTER. 67 Polski Powtórzyć kroki 3 i 4 dla pozostałych parametrów. Polecenie to nie zostaje zamknięte automatycznie; konieczne jest wciśnięcie przycisku MENU lub odłączenie zasilania. 7.3 Tryb master/slave Pojedyncze urządzenia WASH-50LED mogą zostać połączone w celu równoczesnego sterowania wszystkich urządzeń podrzędnych (slave) zgodnie z rytmem nadrzędnego (master). Urządzenia należy połączyć zgodnie z opisem w rozdz. 8.1, pomijając krok 1. Ustawić urządzenia na odpowiedni tryb: 1) Wywołać menu sterujące przyciskiem MENU. 2) Wybrać polecenie przyciskami oraz i zatwierdzić przyciskiem ENTER. Na wyświetlaczu pokazane zostanie bieżące ustawienie. 3) Za pomocą przycisków oraz wybrać żądany tryb i zatwierdzić przyciskiem ENTER. urządzenie nadrzędne master urządzenie podrzędne slave urządzenie podrzędne slave (przeciwny kierunek ruchu) Alternatywnie, użyć przycisku SLAVE na pilocie sterującym, aby przełączać urządzenie między trybami master i slave. Na urządzeniu nadrzędnym master, ustawić automatyczny (sterowany muzyką) program lub dokonać manualnych ustawień. Na wyświetlaczu urządzeń podrzędnych slave pojawi się . 8 Sterowanie DMX DMX jest skrótem od Digital Multiplex i pozwala na cyfrowe sterowanie wieloma urządzeniami DMX poprzez wspólną linię. Urządzenie WASH-50LED przystosowane jest do sterowania poprzez kontroler DMX (np. DMX-1440 lub DMX-510USB marki ”img Stage Line”) i posiada 16 kanałów DMX. Można także przełączyć je na sterowanie także za pomocą 9 lub tylko 1 kanału, zależnie od wymaganej liczby funkcji lub dostępnych kanałów kontrolera. Funkcje poszczególnych kanałów DMX opisano w rozdz. 11.1. 68 8.1 Podłączanie Do podłączania sygnału sterującego DMX do panelu służy 3-pinowe gniazdo XLR o następującej konfiguracji pinów: pin 1 = masa, pin 2 = DMX–, pin 3 = DMX+ Do podłączania zaleca się wykorzystać specjalny kabel do transmisji sygnałów DMX (np. serii CDMXN marki ”img Stage Line”). Jeżeli długość przewodu przekracza 150 m lub podłączane jest więcej niż 32 urządzenia, zalecane jest podłączenie wzmacniacza sygnału DMX (np. SR-103DMX marki ”img Stage Line”). 1) Połączyć wejście DMX IN (4) z wyjściem DMX kontrolera lub wyjściem poprzedniego urządzenia sterowanego sygnałem DMX. 2) Podłączyć wyjście DMX OUT (5) do wejścia DMX kolejnego efektu świetlnego. Kolejne urządzenia podłączać analogicznie, aż wszystkie urządzenia zostaną połączone. 3) Aby zapobiec zakłóceniom, zwłaszcza w przypadku długich linii lub wielu urządzeń, na wyjście DMX ostatniego z podłączonych paneli podłączyć opornik 120 Ω (> 0,3 W) lub użyć gotowy wtyk terminujący (np. DLT-123 marki ”img Stage Line”). 8.2 Ustawianie liczby kanałów DMX Aby móc sterować wieloma urządzeniami poprzez kontroler, należy ustawić indywidualne adresy startowe DMX (☞ rozdz. 8.3) oraz liczbę kanałów DMX, zależnie od wymaganej liczby funkcji lub dostępnych kanałów kontrolera. W oparciu o przedstawioną w rozdz. 11.1 listę funkcji dostępnych dla różnej liczby kanałów sterujących (1, 9, 16), wybrać odpowiednią liczbę kanałów DMX: 1) Wywołać menu sterujące przyciskiem MENU. 2) Wybrać polecenie przyciskami oraz i wcisnąć przycisk ENTER aby zatwierdzić wybór. Na wyświetlaczu pokazane zostanie bieżące ustawienie. 3) Za pomocą przycisków oraz wybrać liczbę kanałów i zatwierdzić przyciskiem ENTER. 1 kanał 9 kanałów 16 kanałów Aby móc sterować wieloma urządzeniami poprzez kontroler, należy ustawić indywidualne adresy startowe DMX. Przykładowo: jeżeli pierwszy kanał DMX urządzenia WASH-50LED ma być sterowany kontrolerem DMX poprzez adres 5, należy ustawić adres startowy urządzenia na 5. Pozostałym funkcjom panelu zostaną automatycznie przypisane kolejne adresy. Przykładowo: Dla 16 kanałów sterujących oraz adresu startowego kanału 1 ustawionego na 5, kanały 2 do 16 zostaną przypisane do adresów 6 do 20; adres 21 może być wykorzystany do sterowania kolejnym urządzeniem DMX. 1) Wywołać menu sterujące przyciskiem MENU. Na wyświetlaczu pojawi się polecenie . 2) Wcisnąć przycisk ENTER. Na wyświetlaczu pokazany zostanie bieżący adres startowy. 3) Za pomocą przycisków oraz ustawić żądany adres (1 – 512) i zatwierdzić przyciskiem ENTER. Za pomocą pilota sterującego IR ustawienie adresu jest jeszcze prostsze: Wcisnąć przycisk DMX i następnie wprowadzić adres za pomocą przycisków numerycznych. Aby wpisać ”0”, wcisnąć przycisk SHOW. Uwaga: Ustawienie adresu startowego za pomocą pilota możliwe jest tylko wówczas, gdy urządzenie odbiera sygnał sterujący DMX. Po ustawieniu adresu startowego, urządzenie może być sterowane sygnałem DMX z kontrolera. Na wyświetlaczu pokazany zostanie bieżący adres startowy, jako potwierdzenie odbioru sygnału sterującego. 9 Dodatkowe funkcje 9.1 Przeciwny kierunek ruchu 3) Za pomocą przycisków oraz zdefiniować czy dany ruch ma się odbywać w przeciwnym kierunku ( ) czy nie ( ); zatwierdzić ustawienie przyciskiem ENTER. 9.2 Obrót wyświetlacza W przypadku montażu podwieszanego, możliwe jest obrócenie sposobu wyświetlania wyświetlacza o 180°. 1) Wywołać menu sterujące przyciskiem MENU. 2) Wybrać polecenie oraz . przyciskami 3) Wcisnąć przycisk ENTER. Wyświetlacz zosta). nie obrócony ( Aby powrócić do poprzedniego ustawienia, powtórzyć procedurę. 9.3 Wygaszanie wyświetlacza Możliwe jest automatyczne wygaszanie wyświetlacza, kilka sekund po ostatnim wciśnięciu przycisku. Wyświetlacz zapala się ponownie po wciśnięciu dowolnego przycisku. 1) Wywołać menu sterujące przyciskiem MENU. 2) Wybrać polecenie przyciskami oraz i wcisnąć przycisk ENTER aby zatwierdzić wybór. Na wyświetlaczu pokazane zostanie bieżące ustawienie. 3) Za pomocą przycisków oraz zdefiniować czy wyświetlacz ma pozostawać włączony ( ) czy ma automatycznie gasnąć ( ); zatwierdzić ustawienie przyciskiem ENTER. 9.4 Balans kolorów W celu dopasowania barwy światła do uzyskiwanej z innych efektów świetlnych, współpracujących z WASH-50LED możliwa jest regulacja balansu pomiędzy podstawowymi kolorami. W przypadku wykorzystywania kilku urządzeń, część z nich może poruszać się w przeciwnym kierunku. Dotyczy to zarówno ruchu w pionie, jak i w poziomie. 1) Wywołać menu sterujące przyciskiem MENU. 1) Wywołać menu sterujące przyciskiem MENU. 3) Za pomocą przycisków oraz wybrać jeden z podstawowych kolorów i wcisnąć przycisk ENTER. czerwony (red) zielony (green) niebieski (blue) 2) Za pomocą przycisków oraz wybrać polecenie dla ruchu w poziomie lub dla ruchu w pionie i wcisnąć przycisk ENTER. Na wyświetlaczu pokazane zostanie bieżące ustawienie. Polski 8.3 Ustawianie adresu startowego 2) Wybrać polecenie przyciskami oraz i wcisnąć przycisk ENTER aby zatwierdzić wybór. 69 Polski 4) Ustawić maksymalną wartość jasności (125 – 255) dla danego koloru i zatwierdzić przyciskiem ENTER. Jeżeli trzeba, powtórzyć kroki 3 i 4 dla pozostałych kolorów podstawowych. 9.5 Zachowanie urządzenia w przypadku utraty sygnału DMX Zgodnie z poniższym opisem, zdefiniować czy w przypadku utraty sygnału sterującego DMX urządzenie ma się zostać wygaszone czy ma przełączyć się na tryb automatyczny: 1) Wywołać menu sterujące przyciskiem MENU. 2) Wybrać polecenie przyciskami oraz i wcisnąć przycisk ENTER aby zatwierdzić wybór. Na wyświetlaczu pokazane zostanie bieżące ustawienie. 3) Za pomocą przycisków oraz wybrać: wygaszenie ( ) lub przełączenie na tryb automatyczny ( ); zatwierdzić ustawienie przyciskiem ENTER. 9.6 Powrót głowicy do pozycji wyjściowej W przypadku ręcznego przestawienia głowicy lub jej zablokowania podczas ruchu, zalecany jest powrót do pozycji wyjściowej (podobnie jak po każdym włączeniu zasilania) 1) Wywołać menu sterujące przyciskiem MENU. 2) Wybrać polecenie oraz . przyciskami 3) Wcisnąć przycisk ENTER. Głowica powróci do pozycji wyjściowej, a na wyświetlaczu pojawi się . 9.7 Test funkcjonalności Aby uruchomić program testowy: 1) Wywołać menu sterujące przyciskiem MENU. 2) Wybrać polecenie oraz . przyciskami 3) Wcisnąć przycisk ENTER. Odtworzony zostanie program testowy, a wyświetlacz zacznie migać. 4) Aby wyjść z programu testowego, wcisnąć przycisk ENTER lub MENU. 70 9.8 Wyświetlanie informacji o systemie 1) Wywołać menu sterujące przyciskiem MENU. 2) Wybrać polecenie przyciskami oraz i wcisnąć przycisk ENTER aby zatwierdzić wybór. 3) Za pomocą przycisków oraz wybrać żądaną informację i zatwierdzić wybór przyciskiem ENTER. liczba godzin pracy wersja firmware’a temperatura wewnątrz urządzenia (w °C) 4) Wcisnąć przycisk ENTER i postępować zgodnie z opisem w kroku 3 aby zobaczyć poszczególne informacje. 10 Czyszczenie urządzenia Zaleca się regularne czyszczenie obiektywu, w zależności od warunków pracy urządzenia: kurzu, dymu oraz innych czynników wpływających na osłabienie siły światła. Przed przystąpieniem do czyszczenia urządzenia należy bezwzględnie odłączyć urządzenie od gniazdka sieciowego. Do czyszczenia można wykorzystać standardowe środki do czyszczenia szyb, a następnie wytrzeć czyszczone elementy do sucha. Do czyszczenia obudowy używać suchej miękkiej ściereczki. Nie używać wody ani innych płynów, które po wniknięciu do urządzenia mogą spowodować jego uszkodzenie. Protokół danych:�������������������DMX 512 Liczba kanałów DMX:�����������1, 9 lub 16 Złącza: ���������������������������������XLR, 3-pinowe Źródło światła: ���������������������4 × 15 W diody RGBW Kąt promieniowania:�������������8° Kąt obrotu w poziomie (pan): 540° Kąt obrotu w pionie (tilt):�������180° Zasilanie: �����������������������������230 V~ / 50 Hz Pobór mocy: �������������������������60 VA max Bateria pilota:�����������������������3 V litowa pastylkowa, typ CR 2025 Zakres temperatur: ���������������0 – 40° C Wymiary:�������������������������������160 × 130 × 240 mm Waga:�����������������������������������3,4 kg 11.1 Funkcje kanałów DMX 11.1.1 Tryb 1-kanałowy Wartość DMX 0–3 4–7 8 – 11 12 – 15 16 – 19 20 – 23 24 – 27 28 – 31 32 – 35 36 – 39 40 – 43 44 – 47 48 – 51 52 – 55 56 – 59 60 – 63 64 – 67 68 – 71 72 – 75 76 – 79 80 – 83 84 – 87 88 – 91 92 – 95 96 – 99 100 – 103 104 – 107 108 – 111 112 – 115 116 – 119 120 – 123 124 – 127 128 – 131 132 – 135 136 – 139 140 – 143 144 – 147 148 – 151 152 – 155 156 – 159 160 – 163 164 – 167 168 – 171 172 – 175 176 – 179 180 – 183 184 – 187 188 – 191 192 – 195 196 – 199 200 – 203 204 – 208 209 – 255 Polski 11 Specyfikacja Funkcja zgaszenie czerwony zielony niebieski zmiksowany kolor 1 (żółty) zmiksowany kolor 2 (turkusowy) zmiksowany kolor 3 (karmazynowy) biały zmiksowany kolor 4 zmiksowany kolor 5 zmiksowany kolor 6 zmiksowany kolor 7 zmiksowany kolor 8 zmiksowany kolor 9 (RGBW biały) zmiksowany kolor 10 zmiksowany kolor 11 zmiksowany kolor 12 zmiksowany kolor 13 zmiksowany kolor 14 zmiksowany kolor 15 zmiksowany kolor 16 zmiksowany kolor 17 zmiksowany kolor 18 zmiksowany kolor 19 zmiksowany kolor 20 zmiksowany kolor 21 zmiksowany kolor 22 zmiksowany kolor 23 zmiksowany kolor 24 zmiksowany kolor 25 zmiksowany kolor 26 zmiksowany kolor 27 zmiksowany kolor 28 zmiksowany kolor 29 zmiksowany kolor 30 zmiksowany kolor 31 zmiksowany kolor 32 zmiksowany kolor 33 zmiksowany kolor 34 zmiksowany kolor 35 zmiksowany kolor 36 zmiksowany kolor 37 zmiksowany kolor 38 zmiksowany kolor 39 zmiksowany kolor 40 zmiksowany kolor 41 zmiksowany kolor 42 zmiksowany kolor 43 zmiksowany kolor 44 zmiksowany kolor 45 zmiksowany kolor 46 zmiksowany kolor 47 losowe zmiany kolorów 71 Polski 11.1.2 Tryb 9-kanałowy Kanał 1 2 3 4 5 6 7 8 9 Wartość DMX 0 – 255 0 – 255 0 – 255 0–7 8 – 15 16 – 131 132 – 139 140 – 181 182 – 189 190 – 231 232 – 239 240 – 247 248 – 255 0 – 255 0 – 255 0 – 255 0 – 255 0 – 69 70 – 79 80 – 199 200 – 209 210 – 239 240 – 255 11.1.3 Tryb 16-kanałowy Funkcja Kanał obrót w poziomie (pan) obrót w pionie (tilt) ściemniacz (jasność całkowita) zgaszenie bez efektu stroboskopu stroboskop: wolno szybko bez efektu stroboskopu rozjaśnianie/wyłączenie: wolno szybko bez efektu stroboskopu włączenie/wygaszanie: wolno szybko bez efektu stroboskopu losowe efekty stroboskopu bez efektu stroboskopu jasność czerwonego jasność zielonego jasność niebieskiego jasność białego bez funkcji zgaszenie dla ruchów przez kanały 1 i 2 bez funkcji reset (pozycja wyjściowa) bez funkcji program sterowany muzyką 1 2 3 4 5 6 7 8 9 10 11 12 13 14 15 16 Wartość DMX 0 – 255 0 – 255 0 – 255 0 – 255 0 – 255 0 – 15 16 – 35 36 – 55 56 – 75 76 – 95 96 – 115 116 – 135 136 – 155 156 – 175 176 – 195 196 – 215 216 – 235 236 – 255 0 – 255 0 – 255 0–7 8 – 15 16 – 131 132 – 139 140 – 181 182 – 189 190 – 231 232 – 239 240 – 247 248 – 255 0 – 255 0 – 255 0 – 255 0 – 255 0–7 8 – 127 128 – 191 192 – 255 0 – 255 0 – 69 70 – 79 80 – 199 200 – 209 210 – 239 240 – 255 Funkcja obrót w poziomie (pan), szybki obrót w poziomie (pan), płynny obrót w pionie (tilt), szybki obrót w pionie (tilt), płynny prędkość dla kanałów 1 i 3 szybko wolno bez programu ruchu program ruchu 1 program ruchu 2 program ruchu 3 program ruchu 4 program ruchu 5 program ruchu 6 program ruchu 7 program ruchu 8 program ruchu 9 program ruchu 10 program ruchu 11 program ruchu 12 prędkość dla kanału 6 szybko wolno ściemniacz (jasność całkowita) zgaszenie bez efektu stroboskopu stroboskop: wolno szybko bez efektu stroboskopu rozjaśnianie/wyłączenie: wolno szybko bez efektu stroboskopu włączenie/wygaszenie: wolno szybko bez efektu stroboskopu losowe efekty stroboskopu bez efektu stroboskopu jasność czerwonego jasność zielonego jasność niebieskiego jasność białego miksowanie kolorów przez kanały 10 – 13 32 kolory automatyczne zmiany kolorów automatyczne przechodzenie między kolorami prędkość dla kanału 14 wolno szybko bez funkcji zgaszenie dla ruchów przez kanały 1 – 4 bez funkcji reset (pozycja wyjściowa) bez funkcji program sterowany muzyką Z zastrzeżeniem możliwości zmian. Instrukcje obsługi są chronione prawem copyright for MONACOR ® INTERNATIONAL GmbH & Co. KG. Przetwarzanie całości lub części instrukcji dla osobistych korzyści finansowych jest zabronione. 72 Struktura menu Polski 11.2 MENU Obrót wyświetlacza Przeciwny kierunek tilt Przeciwny kierunek pan Pozycja wyjściowa tak Informacja o systemie tak Czułość mikrofonu Sterowanie muzyką stroboskop zawsze włączony ściemniacz zgaszenie tryb automatyczny jasność białego jasność niebieskiego wł. Tryb manualny wył. Tryb master/slave wersja firmware’a Program testowy automatyczne wyłączanie Bez sygnału DMX temperatura liczba godzin pracy nie nie Wyświetlacz ENTER jasność zielonego tryb slave 2 tryb slave 1 jasność czerwonego tryb master pozycja tilt Tryb automatyczny pozycja pan auto 1 – 4 prędkość SP1/2 (pan/tilt) Liczba kanałów DMX 16 kanałów 9 kanałów Adres startowy DMX max niebieskiego Balans kolorów max zielonego 1 kanał max czerwonego 73 Dansk Læs nedenstående sikkerhedsoplysninger opmærksomt igennem før ibrugtagning af enheden. Bortset fra sikkerhedsoplysningerne henvises til den engelske tekst. Sikkerhedsoplysninger Denne enhed overholder alle relevante EU-direktiver og er som følge deraf mærket . ADVARSEL Dette produkt benytter 230 V~. Udfør aldrig nogen form for modifikationer på produktet og indfør aldrig genstande i ventilationshullerne, da du dermed risikere at få elektrisk stød. ADVARSEL Hurtige farveskift kan udløse epileptiske anfald hos personer der fotosensitive eller lider af epilepsi. • Enheden er kun beregnet til indendørs brug. Beskyt den mod vanddråber og -stænk, høj luftfugtighed og varme (tilladt omgivelsestemperatur 0 – 40 °C). • Undgå at placere væskefyldte genstande, som f. eks. glas, ovenpå enheden. • Tag ikke enheden i brug og tag straks stikket ud af stikkontakten i følgende tilfælde: 1.hvis der er synlig skade på enheden eller netkablet. 2.hvis der kan være opstået skade, efter at enheden er tabt eller lignende. 3.hvis der forekommer fejlfunktion. Enheden skal altid repareres af autoriseret personel. • Tag aldrig netstikket ud af stikkontakten ved Hvis enheden skal tages ud af drift for bestandigt, skal de afleveres på en genbrugsstation, for at undgå skader på miljøet. Brugte eller defekte batterier må aldrig smides ud sammen med den øvrige husholdningsaffald. Aflever dem altid i genbrugsstationens battericontainere. Montering Lyseffekten skal monteres på en sikker måde. Placér altid enheden så der er rigeligt med ventilation omkring denne. Kabinettets ventilationshuller må ikke tildækkes. ADVARSEL Hvis enheden skal monteres hængende over personer, skal der yderligere monteres en sikkerhedswire. Spænd wiren så enheden maximalt kan falde 20 cm. Rengøring Rengør kabinettet med en tør, blød klud; der må under ingen omstændigheder benyttes kemikalier eller vand. Til rengøring af plastiklinserne kan der benyttes en ren, blød klud og et mildt vaskemiddel. Før rengøring skal strømstikket tages ud af apparatet! at trække i kablet, tag fat i selve stikket. • Garantien og produktansvaret bortfalder, hvis enhederne benyttes til andet end de tiltænkte formål, hvis de ikke er installeret korrekt, hvis de ikke er tilsluttet korrekt eller der er udført uautoriserede reperationer. Alle rettigheder til denne brugsvejledning tilhører MONACOR ® INTERNATIONAL GmbH & Co. KG. Ingen dele af denne vejledning må reproduceres under ingen omstændigheder til kommerciel anvendelse. 74 Säkerhetsföreskrifter Denna enhet uppfyller alla relevanta direktiv inom EU och har därför fått märkning. VARNING Enheten använder hög spänning internt (230 V~). Gör inga modifieringar i enheten eller stoppa föremål i ventilhålen. Risk för elskador föreligger. VARNING Titta aldrig direkt in i ljuskällan. Risk för permanent ögonskada föreligger. Observera att snabba ljusväxlingar kan ge upphov till epileptiska anfall hos känsliga personer. • Enheten är endast avsedd för inomhusbruk. Skydda enheten mot vätskor, hög luftfuktighet och hög värme (tillåten omgivningstemperatur 0 – 40 °C). • Placera inte föremål innehållande vätskor, t. ex. dricksglass, på enheten. • Använd inte enheten och tag omedelbart ut kontakten ur elurtaget om något av följande uppstår: 1.Enheten eller elsladden har synliga skador. 2.Enheten är skadad av fall e. d. 3.Enheten har andra felfunktioner. Enheten skall alltid lagas av kunnig personal. • Drag aldrig ur kontakten genom att dra i sladden, utan ta tag i kontaktkroppen. • Inga garantianspråk för enheten och inget Svenska Ge akt på säkerhetsinformationen innan enheten tas i bruk. Skulle ytterliggare information behövas kan den återfinnas i Manualen för andra språk. Om enheten ska tas ur drift slutgiltigt, ta den till en lokal återvinningsanläggning för en avyttring som inte är skadligt för miljön. Batterier får inte placeras i hushållsavfallet. För att skydda miljön, ta alltid dem till en återvinnings central eller lämna dem i en uppsamlingsbehållare. Montering Ljuseffekten måste monteras på ett professionellt och säkert sätt. Placera enheten så att luften kan cirkulera fritt runt den och täpp inte till kylhålen i chassiet. VARNING Om enheten monteras över platser där människor passerar skall den säkras med en säkerhetslina. Linan skall fästas så att max frifall är 20 cm. Rengöring Rengör huset endast med en mjuk och torr trasa, använd aldrig kemikalier eller vätskor i någon form då dessa kan rinna in och orsaka kortslutning. För rengöring av plastlinserna går det även bra att använda en mjuk och ren trasa och ett milt rengörningsmedel. Före rengöring, koppla bort kontakten ur vägguttaget! nsvar för eventuell personlig skada eller a materiella skador accepteras om enheten används för andra ändamål än den är avsedd, om den inte är säkert installerad, om den inte är korrekt ansluten, eller om den inte repareras på ett expert sätt. Alla rättigheter är reserverade av MONACOR ® INTERNATIONAL GmbH & Co. KG. Ingen del av denna instruktionsmanual får eftertryckas i någon form eller på något sätt användas i kommersiellt syfte. 75 Suomi Ole hyvä ja huomioi joka tapauksessa seuraavat turvallisuuteen liittyvät seikat ennen laitteen käyttöä. Laitteen toiminnasta saa lisätietoa tarvittaessa tämän laitteen muunkielisistä käyttöohjeista. Turvallisuudesta Tämä laite täyttää kaikki siihen kohdistuvat EU-direktiivit ja sille on myönnetty hyväksyntä. VAROITUS Tämä laite toimii vaarallisella 230 V~ jännitteellä. Älä koskaan tee mitään muutoksia laitteeseen taikka asenna mitään ilmanvaihto aukkoihin, koska siitä saattaa seurata sähköisku. VAROITUS Älä katso suoraan valonlähteeseen, se voi vaurioittaa silmää. Erittäin nopeat valon muutokset saattavat laukaista epileptisen kohtauksen henkilöillä, jotka ovat valoherkkiä tai epileptisiä. • Laitteet soveltuvat vain sisätilakäyttöön. Suojele niitä kosteudelta, vedeltä ja kuumuudelta (sallittu ympäröivä lämpötila 0 – 40 °C). Kun laite poistetaan lopullisesti käytöstä, vie se paikalliseen kierrätyskeskukseen jälkikäsittelyä varten. Paristoja ei saa laittaa sekajätteeseen. Ympäristön suojelemiseksi vie ne aina paristojen kierrätyspisteeseen. Asennus Spottivalo on asennettava turvallisesti ja huolellisesti. Asenna laite aina siten, että riittävä ilmankierto on varmistettu käytön aikana. Älä koskaan peitä tuuletusaukkoja. ADVARSEL Jos laite asennetaan paikkaan minkä alla on ihmisiä, on hyvä tehdä lisävarmistus (esim. kiinnittää turvavaijeri asennuskiinnikkeeseen siten, että vaikka laite irtoaisi, se ei putoaisi 20 cm alemmas). • Älä sijoita laitteen päälle mitään nestettä sisältävää, kuten vesilasia tms. • Älä kytke virtaa päälle ja irrota laite välittö- mästi sähköverkosta jos: 1.laitteessa on näkyvä vika. 2.laite on saattanut vaurioitua pudotuksessa tai vastaavassa tilanteessa. 3.laite toimii väärin. Kaikissa näissä tapauksissa laitteen saa korjata vain hyväksytty huolto. • Älä Puhdistus Laitteen ulkopuoliseen puhdistamiseen käytä ainoastaan kuivaa, puhdasta kangasta. Älä käytä kemikaaleja tai vettä, jotka saattavat valua laitteen sisään. Käytä muovilinssien puhdistamiseen pehmeää puhdasta kangasta ja mietoa puhdistusainetta. Ennen puhdistusta, on virtajohto irrotettava pistorasiasta! koskaan irroita verkkoliitintä johdosta vetämällä. Vedä aina itse liittimestä. • Laitteen takuu raukeaa, eikä valmistaja, maahantuoja tai myyjä ota vastuuta mahdollisista välittömistä tai välillisistä vahingoista, jos laitetta on käytetty muuhun kuin alkupe räiseen käyttötarkoitukseen, laitetta on taitamattomasti käytetty tai kytketty tai jos laitetta on huollettu muussa kuin valtuutetussa huollossa. Kaikki oikeudet pidätetään MONACOR ® INTERNATIONAL GmbH & Co. KG. Mitään tämän käyttöohjeen osaa ei saa jäljentää miltään osin käytettäväksi mihinkään kaupallisiin tarkoituksiin. 76 MONACOR INTERNATIONAL GmbH & Co. KG • Zum Falsch 36 • 28307 Bremen • Germany Copyright © by MONACOR INTERNATIONAL. All rights reserved. A-1694.99.01.08.2015