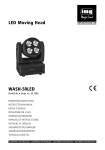
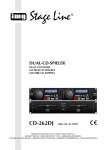
1
DMX-LED-SCHEINWERFER-SET SET OF DMX LED SPOTLIGHTS SET DE PROJECTEURS DMX À LEDS SET DI PROIETTORI DMX A LED PARL-47SET PARL-42SET PARL-47SET Bestellnummer 38.5730 Bestellnummer 38.5740 BEDIENUNGSANLEITUNG • INSTRUCTION MANUAL • MODE D’EMPLOI ISTRUZIONI PER L’USO • GEBRUIKSAANWIJZING MANUAL DE INSTRUCCIONES • INSTRUKCJA OBSŁUGI SIKKERHEDSOPLYSNINGER • SÄKERHETSFÖRESKRIFTER • TURVALLISUUDESTA D A CH F B CH Bevor Sie einschalten … GB Before switching on … Wir wünschen Ihnen viel Spaß mit Ihrem neuen Gerät von „img Stage Line“. Bitte lesen Sie diese Bedienungsanleitung vor dem Betrieb gründlich durch. Nur so lernen Sie alle Funktionsmöglichkeiten kennen, vermeiden Fehlbedienungen und schützen sich und Ihr Gerät vor eventuellen Schäden durch unsachgemäßen Gebrauch. Heben Sie die Anleitung für ein späteres Nachlesen auf. We wish you much pleasure with your new “img Stage Line” unit. Please read these operating instructions carefully prior to operating the unit. Thus, you will get to know all functions of the unit, operating errors will be prevented, and yourself and the unit will be protected against any damage caused by improper use. Please keep the operating instructions for later use. Der deutsche Text beginnt auf der Seite 4. The English text starts on page 12. Avant toute installation … I Nous vous souhaitons beaucoup de plaisir à utiliser cet appareil “img Stage Line”. Lisez ce mode dʼemploi entièrement avant toute utilisation. Uniquement ainsi, vous pourrez apprendre lʼensemble des possibilités de fonctionnement de lʼappareil, éviter toute manipulation erronée et vous protéger, ainsi que lʼappareil, de dommages éventuels engendrés par une utilisation inadaptée. Conservez la notice pour pouvoir vous y reporter ultérieurement. Prima di accendere … Vi auguriamo buon divertimento con il vostro nuovo apparecchio di “img Stage Line”. Leggete attentamente le istruzioni prima di mettere in funzione lʼapparecchio. Solo così potete conoscere tutte le funzionalità, evitare comandi sbagliati e proteggere voi stessi e lʼapparecchio da eventuali danni in seguito ad un uso improprio. Conservate le istruzioni per poterle consultare anche in futuro. Il testo italiano inizia a pagina 28. La version française se trouve page 20. NL B Voor u inschakelt … E Antes de la utilización … Le deseamos una buena utilización para su nuevo aparato “img Stage Line”. Por favor, lea estas instrucciones de uso atentamente antes de hacer funcionar el aparato. De esta manera conocerá todas las funciones de la unidad, se prevendrán errores de operación, usted y el aparato estarán protegidos en contra de todo daño causado por un uso inadecuado. Por favor, guarde las instrucciones para una futura utilización. Wij wensen u veel plezier met uw nieuwe apparaat van “img Stage Line”. Lees deze gebruikershandleiding grondig door, alvorens het apparaat in gebruik te nemen. Alleen zo leert u alle functies kennen, vermijdt u foutieve bediening en behoedt u zichzelf en het apparaat voor eventuele schade door ondeskundig gebruik. Bewaar de handleiding voor latere raadpleging. De Nederlandstalige tekst vindt u op pagina 36. La versión española comienza en la página 44. PL Przed uruchomieniem … DK Før du tænder … Tillykke med dit nye “img Stage Line” produkt. Læs sikkerhedsanvisningerne nøje før ibrugtagning, for at beskytte Dem og enheden mod skader, der skyldes forkert brug. Gem manualen til senere brug. Życzymy zadowolenia z nowego produktu “img Stage Line”. Dzięki tej instrukcji obsługi będą państwo w stanie poznać wszystkie funkcje tego urządzenia. Stosując się do instrukcji unikną państwo błędów i ewentualnego uszkodzenia urządzenia na skutek nieprawidłowego użytkowania. Prosimy zachować instrukcję. Sikkerhedsanvisningerne findes på side 60. Tekst polski zaczyna się na stronie 52. S Innan du slår på enheten … Vi önskar dig mycket glädje med din nya “img Stage Line” produkt. Läs igenom säkerhetsföreskrifterna innan enheten tas i bruk för att undvika skador till följd av felaktig hantering. Behåll instruktionerna för framtida bruk. Säkerhetsföreskrifterna återfinns på sidan 61. FIN Ennen kytkemistä … Toivomme Sinulle paljon miellyttäviä hetkiä uuden “img Stage Line” laitteen kanssa. Ennen laitteen käyttöä pyydämme Sinua huolellisesti tutustumaan turvallisuusohjeisiin. Näin vältyt vahingoilta, joita virheellinen laitteen käyttö saattaa aiheuttaa. Ole hyvä ja säilytä käyttöohjeet myöhempää tarvetta varten. Turvallisuusohjeet löytyvät sivulta 62. ® w w w.imgstageline.com 2 1 2 3 4 5 6 10 7 8 9 11 12 13 14 15 13 14 16 3 17 18 19 20 D A Inhalt 1 Übersicht der Bedienelemente und Anschlüsse . . . . . . . . . . . . . . . . . . . . . . . . 4 2 Hinweise für den sicheren Gebrauch . . . 5 3 Einsatzmöglichkeiten . . . . . . . . . . . . . . . . 5 4 Inbetriebnahme . . . . . . . . . . . . . . . . . . . . . 5 CH Auf der ausklappbaren Seite 3 finden Sie alle beschriebenen Bedienelemente und Anschlüsse. 1 Übersicht der Bedienelemente und Anschlüsse Steuereinheit mit Scheinwerfern, Stativ (Abb. 1) 4.1 Montage . . . . . . . . . . . . . . . . . . . . . . . . . . . 5 4.2 Stromversorgung . . . . . . . . . . . . . . . . . . . . . 6 5 Bedienung . . . . . . . . . . . . . . . . . . . . . . . . . 6 6 Betrieb ohne DMX-Steuergerät . . . . . . . . 6 1 Netzeingang zum Anschluss an eine Steckdose (230 V~/50 Hz) über das beiliegende Netzkabel 2 Halterung für die Netzsicherung Eine geschmolzene Sicherung nur durch eine gleichen Typs ersetzen. 3 Display 6.1 Automatikmodus . . . . . . . . . . . . . . . . . . . . . 6 6.2 Musiksteuerung . . . . . . . . . . . . . . . . . . . . . . 6 6.3 Farbstrahlerbetrieb . . . . . . . . . . . . . . . . . . . 7 6.4 Farbwechselmodus . . . . . . . . . . . . . . . . . . . 7 6.5 Master / Slave-Betrieb . . . . . . . . . . . . . . . . . 7 6.6 Fußfernsteuerung . . . . . . . . . . . . . . . . . . . . 8 6.6.1 Licht ein- und ausschalten . . . . . . . . . . . . 8 6.6.2 Automatikmodus . . . . . . . . . . . . . . . . . . . 8 6.6.3 Musiksteuerung . . . . . . . . . . . . . . . . . . . . 8 6.6.4 Farbstrahlerbetrieb . . . . . . . . . . . . . . . . . 8 7 DMX-Steuerung . . . . . . . . . . . . . . . . . . . . . 8 7.1 Anschluss . . . . . . . . . . . . . . . . . . . . . . . . . . 8 7.2 Anzahl der DMX-Kanäle einstellen . . . . . . . 9 7.3 Startadresse einstellen . . . . . . . . . . . . . . . . 9 5 Buchse FOOT CONTROLLER zum Anschluss der Fernbedienung über das beiliegende Kabel 6 DMX-Signal-Eingang (3-pol. XLR) zum Anschluss eines Lichtsteuergerätes; Pin 1 = Masse, 2 = DMX-, 3 = DMX+ 7 DMX-Signal-Ausgang (3-pol. XLR) zum Anschluss an den DMX-Eingang eines weiteren DMX-Lichteffektgerätes; Pin 1 = Masse, 2 = DMX-, 3 = DMX+ 8 Mikrofon für musikgesteuerte Lichteffekte 9 Regler SENSITIVITY zum Einstellen der Mikrofonempfindlichkeit für musikgesteuerte Lichteffekte 10 Verbindungskabel zwischen der Steuereinheit und dem Scheinwerfer 11 Montage- und Feststellschraube gegen Verdrehen des Scheinwerfers (14) Auf der Oberseite der Steuereinheit befinden sich zusätzliche Gewindelöcher; bei Bedarf die Schraube herausdrehen und den Scheinwerfer dort befestigen. 8 Anzeige der Firmwareversion . . . . . . . . . 9 12 Feststellschrauben zum beidseitigen Fixieren der Steuereinheit auf dem Stativrohr (15) 9 Reinigung des Gerätes . . . . . . . . . . . . . . . 9 13 Feststellschrauben für die vertikale Neigung des Scheinwerfers (14) 10 Technische Daten . . . . . . . . . . . . . . . . . . . 9 14 LED-Scheinwerfer 10.1 DMX-Funktionen . . . . . . . . . . . . . . . . . . 10 15 Stativ 10.1.1 5-Kanal-Modus . . . . . . . . . . . . . . . . . . . 10 Fernbedienung (Abb. 2) 10.1.2 14-Kanal-Modus . . . . . . . . . . . . . . . . . . 10 16 Anschlussbuchse zur Verbindung mit der Buchse FOOT CONTROLLER (5) an der Steuereinheit über das beiliegende Kabel 10.2 Menüstruktur . . . . . . . . . . . . . . . . . . . . . . 11 4 4 Bedientasten 17 Fußtaste AUTO zur Wahl eines automatisch ablaufenden Show-Programms 18 Fußtaste SOUND zur Wahl eines über das Mikrofon (8) musikgesteuerten Programms 19 Fußtaste COLOR zur Wahl einer bestimmten Lichtfarbe 20 Fußtaste BLACKOUT zum Aus- und Wiedereinschalten des Lichtes 2 Hinweise für den sicheren Gebrauch Das Gerät entspricht allen relevanten Richtlinien der EU und ist deshalb mit gekennzeichnet. WARNUNG Das Gerät wird mit lebensgefährlicher Netzspannung versorgt. Nehmen Sie deshalb niemals selbst Eingriffe am Gerät vor! Es besteht die Gefahr eines elektrischen Schlages. Beachten Sie auch unbedingt folgende Punkte: G Verwenden Sie das Gerät nur im Innenbereich und schützen Sie es vor Tropf- und Spritzwasser, hoher Luftfeuchtigkeit und Hitze (zulässiger Einsatztemperaturbereich 0 – 40 °C). 3 Einsatzmöglichkeiten Die Scheinwerfersets PARL-42SET und PARL47SET bestehen aus vier flachen LED-Scheinwerfern, montiert an einer Steuereinheit. Sie dienen zur Beleuchtung z. B. auf Bühnen, in Diskotheken und Festsälen. In jedem Scheinwerfer sind als Lichtquelle 144 superhelle 10-mm-LEDs (PARL42SET) bzw. 7 RGB-LEDs (PARL-47SET) eingesetzt. Diese haben im Vergleich zu Glühlampen einen niedrigen Stromverbrauch, eine geringe Wärmeentwicklung und eine lange Lebensdauer. Mit den LEDs kann farbiges Licht in den drei Grundfarben (Rot, Grün und Blau) abgestrahlt werden und Licht, das sich aus den Grundfarben additiv mischen lässt. Ein Set lässt sich allein, mit der beiliegenden Fußfernbedienung oder an einem DMX-Lichtsteuergerät (5 oder 14 DMX-Steuerkanäle) betreiben. Zudem lassen sich mehrere Scheinwerfersets zusammenschalten (Master/ Slave-Betrieb) und gemeinsam über eine Fußfernbedienung steuern. Es stehen verschiedene interne Lichtprogramme zur Verfügung. Das integrierte Mikrofon sorgt dabei für musiksynchrone Effekte. Ein Stativ und Transporttaschen werden mitgeliefert. D A CH G Stellen Sie keine mit Flüssigkeit gefüllten Gefäße, z. B. Trinkgläser, auf das Gerät. G Nehmen Sie das Gerät nicht in Betrieb oder ziehen Sie sofort den Netzstecker aus der Steckdose, 1. wenn sichtbare Schäden am Gerät oder am Netzkabel vorhanden sind, 2. wenn nach einem Sturz oder Ähnlichem der Verdacht auf einen Defekt besteht, 3. wenn Funktionsstörungen auftreten. Geben Sie das Gerät in jedem Fall zur Reparatur in eine Fachwerkstatt. G Ziehen Sie den Netzstecker nie am Kabel aus der Steckdose, fassen Sie immer am Stecker an. G Wird das Gerät zweckentfremdet, nicht sicher montiert, nicht richtig angeschlossen, falsch bedient oder nicht fachgerecht repariert, kann keine Haftung für daraus resultierende Sachoder Personenschäden und keine Garantie für das Gerät übernommen werden. Soll das Gerät endgültig aus dem Betrieb genommen werden, übergeben Sie es zur umweltgerechten Entsorgung einem örtlichen Recyclingbetrieb. 4 Inbetriebnahme 4.1 Montage 1) Das Stativ auf einen waagerechten, festen Untergrund stellen. Für einen sicheren Stand die Stativbeine maximal spreizen und mit der Feststellschraube fixieren. 2) Die Steuereinheit mit den Scheinwerfern auf das Stativrohr (15) setzen und mit den beiliegenden Schrauben (12) von beiden Seiten fixieren. 3) Zum Ausrichten der Scheinwerfer (14) die jeweiligen Feststellschrauben (11, 13) lösen und den Scheinwerfer in die gewünschte Richtung drehen und neigen. Dabei darauf achten, dass das Kabel (10) nicht gedehnt oder gequetscht wird. Die Schrauben anschließend wieder festdrehen. Auf der Oberseite der Steuereinheit befinden sich zusätzliche Gewindelöcher, sodass die Scheinwerfer bei Bedarf auch auf die Steuereinheit montiert werden können. Für diesen Fall die Schraube (11) des Scheinwerfers herausdrehen und den Scheinwerfer in gleicher Art mit der Schraube und Gummischeibe von oben befestigen. Bei einer Änderung der Scheinwerferposi- 5 tionen darauf achten, dass die Gewichtsverteilung zwischen der linken und rechten Seite gleich bleibt. D A CH 4) Zum Einstellen der gewünschten Betriebshöhe zuerst das innerste Rohr des Stativs herausziehen. Den Sicherungsstift durch die beiden Löcher für die gewünschte Höhe stecken und das Rohr soweit wieder hineinschieben, dass der Sicherungsstift auf dem mittleren Rohr aufliegt. Das innere Rohr zusätzlich mit der Feststellschraube fixieren. Ist die gewünschte Höhe noch nicht erreicht, das mittlere Rohr in gleicher Weise herausziehen und befestigen. – Taste MENU/ESC für den Rücksprung auf die übergeordnete Menüebene – Taste ENTER für den Weitersprung auf die nächste Menüfunktion – Tasten UP und DOWN für die Auswahl zwischen mehreren Menüoptionen und zum Einstellen von Werten Die Menüstruktur ist in Kapitel 10.2 dargestellt. Anhand des Kapitels 6 oder 7 mit den Tasten die gewünschten Einstellungen für den jeweiligen Betriebsmodus vornehmen. WICHTIG! G Das Stativ muss standsicher aufgestellt werden. Die Teleskoprohre nur so hoch ausziehen, wie ein sicherer Halt gewährleistet ist. 6 G Vor dem Betrieb alle Feststellschrauben überprüfen und ggf. festziehen. 6.1 Automatikmodus G Alle Anschlusskabel so verlegen, dass niemand darüber stolpern und dadurch das Stativ zu Fall bringen kann. G Platzieren Sie das Gerät immer so, dass im Betrieb eine ausreichende Luftzirkulation gewährleistet ist. Lüftungsöffnungen am Gehäuse dürfen auf keinen Fall abgedeckt werden. 4.2 Stromversorgung Das beiliegende Netzkabel zuerst in die Netzbuchse (1) stecken und dann in eine Steckdose (230 V~/ 50 Hz). Danach ist das Gerät betriebsbereit. Zum Ausschalten den Netzstecker aus der Steckdose ziehen. WARNUNG Blicken Sie nicht für längere Zeit direkt in die Lichtquelle, das kann zu Augenschäden führen. Beachten Sie, dass sehr schnelle Lichtwechsel bei fotosensiblen Menschen und Epileptikern epileptische Anfälle auslösen können! Vorsicht: Das Gerät darf nicht über einen Dimmer an die Netzspannung angeschlossen werden! 5 Bedienung Die Geräteeinstellungen werden über ein Systemmenü durchgeführt, das sich mithilfe der Tasten (4) und des Displays (3) bedienen lässt. Das 4-stellige Display wird durch Drücken einer beliebigen Taste eingeschaltet und zeigt die letzte Einstellung. Die Anzeige erlischt einige Sekunden nach dem letzten Tastendruck. 6 Die Tasten haben folgende Funktionen: Betrieb ohne DMX-Steuergerät Das Gerät verfügt über zwei automatisch ablaufende Show-Programme (zusätzliche einfache Farbwechselprogramme Kap. 6.4). Zum Aufruf eines dieser Programme: 1) Die Taste MENU/ESC so oft drücken, bis das Hauptmenü erreicht ist. 2) Mit der Taste UP oder DOWN im Hauptmenü die Option wählen. 3) Die Taste ENTER drücken: Das zuletzt eingestellte Programm ( oder ) ist aktiviert und wird im Display angezeigt. Mit der Taste UP oder DOWN aus den beiden Programmen das gewünschte auswählen. 4) Um die Geschwindigkeit zu ändern, die Taste ENTER drücken: Die aktuelle Geschwindigkeit wird angezeigt. Mit der Taste UP oder DOWN aus den 9 Geschwindigkeiten bis die gewünschte auswählen. 6.2 Musiksteuerung Soll die Licht-Show musikgesteuert ablaufen, kann zwischen drei Musikmodi, „Sound 1“ bis „Sound 3“, gewählt werden: „Sound 1“: schallgesteuertes Stroboskop mit weißem Licht „Sound 2“: schallgesteuertes Aufblinken mit wechselnden Farben „Sound 3“: schallgesteuertes Auslösen von Programmen Hinweis: Die Musikmodi „Sound 1“ und „Sound 2“ sind die gleichen Musikmodi, die bei DMX-Steuerung aufgerufen werden können ( Kapitel 10.1). 1) Die Taste MENU/ESC so oft drücken, bis das Hauptmenü erreicht ist. c) Mit der Taste ENTER zur nächsten Grundfarbe wechseln und ihre Helligkeit einstellen. 2) Mit der Taste UP oder DOWN im Hauptmenü die Option wählen. Tipp: Beim Einstellen der Grundfarben ändert sich nicht nur deren Helligkeit, sondern bei einer Farbmischung auch der Farbton. Darum zuerst die Farbe, die dominieren soll, auf die gewünschte Helligkeit einstellen und danach die anderen beiden Farben dazumischen. Soll die Farbmischung Weiß ergeben, zuerst die Helligkeit der Farbe Grün einstellen, weil diese dem Auge am hellsten erscheint. Dann mit Rot zu Gelb mischen und zuletzt mit Blau zu Weiß mischen. 3) Die Taste ENTER drücken: Der zuletzt eingestellte Musikmodus ( oder ) ist , aktiviert und wird im Display angezeigt. Mit der Taste UP oder DOWN aus den drei Modi den gewünschten auswählen. 4) Um beim Modus „Sound 3“ die Geschwindigkeit für den Ablauf der Programme zu ändern, die Taste ENTER drücken: Die aktuelle Geschwindigkeit wird angezeigt. Mit der Taste UP oder DOWN aus den 9 Geschwindigkeiten bis die gewünschte auswählen. 5) Den Regler SENSITIVITY (9) für die Empfindlichkeit des Mikrofons MIC (8) so weit im Uhrzeigersinn aufdrehen, bis die Scheinwerfer wie gewünscht auf die Musik reagieren. Beim Ändern der Lautstärke an der Musikanlage muss auch die Mikrofonempfindlichkeit entsprechend angepasst werden. Sollte die Musiksteuerung trotz weit aufgedrehten Empfindlichkeitsreglers nicht optimal funktionieren, die Lautstärke erhöhen oder den Abstand zwischen Schallquelle und Mikrofon verringern. 6.3 Farbstrahlerbetrieb Sollen die Scheinwerfer konstant eine Farbe abstrahlen, kann zwischen neun voreingestellten Farben und einer individuell einstellbaren Farbe gewählt werden: 1) Die Taste MENU/ESC so oft drücken, bis das Hauptmenü erreicht ist. 2) Mit der Taste UP oder DOWN im Hauptmenü die Option wählen. 3) Die Taste ENTER drücken: Der zuletzt eingestellte Farbmodus (eine der voreingestellten Farben … oder die individuelle Farbeinstellung ) ist aktiviert und wird im Display angezeigt. Mit der Taste UP oder DOWN aus den Farbmodi den gewünschten auswählen. Individuelle Farbeinstellung Im Farbmodus „ATF“ lässt sich die Helligkeit der Grundfarben Rot, Grün und Blau separat einstellen und damit der gewünschte Farbton mischen: a) Ist gewählt, die Taste ENTER drücken. Das Display zeigt die zuletzt eingestellte Grundfarbe und ihren Helligkeitswert: Rot ( ), Grün ( ) oder Blau ( ). b) Die Helligkeit der angewählten Farbe mit der Taste DOWN oder UP einstellen (Anzeige 0 – 255). D A CH 6.4 Farbwechselmodus Für einen automatischen Farbwechsel mit Überblendungen kann zwischen fünf Programmen mit unterschiedlichen Farbfolgen gewählt werden: 1) Die Taste MENU/ESC so oft drücken, bis das Hauptmenü erreicht ist. 2) Mit der Taste UP oder DOWN im Hauptmenü die Option wählen. 3) Die Taste ENTER drücken: Das zuletzt eingestellte Farbwechselprogramm ( … ) ist aktiviert und wird im Display angezeigt. Mit der Taste UP oder DOWN das gewünschte Programm auswählen. 4) Um die Geschwindigkeit zu ändern, die Taste ENTER drücken: Die aktuelle Geschwindigkeit wird angezeigt. Mit der Taste UP oder DOWN aus den 9 Geschwindigkeiten bis die gewünschte auswählen. 6.5 Master / Slave-Betrieb Mehrere Geräte PARL-42SET oder PARL-47SET (auch gemischt) können synchron betrieben werden. Dabei übernimmt das erste Gerät (MasterGerät) die Steuerung der übrigen Geräte (SlaveGeräte). Die Geräte miteinander zu einer Kette verbinden. Siehe dazu Kapitel 7.1, jedoch ohne den Bedienschritt 1 zu beachten. Das Master-Gerät [das erste Gerät der Kette, dessen Steuereingang DMX IN (6) nicht angeschlossen ist] auf Automatikmodus, Musiksteuerung, Farbstrahlerbetrieb oder Farbwechselmodus einstellen ( Kapitel 6.1 – 6.4). Die Slave-Geräte folgendermaßen auf den Slave-Betrieb einstellen: 1) Die Taste MENU/ESC so oft drücken, bis das Hauptmenü erreicht ist. 2) Mit der Taste UP oder DOWN im Hauptmenü die Option wählen. 3) Die Taste ENTER drücken: Der Slave-Betrieb ist aktiviert, das Display zeigt . Sobald das Slave-Gerät Steuersignale vom Master-Gerät empfängt, blinkt ein Punkt im Display. 7 D 6.6 Fußfernsteuerung 7 A Über die mitgelieferte Fußfernbedienung können verschiedene Funktionen der Scheinwerfer gesteuert werden. Sind mehrere Scheinwerfersets miteinander im Master / Slave-Betrieb verbunden, werden alle gemeinsam über die Fernbedienung des Master-Gerätes gesteuert. DMX ist die Abkürzung für Digital Multiplex und ermöglicht die digitale Steuerung von mehreren DMX-Geräten über eine gemeinsame Steuerleitung. Zur Bedienung über ein DMX-Lichtsteuergerät (z. B. DMX-1440 oder DMX-510USB von „img Stage Line“) verfügt das Lichteffekt-Panel über 14 DMX-Steuerkanäle. Er lässt sich bei Bedarf aber auch über nur 5 Kanäle steuern. Die Funktionen der Kanäle und die entsprechenden DMX-Werte finden Sie in Kapitel 10.1. CH 1) Die Buchse (16) auf der Rückseite der Fernbedienung mit der Buchse FOOT CONTROLLER (5) an der Steuereinheit über das beiliegende Kabel verbinden. Die Steckverbindung jeweils durch Festdrehen der Überwurfmutter sichern. 2) Am Eingang DMX IN (6) darf kein DMX-Signal anliegen. 6.6.1 Licht ein- und ausschalten Mit der Taste BLACKOUT (20) auf der Fernbedienung wird das Licht ausgeschaltet. Beim Ausschalten des Lichts (Blackout) zeigt das Display (3) des (Master-)Gerätes kurz . Zum Wiedereinschalten des Lichtes die Taste BLACKOUT erneut betätigen oder mit einer der anderen drei Tasten der Fernbedienung direkt eine andere Funktion wählen. 6.6.2 Automatikmodus Mit der Taste AUTO (17) können die beiden Programme des Automatikmodus ( Kap. 6.1) gewählt werden. Durch wiederholtes Betätigen der Taste wird zwischen den Programmen gewechselt. Das Display zeigt entsprechend oder . Die Ablaufgeschwindigkeit der Programme ist von der Menüeinstellung abhängig ( Kap. 6.1, Bedienschritt 4). 6.6.3 Musiksteuerung Mit der Taste SOUND (18) können die über das Mikrofon (8) gesteuerten Programme ( Kap. 6.2) gewählt werden. Durch wiederholtes Betätigen der Taste wird zwischen den Programmen gewechselt. Das Display zeigt entsprechend oder , . Die Ablaufgeschwindigkeit des Programms ist bei von der Menüeinstellung abhängig ( Kap. 6.2, Bedienschritt 4). 6.6.4 Farbstrahlerbetrieb Mit der Taste COLOR (19) können die 9 vorgegebenen Farben des Farbstrahlerbetriebs ( Kap. 6.3) gewählt werden. Durch wiederholtes Betätigen der Taste wird zwischen den Farben gewechselt. Das Display zeigt entsprechend … . 8 DMX-Steuerung 7.1 Anschluss Als DMX-Schnittstelle besitzt das Gerät 3-polige XLR-Anschlüsse mit folgender Kontaktbelegung: Pin 1 = Masse, Pin 2 = DMX-, Pin 3 = DMX+ Zum Anschluss sollten spezielle Kabel für hohen Datenfluss verwendet werden. Normale abgeschirmte Mikrofonkabel mit einem Leitungsquerschnitt von mindestens 2 × 0,22 mm2 und möglichst geringer Kapazität sind nur bei einer Gesamtkabellänge bis 100 m zu empfehlen. Bei Leitungslängen ab 150 m wird grundsätzlich das Zwischenschalten eines DMX-Aufholverstärkers (z. B. SR-103DMX von „img Stage Line“) empfohlen. 1) Den Steuereingang DMX IN (6) mit dem DMXAusgang des Lichtsteuergerätes verbinden. Angeschlossene Fernbedienungen von den Scheinwerfersets trennen, damit diese nicht die DMX-Steuerung beeinträchtigen. 2) Den Steuerausgang DMX OUT (7) mit dem Steuereingang DMX IN des nächsten DMXgesteuerten Gerätes verbinden. Dessen Ausgang wieder mit dem Eingang des nachfolgenden Gerätes verbinden usw., bis alle DMX-gesteuerten Geräte in einer Kette angeschlossen sind. 3) Um Störungen bei der Signalübertragung auszuschließen, sollte bei langen Leitungen oder bei einer Vielzahl von hintereinandergeschalteten Geräten der Steuerausgang des letzten DMX-Gerätes der Kette mit einem 120-Ω-Widerstand (> 0,3 W) abgeschlossen werden: In die Ausgangsbuchse einen entsprechenden Abschlussstecker (z. B. DLT-123 von „img Stage Line“) stecken. 7.2 Anzahl der DMX-Kanäle einstellen 8 Die Anzahl der DMX-Kanäle hängt von den benötigten Funktionen ab und eventuell auch von der Anzahl der verfügbaren Steuerkanäle am Lichtsteuergerät. Im 14-Kanal-Betrieb lassen sich die vier Scheinwerfer für eine Farbmischung getrennt steuern, während im 5-Kanal-Betrieb nur eine gemeinsame Steuerung möglich ist. Zum Auswählen der Anzahl der DMX-Kanäle: Um die Versionsnummer der Firmware (Betriebssystem des Geräts) anzuzeigen: 1) Die Taste MENU/ESC so oft drücken, bis das Hauptmenü erreicht ist. 2) Mit der Taste UP oder DOWN im Hauptmenü die Option wählen. 3) Die Taste ENTER drücken: Der aktuell eingestellte Kanalmodus wird angezeigt: = 5-Kanal-Betrieb = 14-Kanal-Betrieb 4) Mit der Taste UP oder DOWN die gewünschte Option auswählen. 7.3 Startadresse einstellen Damit die Scheinwerfer angesteuert werden können, muss eine DMX-Startadresse für den 1. DMXKanal eingestellt werden. Die folgenden DMXKanäle sind dann automatisch den folgenden Adressen zugeordnet. Beispiel: Bei Startadresse 5 für Kanal 1 – sind im 5-Kanal-Modus die Kanäle 2 bis 5 den Adressen 6 bis 9 zugeordnet; die Adresse 10 ist die nächstmögliche freie Startadresse für das folgende DMXgesteuerte Gerät. – sind im 14-Kanal-Modus die Kanäle 2 bis 14 den Adressen 6 bis 18 zugeordnet; die Adresse 19 ist die nächstmögliche freie Startadresse für das folgende DMX-gesteuerte Gerät. 1) Die Taste MENU/ESC so oft drücken, bis das Hauptmenü erreicht ist. 2) Mit der Taste UP oder DOWN im Hauptmenü die Option wählen. 3) Die Taste ENTER drücken: Die aktuell eingestellte Adresse, z. B. , wird angezeigt. 4) Mit der Taste UP oder DOWN die gewünschte Adresse einstellen. Nach dem Einstellen der Startadresse lassen sich die Scheinwerfer über das DMX-Steuergerät bedienen. Der Empfang von Steuersignalen wird durch einen blinkenden Punkt im Display angezeigt. Anzeige der Firmwareversion 1) Die Taste MENU/ESC so oft drücken, bis das Hauptmenü erreicht ist. D A CH 2) Mit der Taste UP oder DOWN im Hauptmenü die Option wählen. 3) Die Taste ENTER drücken: Im Display wird die aktuelle Versionsnummer (z. B. ) angezeigt. 9 Reinigung des Gerätes Die Kunststoffscheiben vor den LEDs sollten in regelmäßigen Abständen, je nach Verschmutzung durch Staub, Rauch oder andere Schmutzpartikel gereinigt werden. Nur dann kann das Licht in maximaler Helligkeit abgestrahlt werden. Vor dem Reinigen den Netzstecker aus der Steckdose ziehen. Nur ein weiches, sauberes Tuch und ein mildes Reinigungsmittel verwenden. Anschließend die Kunststoffscheiben trocken wischen. Zum Reinigen der anderen Gehäuseteile nur ein trockenes, weiches Tuch benutzen. Auf keinen Fall Chemikalien oder eine Flüssigkeit verwenden, diese könnte in das Gerät laufen und Beschädigungen verursachen. 10 Technische Daten Stromversorgung: . . . . 230 V~/50 Hz Leistungsaufnahme PARL-42SET: . . . . . max. 80 VA PARL-47SET: . . . . . max. 165 VA Leuchtmittel PARL-42SET: . . . . . 4 × 144 superhelle 10-mmLEDs, jeweils 48 in Rot, Grün und Blau, Abstrahlwinkel 20° PARL-47SET: . . . . . 4 × 7 superhelle 3-WRGB-LEDs, Abstrahlwinkel 25° Einsatztemperatur: . . . 0 – 40 °C Abmessungen: . . . . . . 1210 × 345 × 80 mm (Steuereinheit mit Scheinwerfern) Stativhöhe: . . . . . . . . . 1,5 – 3,2 m Gewicht PARL-42SET: . . . . . 19,4 kg PARL-47SET: . . . . . 20,5 kg Änderungen vorbehalten. 9 D A 10.1 DMX-Funktionen 10.1.1 5-Kanal-Modus 10.1.2 DMX-Wert Funktion 1. Scheinwerfer: Farbmischung, wenn Kanal 14 = 0 – 11 CH DMX-Wert Funktion Kanal 1: Rot-Anteil, wenn Kanal 5 = 0 – 11 0 – 255 Helligkeit Rot Kanal 2: Grün-Anteil, wenn Kanal 5 = 0 – 11 K. 1: 0 – 255 Helligkeit Rot K. 2: 0 – 255 Helligkeit Grün K. 3: 0 – 255 Helligkeit Blau 2. Scheinwerfer: Farbmischung, wenn Kanal 14 = 0 – 11 Helligkeit Grün K. 4: 0 – 255 Helligkeit Rot Kanal 3: Blau-Anteil, wenn Kanal 5 = 0 – 11 K. 5: 0 – 255 Helligkeit Grün K. 6: 0 – 255 Helligkeit Blau 0 – 255 0 – 255 Helligkeit Blau Kanal 4: Stroboskop, Geschwindigkeit wenn Kanal 5 = 0 – 11: 0–7 8 – 255 kein Stroboskop Stroboskop: langsam → schnell wenn Kanal 5 = 12 – 239: 0 – 255 Programmablauf: langsam → schnell Kanal 5: Show-Programme 0 – 11 kein Programm: Farbmischung über die Kanäle 1 – 3 mit Stroboskop-Funktion über Kanal 4 12 – 23 Programm 1 (Farbwechsel) 24 – 35 Programm 2 (Farbwechsel) 36 – 47 Programm 3 (Farbwechsel) 48 – 59 Programm 4 (Farbwechsel) 60 – 71 Programm 5 (Farbwechsel) 72 – 83 Programm 6 84 – 95 Programm 7 96 – 107 Programm 8 108 – 119 Programm 9 3. Scheinwerfer: Farbmischung, wenn Kanal 14 = 0 – 11 K. 7: 0 – 255 Helligkeit Rot K. 8: 0 – 255 Helligkeit Grün K. 9: 0 – 255 Helligkeit Blau 4. Scheinwerfer: Farbmischung, wenn Kanal 14 = 0 – 11 K. 10: 0 – 255 Helligkeit Rot K. 11: 0 – 255 Helligkeit Grün K. 12: 0 – 255 Helligkeit Blau Kanal 13: Stroboskop, Geschwindigkeit wenn Kanal 14 = 0 – 11: 0–7 kein Stroboskop 8 – 255 Stroboskop: langsam → schnell wenn Kanal 14 = 12 – 239: 0 – 255 Programmablauf: langsam → schnell Kanal 14: Show-Programme 0 – 11 kein Programm: Farbmischung über die Kanäle 1 – 12 mit Stroboskop-Funktion über Kanal 13 12 – 23 Programm 1 (Farbwechsel) 24 – 35 Programm 2 (Farbwechsel) 36 – 47 Programm 3 (Farbwechsel) 48 – 59 Programm 4 (Farbwechsel) 60 – 71 Programm 5 (Farbwechsel) 72 – 83 Programm 6 120 – 131 Programm 10 132 – 143 Programm 11 144 – 155 Programm 12 156 – 167 Programm 13 84 – 95 Programm 7 168 – 179 Programm 14 96 – 107 Programm 8 180 – 191 Programm 15 108 – 119 Programm 9 192 – 203 Programm 16 120 – 131 Programm 10 204 – 215 Programm 17 132 – 143 Programm 11 216 – 227 Programm 18 144 – 155 Programm 12 228 – 239 Programm 19 156 – 167 Programm 13 „Sound 1“ ( Kap. 6.2) 168 – 179 Programm 14 180 – 191 Programm 15 192 – 203 Programm 16 204 – 215 Programm 17 216 – 227 Programm 18 228 – 239 Programm 19 240 – 251 „Sound 1“ ( Kap. 6.2) 240 – 251 252 – 255 „Sound 2“ ( Kap. 6.2) 252 – 255 10 14-Kanal-Modus „Sound 2“ ( Kap. 6.2) 10.2 Menüstruktur D Hauptmenü DMXStartadresse A CH Automatikmodus Musiksteuerung Farbstrahlerbetrieb Farbwechselmodus Anzahl der DMX-Kanäle Slave-Betrieb Version Diese Bedienungsanleitung ist urheberrechtlich für MONACOR ® INTERNATIONAL GmbH & Co. KG geschützt. Eine Reproduktion für eigene kommerzielle Zwecke – auch auszugsweise – ist untersagt. 11 GB Contents 1 Operating Elements and Connections . 12 2 Safety Notes . . . . . . . . . . . . . . . . . . . . . . 13 3 Applications . . . . . . . . . . . . . . . . . . . . . . . 13 4 Setting into Operation . . . . . . . . . . . . . . 14 1 Operating Elements and Connections Controller with spotlights, stand (fig. 1) 4.1 Mounting . . . . . . . . . . . . . . . . . . . . . . . . . . 14 1 Mains input for connection to a socket (230 V~ / 50 Hz) via the supplied mains cable 4.2 Power supply . . . . . . . . . . . . . . . . . . . . . . . 14 5 Operation . . . . . . . . . . . . . . . . . . . . . . . . . 14 2 Support for the mains fuse Only replace a blown fuse by one of the same type. 6 Operation without DMX Controller . . . . 14 3 Display 6.1 Automatic mode . . . . . . . . . . . . . . . . . . . . 14 4 Control buttons 6.2 Music control . . . . . . . . . . . . . . . . . . . . . . . 15 5 Jack FOOT CONTROLLER for connection of the remote controller via the supplied cable 6.3 Colour spotlight mode . . . . . . . . . . . . . . . . 15 6.4 Colour change mode . . . . . . . . . . . . . . . . . 15 6 DMX signal input (3-pole XLR) for connection of a light controller; pin 1 = ground, 2 = DMX-, 3 = DMX+ 6.6 Foot remote controller . . . . . . . . . . . . . . . . 16 7 DMX signal output (3-pole XLR) for connection to the DMX input of another DMX light effect unit; pin 1 = ground, 2 = DMX-, 3 = DMX+ 6.6.1 Switching the light on and off . . . . . . . . 16 8 Microphone for music-controlled light effects 6.6.2 Automatic mode . . . . . . . . . . . . . . . . . . 16 9 Control SENSITIVITY to adjust the microphone sensitivity for music-controlled light effects 6.6.3 Music control . . . . . . . . . . . . . . . . . . . . . 16 10 Connection cable between the controller and the spotlight 6.6.4 Colour spotlight mode . . . . . . . . . . . . . . 16 11 Mounting and setscrew to hold the spotlight (14) in place On the upper side of the controller there are additional threaded holes; if required, turn out the screw and fix the spotlight there. 6.5 Master/slave mode . . . . . . . . . . . . . . . . . . 15 7 DMX Control . . . . . . . . . . . . . . . . . . . . . . 16 7.1 Connection . . . . . . . . . . . . . . . . . . . . . . . . 16 7.2 Adjusting the number of DMX channels . . 17 7.3 Adjusting the start address . . . . . . . . . . . . 17 12 Setscrews to fix the controller at both sides on the stand tube (15) 8 Display of the Firmware Version . . . . . . 17 13 Setscrews for the vertical inclination of the spotlight (14) 9 Cleaning the Unit . . . . . . . . . . . . . . . . . . . 17 14 LED spotlight 10 Specifications . . . . . . . . . . . . . . . . . . . . . 17 10.1 DMX functions . . . . . . . . . . . . . . . . . . . . . . 18 10.1.1 5-channel mode . . . . . . . . . . . . . . . . . . . 18 10.1.2 14-channel mode . . . . . . . . . . . . . . . . . . 18 10.2 Menu structure . . . . . . . . . . . . . . . . . . . . . 19 12 All operating elements and connections described can be found on the fold-out page 3. 15 Stand Remote controller (fig. 2) 16 Jack for connection to the jack FOOT CONTROLLER (5) at the controller via the supplied cable 17 Foot switch AUTO to select an automatic show program As the colours of the wires in the mains lead of this appliance may not correspond with the coloured markings identifying the terminals in your plug, proceed as follows: 1. The wire which is coloured green and yellow must be connected to the terminal in the plug which is marked with the letter E or by the earth symbol , or coloured green or green and yellow. 2. The wire which is coloured blue must be connected to the terminal which is marked with the letter N or coloured black. 3. The wire which is coloured brown must be connected to the terminal which is marked with the letter L or coloured red. 18 Foot switch SOUND to select a program musiccontrolled via the microphone (8) 19 Foot switch COLOR to select a certain light colour 20 Foot switch BLACKOUT to switch the light off and on again 2 Safety Notes The unit corresponds to all relevant directives of the EU and is therefore marked with . WARNING The unit is supplied with hazardous mains voltage. Leave servicing to skilled personnel only. Inexpert handling or modification of the unit may cause an electric shock hazard. GB Warning – This appliance must be earthed. If the unit is to be put out of operation definitively, take it to a local recycling plant for a disposal which is not harmful to the environment. It is essential to observe the following items: G The unit is suitable for indoor use only. Protect it against dripping water and splash water, high air humidity and heat (admissible ambient temperature range 0 – 40 °C). G Do not place any vessels filled with liquid, e. g. a drinking glass, on the unit. G Do not set the unit into operation, or immediately disconnect the mains plug from the mains socket if 1. there is visible damage to the unit or to the mains cable, 2. a defect might have occurred after a drop or similar accident, 3. malfunctions occur. The unit must in any case be repaired by skilled personnel. G Never pull the mains cable to disconnect the mains plug from the mains socket, always seize the plug. G No guarantee claims for the unit and no liability for any resulting personal damage or material damage will be accepted if the unit is used for other purposes than originally intended, if it is not safely mounted or not correctly connected or operated, or if it is not repaired in an expert way. G Important for U. K. Customers! The wires in this mains lead are coloured in accordance with the following code: green/yellow = earth blue = neutral brown = live 3 Applications The spotlight sets PARL-42SET and PARL-47SET consist of four flat LED spotlights mounted to a controller. They serve for illumination e. g. on stage, in discotheques and festival rooms. As a light source, 144 super bright 10 mm LEDs (PARL-42SET) or 7 RGB LEDs (PARL-47SET) are inserted in each spotlight which feature a low power consumption, a low heat development and a long life compared to incandescent lamps. The LEDs allow to emit coloured light in the three primary colours (red, green and blue) and light which can be mixed from the primary colours by addition. A set can be operated on its own, with the supplied foot remote controller or at a DMX light controller (5 or 14 DMX control channels). In addition, several spotlight sets can be interconnected (master/slave mode) and be controlled together via a foot remote controller. Different internal light programs are available. The integrated microphone provides effects in sync with the music. A stand and transport bags are supplied with the unit. 13 GB 4 Setting into Operation 1) Place the stand on a horizontal, solid ground. For a safe position spread the legs of the stand as far as possible and fix them with the setscrew. WARNING To prevent damage to your eyes, never look directly into the light source for a long time. Please note that fast light changes may trigger epileptic seizures with photosensitive persons or persons with epilepsy! 2) Place the controller with the spotlights onto the stand tube (15) and fix it with the supplied screws (12) from both sides. Caution: The unit must not be connected to the mains voltage via a dimmer! 4.1 Mounting 3) To align the spotlights (14), release the respective setscrews (11, 13) and turn the spotlight into the desired direction. Pay attention that the cable (10) will not be stretched or squeezed. Then retighten the screws. On the upper side of the controller there are additional threaded holes so that the spotlights may also be mounted onto the controller, if required. In this case unscrew the screw (11) of the spotlight and fix the spotlight from above in the same way with the screw and the rubber washer. When changing the positions of the spotlights, ensure that the weight is equally distributed on the left and right sides. 4) To adjust the desired operating height, first remove the innermost tube of the stand. Place the safety pin through the two holes for the desired height and push in the tube to such an extent that the safety pin is placed on the central tube. Additionally fix the inside tube with the setscrew. If the desired height is not yet reached, pull out the central tube in the same way and fix it. IMPORTANT! G The stand must be set up in a stable way. Only extract the telescopic tubes to such an extent that a safe hold is ensured. 14 G Prior to operation check all setscrews and tighten them, if required. G Lay all connection cables so that nobody will trip over them and thus may overthrow the stand. G Always place the unit so that during operation a sufficient air circulation is ensured. Air vents at the housing must not be covered in any case. 5 Operation The settings of the unit are made via a system menu which can be operated by means of the buttons (4) and the display (3). The 4-digit display is switched on by pressing any button and shows the last adjustment. The display disappears a few seconds after the last button has been pressed. The buttons have the following functions: – Button MENU / ESC to return to the superior menu level – Button ENTER to go to the next menu function – Buttons UP and DOWN to select several menu options and to adjust values The menu structure is shown in chapter 10.2. By means of chapter 6 or 7 make the desired adjustments for the respective operating mode with the buttons. 6 Operation without DMX Controller 6.1 Automatic mode The unit has two automatic show programs (additional basic colour change programs chapter 6.4). To activate one of these programs: 1) Press the button MENU / ESC repeatedly until the main menu is reached. 2) Select the option in the main menu with the button UP or DOWN. 4.2 Power supply 3) Press the button ENTER: The last program adjusted ( or ) is activated and displayed. Select the desired program from both programs with the button UP or DOWN. First connect the supplied mains cable to the mains jack (1) and then to a socket (230 V~ / 50 Hz). Then the unit is ready for operation. To switch off, disconnect the mains plug from the socket. 4) To change the speed, press the button ENTER. The present speed is displayed. Select the desired speed from the 9 speeds to with the button UP or DOWN. 6.2 Music control For a music-controlled light show it is possible to select three music modes “Sound 1” to “Sound 3”. “Sound 1”: sound-controlled stroboscope with white light “Sound 2”: sound-controlled flashing with changing colours “Sound 3”: sound-controlled activation of programs Note: The music modes “Sound 1” and “Sound 2” are the same music modes which can be activated for DMX control ( chapter 10.1). 1) Press the button MENU / ESC repeatedly until the main menu is reached. 2) Select the option button UP or DOWN. in main menu with the 3) Press the button ENTER: The last music mode adjusted ( or ) is activated and , displayed. Select the desired mode from the three modes with the button UP or DOWN. 4) To change the speed for the programs for the mode “Sound 3”, press the button ENTER: The present speed is displayed. Select the desired speed from the 9 speeds to with the button UP or DOWN. 5) Turn up clockwise the control SENSITIVITY (9) for the sensitivity of the microphone MIC (8) until the spotlights respond to the music as desired. When changing the volume at the music system, the microphone sensitivity must be adapted accordingly. If the music control should not function in an optimum way in spite of the sensitivity control fully turned up, increase the volume or reduce the distance between the sound source and the microphone. 6.3 Colour spotlight mode For a constant colour beam of the spotlights it is possible to select nine preset colours and a colour to be adjusted individually: 1) Press the button MENU / ESC repeatedly until the main menu is reached. 2) Select the option in the main menu with the button UP or DOWN. 3) Press the button ENTER: The last colour mode adjusted (one of the preset colours … or the individual colour adjustment ) is activated and displayed. Select the desired colour mode from the colour modes with the button UP or DOWN. GB Individual colour adjustment In the colour mode “ATF” the brightness of the primary colours red, green and blue can separately be adjusted and thus the desired shade of colour can be mixed: a) If is selected, press the button ENTER. The display shows the last primary colour adjusted and its brightness value: red ( ), green ( ) or blue ( ). b) Adjust the brightness of the selected colour with the button DOWN or UP (indication 0 – 255). c) Change to the next primary colour with the button ENTER and adjust its brightness. Hint: When adjusting the primary colours, not only their brightness changes but also the shade of colour in case the colours are mixed. Therefore, first adjust the colour which is to dominate to the desired brightness and then add the other two colours. If the intended colour mixture is white, first adjust the brightness of the green colour because this appears to be the brightest colour to the human eye. Then add red to get yellow and finally add blue to get white. 6.4 Colour change mode For an automatic change of colour with crossfading it is possible to select five programs with different colour sequences: 1) Press the button MENU / ESC repeatedly until the main menu is reached. 2) Select the option in the main menu with the button UP or DOWN. 3) Press the button ENTER: The last colour change program adjusted ( … ) is activated and displayed. Select the desired program with the button UP or DOWN. 4) To change the speed, press the button ENTER: The present speed is shown. Select the desired speed from the 9 speeds to with the button UP or DOWN. 6.5 Master / slave mode Several units PARL-42SET or PARL-47SET (also mixed) may be operated in sync. Then the first unit (master unit) controls the remaining units (slave units). Connect the units with each other in a chain. For this purpose see chapter 7.1, however, skip step 1. 15 GB Adjust the master unit [the first unit of the chain of which the control input DMX IN (6) is not connected] to automatic mode, music control, colour spotlight mode or colour change mode ( chapters 6.1 to 6.4). Adjust the slave units to the slave mode as follows: 1) Press the button MENU / ESC repeatedly until the main menu is reached. 2) Select the option in the main menu with the button UP or DOWN. 3) Press the button ENTER: The slave mode is activated, the display shows . As soon as the slave unit receives control signals from the master unit, a point flashes on the display. 6.6 Foot remote controller Via the supplied foot remote controller different functions of the spotlights may be controlled. If several spotlight sets are interconnected in the master / slave operation, all of them are controlled together via the remote controller of the master unit. 1) Connect the jack (16) on the rear side of the remote controller to the jack FOOT CONTROLLER (5) at the controller via the supplied cable. Secure the plug connection in each case by tightly turning the cap nut. 2) There must be no DMX signal at the input DMX IN (6). 6.6.1 Switching the light on and off The light is switched off with the button BLACKOUT (20) on the remote controller. When switching off the light (blackout), the display (3) of the (master) unit shortly shows . To switch on the light again, press the button BLACKOUT once more or directly select another function with one of the other three buttons of the remote controller. 6.6.2 Automatic mode It is possible to select the two programs of the automatic mode ( chapter 6.1) with the button AUTO (17). Press the button repeatedly to change from one program to the other. The display shows or accordingly. The speed of the programs depends on the menu adjustment ( chapter 6.1, step 4). 6.6.3 Music control The programs ( chapter 6.2) controlled via the microphone (8) may be selected with the button SOUND (18). Press the button repeatedly to change the program. The display shows , 16 or accordingly. For , the speed of the program depends on the menu adjustment ( chapter 6.2, step 4). 6.6.4 Colour spotlight mode The 9 preset colours of the colour spotlight mode ( chapter 6.3) may be selected with the button COLOR (19). Press the button repeatedly to change the colour. The colour shows … accordingly. 7 DMX Control DMX is short for Digital Multiplex and allows digital control of several DMX units via a common control line. For operation via a DMX light controller (e. g. DMX-1440 or DMX-510USB from “img Stage Line”) the light effect panel is equipped with 14 DMX control channels. However, it can also be controlled via 5 channels only, if required. The functions of the channels and the corresponding DMX values can be found in chapter 10.1. 7.1 Connection As a DMX interface the unit is equipped with 3-pole XLR connections with the following pin configuration: pin 1 = ground, pin 2 = DMX-, pin 3 = DMX+ For connection, special cables for high data flow should be used. Standard microphone cables with screening and a minimum cross section of 2 × 0.22 mm2 and with a capacity as low as possible can only be recommended for a total cable length of up to 100 m. For cable lengths exceeding 150 m it is recommended to insert a DMX level matching amplifier (e. g. SR-103DMX from “img Stage Line”). 1) Connect the control input DMX IN (6) to the DMX output of the light controller. If remote controllers are connected, separate them from the spotlight sets so that they do not impair the DMX control. 2) Connect the control output DMX OUT (7) to the control input DMX IN of the next DMX-controlled unit. Connect its output again to the input of the following unit, etc. until all DMX-controlled units are connected in a chain. 3) To prevent interferences in signal transmission, for long cables or for a great number of units connected in series, terminate the control output of the last DMX unit of the chain with a 120 Ω resistor (> 0.3 W): Connect a corresponding terminating plug (e. g. DLT-123 from “img Stage Line”) to the output jack. 7.2 Adjusting the number of DMX channels 8 The number of DMX channels depends on the functions required and possibly also on the number of control channels available on the light controller. In the 14-channel mode the four spotlights can separately be controlled for colour mixing, while in the 5-channel mode only a common control is possible. To select the number of DMX channels: To indicate the version number of the firmware (operating system of the unit): 1) Press the button MENU / ESC repeatedly until the main menu is reached. 3) Press the button ENTER: The display shows the present version number (e. g. ). 2) Select the option in the main menu with the button UP or DOWN. 3) Press the button ENTER: the channel mode presently adjusted is displayed: = 5-channel mode = 14-channel mode 4) Select the desired option with the button UP or DOWN. 7.3 Adjusting the start address For controlling the spotlights adjust a DMX start address for its first DMX channel. The following DMX channels are then automatically assigned to the following addresses. Example: For start address 5 for channel 1 – in the 5-channel mode, the channels 2 to 5 are assigned to the addresses 6 to 9. The address 10 is the next possible free start address for the following DMX-controlled unit. – in the 14-channel mode, the channels 2 to 14 are assigned to the addresses 6 to 18. The address 19 is the next possible free start address for the following DMX-controlled unit. 1) Press the button MENU / ESC repeatedly until the main menu is reached. 2) Select the option in the main menu with the button UP or DOWN. 3) Press the button ENTER: The present address adjusted, e. g. , is displayed. 4) Adjust the desired address with the button UP or DOWN. After adjusting the start address the spotlights can be operated via the DMX controller. The reception of control signals will be indicated by a point flashing on the display. Display of the Firmware Version GB 1) Press the button MENU / ESC repeatedly until the main menu is reached. 2) Select the option in the main menu with the button UP or DOWN. 9 Cleaning the Unit The plastic panes in front of the LEDs should be cleaned at regular intervals, depending on impurities caused by dust, smoke or other dirt particles. Only this will ensure that the light is radiated at maximum brightness. Prior to cleaning, disconnect the mains plug from the socket. Only use a soft, clean cloth and a mild detergent. Then wipe the plastic panes dry. For cleaning the other parts of the housing only use a dry, soft cloth. Never use chemicals or any fluid; it may leak into the unit and cause damage. 10 Specifications Power supply: . . . . . . 230 V~ / 50 Hz Power consumption PARL-42SET: . . . . . 80 VA max. PARL-47SET: . . . . . 165 VA max. Light source PARL-42SET: . . . . .4 × 144 super bright 10 mm LEDs, 48 in red, green and blue respectively, beam angle 20° PARL-47SET: . . . . . 4 × 7 super bright 3 W RGB LEDs, beam angle 25° Ambient temperature: 0 – 40 °C Dimensions: . . . . . . . . 1210 × 345 × 80 mm (controller with spotlights) Height of stand: . . . . . 1.5 to 3.2 m Weight PARL-42SET: . . . . . 19.4 kg PARL-47SET: . . . . . 20.5 kg Subject to technical modification. 17 GB 10.1 DMX functions 10.1.1 5-channel mode 10.1.2 14-channel mode DMX Value Function Spotlight 1: colour mixing when channel 14 = 0 – 11 DMX Value Function CH 1: 0 – 255 brightness of red Channel 1: proportion of red when channel 5 = 0 – 11 CH 2: 0 – 255 brightness of green 0 – 255 brightness of red Channel 2: proportion of green when channe 5 = 0 – 11 0 – 255 brightness of green Channel 3: proportion of blue when channel 5 = 0 – 11 0 – 255 brightness of blue Channel 4: stroboscope, speed when channel 5 = 0 – 11: 0–7 no stroboscope 8 – 255 stroboscope: slow → fast when channel 5 = 12 – 239: 0 – 255 program speed: slow → fast Channel 5: show programs 0 – 11 no program: colour mixing via channels 1 – 3 with stroboscope function via channel 4 12 – 23 program 1 (colour change) 24 – 35 program 2 (colour change) 36 – 47 program 3 (colour change) 48 – 59 program 4 (colour change) 60 – 71 program 5 (colour change) 72 – 83 program 6 84 – 95 program 7 96 – 107 program 8 108 – 119 program 9 CH 3: 0 – 255 brightness of blue Spotlight 2: colour mixing when channel 14 = 0 – 11 CH 4: 0 – 255 brightness of red CH 5: 0 – 255 brightness of green CH 6: 0 – 255 brightness of blue Spotlight 3: colour mixing when channel 14 = 0 – 11 CH 7: 0 – 255 brightness of red CH 8: 0 – 255 brightness of green CH 9: 0 – 255 brightness of blue Spotlight 4: colour mixing when channel 14 = 0 – 11 CH 10: 0 – 255 brightness of red CH 11: 0 – 255 brightness of green CH 12: 0 – 255 brightness of blue Channel 13: stroboscope, speed when channel 14 = 0 – 11: 0–7 no stroboscope 8 – 255 stroboscope: slow → fast when channel 14 = 12 – 239: 0 – 255 0 – 11 no program: colour mixing via channels 1 – 12 with stroboscope function via channel 13 12 – 23 program 1 (colour change) 24 – 35 program 2 (colour change) 36 – 47 program 3 (colour change) 48 – 59 program 4 (colour change) 60 – 71 program 5 (colour change) 72 – 83 program 6 120 – 131 program 10 132 – 143 program 11 144 – 155 program 12 156 – 167 program 13 84 – 95 program 7 168 – 179 program 14 96 – 107 program 8 180 – 191 program 15 108 – 119 program 9 192 – 203 program 16 120 – 131 program 10 204 – 215 program 17 132 – 143 program 11 216 – 227 program 18 144 – 155 program 12 228 – 239 program 19 156 – 167 program 13 “Sound 1” ( chapter 6.2) 168 – 179 program 14 180 – 191 program 15 192 – 203 program 16 204 – 215 program 17 216 – 227 program 18 228 – 239 program 19 240 – 251 “Sound 1” ( chapter 6.2) 240 – 251 252 – 255 “Sound 2” ( chapter 6.2) 252 – 255 18 program speed: slow → fast Channel 14: show programs “Sound 2” ( chapter 6.2) 10.2 Menu structure GB Main menu DMX start address automatic mode music control colour spotlight mode colour change mode number of DMX channels slave mode version All rights reserved by MONACOR ® INTERNATIONAL GmbH & Co. KG. No part of this instruction manual may be reproduced in any form or by any means for any commercial use. 19 F B CH Table des matières 1 Eléments et branchements . . . . . . . . . . 20 2 Conseils dʼutilisation et de sécurité . . . 21 3 Possibilités dʼutilisation . . . . . . . . . . . . . 21 4 Fonctionnement . . . . . . . . . . . . . . . . . . . 21 4.1 Montage . . . . . . . . . . . . . . . . . . . . . . . . . . 21 4.2 Alimentation . . . . . . . . . . . . . . . . . . . . . . . 22 5 Utilisation . . . . . . . . . . . . . . . . . . . . . . . . . 22 6 Fonctionnement sans contrôleur DMX . 22 6.1 Mode automatique . . . . . . . . . . . . . . . . . . 22 Ouvrez le présent livret page 3, dépliable, de manière à visualiser les éléments et branchements. 1 Eléments et branchements Unité de commande avec projecteurs et pied (schéma 1) 1 Prise secteur à relier à une prise 230 V~ / 50 Hz via le cordon secteur livré 2 Porte fusible : tout fusible fondu doit être impérativement remplacé par un fusible de même type 3 Affichage 6.2 Gestion par la musique . . . . . . . . . . . . . . . 22 4 Touches de commande 6.3 Projecteur de couleur . . . . . . . . . . . . . . . . 23 5 Prise FOOT CONTROLLER pour brancher la télécommande via le cordon livré 6.4 Mode changement de couleur . . . . . . . . . . 23 6.5 Mode master / slave . . . . . . . . . . . . . . . . . . 23 6.6 Gestion à distance via la pédale . . . . . . . . 24 6 Entrée signal DMX (XLR, 3 pôles) pour brancher à un contrôleur : Pin 1 = masse, 2 = DMX-, 3 = DMX + 6.6.2 Mode automatique . . . . . . . . . . . . . . . . . 24 7 Sortie signal DMX (XLR 3 pôles) pour brancher à lʼentrée DMX dʼun autre jeu de lumière DMX : Pin 1 = masse, 2 = DMX-, 3 = DMX + 6.6.3 Gestion par la musique . . . . . . . . . . . . . 24 8 Microphone pour créer des effets de lumière gérés par la musique 6.6.1 Allumer et éteindre la lumière . . . . . . . . 24 6.6.4 Fonctionnement projecteur de couleur . 24 7 Gestion DMX . . . . . . . . . . . . . . . . . . . . . . 24 7.1 Branchement . . . . . . . . . . . . . . . . . . . . . . . 24 7.2 Réglage du nombre de canaux DMX . . . . 24 7.3 Réglage de lʼadresse de démarrage DMX 25 8 Affichage de la version Firmware . . . . . 25 9 Nettoyage de lʼappareil . . . . . . . . . . . . . . 25 10 Caractéristiques techniques . . . . . . . . . 25 10.1 Fonctions DMX . . . . . . . . . . . . . . . . . . . . . 26 10.1.1 Mode 5 canaux . . . . . . . . . . . . . . . . . . . 26 10.1.2 Mode 14 canaux . . . . . . . . . . . . . . . . . . 26 10.2 Structure du menu . . . . . . . . . . . . . . . . . . . 27 9 Réglage SENSITIVITY pour régler la sensibilité du micro pour des effets de lumière gérés par la musique 10 Cordon de liaison entre lʼunité de commande et le projecteur 11 Vis de montage et de réglage pour maintenir le projecteur (14) en place Vous trouverez sur la face supérieure du contrôleur des trous filetés supplémentaires ; si besoin, tournez la vis pour la retirer et fixez le projecteur à cette place 12 Vis de réglage pour fixer des deux côtés lʼunité de commande sur le tube du pied (15) 13 Vis de réglage pour lʼinclinaison verticale du projecteur (14) 14 Projecteur à LEDs 15 Pied Télécommande (schéma 2) 16 Prise de branchement pour relier à la prise FOOT CONTROLLER (5) sur lʼunité de commande via le cordon livré 17 Pédale AUTO pour sélectionner un programme Show défilant automatiquement 20 18 Pédale SOUND pour sélectionner un programme géré par la musique via le micro (8) 19 Pédale COLOR pour sélectionner une couleur donnée 20 Pédale BLACKOUT pour éteindre et rallumer la lumière 2 Conseils dʼutilisation et de sécurité Lʼappareil répond à toutes les directives nécessaires de lʼUnion européenne et porte donc le symbole . AVERTISSEMENT Lʼappareil est alimenté par une tension dangereuse. Ne touchez jamais lʼintérieur de lʼappareil ! Risque de décharge électrique. Respectez scrupuleusement les points suivants : G Lʼappareil nʼest conçu que pour une utilisation en intérieur. Protégez-le de tout type de projections dʼeau, des éclaboussures, dʼune humidité élevée de lʼair et de la chaleur (plage de température de fonctionnement autorisée : 0 – 40 °C). 3 Possibilités dʼutilisation Les sets de projecteurs PARL-42SET et PARL47SET se composent de 4 projecteurs à LEDs plats montés sur une unité de commande. Ils permettent un éclairage p. ex. sur scène, dans des discothèques ou salles des fêtes. Chaque projecteur possède 144 LEDs 10 mm (PARL-42SET) extrêmement claires ou 7 LEDs RGB (PARL-47SET) comme source lumineuse. Elles ont une faible consommation, un faible dégagement de chaleur et une longue durée de vie par rapport aux lampes à incandescence. Les LEDs permettent de projeter une lumière de couleur dans les trois couleurs primaires (rouge, vert et bleu) et une lumière pouvant être mixée, par ajout, à partir des couleurs primaires. Un set peut fonctionner seul, avec la télécommande pédale livrée ou avec un contrôleur DMX (5 ou 14 canaux de commande DMX). On peut également brancher ensemble plusieurs sets de projecteurs (mode master / slave) et les gérer ensemble via une pédale. Différents programmes de lumière internes sont disponibles ; le microphone intégré permet de créer des effets synchronisés avec la musique. Un pied et une sacoche de transport sont livrés. F B CH G En aucun cas, vous ne devez pas poser dʼobjet contenant du liquide ou un verre sur lʼappareil. 4 Fonctionnement G Ne faites pas fonctionner lʼappareil ou débranchez-le immédiatement du secteur lorsque : 1. des dommages visibles apparaissent sur lʼappareil ou sur le cordon secteur, 2. après une chute ou un cas similaire, vous avez un doute sur lʼétat de lʼappareil, 3. des dysfonctionnements apparaissent. Dans tous les cas, les dommages doivent être réparés par un technicien spécialisé. G Ne débranchez jamais lʼappareil en tirant sur le cordon secteur ; retirez toujours le cordon secteur en tirant la fiche. G Nous déclinons toute responsabilité en cas de dommages matériels ou corporels résultants si lʼappareil est utilisé dans un but autre que celui pour lequel il a été conçu, sʼil nʼest pas monté dʼune manière sûre, sʼil nʼest pas correctement branché ou utilisé ou nʼest pas réparé par une personne habilitée, en outre, la garantie deviendrait caduque. Lorsque lʼappareil est définitivement retiré du service, vous devez le déposer dans une usine de recyclage adaptée pour contribuer à son élimination non polluante. 4.1 Montage 1) Posez le pied sur un sol rigide et plat. Pour une meilleure stabilité, écartez au maximum les éléments du pied et fixez avec la vis de réglage. 2) Placez lʼunité de commande avec les projecteurs sur le tube du pied (15) et fixez des deux côtés avec les vis livrées (12). 3) Pour orienter les projecteurs (14), desserrez respectivement les vis (11, 13) et orientez et inclinez le projecteur dans le sens voulu. Veillez à ce que le cordon (10) ne soit pas étiré ou torsadé. Revissez ensuite les vis. Des trous filetés supplémentaires sont prévus sur la face supérieure de lʼunité de commande pour pouvoir monter si besoin les projecteurs sur lʼunité de commande. Dans ce cas, dévissez la vis (11) du projecteur, fixez le projecteur de la même manière avec la vis et la rondelle caoutchouc par le haut. Si vous souhaitez modifier la position des projecteurs, veillez à ce que la répartition des poids demeure identique entre le côté gauche et le côté droit. 4) Pour régler la hauteur voulue, retirez tout dʼabord le tube interne du pied. Placez la gou- 21 pille de sécurité à la hauteur voulue dans les deux trous, poussez le tube jusquʼà ce que la goupille soit sur le tube du milieu. Fixez le tube intérieur avec la vis de réglage en plus. Si la hauteur voulue nʼest toujours pas atteinte, sortez de la même manière le tube du milieu et fixez. – touche ENTER pour aller à la prochaine fonction du menu IMPORTANT ! G Le pied doit être monté de manière sûre et solide. Etirez les tubes télescopiques jusquʼà atteindre un maintien sûr. Effectuez les réglages pour chaque mode de fonctionnement avec les touches en fonction des indications du chapitre 6 ou 7. F B CH Vous trouverez dans le chapitre 10.2 la structure du menu. G Avant tout fonctionnement, vérifiez toutes les vis de réglage et si besoin, resserrez-les. 6 G Placez les câbles de branchement de telle sorte que personne ne puisse y buter et puisse faire tomber le pied. 6.1 Mode automatique G Placez toujours lʼappareil de telle sorte quʼune circulation dʼair suffisante soit assurée pendant le fonctionnement. Les ouïes de ventilation sur le boîtier ne doivent en aucun cas être obturées. Lʼappareil dispose de deux programmes show défilant automatiquement (programmes simples supplémentaires de changement de couleur, chapitre 6.4). Pour appeler un de ces programmes : 4.2 Alimentation Reliez le cordon secteur livré tout dʼabord à la prise (1) et lʼautre extrémité du cordon à une prise secteur 230 V~ / 50 Hz. Lʼappareil est alors prêt à fonctionner. Pour éteindre, débranchez le cordon secteur. AVERTISSEMENT Ne regardez jamais directement la source de lumière, cela pourrait causer des troubles de la vision. Nʼoubliez pas que des changements très rapides de lumière peuvent déclencher des crises dʼépilepsie chez les personnes photosensibles et épileptiques. Fonctionnement sans contrôleur DMX 1) Appuyez sur la touche MENU / ESC jusquʼà atteindre le menu principal. 2) Avec la touche UP ou DOWN, sélectionnez lʼoption dans le menu principal. 3) Appuyez sur la touche ENTER : le dernier programme réglé ( ou ) est activé et indiqué sur lʼaffichage. Avec la touche UP ou DOWN, sélectionnez le programme voulu parmi les deux programmes. 4) Pour modifier la vitesse, appuyez sur la touche ENTER : la vitesse actuelle est affichée. Avec la touche UP ou DOWN, sélectionnez la vitesse voulue parmi les 9 vitesses proposées à . 6.2 Gestion par la musique Attention : Lʼappareil ne doit pas être relié à la tension dʼalimentation via un dimmer. Si le show de lumière doit défiler selon la musique, vous pouvez sélectionner entre trois modes de musique, “Sound 1” à “Sound 3” : 5 “Sound 1” : stroboscope géré par le son avec lumière blanche Utilisation Les réglages de lʼappareil sont effectués via un menu système pouvant être utilisé via les touches (4) et lʼaffichage (3). Lʼaffichage 4 positions est allumé en appuyant sur une touche et indique le dernier réglage. Lʼaffichage sʼéteint quelques secondes après une dernière pression sur la touche. 22 – touches UP et DOWN pour sélectionner entre plusieurs options de menu et pour régler les valeurs “Sound 2” : clignotement géré par le son avec couleurs changeantes “Sound 3” : déclenchement géré par le son des programmes Les touches ont les fonctions suivantes : Remarque : les modes de musique “Sound 1” et “Sound 2” sont les mêmes modes musique pouvant être activés par une gestion DMX ( chapitre 10.1). – touche MENU / ESC pour revenir à la plage supérieure de menu 1) Appuyez sur la touche MENU / ESC jusquʼà atteindre le menu principal. 2) Avec la touche UP ou DOWN, sélectionnez lʼoption dans le menu principal. c) Avec la touche ENTER, allez à la couleur primaire suivante et réglez sa luminosité. 3) Appuyez sur la touche ENTER : le dernier mode musique réglé ( ou ) est activé , et affiché. Avec la touche UP ou DOWN, sélectionnez le mode souhaité parmi les trois proposés. Remarque : lorsque vous réglez la luminosité des LEDs rouges, vertes ou bleues, non seulement la luminosité de la LED change mais aussi dans le cadre dʼun mixage de couleurs, la teinte. Cʼest pourquoi il convient de régler tout dʼabord la couleur qui doit dominer, sur la luminosité voulue puis de mixer les deux autres couleurs. Si la couleur de mixage voulue est le blanc, réglez tout dʼabord la luminosité du vert car cʼest la couleur qui apparaît le plus clair à lʼoeil. Ensuite mixez avec du rouge pour avoir du jaune et enfin avec le bleu pour avoir du blanc. 4) Pour modifier en mode “Sound 3” la vitesse de défilement des programmes, appuyez sur la touche ENTER : la vitesse actuelle est affichée. Avec la touche UP ou DOWN, sélectionnez la vitesse souhaitée parmi les 9 vitesses proposées à . Pour un changement automatique de couleurs avec transition, vous pouvez sélectionner entre 5 programmes avec différentes suites de couleurs : 6.3 Projecteur de couleur 4) Pour modifier la vitesse, appuyez sur la touche ENTER : la vitesse actuelle est affichée ; avec la touche UP ou DOWN, sélectionnez parmi les 9 vitesses à la vitesse souhaitée. 1) Appuyez sur la touche MENU / ESC jusquʼà atteindre le menu principal. 2) Avec la touche UP ou DOWN, sélectionnez lʼoption dans le menu principal. 3) Appuyez sur la touche ENTER : le dernier mode de couleur réglé (une des couleurs préréglées … ou le réglage individuel de couleur ) est activé et indiqué sur lʼaffichage. Avec la touche UP ou DOWN, sélectionnez le mode souhaité parmi les modes de couleur. Réglage individuel de couleur Avec le mode “ATF”, vous pouvez régler séparément la luminosité des couleurs primaires rouge, vert et bleu et mixez ainsi la teinte voulue. a) Si est sélectionné, appuyez sur la touche ENTER. Lʼaffichage indique la dernière couleur primaire réglée et la valeur de sa luminosité : rouge ( ), vert ( ) ou bleu ( ). b) Réglez la luminosité de la couleur choisie avec la touche DOWN ou UP (affichage 0 – 255). B CH 6.4 Mode changement de couleur 5) Tournez le réglage SENSITIVITY (9) dans le sens des aiguilles dʼune montre pour régler la sensibilité du micro MIC (8) de telle sorte que les projecteurs réagissent comme souhaité à la musique. Lorsque vous modifiez le volume sur lʼinstallation de musique, il faut adapter en conséquence la sensibilité du micro. Si la gestion par la musique ne fonctionne pas correctement malgré le positionnement du réglage de sensibilité au maximum, augmentez le volume ou diminuez la distance entre la source audio et le microphone. Si les projecteurs doivent diffuser une couleur de manière constante, vous pouvez choisir entre 9 couleurs préréglées et une couleur réglable individuellement : F 1) Appuyez sur la touche MENU / ESC jusquʼà atteindre le menu principal. 2) Avec la touche UP ou DOWN, sélectionnez lʼoption dans le menu principal. 3) Appuyez sur la touche ENTER : le dernier programme de changement de couleur réglé ( … ) est activé et indiqué sur lʼaffichage. Avec la touche UP ou DOWN, sélectionnez le programme voulu. 6.5 Mode master / slave Plusieurs appareils PARL-42SET ou PARL-47SET (même mixés) peuvent fonctionner de manière synchrone ; le premier appareil (appareil master) prend en charge la gestion des autres appareils (appareils Slave). Reliez les appareils en une chaîne. Voir chapitre 7.1 sans tenir compte des indications du point 1. Réglez lʼappareil master [le premier appareil de la chaîne dont lʼentrée de commande DMX IN (6) nʼest pas branchée] sur le mode automatique, gestion par la musique ou mode de changement de couleur ( chapitre 6.1-6.4). Réglez les appareils slave sur le mode Slave: 1) Appuyez sur la touche MENU / ESC jusquʼà atteindre le menu principal. 2) Avec la touche UP ou DOWN, sélectionnez lʼoption dans le menu principal. 3) Appuyez sur la touche ENTER : le mode Slave est activé, lʼaffichage indique . Dès que lʼappareil slave reçoit les signaux de commande de lʼappareil master, un point sur lʼaffichage clignote. 23 F 6.6 Gestion à distance via la pédale 7 B Via la télécommande à pédale livrée, vous pouvez gérer plusieurs fonctions des projecteurs. Si plusieurs sets de projecteurs sont reliés ensemble en mode master / slave, ils sont tous gérés ensemble via la télécommande de lʼappareil master. 1) Reliez la prise (16) sur la face arrière de la télécommande à la prise FOOT CONTROLLER (5) sur lʼunité de commande via le cordon livré. Verrouillez la connexion en tournant lʼécrou. DMX est lʼabréviation de Digital Multiplex et permet la gestion digitale de plusieurs appareils DMX via un câble de commande commun. Pour une utilisation via un contrôleur DMX (p. ex. DMX-1440 ou DMX-510USB de “img Stage Line”), la barre à LEDs dispose de 14 canaux de commande DMX. Si besoin, on peut utiliser uniquement 5 canaux. Vous trouverez dans le chapitre 10.1 les fonctions des canaux et les valeurs DMX. 2) Aucun signal DMX ne doit être présent à lʼentrée DMX IN (6). 7.1 Branchement CH 6.6.1 Allumer et éteindre la lumière Avec la touche BLACKOUT (20) sur la télécommande, la lumière sʼéteint. Lorsque la lumière est éteinte (Blackout), lʼaffichage (3) de lʼappareil (master) indique brièvement . Pour rallumer la lumière, appuyez sur la touche BLACKOUT à nouveau ou sélectionnez avec une des trois autres touches de la télécommande directement une autre fonction. 6.6.2 Mode automatique Avec la touche AUTO (17), vous pouvez sélectionner les deux programmes du mode automatique ( chapitre 6.1). En activant de manière répétée la touche, vous changez de programme. Lʼaffichage indique en fonction ou . La vitesse de défilement des programmes dépend du réglage du menu ( chapitre 6.1, point 4). 6.6.3 Gestion par la musique Avec la touche SOUND (18), on peut sélectionner les programmes gérés par le microphone (8) [ chapitre 6.2]. Par une activation répétée de la touche, vous pouvez changer de programme. Lʼaffichage indique en fonction ou . , La vitesse de défilement du programme dépend, pour le réglage , du réglage du menu ( chapitre 6.2, point 4). 6.6.4 Fonctionnement projecteur de couleur Avec la touche COLOR (19), on peut sélectionner les 9 couleurs préréglées du mode projecteur de couleur ( chapitre 6.3). Par une activation répétée de la touche, vous pouvez changer de couleur. Lʼaffichage indique en fonction … . 24 Gestion DMX Comme interface DMX, lʼappareil possède des prises XLR 3 pôles avec la configuration suivante : pin 1 = masse, pin 2 = DMX-, pin 3 = DMX + Pour le branchement, il est recommandé dʼutiliser des câbles spécifiques pour des flots importants de données. Lʼemploi de câbles micro usuels avec blindage et une section de 2 × 0,22 mm2 au moins et la capacité la plus faible possible nʼest recommandé que pour des longueurs de câble de 100 m maximum. Pour des longueurs de liaison à partir de 150 m, il est recommandé dʼinsérer un amplificateur DMX de signal (par exemple SR-103DMX de “img Stage Line”). 1) Reliez lʼentrée de commande DMX IN (6) à la sortie DMX du contrôleur. Débranchez les télécommandes reliées des sets de projecteurs pour ne pas les perturber par la gestion DMX. 2) Reliez la sortie de commande DMX OUT (7) à lʼentrée de commande DMX IN du prochain appareil géré par DMX. Reliez sa sortie à lʼentrée de lʼappareil suivant de manière à relier tous les appareils gérés par DMX en une chaîne. 3) Pour éviter toute interférence lors de la transmission de signaux, il est recommandé, pour de longs câbles ou pour une multitude dʼappareils branchés les uns derrières les autres, de terminer la sortie DMX du dernier appareil DMX de la chaîne avec une résistance 120 Ω (> 0,3 W) ; reliez un bouchon correspondant (par exemple DLT-123 de “img Stage Line”) à la prise. 7.2 Réglage du nombre de canaux DMX Le nombre de canaux DMX dépend des fonctions nécessaires et éventuellement du nombre de canaux de commande disponibles sur le contrôleur. En mode 14 canaux, on peut gérer séparément les 4 projecteurs pour un mixage des couleurs, en mode 5 canaux, seule une gestion commune est possible. Pour sélectionner le nombre de canaux DMX : 1) Appuyez sur la touche MENU / ESC jusquʼà atteindre le menu principal. 2) Avec la touche UP ou DOWN, sélectionnez lʼoption dans le menu principal. 3) Appuyez sur la touche ENTER : le mode de canal réglé actuellement est affiché : = mode 5 canaux = mode 14 canaux. 4) Avec la touche UP ou DOWN, sélectionnez lʼoption voulue. 7.3 Réglage de lʼadresse de démarrage DMX Pour gérer les projecteurs, il faut régler pour le canal DMX 1 une adresse de démarrage DMX. Les canaux suivants sont automatiquement attribués aux adresses suivantes. Exemple : Pour lʼadresse de démarrage 5 pour le canal 1 – Si en mode 5 canaux, les canaux 2 à 5 sont attribués aux adresses 6 à 9, lʼadresse 10 est la prochaine adresse libre possible pour lʼappareil suivant géré par DMX. – Si en mode 14 canaux, les canaux 2 à 14 sont attribués aux adresses 6 à 18, lʼadresse 19 est la prochaine adresse libre possible pour lʼappareil suivant géré par DMX. 1) Appuyez sur la touche MENU / ESC jusquʼà atteindre le menu principal. 2) Avec la touche UP ou DOWN, sélectionnez lʼoption dans le menu principal. 3) Appuyez sur la touche ENTER : lʼadresse réglée actuellement, par exemple , est affichée. 4) Avec la touche UP ou DOWN, sélectionnez lʼoption voulue. Une fois lʼadresse de démarrage réglée, vous pouvez utiliser les projecteurs via un contrôleur DMX. La réception des signaux de commande est indiquée par un point clignotant sur lʼaffichage. 8 9 Nettoyage de lʼappareil Les vitres plastiques devant les LEDs devraient être nettoyées régulièrement de toute poussière, fumée ou autres particules de salissure. Cʼest à cette condition que la lumière sera émise avec une luminosité maximale. Pour procéder au nettoyage, débranchez la fiche secteur du secteur. Utilisez un tissu propre et doux et un produit de nettoyage doux. Essuyez avec précaution tous les éléments. Pour nettoyer les autres éléments du boîtier, utilisez exclusivement un tissu doux et sec. Nʼutilisez en aucun cas de produits chimiques ou de liquide, il pourrait couler dans lʼappareil et créer des dégâts. F B CH 10 Caractéristiques techniques Alimentation : . . . . . . . 230 V~/50 Hz Consommation PARL-42SET : . . . . 80 VA max. PARL-47SET : . . . . 165 VA max. Lampe PARL-42SET : . . . . 4 × 144 LEDs 10 mm très claires, respectivement 48 rouges, 48 verts, 48 bleues, angle de diffraction 20° PARL-47SET : . . . . 4 × 7 LEDs très claires RGB 3 W, angle de diffraction 25° Température fonc. : . . 0 – 40 °C Dimensions : . . . . . . . 1210 × 345 × 80 mm (unité de commande avec projecteurs) Hauteur du pied : . . . . 1,5 – 3,2 m Poids PARL-42SET : . . . . 19,4 kg PARL-47SET : . . . . 20,5 kg Affichage de la version Firmware Pour afficher le numéro de la version Firmware (système dʼexploitation de lʼappareil) : 1) Appuyez sur la touche MENU / ESC jusquʼà atteindre le menu principal. Tout droit de modification réservé. 2) Avec la touche UP ou DOWN, sélectionnez dans le menu principal lʼoption . 3) Appuyez sur la touche ENTER : sur lʼaffichage, le numéro actuel de la version sʼaffiche (par exemple ). 25 F B 10.1 Fonctions DMX 10.1.1 Mode 5 canaux 10.1.2 Valeur DMX Fonction projecteur 1 : mixage de couleurs si canal 14 = 0 – 11 CH Valeur DMX Fonction C 1: 0 – 255 luminosité rouge canal 1 : part de rouge si canal 5 = 0 – 11 C 2: 0 – 255 luminosité vert C 3: 0 – 255 luminosité bleu 0 – 255 luminosité rouge canal 2 : part de vert, si canal 5 = 0 – 11 projecteur 2 : mixage de couleurs, si canal 14 = 0 – 11 luminosité vert C 4: 0 – 255 luminosité rouge canal 3 : part de bleu, si canal 5 = 0 – 11 C 5: 0 – 255 luminosité vert C 6: 0 – 255 luminosité bleu 0 – 255 0 – 255 luminosité bleu canal 4 : stroboscope, vitesse si canal 5 = 0 – 11: 0–7 8 – 255 pas de stroboscope stroboscope : lent → rapide si canal 5 = 12 – 239: 0 – 255 défilement de programme : lent → rapide canal 5 : programmes Show 0 – 11 aucun programme : mixage de couleur via les canaux 1 – 3 avec fonction stroboscope via canal 4 12 – 23 programme 1 (changement couleurs) 24 – 35 programme 2 (changement couleurs) 36 – 47 programme 3 (changement couleurs) 48 – 59 programme 4 (changement couleurs) 60 – 71 programme 5 (changement couleurs) 72 – 83 programme 6 84 – 95 programme 7 96 – 107 programme 8 108 – 119 programme 9 projecteur 3 : mixage de couleurs, si canal 14 = 0 – 11 C 7: 0 – 255 luminosité rouge C 8: 0 – 255 luminosité vert C 9: 0 – 255 luminosité bleu projecteur 4 : mixage de couleurs, si canal 14 = 0 – 11 C 10: 0 – 255 luminosité rouge C 11: 0 – 255 luminosité vert C 12: 0 – 255 luminosité bleu canal 13 : stroboscope, vitesse si canal 14 = 0 – 11: 0–7 pas de stroboscope 8 – 255 stroboscope : lent → rapide si canal 14 = 12 – 239: 0 – 255 défilement programme : lent → rapide canal 14 : programmes Show 0 – 11 aucun programme : mixage de couleur via les canaux 1 – 12 avec fonction stroboscope via canal 13 12 – 23 programme 1 (changement couleurs) 24 – 35 programme 2 (changement couleurs) 36 – 47 programme 3 (changement couleurs) 48 – 59 programme 4 (changement couleurs) 60 – 71 programme 5 (changement couleurs) 72 – 83 programme 6 120 – 131 programme 10 132 – 143 programme 11 144 – 155 programme 12 156 – 167 programme 13 84 – 95 programme 7 168 – 179 programme 14 96 – 107 programme 8 180 – 191 programme 15 108 – 119 programme 9 192 – 203 programme 16 120 – 131 programme 10 204 – 215 programme 17 132 – 143 programme 11 216 – 227 programme 18 144 – 155 programme 12 228 – 239 programme 19 156 – 167 programme 13 “Sound 1” ( chapitre 6.2) 168 – 179 programme 14 180 – 191 programme 15 192 – 203 programme 16 204 – 215 programme 17 216 – 227 programme 18 228 – 239 programme 19 240 – 251 “Sound 1” ( chapitre 6.2) 240 – 251 252 – 255 “Sound 2” ( chapitre 6.2) 252 – 255 26 Mode 14 canaux “Sound 2” ( chapitre 6.2) 10.2 Structure du menu F Menu principal adresse de démarrage DMX B CH mode automatique gestion par la musique fonctionnement projecteur de couleur mode changement de couleur nombre de canaux DMX mode slave version Notice dʼutilisation protégée par le copyright de MONACOR ® INTERNATIONAL GmbH & Co. KG. Toute reproduction même partielle à des fins commerciales est interdite. 27 I Indice 1 Elementi di comando e collegamenti . . 28 2 Avvertenze di sicurezza . . . . . . . . . . . . . 29 3 Possibilità dʼimpiego . . . . . . . . . . . . . . . 29 4 Messa in funzione . . . . . . . . . . . . . . . . . . 29 A pagina 3, se aperta completamente, vedrete sempre gli elementi di comando e i collegamenti descritti. 1 Elementi di comando e collegamenti Unità di comando con proiettori, stativo (Fig. 1) 4.1 Montaggio . . . . . . . . . . . . . . . . . . . . . . . . . 29 4.2 Alimentazione . . . . . . . . . . . . . . . . . . . . . . 30 5 Funzionamento . . . . . . . . . . . . . . . . . . . . 30 6 Funzionamento senza unità di comando DMX . . . . . . . . . . . . . . 30 2 Portafusibile Sostituire un fusibile difettoso solo con uno dello stesso tipo. 3 Display 6.1 Modo automatico . . . . . . . . . . . . . . . . . . . . 30 4 Tasti funzione 6.2 Comando tramite la musica . . . . . . . . . . . 30 5 Presa FOOT CONTROLLER per il collegamento del telecomando tramite il cavo in dotazione 6.3 Funzionamento come proiettore di colori . . . . . . . . . . . . . . . . . . . 31 6.4 Modo cambio colori . . . . . . . . . . . . . . . . . . 31 6.5 Funzionamento Master / Slave . . . . . . . . . 31 6.6 Telecomando a pedale . . . . . . . . . . . . . . . 31 6.6.1 Accendere e spegnere la luce . . . . . . . . 32 6.6.2 Modo automatico . . . . . . . . . . . . . . . . . . 32 6.6.3 Comando tramite la musica . . . . . . . . . . 32 6.6.4 Funzionamento come proiettore di colori . . . . . . . . . . . . . . . . . 32 7 Comando DMX . . . . . . . . . . . . . . . . . . . . . 32 7.1 Collegamento . . . . . . . . . . . . . . . . . . . . . . 32 7.2 Impostare il numero dei canali DMX . . . . . 32 7.3 Impostare lʼindirizzo di start . . . . . . . . . . . . 33 6 Ingresso dei segnali DMX (XLR a 3 poli) per il collegamento di unʼunità di comando luce; pin 1 = massa, 2 = DMX-, 3 = DMX+ 7 Uscita dei segnali DMX (XLR a 3 poli) per il collegamento con lʼingresso DMX di unʼulteriore unità per effetti di luce; pin 1 = massa, 2 = DMX-, 3 = DMX+ 8 Microfono per effetti di luce comandati dalla musica 9 Regolatore SENSITIVITY per impostare la sensibilità del microfono per effetti di luce comandati dalla musica 10 Cavo di collegamento fra unità di comando e proiettore 11 Vite di montaggio e di bloccaggio contro lo spostamento del proiettore (14) Sul lato superiore dellʼunità di comando si trovano dei fori filettati supplementari; se necessario, svitare la vite e fissare il proiettore in quel punto. 8 Indicazione della versione del firmware 33 12 Viti di bloccaggio per fissare lʼunità di comando ai due lati sul tubo dello stativo (15) 9 Pulizia dellʼapparecchio . . . . . . . . . . . . . 33 10 Dati tecnici . . . . . . . . . . . . . . . . . . . . . . . . 33 13 Viti di bloccaggio per lʼinclinazione verticale del proiettore (14) 14 Proiettore con LED 10.1 Funzioni DMX . . . . . . . . . . . . . . . . . . . . . . 34 15 Stativo 10.1.1 Modo a 5 canali . . . . . . . . . . . . . . . . . . . 34 Telecomando (Fig. 2) 10.1.2 Modo a 14 canali . . . . . . . . . . . . . . . . . . 34 16 Presa di connessione per il collegamento con la presa FOOT CONTROLLER (5) sullʼunità di comando per mezzo del cavo in dotazione 10.2 Struttura del menù . . . . . . . . . . . . . . . . . . . 35 28 1 Ingresso rete per il collegamento con una presa di rete (230 V~ / 50 Hz) tramite il cavo in dotazione 17 Pulsante a pedale AUTO per scegliere un programma show a svolgimento automatico 18 Pulsante a pedale SOUND per scegliere un programma comandato dalla musica tramite il microfono (8) 19 Pulsante a pedale COLOR per scegliere un determinato colore della luce 20 Pulsante a pedale BLACKOUT per spegnere e riaccendere la luce 2 Avvertenze di sicurezza Questʼapparecchio è conforme a tutte le direttive richieste dellʼUE e pertanto porta la sigla . AVVERTIMENTO Lʼapparecchio funziona con pericolosa tensione di rete. Non intervenire mai personalmente al suo interno! Esiste il pericolo di una scarica elettrica. Si devono osservare assolutamente anche i seguenti punti: G Usare lʼapparecchio solo allʼinterno di locali e pro- teggerlo dallʼacqua gocciolante e dagli spruzzi dʼacqua, da alta umidità dellʼaria e dal calore (temperatura dʼimpiego ammessa fra 0 e 40 °C). G Non depositare sullʼapparecchio dei contenitori riempiti di liquidi, p. es. bicchieri. G Non mettere in funzione lʼapparecchio o staccare subito la spina rete se: 1. lʼapparecchio o il cavo rete presentano dei danni visibili; 2. dopo una caduta o dopo eventi simili sussiste il sospetto di un difetto; 3. lʼapparecchio non funziona correttamente. Per la riparazione rivolgersi sempre ad unʼofficina competente. G Staccare il cavo rete afferrando la spina, senza tirare il cavo. G Nel caso dʼuso improprio, di montaggio non sicuro, di collegamenti sbagliati, dʼimpiego scorretto o di riparazione non a regola dʼarte dellʼapparecchio, non si assume nessuna responsabilità per eventuali danni consequenziali a persone o a cose e non si assume nessuna garanzia per lʼapparecchio. Se si desidera eliminare lʼapparecchio definitivamente, consegnarlo per lo smaltimento ad unʼistituzione locale per il riciclaggio. 3 Possibilità dʼimpiego I I set di proiettori PARL-42SET e PARL-47SET sono composti da quattro proiettori piatti a LED, montati su unʼunità di comando. Servono allʼilluminazione, p. es. sul palcoscenico, in discoteche o in sale per feste. In ogni proiettore sono disposti come sorgenti luminose rispettivamente 144 LED superluminosi di 10 mm (PARL-42SET) e 7 LED RGB (PARL47SET). Rispetto alle lampadine a incandescenza consumano poca corrente, sviluppano poco calore e offrono una lunga durata. Con i LED si può irradiare della luce colorata nei tre colori fondamentali (rosso, verde e blu) nonché la luce che si può miscelare dai colori fondamentali. Un set può essere comandato da solo, tramite il telecomando a pedale in dotazione o per mezzo di unʼunità DMX di comando luce (5 o 14 canali di comando DMX). Inoltre è possibile assemblare e comandare insieme tramite un telecomando a pedale più set di proiettori (funzionamento Master / Slave). Sono disponibili vari programmi interni di luci. Il microfono integrato provvede a degli effetti sincronizzati con la musica. Sono in dotazione uno stativo e borse di trasporto. 4 Messa in funzione 4.1 Montaggio 1) Posizionare lo stativo su una base orizzontale, stabile. Per garantire una sistemazione sicura, allargare al massimo le gambe dello stativo e fissarle con la vite di bloccaggio. 2) Sistemare lʼunita di comando con i proiettori sul tubo dello stativo (15) e fissarla sui due lati per mezzo delle viti (12) in dotazione. 3) Per orientare i proiettori (14) allentare le relative viti di bloccaggio (11, 13) e girare e inclinare il proiettore nella direzione voluta, facendo attenzione di non tirare o schiacciare il cavo (10). Quindi stringere nuovamente le viti. Sul lato superiore dellʼunità di comando si trovano dei fori filettati per mezzo dei quali i proiettori possono essere montati, se opportuno, sullʼunità di comando. In questo caso svitare la vite (11) del proiettore e fissare dallʼalto il proiettore come descritto sopra con la vite e la guarnizione di gomma. Spostando i proiettori, fare attenzione che lʼequilibrio fra il lato destro e sinistro rimanga invariato. 4) Per impostare lʼaltezza di lavoro sfilare dapprima il tubo interno dello stativo. Inserire il perno di sicurezza nei due fori corrispondenti 29 allʼaltezza desiderata e spingere indietro il tubo fino al punto che il perno di sicurezza poggi sul tubo centrale. Fissare il tubo interno in più con la vite di bloccaggio. Se non si raggiunge ancora lʼaltezza desiderata, sfilare il tubo centrale e fissarlo nello nesso modo. I IMPORTANTE! G Lo stativo deve essere collocato in modo sicuro. Sfilare i tubi telescopici solo fino al punto da garantire un posizione sicura. G La struttura del menù è rappresentata nel capitolo 10.2. Secondo le indicazioni dei capitoli 6 o 7, eseguire con lʼaiuto dei tasti le impostazioni per i vari modi. 6 Funzionamento senza unità di comando DMX Prima dellʼuso controllare le viti di bloccaggio e stringerli se necessario. 6.1 Modo automatico G Sistemare tutti i cavi ci collegamento in modo tale che nessuno possa inciampare facendo cadere lo stativo. G Posizionare lʼapparecchio sempre in modo che durante il funzionamento sia garantita una circolazione sufficiente dellʼaria. Le fessure dʼaerazione del contenitore non devono essere coperte in nessun caso. Lʼapparecchio dispone di due programmi show a svolgimento automatico (programmi semplici supplementari di cambio colori Cap. 6.4). Per chiamare uno di questi programmi: 4.2 Alimentazione Inserire il cavo rete in dotazione prima nella presa (1) e quindi in una presa di rete (230 V~ / 50 Hz). A questo punto, lʼapparecchio è pronto per lʼuso. Per spegnere, staccare la spina della presa. AVVERTIMENTO Non guardare in modo prolungato direttamente nei LED per escludere possibili danni agli occhi. Tenete presente che i veloci cambi di luce possono provocare attacchi dʼepilessia presso persone fotosensibili o epilettici! 1) Premere il tasto MENU / ESC tante volte finché si raggiunge il menù principale. 2) Con il tasto UP o DOWN scegliere, nel menù principale, lʼopzione . 3) Premere il tasto ENTER: è attivo il programma impostato per ultimo ( o ) che viene indicato sul display. Con il tasto UP o DOWN scegliere il programma desiderato fra i due disponibili. 4) Per modificare la velocità, premere il tasto ENTER: è visualizzata la velocità attuale. Con il tasto UP o DOWN scegliere la velocità desiderata fra le 9 velocità a disponibili. 6.2 Comando tramite la musica Se lo show di luci deve svolgersi comandato dalla musica, sono disponibili 3 modi di musica, da “Sound 1” a “Sound 3”: Attenzione: Lʼapparecchio non deve essere collegato con la tensione di rete per mezzo di un dimmer! “Sound 1”: Stroboscopio comandato dai suoni con luce bianca 5 “Sound 2”: Lampeggio comandato dai suoni con colori che cambiano Funzionamento Le impostazioni dellʼapparecchio si effettuano tramite un menù del sistema che è gestito per mezzo dei tasti (4) e del display (3). Il display a 4 cifre viene attivato premendo un qualsiasi tasto e visualizza lʼultima impostazione. Lʼindicazione si spegne alcuni secondi dopo lʼultimo azionamento di un tasto. “Sound 3”: Attivazione dei programmi comandata dai suoni I tasti hanno le seguenti funzioni: 2) Con il tasto UP o DOWN scegliere, nel menù principale, lʼopzione . – Tasto MENU / ESC per ritornare al livello superiore del menù – Tasto ENTER per passare alla funzione successiva del menù 30 – Tasti UP e DOWN per scegliere le varie opzioni del menù e per impostare i valori Nota: I modi di musica “sound 1” e “sound 2” sono gli stessi modi di musica che si possono chiamare con i comandi DMX ( Capitolo 10.1). 1) Premere tante volte il tasto MENU / ESC finché si raggiunge il menù principale. 3) Premere il tasto ENTER: è attivo il modo di musica impostato per ultimo ( o , ) che viene indicato sul display. Con il tasto UP o DOWN scegliere il modo desiderato fra i tre disponibili. 4) Per modificare la velocità per lo svolgimento dei programmi nel modo “Sound 3”, premere il tasto ENTER: è visualizzata la velocità attuale. Con il tasto UP o DOWN scegliere la velocità desiderata fra le 9 velocità a disponibili. 5) Aprire in senso orario il regolatore SENSITIVITY (9) per la sensibilità del microfono MIC (8) in modo che i proiettori reagiscano alla musica come desiderato. Cambiando il volume dellʼimpianto di musica, si deve adattare anche la sensibilità del microfono. Se il comando tramite la musica non dovesse funzionare in modo ottimale nonostante il regolatore della sensibilità sia aperto molto, bisogna aumentare il volume oppure ridurre la distanza fra sorgente acustica e pannello. 6.3 Funzionamento come proiettore di colori Se i proiettori devono irradiare costantemente un colore, si può scegliere fra nove colori preimpostati e un colore impostabile individualmente: 1) Premere tante volte il tasto MENU / ESC finché si raggiunge il menù principale. 2) Con il tasto UP o DOWN scegliere, nel menù principale, lʼopzione . 3) Premere il tasto ENTER: è attivo il modo di colori impostato per ultimo (uno dei colori preimpostati … oppure lʼimpostazione individuale di colori ) che viene indicato sul display. Con il tasto UP o DOWN scegliere il modo desiderato fra i quelli disponibili. Impostazione individuale dei colori Nel modo di colori “ATF” è possibile impostare separatamente la luminosità dei colori fondamentali rosso, verde e blu e quindi miscelare la tonalità cromatica desiderata: a) Se è scelto , premere il tasto ENTER. Il display visualizza il colore fondamentale impostato per ultimo e il suo valore di luminosità: rosso ( ), verde ( ) o blu ( ). b) Con il tasto DOWN o UP impostare la luminosità del colore scelto (indicazione 0 – 255). c) Con il tasto ENTER passare al colore fondamentale successivo e impostare la sua luminosità. Un consiglio: Regolando i colori fondamentali, non cambia solo la loro luminosità ma nel caso di colori miscelati anche la tonalità. Perciò conviene impostare dapprima la luminosità per il colore dominante e aggiungere successivamente gli altri due colori. Se la miscelazione deve portare al bianco, impostare dap- prima la luminosità del colore verde perché questo colore appare allʼocchio umano più chiaro. Quindi con rosso passare al giallo e alla fine con blu si ottiene il colore bianco. I 6.4 Modo cambio colori Per un cambio colori automatico con dissolvenze, è possibile scegliere fra cinque programmi con differenti sequenze di colori: 1) Premere il tasto MENU / ESC tante volte finché si raggiunge il menù principale. 2) Con il tasto UP o DOWN scegliere, nel menù principale, lʼopzione . 3) Premere il tasto ENTER: è attivo il programma di cambio colori impostato per ultimo ( … ) che viene indicato sul display. Con il tasto UP o DOWN scegliere il programma desiderato. 4) Per modificare la velocità, premere il tasto ENTER: è visualizzata la velocità attuale. Con il tasto UP o DOWN scegliere la velocità desiderata fra le 9 velocità a disponibili. 6.5 Funzionamento Master / Slave È possibile comandare più PARL-42SET o PARL47SET (anche mischiati) in modo sincrono. In questo caso, il primo apparecchio (master) comanda gli altri apparecchi (slave). Collegare gli apparecchi fra loro formando una catena. Per particolari vedere il capitolo 7.1 tralasciando il punto 1. Impostare sul master [il primo apparecchio della catena il cui ingresso di comando DMX IN (6) non è collegato] il modo automatico, il comando tramite la musica, funzionamento come proiettore di colori o modo cambio colori ( Capitolo 6.1 – 6.4). Sugli slave impostare il modo slave procedendo come segue: 1) Premere tante volte il tasto MENU / ESC finché si raggiunge il menù principale. 2) Con il tasto UP o DOWN scegliere, nel menù principale, lʼopzione . 3) Premere il tasto ENTER: è attivo il modo slave, il display indica . Quando lʼapparecchio slave riceve dal master dei segnali di comando, sul display lampeggia un punto. 6.6 Telecomando a pedale Per mezzo del telecomando a pedale in dotazione, si possono comandare varie funzioni dei proiettori. Se più set di proiettori sono collegati fra loro per il funzionamento master / slave, tutti saranno comandati in comune tramite il telecomando dellʼapparecchio master. 31 I 1) Usando il cavo in dotazione, collegare la presa (16) sul retro del telecomando con la presa FOOT CONTROLLER (5) sullʼunità di comando. Assicurare la connessione avvitando il dado di accoppiamento. 2) Allʼingresso DMX IN (6) non deve essere presente nessun segnale DMX. 6.6.1 Accendere e spegnere la luce Con il tasto BLACKOUT (20) del telecomando si spegne la luce. Spegnendo la luce (Blackout), il display (3) dellʼapparecchio (master) visualizza brevemente . Per riaccendere la luce, azionare nuovamente il tasto BLACKOUT oppure con uno degli altri tre tasti scegliere una funzione differente. 6.6.2 Modo automatico Con il tasto AUTO (17) si possono scegliere i due programmi del modo automatico ( Cap. 6.1). Azionando ripetutamente il tasto, si cambia fra i programmi. Il display visualizza quindi o . La velocità di svolgimento dipende dalle impostazioni nel menù ( Cap. 6.1, passo 4). 6.6.3 Comando tramite la musica Con il tasto SOUND (18) si possono scegliere i programmi comandati tramite il microfono (8) [ Cap. 6.2]. Azionando ripetutamente il tasto, si cambia fra i programmi. Il display visualizza quindi , o . Con , la velocità di svolgimento dipende dalle impostazioni nel menù ( Cap. 6.2, passo 4). 6.6.4 Funzionamento come proiettore di colori Con il tasto COLOR (19) si possono scegliere i 9 colori preimpostati del funzionamento come proiettore di colori ( Cap. 6.3). Azionando ripetutamente il tasto, si cambia fra i colori. Il display visualizza quindi … . 7 Comando DMX DMX è lʼabbreviazione di Digital Multiplex e significa il comando digitale di più apparecchi DMX tramite una linea comune di comando. Per il funzionamento tramite unʼunità di comando luce DMX (p. es. DMX-1440 o DMX-510USB di “img Stage Line”), il pannello dispone di 14 canali di comando DMX. Tuttavia, è possibile il comando anche tramite soli 5 canali. Le funzioni dei canali e i relativi valori DMX si trovano nel capitolo 10.1. 32 7.1 Collegamento Come interfaccia DMX, lʼapparecchio possiede dei contatti XLR a 3 poli con la seguente piedinatura: pin 1 = massa, pin 2 = DMX-, pin 3 = DMX+ Per il collegamento si dovrebbero usare cavi per un forte flusso di dati. Lʼimpiego di normali cavi schermati per microfoni di sezione minima di 2 × 0,22 mm2 e con capacità possibilmente bassa è consigliabile solo nel caso di una lunghezza complessiva inferiore a 100 m. Nel caso di lunghezze oltre i 150 m si consiglia per principio lʼimpiego di un amplificatore DMX (p. es. SR-103DMX di “img Stage Line”). 1) Collegare lʼingresso di comando DMX IN (6) con lʼuscita DMX dellʼunità di comando luce. Staccare dai set di proiettori i telecomandi eventualmente collegati per non compromettere il comando DMX. 2) Collegare lʼuscita di comando DMX OUT (7) con lʼingresso di comando DMX IN dellʼapparecchio DMX successivo e lʼuscita di questʼultimo con lʼingresso dellʼapparecchio a valle ecc. finché tutte le unità per effetti di luce sono collegate formando una catena. 3) Per escludere interferenze durante la trasmissione dei segnali, nel caso di linee lunghe o di un gran numero di apparecchi collegati in serie, lʼuscita di comando dellʼultimo apparecchio DMX della catena dovrebbe essere terminata con una resistenza di 120 Ω (> 0,3 W). Inserire un terminatore adatto (p. es. DLT-123 di “img Stage Line”) nella presa dʼuscita. 7.2 Impostare il numero dei canali DMX Il numero dei canali DMX dipende dalle funzioni richieste, e eventualmente anche dal numero dei canali di comando disponibili sullʼunità di comando luce. Nel funzionamento a 14 canali è possibile comandare separatamente i quattro proiettori per miscelare i colori, mentre nel funzionamento a 5 canali è possibile solo il comando comune per tutti. Per scegliere il numero dei canali DMX: 1) Premere tante volte il tasto MENU / ESC finché si raggiunge il menù principale. 2) Con il tasto UP o DOWN scegliere, nel menù principale, lʼopzione . 3) Premere il tasto ENTER: si vede il modo di canali attualmente impostato: = modo a 5 canali = modo a 14 canali 4) Con il tasto UP o DOWN scegliere lʼopzione desiderata. 7.3 Impostare lʼindirizzo di start 9 Per poter comandare i proiettori, occorre impostare lʼindirizzo di start DMX per il suo primo canale DMX. I successivi canali DMX sono quindi assegnati automaticamente agli indirizzi successivi. Ad intervalli regolari, a seconda della presenza di polvere, di fumo o di altre particelle, conviene pulire i dischi di plastica davanti ai LED. Solo allora la luce può essere irradiata alla massima luminosità. Prima della pulizia, staccare la spina dalla presa. Per la pulizia usare solo un panno morbido, pulito e un detergente delicato. Quindi asciugare i dischi di plastica. Per pulire le altre parti del contenitore, usare solo un panno morbido, pulito. Non usare in nessun caso prodotti chimici o liquidi che potrebbero penetrare nellʼapparecchio danneggiandolo. Esempio: Con indirizzo di start 5 per il canale 1, – nel modo a 5 canali, i canali 2 a 5 sono assegnati agli indirizzi 6 a 9; lʼindirizzo 10 è il prossimo indirizzo di start possibile per lʼapparecchio con comando DMX successivo. – nel modo a 14 canali, i canali 2 a 14 sono assegnati agli indirizzi 6 a 18; lʼindirizzo 19 è il prossimo indirizzo di start possibile per lʼapparecchio con comando DMX successivo. Pulizia dellʼapparecchio 1) Premere tante volte il tasto MENU / ESC finché si raggiunge il menù principale. 10 Dati tecnici 2) Con il tasto UP o DOWN scegliere, nel menù principale, lʼopzione . Alimentazione: . . . . . . 230 V~ / 50 Hz 3) Premere il tasto ENTER: si vede lʼindirizzo impostato attualmente, p. es. . Potenza assorbita PARL-42SET: . . . . . max. 80 VA PARL-47SET: . . . . . max. 165 VA Dopo lʼimpostazione dellʼindirizzo di start, i proiettori possono essere comandati tramite lʼunità di comando DMX. La ricezione di segnali di comando è visualizzata da un punto lampeggiante sul display. Lampadine PARL-42SET: . . . . . 4 × 144 LED superluminosi di 10 mm, 48 cad. rossi, verdi e blu, angolo dʼirradiazione 20° PARL-47SET: . . . . . 4 × 7 LED RGB superluminosi di 3 W, angolo dʼirradiazione 25° 8 Temperatura dʼesercizio: . . . . . . . . . 0 – 40 °C 4) Con il tasto UP o DOWN impostare lʼindirizzo. Indicazione della versione del firmware Per visualizzare la versione del firmware (sistema operativo dellʼapparecchio): Dimensioni: . . . . . . . . 1210 × 345 × 80 mm (unità di comando con proiettori) 1) Premere tante volte il tasto MENU / ESC finché si raggiunge il menù principale. Altezza stativo: . . . . . . 1,5 – 3,2 m 2) Con il tasto UP o DOWN scegliere, nel menù principale, lʼopzione . Peso PARL-42SET: . . . . . 19,4 kg PARL-47SET: . . . . . 20,5 kg 3) Premere il tasto ENTER: sul display si vede il numero attuale della versione (p. es. ). I Con riserva di modifiche tecniche. 33 I 10.1 Funzioni DMX 10.1.1 Modo a 5 canali 10.1.2 Modo a 14 canali Valore DMX Funzione 1. proiettore: miscelazione colori, se canale 14 = 0 – 11 Valore DMX Funzione C. 1: 0 – 255 Luminosità rosso Canale 1: Parte rosso, se canale 5 = 0 – 11 C. 2: 0 – 255 Luminosità verde C. 3: 0 – 255 Luminosità blu 0 – 255 Luminosità rosso Canale 2: Parte verde, se canale 5 = 0 – 11 0 – 255 Luminosità verde Canale 3: Parte blu, se canale 5 = 0 – 11 0 – 255 Luminosità blu Canale 4: Stroboscopio, velocità se canale 5 = 0 – 11: 0–7 8 – 255 nessuno stroboscopio Stroboscopio: lento → veloce se canale 5 = 12 – 239: 0 – 255 Svolgimento programma: lento → veloce Canale 5: Programmi show 0 – 11 nessun programma: Miscelazione colori tramite i canali 1 – 3 con funzione stroboscopio tramite canale 4 12 – 23 Programma 1 (Cambio colori) 24 – 35 Programma 2 (Cambio colori) 36 – 47 Programma 3 (Cambio colori) 48 – 59 Programma 4 (Cambio colori) 60 – 71 Programma 5 (Cambio colori) 72 – 83 Programma 6 84 – 95 Programma 7 96 – 107 Programma 8 108 – 119 Programma 9 2. proiettore: miscelazione colori, se canale 14 = 0 – 11 C. 4: 0 – 255 Luminosità rosso C. 5: 0 – 255 Luminosità verde C. 6: 0 – 255 Luminosità blu 3. proiettore: miscelazione colori, se canale 14 = 0 – 11 C. 7: 0 – 255 Luminosità rosso C. 8: 0 – 255 Luminosità verde C. 9: 0 – 255 Luminosità blu 4. proiettore: miscelazione colori, se canale 14 = 0 – 11 C. 10: 0 – 255 Luminosità rosso C. 11: 0 – 255 Luminosità verde C. 12: 0 – 255 Luminosità blu Canale 13: Stroboscopio, velocità se canale 14 = 0 – 11: 0–7 nessuno stroboscopio 8 – 255 Stroboscopio: lento → veloce se canale 14 = 12 – 239: 0 – 255 0 – 11 nessun programma: Miscelazione colori tramite i canali 1 – 12 con funzione stroboscopio tramite canale 13 12 – 23 Programma 1 (Cambio colori) 24 – 35 Programma 2 (Cambio colori) 36 – 47 Programma 3 (Cambio colori) 48 – 59 Programma 4 (Cambio colori) 60 – 71 Programma 5 (Cambio colori) 72 – 83 Programma 6 120 – 131 Programma 10 132 – 143 Programma 11 144 – 155 Programma 12 156 – 167 Programma 13 84 – 95 Programma 7 168 – 179 Programma 14 96 – 107 Programma 8 180 – 191 Programma 15 108 – 119 Programma 9 192 – 203 Programma 16 120 – 131 Programma 10 204 – 215 Programma 17 132 – 143 Programma 11 216 – 227 Programma 18 144 – 155 Programma 12 228 – 239 Programma 19 156 – 167 Programma 13 “Sound 1” ( Cap. 6.2) 168 – 179 Programma 14 180 – 191 Programma 15 192 – 203 Programma 16 204 – 215 Programma 17 216 – 227 Programma 18 228 – 239 Programma 19 240 – 251 “Sound 1” ( Cap. 6.2) 240 – 251 252 – 255 “Sound 2” ( Cap. 6.2) 252 – 255 34 Svolgimento programma: lento → veloce Canale 14: Programmi show “Sound 2” ( Cap. 6.2) 10.2 Struttura del menù I Menù principale Indirizzo di start DMX Modo automatico Comando tramite la musica Funzionamento come proiettore di luci Modo cambio colori Numero dei canali DMX Funzionamento slave Versione La MONACOR ® INTERNATIONAL GmbH & Co. KG si riserva ogni diritto di elaborazione in qualsiasi forma delle presenti istruzioni per lʼuso. La riproduzione – anche parziale – per propri scopi commerciali è vietata. 35 NL B Inhoud 1 Overzicht van de bedieningselementen en aansluitingen . . . . . . . . . . . . . . . . . . . 36 2 Veiligheidsvoorschriften . . . . . . . . . . . . 37 3 Toepassingen . . . . . . . . . . . . . . . . . . . . . 37 4 Ingebruikneming . . . . . . . . . . . . . . . . . . . 37 4.1 Montage . . . . . . . . . . . . . . . . . . . . . . . . . . 37 4.2 Voedingsspanning . . . . . . . . . . . . . . . . . . . 38 5 Bediening . . . . . . . . . . . . . . . . . . . . . . . . . 38 6 Bediening zonder DMX-besturingsapparaat . . . . . . . . . . . . 38 Op de uitklapbare pagina 3 vindt u een overzicht van alle bedieningselementen en de aansluitingen. 1 Overzicht van de bedieningselementen en aansluitingen Besturingseenheid met schijnwerpers, statief (afb. 1) 1 Connector voor aansluiting op een stopcontact (230 V~ / 50 Hz) met behulp van het bijgeleverde netsnoer 2 Houder voor de netzekering Vervang een gesmolten zekering uitsluitend door een zekering van hetzelfde type. 3 Display 4 Bedieningstoetsen 6.1 Automatische modus . . . . . . . . . . . . . . . . . 38 6.2 Muzieksturing . . . . . . . . . . . . . . . . . . . . . . 38 6.3 Kleurenstralerbedrijf . . . . . . . . . . . . . . . . . 39 6.4 Kleurwisselmodus . . . . . . . . . . . . . . . . . . . 39 6.5 Master/ slavebediening . . . . . . . . . . . . . . . 39 6.6 Voetafstandsbediening . . . . . . . . . . . . . . . 40 6 DMX-signaalingang (3-polige XLR) voor aansluiting van een lichtregelaar; pen 1 = massa, 2 = DMX-, 3 = DMX+ 7 DMX-signaaluitgang (3-polige XLR) om een ander DMX-lichteffectapparaat op de DMXingang aan te sluiten; pen 1 = massa, 2 = DMX-, 3 = DMX+ 6.6.1 Licht in- en uitschakelen . . . . . . . . . . . . 40 8 Microfoon voor muziekgestuurde lichteffecten 6.6.2 Automatische modus . . . . . . . . . . . . . . . 40 6.6.3 Muzieksturing . . . . . . . . . . . . . . . . . . . . 40 9 Regelaar SENSITIVITY voor het instellen van de microfoongevoeligheid voor muziekgestuurde lichteffecten 6.6.4 Kleurenstralerbedrijf . . . . . . . . . . . . . . . 40 10 Verbindingskabel tussen de besturingseenheid en de schijnwerper 7 DMX-besturing . . . . . . . . . . . . . . . . . . . . . 40 11 Montage- en stelschroef tegen verdraaien van de schijnwerper (14) 7.1 Aansluiting . . . . . . . . . . . . . . . . . . . . . . . . . 40 Aan de bovenzijde van de besturingseenheid bevinden zich bijkomende draadgaten; indien nodig draait u de schroef uit het draadgat om er schijnwerper op te bevestigen. 7.2 Aantal DMX-kanalen instellen . . . . . . . . . . 40 7.3 Het startadres instellen . . . . . . . . . . . . . . . 41 12 Stelschroeven om de besturingseenheid aan beide zijden op het statief vast te zetten (15) 8 Weergave van de firmwareversie . . . . . 41 9 Het apparaat reinigen . . . . . . . . . . . . . . . 41 13 Stelschroeven voor de verticale hellingshoek van de schijnwerper (14) 10 Technische gegevens . . . . . . . . . . . . . . . 41 14 LED-Schijnwerpers 10.1 DMX-functies . . . . . . . . . . . . . . . . . . . . . 42 10.1.1 5-kanaalmodus . . . . . . . . . . . . . . . . . . . 42 10.1.2 14-kanaalmodus . . . . . . . . . . . . . . . . . . 42 10.2 Menustructuur . . . . . . . . . . . . . . . . . . . . . 43 36 5 Jack FOOT CONTROLLER voor aansluiting van de afstandsbediening via de bijgeleverde kabel 15 Statief Afstandsbediening (afb. 2) 16 Aansluitingsjack voor verbinding met de jack FOOT CONTROLLER (5) op de besturingseenheid; hiervoor wordt de bijgeleverde kabel gebruikt 17 Voetdrukknop AUTO voor het selecteren van een automatisch weergegeven showprogramma 18 Voetdrukknop SOUND voor het selecteren van een via de microfoon (8) muziekgestuurd programma 19 Voetdrukknop COLOR voor het selecteren van een bepaalde lichtkleur 20 Voetdrukknop BLACKOUT voor het uit- en opnieuw inschakelen van het licht 2 Veiligheidsvoorschriften Het apparaat is in overeenstemming met alle relevante EU-Richtlijnen en is daarom met gekenmerkt. WAARSCHUWING De netspanning van de apparaat is levensgevaarlijk. Open het apparaat niet! U loopt het risico van een elektrische schok. Let eveneens op het volgende: G Het apparaat is enkel geschikt voor gebruik binnenshuis; vermijd druip- en spatwater, plaatsen met een hoge vochtigheid en uitzonderlijk warme plaatsen (toegestaan omgevingstemperatuurbereik: 0 – 40 °C). G Plaats geen bekers met vloeistof zoals drinkglazen etc. op het apparaat. G Schakel het apparaat niet in of trek onmiddellijk de stekker uit het stopcontact, 1. wanneer het apparaat of het netsnoer zichtbaar beschadigd is, 2. wanneer er een defect zou kunnen optreden nadat het apparaat bijvoorbeeld is gevallen, 3. wanneer het apparaat slecht functioneert. Het apparaat moet in elk geval worden hersteld door een gekwalificeerd vakman. G Trek de stekker nooit met het snoer uit het stopcontact, maar met de stekker zelf. G In geval van ongeoorloofd of verkeerd gebruik, onveilige montage, verkeerde aansluiting, foutieve bediening of van herstelling door een nietgekwalificeerd persoon vervalt de garantie en de verantwoordelijkheid voor hieruit resulterende materiële of lichamelijke schade. Wanneer het apparaat definitief uit bedrijf wordt genomen, bezorg het dan voor milieuvriendelijke verwerking aan een plaatselijk recyclagebedrijf. 3 Toepassingen De schijnwerpersets PARL-42SET en PARL47SET bestaan uit vier vlakke LED-schijnwerpers, die op een besturingseenheid zijn gemonteerd. Ze worden gebruikt voor de belichting b.v. op podia, in discotheken en feestzalen. Elke schijnwerper bevat als lichtbron 144 superheldere 10 mm-LED's (PARL-42SET) of 7 RGB-LED's (PARL-47SET) gebruikt. Deze hebben in vergelijking met gloeilampen een laag stroomverbruik, een geringe warmteontwikkeling en een lange levensduur. Met de LED's kan gekleurd licht in de drie basiskleuren (rood, groen en blauw) worden uitgestraald, en licht dat u bijkomend uit de drie basiskleuren kunt mengen. Een set kan alleen, met de bijgeleverde voetafstandsbediening, of op een DMX-lichtregelaar (5 of 14 DMX-besturingskanalen) worden gebruikt. Bovendien kunt u meerdere schijnwerpersets aaneenschakelen (Master / Slave-bediening) en samen via een voetafstandsbediening besturen. Er zijn verschillende interne lichtprogramma's beschikbaar. De ingebouwde microfoon zorgt daarbij voor muzieksynchrone effecten. Een statief en transporttassen zijn inbegrepen. 4 NL B Ingebruikneming 4.1 Montage 1) Plaats het statief op een horizontale, stabiele ondergrond. Voor een veilige stand spreidt u de poten van het statief maximaal en zet u ze met de stelschroef vast. 2) Plaats de besturingseenheid met de schijnwerpers op het statief (15) en zet aan beide zijden met de bijgeleverde schroeven (12) vast. 3) Om de schijnwerpers (14) uit te lijnen, draait u de betreffende stelschroeven (11, 13) los en draait en kantelt u de schijnwerper in de gewenste richting. Zorg daarbij dat de kabel (10) niet uitgerekt of gekneld wordt. Draai de schroeven aansluitend opnieuw vast. Aan de bovenzijde van de besturingseenheid bevinden zich bijkomende draadgaten, zodat de schijnwerpers indien nodig ook op de besturingseenheid kunnen worden gemonteerd. Hiervoor draait u de schroef (11) van de schijnwerper los en bevestigt u de schijnwerper op dezelfde wijze met de schroef en rubberen ring erbovenop. Bij een wijziging van de schijnwerperposities moet u erop letten dat de gewichtsverdeling tussen de linker en rechter zijde gelijk blijft. 37 NL B 4) Voor het instellen van de gewenste bedrijfshoogte trekt u eerst de binnenbuis van het statief eruit. Steek de borgpen door de beide gaten voor de gewenste hoogte en schuif de buis er opnieuw in tot de borgpen op de middelste buis ligt. Zet de buis met de stelschroef extra vast. Als u de gewenste hoogte nog niet hebt bereikt, moet u de middelste buis er op dezelfde wijze uittrekken en bevestigen. BELANGRIJK! G Het statief moet stabiel worden opgesteld. Trek de telescoopbuizen niet verder uit dan een veilige stand gegarandeerd is. G Controleer voor gebruik alle stelschroeven en haal ze zo nodig aan. G Leg alle verbindingskabels zo dat niemand erover struikelt en het statief kan doen vallen. G Plaats het apparaat steeds zo, dat bij het gebruik voldoende ventilatie is gegarandeerd. De ventilatieopeningen in de behuizing mogen in geen geval zijn afgedekt. – Toetsen UP en DOWN om tussen meerdere menu-items te selecteren en waarden in te stellen De menustructuur wordt weergegeven in hoofdstuk 10.2. Aan de hand van het hoofdstuk 6 of 7 voert u met de toetsen de gewenste instellingen voor de respectieve bedrijfsmodus door. 6 Bediening zonder DMX-besturingsapparaat 6.1 Automatische modus Het apparaat beschikt over twee automatisch lopende programma's (aanvullende eenvoudige kleurwisselingsprogramma's hoofdstuk 6.4). Om een van deze programma's op te roepen: 1) Druk een aantal keren op de toets MENU / ESC tot het hoofdmenu wordt weergegeven. 4.2 Voedingsspanning 2) Selecteer de optie met de toets UP of DOWN in het hoofdmenu. Verbind het meegeleverde netsnoer eerst met de jack (1) en plug de stekker vervolgens in een stopcontact (230 V~ / 50 Hz). Daarna is het apparaat gebruiksklaar. Trek de stekker uit het stopcontact om het apparaat uit te schakelen. 3) Druk op de toets ENTER: Het laatst ingestelde programma ( of ) is geactiveerd en wordt op het display weergegeven. Selecteer met de toets UP of DOWN het gewenste programma uit de twee mogelijkheden. OPGELET Kijk niet rechtstreeks in de lichtbron gedurende lange tijd, omdat dit de ogen kan beschadigen. Weet dat stroboscoopeffecten en zeer snelle lichtwisselingen bij fotosensibele mensen en epileptici epileptische aanvallen kunnen veroorzaken! 4) Om de snelheid te wijzigen, drukt u op de toets ENTER: De huidige snelheid wordt weergegeven. Selecteer met de toets UP of DOWN de gewenste snelheid uit de 9 mogelijkheden van tot . Opgelet: Het apparaat mag niet via een dimmer op de netspanning worden aangesloten! 6.2 Muzieksturing Wenst u de lichtshow muziekgestuurd te laten lopen, dan kunt u kiezen uit de drie muziekmodi “Sound 1” tot “Sound 3”. “Sound 1”: geluidgestuurde stroboscoop met wit licht 5 Bediening De toestelinstellingen worden doorgevoerd via een systeemmenu dat u met behulp van de toetsen (4) en het display (3) kunt bedienen. Het 4-cijferige display wordt ingeschakeld door op een willekeurige toets te drukken. Dan verschijnt de laatste instelling. Het displaybericht verdwijnt enkele seconden na de laatste keer drukken op de toets. 38 “Sound 2:” geluidgestuurd knipperen met wisselende kleuren “Sound 3:” geluidgestuurd activeren van programma's Opmerking: De muziekmodi “Sound 1” en “Sound 2” zijn dezelfde muziekmodussen die bij DMX-besturing kunnen worden opgeroepen ( hoofdstuk 10.1). De toetsen hebben volgende functies: 1) Druk een aantal keren op de toets MENU / ESC tot het hoofdmenu wordt weergegeven. – Toets MENU / ESC om naar het hogere menuniveau terug te keren 2) Selecteer de optie met de toets UP of DOWN in het hoofdmenu. – Toets ENTER om door te gaan naar de volgende menufunctie 3) Druk op de toets ENTER: De laatst ingestelde muziekmodus ( of ) is geacti, veerd en wordt op het display weergegeven. Selecteer met de toets UP of DOWN de gewenste modus uit de drie mogelijkheden. 4) Om bij de modus “Sound 3” de snelheid voor het verloop van de programma's te wijzigen, drukt u op de toets ENTER: De huidige snelheid wordt weergegeven. Selecteer met de toets UP of DOWN de gewenste snelheid uit de 9 mogelijkheden van tot . 5) Draai de regelaar SENSITIVITY (9) voor de gevoeligheid van de microfoon MIC (8) naar rechts open tot de schijnwerpers zoals gewenst op de muziek reageren. Bij het wijzigen van het geluidsvolume op de muziekinstallatie moet u ook de microfoongevoeligheid overeenkomstig aanpassen. Mocht de muzieksturing niet optimaal functioneren, ondanks opengedraaide gevoeligheidsregelaar, dan verhoogt u het geluidsvolume of verkort u de afstand tussen geluidsbron en microfoon. 6.3 Kleurenstralerbedrijf Als de schijnwerpers constant een kleur moeten afstralen, dan kunt u selecteren uit negen vooraf ingestelde kleuren en een individueel regelbare kleur: Tip: Bij het instellen van de basiskleuren wijzigt niet alleen de helderheid ervan, maar bij een kleurmenging ook de tint. Stel daarom eerst de kleur die moet domineren, in op de gewenste helderheid, en meng daarna de andere twee kleuren erbij. Als het resultaat van de kleurmenging wit moet zijn, stelt u eerst de helderheid van de kleur groen in, omdat deze het meest helder is voor het oog. Meng dan met rood naar geel en ten slotte met blauw naar wit. Voor een automatische kleurwisseling met overgangen kunt u kiezen uit vijf programma's met verschillende kleursequenties: 1) Druk een aantal keren op de toets MENU / ESC tot het hoofdmenu wordt weergegeven. 2) Selecteer de optie met de toets UP of DOWN in het hoofdmenu. 3) Druk op de toets ENTER: Het laatst ingestelde kleurwisselingsprogramma ( … ) is geactiveerd en wordt op het display weergegeven. Selecteer met de toets UP of DOWN het gewenste programma. 1) Druk een aantal keren op de toets MENU / ESC tot het hoofdmenu wordt weergegeven. 2) Selecteer de optie met de toets UP of DOWN in het hoofdmenu. 6.5 Master / slavebediening Individuele kleurinstelling In de kleurmodus “ATF” kunt u de helderheid van de basiskleuren rood, groen en blauw afzonderlijk instellen en zodoende de gewenste kleurtint mengen: a) Als geselecteerd is, drukt u op de toets ENTER. Op het display wordt de laatst ingestelde basiskleur en de helderheidswaarde ervan weergegeven: Rood ( ), groen ( ) of blauw ( ) b) Stel de helderheid van de geselecteerde kleur in met de toets DOWN of UP (weergave 0 – 255). c) Wissel met de toets ENTER naar de volgende basiskleur en stel de helderheid ervan in. B 6.4 Kleurwisselmodus 4) Om de snelheid te wijzigen, drukt u op de toets ENTER: De huidige snelheid wordt weergegeven. Selecteer met de toets UP of DOWN de gewenste snelheid uit de 9 mogelijkheden van tot . 3) Druk op de toets ENTER: De laatst ingestelde kleurmodus (een van de vooringestelde kleuren … of de individuele kleurinstelling ) is geactiveerd en wordt op het display weergegeven. Selecteer met de toets UP of DOWN de gewenste kleurmodus uit de verschillende mogelijkheden. NL U kunt meerdere apparaten PARL-42SET of PARL47SET (ook gemengd) synchroon bedienen. Daarbij neemt het eerste apparaat (Master-apparaat) de besturing over van de overige apparaten (Slaveapparaten). Verbind de apparaten met elkaar tot een ketting. Zie hiervoor hoofdstuk 7.1, evenwel zonder bedieningsstap 1 in acht te nemen. Stel het Master-apparaat [het eerste apparaat in de ketting, waarvan de besturingsingang DMX IN (6) niet is aangesloten] in op automatische modus, muzieksturing, kleurenstralerbedrijf of kleurwisselmodus ( hoofdstuk 6.1 – 6.4). Stel de Slaveapparaten als volgt in op het Slave-bedrijf: 1) Druk een aantal keren op de toets MENU / ESC tot het hoofdmenu wordt weergegeven. 2) Selecteer de optie met de toets UP of DOWN in het hoofdmenu. 3) Druk op de toets ENTER: Het Slave-bedrijf is geactiveerd, op het display verschijnt . Zodra het Slave-apparaat besturingssignalen van het Master-apparaat ontvangt, knippert er een punt op het display. 39 NL B 6.6 Voetafstandsbediening 7 Via de bijgeleverde voetafstandsbediening kunnen verschillende functies van de schijnwerpers worden gestuurd. Als er meerdere schijnwerpersets met elkaar zijn verbonden in Master/Slave-bedrijf, worden ze allemaal samen via de afstandsbediening van het Master-apparaat gestuurd. DMX is de afkorting van Digital Multiplex, en laat de digitale besturing van meerdere DMX-apparaten via één gemeenschappelijke besturingsleiding toe. Voor de bediening via een DMX-lichtregelaar (b.v. DMX-1440 of DMX-510USB van “img Stage Line”) beschikt het lichteffectenpaneel over 14 DMXbesturingskanalen. Indien nodig is besturing via slechts 5 kanalen ook mogelijk. De functies van de kanalen en de overeenkomstige DMX-waarden vindt u terug in het hoofdstuk 10.1. 1) Verbind de jack (16) op de achterzijde van de afstandsbediening met de jack FOOT CONTROLLER (5) op de besturingseenheid; gebruik hiervoor de bijgeleverde kabel. Beveilig de stekkerverbinding telkens door de wartelmoer vast te draaien. DMX-besturing 7.1 Aansluiting 2) Op de ingang DMX IN (6) mag geen DMX-signaal aanwezig zijn. Als DMX-interface heeft het apparaat 3-polige XLR-aansluitingen met volgende penconfiguratie: 6.6.1 Licht in- en uitschakelen Met de toets BLACKOUT (20) op de afstandsbediening wordt het licht uitgeschakeld. Bij het uitschakelen van het licht (Blackout) wordt op het display (3) van het (Master-)apparaat kort weergegeven. Om het licht opnieuw in te schakelen, drukt u opnieuw op de toets BLACKOUT of selecteert u met een van de drie andere toetsen op de afstandsbediening direct een andere functie. Voor de aansluiting moeten speciale kabels voor hoge gegevensstromen worden gebruikt. Normale afgeschermde microfoonkabels met een leidingdiameter van ten minste 2 × 0,22 mm2 en een zo gering mogelijke capaciteit zijn alleen bij een totale kabellengte tot 100 m aan te bevelen. Bij kabellengten vanaf 150 m is het aanbevolen om een DMX-ophaalversterker tussen te schakelen (b.v. SR-103DMX van „img Stage Line). pen 1 = massa, pen 2 = DMX-, pen 3 = DMX+ 6.6.2 Automatische modus Met de toets AUTO (17) kunt u de beide programma's van de automatische modus ( hoofdstuk 6.1) selecteren. Door telkens opnieuw op de toets te drukken, wisselt u tussen de programma's. Op het display verschijnt dan of . De snelheid waarmee de programma's lopen, is afhankelijk van de menu-instelling ( hoofdstuk 6.1, bedieningsstap 4). 6.6.3 Muzieksturing Met de toets SOUND (18) kunt u de via de microfoon (8) gestuurde programma's ( hoofdstuk 6.2) selecteren. Door telkens opnieuw op de toets te drukken, wisselt u tussen de programma's. Op het display verschijnt dan oder . , De snelheid waarmee het programma loopt, is afhankelijk van de menu-instelling ( hoofdstuk 6.2, bedieningsstap 4). 1) Verbind de besturingsingang DMX IN (6) met de DMX-uitgang van de lichtregelaar. Koppel aangesloten afstandsbedieningen van de schijnwerpersets los, zodat deze de DMX-besturing niet beïnvloeden. 2) Verbind de besturingsuitgang DMX OUT (7) met de besturingsingang DMX IN van het volgende DMX-gestuurde apparaat. Verbind de uitgang hiervan opnieuw met de ingang van het nageschakelde apparaat etc., tot alle DMX-gestuurde apparaten in een kring zijn aangesloten. 3) Om storingen bij signaaloverdracht uit te sluiten, moet u bij lange leidingen of bij een veelvoud van aaneengesloten apparaten de besturingsuitgang van het laatste DMX-apparaat in de ketting afsluiten met een weerstand van 120 Ω (> 0,3 W): steek een geschikte afsluitstekker (b.v. DLT-123 van “img Stage Line”) in de uitgangsbus. 7.2 Aantal DMX-kanalen instellen 6.6.4 Kleurenstralerbedrijf Met de toets COLOR (19) kunt u de negen ingestelde kleuren van het kleurenstralerbedrijf ( hoofdstuk 6.3) selecteren. Door telkens opnieuw op de toets te drukken, wisselt u tussen de kleuren. Op het display verschijnt dan … . 40 Het aantal DMX-kanalen hangt af van de benodigde functies en eventueel ook van het aantal beschikbare besturingskanalen op de lichtregelaar. In het 14-kanaalbedrijf kunt u de vier schijnwerpers voor een kleurmenging gescheiden besturen, terwijl in het 5-kanaalbedrijf slechts een gemeenschappelijke besturing mogelijk is. Om het aantal DMX-kanalen te selecteren, gaat u als volgt te werk: 2) Selecteer de optie met de toets UP of DOWN in het hoofdmenu. 1) Druk een aantal keren op de toets MENU / ESC tot het hoofdmenu wordt weergegeven. 3) Druk op de toets ENTER: Op het display wordt het huidige versienummer (b.v. ) weergegeven. 2) Selecteer de optie met de toets UP of DOWN in het hoofdmenu. 3) Druk op de toets ENTER: De momenteel ingestelde kanaalmodus wordt weergegeven: = 5-kanaalbedrijf = 14-kanaalbedrijf 4) Selecteer met de toets UP of DOWN de gewenste optie. 7.3 Het startadres instellen Om de schijnwerpers te kunnen aansturen, moet u een DMX-startadres instellen voor het 1ste DMXkanaal. De volgende DMX-kanalen zijn dan automatisch aan de volgende adressen toegewezen. Voorbeeld: Bij startadres 5 voor kanaal 1 – zijn in de 5-kanaalmodus de kanalen 2 tot 5 toegewezen aan de adressen 6 tot 9 toegewezen; adres 10 is het volgende vrije startadres voor het volgende DMXgestuurde apparaat. – zijn in de 14-kanaalmodus de kanalen 2 tot 14 toegewezen aan de adressen 6 tot 18 toegewezen; adres 19 is het volgende vrije startadres voor het volgende DMX-gestuurde apparaat. 1) Druk een aantal keren op de toets MENU / ESC tot het hoofdmenu wordt weergegeven. 2) Selecteer de optie met de toets UP of DOWN in het hoofdmenu. 3) Druk op de toets ENTER: Het momenteel ingestelde adres, b.v. , wordt weergegeven. 4) Stel met de toets UP of DOWN het gewenste adres in. Na het instellen van het startadres kunt u de schijnwerpers via het DMX-besturingsapparaat bedienen. De ontvangst van besturingssignalen wordt weergegeven door een knipperend punt op het display. 9 NL B Het apparaat reinigen De kunststofschijven vóór de LED's moeten afhankelijk van de verontreiniging door stof, rook of ander vuil regelmatig worden gereinigd. Alleen dan kan het licht met maximale helderheid worden uitgestraald. Trek de stekker uit het stopcontact, alvorens het filter te reinigen. Gebruik alleen een zachte, schone doek en een mild reinigingsmiddel. Veeg de kunststofschijven vervolgens droog. Om de andere behuizingsonderdelen te reinigen, gebruikt u alleen een droge, zachte doek. Gebruik in geen geval chemicaliën of een vloeistof; deze kunnen immers in het apparaat indringen en schade veroorzaken. 10 Technische gegevens Voedingsspanning: . . 230 V~ / 50 Hz Vermogensverbruik PARL-42SET: . . . . . max. 80 VA PARL-47SET: . . . . . max. 165 VA Verlichting PARL-42SET: . . . . . 4 × 144 superheldere 10 mm-LED's, telkens 48 in rood, groen en blauw, uitstralingshoek 20° PARL-47SET: . . . . . 4 × 7 superhelderen RGB-LED's van 3 W, uitstralingshoek 25° Omgevingstemperatuurbereik: . . . 0 – 40 °C Afmetingen: . . . . . . . . 1210 × 345 × 80 mm (besturingseenheid met schijnwerpers) Statiefhoogte: . . . . . . . 1,5 – 3,2 m 8 Weergave van de firmwareversie Om het versienummer van de firmware (besturingssysteem van het apparaat) weer te geven: 1) Druk een aantal keren op de toets MENU / ESC tot het hoofdmenu wordt weergegeven. Gewicht PARL-42SET: . . . . . 19,4 kg PARL-47SET: . . . . . 20,5 kg Wijzigingen voorbehouden. 41 NL B 10.1 DMX-functies 10.1.1 5-kanaalmodus 10.1.2 14-kanaalmodus DMX-waarde Functie 1ste schijnwerper: kleurmenging, als kanaal 14 = 0 – 11 DMX-waarde Functie K. 1: 0 – 255 Helderheid rood Kanaal 1: Roodaandeel, als kanaal 5 = 0 – 11 K. 2: 0 – 255 Helderheid groen K. 3: 0 – 255 Helderheid blauw 0 – 255 Helderheid rood Kanaal 2: Groenaandeel, als kanaal 5 = 0 – 11 0 – 255 Helderheid groen Kanaal 3: Blauwaandeel, als kanaal 5 = 0 – 11 0 – 255 Helderheid blauw Kanaal 4: Stroboscoop, snelheid als kanaal 5 = 0 – 11: 0–7 8 – 255 geen stroboscoop stroboscoop: langzaam → snel als kanaal 5 = 12 – 239: 0 – 255 programmaloop: langzaam → snel Kanaal 5: Showprogramma's 0 – 11 geen programma: Kleurmenging via de kanalen 1 – 3 met stroboscoopfunctie via kanaal 4 12 – 23 Programma 1 (kleurwisseling) 24 – 35 Programma 2 (kleurwisseling) 36 – 47 Programma 3 (kleurwisseling) 48 – 59 Programma 4 (kleurwisseling) 60 – 71 Programma 5 (kleurwisseling) 72 – 83 Programma 6 84 – 95 Programma 7 96 – 107 Programma 8 108 – 119 Programma 9 2de schijnwerper: kleurmenging, als kanaal 14 = 0 – 11 K. 4: 0 – 255 Helderheid rood K. 5: 0 – 255 Helderheid groen K. 6: 0 – 255 Helderheid blauw 3de schijnwerper: kleurmenging, als kanaal 14 = 0 – 11 K. 7: 0 – 255 Helderheid rood K. 8: 0 – 255 Helderheid groen K. 9: 0 – 255 Helderheid blauw 4de schijnwerper: kleurmenging, als kanaal 14 = 0 – 11 K. 10: 0 – 255 Helderheid rood K. 11: 0 – 255 Helderheid groen K. 12: 0 – 255 Helderheid blauw Kanaal 13: stroboscoop, snelheid als kanaal 14 = 0 – 11: 0–7 geen stroboscoop 8 – 255 stroboscoop: langzaam → snel als kanaal 14 = 12 – 239: 0 – 255 0 – 11 geen programma: Kleurmenging via de kanalen 1 – 12 met stroboscoopfunctie via kanaal 13 12 – 23 Programma 1 (kleurwisseling) 24 – 35 Programma 2 (kleurwisseling) 36 – 47 Programma 3 (kleurwisseling) 48 – 59 Programma 4 (kleurwisseling) 60 – 71 Programma 5 (kleurwisseling) 72 – 83 Programma 6 120 – 131 Programma 10 132 – 143 Programma 11 144 – 155 Programma 12 156 – 167 Programma 13 84 – 95 Programma 7 168 – 179 Programma 14 96 – 107 Programma 8 180 – 191 Programma 15 108 – 119 Programma 9 192 – 203 Programma 16 120 – 131 Programma 10 204 – 215 Programma 17 132 – 143 Programma 11 216 – 227 Programma 18 144 – 155 Programma 12 228 – 239 Programma 19 156 – 167 Programma 13 „Sound 1“ ( hoofdstuk 6.2) 168 – 179 Programma 14 180 – 191 Programma 15 192 – 203 Programma 16 204 – 215 Programma 17 216 – 227 Programma 18 228 – 239 Programma 19 240 – 251 „Sound 1“ ( hoofdstuk 6.2) 240 – 251 252 – 255 „Sound 2“ ( hoofdstuk 6.2) 252 – 255 42 programmaloop: langzaam → snel Kanaal 14: showprogramma's „Sound 2“ ( hoofdstuk 6.2) 10.2 Menustructuur NL Hoofdmenu B DMXstartadres Automatische modus Muzieksturing Kleurenstralerbedrijf Kleurwisselmodus Aantal DMX-kanalen Slave-bedrijf Versie Deze gebruiksaanwijzing is door de auteurswet beschermd eigendom van MONACOR ® INTERNATIONAL GmbH & Co. KG. Een reproductie – ook gedeeltelijk – voor eigen commerciële doeleinden is verboden. 43 E Contenidos 1 Elementos de Funcionamiento y Conexiones . . . . . . . . . . . . . . . . . . . . . . 44 2 Notas de Seguridad . . . . . . . . . . . . . . . . 45 3 Aplicaciones . . . . . . . . . . . . . . . . . . . . . . 45 4 Puesta en Marcha . . . . . . . . . . . . . . . . . . 45 4.1 Montaje . . . . . . . . . . . . . . . . . . . . . . . . . . . 45 4.2 Alimentación . . . . . . . . . . . . . . . . . . . . . . . 46 1 Elementos de Funcionamiento y Conexiones Controlador con proyectores y pie (fig. 1) 1 Entrada de corriente para la conexión a un enchufe (230 V~ / 50 Hz) mediante el cable de corriente entregado 5 Funcionamiento . . . . . . . . . . . . . . . . . . . 46 2 Soporte para el fusible de corriente Cambie un fusible fundido sólo por otro del mismo tipo. 6 Funcionamiento sin Controlador DMX . 46 3 Visualizador 6.1 Modo automático . . . . . . . . . . . . . . . . . . . . 46 4 Botones de control 6.2 Control por música . . . . . . . . . . . . . . . . . . 46 5 Toma FOOT CONTROLLER para conectar el control remoto mediante el cable entregado 6.3 Modo proyector de color . . . . . . . . . . . . . . 47 6.4 Modo cambio de color . . . . . . . . . . . . . . . . 47 6.5 Modo Master / Slave . . . . . . . . . . . . . . . . . . 47 6.6 Control remoto de pedal . . . . . . . . . . . . . . 47 6 Entrada de señal DMX (XLR 3 polos) para conectar un controlador de luces; Pin 1 = masa, 2 = DMX-, 3 = DMX+ 7 Salida de señal DMX (XLR 3 polos) para conectar a la entrada DMX de otro juego de luces DMX; Pin 1 = masa, 2 = DMX-, 3 = DMX+ 6.6.1 Encendido y apagado de la luz . . . . . . . 48 8 Micrófono para los efectos de luz controlados por música 6.6.2 Modo automático . . . . . . . . . . . . . . . . . . 48 9 Control SENSITIVITY para ajustar la sensibilidad del micrófono, para los efectos de luz controlados por música 6.6.3 Control por música . . . . . . . . . . . . . . . . 48 6.6.4 Modo proyector de color . . . . . . . . . . . . 48 7 Control DMX . . . . . . . . . . . . . . . . . . . . . . 48 7.1 Conexión . . . . . . . . . . . . . . . . . . . . . . . . . . 48 7.2 Ajuste del número de canales DMX . . . . . 48 7.3 Ajuste de la dirección de inicio . . . . . . . . . 49 8 Visualización de la Versión de Firmware . . . . . . . . . . . . . . . . . . . . . . . 49 10 Cable de conexión entre el controlador y el proyector 11 Perno de rosca y montaje para mantener el proyector (14) en su lugar En la parte superior del controlador hay agujeros roscados adicionales; si es necesario, desenrosque el tornillo y fije ahí el proyector. 12 Pernos para fijar el controlador por ambas caras del tubo del pie (15) 13 Pernos para la inclinación vertical del proyector (14) 9 Limpieza del Aparato . . . . . . . . . . . . . . . 49 14 Proyector de LEDs 10 Especificaciones . . . . . . . . . . . . . . . . . . . 49 15 Pie 10.1 Funciones DMX . . . . . . . . . . . . . . . . . . . . . 50 Control remoto (fig. 2) 10.1.1 Modo 5 canales . . . . . . . . . . . . . . . . . . . 50 16 Toma para conectar a la toma FOOT CONTROLLER (5) del controlador mediante el cable entregado 10.1.2 Modo 14 canales . . . . . . . . . . . . . . . . . . 50 10.2 Estructura del menú . . . . . . . . . . . . . . . . . 51 44 Todos los elementos de funcionamiento y las conexiones que se describen pueden encontrarse en la página 3 desplegable. 17 Interruptor de pie AUTO para seleccionar un programa de muestra automático 18 Interruptor de pie SOUND para seleccionar un programa controlado por música mediante el micrófono (8) 19 Interruptor de pie COLOR para seleccionar un color de luz concreto 20 Interruptor de pie BLACKOUT para apagar la luz y encenderla de nuevo 2 Notas de Seguridad El aparato cumple con todas las directivas relevantes de la UE y por lo tanto está marcado con el símbolo . ADVERTENCIA El aparato está alimentado con un voltaje peligroso. Deje el mantenimiento en manos del personal cualificado. El manejo inexperto o la modificación del aparato pueden provocar una descarga. Es imprescindible que preste atención a los puntos siguientes: G El aparato está adecuado para su utilización sólo en interiores. Protéjalo de goteos y salpicaduras, elevada humedad del aire y calor (temperatura ambiente admisible: 0 – 40 ºC). G No coloque ningún recipiente con líquido encima del aparato, p. ej. un vaso. 3 Aplicaciones E Los conjuntos de proyectores PARL-42SET y PARL-47SET están formados por cuatro proyectores planos de LEDs montados en un controlador. Sirven para iluminación p. ej. en escenarios, discotecas, o salas de fiestas. Como fuente de luz, se han insertado 144 LEDs de 10 mm y de gran brillo (PARL-42SET) o 7 LEDs RGB (PARL-47SET) en cada proyector que ofrecen un bajo consumo, poca generación de calor y una larga duración en comparación con las lámparas incandescentes. Los LEDs permiten emitir luz coloreada en los tres colores primarios (rojo, verde, azul) y luz que puede mezclarse con la suma de los colores primarios. Un conjunto puede funcionar por sí mismo, con el control remoto de pedal entregado o mediante un controlador DMX (5 ó 14 canales de control DMX). Además, se pueden interconectar varios conjuntos de proyectores (modo Master / Slave) y se pueden controlar conjuntamente mediante un control remoto de pedal. Hay varios programas internos de iluminación disponibles. El micrófono integrado ofrece efectos sincronizados con la música. Con el aparato se entrega un pie y bolsas de transporte. 4 Puesta en Marcha G No ponga el aparato en funcionamiento o desconecte inmediatamente el enchufe de la toma de corriente si: 1. Existe algún daño visible en el aparato o en el cable de corriente. 2. Aparece algún defecto por caída o accidente similar. 3. No funciona correctamente. Sólo el personal cualificado puede reparar el aparato bajo cualquier circunstancia. G No tire nunca del cable de corriente para desconectar el enchufe de la toma de corriente, tire siempre del enchufe. G No podrá reclamarse garantía o responsabilidad alguna por cualquier daño personal o material resultante si el aparato se utiliza para otros fines diferentes a los originalmente concebidos, si no se monta con seguridad, no se conecta o no se utiliza adecuadamente, o no se repara por expertos. Si va a poner el aparato fuera de servicio definitivamente, llévelo a la planta de reciclaje de la zona para que su eliminación no sea perjudicial para el medio ambiente. 4.1 Montaje 1) Ponga el pie en una superficie sólida y horizontal. Para una colocación segura, abra las patas del pie todo lo que pueda y fíjelos con el perno. 2) Coloque el controlador con los proyectores en el tubo del pie (15) y fíjelo con los tornillos entregados (12) por ambas caras. 3) Para alinear los proyectores (14), afloje los pernos respectivos (11, 13) y gire el proyector hasta la dirección deseada. Asegúrese de que el cable (10) no se estire o se comprima. Luego apriete los tornillos de nuevo. En la parte superior del controlador hay agujeros roscados adicionales para montar los proyectores en el controlador, si es necesario. En este caso, afloje el tornillo (11) del proyector y fije el proyector desde encima del mismo modo con el tornillo y la junta de goma por encima. Cuando cambie las posiciones de los proyectores, asegúrese de que el peso está bien distribuido por ambos lados. 4) Para ajustar la altura de funcionamiento deseada, extraiga primero el tubo interno del pie. Coloque la clavija de seguridad a través de los 45 dos agujeros de la altura deseada y apriete hacia el tubo hasta que la clavija de seguridad esté colocada en el tubo central. Fije el tubo interior adicionalmente con el perno. Si todavía no ha alcanzado la altura deseada, tire del tubo central del mismo modo y fíjelo. E ¡IMPORTANTE! G El pie tiene que ponerse de modo que sea estable. Extraiga los tubos telescópicos sólo hasta donde se asegure un soporte seguro. G Antes del funcionamiento, compruebe todos los pernos y apriételos si es necesario. G Ponga los cables de conexión de modo que nadie pueda tropezarse con ellos y tumbar el pie. G Coloque siempre el aparato de modo que exista una ventilación suficiente durante el funcionamiento. Las rejillas de ventilación de la carcasa no deben obstruirse en ningún caso. 4.2 Alimentación Conecte primero el cable de corriente entregado a la toma de corriente (1) y luego a un enchufe (230 V~ / 50 Hz). Luego el aparato estará listo para funcionar. Para apagarlo, desconecte la toma de corriente del enchufe. ADVERTENCIA Para prevenir daños oculares, no mire nunca directamente hacia la fuente de luz durante un periodo prolongado. ¡Tenga en cuenta que los cambios rápidos de iluminación pueden provocar ataques epilépticos en personas fotosensibles o con epilepsia! Mediante los apartados 6 ó 7, haga con los botones los ajustes necesarios del modo de funcionamiento correspondiente. 6 Funcionamiento sin Controlador DMX 6.1 Modo automático El aparato tiene dos programas de muestra automáticos (programas adicionales de cambio de color básico apartado 6.4). Para activar uno de estos programas: 1) Pulse el botón MENU / ESC hasta que llegue al menú principal. 2) Seleccione la opción en el menú principal con el botón UP o DOWN. 3) Pulse el botón ENTER: Se activa y se visualiza el último programa ajustado ( o ). Seleccione el programa que desee de los dos con el botón UP o DOWN. 4) Para cambiar la velocidad, pulse el botón ENTER. Se visualiza la velocidad actual. Seleccione la velocidad que quiera de las 9 velocidades a con el botón UP o DOWN. 6.2 Control por música Para el control por música del programa de iluminación, hay tres modos de música disponibles, “Sound 1” a “Sound 3”: Precaución: ¡No se puede conectar el aparato a la corriente mediante un dimmer! “Sound 1”: Estroboscopio controlado por sonido con luz blanca 5 “Sound 2”: Destellos controlados por sonido con cambio de colores Funcionamiento Los ajustes del aparato se hacen a través de un menú de sistema que puede funcionar con los botones (4) y con el visualizador (3). El visualizador de 4 dígitos se activa pulsando cualquier botón y muestra el último ajuste. El visualizador desaparece varios segundos después de que se haya pulsado el último botón. “Sound 3”: Activación controlada por sonido de los programas Nota: Los modos de música “Sound 1” y “Sound 2” son los mismos modos de música que se pueden activar para control DMX (apartado 10.1). Los botones tienen las siguientes funciones: 1) Pulse el botón MENU / ESC hasta que llegue al menú principal. – Botón MENU / ESC para volver al nivel superior de menú 2) Seleccione la opción en el menú principal con el botón UP o DOWN. – Botón ENTER para ir a la siguiente función de menú 3) Pulse el botón ENTER: Se activa y se visualiza el último modo de música ajustado ( , o ). Luego seleccione el modo que quiera de los tres modos con el botón UP o DOWN. – Botones UP y DOWN para seleccionar entre varias opciones de menú y para ajustar valores 46 La estructura del menú se muestra en el apartado 10.2. 4) Para cambiar la velocidad de los programas para el modo “Sound 3”, pulse el botón ENTER: Se visualiza la velocidad actual. Seleccione la velocidad que quiera de las 9 velocidades a con el botón UP o DOWN. 5) Gire el control SENSITIVITY (9) para la sensibilidad del micrófono MIC (8) en sentido horario hasta que los proyectores respondan a la música como usted desea. Cuando se modifica el volumen del sistema de música, tiene que adaptarse la sensibilidad del micrófono adecuadamente. Si el control por música no funciona correctamente a pesar de que el control de sensibilidad está al máximo, aumente el volumen o reduzca la distancia entre la fuente de sonido y el micrófono. 6.3 Modo proyector de color Para un haz de color constante de los proyectores se pueden seleccionar nueve colores preajustados y un color personalizable: 1) Pulse el botón MENU / ESC hasta que llegue al menú principal. 2) Seleccione la opción en el menú principal con el botón UP o DOWN. 3) Pulse el botón ENTER: Se activa y se visualiza el último modo de color ajustado (uno de los colores preajustados … o el color de ajuste personalizado ). Seleccione el modo de color que quiera de los tres con el botón UP o DOWN. Ajuste de color personalizado En el modo de color “ATF”, el brillo del los colores primarios rojo, verde y azul se puede ajustar por separado y por lo tanto se puede conseguir la mezcla del matiz de color que quiera: a) Si se selecciona , pulse el botón ENTER. El visualizador muestra el último color primario ajustado y su valor de brillo: rojo ( ), verde ( ) o azul ( ). b) Ajuste el brillo del color seleccionado con el botón DOWN o UP (indicación 0 – 255). c) Cambie el siguiente color primario con el botón ENTER y ajuste su brillo. Consejo: Cuando ajuste los colores primarios, no cambia solamente su brillo sino también el matiz del color cuando los colores están mezclados. Por lo tanto, ajuste primero el color que tiene que dominar, al brillo que quiera y luego añada los otros dos colores. Si el color mezclado que quiere conseguir es el blanco, ajuste primero el brillo del color verde ya que este es el color más brillante para el ojo humano. Luego añada rojo para conseguir el amarillo y finalmente añada azul para conseguir el blanco. 6.4 Modo cambio de color E Para un cambio automático de color con fundido, se pueden seleccionar cinco programas con secuencias de colores diferentes: 1) Pulse el botón MENU / ESC hasta que llegue al menú principal. 2) Seleccione la opción en el menú principal con el botón UP o DOWN. 3) Pulse el botón ENTER: Se activa y se visualiza el último programa de cambio de color ( … ). Seleccione el programa deseado con el botón UP o DOWN. 4) Para cambiar la velocidad, pulse el botón ENTER: Se muestra la velocidad actual. Seleccione la velocidad que quiera de las 9 velocidades a con el botón UP o DOWN. 6.5 Modo Master / Slave Pueden funcionar varios aparatos PARL-42SET o PARL-47SET (también mezclados) en modo sincronizado. En este caso, el primer aparato (Master) controla a los aparatos restantes (Slaves). Conecte los aparatos entre sí en cadena. Para ello, vea el apartado 7.1 pero saltando el paso 1. Ajuste el aparato Master [el primer aparato de la cadena cuya entrada de control DMX IN (6) no está conectada] en modo automático, control por música, modo proyector de color o modo de cambio de color ( apartados 6.1 a 6.4). Ajuste los aparatos Slave en el modo Slave como se describe a continuación: 1) Pulse el botón MENU / ESC hasta que llegue al menú principal. 2) Seleccione la opción en el menú principal con el botón UP o DOWN. 3) Pulse el botón ENTER: Se activa el funcionamiento Slave, en el visualizador se muestra . En cuanto el aparato Slave recibe señales de control del aparato Master, parpadea un punto en el visualizador. 6.6 Control remoto de pedal Mediante el control remoto de pedal entregado se pueden controlar varias funciones de los proyectores. Si se interconectan varios conjuntos de proyectores en funcionamiento Master / Slave, todos se controlan mediante el control remoto del aparato Master. 1) Conecte la toma (16) de la parte posterior del control remoto a la toma FOOT CONTROLLER (5) del controlador mediante el cable entregado. 47 Asegure el conector girando con firmeza la tuerca. E 7.1 Conexión 2) No puede haber ninguna señal DMX en la entrada DMX IN (6). Como interfaz DMX, el aparato está equipado con conexiones XLR de 3 polos con la siguiente configuración de pines: 6.6.1 Encendido y apagado de la luz La luz se apaga con el botón BLACKOUT (20) del control remoto. Cuando se apaga la luz (blackout), en el visualizador (3) del aparato (Master) se muestra brevemente . Para encender la luz de nuevo, pulse el botón BLACKOUT una vez más o directamente seleccione otra función con uno de los otros tres botones del control remoto. Se recomienda utilizar cables especiales de alta transmisión de datos para la conexión. Los cables estándares de micrófono con blindaje y con un corte de sección mínimo de 2 × 0,22 mm2 y con una capacidad tan baja como sea posible sólo se recomiendan para un cableado de hasta 100 m. Para cableados de más de 150 m, se recomienda insertar un amplificador de nivel DMX adecuado (p. ej. SR-103DMX de “img Stage Line”). Pin 1 = masa, pin 2 = DMX-, pin 3 = DMX+ 6.6.2 Modo automático Se pueden seleccionar los dos programas del modo automático ( apartado 6.1) con el botón AUTO (17). Pulse el botón repetidamente para cambiar desde un programa al otro. En el visualizador se muestra o según corresponda. La velocidad de los programas depende del ajuste del menú ( apartado 6.1, paso 4). 6.6.3 Control por música Los programas ( apartado 6.2) controlados mediante el micrófono (8) se pueden seleccionar con el botón SOUND (18). Pulse el botón repetidamente para cambiar el programa. En el visualizador se muestra o según corres, ponda. La velocidad del programa depende del ajuste del menú ( apartado 6.2, paso 4). 6.6.4 Modo proyector de color Los 9 colores preajustados del modo proyector de color ( apartado 6.3) se pueden seleccionar con el botón COLOR (19). Pulse el botón repetidamente para cambiar el color. El color aparece como … según corresponda. 7 Control DMX DMX es la abreviatura de Digital Multiplex y permite el control digital de varios aparatos DMX mediante una línea de control común. Para el funcionamiento mediante un controlador DMX (p. ej. DMX-1440 o DMX-510USB de “img Stage Line”), el panel de efectos está equipado con 14 canales de control DMX. Sin embargo, también puede controlarse solamente mediante 5 canales, si es necesario. Las funciones de los canales y los correspondientes valores DMX pueden encontrarse en el apartado 10.1. 48 1) Conecte la entrada de control DMX IN (6) a la salida DMX del controlador. Si los controles remotos están conectados, sepárelos de los conjuntos de proyectores para que no perjudiquen el control DMX. 2) Conecte la salida de control DMX OUT (7) a la entrada de control DMX IN del siguiente aparato controlado por DMX. Conecte su salida de nuevo a la entrada del siguiente aparato, etc., hasta que todos aparatos controlados por DMX se hayan conectado en una cadena. 3) Para evitar interferencias en la transmisión de señal, en cableados largos o para un gran número de aparatos conectados en serie, termine la salida de control del último aparato DMX de la cadena con un resistor de 120 Ω (> 0,3 W): Conecte el tapón correspondiente (p. ej. el DLT123 de “img Stage Line”) a la toma de salida. 7.2 Ajuste del número de canales DMX El número de canales DMX depende de las funciones necesarias y puede que también del número de canales de control disponibles en el controlador. En el modo de 14 canales se pueden controlar los cuatro proyectores por separado para mezclar colores; en el modo de 5 canales sólo puede haber un control común. Para seleccionar el número de canales DMX: 1) Pulse el botón MENU / ESC hasta que llegue al menú principal. 2) Seleccione la opción en el menú principal con el botón UP o DOWN. 3) Pulse el botón ENTER: Se visualizará el modo de canales ajustado: = modo de 5 canales = modo de 14 canales 4) Seleccione la opción deseada con el botón UP o DOWN. 7.3 Ajuste de la dirección de inicio 9 Para controlar los proyectores ajuste una dirección de inicio DMX para su primer canal DMX. Los siguientes canales DMX se asignan automáticamente a las direcciones siguientes. Hay que limpiar los paneles de plástico frente a los LEDs periódicamente, dependiendo de las impurezas provocadas por la suciedad, el humo u otras partículas. Sólo de este modo puede asegurarse de que la luz se irradie con su máximo brillo. Antes de la limpieza, desconecte el enchufe de la toma de corriente. Utilice sólo un paño suave y limpio y un detergente no agresivo. Luego seque los paneles de plástico. Para la limpieza de las otras partes de la carcasa, utilice sólo un paño suave y seco. No utilice ningún líquido o producto químico; podría penetrar en el aparato y provocar daños. Ejemplo: Para la dirección de inicio 5 del canal 1 – En el modo de 5 canales, los canales 2 a 5 se asignan a las direcciones 6 a 9. La dirección 10 es la siguiente dirección de inicio libre posible para el siguiente aparato controlado por DMX. – En el modo de 14 canales, los canales 2 a 14 se asignan a las direcciones 6 a 18. La dirección 19 es la siguiente dirección de inicio libre posible para el siguiente aparato controlado por DMX. 1) Pulse el botón MENU / ESC hasta que llegue al menú principal. 2) Seleccione la opción en el menú principal con el botón UP o DOWN. 3) Pulse el botón ENTER: Se ajusta la dirección actual, p. ej. se visualiza . 4) Ajuste la dirección deseada con el botón UP o DOWN. Limpieza del Aparato 10 Especificaciones Alimentación: . . . . . . . 230 V~/50 Hz Consumo PARL-42SET: . . . . . 80 VA máx. PARL-47SET: . . . . . 165 VA máx. Después de ajustar la dirección de inicio, los proyectores pueden funcionar mediante el controlador DMX. La recepción de las señales de control se indicará mediante un punto parpadeante en el visualizador. Fuente de luz PARL-42SET: . . . . . 4 × 144 LEDs de 10 mm y gran brillo, 48 en rojo, en verde y en azul, ángulo del haz: 20º PARL-47SET: . . . . . 4 × 7 LEDs RGB de 3 W y gran brillo, ángulo del haz: 25º 8 Temperatura ambiente: 0 – 40 °C Visualización de la Versión de Firmware Para indicar el número de la versión de firmware (sistema operativo del aparato): 1) Pulse el botón MENU / ESC hasta que llegue al menú principal. 2) Seleccione la opción en el menú principal con el botón UP o DOWN. 3) Pulse el botón ENTER: En el visualizador se muestra el número de versión actual (p. ej. ). E Dimensiones: . . . . . . . 1210 × 345 × 80 mm (controlador con proyectores) Altura del pie: . . . . . . . 1,5 a 3,2 m Peso PARL-42SET: . . . . . 19,4 kg PARL-47SET: . . . . . 20,5 kg Sujeto a modificaciones técnicas. 49 E 10.1 Funciones DMX 10.1.1 Modo 5 canales 10.1.2 Modo 14 canales Valor DMX Función Proyector 1: mezcla de color cuando canal 14 = 0 – 11 Valor DMX Función Canal 1: proporción de rojo cuando canal 5 = 0 – 11 0 – 255 Brillo del rojo Canal 2: proporción de verde cuando canal 5 = 0 – 11 0 – 255 Brillo del verde Canal 3: proporción de azul cuando canal 5 = 0 – 11 0 – 255 Brillo del azul Canal 4: estroboscopio, velocidad Cuando canal 5 = 0 – 11: 0–7 8 – 255 Sin estroboscopio Estroboscopio: Lento → Rápido Cuando canal 5 = 12 – 239: 0 – 255 Velocidad del programa: Lento → Rápido Canal 5: programas de muestra 0 – 11 Sin programa: Mezcla de color mediante canales 1 – 3 con función estroboscopio mediante canal 4 12 – 23 Programa 1 (cambio de color) 24 – 35 Programa 2 (cambio de color) 36 – 47 Programa 3 (cambio de color) 48 – 59 Programa 4 (cambio de color) 60 – 71 Programa 5 (cambio de color) 72 – 83 Programa 6 84 – 95 Programa 7 96 – 107 Programa 8 108 – 119 Programa 9 C. 1: 0 – 255 Brillo del rojo C. 2: 0 – 255 Brillo del verde C. 3: 0 – 255 Brillo del azul Proyector 2: mezcla de color cuando canal 14 = 0 – 11 C. 4: 0 – 255 Brillo del rojo C. 5: 0 – 255 Brillo del verde C. 6: 0 – 255 Brillo del azul Proyector 3: mezcla de color cuando canal 14 = 0 – 11 C. 7: 0 – 255 Brillo del rojo C. 8: 0 – 255 Brillo del verde C. 9: 0 – 255 Brillo del azul Proyector 4: mezcla de color cuando canal 14 = 0 – 11 C. 10: 0 – 255 Brillo del rojo C. 11: 0 – 255 Brillo del verde C. 12: 0 – 255 Brillo del azul Canal 13: estroboscopio, velocidad Cuando canal 14 = 0 – 11: 0–7 Sin estroboscopio 8 – 255 Estroboscopio: Lento → Rápido Cuando canal 14 = 12 – 239: 0 – 255 0 – 11 Sin programa: Mezcla de color mediante canales 1 – 12 con función estroboscopio mediante canal 13 12 – 23 Programa 1 (cambio de color) 24 – 35 Programa 2 (cambio de color) 36 – 47 Programa 3 (cambio de color) 48 – 59 Programa 4 (cambio de color) 60 – 71 Programa 5 (cambio de color) 72 – 83 Programa 6 120 – 131 Programa 10 132 – 143 Programa 11 144 – 155 Programa 12 156 – 167 Programa 13 84 – 95 Programa 7 168 – 179 Programa 14 96 – 107 Programa 8 180 – 191 Programa 15 108 – 119 Programa 9 192 – 203 Programa 16 120 – 131 Programa 10 204 – 215 Programa 17 132 – 143 Programa 11 216 – 227 Programa 18 144 – 155 Programa 12 228 – 239 Programa 19 156 – 167 Programa 13 “Sound 1” ( apartado 6.2) 168 – 179 Programa 14 180 – 191 Programa 15 192 – 203 Programa 16 204 – 215 Programa 17 216 – 227 Programa 18 228 – 239 Programa 19 240 – 251 “Sound 1” ( apartado 6.2) 240 – 251 252 – 255 “Sound 2” ( apartado 6.2) 252 – 255 50 Velocidad del programa: Lento → Rápido Canal 14: programas de muestra “Sound 2” ( apartado 6.2) 10.2 Estructura del menú E Menú principal Dirección DMX de inicio Modo automático Control por música Modo proyector de color Modo cambio de color Número de canales DMX Modo Slave Versión Manual de instrucciones protegido por el copyright de MONACOR ® INTERNATIONAL GmbH & Co. KG. Toda reproducción mismo parcial para fines comerciales está prohibida. 51 PL Spis treści 1 Elementy operacyjne oraz złącza . . . . . 52 2 Środki bezpieczeństwa . . . . . . . . . . . . . . 53 3 Zastosowanie . . . . . . . . . . . . . . . . . . . . . 53 1 4 Przygotowanie do pracy . . . . . . . . . . . . . 53 Kontroler z reflektorami, statyw (rys. 1) 4.1 Montaż . . . . . . . . . . . . . . . . . . . . . . . . . . . 53 4.2 Zasilanie . . . . . . . . . . . . . . . . . . . . . . . . . . 54 5 Obsługa . . . . . . . . . . . . . . . . . . . . . . . . . . 54 6 Praca bez kontrolera DMX . . . . . . . . . . . 54 6.1 Tryb automatyczny . . . . . . . . . . . . . . . . . . 54 6.2 Sterowanie muzyką . . . . . . . . . . . . . . . . . . 54 6.3 Kolorowy reflektor . . . . . . . . . . . . . . . . . . . 55 6.4 Tryb zmiany kolorów . . . . . . . . . . . . . . . . . 55 6.5 Tryb master / slave . . . . . . . . . . . . . . . . . . . 55 Elementy operacyjne oraz złącza 1 Gniazdo zasilania do łączenia z gniazdkiem sieciowym (230 V~ / 50 Hz) za pomocą dołączonego kabla zasilającego 2 Pokrywa bezpiecznika Spalony bezpiecznik wymieniać na nowy o identycznych parametrach. 3 Wyświetlacz 4 Przyciski sterujące 5 Gniazdo FOOT CONTROLLER do podłączania kontrolera nożnego, za pomocą dołączonego kabla 6 Wejście sygnału DMX (3-pinowy, XLR) do podłączania kontrolera światła; pin 1 = masa, 2 = DMX-, 3 = DMX+ 6.6.1 Włączanie i wyłączanie światła . . . . . . . 55 7 Wyjście sygnału DMX (3-pinowy, XLR) do podłączania wejścia DMX kolejnego urządzenia; pin 1 = masa, 2 = DMX-, 3 = DMX+ 6.6.2 Tryb automatyczny . . . . . . . . . . . . . . . . 56 8 Mikrofon do sterowania muzyką 6.6.3 Sterowanie muzyką . . . . . . . . . . . . . . . . 56 9 Regulator SENSITIVITY do ustawiania czułości mikrofonu 6.6 Kontroler nożny . . . . . . . . . . . . . . . . . . . . . 55 6.6.4 Kolorowy reflektor . . . . . . . . . . . . . . . . . 56 7 Sterowanie DMX . . . . . . . . . . . . . . . . . . . 56 7.1 Podłączanie . . . . . . . . . . . . . . . . . . . . . . . . 56 7.2 Ustawianie liczby kanałów DMX . . . . . . . . 56 7.3 Ustawianie adresu startowego . . . . . . . . . 56 10 Kabel połączeniowy między kontrolerem a reflektorem 11 Śruby mocujące: utrzymują żądane skierowanie reflektora (14) Na górnej stronie kontrolera znajdują się dodatkowe gwintowane otwory; jeżeli trzeba, odkręcić śrubę i przykręcić reflektor po tej stronie. 8 Wersja firmwareʼa . . . . . . . . . . . . . . . . . . 57 12 Śruby mocujące: zabezpieczają przed przesuwaniem się kontrolera na statywie(15) 9 Czyszczenie urządzenia . . . . . . . . . . . . . 57 13 Śruby blokujące: utrzymują żądane nachylenie reflektora (14) 10 Specyfikacja . . . . . . . . . . . . . . . . . . . . . . 57 14 Reflektor diodowy 10.1 Funkcje DMX . . . . . . . . . . . . . . . . . . . . . . . 58 15 Statyw 10.1.1 Tryb 5-kanałowy . . . . . . . . . . . . . . . . . . 58 Kontroler nożny (rys. 2) 10.1.2 Tryb 14-kanałowy . . . . . . . . . . . . . . . . . 58 16 Gniazdo do łączenia z gniazdem FOOT CONTROLLER (5) na kontrolerze, za pomocą dołączonego kabla 10.2 Struktura menu . . . . . . . . . . . . . . . . . . . . . 59 52 Proszę otworzyć niniejszą instrukcję na stronie 3. Pokazano tam rozkład elementów operacyjnych oraz złączy. 17 Przełącznik nożny AUTO do wyboru automatycznego programu show 18 Przełącznik nożny SOUND do wyboru programu sterowanego muzyką, przez mikrofon (8) 19 Przełącznik nożny COLOR do wyboru koloru światła 20 Przełącznik nożny BLACKOUT do wygaszania i ponownego włączania reflektorów 2 Środki bezpieczeństwa Zestaw spełnia wszystkie wymagania norm UE dzięki czemu został oznaczony symbolem . UWAGA Urządzenie jest zasilane wysokim napięciem. Wszelkie naprawy należy zlecić specjaliście. Nieprawidłowa obsługa może spowodować porażenie prądem elektrycznym. Należy przestrzegać następujących zasad: G Urządzenie jest przeznaczone tylko do użytku wewnątrz pomieszczeń. Należy chronić je przed działaniem wody, dużej wilgotności powietrza oraz wysokiej temperatury (dopuszczalny zakres 0 – 40 °C). 3 Zastosowanie PL Zestawy PARL-42SET oraz PARL-47SET składają się z 4 płaskich reflektorów diodowych oraz modułu sterującego. Może znaleźć zastosowanie w na scenie, w dyskotekach, klubach oraz salach tanecznych. Jako źródło światła, każdy reflektor wyposażony jest w 144 diody 10mm (PARL-42SET) lub 7 diod RGB (PARL-47SET) o dużej sile światła, o niskim poborze mocy, małej emisji ciepła oraz długiej żywotności. Diody pozwalają na uzyskanie światła w trzech podstawowych kolorach (czerwonym, zielonym i niebieskim) oraz kolorów uzyskiwanych przez ich zmiksowanie. Zestawy przystosowane są do pracy samodzielnej, oraz do współpracy z dołączonym kontrolerem nożnym lub kontrolerem DMX (5 lub 14 kanałów DMX). Dodatkowo, istnieje możliwość połączenia kilku zestawów (tryb master/slave) i wspólne sterowanie za pomocą kontrolera nożnego. Urządzenia oferują różne programy oraz możliwość pracy z rytm muzyki, przez wbudowany mikrofon. W komplecie znajduje się statyw oraz torby transportowe. 4 Przygotowanie do pracy G Na urządzeniu nie wolno stawiać żadnych pojemników z cieczą np. szklanek. G Nie należy włączać lub natychmiast odłączyć urządzenie od sieci w przypadku gdy 1. stwierdzono widoczne uszkodzenie urządzenia lub kabla zasilającego, 2. urządzenie mogło ulec uszkodzeniu na skutek upadku lub podobnego zdarzenia, 3. stwierdzono nieprawidłowe działanie. Naprawy urządzenia może dokonywać tylko przeszkolony personel. G Nie wolno odłączać zasilania ciągnąc za kabel, należy zawsze chwytać za wtyczkę. G Producent ani dostawca nie ponoszą odpowiedzialności za wynikłe uszkodzenia sprzętu lub obrażenia użytkownika w przypadku gdy urządzenie jest wykorzystywane w innych celach niż to się przewiduje lub jeśli jest nieodpowiednio zainstalowane, użytkowane lub naprawiane. Aby nie zaśmiecać środowiska po całkowitym zakończeniu eksploatacji urządzenia należy je oddać do punktu recyklingu. 4.1 Montaż 1) Ustawić statyw w sposób stabilny na poziomym podłożu. Należy sprawdzić wszystkie śruby blokujące i dokręcić je jeśli trzeba. 2) Umieścić kontroler z reflektorami na statywie (15) i przykręcić go za pomocą dołączonych śrub (12) po obu stronach. 3) Aby ustawić poszczególne reflektory (14), poluzować odpowiednie śruby (11, 13). Uważać aby kabel (10) nie uległ uszkodzeniu lub zgnieceniu. Następnie dokręcić wszystkie śruby mocujące. Jeżeli trzeba, reflektory mogą być przestawione na górną stronę kontrolera. Znajdują się tam dodatkowe gwintowane otwory. W tym przypadku, odkręcić śruby mocujące (11) i przymocować za ich pomocą reflektory wyjmując gumowe zaślepki. W przypadku zmiany pozycji reflektorów, upewnić się, że statyw jest równomiernie obciążony po obu stronach. 4) Aby uzyskać żądaną wysokość statywu, należy wysunąć wewnętrzną rurę. Następnie wsunąć blokadę przez dwa otwory na odpowiedniej 53 wysokości, regulując wysokość wewnętrzną rurą, aż będzie możliwe przełożenie blokady przez jej otwory. Dodatkowo, zabezpieczyć wewnętrzną rurę śrubami. Jeżeli statyw nie pozwala na uzyskanie żądanej wysokości, można wymienić wewnętrzną rurę, postępując analogicznie z powyższym opisem. PL UWAGA! G Statyw musi być ustawiony w sposób stabilny. Wewnętrzną rurę należy wysunąć do wysokości zapewniającej bezpieczną i stabilną pracę. G Przed przystąpieniem do pracy sprawdzić i w razie potrzeby dokręcić wszystkie śruby. G Kable połączeniowe układać w taki sposób, aby uchronić je przed podeptaniem oraz zaczepieniem mogącym wywrócić statyw. G Podczas pracy należy zawsze zapewnić swobodną cyrkulację powietrza wokół urządzenia. Nie wolno zakrywać otworów wentylacyjnych. 4.2 Zasilanie Podłączyć dostarczony z urządzeniem kabel zasilający do gniazda zasilającego (1) oraz do gniazdka sieciowego (230 V~ / 50 Hz). Urządzenie jest już gotowe do pracy. Aby wyłączyć urządzenie należy odłączyć wtyczkę od gniazdka sieciowego. UWAGA Nie należy patrzeć bezpośrednio na diody, silne światło może uszkodzić wzrok. Efekt stroboskopu i szybkie zmiany światła mogą być groźne dla osób wrażliwych na światło oraz chorych na epilepsję! Uwaga: Nie wolno podłączać urządzenia do zasilania poprzez ściemniacz (dimmer)! 5 Obsługa Wszystkie ustawienia dokonywane są w menu systemowym za pomocą przycisków (4) i wyświetlacza (3). 4-cyfrowy wyświetlacz włączany jest po wciśnięciu dowolnego przycisku i pokazuje ostatnie ustawienie. Wygaszenie wyświetlacza następuje kilka sekund po ostatnim wciśnięciu przycisku. Przyciski mają następujące funkcje: – Przycisk MENU / ESC do powrotu do poprzedniego poziomu menu – Przycisk ENTER do przechodzenia do następnej funkcji menu – Przyciski UP oraz DOWN do wyboru poszczególnych opcji menu oraz ustawiania wartości 54 Strukturę menu pokazano w rozdz. 10.2. W rozdz. 6 oraz 7 opisano sposób wprowadzania ustawień dla poszczególnych trybów pracy, za pomocą przycisków. 6 Praca bez kontrolera DMX 6.1 Tryb automatyczny Urządzenie oferuje dwa automatyczne programy show (dodatkowo proste programy zmiany kolorów rozdz. 6.4). Aby aktywować jeden z tych programów: 1) Wcisnąć kilka razy przycisk MENU / ESC, aż na wyświetlacz powróci do menu głównego. 2) Wybrać opcję z menu głównego przyciskami UP oraz DOWN. 3) Wcisnąć przycisk ENTER: Aktywowany i wyświetlony zostanie ostatnio wybrany program ( lub ). Wybrać żądany program przyciskami UP oraz DOWN. 4) Aby zmienić prędkość, wcisnąć przycisk ENTER. Wyświetlona zostanie bieżąca prędkość. Ustawić odpowiednią wartość spośród 9 dostępnych do , za pomocą przycisków UP oraz DOWN. 6.2 Sterowanie muzyką Dostępne są trzy programy sterowane muzyką, “Sound 1” do “Sound 3”. “Sound 1”: sterowany muzyką stroboskop z białym światłem “Sound 2”: sterowane muzyką błyski ze zmianą kolorów “Sound 3”: sterowany muzyką start programów Uwaga: Programy sterowane muzyką “Sound 1” i “Sound 2” odpowiadają programom aktywowanym sygnałem DMX ( rozdz. 10.1). 1) Wcisnąć kilka razy przycisk MENU / ESC, aż na wyświetlacz powróci do menu głównego. 2) Wybrać opcję z menu głównego przyciskami UP oraz DOWN 3) Wcisnąć przycisk ENTER: Aktywowany i wyświetlony zostanie ostatnio wybrany program ( lub ). Wybrać żądany pro, gram przyciskami UP oraz DOWN. 4) Aby zmienić prędkość dla programu “Sound 3”, wcisnąć przycisk ENTER: Wyświetlona zostanie bieżąca prędkość. Ustawić odpowiednią wartość spośród 9 dostępnych do , za pomocą przycisków UP oraz DOWN. 5) Za pomocą regulatora SENSITIVITY (9) ustawić czułość mikrofonu MIC (8) na taką wartość, aby zoptymalizować pracę urządzenia w rytm muzyki. Jeżeli zmieniony zostanie poziom głośności odtwarzanej muzyki, konieczna jest zmiana również czułości mikrofonu. Jeżeli nie można uzyskać optymalnego sterowania muzyką, nawet przy maksymalnie odkręconym regulatorze czułości, zwiększyć głośność odtwarzanej muzyki lub zmniejszyć odległość urządzenia od głośnika. 6.3 Kolorowy reflektor Urządzenie może pracować jako reflektor w jednym z dziewięciu dostępnych kolorów lub z manualnie ustawionym kolorem: 1) Wcisnąć kilka razy przycisk MENU / ESC, aż na wyświetlacz powróci do menu głównego. 2) Wybrać opcję z menu głównego przyciskami UP oraz DOWN. 3) Wcisnąć przycisk ENTER: Aktywowany i wyświetlony zostanie ostatnio wybrany kolor (jeden z gotowych … lub ustawiony indywidualnie ). Wybrać żądany kolor przyciskami UP oraz DOWN. 2) Wybrać opcję z menu głównego przyciskami UP oraz DOWN. 3) Wcisnąć przycisk ENTER: Aktywowany i wyświetlony zostanie ostatnio wybrany program zmiany kolorów ( … ). Wybrać żądany program przyciskami UP oraz DOWN. 4) Aby zmienić prędkość, wcisnąć przycisk ENTER: Wyświetlona zostanie bieżąca prędkość. Ustawić odpowiednią wartość spośród 9 dostępnych do , za pomocą przycisków UP oraz DOWN. 6.5 Tryb master / slave Pojedyncze zestawy PARL-42SET lub PARL-47SET oraz ich kombinacje mogą zostać połączone aby umożliwić jednoczesne sterowanie wszystkich podrzędnych zgodnie z rytmem nadrzędnego (master/ slave). Połączyć urządzenia zgodnie z opisem w rozdz. 7.1, pomijając krok 1. Ustawić pierwszy zestaw [z niepodłączonym wejściem sterującym DMX IN (6)] na tryb automatyczny, sterowany muzyką, kolorowego reflektora lub zmiany kolorów ( rozdz. 6.1 do 6.4). Pozostałe urządzenia należy ustawić w tryb podrzędny slave: Manualne ustawianie koloru W trybie koloru “ATF” jasność czerwonych, zielonych i niebieskich diod może być regulowana osobno: 1) Wcisnąć kilka razy przycisk MENU / ESC, aż na wyświetlacz powróci do menu głównego. a) Jeżeli wybrano , wcisnąć przycisk ENTER. Wyświetlacz pokaże ostatnio ustawione wartości dla diod: czerwonych ( ), zielonych ( ) lub niebieskich ( ). 3) Wcisnąć przycisk ENTER: Aktywowany zostaje tryb slave, wyświetlacz pokaże . Po odebraniu sygnału sterującego z urządzenia nadrzędnego, zacznie migać punkt na wyświetlaczu. b) Ustawić jasność wybranego koloru przyciskami DOWN oraz UP (wskazanie 0 – 255). c) Zmiana koloru dla którego odbywa się regulacja jasności, odbywa się za pomocą przycisku ENTER. Wskazówka: Przy zmianie jasności diod w poszczególnych kolorach, zmienia się również jasność koloru wypadkowego. Zaleca się w pierwszej kolejności ustawianie jasności dominującego koloru, a dopiero potem dwóch pozostałych. Przy ustawianiu koloru białego należy najpierw ustawić jasność koloru zielonego, gdyż jest on najjaśniejszy dla oka. Następnie należy dodać kolor czerwony do uzyskania koloru żółtego, a po nim niebieski – do uzyskania białej barwy. 6.4 Tryb zmiany kolorów Dostępnych jest pięć programów automatycznej zmiany kolorów, każdy o innej sekwencji barw: 1) Wcisnąć kilka razy przycisk MENU / ESC, aż na wyświetlacz powróci do menu głównego. PL 2) Wybrać opcję z menu głównego przyciskami UP oraz DOWN. 6.6 Kontroler nożny Za pomocą dołączonego kontrolera nożnego możliwe jest sterowanie różnymi funkcjami. Po połączeniu kilku zestawów w trybie master/slave, wszystkie zestawy sterowane są równocześnie, zgodnie z rytmem nadrzędnego. 1) Połączyć gniazdo (16) na tylnej stronie kontrolera nożnego z gniazdem FOOT CONTROLLER (5) za pomocą dołączonego kabla. Zabezpieczyć połączenie nakrętką na wtyku. 2) Na wejście DMX IN (6) nie może być podawany sygnał sterujący DMX. 6.6.1 Włączanie i wyłączanie światła Do wygaszania światła służy przycisk BLACKOUT (20) na kontrolerze nożnym. Po wygaszeniu światła (blackout), wyświetlacz (3) urządzenia nadrzędnego (master) pokaże na krótko . 55 PL Aby zapalić ponownie światło, wcisnąć ponownie przycisk BLACKOUT lub wybrać bezpośrednio kolejną funkcję, za pomocą pozostałych trzech przycisków na kontrolerze nożnym. 6.6.2 Tryb automatyczny Do wyboru jednego z dwóch programów automatycznych ( rozdz. 6.1) służy przycisk AUTO (17). Każe wciśnięcie przycisku powoduje przełączenie na drugi program. Wyświetlacz pokazuje odpowiednio lub . Prędkość programów można ustawiać w menu ( rozdz. 6.1, krok 4). 6.6.3 Sterowanie muzyką Do wyboru programów sterowanych muzyką ( rozdz. 6.2) poprzez mikrofon (8), służy przycisk SOUND (18). Każe wciśnięcie przycisku powoduje przełączenie kolejny program. Wyświetlacz pokazuje odpowiednio lub . Prędkość , programów można ustawiać w menu ( rozdz. 6.2, krok 4). 6.6.4 Kolorowy reflektor Do wyboru jednego z 9 gotowych kolorów ( rozdz. 6.3) służy przycisk COLOR (19). Każe wciśnięcie przycisku powoduje zmianę koloru. Wyświetlacz pokazuje odpowiednio … . 7 Sterowanie DMX DMX jest skrótem od Digital Multiplex i pozwala na cyfrowe sterowanie wieloma urządzeniami DMX poprzez wspólną linię. Urządzenie może być sterowane poprzez kontroler światła (np. DMX-1440 lub DMX-510USB marki “img Stage Line”), do tego celu można wykorzystać 14 kanałów sterujących. Można wybrać również sterowanie tylko za pomocą 5 kanałów. Funkcje poszczególnych kanałów oraz wartości DMX opisano w rozdz. 10.1. 7.1 Podłączanie Do podłączania sygnału sterującego DMX do panelu służy 3-pinowe gniazdo XLR o następującej konfiguracji pinów: pin 1 = masa, 2 = DMX-, 3 = DMX+ Do podłączania należy wykorzystać specjalny kabel o dużej przepływności danych, może to być kabel mikrofonowy ze standardowym ekranowaniem o przekroju żył minimum 2 × 0,22 mm2, możliwie małej pojemności i długości do 100 m. Jeżeli długość przewodu przekracza 150 m, zalecane jest podłączenie wzmacniacza sygnału DMX (np. SR103DMX marki “img Stage Line”). 1) Połączyć wejście sterujące DMX IN (6) z wyjściem DMX kontrolera światła. Jeżeli podłą56 czone są kontrolery nożne, należy je odłączyć, aby nie zakłócały sygnału DMX. 2) Podłączyć wyjście DMX OUT (7) do wejścia DMX IN kolejnego efektu świetlnego. Kolejne urządzenia podłączać analogicznie, aż wszystkie urządzenia zostaną połączone. 3) Aby zapobiec zakłóceniom, zwłaszcza w przypadku długich linii lub wielu urządzeń, na wyjście DMX ostatniego z urządzeń podłączyć opornik 120 Ω (> 0,3 W) lub użyć gotowy wtyk terminujący (np. DLT-123 marki “img Stage Line”). 7.2 Ustawianie liczby kanałów DMX W przypadku sterowania poprzez kontroler DMX, należy wybrać najpierw liczbę kanałów DMX. Liczba kanałów DMX zależy od ich wymaganej do sterowania ilości oraz liczby wolnych kanałów kontrolera. W trybie 14-kanałówym, możliwe jest niezależne sterowanie poszczególnymi reflektorami, natomiast w trybie 5-kanałowym sterowanie jest wspólne. Aby wybrać liczbę kanałów DMX należy: 1) Wcisnąć kilka razy przycisk MENU / ESC, aż na wyświetlacz powróci do menu głównego. 2) Wybrać opcję z menu głównego przyciskami UP oraz DOWN. 3) Wcisnąć przycisk ENTER: wyświetlacz pokaże bieżące ustawienie: = tryb 5-kanałowy = tryb 14-kanałowy 4) Wybrać żądaną liczbę kanałów przyciskami UP oraz DOWN. 7.3 Ustawianie adresu startowego W przypadku sterowania poprzez kontroler DMX, należy ustawić adres startowy DMX pierwszego kanału. Pozostałym funkcjom zostaną automatycznie przypisane kolejne adresy. Przykładowo: adres startowy 5 dla kanału 1 – w trybie 5-kanałówym, kanałom 2 do 5 zostaną przypisane adresy 6 do 9. Możliwy adres DMX dla kolejnego urządzenia to 10. – w trybie 14-kanałówym, kanałom 2 do 14 zostaną przypisane adresy 6 do 18. Możliwy adres DMX dla kolejnego urządzenia to 19. 1) Wcisnąć kilka razy przycisk MENU / ESC, aż na wyświetlacz powróci do menu głównego. 2) Wybrać opcję z menu głównego przyciskami UP oraz DOWN. 3) Wcisnąć przycisk ENTER: wyświetlacz pokaże bieżące ustawienie, np. . 4) Ustawić żądany adres przyciskami UP oraz DOWN. Po ustawieniu adresu startowego, panel diodowy może być już sterowany za pomocą kontrolera DMX. Odebranie sygnału sterującego sygnalizowane jest miganiem punktu na wyświetlaczu. 8 Wersja firmwareʼa Aby sprawdzić numer wersji firmwareʼa (system operacyjny urządzenia): 1) Wcisnąć kilka razy przycisk MENU / ESC, aż na wyświetlacz powróci do menu głównego. 2) Wybrać opcję z menu głównego przyciskami UP oraz DOWN. 3) Wcisnąć przycisk ENTER: Pokazany zostanie numer bieżącej wersji (np. ). 9 Czyszczenie urządzenia Panele przednie reflektorów należy czyścić w regularnych odstępach czasowych, w zależności od warunków pracy urządzenia. Zapewni to uzyskanie maksymalnej jasności światła. Przed przystąpieniem do czyszczenia należy odłączyć urządzenie od zasilania. Do czyszczenia obudowy używać suchej, miękkiej ściereczki oraz łagodnych środków chemicznych. Następnie wytrzeć do sucha. Do czyszczenia obudowy należy używać tylko suchej, miękkiej ściereczki. Nie wolno używać wody ani żadnych środków chemicznych, który mogłyby dostać się do wnętrza urządzenia. 10 Specyfikacja PL Zasilanie: . . . . . . . . . . 230 V~ / 50 Hz Pobór mocy PARL-42SET: . . . . . 80 VA max PARL-47SET: . . . . . 165 VA max Źródło światła PARL-42SET: . . . . . 4 × 144 diody o dużej jasności, 10 mm każda, po 48 w kolorach czerwonym, zielonym i niebieskim, kąt świecenia 20° PARL-47SET: . . . . . 4 × 7 diod RGB o dużej jasności 3 W każda, kąt świecenia 25° Zakres temperatur: . . 0 – 40 °C Wymiary: . . . . . . . . . . 1210 × 345 × 80 mm (kontroler z reflektorami) Wysokość statywu: . . 1,5 do 3,2 m Waga PARL-42SET: . . . . . 19,4 kg PARL-47SET: . . . . . 20,5 kg Z zastrzeżeniem możliwość zmian. 57 PL 10.1 Funkcje DMX 10.1.1 Tryb 5-kanałowy 10.1.2 Tryb 14-kanałowy Wartość DMX Funkcje Reflektor 1: miksowanie kolorów jeżeli kanał 14 = 0 – 11 Wartość DMX Funkcje K. 1: 0 – 255 jasność czerwonego Kanał 1: proporcja czerwonego jeżeli kanał 5 = 0 – 11 K. 2: 0 – 255 jasność zielonego K. 3: 0 – 255 jasność niebieskiego 0 – 255 jasność czerwonego Kanał 2: proporcja zielonego jeżeli kanał 5 = 0 – 11 0 – 255 jasność zielonego Kanał 3: proporcja niebieskiego jeżeli kanał 5 = 0 – 11 0 – 255 jasność niebieskiego Kanał 4: stroboskop, prędkość jeżeli kanał 5 = 0 – 11: 0–7 8 – 255 bez stroboskopu stroboskop: wolno → szybko jeżeli kanał 5 = 12 – 239: 0 – 255 prędkość programu: wolno → szybko Kanał 5: programy show 0 – 11 bez programu:: miksowanie kolorów poprzez kanały 1 – 3 z funkcją stroboskopu poprzez kanał 4 12 – 23 program 1 (zmiana kolorów) 24 – 35 program 2 (zmiana kolorów) 36 – 47 program 3 (zmiana kolorów) 48 – 59 program 4 (zmiana kolorów) 60 – 71 program 5 (zmiana kolorów) 72 – 83 program 6 84 – 95 program 7 96 – 107 program 8 108 – 119 program 9 Reflektor 2: miksowanie kolorów jeżeli kanał 14 = 0 – 11 K. 4: 0 – 255 jasność czerwonego K. 5: 0 – 255 jasność zielonego K. 6: 0 – 255 jasność niebieskiego Reflektor 3: miksowanie kolorów jeżeli 14 = 0 – 11 K. 7: 0 – 255 jasność czerwonego K. 8: 0 – 255 jasność zielonego K. 9: 0 – 255 jasność niebieskiego Reflektor 4: miksowanie kolorów jeżeli 14 = 0 – 11 K. 10: 0 – 255 jasność czerwonego K. 11: 0 – 255 jasność zielonego K. 12: 0 – 255 jasność niebieskiego Kanał 13: stroboskop, prędkość jeżeli kanał 14 = 0 – 11: 0–7 bez stroboskopu 8 – 255 stroboskop: wolno → szybko jeżeli kanał 14 = 12 – 239: 0 – 255 0 – 11 bez programu: miksowanie kolorów poprzez kanały 1 – 12 z funkcją stroboskopu poprzez kanał 13 12 – 23 program 1 (zmiana kolorów) 24 – 35 program 2 (zmiana kolorów) 36 – 47 program 3 (zmiana kolorów) 48 – 59 program 4 (zmiana kolorów) 60 – 71 program 5 (zmiana kolorów) 72 – 83 program 6 120 – 131 program 10 132 – 143 program 11 144 – 155 program 12 156 – 167 program 13 84 – 95 program 7 168 – 179 program 14 96 – 107 program 8 180 – 191 program 15 108 – 119 program 9 192 – 203 program 16 120 – 131 program 10 204 – 215 program 17 132 – 143 program 11 216 – 227 program 18 144 – 155 program 12 228 – 239 program 19 156 – 167 program 13 “Sound 1” ( rozdz. 6.2) 168 – 179 program 14 180 – 191 program 15 192 – 203 program 16 204 – 215 program 17 216 – 227 program 18 228 – 239 program 19 240 – 251 “Sound 1” ( rozdz. 6.2) 240 – 251 252 – 255 “Sound 2” ( rozdz. 6.2) 252 – 255 58 prędkość programu: wolno → szybko Kanał 14: programy show “Sound 2” ( rozdz. 6.2) 10.2 Struktura menu PL Menu główne Adres startowy DMX Tryb automatyczny Sterowanie muzyką Kolorowy reflektor Tryb zmiany kolorów Liczba kanałów DMX Tryb podrzędny slave Wersja Instrukcje obsługi są chronione prawem copyright for MONACOR ® INTERNATIONAL GmbH & Co. KG. Przetwarzanie całości lub części instrukcji dla osobistych korzyści finansowych jest zabronione. 59 DK Læs nedenstående sikkerhedsoplysninger grundigt igennem før ibrugtagning af enheden. Bortset fra sikkerhedsoplysningerne henvises til den engelske tekst. Vigtige sikkerhedsoplysninger Montering Denne enhed overholder alle nødvendige EUdirektiver og er som følge deraf mærket . G Fastgør ADVARSEL Enheden benytter livsfarlig netspænding. Overlad al servicering til autoriserede personer. Ukyndig håndtering kan føre til elektrisk stød. Vær altid opmærksom på følgende: G ADVARSEL: Hurtige farveskift kan udløse epileptiske anfald hos personer der fotosensitive eller lider af epilepsi. G Enheden er kun beregnet til indendørs brug. Beskyt den mod vanddråber og -stænk, høj luftfugtighed og varme (tilladt omgivelsestemperatur 0 – 40 °C). G Undgå at placere væskefyldte genstande, som f. eks. glas, ovenpå enheden. G Tag ikke enheden i brug og tag straks stikket ud af stikkontakten i følgende tilfælde: 1. hvis der er synlig skade på enheden eller netkablet, 2. hvis der kan være opstået skade, efter at enheden er tabt eller lignende, 3. hvis der forekommer fejlfunktion. Enheden skal altid repareres af autoriseret personel. G Tag aldrig netstikket ud af stikkontakten ved at trække i kablet, tag fat i selve stikket. G Rengør kabinettet med en tør, blød klud; der må under ingen omstændigheder benyttes kemikalier eller vand. G Hvis enheden benyttes til andre formål, end den oprindeligt er beregnet til, hvis den monteres eller betjenes forkert, eller hvis den ikke repareres af uautoriseret personel, omfattes eventuelle skader ikke af garantien. Hvis enheden skal tages ud af drift for bestandigt, skal den bringes til en lokal genbrugsstation for bortskaffelse. 60 G Placér enheden på en sikker måde. altid enheden så der er rigeligt med ventilation omkring denne. Kabinettets ventilationshuller må ikke tildækkes. Läs igenom säkerhetsföreskrifterna innan enheten tas i bruk. Ytterligare information återfinns på övriga språk i manualen. S Säkerhetsföreskrifter Montering Enheten uppfyller alla krav enligt EU och har därför försetts med symbolen . G Montera enheten säkert och professionellt. G Placera enheten så att luften kan cirkulera fritt runt den och täpp inte till kylhålen i chassiet. VARNING Enheten använder högspänning internt. Överlåt all service till auktoriserad personal. Egna ingrepp kan ge elektriska överslag med risk för skada på person och /eller materiel. Ge även akt på följande G VARNING: Titta aldrig direkt in i ljuskällan. Risk för permanent ögonskada föreligger. Observera att snabba ljusväxlingar kan ge upphov till epileptiska anfall hos känsliga personer. G Enheten är endast avsedd för inomhusbruk. Enheten skall skyddas mot vätskor, hög värme och hög luftfuktighet. Arbetstemperatur 0 – 40 grader C. G Placera inte föremål innehållande vätskor, t. ex. dricksglas, på enheten. G Tag omedelbart ur elsladden ur eluttaget om något av följande fel uppstår. 1. Om enheten eller elsladden har synliga skador. 2. Om enheten skadats av fall eller dylikt. 3. Om andra felfunktioner uppstår. Enheten skall alltid lagas av kunnig personal. G Drag aldrig ur kontakten genom att dra i sladden, utan ta tag i kontaktkroppen. G Rengör endast med en ren och torr trasa, använd aldrig vätskor i någon form då dessa kan rinna in och orsaka kortslutning. G Om enheten används för andra ändamål än avsett, om den monteras eller används på fel sätt eller inte repareras av auktoriserad personal upphör alla garantier att gälla. I dessa fall tas inget ansvar för uppkommen skada på person eller materiel. Om enheten skall kasseras skall den lämnas till återvinning. 61 FIN Ole hyvä ja tutustu seuraaviin ohjeisiin varmistaaksesi tuotteen turvallisen käytön. Tarvitessasi lisätietoja tuotteen käytöstä löydät ne muun kielisistä käyttöohjeista. Turvallisuudesta Asennus Laite vastaa kaikkia vaadittuja EU direktiivejä, joten se on varustettu merkinnällä. G Laite VAROITUS Laite toimii hengenvaarallisella jännitteellä. Laiteen huolto tulee tehdä siihen valtuutetun huollon toimesta. Asiaa tuntematon käsittely voi aiheuttaa sähköiskun vaaran. Ole hyvä ja huomioi seuraavat seikat: G VAROITUS: Älä katso suoraan valonlähteeseen, se voi vaurioittaa silmää. Erittäin nopeat valon muutokset saattavat laukaista epileptisen kohtauksen henkilöillä, jotka ovat valoherkkiä tai epileptisiä. G Laitteet soveltuvat vain sisätilakäyttöön. Suojele niitä kosteudelta, vedeltä ja kuumuudelta (sallittu ympäröivä lämpötila 0 – 40 °C). G Älä sijoita laitteen päälle mitään nestettä sisältävää, kuten vesilasia tms. G Irrota virtajohto pistorasiasta, äläkä käynnistä lai- tetta, jos 1. laitteessa tai virtajohdossa on havaittava vaurio, 2. putoaminen tai muu vastaava vahinko on saattanut aiheuttaa vaurion, 3. laitteessa esiintyy toimintahäiriöitä Kaikissa näissä tapauksissa laite tulee huollattaa valtuutetussa huollossa. G Älä koskaan irrota virtajohtoa pistorasiasta johdosta vetämällä. G Käytä puhdistamiseen pelkästään kuivaa, pehmeää kangasta. Älä käytä kemikaaleja tai vettä. G Laitteen takuu raukeaa, eikä valmistaja, maahan- tuoja tai myyjä ota vastuuta mahdollisista välittömistä tai välillisistä vahingoista, jos laitetta on käytetty muuhun kuin alkuperäiseen käyttötarkoitukseen, laitetta on taitamattomasti käytetty tai kytketty tai jos laitetta on huollettu muussa kuin valtuutetussa huollossa. Kun laite poistetaan lopullisesti käytöstä, vie se paikalliseen kierrätyskeskukseen jälkikäsittelyä varten. 62 on asennettava asiantuntevasti ja turvalli- sesti. G Asenna laite aina siten, että riittävä ilmankierto on varmistettu käytön aikana. Älä koskaan peitä tuuletusaukkoja (esim. verhoilla). ® MONACOR INTERNATIONAL GmbH & Co. KG • Zum Falsch 36 • 28307 Bremen • Germany Copyright © by MONACOR INTERNATIONAL. All rights reserved. A-1278.99.01.11.2011