1
EN
INSTRUCTIONS ON ASSEMBLY AND USE
CONGRATULATIONS ON PURCHASING THIS PRODUCT!
Please read these instructions carefully. The instructions are an integral
component of the product. Therefore, please store them and the packaging
carefully in case questions arise in the future. Please always include these
instructions when handing on the product to a third party. This product must be
assembled by an adult. This product is not designed for industrial use. The use
of the product requires specific skills and knowledge to be able to avoid injuries
due to crashes and collisions. Always adjust according to the age of the user and
use for the purpose it has been designed for.
Technical specifications
Item:
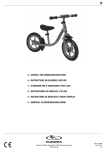
Running bike Seven 2.0
Item number:
10705
Handlebar height adjustable:
52 – 60 cm
Saddle height adjustable:
33 – 43,5 cm
Weight:
3.3 kg
Maximum user weight:
35 kg
If you have assembly problems or would like further information on the product,
we have all you need and more at http://www.hudora.de.
Contents
1 x Bag including clamp, washers, guide sleeves, covers and tools
1 x Saddle with seat post
1 x Frame with rear wheel
1 x Handlebars with protective padding
1 x Front wheel fork
1 x Front wheel with nuts and axle lock washers
1 x Manual
Other items included are meant to facilitate safe transportation and are not
required for the installation and use of the product.
SAFETY INSTRUCTIONS
- This product is only suitable for smooth paved surfaces. Do not use it on public
roads.
- The running bike is only intended for use by one person.
- Warning! Please ensure that your child wears the appropriate protective clothing
(helmet).
- Warning! The running bike is not equipped with a breaking system since feet
provide the motion power to the driving wheels. Therefore, it is necessary to
wear shoes while using the bike. There is a risk of injury.
- Do not allow your child to ride the running bike at twilight, at night or in poor
visibility.
- To prevent putting your child or others in danger, you should not let the running
bike be used on roads or thoroughfares or on slopes or hills. Avoid using it in the
proximity of stairs or open water.
- Inspect the running bike before each use to ensure that all parts are still fixed in
place correctly and that the running bike is functioning as intended.
- The product has been tested in accordance with standard EN 71. For children
from 2 to 5 years of age only.
- This product contains small parts which could cause asphyxia if swallowed.
Supervise children during the assembling. This product must be assembled
by an adult. Children should only use the product when they are under adult
supervision.
- Please ensure that your child keeps both hands securely on the handlebars in
order to maintain better control over the bike.
- Warnings! Protective equipment should be worn (helmet). Not to be used in
traffic. 35 kg max.
INSTRUCTIONS ON ASSEMBLY
ATTACHING THE WHEELS AND SADDLE
1. The rear wheel (1) is pre-mounted. Only the front wheel (2) has to be mounted. Insert the front wheel (2) into the front wheel fork by removing the axle
lock washers (3) and external nuts (4a) from the wheel axle. Check whether
the tapers (screw fittings on the wheel bearings) (5) are tightly screwed on to
the axles and secure them through the nuts (4b). Now secure the wheel with
the aid of the hooks to the axle lock washers (3) in order to hook these into
the holes on the fork. Tighten the nuts (4a) to the.
2. Attach the saddle (6) as shown in the picture. The cover (7) should initially be
pulled over the seat’s supporting tube. However, this is not necessary with
the lowest saddle setting. Please take care not to exceed the maximum seat
height by refraining from pulling the saddle support higher than the “MAX”
indication as exceeding the maximum saddle height could lead to serious
injuries.
ATTACHING THE HANDLEBARS
Attach the steering rod (8) parallel to the front wheel. The cover (7), the clamp
(9) and the two plastic washers (10) have to be pulled over the front wheel fork
and the steering rod supporting tube as shown in the illustration. Insert the guide
sleeves (11) into the stem of the frame as shown in the picture. The vertical
supporting rod has to be stuck into the upper end of the fork (with spreader). The
clamp (9) must be completely attached to the front wheel fork and not directly to
the vertical support. In order to set the highest position of the steering rod, the
vertical supporting tube can be pulled out to the “MAX” indication. Do not pull out
the rod further as this might lead to accidents. Then attach the clamp (9) securely
with the washer and nut. Please ensure that the steering rod is positioned correctly in relation to the front wheel before tightening the screw.
MAINTENANCE AND STORAGE
Use a dry or damp cloth only to clean the product; do not use special cleaning
agents! Check the product for damage or traces of wear and tear before and after
each use. Do not make any structural changes. For your own safety, please use
original spare parts only. These can be sourced from HUDORA. If parts become
damaged or if sharp edges or corners should develop, the product may not be
used any more. If in any doubt, please contact our service team (http://www.
hudora.de/service/). Store the product in a safe place where it is protected from
the elements, cannot be damaged, and cannot injure anyone.
DISPOSAL ADVICE
At the end of the product’s life, please dispose of it at an appropriate collection
point provided in your area. Local waste management companies will be able to
answer your questions on this.
SERVICE
We make every effort to deliver faultless products. If faults do arise however, we
put just as much effort into rectifying them. Therefore, you can find numerous
information on the product, replacement parts, solutions to problems and lost
assembly manuals at http://www.hudora.de/artnr/10705/.
All images are examples of the design.
HUDORA | Jägerwald 13 | 42897 Remscheid | Germany
www.hudora.de
Item no. 10705
As of 01/12
Page 4/8