1
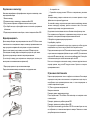
Thanks for purchasing this wearable camera goggle, please read this manual before use
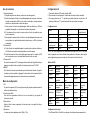
Technical Specifications
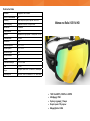
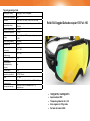
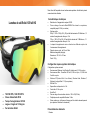
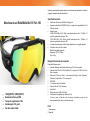
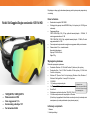
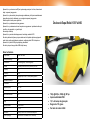
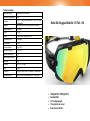
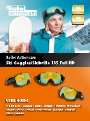
Rollei Ski Goggles/Skibrille 135 Full - HD
•
•
•
•
•
Sensor resolution 5 Mega pixels CMOS.
Support Micro SD/SDHC Class 4 card or above and compatible up to 32GB
(not included).
Movie storage:
1080P=1920x1080p (16:9), 30fps, ~ 12 Mbit/s data rate, 12 minutes of video
recording per 1GB
720P=1280x720p (16:9), 60fps, ~ 12 Mbit/s data rate, 12 minutes of video
recording per 1GB
The recording duration will be varied because of different recording objects
and environment.
Focusing range: 0.8m~infinity.
Rechargeable battery (built in)
Size: 227*95*130mm
Weight: 230g
Computer System Requirements
•
•
•
•
•
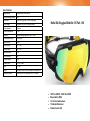
720P@60FPS, 1080P@30FPS
Waterproof IP68
1.5H recording time
135 degree wide angle
Video Format H.264
Minimum System Requirements
Windows Environment: 3.0 GHz Intel Pentium D(dual-core) or faster.
•
Mac Environment: Dual 2.0 GHz PowerMac G5 or faster; 2.0 GHz Intel Core
•
Duo or faster.
Windows XP (Service Pack 2 or later),Windows Vista, Windows7, Windows 8
•
or Apple Mac X 10.6 or above.
2GB RAM.
•
1G Free hard disk space.
•
1GB or greater video card.
•
QuickTime 7.
•
1024x768 resolution video support(32 bit).
•
16 bit Windows compatible sound device.
•
(In some cases, the frame rate may be automatically reduced to maximize the
memory usage)
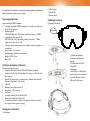
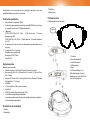
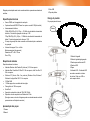
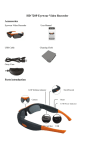
Parts Introduction
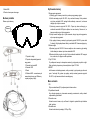
1. Camera
2. Manual
3. USB cable
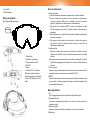
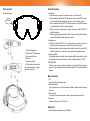
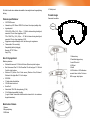
Product design
Using your camera
Main parts of the camera
1. To start recording
A)Wear the camera goggle and focus on what you would like to record.
B)Short press on/off button to power on the camera, when the green LED
indicators are on and there is a short vibration, it means the camera is in
standby mode.
C)Press the power ON/OFF button again, there is a vibration alert and blue LED
light flash every second, it means the camera is recording.
D)If the camera in standby mode, press the recording button to start recording.
E)To switch the camera off, press the power button for about three seconds.
The goggles will vibrate longer and the LED and the camera will switch off.
2. To take a picture
A)Press on/off button, the camera will go into standby mode when we hear a
short vibrate and the green LED light are on.
B)Short press the photo button for capturing a picture, when the blue LED light
flash one time,it means the photos have been taken successfully.
3. PC Camera
When connect the camera with the PC, Long press the photo button, removable
disk disappears, the camera is in PC CAM mode.
4. RESET
When the camera will not operate correctly, please press reset button for 1
second, the system will return to off status, repress the on/off button for normal
operation.
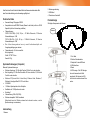
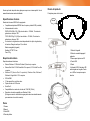
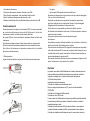
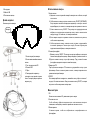
Camera
1. Photo button
2. On/off/recording button
3. SD card slot
4. USB slot
5. Reset
6. LED Indicator – The LED
indicator is assembled into the
inside of the goggles. You can see
the LED in the right top corner.
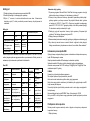
Setting menu
1. EV
Higher EV can increase the brightness of the video quality.
2. Light Frequency
To avoid the flicker for indoor use, the right frequency needs to be set.
3. Time stamp
Set time stamp, then the exact time will display on the video and photo.
4. Resolution
Change the resolution between 1080p and 720p.
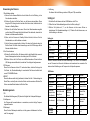
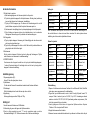
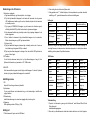
Setting.txt
1. Connect the camera to the PC with USB cable
2. Find the setting.txt by opening the removable disk
3. Choose update with “Y” means you can update the new data, default setting is “N”,
restart the camera to activate the setting
Setting.txt
Status
0
1
Default setting
EV
0-12
0-12
6
Light Frequency
60HZ
50HZ
0
RTC Display
time stamp off
time stamp on
1
Resolution
1080P
720P
0
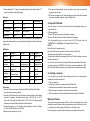
NOTE: Users can choose 50HZ or 60HZ by this setting to avoid flickering in the
video while shooting indoors; you need to adjust this setting to match the frequency
of light source
LED Status
Status
Green light
Blue light
Red light
Vibration
Power on
Stay on
off
off
Vibrate 1 sec
Power off
off
off
off
Vibrate 2 sec
Recording
No card or
memory is full
Flash once per sec.
Quick flash 5 times
and goes off
off
off
off
Charging
Stay on
Quick flash 5 times
and goes off
Quick flash for510sec and then off
off
off
on
Vibrate 0.5 sec
Vibrate 2 sec,
then off
Vibrate 3 times,
then off
N/A
Full charge
off
off
off
N/A
Low battery
off
Time setting
1. Create a .txt document named “settime.txt” with Microsoft Word, Word Pad or
any other word processing software.
2. Open the new Text document, input the local true time according to the following
set form. For example: The present London time is: 06:09:01, 8th, Jul, 2013,
The syntax of the input must look like this: 2013 07 08, 06 09 01(space needed
between each number).When finished save the file and exit.
3. Connect the goggle to your PC and open the removable disc. Copy the “Settime.
txt” file to the Root directory of the SD card.
4. Disconnect the camera from your PC.
5. The camera will automatically use the new date and time when you switch the
goggles on the next time.
6. To see the time stamp on your video and photos you must enable the time stamp
function as described on page 6, chapter “Setting Menu”.
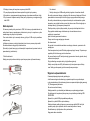
Charge with USB cable
Turn the camera off, then plug the camera with the rechargeable battery to a
computer with the
USB cable provided
The blue LED will light up to show the battery is charging.
The blue LED will be turned off when the battery is fully charged.
The rechargeable battery can work nearly 90-100 Minutes under the
1080P@30FPS or 720p@60fps; a full charge will take 2-3 hours.
NOTE
Ensure the card is inserted correctly
Do not touch the connect terminals on the back of the micro SD card
The card may be damaged if it is not fully inserted
The card and the data may be damaged if the micro SD card is inserted or removed
while the camera is on
Do not touch the cable connector as this may affect the camera performance and functions
The camera supports micro SD/SDHC Class 4 cards or above and compatible up to 32GB.
Micro SD cards with lower classes may cause performance drop during recording.
Connecting a computer
You can upload your recorded video footage and photos on a computer when
enabled the Computer and camera.
1. Turn the camera on.
2. Connect your camera to a computer using the USB cable.
3. It will show the removable disk when connected successfully.
4. Using the computer software to process the video and photo.
5. When exit please click the removable disk and then remove the USB cable.
Waterproof feature
This camera has passed waterproof IP68; we will not be responsible for camera
malfunction caused by liquid entering the camera as a result of misuse by the user.
Liquid may get inside the camera if the USB port is not firmly locked.
If the camera gets wet, wipe the liquid off as soon as possible with a dry cloth.
Other camera accessories may not be waterproof.
(Don’t use the camera in extreme temperatures as this may cause the camera to
malfunction).
1. Camera precautions
Please read below instructions before use this camera
Please notice following cautions:
Do not disassemble.
Do not crush and expose the rechargeable battery to any shock or force such as
hammering, dropping or stepping on it.
Before remove the SD card, please turn off the camera at first, or it may cause
damage of the files or SD card.
Remove the SD card before storing the camera for long periods of time. Keep it in
a well-ventilated place.
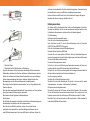
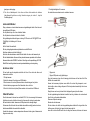
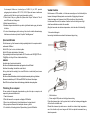
Disclaimer
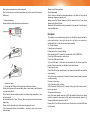
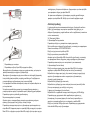
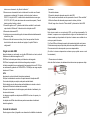
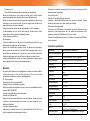
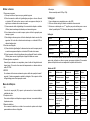
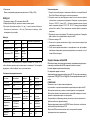
① . Please don’t open
② . Please open the USB port at the instructions of the arrow direction
Do not put the camera to the wet and dusty place, it may cause to the file disaster
or get an electric shock.
Do not leave the camera in places exposed to extremely high temperatures , such
as direct sunlight
for extended periods of time. This may affect the camera housing and internal
components.
Please clean the lens with a soft cloth to remove fingerprints or dust.
If the rechargeable battery is mishandled, it can burst, cause a fire or even
chemical burns.
The warranty covers manufacturing defects only. Should the camera malfunction
under participation of any high-risk sports or activities not endorsed or
recommended by us, it will not be covered under warranty
XV) Trouble shooting
Cannot power on the camera
Please check if there is enough battery.
After connected with PC, cannot find removable disk in MY COMPUTER.
Check if the USB connection is correct or not.
Check if the USB cable is normal
Try other USB cable, if still cannot find removable disk, the camera may have
problem. Please contact with your distributor or the manufacturer.
Cannot record a video
Check if the SD card has enough space, if not, please format the SD card and then
start recording
Verify if there are enough power, if running low power, please charge the camera
and then recording.
No sound or low volume.
Verify if the audio setting is correct.
Verify if the audio setting in the PC is correct, and try to play other videos to see if
there is any sound.
The camera cannot charge
Verify if the power adapter work well by LED light indicator. Please do not charge
with other adapter for this camera, if still cannot charge normally, please try to
charge by USB cable connection to the PC.
Please check if the USB connection is correct. Please do not use other USB cable
for this camera.
Specifications
Image Sensor
5 mega pixels CMOS sensor
Pixels for taking pictures
3MP
Resolution
1920x1080P@30fps ; 1280x720P@60fps
Power supply
Embedded 660mAh Li-polymer Battery
Power duration
1.5 hours
Power Consumption
<1.5W
Memory
Support Max high speed 32 GB TF Card
Photographing Angle
135 degree
Video Format
H.264
Working temp
-10℃ –50℃
Storage temp
-20℃ -60℃
Waterproof rate
IP 68
On/off vibration
Yes
Physical weight
230g
Product size
227*95*130mm
USB
2.0(HS)
Player
KM Player; Quick Time7.6;Storm2012;RealPlayer11
Operating System
Win8/Win7/Win XP/Vista/Mac Os10.7 or above
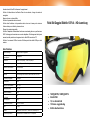
Rollei Ski Goggles/Skibrille 135 Full - HD
•
•
•
•
•
720P bei 60FPS, 1080P bei 30FPS
Wasserdicht (IP68)
1,5 Std. Aufnahmedauer
135-Grad-Weitwinkel
Videoformat H.264
Vielen Dank, dass Sie sich für den Kauf dieser Skibrille mit Kamera entschieden haben. Bitte
lesen Sie sich diese Anleitung vor der Verwendung sorgfältig durch.
Technische Daten
•
•
•
•
•
Sensorauflösung 5 Megapixel CMOS.
Kompatibel mit microSD/SDHC-Karten (Klasse 4 oder höher) mit bis zu 32 GB
Kapazität (nicht im Lieferumfang enthalten).
Filmspeicherung:
1080P=1920x1080p (16:9), 30 fps, ~ 12 Mbit/s Datenrate, 12 Minuten
Videoaufnahme pro 1 GB
720P=1280x720p (16:9), 60 fps, ~ 12 Mbit/s Datenrate, 12 Minuten
Videoaufnahme pro 1 GB
Die Aufzeichnungsdauer kann je nach Aufnahmeobjekt und
Umgebungsbedingungen variieren.
Fokussierbereich: 0,8 m bis unendlich.
Akku (eingebaut).
Größe: 227*95*130 mm
Gewicht: 230 g
Systemanforderungen (Computer)
Minimale Systemanforderungen
Windows-Umgebung: 3,0-GHz-Intel Pentium D (Dual-Core) oder schneller.
•
Mac-Umgebung: 2,0-GHz-Dual-PowerMac G5 oder schneller; 2,0-GHz-Intel
•
Core Duo oder schneller.
Windows XP (Service Pack 2 oder höher), Windows Vista, Windows 7,
•
Windows 8 oder Apple MacOS X 10.6 oder höher.
2 GB RAM.
•
1 GB freier Speicherplatz auf der Festplatte.
•
Grafikkarte mit 1 GB Speicher oder mehr.
•
Quicktime 7.
•
Videoauflösung 1024x768 (32 Bit).
•
Windows-kompatible 16-Bit-Soundkarte.
•
(Manchmal kann die Bildrate automatisch reduziert werden, um die
Speichernutzung zu maximieren)
Lieferumfang
1. Kamera
2. Bedienungsanleitung
3. USB-Kabel
4. Pinzette aus Kunststoff
Produktdesign
Wichtigste Komponenten der Kamera
Kamera
1. Foto-Taste
2. Ein/Aus-/Aufnahmetaste
3. Steckplatz für microSD-Karte
4. USB-Anschluss
5. Reset
6. LED-Anzeige – Die LED-Anzeige
ist an der Innenseite der Brille
angebracht. Sie können die LEDLeuchte in der rechten oberen Ecke
sehen.
Verwendung der Kamera
1. Die Aufnahme starten
A)Setzen Sie die Kamera-Skibrille auf und blicken Sie in die Richtung, in der
Sie aufnehmen möchten.
B)Drücken Sie kurz die Ein/Aus-Taste, um die Kamera einzuschalten. Wenn
die grüne LED-Anzeige leuchtet und das Gerät kurz vibriert, befindet sich die
Kamera im Standby-Modus.
C)Drücken Sie die Ein/Aus-Taste erneut. Es wird ein Vibrationsalarm ausgelöst
und die blaue LED-Anzeige blinkt jede Sekunde. Dies bedeutet, dass sich die
Kamera im Aufnahmemodus befindet.
D)W enn sich die Kamera im Standby-Modus befindet, drücken Sie die
Aufnahmetaste, um die Aufnahme zu starten.
E)Um die Kamera auszuschalten, drücken Sie etwa drei Sekunden lang die
Ein/Aus-Taste. Die Brille vibriert etwas länger und die LED-Anzeige und die
Kamera schaltet sich aus.
2. Ein Foto aufnehmen
A)Drücken Sie die Ein/Aus-Taste. Die Kamera schaltet in den Standby-Modus, wenn ein
kurzes Vibrationsgeräusch zu hören ist und das grüne LED-Licht leuchtet.
B)Drücken Sie kurz die Foto-Taste, um ein Bild aufzunehmen. Wenn die blaue
LED-Anzeige einmal aufleuchtet, wurde das Foto erfolgreich aufgenommen.
3. PC-Kamera
Wenn Sie die Kamera mit dem PC verbunden haben, drücken Sie lange die
Foto-Taste, bis „Wechseldatenträger“ verschwindet. Die Kamera befindet sich
nun im PC-KAMERA-Modus.
4. RESET
Wenn die Kamera nicht richtig funktioniert, drücken Sie bitte 1 Sekunde lang die
Reset-Taste, um das System in den Aus-Status zurückzuversetzen. Drücken Sie
für den normalen Betrieb wieder die Ein/Aus-Taste.
Einstellungsmenü
1. EV
Ein höherer Belichtungswert (EV) kann die Helligkeit der Videoqualität steigern.
2. Lichtfrequenz
Um Flimmern bei Innenaufnahmen zu vermeiden, muss die richtige Frequenz
eingestellt werden.
3. Zeitstempel
Wenn Sie den Zeitstempel einstellen, wird die genaue Aufnahmezeit im Video
oder Foto angezeigt.
4. Auflösung
Sie können Sie die Auflösung zwischen 1080p und 720p umschalten.
Setting.txt
1.Schließen Sie die Kamera mit dem USB-Kabel an den PC an.
2.Öffnen Sie den Wechseldatenträger und hier die Datei „setting.txt“.
3.Wählen Sie Update mit „Y“, um die Kamera mit den neuen Daten zu
aktualisieren. Die Standardeinstellung ist „N“. Starten Sie die Kamera neu, um
die Einstellung zu aktivieren.
Setting.txt
Status
Exponeringsvärde
(EV)
Ljusfrekvens
0
1
Standardinställning
0-12
0-12
6
60 HZ
50 HZ
0
RTC-visning
Tidsstämpel av
Tidsstämpel på
1
Upplösning
1080p
720p
0
HINWEIS: Benutzer können über diese Einstellung 50 Hz oder 60 Hz auswählen,
um ein Flimmern des Videos bei Aufnahmen im Innenbereich zu vermeiden. Sie
müssen diese Einstellung an die Frequenz der Lichtquelle anpassen.
LED-Status
Status
Grünes Licht
Blaues Licht
Rotes Licht
Vibration
Eingeschaltet
leuchtet dauerhaft
aus
aus
vibriert 1 Sek.
Ausgeschaltet
aus
aus
vibriert 2 Sek.
Aufnahme
leuchtet dauerhaft
aus
vibriert 0,5 Sek.
Keine Karte
eingesetzt oder
voller Speicher
blinkt 5 Mal schnell
und geht aus
aus
blinkt einmal
pro Sekunde
blinkt 5 Mal
schnell und
geht aus
aus
vibriert 2 Sek.,
dann aus
Akku schwach
Wird
aufgeladen
Vollständig
aufgeladen
schnelles Aufblinken
für 5-10 Sek., dann
aus
aus
aus
vibriert 3 Mal,
dann aus
aus
aus
ein
k. A.
aus
aus
aus
k. A.
Zeit einstellen
1. Erstellen Sie ein txt-Dokument namens „settime.txt“ mit Microsoft Word,
Wordpad oder einer anderen Textverarbeitungssoftware.
2. Öffnen Sie das neue Textdokument und geben Sie die genaue lokale Zeit nach
dem folgenden Muster ein. Zum Beispiel: Die Zeit in London ist: 06:09:01, 8.
Juli 2013. Die Syntax der Eingabe muss wie folgt aussehen: 2013 07 08, 06 09
01 (Leerzeichen zwischen jeder Nummer erforderlich). Wenn Sie fertig sind,
speichern und schließen Sie die Datei.
3. Verbinden Sie die Skibrille mit Ihrem PC und öffnen Sie den Wechseldatenträger.
Kopieren Sie die Datei „settime.txt“ in das Stammverzeichnis der microSD-Karte.
4. Trennen Sie die Kamera von Ihrem PC.
5. Die Kamera wird automatisch das neue Datum und die neue Zeit verwenden,
wenn Sie die Skibrille das nächste Mal einschalten.
6. Um Ihre Videos und Fotos mit einem Zeitstempel zu versehen, müssen Sie die
Zeitstempel-Funktion wie auf Seite 6 im Kapitel „Einstellungsmenü“ beschrieben
aktivieren.
Laden mit USB-Kabel
Schalten Sie die Kamera aus und schließen Sie die Kamera mit dem Akku mit dem
mitgelieferten USB-Kabel an einen Computer an.
Die blaue LED-Anzeige leuchtet auf, um zu zeigen, dass der Akku geladen wird.
Die blaue LED-Anzeige erlischt, wenn der Akku vollständig aufgeladen ist.
Bei 1080P/30fps oder 720p/60fps hat der Akku eine Laufzeit von fast 90-100 Minuten, ein
vollständiger Ladevorgang dauert 2-3 Stunden.
HINWEIS:
Achten Sie darauf, dass die Speicherkarte korrekt eingelegt ist.
Berühren Sie auf keinen Fall die Kontaktstellen auf der Rückseite der microSD-Karte.
Die Speicherkarte kann beschädigt werden, wenn sie nicht vollständig eingesetzt ist.
Die Speicherkarte und die Daten können beschädigt werden, wenn die microSDKarte eingesetzt oder entfernt wird, während die Kamera eingeschaltet ist.
Berühren Sie nicht den Kabelanschluss, da dies die Leistung der Kamera und ihre
Funktionen beeinträchtigen könnte.
Die Kamera unterstützt microSD/SDHC-Karten (Klasse 4 oder höher) mit bis zu 32
GB Kapazität.
Der Einsatz von microSD-Karten einer niedrigeren Klasse kann zu Leistungsabfall
während der Aufnahme führen.
An einen Computer anschließen
Sie können Ihre Videoaufnahmen und Fotos auf einen Computer hochladen, wenn
sowohl der Computer als auch die Kamera eingeschaltet sind.
1. Schalten Sie die Kamera ein.
2. Schließen Sie die Kamera mit dem USB-Kabel an einen Computer an.
3. Wenn die Verbindung erfolgreich war, wird die Kamera auf dem Computer als
Wechseldatenträger angezeigt.
4. Verwenden Sie die Computersoftware, um das Video- und Fotomaterial zu bearbeiten.
5. Bevor Sie die Kamera vom Computer trennen, klicken Sie bitte zuerst auf den
Wechseldatenträger (Auswerfen oder Wechseldatenträger sicher entfernen) und
entfernen Sie dann das USB-Kabel.
Wasserdichtigkeit
Diese Kamera ist wasserdicht gemäß IP68. Wir übernehmen allerdings keine
Haftung für eine Fehlfunktion der Kamera, wenn aufgrund unsachgemäßer
Verwendung durch den Benutzer Feuchtigkeit in die Kamera eingedrungen ist.
Feuchtigkeit kann in die Kamera gelangen, wenn der USB-Anschluss nicht fest
verschlossen ist.
Wenn die Kamera nass wird, wischen Sie die Feuchtigkeit so schnell wie möglich
mit einem trockenen Tuch ab.
Das weitere Kamerazubehör ist unter Umständen nicht wasserdicht.
(Verwenden Sie die Kamera nicht bei extremen Temperaturen, da dies
Fehlfunktionen verursachen kann).
1. Hinweise für den Betrieb der Kamera
Bitte lesen Sie die unten stehenden Anweisungen vor der Verwendung dieser
Kamera sorgfältig durch.
die Karte in den Kartenschlitz. Die Karte wird dann freigegeben. Verwenden Sie die
Kunststoffpinzette, um die microSD-Karte vollständig herauszunehmen.
Entfernen Sie die microSD-Karte, bevor Sie die Kamera für längere Zeit lagern.
Bewahren Sie diese an einem gut belüfteten Ort auf.
Haftungsausschluss
① . Bitte nicht öffnen.
② . Bitte öffnen Sie den USB-Anschluss in Pfeilrichtung.
Legen Sie die Kamera nicht auf eine nasse oder staubige Stelle, da ansonsten
Dateischäden entstehen oder Sie einen elektrischen Schlag bekommen könnten.
Setzen Sie die Kamera nicht extrem hohen Temperaturen aus, wie zum Beispiel
direkter Sonneneinstrahlung über längere Zeiträume. Dadurch können das
Kameragehäuse und die internen Komponenten beschädigt werden.
Bitte reinigen Sie das Objektiv mit einem weichen Tuch, um Fingerabdrücke oder
Staub zu entfernen.
Wenn der Akku unsachgemäß behandelt wird, kann er platzen, ein Feuer auslösen
oder sogar chemische Verbrennungen verursachen.
Bitte beachten Sie die folgenden Sicherheitshinweise:
Nicht zerlegen.
Das Gerät darf nicht gequetscht und der Akku keinen Stößen oder Gewalteinwirkungen wie
Hammerschlägen, Herunterfallen oder Tritten ausgesetzt werden.
Bevor Sie die microSD-Karte entfernen, müssen Sie zuerst die Kamera
ausschalten, da es andernfalls zu einer Beschädigung der Dateien oder der
microSD-Karte kommen kann. Um die microSD-Karte zu entfernen, drücken Sie
Die Garantie deckt nur Herstellungsfehler ab. Sollte es im Zusammenhang mit HochrisikoSportarten oder Aktivitäten, die von uns nicht unterstützt oder empfohlen werden, zu einer
Fehlfunktion der Kamera kommen, wird dies nicht von der Garantie abgedeckt.
XV) Fehlerbehebung
Die Kamera kann nicht eingeschaltet werden.
Prüfen Sie, ob der Akku ausreichend geladen ist.
Nach Anschließen an den PC wird der Wechseldatenträger nicht im Verzeichnis
COMPUTER (bzw. ARBEITSPLATZ) angezeigt.
Prüfen Sie, ob die Kamera korrekt per USB angeschlossen ist.
Überprüfen Sie den Zustand des USB-Kabels.
Versuchen Sie es mit einem anderen USB-Kabel. Wenn der Wechseldatenträger noch
immer nicht angezeigt wird, liegt das Problem möglicherweise an der Kamera. Bitte wenden
Sie sich an Ihren Händler oder den Hersteller.
Es kann kein Video aufgenommen werden.
Prüfen Sie, ob auf der microSD-Karte genug Speicherplatz vorhanden ist. Wenn nicht,
formatieren Sie bitte die microSD-Karte und starten Sie die Aufnahme neu.
Überprüfen Sie, ob der Akku ausreichend geladen ist. Bei niedrigem Ladestatus laden Sie
die Kamera bitte erst auf und starten Sie dann die Aufnahme neu.
Kein Ton oder geringe Lautstärke.
Überprüfen Sie, ob die Audio-Einstellung korrekt ist.
Überprüfen Sie, ob die Audio-Einstellung des PCs korrekt ist, und versuchen Sie, andere
Videos abzuspielen, um zu sehen, ob bei diesen der Ton funktioniert.
Die Kamera kann nicht aufgeladen werden.
Überprüfen Sie anhand der LED-Anzeige, ob das Netzteil funktioniert. Bitte verwenden
Sie zum Aufladen dieser Kamera keinen anderen Adapter. Wenn es immer noch nicht
funktioniert, versuchen Sie bitte, die Kamera per USB-Verbindung über den PC zu laden.
Bitte prüfen Sie, ob die Kamera korrekt per USB angeschlossen ist. Bitte verwenden Sie
keine anderen USB-Kabel für diese Kamera.
Technische Daten
Bildsensor
5 Megapixel CMOS-Sensor
Pixel für Fotoaufnahmen
3MP
Auflösung
1920x1080p bei 30 fps; 60 fps bei 1280x720P
Stromversorgung
eingebauter 660mAh Li-Polymer-Akku
Akkulaufzeit
1,5 Stunden
Stromverbrauch
<1,5 W
Speicher
Kompatibel mit High-Speed TF-Karte (max. 32 GB)
Aufnahmewinkel
135 Grad
Videoformat
H.264
Betriebstemperatur
-10 °C – 50 °C
Lagertemperatur
-20 °C – 60 °C
Wasserdichtigkeit
IP 68
Ein/Aus-Vibration
Ja
Gewicht
230 g
Produktabmessungen
227*95*130 mm
USB
2.0(HS)
KM Player; Quick Time 7.6; Storm2012; RealPlayer
11
Win 8/Win 7/Win XP/Vista/Mac OS 10.7 oder höher
Player
Betriebssystem
Μάσκα σκι Rollei 135 Full HD
•
•
•
•
•
720P στα 60FPS, 1080P στα 30FPS
Αδιάβροχη IP 68
Χρόνος εγγραφής 1,5 ώρα
Ευρεία γωνία 135 μοιρών
Μορφή βίντεο H.264
Σας ευχαριστούμε που επιλέξατε αυτήν τη φορητή βιντεοκάμερα-μάσκα σκι. Παρακαλούμε
διαβάστε προσεκτικά τις οδηγίες πριν από τη χρήση
Τεχνικά χαρακτηριστικά
Ανάλυση αισθητήρα CMOS 5 Megapixel.
•
•
•
•
Υποστηρίζει κάρτα Micro SD/SDHC κατηγορίας 4 ή ανώτερης και συμβατή για
έως 32 GB (δεν παρέχεται).
Αποθήκευση βίντεο:
1080P=1920x1080p (16:9), 30fps, ρυθμός μετάδοσης δεδομένων ~ 12 Mbit/s,
εγγραφή βίντεο 12 λεπτών ανά 1 GB
720P=1280x720p (16:9), 60fps, ρυθμός μετάδοσης δεδομένων ~ 12 Mbit/s,
εγγραφή βίντεο 12 λεπτών ανά 1 GB
Η διάρκεια εγγραφής ποικίλει ανάλογα με τα διάφορα αντικείμενα εγγραφής και
το περιβάλλον.
Εύρος εστίασης: 0,8 m ~ άπειρο.
Επαναφορτιζόμενη μπαταρία (ενσωματωμένη)
Μέγεθος: 227*95*130 mm
Βάρος: 230 g
Απαιτήσεις συστήματος υπολογιστή
Ελάχιστες απαιτήσεις συστήματος
Περιβάλλον Windows: 3,0 GHz Intel Pentium D (Dual Core) ή ταχύτερο.
•
Περιβάλλον Mac: Dual 2,0 GHz PowerMac G5 ή ταχύτερο, 2,0 GHz Intel Core
•
Duo ή ταχύτερο.
Windows XP (Service Pack 2 ή μεταγενέστερο), Windows Vista, Windows 7,
•
Windows 8 ή Apple Mac X 10.6 ή ανώτερο.
2 GB RAM.
•
Ελεύθερος χώρος σκληρού δίσκου 1 G.
•
Κάρτα βίντεο 1 GB ή μεγαλύτερη.
•
QuickTime 7.
•
Υποστήριξη ανάλυσης βίντεο 1024x768 (32 bit).
•
Συσκευή ήχου συμβατή με Windows 16 bit.
•
(Σε ορισμένες περιπτώσεις, ο ρυθμός των καρέ μπορεί να μειώνεται αυτόματα
για να μεγιστοποιείται η χρήση της μνήμης)
Περιεχόμενο συσκευασίας
1. Βιντεοκάμερα
2. Οδηγίες χρήσης
3. Καλώδιο USB
4. Πλαστική λαβίδα
Σχεδιασμός προϊόντος
Περιγραφή βιντεοκάμερας:
Βιντεοκάμερα
1. Πλήκτρο φωτογράφησης
2. Πλήκτρο έναρξης/διακοπής
εγγραφής
3. Υποδοχή κάρτας Micro SD
4. Θύρα USB
5. Επαναφορά
6. LED ένδειξης – Το LED ένδειξης
είναι ενσωματωμένο στο εσωτερικό
της μάσκας. Μπορείτε να δείτε το
LED στην άνω δεξιά γωνία.
Χρήση της βιντεοκάμερας
1. Έναρξη βιντεοσκόπησης
A)Φ ορέστε τη βιντεοκάμερα-μάσκα σκι και εστιάστε το αντικείμενο της
βιντεοσκόπησης.
B)Πατήστε σύντομα το πλήκτρο λειτουργίας για να ενεργοποιήσετε τη
βιντεοκάμερα. Το άναμμα των πράσινων LED ένδειξης και μια μικρή δόνηση
σηματοδοτούν ότι η βιντεοκάμερα είναι σε θέση ετοιμότητας.
C)Πατήστε ξανά το πλήκτρο λειτουργίας, Η προειδοποιητική δόνηση και το
αναβοσβήσιμο του μπλε LED ανά δευτερόλεπτο δηλώνουν ότι η βιντεοκάμερα
είναι σε λειτουργία εγγραφής.
D)Αν η βιντεοκάμερα είναι σε θέση ετοιμότητας, πατήστε το πλήκτρο εγγραφής
για να ξεκινήσετε τη βιντεοσκόπηση.
E)Για να απενεργοποιήσετε τη βιντεοκάμερα, πατήστε το πλήκτρο λειτουργίας
για περίπου τρία δευτερόλεπτα. Η μάσκα δονείται παρατεταμένα και κατόπιν
απενεργοποιείται μαζί με το LED.
2. Φωτογράφηση
A)Πατήστε το πλήκτρο λειτουργίας. Η βιντεοκάμερα ρυθμίζεται σε θέση
ετοιμότητας μετά από μια μικρή δόνηση και το άναμμα των πράσινων LED.
B)Πατήστε σύντομα το πλήκτρο λήψης για να φωτογραφήσετε. Το μπλε LED
αναβοσβήνει μια φορά δηλώνοντας την επιτυχή λήψη.
3. Κάμερα Η/Υ
Για σύνδεση της βιντεοκάμερας σε υπολογιστή, πατήστε παρατεταμένα το
πλήκτρο λήψης. Ο αφαιρούμενος δίσκος σβήνει από την οθόνη και η συσκευή
λειτουργεί ως κάμερα του υπολογιστή (λειτουργία PC CAM).
4. Επαναφορά
Αν η βιντεοκάμερα δεν λειτουργεί σωστά, πατήστε το πλήκτρο επαναφοράς για
1 δευτερόλεπτο για να απενεργοποιήσετε το σύστημα. Πατήστε ξανά το πλήκτρο
λειτουργίας για κανονική λειτουργία της συσκευής.
Μενού ρυθμίσεων
1. Τιμή έκθεσης
Με μεγαλύτερη τιμή έκθεσης αυξάνεται η φωτεινότητα στην ποιότητα του βίντεο.
2. Συχνότητα φωτός
Για να αποφύγετε το τρεμόσβημα όταν χρησιμοποιείτε τη συσκευή σε
εσωτερικούς χώρους, πρέπει να ρυθμίσετε τη σωστή συχνότητα.
3. Στάμπα ώρας
Με τη ρύθμιση της στάμπας ώρας εμφανίζεται ο ακριβής χρόνος λήψης και
εγγραφής στη φωτογραφία και στο βίντεο.
4. Ανάλυση
Μπορείτε να ρυθμίσετε την ανάλυση σε 1080p και 720p.
Αρχείο Setting.txt
1. Συνδέστε τη βιντεοκάμερα στον υπολογιστή με το καλώδιο USB.
2. Ανοίξτε τον αφαιρούμενο δίσκο και εντοπίστε το αρχείο setting.txt.
3. Με την επιλογή «Υ» (Ναι) μπορείτε να ενημερώσετε τα νέα δεδομένα, η
προεπιλεγμένη ρύθμιση είναι «Ν» (Όχι). Ενεργοποιήστε ξανά τη βιντεοκάμερα
για να ενεργοποιήσετε τη ρύθμιση.
Setting.txt
Κατάσταση
0
1
Τιμή έκθεσης
0-12
0-12
Προεπιλεγμένη
ρύθμιση
6
Συχνότητα φωτός
Ένδειξη πραγματικής
ώρας λήψης/
εγγραφής
Ανάλυση
60 HZ
50 HZ
0
Στάμπα ώρας
ανενεργή
Στάμπα ώρας
ενεργή
1
1080P
720P
0
ΥΠΟΔΕΙΞΗ: Με αυτή τη ρύθμιση μπορείτε να επιλέξετε 50 HZ ή 60 HZ, για να
αποφύγετε το τρεμόσβημα όταν χρησιμοποιείτε τη συσκευή σε εσωτερικούς χώρους.
Θα πρέπει να προσαρμόσετε αυτή τη ρύθμιση στη συχνότητα της πηγής φωτός.
Κατάσταση LED
Κατάσταση
Ενεργοποιημένη
συσκευή
Απενεργοποιημένη
συσκευή
Κόκκινη
Πράσινη λυχνία
Μπλε λυχνία
Ανάβει
Σβηστή
Σβηστή
Δόνηση 1 δευτερόλ.
Σβηστή
Σβηστή
Σβηστή
Δόνηση 2 δευτερόλ.
Σβηστή
Δόνηση 0,5 δευτερόλ.
Αναβοσβήνει μια φορά
λυχνία
Βιντεοσκόπηση
Ανάβει
Απουσία κάρτας ή
Αναβοσβήνει γρήγορα
πλήρης μνήμη
5 φορές και σβήνει
Αναβοσβήνει γρήγορα
5 φορές και σβήνει
5-10 δευτερόλ. και μετά
Σβηστή
Σβηστή
Χαμηλή φόρτιση
μπαταρίας
ανά δευτερόλ.
Αναβοσβήνει γρήγορα
Σβηστή
σβήνει
Δόνηση
Δόνηση 2 δευτερόλ.,
μετά απενεργοποίηση
Δόνηση 3 φορές, μετά
απενεργοποίηση
Φόρτιση
Σβηστή
Σβηστή
Ανάβει
Χωρίς στοιχεία
Πλήρης φόρτιση
Σβηστή
Σβηστή
Σβηστή
Χωρίς στοιχεία
Ρύθμιση ώρας
Σύνδεση σε υπολογιστή
1. Δημιουργήστε ένα αρχείο .txt με την ονομασία settime.txt με το Microsoft Word,
το Word Pad ή κάποιο άλλο πρόγραμμα επεξεργασίας κειμένου.
2. Ανοίξτε το νέο αρχείο κειμένου και καταχωρήστε την πραγματική τοπική ώρα
με την ακόλουθη μορφή. Για παράδειγμα: Η τρέχουσα ώρα στο Λονδίνο είναι:
06:09:01, 8 Ιουλίου 2013. Η σύνταξη της καταχώρησης πρέπει να είναι: 2013
07 08, 06 09 01(μεταξύ των επιμέρους αριθμών απαιτείται διάστημα). Όταν
ολοκληρώσετε την καταχώρηση, αποθηκεύστε το αρχείο και κλείστε το.
3. Συνδέστε τη μάσκα σκι στον υπολογιστή και ανοίξτε τον αφαιρούμενο δίσκο.
Αντιγράψτε το αρχείο settime.txt στον κύριο κατάλογο αρχείων της κάρτας Micro SD.
4. Αποσυνδέστε τη βιντεοκάμερα από τον υπολογιστή.
5. Με την επόμενη ενεργοποίηση της μάσκας σκι, η βιντεοκάμερα χρησιμοποιεί
αυτόματα τη νέα ημερομηνία και ώρα.
6. Για να εμφανίζεται η στάμπα ώρας στα βίντεο και τις φωτογραφίες σας, θα
πρέπει να ενεργοποιήσετε τη λειτουργία στάμπας ώρας όπως περιγράφεται στη
σελίδα 6, στην ενότητα «Μενού ρυθμίσεων».
Με τη σύνδεση της βιντεοκάμερας σε υπολογιστή μπορείτε να μεταφέρετε τα
εγγεγραμμένα βίντεο και τις φωτογραφίες σας στον υπολογιστή.
1. Ενεργοποιήστε τη βιντεοκάμερα.
2. Συνδέστε τη βιντεοκάμερα στον υπολογιστή με ένα καλώδιο USB.
3. Αν η σύνδεση είναι επιτυχής, εμφανίζεται ο αφαιρούμενος δίσκος.
4. Χρησιμοποιήστε το λογισμικό του υπολογιστή για την επεξεργασία των βίντεο και
των φωτογραφιών σας.
5. Στο τέλος επιλέξτε έξοδο με κλικ στον αφαιρούμενο δίσκο και αποσυνδέστε το
καλώδιο USB.
Φόρτιση με το καλώδιο USB
Απενεργοποιήστε τη βιντεοκάμερα και συνδέστε τη, μαζί με την επαναφορτιζόμενη
μπαταρία, σε έναν υπολογιστή μέσω του παρεχόμενου καλωδίου USB
Το μπλε LED ανάβει σηματοδοτώντας τη φόρτιση της μπαταρίας.
Το μπλε LED σβήνει μετά την πλήρη φόρτιση της μπαταρίας.
Η επαναφορτιζόμενη μπαταρία μπορεί να χρησιμοποιηθεί για περίπου 90-100
λεπτά στη λειτουργία 1080P στα 30FPS ή 720p στα 60fps. Μια πλήρης φόρτιση
διαρκεί 2-3 ώρες.
ΥΠΟΔΕΙΞΕΙΣ
Βεβαιωθείτε ότι η κάρτα έχει τοποθετηθεί σωστά
Μην αγγίζετε τις επαφές στην πίσω πλευρά της κάρτας Micro SD
Η κάρτα μπορεί να υποστεί βλάβη αν δεν εισαχθεί πλήρως
Η κάρτα και τα δεδομένα μπορεί να υποστούν βλάβη σε περίπτωση τοποθέτησης ή
αφαίρεσης της κάρτας Micro SD ενώ η βιντεοκάμερα είναι ενεργοποιημένη
Μην αγγίζετε τον σύνδεσμο του καλωδίου, γιατί μπορεί να επηρεαστούν οι
λειτουργίες και η απόδοση της βιντεοκάμερας
Η βιντεοκάμερα υποστηρίζει κάρτες Micro SD/SDHC κατηγορίας 4 ή ανώτερης και
συμβατές για έως 32 GB
Οι κάρτες Micro SD μικρότερης κατηγορίας μπορεί να μειώσουν την απόδοση κατά
τη βιντεοσκόπηση
Αδιάβροχη λειτουργία
Αυτή η βιντεοκάμερα έχει υποβληθεί σε έλεγχο αδιάβροχης συμπεριφοράς με
βαθμό προστασίας IP68. Ο κατασκευαστής δεν φέρει ευθύνη για βλάβη της
βιντεοκάμερας σε περίπτωση εισχώρησης υγρών στο εσωτερικό της λόγω
ακατάλληλης χρήσης.
Αν η θύρα USB δεν έχει κλείσει σωστά, μπορεί να εισχωρήσει υγρό στο εσωτερικό
της βιντεοκάμερας.
Αν η βιντεοκάμερα βραχεί, σκουπίστε την το συντομότερο δυνατό με ένα στεγνό
πανί.
Τα αξεσουάρ της βιντεοκάμερας μπορεί να μην είναι αδιάβροχα.
(Μην χρησιμοποιείτε τη βιντεοκάμερα σε υπερβολικές θερμοκρασίες, γιατί μπορεί
να προκληθούν δυσλειτουργίες στη συσκευή).
1. Προφυλάξεις για τη βιντεοκάμερα
Προτού χρησιμοποιήσετε τη βιντεοκάμερα, παρακαλούμε διαβάστε τις ακόλουθες
υποδείξεις
υποδοχή κάρτας. Η κάρτα απελευθερώνεται. Χρησιμοποιήστε την πλαστική λαβίδα
για να αφαιρέσετε πλήρως την κάρτα Micro SD.
Αν πρόκειται να αποθηκεύσετε τη βιντεοκάμερα για μεγάλο χρονικό διάστημα,
αφαιρέστε την κάρτα Micro SD. Φυλάξτε την σε ένα καλά αεριζόμενο σημείο.
Αποποίηση ευθύνης
① . Παρακαλούμε μην το ανοίγετε
② . Παρακαλούμε ανοίξτε τη θύρα USB με τη φορά του βέλους
Μην τοποθετείτε τη βιντεοκάμερα σε μέρος με υγρασία και σκόνη, γιατί μπορεί να
προκληθεί καταστροφή των αρχείων ή ηλεκτροπληξία.
Μην αφήνετε τη βιντεοκάμερα σε μέρη που εκτίθενται σε πολύ υψηλές θερμοκρασίες,
όπως απευθείας ηλιακή ακτινοβολία, για μεγάλο χρονικό διάστημα. Το περίβλημα και τα
εσωτερικά εξαρτήματα της βιντεοκάμερας μπορεί να υποστούν βλάβη.
Για να αφαιρέσετε δακτυλικά αποτυπώματα ή σκόνη από τον φακό, καθαρίστε τον
με ένα μαλακό πανί.
Σε περίπτωση ακατάλληλου χειρισμού της επαναφορτιζόμενης μπαταρίας, η
μπαταρία μπορεί να εκραγεί, να προκαλέσει φωτιά ή ακόμα και χημικά εγκαύματα.
Παρακαλούμε τηρείτε τις ακόλουθες προειδοποιήσεις:
Μην αποσυναρμολογείτε τη συσκευή.
Φροντίστε ώστε η επαναφορτιζόμενη μπαταρία να μην υφίσταται χτυπήματα,
κρούσεις ή βίαιο χειρισμό, όπως χτύπημα, πτώση ή πάτημα.
Παρακαλούμε απενεργοποιήστε πρώτα τη βιντεοκάμερα προτού αφαιρέσετε την
κάρτα Micro SD, διαφορετικά μπορεί να προκληθεί βλάβη στα αρχεία ή στην κάρτα
Micro SD. Για να εξαγάγετε την κάρτα Micro SD, σπρώξτε ξανά την κάρτα προς την
Η εγγύηση καλύπτει μόνο κατασκευαστικά ελαττώματα. Η εγγύηση δεν καλύπτει
βλάβες της βιντεοκάμερας που μπορεί να προκληθούν λόγω χρήσης της σε
αθλήματα ή δραστηριότητες υψηλού κινδύνου που δεν προβλέπονται ή συνιστώνται
από τον κατασκευαστή.
XV) Εντοπισμός βλαβών
Η βιντεοκάμερα δεν ενεργοποιείται
Παρακαλούμε ελέγξτε αν η μπαταρία είναι επαρκώς φορτισμένη.
Μετά τη σύνδεση σε υπολογιστή δεν είναι δυνατός ο εντοπισμός του αφαιρούμενου
δίσκου στον κατάλογο «Ο ΥΠΟΛΟΓΙΣΤΗΣ ΜΟΥ».
Ελέγξτε αν έχει γίνει σωστά η σύνδεση USB.
Ελέγξτε την κατάσταση του καλωδίου USB.
Δοκιμάστε με ένα άλλο καλώδιο USB. Αν και πάλι δεν είναι δυνατός ο εντοπισμός
του αφαιρούμενου δίσκου, ενδεχομένως υπάρχει πρόβλημα στη βιντεοκάμερα.
Παρακαλούμε επικοινωνήστε με τον αντιπρόσωπο ή τον κατασκευαστή.
Η βιντεοσκόπηση δεν είναι δυνατή
Ελέγξτε αν υπάρχει επαρκής χώρος στην κάρτα Micro SD. Αν δεν υπάρχει,
φορμάρετε την κάρτα Micro SD και ξεκινήστε και πάλι τη βιντεοσκόπηση.
Βεβαιωθείτε ότι υπάρχει αρκετή ισχύς. Αν η συσκευή λειτουργεί με χαμηλή ισχύ,
φορτίστε τη βιντεοκάμερα και κατόπιν ενεργοποιήστε τη βιντεοσκόπηση.
Απουσία ή χαμηλή ένταση ήχου.
Βεβαιωθείτε ότι η ρύθμιση ήχου είναι σωστή.
Βεβαιωθείτε ότι η ρύθμιση ήχου στον υπολογιστή είναι σωστή και επιλέξτε άλλα
βίντεο για αναπαραγωγή για να ελέγξετε τον ήχο τους.
Η φόρτιση της βιντεοκάμερας δεν είναι δυνατή
Βεβαιωθείτε ότι το τροφοδοτικό λειτουργεί σωστά ελέγχοντας το LED ένδειξης.
Παρακαλούμε μην χρησιμοποιείτε άλλα τροφοδοτικά για τη φόρτιση της
βιντεοκάμερας. Αν η κανονική φόρτιση δεν είναι δυνατή, προσπαθήστε να
φορτίσετε τη συσκευή συνδέοντάς τη σε υπολογιστή με καλώδιο USB.
Ελέγξτε αν η σύνδεση USB έχει γίνει σωστά. Παρακαλούμε μην χρησιμοποιείτε
άλλο καλώδιο USB για αυτή τη βιντεοκάμερα.
Τεχνικά χαρακτηριστικά
Αισθητήρας εικόνας
Αισθητήρας CMOS 5 Megapixel
Pixel στη φωτογράφηση
3MP
Ανάλυση
1920x1080P στα 30fps, 1280x720P στα 60fps
Ενσωματωμένη μπαταρία πολυμερών ιόντων λιθίου
660 mAh
1,5 ώρα
Τροφοδοσία τάσης
Διάρκεια τροφοδοσίας
Κατανάλωση ρεύματος
Μνήμη
Γωνία φωτογράφησης
Μορφή βίντεο
Θερμοκρασία
λειτουργίας
Θερμοκρασία
αποθήκευσης
Βαθμός αδιάβροχης
προστασίας
Ενεργοποίηση/
απενεργοποίηση
δόνησης
Φυσικό βάρος
< 1,5 W
Υποστηρίζει κάρτα TF μέγιστης υψηλής ταχύτητας
32 GB
135 μοίρες
H.264
-10℃ –50℃
-20℃ –60℃
IP 68
Ναι
230 g
Διαστάσεις προϊόντος
227*95*130 mm
USB
Συσκευή
αναπαραγωγής
2.0(HS)
KM Player, Quick Time 7.6, Storm 2012, RealPlayer
11
Win 8/Win 7/Win XP/Vista/Mac Os10.7 ή
μεταγενέστερο
Λειτουργικό σύστημα
Rollei Ski Goggles/Gafas de esquiar 135 Full - HD
•
•
•
•
•
720P@60FPS, 10b80P@30FPS
Impermeables IP68
Tiempo de grabación de 1,5 h
Gran angular de 135 grados
Formato de vídeo H.264
Gracias por haber adquirido estas gafas para esquiar con cámara portátil. Lea el
manual de instrucciones antes de utilizarlas.
Especificaciones técnicas
Resolución del sensor CMOS de 5 megapíxeles
Compatibles con tarjeta microSD/SDHC clase 4 o superior y de hasta 32 GB (no incluida)
•
Almacenamiento de vídeo
•
1080P=1920x1080p (16:9), 30fps, tasa de datos ~ 12 Mbit/s, 12 minutos de
grabación en vídeo por 1GB
720P=1280x720p (16:9), 60fps, tasa de datos ~ 12 Mbit/s, 12 minutos de
grabación en vídeo por 1GB
La duración de la grabación variará dependiendo del objeto de grabación y
•
del entorno. Rango de enfoque: 0,8 m~infinito.
Batería recargable (integrada)
Medidas: 227*95*130 mm
Peso: 230 g
Requisitos del sistema
Requisitos mínimos del sistema
Entorno Windows: 3.0 GHz Intel Pentium D (dual-core) o superior.
•
Entorno Mac: Dual 2.0 GHz PowerMac G5 o superior; 2.0 GHz Intel Core Duo
•
o superior.
Windows XP (Service Pack 2 o posterior), Windows Vista, Windows7,
•
Windows 8 o Apple Mac X 10.6 o superior.
2GB de RAM.
•
1G de espacio libre en el disco duro.
•
Tarjeta de vídeo de 1GB o más.
•
QuickTime 7.
•
Compatibilidad con resolución de vídeo de 1024x768 (32 bits).
•
Dispositivo de sonido compatible con Windows 16 bits.
•
(En algunos casos la velocidad de imagen podría reducirse automáticamente
para maximizar el uso de la memoria.)
Piezas
1. Cámara
2. Manual
3. Cable USB
4. Pinza de plástico
Diseño del producto
Principales piezas de la cámara
Cámara
1. Botón de fotografía
2. Botón de encendido/apagado/
grabación
3. Ranura para tarjeta microSD
4. Puerto USB
5. Reset
6. Indicador LED: El indicador LED
está integrado en las gafas. Puede
ver el LED en la esquina superior
derecha.
Uso de la cámara
Configuración.txt
1. Iniciar la grabación
A)Póngase las gafas con cámara y enfoque lo que desea grabar.
B)Pulse brevemente el botón de encendido/apagado para encender la cámara.
Cuando los indicadores LED de color verde se enciendan y sienta una breve
vibración, la cámara estará en modo de espera.
C)Vuelva a pulsar el botón de encendido/apagado. Sentirá una vibración y el LED azul
parpadeará cada segundo, lo cual indica que la cámara está grabando.
D)Si la cámara está en modo de espera, pulse el botón de grabación para
iniciar la grabación.
E)Para apagar la cámara, pulse el botón de encendido/apagado durante unos
tres segundos. Las gafas vibrarán durante más tiempo y el LED y la cámara
se apagarán.
2. Tomar una foto
A) Pulse el botón de encendido/apagado y cuando sienta una breve vibración y
el LED verde se encienda la cámara pasará a modo de espera.
B) Pulse brevemente el botón de fotografía para tomar una foto; cuando el LED
azul se encienda una vez, la cámara habrá tomado la foto con éxito.
3. Cámara de PC
Al conectar la cámara al PC, mantenga pulsado el botón de fotografía hasta que
aparezca la unidad de disco extraíble y la cámara pase al modo PC CAM.
4. RESET
Si la cámara no funciona correctamente, pulse el botón reset durante 1 segundo:
el sistema volverá al estado de apagado. A continuación vuelva a pulsar el botón
de encendido/apagado para que la cámara funcione normalmente.
1.Conecte la cámara al PC usando el cable USB.
2.Para acceder a la configuración .txt debe abrir la unidad de disco extraíble.
3.Si escoge actualizar con “Y”, significa que podrá actualizar nuevos datos. El
ajuste por defecto es “N” y para reactivarlo tiene que reiniciar la cámara.
Menú de configuración
1. EV
Un valor de exposición (EV, por sus siglas en inglés) superior puede aumentar el
brillo de la calidad de vídeo.
2. Frecuencia de flash
Para evitar los parpadeos durante el uso en interiores hay que ajustar la
frecuencia correcta.
3. Sello de hora
Ajuste el sello de hora y aparecerá la hora exacta en la que grabó el vídeo o
tomó la foto.
4. Resolución
La resolución puede ajustarse entre 1080p y 720p.
Configuración.txt
Estado
0
1
EV
Frecuencia de la
luz
Pantalla con reloj
en tiempo real
Resolución
0-12
0-12
Ajuste
predeterminado
6
60 HZ
50 HZ
0
sello de hora
apagado
1080P
sello de hora
encendido
720P
1
0
NOTA: Con esta configuración el usuario puede escoger entre 50 o 60 HZ para
evitar el parpadeo en el vídeo mientras esté grabando en interiores; debe ajustar
esta configuración para que coincida con la frecuencia de la fuente de luz.
Estado de LED
Estado
Encendido
Apagado
Grabación
No hay tarjeta
o memoria
llena
Batería baja
Cargando
Carga
completa
Luz verde
Permanece
encendido
apagado
Permanece
encendido
Parpadea rápido 5
veces y después
se apaga
Parpadea rápido
5-10 veces y
después se apaga
apagado
Luz azul
Luz roja
Vibración
apagado
apagado
Vibra 1 s
apagado
Parpadea una vez
por s
Parpadea rápido 5
veces y después
se apaga
apagado
Vibra 2 s
apagado
Vibra 0,5 s
apagado
apagado
apagado
encendido
Vibra 2 s y
después se
apaga
Vibra 3 veces
y después se
apaga
N/A
apagado
apagado
apagado
N/A
apagado
Configuración de la hora
1. Con Microsoft Word, Word Pad o cualquier otro software de procesamiento de
textos cree un documento .txt y llámelo “settime.txt”.
2. Abra ese nuevo documento de texto e introduzca la hora local con el formato
que aparece a continuación. Por ejemplo: si la hora local en Londres es
06:09:01, 8 de julio de 2013, la sintaxis de la entrada deberá ser como sigue:
2013 07 08, 06 09 01 (entre cada número de se necesita un espacio). Cuando
termine, guarde el archivo y ciérrelo.
3. Conecte las gafas a su PC y abra la unidad de disco extraíble. A continuación
copie el archivo “Settime.txt” al directorio raíz de la tarjeta microSD.
4. Desconecte la cámara del PC.
5. La próxima vez que encienda las gafas, la cámara utilizará automáticamente la
nueva fecha y hora.
6. Para ver el sello de hora en sus vídeos y fotos, tiene que activar la función
de sello de hora tal como se describe en la página 6, capítulo “Menú de
configuración”.
Cargar con cable USB
Apague la cámara y a continuación, con el cable USB incluido en el envío, enchufe
la cámara con la batería recargable a un PC.
El LED azul se iluminará para indicar que la batería se está cargando.
El LED azul se apagará cuando la batería esté cargada por completo.
La batería recargable tiene una autonomía de funcionamiento de unos 90-100 min.
en condiciones de grabación de 1080Pa30FPS o 720Pa60fps; una carga completa
durará unas 2-3 horas.
NOTA
Asegúrese de que ha introducido la tarjeta correctamente.
No toque los terminales de conexión en la parte trasera de la tarjeta microSD.
Si no inserta la tarjeta por completo, esta puede resultar dañada.
Tanto la tarjeta como los datos pueden resultar dañados si se inserta o extrae la
tarjeta microSD mientras la cámara está encendida.
No toque los conectores de los cables porque puede afectar el rendimiento y las
funciones de la cámara.
La cámara es compatible con tarjetas microSD/SDHC de clase 4 o superior y de
hasta 32 GB.
Las tarjetas microSD de clases inferiores pueden menoscabar el rendimiento
durante la grabación.
Conectar al ordenador
Puede cargar sus vídeos y fotografías a un ordenador si ha habilitado el ordenador
y la cámara.
1. Encienda la cámara.
2. Conecte la cámara al ordenador usando el cable USB.
3. Si la conexión se ha realizado con éxito, aparecerá el icono de “Disco extraíble”.
4. Utilice el software del ordenador para procesar los vídeos y las fotos.
5. Al salir, haga clic en el icono de “Disco extraíble” y desconecte el cable USB.
Impermeable
Esta cámara cuenta con una protección IP68, que la hace impermeable. No
obstante, la empresa no se responsabiliza de ningún mal funcionamiento de la
cámara causado por la penetración de líquido en la misma como resultado de un
mal uso por parte del usuario.
Si el Puerto USB no está firmemente cerrado, podría penetrar algún líquido en la cámara.
Si la cámara se moja, seque el líquido tan pronto como sea posible con un paño seco.
Otros accesorios de la cámara puede que no sean impermeables.
(No utilice la cámara a temperaturas extremas porque podría causar un mal
funcionamiento.)
1. Precauciones con la cámara
Antes de utilizar la cámara, lea atentamente las instrucciones que aparecen abajo.
① . No abrir.
② . Abrir el puerto USB tal como lo indica la flecha de dirección.
No coloque la cámara en lugares mojados o polvorientos porque ello podría dañar
los archivos o provocar una descarga eléctrica.
No deje la cámara en lugares en los que esté expuesta a temperaturas
extremadamente elevadas tales como las causadas por la radiación solar directa
durante mucho tiempo. Ello podría afectar a la carcasa de la cámara y a los
componentes internos.
Limpie la lente con un paño suave para eliminar las huellas dactilares o el polvo.
Si se manipula incorrectamente, la batería recargable podría prender fuego, causar
un incendio o incluso provocar quemaduras químicas.
Tenga en cuenta las siguientes precauciones:
No desmonte la batería.
No deje caer la batería ni la exponga a cualquier tipo de golpe o fuerza tales como
un golpe con un martillo, una caída o pisadas.
Antes de extraer la tarjeta microSD, apague la cámara; de lo contrario podría dañar
los archivos o la propia tarjeta microSD. Para extraer la tarjeta microSD, empújela
hacia el interior de la ranura y la tarjeta saldrá sola. Utilice las pinzas de plástico
para extraer la tarjeta microSD del todo.
Extraiga la tarjeta microSD antes de guardar la cámara durante periodos de tiempo
prolongados. Guárdela en un lugar bien ventilado.
tarjeta microSD y después inicie la grabación.
Compruebe si la cámara recibe suficiente corriente. Si la cámara está funcionando
con poca potencia, cargue la cámara y después inicie la grabación.
No hay sonido o el volumen está bajo.
Compruebe si la configuración de audio está correcta.
Compruebe si la configuración de audio en el PC está correcta e intente reproducir
otros vídeos para ver si hay sonido.
La cámara no se carga.
Con el indicador LED, compruebe si el adaptador de corriente funciona
correctamente. No cargue la cámara con otro cargador. Si sigue sin poder cargar
la cámara normalmente, intente cargarla conectando el cable USB al PC.
Compruebe si la conexión USB se ha realizado correctamente. No utilice ningún
otro cable USB para esta cámara.
Especificaciones:
Sensor de imagen
Sensor CMOS de 5 megapíxeles
Píxeles para tomar fotos
3MP
Resolución
1920x1080Pa30fps ; 1280x720Pa60fps
Fuente de energía
Batería de iones de litio de 660 mAh integrada
Autonomía
1,5 horas
Exención de responsabilidad
Consumo de energía
< 1,5 W
La garantía sólo cubre los defectos de fabricación. Si se produjera un error de
funcionamiento de la cámara durante la práctica de algún deporte o actividad de
alto riesgo no aceptado o recomendado por nosotros, la garantía no lo cubrirá.
XV) Solución de problemas
La cámara no se enciende.
Compruebe si la batería tiene suficiente carga.
Después de conectar la cámara al PC, no se encuentra el disco extraíble en MI
EQUIPO.
Compruebe si la conexión USB se ha realizado correctamente.
Compruebe si el cable USB es normal.
Pruebe con otro cable USB y si con ese cable tampoco encuentra el disco
extraíble, podría ser que la cámara tuviera un problema. Póngase en contacto con
su distribuidor o con el fabricante.
No se pueden grabar vídeos.
Compruebe si queda suficiente espacio en la tarjeta microSD. Si no, formatee la
Memoria
Compatible con tarjetas TF 32 GB de alta velocidad
Ángulo de fotografía
135 grados
Formato de vídeo
Temperatura de
funcionamiento
Temperatura de
almacenamiento
Impermeabilidad
Vibración de encendido/
apagado
Peso físico
Dimensiones del
producto
USB
H.264
-10℃ –50℃
-20℃ -60℃
IP 68
Sí
230 g
227*95*130 mm
2.0(HS)
Reproductor
KM Player; Quick Time7.6; Storm2012; RealPlayer11
Sistema operativo
Win8/Win7/Win XP/Vista/Mac Os10.7 o superior
Merci d’avoir fait l’acquisition de ces lunettes caméra portatives. Veuillez lire le présent
manuel avant toute utilisation.
Lunettes de ski Rollei 135 full HD
Caractéristiques techniques
•
•
•
•
•
Résolution de 5 mégapixels du capteur CMOS.
Prise en charge d’une carte MicroSD/SDHC de classe 4 ou supérieure,
compatible jusqu’à 32 Go (non incluse)
Stockage vidéo :
1080 p = 1 920 x 1 080 p (16:9), 30 fps, débit de données de 12 Mbits/s env., 12
minutes d’enregistrement vidéo pour 1 Go
720 p = 1 280 x 720 p (16:9), 60 fps, débit de données de 12 Mbits/s env., 12
minutes d’enregistrement vidéo pour 1 Go
Le temps d’enregistrement varie en fonction des différents sujets et de
l’environnement d’enregistrement.
Plage de mise au point : de 0.8 m à l’infini
Batterie rechargeable (intégrée)
Dimensions : 227 x 95 x 130 mm
Poids : 230 g
Configuration requise système informatique
•
•
•
•
•
720 P/60 FPS, 1 080 P/30 FPS
Classe d’étanchéité IP 68
Temps d’enregistrement d'1h30
Largeur d’angle de 135 degrés
Format vidéo H.264
Configuration système minimale
Environnement Windows : Intel Pentium D (double cœur), 3,0 GHz ou plus.
•
Environnement Mac : PowerMac G5 Dual 2,0 GHz ou plus ; 2,0 GHz Intel
•
Core Duo ou plus.
Windows XP (Service Pack 2 ou ultérieur), Windows Vista, Windows 7,
•
Windows 8 ou Apple Mac X 10.6 (ou supérieur).
RAM de 2 Go.
•
Espace libre sur disque dur de 1 Go.
•
Carte vidéo d’1 Go ou plus.
•
QuickTime 7.
•
Prise en charge d’une résolution vidéo de 1 024 x 768 (32 bits).
•
Périphérique audio compatible Windows 16 bits.
•
(Dans certains cas, la fréquence d’image peut être réduite automatiquement
•
pour optimiser l’utilisation de la mémoire).
Présentation des éléments
1. Caméra
Utilisation de votre caméra
2. Manuel
3. Câble USB
4. Pince plastique
Conception du produit
Éléments principaux de la caméra
Caméra
1. Bouton photo
2. Bouton marche/arrêt
d’enregistrement
3. Emplacement pour carte MicroSD
4. Emplacement USB
5. Réinitialisation
6. Voyant LED : le voyant LED est
assemblé à l’intérieur des lunettes.
Le voyant LED se trouve dans le
coin supérieur, à droite.
1. Commencer l’enregistrement
A)Mettez les lunettes caméra et faites la mise au point sur l’objet de votre
enregistrement.
B)Appuyez brièvement sur le bouton marche/arrêt pour mettre la caméra en
marche. Lorsque les voyants LED verts s’allument et qu’une courte vibration
se fait ressentir, cela signifie que la caméra est en mode veille.
C)Appuyez à nouveau sur le bouton marche/arrêt. Une vibration d’alerte se fait
ressentir et un voyant LED bleu clignote au rythme d’une fois par seconde.
Cela signifie que la caméra enregistre.
D)Si la caméra est en mode veille, appuyez sur le bouton pour commencer
l’enregistrement.
E)Pour arrêter la caméra, appuyez sur le bouton de mise en marche
pendant environ trois secondes. Les lunettes se mettent alors à vibrer plus
longuement, la caméra et la LED s’éteignent.
2. Prendre une photographie
A) Appuyez sur le bouton marche/arrêt. La caméra se met en mode veille tandis
que se fait ressentir une courte vibration et que la LED verte s’allume.
B) Appuyez brièvement sur le bouton de prise de vue. Lorsque le voyant LED
bleu clignote une fois, cela signifie que les photographies ont été prises avec
succès.
3. Caméra PC
Lors de la connexion de la caméra avec le PC, appuyez longuement sur le
bouton de prise de vue. Le disque amovible disparaît et la caméra est en mode
PC CAM.
4. RÉINITIALISATION
Si la caméra ne fonctionne pas correctement, veuillez appuyer sur le bouton
de réinitialisation pendant 1 seconde et le système se remet en statut arrêt.
Appuyez à nouveau sur le bouton marche/arrêt pour un fonctionnement normal.
Menu paramètres
1. EV
Une valeur d’EV plus élevée permet d’augmenter la luminosité de la qualité vidéo.
2. Fréquence lumineuse
En utilisation en intérieur, pour désactiver le clignotement, il est nécessaire de
paramétrer la fréquence lumineuse.
3. Horodatage
Paramétrez l’horodatage pour afficher l’heure exacte sur la vidéo et sur la photographie.
4. Résolution
Modifiez la résolution en choisissant entre 1 080 p et 720 p.
Setting.txt
1.Connectez la caméra au PC avec le câble USB.
2.Trouvez le setting.txt en ouvrant le disque amovible.
3.En choisissant la mise à jour « Y », vous pouvez mettre à jour les nouvelles
données. Le paramètre par défaut est « N ». Redémarrer la caméra pour activer
le paramètre.
Setting.txt
Statut
0
1
EV
Fréquence
lumineuse
0-12
0-12
Paramètre par
défaut :
6
60 Hz
50 Hz
0
Horodatage activé
1
720 p
0
Horodatage
désactivé
1080 p
Affichage RTC
Résolution
Charger la batterie à l’aide du câble USB
NOTE : Pour ce paramétrage, les utilisateurs peuvent choisir entre 50 et 60 Hz
pour empêcher le clignotement lors de l’enregistrement vidéo en intérieur. Vous
devez régler ce paramètre pour obtenir la fréquence lumineuse souhaitée.
Statut des LED
Lumière
Statut
Lumière verte
Lumière bleue
Mise en marche
Reste en mode marche
Arrêt
Arrêt
Vibration d’1 s
Arrêt
Arrêt
Arrêt
Arrêt
Vibration de 2 s
Clignote une fois par
rouge
Enregistrement
Reste en mode marche
Clignote rapidement 5
ou mémoire pleine
fois, puis s’arrête
Clignote rapidement
5 fois, puis s’arrête
pendant 5 à 10 s, puis
Arrêt
Arrêt
Arrêt
Arrêt
Marche
S.o.
Arrêt
Arrêt
Arrêt
S.o.
Batterie faible
En cours de
chargement
Charge complète
Arrêt
Vibration
Carte inexistante
seconde
Clignote rapidement
Arrêt
s’éteint
Paramétrer l’heure
1. Créez un document .txt nommé « settime.txt » à l’aide de Microsoft Word, de
Word Pad ou de tout autre logiciel de traitement de texte.
2. Ouvrez le nouveau document texte, entrez l’heure locale réelle en respectant le
format suivant. Par exemple : à Londres, l’heure actuelle est : 06:09:01, 8 juillet
2013. La syntaxe de la saisie doit être la suivante : 2013 07 08, 06 09 01 (espace
nécessaire entre chaque nombre). Une fois la saisie terminée, enregistrez le
fichier et quittez le programme.
3. Connectez les lunettes à votre PC et ouvrez le disque amovible. Copiez le fichier
« settime.txt » dans le répertoire racine de la carte MicroSD.
4. Déconnectez la caméra du PC.
5. La caméra utilise automatiquement les nouvelles date et heure lors de la mise
en marche suivante des lunettes.
6. Pour afficher l’horodatage sur votre vidéo et sur vos photographies, vous devez
activer la fonction d’horodatage en suivant le procédé décrit en page 6, au
chapitre « Menu paramètres ».
Vibration de 0,5 s
Vibre pendant 2 s,
puis s’éteint
Vibre à 3 reprises,
puis s’éteint
Arrêtez la caméra, puis branchez la caméra équipée de la batterie rechargeable à un
ordinateur à l’aide du câble USB fourni.
La LED bleue s’allume pour confirmer que la batterie est en cours de chargement.
La LED bleue s’éteint lorsque la charge de la batterie est complète.
La batterie rechargeable peut fonctionner pendant 90 à 100 minutes en configuration
1 080 p/30 fps ou 720 p/60 fps. Une charge complète nécessite 2 à 3 heures.
NOTE
Assurez-vous que la carte est correctement insérée.
Ne touchez pas aux bornes de connexion situées à l’arrière de la carte MicroSD
La carte peut s’endommager si l’insertion n’est pas complète
La carte et les données peuvent s’endommager si la carte MicroSD est insérée ou
retirée alors que la caméra est en marche
Ne touchez pas le connecteur du câble pour éviter d’affecter la performance et les
fonctions de la caméra.
La caméra prend en charge les cartes MicroSD/SDHC de classe 4 ou plus
compatibles jusqu’à 32 Go.
Les cartes MicroSD de classes inférieures peuvent entraîner une baisse des
performances d’enregistrement.
Connecter un ordinateur
Une fois l’ordinateur et la caméra activés, vous pouvez charger sur un ordinateur la
séquence vidéo et les photographies enregistrées.
1. Mettez la caméra en marche.
2. Connectez votre caméra à un ordinateur à l’aide du câble USB.
3. Une fois la connexion réussie, le disque amovible apparaît.
4. Utilisez le logiciel de l’ordinateur pour traiter les vidéos et les photographies.
5. Pour sortir, veuillez cliquer le disque amovible, puis retirer le câble USB.
Fonctionnalité d’étanchéité
Cette caméra est conforme à la classe IP68 en termes d’étanchéité. Nous ne
saurions être tenu responsables d’un dysfonctionnement de la caméra dû à
l’infiltration de liquide dans l’appareil et résultant d’une mauvaise utilisation.
Le liquide peut s’introduire à l’intérieur de la caméra si le port USB n’est pas
fermement verrouillé.
Si la caméra est mouillée, essuyez le liquide aussi rapidement que possible à l’aide
d’un chiffon sec.
Les accessoires de la caméra peuvent ne pas être étanches.
(N’utilisez pas la caméra lors de températures extrêmes, ceci pouvant entraîner le
dysfonctionnement de l’appareil).
1. Précautions à prendre avec la caméra
Veuillez lire les instructions ci-dessous avant d’utiliser cette caméra
① . Ne pas ouvrir
② . Ouvrir le port USB selon les instructions, dans le sens de la flèche
N’ouvrez pas la caméra en milieu humide et poussiéreux, cela peut endommager
le fichier et causer un choc électrique.
Ne laissez pas la caméra dans des lieux exposés pendant de longues périodes à
des températures extrêmement élevées, comme par exemple la lumière directe du
soleil. Le boîtier et les composants internes peuvent s’endommager.
Nettoyez l’optique à l’aide d’un chiffon doux pour retirer la poussière ou les traces
de doigts.
Si la batterie rechargeable est manipulée de manière incorrecte, elle peut éclater,
causer un incendie ou même des brûlures chimiques.
Veuillez respecter les précautions suivantes :
Ne démontez pas l’appareil.
N’écrasez pas la batterie rechargeable. Ne l’exposez à aucun choc ou force tels
qu’un martèlement, une chute ou un écrasement.
Avant de retirer la carte MicroSD, veuillez éteindre tout d’abord la caméra pour
éviter tout endommagement des fichiers ou de la carte MicroSD. Pour retirer la
carte MicroSD, exercez une pression sur la carte située dans son emplacement
pour la libérer. Utilisez la pince en plastique pour sortir complètement la carte
MicroSD.
Avant de stocker la caméra pendant de longues périodes, retirez la carte MicroSD.
Entreposez-la dans un endroit bien ventilé.
Clause de non-responsabilité
La garantie couvre uniquement les défauts de fabrication. La caméra n’est pas couverte
si elle devait présenter un dysfonctionnement lors de la participation à des sports ou à
des activités à haut risque non approuvés ou recommandés par nos soins.
XV) Dépannage
Mise en marche de la caméra impossible
Veuillez vérifier si le niveau de la batterie est suffisant.
Une fois la caméra connectée au PC, aucun disque amovible ne se trouve dans MON
ORDINATEUR.
Vérifiez si la connexion USB est correcte.
Vérifiez si le câble USB est normal
Essayez un autre câble USB. Si le disque amovible est toujours introuvable, la caméra
présente peut-être un problème. Veuillez contacter votre distributeur ou le fabricant.
Enregistrement d’une vidéo impossible
Vérifiez si la carte MicroSD dispose d’un espace suffisant. Dans le cas contraire,
formatez la carte MicroSD et démarrez l’enregistrement
Vérifiez si l’alimentation est suffisante. Dans le cas contraire, chargez la caméra et
enregistrez.
Absence de son ou volume faible
Vérifiez si le paramètre audio est correct.
Vérifiez dans l’ordinateur si le paramètre audio est correct et essayez de visionner
d’autres vidéos pour vérifier la présence de son.
Charge de la caméra impossible
Vérifiez si l’adaptateur d’alimentation fonctionne correctement grâce au voyant lumineux
LED. Ne chargez pas la caméra avec un autre adaptateur. Si le chargement est toujours
anormal, veuillez procéder au chargement via le câble USB connecté au PC.
Vérifiez si la connexion USB est correcte. N’utilisez pas d’autre câble USB pour cette
caméra.
Rollei Ski Goggles/Skibrille 135 Full – HD síszemüveg
Spécifications
Capteur d’images
Capteur CMOS 5 mégapixels
Pixels pour la prise de
photographies
3 mégapixels
Résolution
1 920 x 1 080 p/30 fps ; 1 280 x 720 p/60 fps
Alimentation électrique
Batterie Li-Polymère 660 mAh intégrée
Durée de fonctionnement
1 heure et demie
Consommation électrique
< 1,5 W
Mémoire
Prise en charge d’une carte SD haute vitesse de 32 Go max.
Angle de photographie
135 degrés
Format vidéo
H.264
Temp. de fonctionnement
-10℃ –50℃
Temp. de stockage
-20℃ -60℃
Niveau d’étanchéité
IP 68
Arrêt/marche de la fonction
de vibration
Oui
Poids physique
230 g
Dimensions du produit
227 x 95 x 130 mm
USB
2.0 (HS)
Lecteur
Lecteur KM ; Quick Time 7.6 ; Storm 2012 ; RealPlayer 11
Système d’exploitation
Win8/Win7/Win XP/Vista/Mac Os 10.7 ou supérieur
•
•
•
•
•
720P@60FPS, 1080P@30FPS
Vízálló IP68
1,5 óra felvételi idő
135 fokos nagylátószög
H.264 videoformátum
Köszönjük, hogy megvásárolta ezt a hordható kamera-szemüveget, és kérjük, hogy
használat előtt olvassa el a jelen használati utasítást.
Műszaki adatok
•
•
•
•
•
Érzékelő felbontása 5 megapixeles CMOS.
Támogatja a 4-es osztályú vagy újabb Micro SD/SDHC kártyát, és max. 32
GB-ig kompatibilis vele (nem tartozék).
Filmtárolás:
1080P=1920x1080p (16:9), 30fps, ~ 12 Mbit/s adatráta, 1 Gb-onként 12 percnyi
videó rögzítése
720P=1280x720p (16:9), 60fps, ~ 12 Mbit/s adatráta, 1 GB-onként 12 percnyi
videó rögzítése
A felvétel időtartama a különböző felvételi objektumok és környezet miatt változó.
Fókusztartomány: 0,8 m-től végtelenig.
Újratölthető akkumulátor (beépített)
Méret: 227 x 95 x 130 mm
Súly: 230 g
Számítógépes rendszerkövetelmények
Minimális rendszerkövetelmények
Windows környezet: 3,0 GHz-es Intel Pentium D (dual-core) vagy gyorsabb.
•
Mac környezet: Dual 2,0 GHz-es PowerMac G5 vagy gyorsabb; 2,0 GHz-es
•
Intel Core Duo vagy gyorsabb.
Windows XP (Service Pack 2 vagy újabb), Windows Vista, Windows7,
•
Windows 8 vagy Apple Mac X 10.6 vagy újabb.
2 GB RAM.
•
1 G szabad merevlemez-hely.
•
1 GB-os vagy nagyobb videokártya.
•
QuickTime 7.
•
1024x768 felbontású videó támogatás (32 bites).
•
16 bites Windows-kompatibilis hangeszköz.
•
(Egyes esetekben a memória-felhasználás maximalizálása érdekében
automatikusan csökkentésre kerülhet a képkocka-sebesség.)
Az alkatrészek bemutatása
1. Kamera
2. Kézikönyv
3. USB-kábel
4. Műanyag csipesz
A termék kialakítása
A kamera fő részei
Kamera
1. Fénykép gomb
2. Be/ki/felvétel gomb
3. microSD-aljzat
4. USB-aljzat
5. Reset
6. LED-kijelző – A LED-kijelző a
szemüveg belsejébe van szerelve.
A LED a jobb felső sarokban
látható.
A kamera használata
1. A felvétel elindítása
A)Vegye fel a kamera-szemüveget és fókuszáljon arra, amit rögzíteni szeretne.
B)A kamera bekapcsolásához nyomja meg röviden a be/ki gombot, amikor a
zöld LED-kijelzők világítanak és egy rövid vibrációt érez, az azt jelenti, hogy a
kamera készenléti üzemmódban van.
C)Nyomja meg újra a BE/KI gombot, egy vibrációs figyelmeztetés érezhető és
a kék LED-lámpa másodpercenként felvillan, ez azt jelenti, hogy a kamera
éppen rögzít.
D)Ha a kamera készenléti üzemmódban van, a felvétel elindításához nyomja
meg a felvétel gombot.
E)A kamera kikapcsolásához nyomja meg körülbelül három másodpercig a
tápfeszültség gombot. A szemüveg hosszabban fog vibrálni, a LED és a
kamera pedig kikapcsolódik.
2. Fénykép készítése
A)Nyomja meg a be/ki gombot, és amikor egy rövid vibrálást hallunk, és a zöld
LED-lámpa világít, a kamera készenléti üzemmódba lép.
B)Fénykép készítéséhez röviden nyomja meg a fénykép gombot, amikor a
kék LED-lámpa egyszer felvillan, az azt jelenti, hogy a fényképek sikeresen
elkészültek.
3. PC kamera
Amikor a kamera össze van kapcsolva a számítógéppel, nyomja meg hosszan a
fénykép gombot, a cserélhető lemez eltűnik, és a kamera PC CAM üzemmódban
van.
4. RESET
Amikor a kamera nem működik megfelelően, nyomja meg 1 másodpercre a reset
gombot, a rendszer visszatér kikapcsolt állapotra, majd nyomja meg újra a be/ki
gombot a normál működéshez.
Beállítás menü
1. EV
A magasabb EV növelheti a videó minőségének fényerejét.
2. Fény frekvencia
A beltéri használatkori vibrálás elkerülése érdekében a megfelelő frekvenciát kell
beállítani.
3. Időbélyegző
Állítsa be az időbélyegzőt, és akkor a videón vagy fényképen megjelenikl a
pontos idő.
4. Felbontás
Változtassa a felbontást 1080p és 720p között.
Setting.txt
1.USB-kábellel csatlakoztassa a kamerát a számítógéphez
2.A cserélhető lemez megnyitásával keresse meg a setting.txt fájlt
3.Válassza a frissítést „Y”-nal, ez azt jelenti, hogy frissítheti az új adatokat, az
alapértelmezett beállítás „N”, a beállítás aktiválásához indítsa újra a kamerát
Setting.txt
Állapot
0
1
EV
0-12
0-12
Alapértelmezett
beállítás
6
Fény frekvencia
60 HZ
50 HZ
0
RTC kijelző
időbélyegző ki
időbélyegző be
1
Felbontás
1080P
720P
0
MEGJEGYZÉS: A beltéri felvételkor a videó vibrálásának elkerülése érdekében a
felhasználók ennek a beállításnak a segítségével választhatnak az 50 HZ vagy 60
HZ között; ezt a beállítást hozzá kell igazítani a fényforrás frekvenciájához
LED állapot
Állapot
Zöld fény
Kék fény
Bekapcsolás
Tápfeszültség
ki
Bekapcsolva marad
ki
Piros
fény
ki
ki
ki
ki
2 mp-ig vibrál
Felvétel
Bekapcsolva marad
ki
0,5 mp-ig vibrál
ki
2 mp-ig vibrál,
majd ki
Nincs kártya
vagy tele a
memória
Gyenge
töltöttség
Töltés
Teljes töltöttség
Gyorsan villan
5-ször, majd kialszik
Gyorsan villog 5-10
mp-ig, majd ki
ki
ki
Mp-ként egyet
villan
Gyorsan villan
5-ször, majd
kialszik
Vibráció
1 mp-ig vibrál
ki
ki
ki
be
3-szor vibrál,
majd ki
–
ki
ki
–
Időbeállítás
1. A Microsoft Word, Jegyzettömb vagy bármely egyéb szövegszerkesztő program
segítségével hozzon létre egy „settime.txt” elnevezésű .txt dokumentumot.
2. Nyissa meg az új szöveges dokumentumot, adja meg a helyi pontos időt a
következő megszabott formátum szerint. Például: A jelenlegi londoni idő: 2013.
július 8., 06:09:01, A beírtaknak a következőképpen kell kinézniük: 2013 07 08,
06 09 01 (minden szám közé szóközt kell tenni). Ha befejezte, mentse el a fájlt
és lépjen ki a programból.
3. Csatlakoztassa a szemüveget a számítógéphez, és nyissa meg a cserélhető
lemezt. Másolja a „Settime.txt” fájlt a microSD-kártya gyökérkönyvtárába.
4. Csatlakoztassa le a kamerát a számítógépről.
5. Amikor legközelebb bekapcsolja a szemüveget, a kamera automatikusan az új
dátumot és időt fogja használni.
6. Ha látni szeretné videóin és fényképein az időbélyegzőt, a 6. oldalon a „Beállítás
menü” fejezetben leírtak szerint engedélyeznie kell az időbélyegző funkciót.
Töltés USB-kábellel
Kapcsolja ki a kamerát, majd a mellékelt USB-kábellel csatlakoztassa az
újratölthető akkumulátoros kamerát egy számítógéphez
A kék LED világítani kezd, és így jelzi az akkumulátor töltését.
Az akkumulátor teljes feltöltésekor a kék LED kialszik.
Az újratölthető akkumulátor közel 90-100 percig képes működni 1080P@30FPS
vagy 720p@60fps beállítással; egy teljes töltés 2-3 órát vesz igénybe.
MEGJEGYZÉS
Győződjön meg a kártya helyes behelyezéséről
Ne érjen a microSD-kártya hátoldalán található csatlakozó terminálokhoz
A kártya esetleg megsérülhet, ha nincs teljesen bedugva
A kártya és az adatok esetleg megsérülhetnek, ha a microSD-kártyát a bekapcsolt
kamerába teszik be vagy veszik ki onnan
Ne érjen a kábelcsatlakozóhoz, mert ez befolyásolhatja a kamera teljesítményét és
működését
A kamera támogatja a 4-es osztályú vagy újabb microSD/SDHC kártyákat, és max.
32 GB-ig kompatibilis.
Az alacsonyabb osztályú microSD-kártyák esetleg felvétel közbeni
teljesítményesést okozhatnak.
Csatlakozás számítógéphez
A rögzített videofelvételt és fényképeket feltöltheti egy számítógépre, ha
engedélyezte a számítógép és kamera lehetőséget.
1. Kapcsolja be a kamerát.
2. Az USB-kábel használatával csatlakoztassa a kamerát egy számítógéphez.
3. Sikeres csatlakoztatás esetén megjeleníti a cserélhető lemezt.
4. A videó és fénykép feldolgozásához használja a számítógép szoftverét.
5. Kilépéskor kattintson a cserélhető lemezre, majd távolítsa el az USB-kábelt.
Vízálló funkció
Ez a kamera átment az IP68 vízállósági teszten; nem vagyunk felelősek a
felhasználó hibás használata eredményeképpen a kamerába bejutó folyadék által
okozott meghibásodásért.
Folyadék juthat a kamera belsejébe, ha az USB-port nincs szorosan zárva.
Ha a kamera nedves lesz, egy száraz kendővel a lehető leghamarabb törölje le a
folyadékot.
Az egyéb kameratartozékok esetleg nem vízállók.
(Ne használja a kamerát extrém hőmérsékleti viszonyok közepette, mert ez esetleg
a kamera meghibásodását okozhatja).
1. A kamerával kapcsolatos óvintézkedések
A kamera használata előtt olvassa el az alábbi utasításokat
① . Ne nyissa ki
② . Az USB-portot a nyíl által jelzett irányban nyissa ki
Ne tegye a kamerát nedves vagy poros helyre, mert az károsíthatja a fájlt, vagy
áramütést szenvedhet.
Ne hagyja a kamerát hosszú ideig különösen magas hőmérsékleteknek, például
közvetlen napsugárzásnak kitett helyeken. Ez károsíthatja a kamera burkolatát és
a belső alkatrészeket.
Az ujjlenyomatok illetve por lencséről történő eltávolítására használjon puha kendőt.
Ha az újratölthető akkumulátort nem megfelelően kezelik, az felrobbanhat, tüzet
vagy akár marást is okozhat.
Tartsa be az alábbi óvintézkedéseket:
Ne szerelje szét.
Ne törje össze és ne tegye ki az újratölthető akkumulátort olyan erőhatásoknak,
mint amilyen például az ütés, leejtés illetve rálépés.
A microSD-kártya eltávolítása előtt először kapcsolja ki a kamerát, máskülönben
ez a fájlok vagy a microSD-kártya károsodását okozhatja. A microSD-kártya
eltávolításához nyomja be újra a kártyát a kártyaaljzatba, és a kártya kivehető. A
microSD-kártya teljes kivételéhez használja a műanyag csipeszt.
Mielőtt hosszabb időre eltenné a kamerát, vegye ki a microSD-kártyát. Jól szellőző
helyen tárolja.
Jognyilatkozat
A garancia csak gyártási hibákra vonatkozik. Ha a kamera meghibásodása általunk
nem támogatott vagy javasolt veszélyes sportokban vagy tevékenységekben történő
részvétel miatt következik be, erre nem terjed ki a garancia
XV) Hibaelhárítás
A kamera nem kapcsolható be
Ellenőrizze az akkumulátor megfelelő töltöttségét.
A számítógéphez történő csatlakoztatás után nem található cserélhető lemez a
SAJÁTGÉP mappában.
Ellenőrizze, hogy az USB-csatlakozás helyes-e vagy sem.
Ellenőrizze, hogy az USB-kábel működik-e.
Próbálkozzon egy másik USB-kábellel, ha még mindig nem található cserélhető lemez,
a kamera esetleg hibás lehet. Lépjen kapcsolatba kereskedőjével vagy a gyártóval.
Nem rögzíthető videó.
Ellenőrizze, hogy a microSD-kártyán elegendő hely van-e, ha nincs, formázza meg a
microSD-kártyát, majd indítsa el a felvételt
Ellenőrizze, hogy megfelelő-e a töltöttség, ha ez kezd alacsony szintre szállni, töltse fel
a kamerát, majd kezdje meg a felvételt.
Nincs hang, vagy kicsi a hangerő.
Ellenőrizze, hogy megfelelő-e a hangbeállítás.
Ellenőrizze, hogy megfelelő-e a számítógép hangbeállítása, és próbáljon meg lejátszani
más videókat, hogy lássa, van-e hang.
A kamera nem tölthető.
A LED-lámpás kijelzőn ellenőrizze, hogy a tápadapter jól működik-e. Ezt a kamerát
ne töltse másik adapterrel, ha továbbra sem tölthető rendesen, próbálja meg a
számítógéphez csatlakoztatott USB-kábellel tölteni.
Ellenőrizze, hogy az USB-csatlakozás megfelelő-e. Ehhez a kamerához ne használjon
másik USB-kábelt.
Specifikációk
Képérzékelő
5 megapixeles CMOS érzékelő
Pixelszám
fényképezéshez
3 MP
Felbontás
1920 x 1080P@30fps ; 1280 x 720P@60fps
Tápellátás
Beágyazott 660 mAh Li-polimer akkumulátor
Tápellátás időtartama
1,5 óra
Energiafogyasztás
< 1,5 W
Memória
Max. nagysebességű 32 GB TF kártyát támogat
Fényképezési szög
135 fok
Videó formátum
H.264
Működési hőmérséklet
-10 ℃ –50℃
Tárolási hőmérséklet
-20 ℃ -60℃
Vízállósági fokozat
IP 68
Be/ki vibrálás
Igen
Fizikai súly
230 g
Termék mérete
227 x 95 x 130 mm
USB
2.0(HS)
Lejátszó
KM Player; Quick Time7.6; Storm2012; RealPlayer11
Operációs rendszer
Win8/Win7/Win XP/Vista/Mac Os10.7 vagy újabb
Grazie per aver acquistato questa maschera con videocamera indossabile. La invitiamo
a leggere il presente manuale prima dell'uso
Maschera da sci Rollei/Skibrille 135 Full - HD
Specifiche tecniche
•
•
•
•
•
Risoluzione del sensore CMOS da 5 Mega pixel.
Supporto scheda Micro SD/SDHC Classe 4 o superiore e compatibile fino a 32
GB (non inclusa).
Memoria video:
1080P=1920x1080p (16:9), 30fps, velocità trasmissione dati ~ 12 Mbit/s, 12
minuti di registrazione video per 1GB
720P=1280x720p (16:9), 60fps, velocità trasmissione dati ~ 12 Mbit/s, 12
minuti di registrazione video per 1GB
La durata di registrazione varierà in base all'ambiente e ai soggetti registrati.
Intervallo di focus: Da 0,8m~infinito.
Batteria ricaricabile (integrata)
Dimensioni: 227*95*130mm
Peso: 230g
Requisiti di sistema del computer
•
•
•
•
•
720P@60FPS, 1080P@30FPS
Resistente all'acqua IP68
Tempo di registrazione 1,5H
Grandangolo 135 gradi
Formato video H.264
Requisiti di sistema minimi
Ambiente Windows: Intel Pentium D(dual-core) 3.0 GHz o superiore.
•
Ambiente Mac: Dual 2.0 GHz PowerMac G5 o superiore; 2.0 GHz Intel Core
•
Duo o superiore.
Windows XP (Service Pack 2 o successivo),Windows Vista, Windows7,
•
Windows 8 o Apple Mac X 10.6 o successivo.
2GB RAM.
•
1G di spazio libero sull'hard disk.
•
Scheda video da 1 GB o superiore.
•
QuickTime 7.
•
Risoluzione video 1024x768 (32 bit).
•
Scheda audio compatibile con Windows 16 bit.
•
(In alcuni casi la frequenza di fotogrammi potrebbe essere ridotta
automaticamente per ridurre l'uso della memoria)
Parti
1. Videocamera
2. Manuale
Usare la videocamera
3. Cavo USB
4. Pinza di plastica
Design del prodotto
Parti principali della videocamera
Videocamera
1. Pulsante foto
2. Pulsante di registrazione
3. Slot per scheda microSD
4. Slot USB
5. Reset
6. Indicatore LED – L'indicatore
LED viene montato nella parte
interna della maschera. È possibile
vedere il LED nell'angolo in alto a
destra.
1. Iniziare a registrare
A)Indossare la maschera videocamera e inquadrare ciò che si desidera registrare.
B)Premere brevemente il pulsante on/off per accendere la videocamera.
Quando gli indicatori LED verdi si accendono e si avverte una breve
vibrazione, significa che la videocamera è in modalità stand-by.
C)Premere di nuovo il pulsante ON/OFF, si avverte una vibrazione e la spia
LED blu lampeggia ogni secondo. In questo momento la videocamera sta
registrando.
D)Se la videocamera è in modalità stand-by, premere il pulsante di registrazione
per iniziare a registrare.
E)Per spegnere la videocamera, tenere premuto il pulsante di accensione
per circa tre secondi. La maschera vibrerà a lungo e la spia LED e la
videocamera si spegneranno.
2. Scattare una foto
A)Premere il pulsante di accensione on/off. Quando si sentirà una breve
vibrazione e la spia LED verde si accende, la videocamera andrà in modalità
stand-by.
B)Premere brevemente il pulsante foto per scattare una fotografia. Quando la
spia LED blu lampeggia una volta significa che le foto sono state scattate con
successo.
3. PC videocamera
Quando si collega la videocamera al PC, premere a lungo il pulsante foto, l'unità
rimovibile scompare e la videocamera è in modalità PC CAM.
4. RESET
Quando la videocamera non funziona correttamente, premere il pulsante di reset
per un secondo. Il sistema si spegnerà. Premere nuovamente il pulsante on/off
per il normale funzionamento.
Menu Impostazioni
1. EV
Un EV maggiore può aumentare la luminosità della qualità del video.
2. Frequenza della luce
Per evitare il lampeggiamento durante l'uso interno, occorre impostare la
frequenza corretta.
3. Indicazione dell'ora
Impostare l'indicazione dell'ora per visualizzare su video e foto l'ora esatta.
4. Risoluzione
Cambiare la risoluzione tra 1080p e 720p.
Setting.txt
1. Collegare la videocamera al PC con un cavo USB
2. Trovare il file setting.txt facendo clic sull'unità rimovibile
3. Scegliere aggiorna con “Y” significa che è possibile aggiornare i nuovi dati,
l'impostazione predefinita è “N”. Riavviare la videocamera per attivare
l'impostazione
Setting.txt
Stato
0
1
EV
Frequenza della
luce
0-12
0-12
Impostazione
predefinita
6
60HZ
50HZ
0
Indicazione ora
disattivata
1080P
Indicazione ora
attivata
720P
Display RTC
Risoluzione
Carica con cavo USB
1
0
NOTA: gli utenti possono scegliere tra 50HZ o 60HZ per evitare il lampeggiamento
nel video durante le riprese interne. Occorre regolare questa impostazione affinché
coincida con la frequenza della fonte di luce
Stato del LED
Stato
Luce verde
Luce blu
Luce rossa
Vibrazione
Power ON
Rimane accesa
disattivata
disattivata
Vibra 1 secondo
Power off
disattivata
disattivata
Registrazione
Rimane accesa
Nessuna
scheda o
memoria piena
Lampeggia
rapidamente 5
volte e si spegne
Lampeggia
rapidamente per
5-10 secondi poi si
spegne
disattivata
disattivata
Lampeggia una
volta al secondo
Lampeggia
rapidamente 5
volte e si spegne
Vibra 2 secondi
Vibra 0,5
secondi
Vibra per 2
secondi poi si
spegne
disattivata
disattivata
Vibra per 3 volte
poi si spegne
disattivata
on
N/D
disattivata
disattivata
disattivata
N/D
Batteria scarica
Carica
Carica
completa
disattivata
disattivata
Impostazione dell'ora
1. Creare un documento .txt nominato “settime.txt” con Microsoft Word, Word Pad
o qualsiasi altro software di scrittura.
2. Aprire il nuovo documento di testo, inserire l'ora locale esatta in base al seguente
formato. Per esempio: l'orario attuale a Londra è 8 luglio 2013 ore 06:09:01. La
sintassi dell'inserimento deve essere la seguente: 2013 07 08, 06 09 01(spazio
tra ciascun numero). Al termine salvare il file e uscire.
3. Collegare la maschera al PC e fare clic sull'unità rimovibile. Copiare il file
“Settime.txt” nella cartella Root della scheda microSD.
4. Scollegare la videocamera dal PC.
5. La videocamera utilizzerà automaticamente la nuova data e ora non appena la
maschera viene riaccesa.
6. Per visualizzare l'indicazione dell'ora su video e foto, attivare la funzione
indicazione dell'ora come descritto a pagina 6, al capitolo "Menu Impostazioni"
Spegnere la videocamera, collegare la videocamera con la batteria ricaricabile a un
PC con il cavo USB fornito in dotazione
La spia LED blu si accenderà per indicare che la batteria è in carica.
La spia LED blu si spegnerà quando la batteria sarà completamente carica.
La batteria ricaricabile può funzionare circa 90-100 minuti in 1080P@30FPS o
720p@60fps. Una ricarica completa richiede 2-3 ore.
NOTA
Accertarsi che la scheda sia inserita correttamente
Non toccare i terminali di connessione posti sul retro della scheda microSD
La scheda potrebbe danneggiarsi qualora non fosse inserita completamente
La scheda e i dati possono danneggiarsi qualora la scheda microSD sia inserita o
rimossa quando la videocamera è accesa
Non toccare il connettore del cavo poiché ciò potrebbe alterare le prestazioni e le
funzioni della videocamera
La videocamera supporta schede microSD/SDHC Classe 4 o superiori e compatibili
sino a 32 GB.
Le schede MicroSD di classi inferiori possono produrre un calo della prestazione
durante la registrazione.
Collegarsi a un computer
È possibile caricare i filmati registrati e le foto su un computer con attivata la
funzione computer e videocamera.
1. Accendere la videocamera.
2. Collegare la fotocamera al computer utilizzando il cavo USB.
3. Dopo l'avvenuto collegamento, verrà visualizzata l'unità rimovibile.
4. Usare il software del computer per elaborare video e foto.
5. Quando si decide di uscire, fare clic sull'unità rimovibile poi rimuovere il cavo USB.
Funzione waterproof
Questa videocamera ha superato il test waterproof IP68. Non siamo responsabili
per eventuali malfunzionamenti provocati dall'infiltrazione di liquidi nella
videocamera a causa di un utilizzo scorretto da parte dell'utente.
Se la porta USB non è chiusa correttamente, potrebbero infiltrarsi dei liquidi nella
videocamera.
Se la videocamera si bagna, asciugare il liquido il prima possibile con un panno asciutto.
Gli altri accessori della videocamera potrebbero non essere resistenti all'acqua.
(Non utilizzare la videocamera a temperature estreme poiché ciò potrebbe
provocare un malfunzionamento).
1. Misure preventive
Leggere le istruzioni riportate di seguito prima di utilizzare questa videocamera
① . Non aprire
② . Aprire la porta USB seguendo la direzione della freccia
Non lasciare la videocamera in luoghi polverosi e umidi per evitare di danneggiare
il file o per il rischio di elettrocuzione.
Non lasciare la videocamera in luoghi esposti a temperature troppo elevate,
quali la luce diretta del sole, per lunghi periodi di tempo. Ciò può danneggiare
l'alloggiamento della videocamera e i componenti interni.
Pulire le lenti con un panno morbido per rimuovere le ditate o la polvere.
Se la batteria è stata utilizzata in modo errato c'è il rischio di esplosione, incendio o
ustione da sostanze chimiche.
Si prega di osservare le misure preventive riportate di seguito:
Non smontare.
Non schiacciare o esporre la batteria ricaricabile a urti o esercitare su di essa forze
quali l'uso del martello. Non lasciarla cadere o pestarla.
Prima di rimuovere la scheda microSD, spegnere la videocamera per evitare danni
ai file o alla scheda microSD. Per rimuovere la scheda microSD, spingere di nuovo
la scheda dentro la slot e questa verrà rilasciata. Utilizzare la pinza di plastica per
estrarre completamente la scheda microSD.
Rimuovere la scheda microSD prima di riporre la videocamera per lunghi periodi di
tempo. Conservare in un luogo asciutto e ben ventilato.
Disclaimer
La garanzia copre soltanto i difetti di fabbricazione. Qualora la videocamera dovesse
riportare malfunzionamenti durante la partecipazione a sport estremi o attività non
supportate o consigliate da noi, il guasto non sarà coperto dalla garanzia.
XV) Risoluzione dei problemi
Impossibile accendere la videocamera
Controllare che la batteria sia sufficientemente carica.
Dopo aver collegato la videocamera con il PC, non si trova l'unità rimovibile in
COMPUTER.
Controllare che il collegamento USB sia corretto.
Controllare se il cavo USB è intatto
Provare un altro cavo USB qualora non fosse ancora possibile trovare l'unità rimovibile.
La videocamera potrebbe avere problemi. Contattare il rivenditore o il produttore.
Impossibile registrare un video
Controllare che sulla scheda microSD vi sia spazio sufficiente. In caso negativo si
consiglia di formattare la scheda microSD e successivamente iniziare a registrare
Controllare che la batteria sia sufficientemente carica. In caso contrario, caricare la
videocamera e successivamente procedere alla registrazione.
Nessun suono o volume basso.
Controllare che le impostazioni audio siano corrette.
Controllare che l'impostazione audio del PC sia corretta e provare a riprodurre altri video
per controllare la presenza del suono.
La videocamera non riesce a ricaricarsi
Controllare che l'adattatore di alimentazione funzioni bene osservando la spia LED.
Non ricaricare la videocamera con adattatori diversi. Se non è possibile caricarla
normalmente, provare con il cavo USB collegato al PC.
Controllare se il collegamento USB è corretto. Non utilizzare un altro cavo USB per
questa videocamera.
Rollei Ski Goggles/skibril 135 Full - HD
Specifiche
Sensore dell'immagine
Sensore CMOS da 5 Mega Pixel
Pixel per scattare foto
3MP
Risoluzione
1920x1080P@30fps ; 1280x720P@60fps
Alimentazione
Batteria incorporata 660mAh ai polimeri di litio
Durata dell'alimentazione
Consumo di
alimentazione
Memoria
1,5 ore
Angolazione di scatto
135 gradi
Formato video
Temperatura di
funzionamento
Temperatura di
conservazione
Percentuale di
impermeabilità
Vibrazione on/off
H.264
-20℃ -60℃
Peso fisico
230 g
Dimensione prodotto
227*95*130 mm
USB
2.0(HS)
KM Player; Quick
Time7.6;Storm2012;RealPlayer11
Win8/Win7/Win XP/Vista/Mac Os10.7 o superiore
Riproduttore
Sistema operativo
<1,5W
Scheda TF 32 GB ad alta velocità
-10℃ –50℃
IP 68
Sì
•
•
•
•
•
720P@60FPS, 1080P@30FPS
Waterdicht IP68
1,5 uur opnametijd
135 graden groothoeklens
Videoformaat H.264
Hartelijk dank voor de aankoop van deze draagbare camerabril. Lees deze
gebruikshandleiding voor gebruik a.u.b. goed door.
Technische specificaties
•
•
•
•
•
Sensorresolutie 5 megapixels CMOS.
Ondersteunt geheugenkaarten van het type microSD/SDHC klasse 4 of hoger
en is geschikt voor tot wel 32 GB (niet meegeleverd).
Filmopslag:
1080P=1920x1080p (16:9), 30fps, ~ 12 Mbit/s data rate, 12 minuten
filmopname per 1GB
720P=1280x720p (16:9), 60fps, ~ 12 Mbit/s data rate, 12 minuten filmopname
per 1 GB
De opnameduur varieert op grond van uiteenlopende opnameobjecten en de
omgeving
Focusbereik: 0,8 m tot oneindig.
Oplaadbare accu (geïntegreerd)
Afmetingen: 227*95*130mm
Gewicht: 230 g
Systeemvereisten
Minimale systeemvereisten
Windows-omgeving: 3.0 GHz Intel Pentium D (dual-core) of sneller.
•
Mac-omgeving: Dual 2.0 GHz PowerMac G5 of sneller; 2.0 GHz Intel Core
•
Duo of sneller.
Windows XP (Service Pack 2 of hoger),Windows Vista, Windows7, Windows
•
8 of Apple Mac X 10.6 of hoger.
2GB RAM.
•
1G vrije schijfruimte.1GB of grotere videokaart.
•
QuickTime 7.
•
1024x768 resolutie video-ondersteuning (32 bit).
•
16 bit Windows-compatibel geluidsapparaat.
•
(In sommige gevallen wordt de frame rate mogelijk automatisch verlaagd tot
het maximale geheugengebruik).
Overzicht van de onderdelen
1. Camera
2. Handleiding
3. USB-kabel
4. Plastic pincet
Productoverzicht
Hoofdbestanddelen van de camera
Camera
1. Fotoknop
2. Aan/uit/opnameknop
3. microSD-kaartsleuf
4. USB-aansluiting
5. Reset
6. LED-indicatielampje – het
LED-indicatielampje zit aan de
binnenkant van de bril. De LED zit
in de rechter bovenhoek.
De camera gebruiken
Setting.txt
1. Beginnen met filmen
A)Zet de camerabril op en kijk naar wat u graag wilt filmen.
B)Druk even op de aan/uit-knop om de camera in te schakelen. Als de groene
LED-indicatielampjes aan zijn en u een korte trilling voelt, staat de camera in
stand-bymodus.
C)Druk opnieuw op de aan/uit-knop. U voelt nu weer een trilling en de blauwe
LED knippert elke seconde. Dit betekent dat de camera aan het opnemen is.
D)Als de camera in de stand-bymodus staat, drukt u op de opnameknop om te
beginnen met opnemen.
E)Om de camera uit te schakelen, drukt u de aan/uit-knop ongeveer drie
seconden in. De bril zal iets langer trillen en de LED en de camera gaan uit.
2. Een foto nemen
A)Druk op de aan/uit-knop. De camera staat nu in de stand-bymodus, de bril trilt
even en de groene LED-lampjes zijn aan.
B)Druk kort op de fotoknop om een foto te nemen. Als de blauwe LED een keer
knippert, betekent dit dat u met succes een foto hebt genomen.
3. PC Camera
Als u de camera op een pc aansluit, drukt u de fotoknop langer in. Nu verschijnt
de verwisselbare schijf en staat de camera in de modus PC CAM.
4. RESET
Als de camera niet correct werkt, drukt u de reset-knop gedurende 1 seconde in.
Het systeem wordt dan uitgeschakeld. Druk daarna op de aan/uit-knop om het
normale bedrijf te hervatten.
1.Sluit de camera met de USB-kabel op de pc aan.
2.Zoek naar setting.txt door de verwisselbare schijf te openen.
3.Update met “Y” betekent dat u de nieuwe gegevens kunt bijwerken. De
standaardinstelling is “N”. Start de camera opnieuw op om de instelling te activeren.
Instellingenmenu
1. EV
Met een hogere EV (Exposure Value) ofwel belichtingswaarde kunt u de
helderheid van de videobeelden verbeteren.
2. Lichtfrequentie
Om schitteringen bij gebruik binnenshuis te voorkomen, moet u de juiste
frequentie instellen.
3. Tijdstempel
Als u de tijdstempel instelt, wordt de exacte tijd weergegeven in de filmopnamen
en op de foto’s.
4. Resolutie
U kunt de resolutie aanpassen tussen 1080p en 720p.
Setting.txt
Status
0
1
Standaardinstelling
EV
0-12
0-12
6
Lichtfrequentie
60HZ
0
RTC-display
Tijdstempel uit
Resolutie
1080p
50HZ
Tijdstempel
aan
720p
1
0
OPMERKING: Gebruikers kunnen bij deze instelling kiezen tussen 50HZ of 60HZ
om schitteringen te voorkomen als ze binnenshuis filmen. U dient deze instelling op
de frequentie van de lichtbron af te stemmen.
LED-status
Status
Groen lampje
Blauw lampje
Inschakelen
Aan
Uit
Uitschakelen
Uit
Opname
Aan
Uit
Knippert een
keer per sec.
Knippert 5 keer
snel en gaat
dan uit
Geen
geheugenkaart of
geheugen is vol
Accuspanning
laag
Bezig met
opladen
Volledig
opgeladen
Knippert 5 keer
snel en gaat dan uit
Rood
lampje
Uit
Trilling 1 sec.
Uit
Trilling 2 sec.
Uit
Trilling 0,5 sec.
Uit
Trilling 2 sec. en uit
Trilling
Knippert 5-10 sec.
snel en gaat dan uit
Uit
Uit
Trilling 3 sec. en uit
Uit
Uit
Aan
n.v.t.
Uit
Uit
Uit
n.v.t.
Tijdsinstelling
1. Maak een .txt-document met de naam “settime.txt” met Microsoft Word, Word
Pad of een ander tekstverwerkingsprogramma.
2. Open het nieuwe tekstdocument en voeg de huidige tijd in volgens het
onderstaande formaat. Bijvoorbeeld: De huidige tijd in Amsterdam is: 06:09:01,
8 juli 2013. Het formaat voor deze invoer ziet er als volgt uit: 2013 07 08, 06 09
01(spatie tussen elk cijfer). Sla het bestand hierna op en sluit het programma af.
3. Sluit de bril op uw pc aan en open de verwisselbare schijf. Kopieer het bestand
“Settime.txt” naar de rootdirectory van de microSD-kaart.
4. Koppel de camera los van uw pc.
5. De camera zal automatisch de nieuwe datum en tijd gebruiken als u de volgende
keer de bril inschakelt.
6. Om een tijdstempel in uw films en op uw foto's te laten weergeven, moet
u deze instelling activeren zoals beschreven op pagina 6 in het hoofdstuk
"Instellingenmenu".
Opladen met de USB-kabel
Schakel de camera uit en sluit hem daarna met de oplaadbare accu via de meegeleverde
USB-kabel aan op een computer.
De blauwe LED zal oplichten en aangeven dat de accu wordt opgeladen.
De blauwe LED dooft als de accu volledig is opgeladen.
De oplaadbare accu heeft een bedrijfsduur van bijna 90-100 minuten met 1080P@30FPS of
720p@60fps. Het duurt 2-3 uur voordat de accu volledig is opgeladen.
OPMERKING
Zorg ervoor dat de geheugenkaart correct is geplaatst.
Raak de aansluitpunten aan de achterkant van de microSD-kaart niet aan.
De kaart kan beschadigd raken als hij niet volledig wordt ingeschoven.
De kaart en de gegevens kunnen beschadigd raken als de microSD-kaart wordt
geplaatst of verwijderd terwijl de camera is ingeschakeld.
Raak de kabelaansluiting niet aan aangezien hierdoor de cameraprestaties en –
functies negatief kunnen worden beïnvloed.
De camera ondersteunt microSD/SDHC-kaarten van klasse 4 en hoger en is
geschikt voor tot wel 32 GB.
MicroSD-kaarten van lagere klassen kunnen tijdens de opnamen tot een
kwaliteitsvermindering leiden.
Een computer aansluiten
U kunt uw film- en foto-opnamen naar een computer uploaden.
1. Schakel de camera in.
2. Sluit de camera met de meegeleverde USB-kabel aan op een computer.
3. De verwisselbare schijf verschijnt als de camera correct is aangesloten.
4. Verwerk de video- of foto-opnamen met de computersoftware.
5. Als u klaar bent, klikt u op de verwisselbare schijf en daarna verwijdert u pas de
USB-kabel.
Waterdichtheid
Deze camera is waterdicht volgens klasse IP68. Wij accepteren geen
aansprakelijkheid voor cameradefecten als gevolg van vloeistoffen die in de
camera terecht zijn gekomen door een verkeerd gebruik.
Er kunnen vloeistoffen in de camera terechtkomen als de USB-aansluiting niet
stevig is gesloten.
Als de camera nat wordt, moet u het vocht zo snel mogelijk met een droge doek
wegvegen.
Andere camera-accessoires zijn mogelijk niet waterdicht.
(Gebruik de camera niet bij extreme temperaturen aangezien zij hierdoor defecten
kan vertonen).
1. Voorzorgsmaatregelen
Lees onderstaande instructies voor gebruik van deze camera door.
① . Niet openen a.u.b.
② . Open de USB-aansluiting volgens de aanwijzing van de pijlrichting.
Bewaar de camera niet op een vochtige en stoffige plaats. Hierdoor kunnen
gegevens beschadigd raken of bestaat er kans op een elektrische schok.
Bewaar de camera niet gedurende een langere tijd op plaatsen met extreem hoge
temperaturen, zoals in direct zonlicht. Dit kan een negatief effect hebben op de
camerabehuizing en de interne onderdelen.
Reinig de lens met een zachte doek om vingerafdrukken of stof te verwijderen.
Als de oplaadbare accu niet correct wordt gebruikt, kan deze breken, brand
veroorzaken of zelfs tot chemische verbrandingen leiden.
Leef de volgende instructies na:
Niet demonteren.
U mag de oplaadbare accu niet pletten of blootstellen aan schokken of een
krachtinwerking zoals hameren, vallen of trappen.
Voordat u de microSD-kaart verwijdert, moet u de camera eerst uitschakelen.
Anders kunnen de bestanden of de microSD-kaart beschadigd raken. Om de
microSD-kaart te verwijderen, duw u de kaart in de sleuf, zodat de kaart losklikt.
Gebruik de plastic pincet om de microSD-kaart volledig uit de camera te halen.
Verwijder de microSD-kaart voordat u de camera gedurende een langere periode
opslaat. Bewaar de kaart in een goed geventileerde ruimte.
Controleer of er voldoende accuspanning is. Zo niet, dient u de camera op te laden
alvorens opnieuw te gaan filmen.
Geen of zacht geluid.
Controleer of de geluidsinstellingen correct zijn.
Controleer of de geluidsinstellingen van de pc correct zijn ingesteld. Probeer
andere films af te spelen om te kijken of deze geluid hebben.
De camera wordt niet opgeladen.
Controleer via de LED-indicator of de netadapter goed werkt. Gebruik voor deze
camera a.u.b. geen andere adapter. Als u nog steeds niet kunt opladen, kunt u
proberen de camera via de USB-kabel via uw pc op te laden.
Controleer of de USB-aansluiting correct is. Gebruik a.u.b. geen andere USB-kabel
voor deze camera.
Technische specificaties
Beeldsensor
CMOS-sensor van 5 megapixels
Pixels voor foto-opnamen
3MP
Resolutie
1920x1080P@30fps ; 1280x720P@60fps
Stroomvoorziening
Geïntegreerde 660mAh lithium-polymeer accu
Bedrijfsduur
1,5 uur
Disclaimer
Stroomverbruik
De garantie geldt uitsluitend voor fabricagefouten. Wanneer de camera defecten
vertoont als gevolg van zeer risicovolle sporten die niet door ons worden
goedgekeurd of aanbevolen, vervalt uw garantieaanspraak
XV) Fouten oplossen
De camera kan niet worden ingeschakeld.
Controleer of de accu voldoende is opgeladen.
Nadat ik de camera heb aangesloten op mijn pc, kan ik de verwisselbare schijf niet
vinden in DEZE COMPUTER.
Controleer of de USB-kabel correct is aangesloten.
Controleer de USB-kabel zelf.
Probeer het met een andere USB-kabel. Indien het probleem hiermee niet wordt
verholpen, is de camera mogelijk defect. Neem in dit geval contact op met de
distributeur of fabrikant.
Ik kan geen filmopname maken.
Controleer of er voldoende ruimte vrij is op de microSD-kaart. Zo niet, dient u de
kaart te formatteren en opnieuw proberen te filmen.
Geheugen
Beeldhoek
<1,5W
Ondersteuning van max. high speed 32 GB TFkaart
135 graden
Videoformaat
H.264
Bedrijfstemperatuur
-10℃ –50℃
Opslagtemperatuur
-20℃ -60℃
Waterdichtheidsklasse
IP 68
Trilling aan/uit
Ja
Gewicht
230g
Productafmeting
227*95*130mm
USB
2.0(HS)
KM Player; Quick
Time7.6;Storm2012;RealPlayer11
Win8/Win7/Win XP/Vista/Mac Os10.7 of hoger
Player
Besturingssysteem
Dziękujemy za zakup gogli z wbudowaną kamerą, przed użyciem prosimy zapoznać się
z instrukcją.
Rollei Ski Goggles/Gogle narciarskie 135 Full HD
Dane techniczne
•
•
•
•
•
Rozdzielczość czujnika 5 MP CMOS
Obsługuje kartę pamięci microSD/SDHC klasy 4 lub wyższej, do 32 GB (poza
zestawem).
Zapisywanie filmów:
1080P=1920x1080p (16:9), 30 fps, szybkość transmisji danych ~ 12 Mbit/s, 12
minut nagrywania wideo na 1 GB
720P=1280x720p (16:9), 60 fps, szybkość transmisji danych ~ 12 Mbit/s, 12 minut
nagrywania wideo do 1 GB
Czas zapisu może się zmieniać ze względu na nagrywane obiekty oraz otoczenie.
Zakres ostrości: 0,8 m ~ nieskończoność.
Akumulator (wbudowany)
Wymiary: 227x95x130 mm
Waga: 230 g
Wymagania systemowe
•
•
•
•
•
720P@60FPS, 1080P@30FPS
Wodoszczelność IP68
Czas nagrywania 1,5 h
Szerokokątny obiektyw 135°
Format wideo H.264
Minimalne wymagania systemowe
Środowisko Windows: 3,0 GHz Intel Pentium D (dual-core) lub szybszy.
•
Środowisko Mac: Dual 2,0 GHz PowerMac G5 lub szybszy; 2,0 GHz Intel
•
Core Duo lub szybszy.
Windows XP (Service Pack 2 lub późniejszy),Windows Vista, Windows 7,
•
Windows 8 lub Apple Mac X wersja 10.6 lub wyższa.
2 GB RAM.
•
1 (G) wolnego miejsca na dysku.
•
Proofreader’s note:
Maybe it should read GB in the
Karta wideo 1 GB lub większa.
•
source text. Please change
QuickTime 7.
•
here accordingly if so.
Obsługiwana rozdzielczość wideo 1024x768 (32 bit).
•
16-bitowe urządzenie audio kompatybilne z Windows.
•
(W niektórych przypadkach liczba klatek na sekundę może być automatycznie
zmniejszana, aby zmaksymalizować wykorzystanie pamięci.)
Informacje o częściach
1. Kamera
2. Instrukcja obsługi
Użytkowanie kamery
3. Kabel USB
4. Pinceta z tworzywa sztucznego
Budowa produktu
Główne części kamery
Kamera
1. Przycisk do zdjęć
2. Przycisk włączania/wyłączania/
nagrywania
3. Gniazdo karty microSD
4. Gniazdo USB
5. Reset
6. Wskaźnik LED – wmontowany od
wewnętrznej strony gogli.Widoczny
w prawym górnym rogu.
1. Rozpoczęcie nagrywania
A)Założyć gogle z kamerą i zwrócić się w stronę nagrywanego ujęcia.
B)Krótko nacisnąć przycisk WŁ./WYŁ., aby uruchomić kamerę. Kiedy zaświeci
się zielony wskaźnik LED i nastąpi krótka wibracja, oznacza to, że kamera
znajduje się w trybie czuwania.
C)Nacisnąć ponownie przycisk WŁ./WYŁ. Pojawi się alarm wibracyjny, a
niebieskie światełko LED będzie błyskać raz na sekundę. Oznacza to, że
kamera znajduje się w trybie nagrywania.
D)Kiedy kamera znajduje się w trybie czuwania, włączyć przycisk nagrywania,
aby rozpocząć nagrywanie.
E)Aby wyłączyć kamerę, nacisnąć i przytrzymać przycisk WŁ./WYŁ. przez około
3 sekundy. Gogle będą wibrować dłużej, a wskaźnik LED i kamera wyłączą się.
2. Robienie zdjęć
A)Nacisnąć przycisk WŁ./WYŁ. Kamera wejdzie w stan czuwania, gdy nastąpi
krótka wibracja i zaświeci się zielone światełko LED.
B)Nacisnąć krótko przycisk do zdjęć. Kiedy niebieskie światełko LED mrugnie
raz, oznacza to, że zdjęcie zostało wykonane.
3. Tryb PC CAM
Po podłączeniu kamery do komputera nacisnąć i przytrzymać przycisk do zdjęć.
Kiedy zniknie dysk wymienny, kamera będzie w trybie PC CAM.
4. RESET
Jeśli kamera nie działa poprawnie, należy nacisnąć i przytrzymać przycisk reset
przez 1 sekundę. Gdy system się wyłączy, należy nacisnąć ponownie przycisk
WŁ./WYŁ., aby kamera wróciła do normalnej pracy.
Menu ustawień
1. EV
Wyższe naświetlenie (EV) zwiększa jasność obrazu wideo.
2. Częstotliwość światła
Aby uniknąć migania przy stosowaniu wewnątrz pomieszczeń, należy ustawić
odpowiednią częstotliwość.
3. Znacznik czasu
Ustawić znacznik czasu, aby na filmach i zdjęciach wyświetlała się dokładna
data i godzina.
4. Rozdzielczość
Ustawić rozdzielczość pomiędzy 1080p a 720p.
Setting.txt
Stan
0
1
Ustawienie domyślne
EV
0-12
0-12
6
Częstotliwość światła
Wyświetlanie
RTC (zegar czasu
rzeczywistego)
Rozdzielczość
60 Hz
50 Hz
0
znacznik
czasu wył.
znacznik
czasu wł.
1
Ustawianie daty i godziny
1. Za pomocą programu Microsoft Word, Word Pad lub innego programu do edycji
tekstu należy utworzyć dokument .txt zatytułowany „settime.txt”.
2. Otworzyć nowy dokument tekstowy, wprowadzić prawidłową lokalną datę i
godzinę zgodnie z poniższym wzorem. Na przykład: Aktualna data i godzina
w Londynie to: 06:09:01, 8 lipca 2013 r. Zapis musi wyglądać w następujący
sposób: 2013 07 08, 06 09 01 (pomiędzy każdą z liczb należy wstawić spację).
Po zakończeniu należy zachować plik i wyjść.
3. Podłączyć gogle do komputera i otworzyć dysk wymienny. Skopiować plik
„settime.txt” do katalogu głównego karty microSD.
4. Odłączyć kamerę od komputera.
5. Kamera automatycznie ustawi nową datę i godzinę przy kolejnym uruchomieniu gogli.
6. Aby zobaczyć znacznik czasu na swoich filmach i zdjęciach, należy włączyć
funkcję znacznika czasu, jak pokazano na stronie 6, w rozdziale „Menu ustawień”.
1080P
720P
0
Ładowanie za pomocą kabla USB
1.Podłączyć kamerę do komputera za pomocą kabla USB.
2.Znaleźć plik setting.txt, otwierając dysk wymienny.
3.Wybór „Y” oznacza, że można aktualizować nowe dane. Ustawieniem
domyślnym jest „N”, należy uruchomić ponownie kamerę, aby aktywować to
ustawienie.
Setting.txt
UWAGA:Dzięki temu ustawieniu użytkownik może wybrać 50 Hz lub 60 Hz, aby
uniknąć migania podczas nagrywania wideo w pomieszczeniu. Należy zmienić to
ustawienie, aby dostosować częstotliwość źródła światła
Stan LED
Stan
Zielone światełko
Niebieskie
światełko
Czerwone
światełko
Włączone
Czuwanie
wył.
wył.
Wyłączone
wył.
wył.
wył.
Nagrywanie
Czuwanie
Brak karty lub
pełna pamięć
Miga szybko 5
razy i wyłącza się
Niski poziom
naładowania
akumulatora
Ładowanie
W pełni
naładowany
Wibracje
Miga szybko 5-10
sek. i wyłącza się
wył.
wył.
wył.
wył.
wł.
Wibracja 1
sek.
Wibracja 2
sek.
Wibracja 0,5
sek.
Wibruje
przez 2 sek.
i wyłącza się
Wibruje
trzykrotnie i
wyłącza się
Nie dotyczy
wył.
wył.
wył.
Nie dotyczy
Miganie 1 na
sek.
Miga szybko
5 razy i
wyłącza się
wył.
wył.
Wyłączyć kamerę, następnie podłączyć ją razem z akumulatorem do komputera za pomocą
kabla USB dołączonego do zestawu.
Zapali się niebieskie światełko LED wskazujące, że akumulator się ładuje.
Niebieskie światełko LED wyłączy się, kiedy akumulator będzie w pełni naładowany.
Akumulator może pracować ok. 90-100 minut przy 1080p@30 fps lub 720p@60 fps. Pełne
naładowanie zajmie 2-3 godziny.
UWAGA
Upewnić się, że karta jest włożona poprawnie.
Nie dotykać styków na tylnej ściance karty microSD.
Karta może zostać uszkodzona, jeśli nie włoży się jej poprawnie.
Karta i dane mogą zostać uszkodzone, jeśli wkłada się lub wyjmuje kartę microSD,
kiedy kamera jest włączona.
Nie należy dotykać wtyczki kabla, ponieważ może to mieć wpływ na wydajność i
funkcje kamery.
Kamera obsługuje karty microSD/SDHC klasy 4 lub wyższej do 32 GB.
Karty microSD o niższej klasie mogą spowodować spadek wydajności podczas
nagrywania.
Podłączenie do komputera
Można przesłać nagrane materiały wideo i zdjęcia na komputer po włączeniu
komputera i kamery.
1. Włączyć kamerę.
2. Podłączyć kamerę do komputera za pomocą kabla USB.
3. Po pomyślnym podłączeniu kamera wyświetli się jako dysk wymienny.
4. Korzystanie z oprogramowania komputerowego do przetwarzania filmów i zdjęć.
5. Przy usuwaniu urządzenia należy kliknąć na dysk wymienny, a następnie wyjąć
kabel USB.
Wodoodporność
Ta kamera przeszła próbę szczelności IP68. Nie bierzemy odpowiedzialności za
uszkodzenie kamery spowodowane dostaniem się cieczy do wnętrza w wyniku
niewłaściwego użycia przez użytkownika.
Ciecz może dostać się do wewnątrz kamery, jeśli port USB nie jest prawidłowo
zabezpieczony.
Jeśli kamera się zamoczy, należy jak najszybciej zetrzeć ciecz za pomocą suchej szmatki.
Pozostałe akcesoria mogą nie być wodoszczelne.
(Nie należy używać kamery przy ekstremalnych temperaturach, ponieważ może to
spowodować jej uszkodzenie.)
1.Środki ostrożności
Należy przeczytać poniższe instrukcje przed rozpoczęciem użytkowania kamery.
① . Nie otwierać.
② . Należy otworzyć port USB według instrukcji zgodnie z kierunkiem strzałki.
Nie należy umieszczać kamery w wilgotnych lub zakurzonych miejscach. Może to
spowodować zniszczenie pliku lub stać się przyczyną porażenia elektrycznego.
Nie należy zostawiać kamery w miejscach narażonych na ekstremalnie wysokie
temperatury, na przykład na słońcu przez długi okres czasu. Może to wpłynąć na
obudowę kamery i jej komponenty wewnętrzne.
Obiektyw należy czyścić miękką szmatką, aby usunąć odciski palców lub kurz.
W przypadku niewłaściwego obchodzenia się z akumulatorem może on
wybuchnąć, spowodować
pożar lub nawet poparzenia chemiczne.
Proszę zwrócić uwagę następujące zalecenia:
Nie demontować.
Nie zgniatać i nie narażać akumulatora na wstrząsy, uderzenia, upuszczenie lub
nadepnięcie.
Przed usunięciem karty microSD należy najpierw wyłączyć kamerę. W przeciwnym
wypadku pliki lub karta mogą zostać uszkodzone.
Aby usunąć kartę microSD, należy wcisnąć ją ponownie w kierunku gniazda, wtedy
zostanie ona wysunięta.
Do jej całkowitego usunięcia należy użyć plastikowej pincety.
Należy usunąć kartę microSD, jeśli kamera ma być nieużywana przez dłuższy
czas. Należy przechowywać ją w dobrze wentylowanym miejscu.
Wyłączenie odpowiedzialności
Gwarancja obejmuje jedynie wady produkcyjne.
Jeżeli kamera ulegnie uszkodzeniu przy uprawianiu sportów o wysokim stopniu
ryzyka, niezatwierdzonych lub niezalecanych przez nas, naprawa nie będzie objęta gwarancją.
XV) Rozwiązywanie problemów
Nie można uruchomić kamery.
Należy sprawdzić, czy akumulator jest naładowany w wystarczającym stopniu.
Po podłączeniu do komputera dysk wymienny nie wyświetla się w katalogu MÓJ
KOMPUTER.
Sprawdzić, czy kabel USB jest prawidłowo podłączony.
Sprawdzić, czy kabel USB nie jest uszkodzony.
Należy spróbować podłączyć kamerę za pomocą innego kabla USB. Jeśli dysk
wymienny wciąż się nie wyświetla, może to oznaczać problem z kamerą.
Skontaktować się z dystrybutorem lub z producentem.
Nagrywanie wideo niemożliwe.
Sprawdzić, czy na karcie microSD jest wystarczająco miejsca. Jeśli nie, sformatować
kartę i rozpocząć nagrywanie.
Sprawdzić, czy akumulator jest wystarczająco naładowany. Jeśli poziom naładowania
akumulatora jest niski, naładować go, a następnie rozpocząć nagrywanie.
Brak dźwięku lub niski poziom głośności.
Sprawdzić, czy ustawienia audio są poprawne.
Sprawdzić, czy ustawienia audio na komputerze są poprawne i spróbować odtworzyć
inne filmy, aby sprawdzić, czy jest dźwięk.
Kamera się nie ładuje.
Sprawdzić, czy zasilacz działa poprawnie, kontrolując wskaźnik LED.
Nie należy ładować tej kamery innym zasilaczem Jeśli problem będzie występował
nadal, należy spróbować naładować urządzenie, podłączając kabel USB do komputera.
Sprawdzić, czy kabel USB jest podłączony prawidłowo.
Nie należy używać innego kabla USB dla tej kamery.
Óculos de Esqui Rollei 135 Full-HD
Dane techniczne
Czujnik obrazu
Czujnik 5 MP CMOS
Liczba pikseli do zdjęć
3 MP
Rozdzielczość
1920x1080P@30 fps; 1280x720P@60 fps
Zasilanie
Wbudowany akumulator litowo-polimerowy 660 mAh
Czas pracy
1,5 h
Pobór mocy
<1,5 W
Pamięć
Obsługuje kartę 32 GB TF o maksymalnej prędkości
Kąt widzenia obiektywu
135°
Format wideo
H.264
Temperatura pracy
-10℃ –50℃
Temperatura przechowywania
-20℃ –60℃
Klasa wodoszczelności
IP 68
Wł./wył. wibracji
Tak
Waga
230 g
Wymiary produktu:
227x95x130 mm
USB
2.0(HS)
Odtwarzacz
KM Player; Quick Time7.6;Storm2012;RealPlayer11
System operacyjny
Win8/Win7/Win XP/Vista/Mac Os10.7 lub nowszy
•
•
•
•
•
720p @ 60 fps, 1080p @ 30 fps
Impermeabilidade IP68
1,5 h de tempo de gravação
Ângulo de 135 graus
Formato de vídeo H.264
Obrigado por ter adquirido estes óculos com câmara! Leia o presente manual antes de
os utilizar.
Especificações técnicas
•
•
•
•
•
Sensor CMOS com 5 megapixéis de resolução.
Suporta cartões microSD/SDHC Classe 4 ou superior e com até 32 GB (não incluído).
Armazenamento de filmes:
1080p=1920x1080p (16:9), 30 fps, ~ 12 Mbit/s de velocidade de transmissão
de dados, 12 minutos de gravação de vídeo por 1 GB
720p=1280x720p (16:9), 60 fps, ~ 12 Mbit/s de velocidade de transmissão de
dados, 12 minutos de gravação de vídeo por 1 GB
O tempo de gravação irá variar consoante os diferentes objetos e ambientes
de gravação.
Alcance de focagem: 0,8 m ~ infinito.
Bateria recarregável (incorporada)
Dimensões: 227 x 95 x 130 mm
Peso: 230 g
Requisitos do sistema
Requisitos mínimos do sistema
Ambiente Windows: Intel Pentium D (dual-core) 3.0 GHz ou superior.
•
Ambiente Mac: PowerMac G5 Dual 2.0 GHz ou superior; Intel Core Duo 2.0
•
GHz ou superior.
Windows XP (Service Pack 2 ou posterior),Windows Vista, Windows7,
•
Windows 8 ou Apple Mac OS X 10.6 ou superior.
2 GB de RAM.
•
1 GB de espaço livre na unidade de disco rígido.
•
Placa gráfica de 1 GB ou superior.
•
QuickTime 7.
•
Suporte de resolução de vídeo de 1024x768 (32 bits).
•
Dispositivo de som compatível com Windows de 16 bits.
•
(Em alguns casos, a taxa de fotogramas pode ser automaticamente reduzida
para maximizar a utilização da memória.)
Apresentação das peças
1. Câmara
2. Manual
3. Cabo USB
4. Pinça de plástico
Design do produto
Peças principais da câmara
Câmara
1. Botão de fotografia
2. Botão de ligar/desligar/gravação
3. Ranhura para cartão microSD
4. Ranhura USB
5. Repor
6. Indicador LED – O indicador LED
encontra-se montado no interior
dos óculos. Pode ver o LED no
canto superior direito.
Utilizar a câmara
1. Para começar a gravar
A)Coloque os óculos e foque-se no que gostaria de gravar.
B)Prima brevemente o botão de ligar/desligar para ligar a câmara. Quando
o indicador LED verde estiver aceso e sentir uma pequena vibração, tal
significa que a câmara está no modo de espera.
C)Prima novamente o botão de ligar/desligar. Ocorre um alerta de vibração e o indicador
LED azul piscará a cada segundo, indicando que a câmara está a gravar.
D)Se a câmara estiver no modo de espera, prima o botão de gravação para
começar a gravar.
E)Para desligar a câmara, prima o botão de alimentação durante cerca de três
segundos. Os óculos irão vibrar durante mais tempo e o indicador LED e a
câmara desligar-se-ão.
2. Para tirar uma fotografia
A) Prima o botão de ligar/desligar. A câmara entrará no modo de espera quando
se sentir uma pequena vibração e o indicador LED verde estiver aceso.
B) Prima brevemente o botão de fotografia para tirar uma fotografia. Quando o indicador
LED azul piscar uma vez, tal significa que a fotografia foi tirada com sucesso.
3. Câmara ligada ao computador
Quando ligar a câmara a um computador, prima o botão de fotografia durante
algum tempo. O ícone de disco amovível desaparecerá e a câmara estará no
modo PC CAM.
4. REPOR
Se a câmara não funcionar corretamente, prima o botão de reposição durante 1
segundo. O sistema regressará ao estado de desligado. Volte a premir o botão
de ligar/desligar para voltar à operação normal.
Menu de definições
1. EV
Um valor de exposição (EV) superior pode aumentar a luminosidade da
qualidade de vídeo.
2. Frequência da luz
Para evitar cintilação na utilização em espaços interiores, é necessário definir a
frequência correta.
3. Marca da data/hora
Ative a marca da data/hora e a data e hora exatas de captura serão depois
apresentadas nos vídeos e fotografias.
4. Resolução
Altere a resolução entre 1080p e 720p.
Setting.txt
1.Ligue a câmara a um computador com o cabo USB.
2.Procure o ficheiro setting.txt, abrindo a unidade de disco amovível.
3.Selecionar a atualização com "Y" significa que pode atualizar para os novos
dados. A predefinição é "N". Reinicie a câmara para ativar a definição.
Setting.txt
Estado
0
1
EV
0-12
0-12
6
Frequência da luz
60 HZ
Marca da data/
hora desativada
1080p
50 HZ
Marca da data/
hora ativada
720p
0
Visor RTC
Resolução
Predefinição
1
0
NOTA: Os utilizadores podem escolher entre 50 HZ e 60 HZ para esta definição
para evitar cintilação no vídeo ao gravar em espaços interiores. É necessário
ajustar a definição de modo a corresponder à frequência da fonte de luz.
Estado do LED
Estado
Alimentação
ligada
Alimentação
desligada
Indicador verde
Indicador azul
Indicador
vermelho
Vibração
Permanece aceso
Apagado
Apagado
Vibra 1 seg.
Apagado
Apagado
Apagado
Vibra 2 seg.
Apagado
Vibra 0,5 seg.
Apagado
Vibra 2 seg. e
depois para
Apagado
Apagado
Vibra 3 vezes
e depois para
Apagado
Aceso
N/A
Apagado
Apagado
N/A
A gravar
Permanece aceso
Sem cartão ou
memória cheia
Pisca rapidamente
5 vezes e apaga-se
Pisca rapidamente
durante 5 a 10 seg.
e, em seguida,
apaga-se
Apagado
Bateria fraca
A carregar
Carregamento
concluído
Apagado
Pisca uma vez por
seg.
Pisca rapidamente
5 vezes e apaga-se
Definição da data/hora
1. Crie um documento .txt com o nome "settime.txt" com o Microsoft Word, Word
Pad ou qualquer outro software de processamento de texto.
2. Abra o novo documento de texto e introduza a hora local de acordo com o
seguinte formato. Exemplo: A hora de Londres atual é: 06:09:01, 8 de julho
de 2013. O formato da introdução deve ser o seguinte: 2013 07 08, 06 09
01 (é necessário um espaço entre cada número). Quando tiver concluído a
introdução, guarde o ficheiro e feche-o.
3. Ligue os óculos ao seu computador e abra a unidade de disco amovível. Copie
o ficheiro "Settime.txt" para o diretório raiz do cartão microSD.
4. Desligue a câmara do computador.
5. A câmara utilizará automaticamente a nova data e hora quando voltar a ligar os óculos.
6. Para visualizar a marca de data/hora nos seus vídeos e fotografias, tem de
ativar a função da marca de data/hora conforme descrito na página 6, secção
"Menu de definições".
Carregamento com o cabo USB
Desligue a câmara e, em seguida, ligue a câmara com a bateria recarregável a um
computador, através do cabo USB fornecido.
O indicador LED azul acender-se-á para indicar que a bateria está a carregar.
O indicador LED azul apagar-se-á quando a bateria estiver totalmente carregada.
A bateria recarregável tem capacidade para funcionar quase 90 a 100 minutos com
as opções 1080p @ 30 fps ou 720p @ 60 fps. Um carregamento completo demora
entre 2 a 3 horas.
NOTAS
Certifique-se de que o cartão está corretamente inserido.
Não toque nos terminais de ligação na parte posterior do cartão microSD.
O cartão poderá ficar danificado se não estiver totalmente inserido.
O cartão e os dados poderão ficar danificados se o cartão microSD for inserido ou
removido com a câmara ligada.
Não toque no conector do cabo, uma vez que tal poderá afetar o desempenho e as
funções da câmara.
A câmara suporta cartões microSD/SDHC Classe 4 ou superior com até 32 GB.
Cartões microSD de classes inferiores podem provocar uma perda de desempenho
durante a gravação.
Ligar a um computador
Pode transferir os seus vídeos e fotografias gravados para um computador quando
ligar a câmara a um computador.
1. Ligue a câmara.
2. Ligue a câmara ao computador, utilizando o cabo USB.
3. Será apresentado o ícone de disco amovível quando a ligação for efetuada com sucesso.
4. Utilize o software do computador para processar os vídeos e fotografias.
5. Quando sair, clique no ícone de disco amovível e, em seguida, retire o cabo USB.
Impermeabilidade
Esta câmara passou no teste de impermeabilidade IP68. Não assumiremos
qualquer responsabilidade por avarias na câmara resultantes da entrada de
líquidos na câmara devido a utilização indevida por parte do utilizador.
Poderá entrar líquido no interior da câmara se a porta USB não estiver bem fechada.
Se a câmara ficar molhada, limpe o líquido com um pano seco logo que possível.
Outros acessórios da câmara poderão não ser impermeáveis.
(Não utilize a câmara sob temperaturas extremas, dado que tal poderá provocar
avarias na câmara.)
1. Precauções a ter com a câmara
Leia as instruções que se seguem antes de utilizar esta câmara.
① . Não abra.
② . Abra a porta USB de acordo com as instruções da seta.
Não coloque a câmara em locais húmidos e com poeira, uma vez que tal pode
causar a perda de dados ou um choque elétrico.
Não deixe a câmara em locais expostos a temperaturas extremamente elevadas,
como, por exemplo, sob a incidência direta da luz solar, durante longos períodos
de tempo. Tal poderá danificar a caixa da câmara e componentes internos.
Limpe a lente com um pano macio para remover quaisquer dedadas ou poeiras.
Se a bateria recarregável for incorretamente utilizada, pode explodir ou causar um
incêndio ou mesmo queimaduras químicas.
Respeite as precauções que seguem:
Não desmonte o produto.
Não esmague, nem submeta a bateria recarregável a qualquer choque ou força, tal
como martelar, pisar ou deixar cair a mesma.
Antes de remover o cartão microSD, desligue primeiro a câmara. Caso contrário,
poderão ocorrer danos nos ficheiros ou no cartão microSD. Para remover o cartão
microSD, pressione novamente o cartão para a ranhura do cartão e o cartão
libertar-se-á. Utilize a pinça de plástico para retirar totalmente o cartão microSD.
Retire o cartão microSD antes de armazenar a câmara durante um longo período
de tempo. Guarde-a num local bem ventilado.
Exoneração de responsabilidade
A garantia apenas cobre defeitos de fabrico. Caso a câmara avarie durante a
participação em atividades ou desportos de alto risco não recomendados por nós,
tal avaria não será abrangida pela garantia.
XV) Resolução de problemas
Não é possível ligar a câmara.
Verifique se a carga da bateria é suficiente.
Após a câmara estar ligada ao computador, não é possível encontrar o disco
amovível na pasta O MEU COMPUTADOR/COMPUTADOR.
Verifique se a ligação USB foi corretamente efetuada.
Verifique se o cabo USB está em bom estado.
Experimente outro cabo USB. Se ainda não encontrar o disco amovível, a câmara
poderá ter um problema. Contacte o seu distribuidor ou o fabricante.
Não é possível gravar um vídeo.
Verifique se o cartão microSD tem espaço suficiente. Se não tiver, formate o cartão
microSD e, em seguida, volte a gravar.
Verifique se existe carga suficiente. Se a carga da bateria for baixa, carregue a
câmara e, em seguida, volte a gravar.
Não há som ou o volume está baixo.
Verifique se a definição de áudio está correta.
Verifique se a definição de áudio no computador está correta e experimente
reproduzir outros vídeos para verificar se existe som.
A câmara não carrega.
Verifique se o adaptador de alimentação funciona corretamente através do
indicador LED. Não utilize outro adaptador para carregar a câmara. Se esta não
carregar normalmente com o adaptador, tente efetuar o carregamento através da
ligação USB a um computador.
Verifique se a ligação USB foi corretamente efetuada. Não utilize outro cabo USB
para esta câmara.
Especificações
Sensor de imagem
Pixéis para tirar
fotografias
Resolução
Sensor CMOS de 5 megapixéis
3 MP
Duração da carga
1920x1080p @ 30 fps; 1280x720p @ 60 fps
Bateria de polímero de iões de lítio de 660 mAh
incorporada
1,5 horas
Consumo de energia
< 1,5 W
Memória
Suporta cartões microSD de alta velocidade até 32 GB
Ângulo de fotografia
135 graus
Formato de vídeo
Temperatura de
funcionamento
Temperatura de
armazenamento
Classe de
impermeabilidade
Vibração ao ligar/desligar
H.264
Fonte de alimentação
-10 ℃ – 50 ℃
-20℃ – 60℃
IP 68
Sim
Peso físico
230 g
Dimensões do produto
227 x 95 x 130 mm
USB
2.0(HS)
Programa de reprodução
KM Player; Quick Time 7.6; Storm2012; RealPlayer 11
Sistema operativo
Win8/Win7/Win XP/Vista/Mac Os X 10.7 ou superior
Благодарим за приобретение очков со встроенной к амерой. Перед
использованием ознакомьтесь с настоящей инструкцией.
Лыжные очки Rollei/135 Full HD
Технические характеристики
Разрешение матрицы: 5 мегапикселей, CMOS.
Поддержка карт microSD/SDHC класса 4 или выше, можно использовать
•
карты объемом до 32 ГБ (не входят в комплект поставки).
Память для записи видео:
•
1080P=1920x1080p (16:9), 30fps, скорость передачи данных ~ 12 Мбит/с,
12 минут записи на 1 ГБ
720P=1280x720p (16:9), 60fps, скорость передачи данных ~ 12 Мбит/с, 12
минут записи на 1 ГБ
Продолжительность записи различается в зависимости от объектов
•
съемки и окружающей среды.
Диапазон фокусировки: от 0,8 м до бесконечности.
•
Заряжаемый аккумулятор (встроенный)
Размеры: 227*95*130 мм
Вес: 230 г
Требования к операционной системе
•
•
•
•
•
720P@60FPS, 1080P@30FPS
Водонепроницаемость IP68
Продолжительность записи 1,5 часа
Угол записи 135 градусов
Формат видео H.264
Минимальные требования к системе
ОС Windows: процессор 3.0 ГГц Intel Pentium D (Dual Core) или быстрее.
•
ОС Mac: Dual 2.0 ГГц PowerMac G5 или быстрее; 2.0 ГГц Intel Core Duo
•
или быстрее.
Windows XP (Service Pack 2 или выше), Windows Vista, Windows 7,
•
Windows 8 или Apple Mac X 10.6 или выше.
2 ГБ RAM.
•
1 ГБ свободного места на жестком диске.
•
Видеокарта 1 ГБ или больше.
•
QuickTime 7.
•
Поддержка видео с разрешением 1024x768 (32 бита).
•
Звуковое устройство 16 бит с поддержкой Windows.
•
(В некоторых случаях частота кадров может быть автоматически снижена
для увеличения памяти).
Обзор деталей
1. Камера
Использование камеры
2. Инструкция
3. Кабель USB
4. Пластиковые щипцы
Дизайн изделия
Основные детали камеры
Камера
1. Кнопка спуска фотокамеры
2. Кнопка включения/выключения
записи
3. Слот для карты microSD
4. Разъем USB
5. Сброс
6. Светодиодный индикатор –
установлен с внутренней стороны
очков. Светодиод виден в правом
верхнем углу.
1. Начало записи
A)Наденьте очки со встроенной камерой и наведите их на объект, который
хотите снять.
B)Чтобы включить камеру, коротко нажмите кнопку ON/OFF (ВКЛ/ВЫКЛ).
Когда загорятся зеленые светодиодные индикаторы и поступит сигнал в
виде вибрации, это означает, что камера находится в режиме готовности.
C)Снова нажмите кнопку ON/OFF. Почувствуется предупредительная
вибрация, и светодиодные индикаторы начнут мигать синим светом
каждую секунду. Это означает, что камера записывает.
D)Если камера находится в режиме готовности, нажмите кнопку записи,
чтобы начать видеосъемку.
E)Чтобы выключить камеру, нажмите кнопку питания и удерживайте
ее нажатой примерно в течение трех секунд. В очках почувствуется
продолжительная вибрация, и камера выключится.
2. Съемка фотографий
A)Нажмите кнопку ON/OFF. Послышится короткая вибрация и загорится
зеленый светодиодный индикатор. Камера перейдет в режим готовности.
B)Коротко нажмите кнопку спуска фотокамеры. При успешной съемке
фотографии однократно загорится синий светодиод.
3. Камера для ПК
При подключении камеры к ПК нажмите и удерживайте кнопку спуска
фотокамеры. Значок съемного диска исчезнет, а камера переключится в
режим компьютерной камеры.
4. СБРОС
Если камера работает некорректно, нажимайте кнопку сброса в течение 1
секунды. Система выключится. Еще раз нажмите кнопку ON/OFF, и камера
запустится в обычном режиме эксплуатации.
Меню настроек
1. EV
Более высокое значение EV увеличивает яркость видео.
2. Световая частота
Чтобы избежать эффекта мерцания при использовании камеры в
помещении, необходимо установить правильное значение частоты.
3. Метка времени
Установите время, чтобы оно отображалось в видеофильмах и на
фотографиях.
1
Установка времени
1. Создайте текстовый документ с названием «settime.txt» с помощью Microsoft
Word, Word Pad или любого другого текстового редактора.
2. Откройте новый текстовый документ, введите точное местное время в
соответствии с указанным ниже форматом. Например: текущее время в
Лондоне - 06:09:01, 8 июля 2013 г. Синтаксис вводимых данных должен
иметь следующий формат: 2013 07 08, 06 09 01 (между каждой цифрой
должен быть пробел). После завершения сохраните файл и завершите
программу.
3. Подключите очки к используемому ПК и откройте съемный диск. Скопируйте
файл «settime.txt» в корневой каталог карты microSD.
4. Отключите камеру от ПК.
5. Новые дата и время автоматически будут использованы камерой при
следующем ее включении.
6. Чтобы метка времени выводилась в видеофильмах и на фотографиях,
необходимо активировать функцию вывода времени, как описано на стр. 6
в главе «Меню настроек».
0
Зарядка с помощью кабеля USB
4. Разрешение
Можно устанавливать разрешение в диапазоне от 1080p до 720p.
Setting.txt
1.Подключите камеру к ПК с помощью кабеля USB
2.Найдите файл setting.txt, щелкнув на значке съемного диска.
3.Если для обновления выбрать «Y» (да), то новые данные обновятся.
Значение по умолчанию – «N» (нет). Перезапустите камеру, чтобы
активировать эту настройку.
Setting.txt
Состояние
0
1
Значение по умолчанию
EV
0-12
0-12
6
Световая частота
60 Гц
Метка
времени
выкл.
1080p
50 Гц
Метка
времени
вкл.
720P
0
Отображение RTC
Разрешение
ПРИМЕЧАНИЕ. Пользователи могут выбрать значение 50 Гц или 60 Гц,
чтобы избежать мерцания при съемке видео в помещении. Эта настройка
регулируется, чтобы подобрать частоту источника света.
Состояние светодиодной лампочки
Красный
свет
Выкл.
Состояние
Зеленый свет
Синий свет
Питание вкл.
Режим готовности
Выкл.
Питание выкл.
Выкл.
Выкл.
Вибрация 2 с
Запись
Режим готовности
Выкл.
Вибрация 0,5 с
Карта не
вставлена, или
память заполнена
Быстро мигает 5
раз и выключается
Выкл.
Мигает один
раз в секунду
Быстро
мигает 5 раз и
выключается
Выкл.
Выкл.
Выкл.
Вкл.
Вибрация
2 с, затем
выключается
Вибрация 3
раза, затем
выключается
Н/П
Выкл.
Выкл.
Н/П
Батарея почти
разряжена
Идет зарядка
Полностью
заряжено
Быстро мигает
5-10 с, затем
выключается
Выкл.
Выкл.
Выкл.
Вибрация
Вибрация 1 с
DВыключите камеру, затем подсоедините камеру с заряжаемым аккумулятором к
компьютеру с помощью кабеля USB, входящего в комплект поставки.
В начале зарядки загорается синий светодиод.
По завершении зарядки он погаснет.
Заряжаемый аккумулятор может работать около 90-100 минут при съемке видео с
разрешением 1080P@30FPS или 720p@60fps. Полная зарядка занимает около 2-3
часов.
ПРИМЕЧАНИЕ
Убедитесь в том, что карта вставлена правильно.
Не прикасайтесь к соединительным клеммам на задней поверхности карты microSD.
Если карта вставлена не до конца, это может привести к ее повреждению.
Если карта вставляется или извлекается во время работы камеры, это может
привести к повреждению карты и потере данных.
Не прикасайтесь к кабельному разъему, поскольку это может отразиться на
работоспособности и функциях камеры.
Камера поддерживает карты microSD/SDHC класса 4 или выше, в ней можно
использовать карты объемом до 32 ГБ.
Карты microSD более низкого класса могут стать причиной снижения
производительности во время записи.
Подключение к компьютеру
Записанные видеофильмы и фотографии можно загрузить на компьютер, если к
нему подключена камера.
1. Включите камеру.
2. Подключите камеру к компьютеру с помощью кабеля USB.
3. При успешном соединении отображается значок съемного диска.
4. Для обработки видео и фотографий можно использовать программное
обеспечение.
5. Перед выходом извлеките съемный диск, а затем отсоедините кабель USB.
Водонепроницаемость
Данная камера обладает водонепроницаемостью класса IP68. Мы не несем
ответственность за неисправность камеры, вызванную проникновением в нее
воды в результате неправильной эксплуатации со стороны пользователя.
Жидкость может проникнуть внутрь камеры, если разъем USB закрыт неплотно.
При попадании на камеру жидкости немедленно протрите ее сухой тканью.
Другие аксессуары камеры не являются водонепроницаемыми.
(Не используйте камеру при экстремальных температурах, поскольку это
может привести к возникновению неисправностей).
1. Меры предосторожности при использовании камеры
Перед использованием камеры ознакомьтесь с инструкциями ниже.
① . Не открывайте так.
② .Открывайте заглушку разъема USB только в направлении, указанном
стрелкой.
Не кладите камеру в мокрое и пыльное место, это может привести к потере
файлов или стать причиной удара током.
Не оставляйте камеру на длительное время в местах воздействия слишком
высоких температур, например, прямого солнечного света. Это может
повредить корпус камеры и внутренние компоненты.
Для удаления отпечатков пальцев или пыли с объектива используйте мягкую ткань.
При неправильном обращении с заряжаемым аккумулятором он может
взорваться, стать причиной пожара или даже химических ожогов.
Соблюдайте следующие меры предосторожности.
Не разбирайте устройство.
Не подвергайте заряжаемый аккумулятор ударам или любым другим
воздействиям: не стучите по нему, не роняйте и не наступайте на него.
Перед извлечением карты microSD сначала выключите камеру. В противном
случае возможны повреждения файлов или карты microSD. Для извлечения
карты microSD нажмите на карту, после чего она разблокируется. Используйте
пластиковые щипцы для полного извлечения карты microSD.
Если вы не планируете использовать камеру в течение продолжительного
периода времени, карту microSD следует извлечь. Храните ее в хорошо
проветриваемом месте.
Ограничение ответственности
Гарантия распространяется только на дефекты изготовления. Если камера
повреждена вследствие использования в экстремальных видах спорта,
неодобренных или нерекомендованных нами, то такое повреждение не
считается гарантийным случаем.
XV) Поиск и устранение неисправностей
Камера не включается
Проверьте уровень зарядки аккумулятора.
После подключения к ПК в области «Мой компьютер» не выводится значок
съемного диска.
Проверьте, правильно ли работает разъем USB.
Проверьте, правильно ли работает кабель USB.
Попробуйте использовать другой кабель USB. Если съемный диск все еще
не отображается, то возможна неисправность камеры. Свяжитесь со своим
дистрибьютором или изготовителем.
Запись видео не работает
Проверьте, достаточно ли места на карте microSD. Если места недостаточно,
отформатируйте карту microSD и начните запись.
Проверьте уровень зарядки аккумулятора. Если он низкий, зарядите камеру и
начните запись.
Звук отсутствует или слишком тихий
Проверьте правильность настроек звука.
Проверьте правильность настроек звука ПК. Попробуйте воспроизвести
другие видеоклипы, чтобы проверить наличие звука.
Камера не заряжается
Проверьте, правильно ли работает блок питания и горит ли на нем светодиод.
Не используйте для зарядки камеры другой блок питания. Если зарядить
аккумулятор по-прежнему не удается, попробуйте выполнить зарядку путем
подключения кабеля USB к ПК.
Проверьте, правильно ли работает разъем USB. Не используйте другие
кабели USB для зарядки камеры.
Rollei skidglasögon/ski goggles 135 Full - HD
Технические характеристики
Матрица
Количество пикселей при съемке
фотографий
Разрешение
Питание
Время работы аккумулятора
Потребляемая мощность
Матрица CMOS 5 мегапикселей
3 Мп
1920x1080P@30fps ; 1280x720P@60fps
Встроенный литий-полимерный аккумулятор
емкостью 660 мА/час
1,5 часа
Угол съемки
<1,5 Вт
Поддержка высокоскоростной карты TF с
максимальным объемом 32 ГБ
135 градусов
Формат видео
H.264
Память
Рабочая температура
-10℃ –50℃
Температура хранения
-20℃ -60℃
Класс водонепроницаемости
IP 68
Вибрация при включении/выключении
Да
Вес
230 г
Размеры
227*95*130 мм
USB
2.0(HS)
Проигрыватель
KM Player; Quick Time 7.6; Storm 2012; RealPlayer 11
Операционная система
Win 8/Win 7/Win XP/Vista/Mac OS 10.7 или выше
•
•
•
•
•
720P@60FPS, 1080P@30FPS
Vattentät IP68
1,5 h inspelningstid
135 grader vidvinkel
Videoformat H.264
Tack för att du har köpt dessa bärbara kameraglasögon. Läs den här
användarhandboken innan du använder dem
Tekniska data
•
•
•
•
•
Sensorupplösning 5 megapixlar CMOS.
Stöder Mikro-SD/SDHC-kort klass 4 eller högre och kompatibla upp till 32 GB
(ingår ej).
Filmlagring:
1080P = 1920 x 1080p (16:9), 30fps, ~ 12 Mbit/s datahastighet, 12 minuters
videoinspelning per 1 GB
720P = 1280 x 720p (16:9), 60fps, ~ 12 Mbit/s datahastighet, 12 minuters
videoinspelning per 1 GB
Inspelningslängden varierar beroende på olika inspelningsobjekt och -miljöer.
Fokusområde: 0,8 m ~ oändlighet.
Uppladdningsbart batteri (inbyggt)
Storlek: 227 * 95 * 130 mm
Vikt: 230 g
Datorsystemkrav
Minimala systemkrav
Windowsmiljö: 3,0 GHz Intel Pentium D (dual-core) eller snabbare.
•
Mac-miljö: Dual 2,0 GHz PowerMac G5 eller snabbare; 2,0 GHz Intel Core
•
Duo eller snabbare.
Windows XP (service pack 2 eller senare),Windows Vista, Windows 7,
•
Windows 8 eller Apple Mac X 10.6 eller högre.
2 GB RAM.
•
1 GB ledigt utrymme på hårddisken.
•
Grafikkort 1 GB eller större.
•
QuickTime 7.
•
Stöd för 1024 x 768 videoupplösning (32 bitar).
•
16 bitar Windows-kompatibelt ljudkort.
•
(I vissa fall minskas bildfrekvensen automatiskt för att maximera
minnesanvändningen)
Introduktion av delar
1. Kamera
2. Handbok
3. USB-kabel
4. Plastpincett
Produktdesign
Kamerans viktigaste delar
Camera
1. Fotoknapp
2. På/av/inspelnings-knapp
3. MikroSD-kortplats
4. USB-ingång
5. Återställning
6. Lysdiod – Lysdioden monteras på
insidan av glasögonen. Du kan se
lysdioden i övre högra hörnet.
Använda din kamera
1. Så här börjar du spela in
A)Bär kameraglasögonen och fokusera på det du vill spela in.
B)Tryck kort på på/av-knappen för att slå på kameran. När de gröna lysdioderna
lyser och det vibrerar kort är kameran i standbyläge.
C)Tryck på PÅ/AV-knappen igen. Du känner en vibrationssignal och en blå
lysdiod blinkar varje sekund, vilket betyder att kameran spelar in.
D)Om kameran är i standbyläge trycker du på inspelningsknappen för att börja spela in.
E)För att stänga av kameran trycker du på strömbrytaren i ca. tre sekunder.
Glasögonen vibrerar längre och lysdioden och kameran stängs av.
2. Att fotografera
A)Tryck på på/av-knappen. Kameran går till standbyläge när den vibrerar kort
och den gröna lysdioden lyser.
B)Tryck kort på fotoknappen för att ta en bild. När den blå lysdioden blinkar en
gång betyder det att fotot har tagits.
3. Datorkamera
När du ansluter kameran till datorn trycker du länge på fotoknappen. Flyttbar
enhet försvinner och kameran är i webbkameraläge.
4. ÅTERSTÄLLNING
Om kameran inte fungerar korrekt kan du trycka på återställningsknappen i
1 sekund. Systemet återgår till avstängd status och du kan trycka på på/avknappen för normal användning.
Inställningsmeny
1. Exponeringsvärde (EV)
Högre EV kan öka ljusstyrkan i videon.
2. Ljusfrekvens
För att undvika flimmer för inomhusbruk måste korrekt frekvens ställas in.
3. Tidsstämpel
Ställ in tidsstämpel så att exakt tid visas på video och foto.
4. Upplösning
Ändra upplösningen mellan 1080p och 720p.
Setting.txt
1.Anslut kameran till datorn med USB-kabeln
2.Hitta setting.txt genom att öppna den flyttbara enheten
3.Om du väljer uppdatering med “Y” kan du uppdatera med nya data.
Standardinställning är “N”. Starta om kameran för att aktivera inställningen
Setting.txt
Status
0
1
Standardinställning
Exponeringsvärde (EV)
0-12
0-12
6
Ljusfrekvens
60 HZ
50 HZ
0
RTC-visning
Tidsstämpel av
Tidsstämpel på
1
Upplösning
1080p
720p
0
OBS: Användare kan välja 50 Hz eller 60 Hz med den här inställningen för
att undvika flimmer i videon när man filmar inomhus. Du måste justera denna
inställning så att den matchar ljuskällans frekvens
Status för lysdiod
Status
Grönt ljus
Blått ljus
Rött ljus
Vibration
Slå på
Lyser
av
av
Vibrerar 1 sek
Stänga av
av
av
Vibrerar 2 sek
Inspelning
Lyser
av
Vibrerar 0,5 sek
Inget kort eller
minnet är fullt
Snabb blinkning 5
gånger och släcks
av
Blinkar en gång
per sekund
Snabb
blinkning 5
gånger och
släcks
av
Vibrerar 2 sek,
sedan av
av
av
av
på
Vibrerar 3 gånger,
sedan av
Ej tillämplig
av
av
Ej tillämplig
Laddning
Snabb blinkning i 5-10
sek och sedan av
av
Full laddning
av
Låg batterinivå
Tidsinställning
1. Skapa ett .txt-dokument med namnet “settime.txt” med Microsoft Word, WordPad
eller någon annan programvara för ordbehandling.
2. Öppna det nya textdokumentet, mata in lokal tid enligt följande format. Till
exempel: Tiden i London är just nu: 06:09:01, 8 juli 2013. Inmatningens format
måste se ut så här: 2013 07 08, 06 09 01(mellanslag mellan varje nummer ). När
du är klar sparar du filen och avslutar.
3. Anslut glasögonen till din dator och öppna den flyttbara enheten. Kopiera
“Settime.txt” till roten på mikroSD-kortet.
4. Koppla från kameran från din dator.
5. Kameran kommer automatiskt använda det nya datumet och tiden när du slår på
glasögonen nästa gång.
6. För att se tidsstämpeln i din video och dina foton måste du aktivera
tidsstämpelsfunktionen enligt beskrivningen på sidan 6, kapitel
“Inställningsmeny”.
1. Försiktighetsåtgärder för kameran
Läs instruktionerna nedan innan du använder kameran
Ladda med USB-kabel
Stäng av kameran och anslut sedan kameran med uppladdningsbart batteri till en dator med
den medföljande USB-kabeln
Den blå lysdioden lyser för att visa att batteriet laddas.
Den blå lysdioden slocknar när batteriet är fulladdat.
Det uppladdningsbara batteriet fungerar i omkring 90-100 minuter vid 1080P@30FPS eller
720p@60fps. En fulladdning tar 2-3 timmar.
OBS!
Se till att kortet är korrekt isatt.
Rör inte på kopplingsterminalerna på baksidan av mikroSD-kortet
Kortet kan skadas om det inte är helt isatt
Kortet och data kan skadas om mikroSD-kortet sätts i eller tas ur när kameran är på
Rör inte kabelkontakten eftersom det kan påverka kamerans prestanda och funktioner
Kameran stöder mikroSD/SDHC-kort klass 4 eller högre och kompatibla upp till 32 GB
MikroSD-kort med lägre klass kan orsaka prestandasänkning under inspelning
Ansluta en dator
Du kan ladda upp din inspelade videofilm och foton till en dator när datorn och
kameran är anslutna.
1. Slå på kameran.
2. Anslut din kamera till en dator med USB-kabeln.
3. Den kommer att visa den flyttbara enheten när anslutningen har lyckats.
4. Använd datorns programvara för att bearbeta video och foton.
5. När du vill sluta klickar du på den flyttbara enheten och tar sedan bort USB-kabeln.
Vattentät funktion
Den här kameran är klassad som vattentät IP68. Vi är inte ansvariga för kamerans
felfunktion på grund av att vätska har kommit in i kameran efter missbruk av användaren.
Det kan komma in vätska i kameran om USB-porten inte är ordentligt stängd.
Om kameran blir våt ska du torka av vätskan så snabbt som möjligt med en torr trasa.
Andra kameratillbehör är eventuellt inte vattentäta.
(Använd inte kameran i extrema temperaturer eftersom det kan göra att kameran inte
fungerar som den ska).
① . Öppna inte
② . Öppna USB-porten enligt pilriktningen
Lägg inte kameran på en våt och dammig plats eftersom det kan leda till att filer
förstörs eller orsaka elstöt.
Lämna inte kameran på platser som utsätts för extremt hög temperatur, som i
direkt solljus, under en längre tidsperiod. Det kan påverka kamerahöljet och interna
komponenter.
Rengör linsen med en mjuk trasa för att avlägsna fingeravtryck eller damm.
Om det uppladdningsbara batteriet missköts kan det gå sönder och orsaka brand
eller till och med kemiska brännskador.
Observera följande varningar:
Montera inte isär kameran.
Slå inte sönder och utsätt inte det uppladdningsbara batteriet för några stöter eller
krafter genom att slå på det, tappa det eller trampa på det.
Innan du tar bort mikroSD-kortet ska du stänga av kameran, eftersom det annars
kan orsaka skada på filerna eller mikroSD-kortet. För att ta bort mikroSD-kortet
trycker du in kortet i kortfacket igen och kortet frigörs. Använd plastpincetten för att
ta ut mikroSD-kortet helt.
Ta ut mikroSD-kortet innan du lagrar kameran under en längre tidsperiod. Förvara
den på en välventilerad plats.
Friskrivningsklausul
Garantin täcker endast tillverkningsfel. Om kameran går sönder när den används vid
högrisksporter eller aktiviteter som vi inte har godkänt, så täcks detta inte av garantin.
XV) Felsökning
Kameran går inte att starta
Kontrollera att batteriet är laddat.
Efter anslutning till dator kan ingen flyttbar enhet hittas under MIN DATOR.
Kontrollera att USB-anslutningen är korrekt.
Kontrollera om USB-kabeln är normal
Prova med en annan USB-kabel. Om det fortfarande inte går att hitta den
flyttbara enheten kan det vara problem med kameran. Kontakt din distributör eller
tillverkaren.
Det går inte att spela in video
Kontrollera om mikroSD-kortet har tillräckligt med minnesutrymme. Om det inte har
det ska du formatera mikroSD-kortet och sedan starta inspelningen
Kontrollera att kameran är tillräckligt laddad. Om laddningen är låg ska du ladda
kameran och sedan spela in.
Inget ljud eller låg volym.
Kontrollera att ljudinställningen är korrekt.
Kontrollera att ljudinställningen på datorn är korrekt och försök spela andra videor
för att se om de har något ljud.
Det går inte att ladda kameran
Kontrollera att strömadaptern fungerar som den ska med LED-indikatorn. Ladda
inte kameran med en annan adapter. Om du fortfarande inte kan ladda normalt kan
du prova att ladda med USB-kabeln ansluten till datorn.
Kontrollera om USB-anslutningen är korrekt. Använd inte någon annan USB-kabel
för den här kameran.
Specifikationer
Bildsensor
5 megapixel CMOS-sensor
Pixel för att ta bilder
3 MP
Upplösning
1920 x 1080P@30fps; 1280 x 720P@60fps
Strömkälla
Inbyggt 660 mAh li-polymer-batteri
Batteritid
1,5 timmar
Strömförbrukning
< 1,5 W
Minne
Stöder max 32 GB TF-kort med hög hastighet
Fotograferingsvinkel
135 grader
Videoformat
H.264
Drifttemperatur
-10℃ –50℃
Förvaringstemperatur
Vattentäthet,
klassificering
På/av-vibration
-20℃ -60℃
Fysisk vikt
230 g
Produktens storlek
227 * 95 * 130 mm
USB
2.0(HS)
KM Player; Quick Time 7.6; Storm 2012;
RealPlayer 11
Win8/Win7/Win XP/Vista/Mac Os 10.7 eller högre
Spelare
Operativsystem
IP 68
Ja
Děkujeme vám, že jste si zakoupili tyto brýle s kamerou. Před jejich použitím si
prostudujte tento návod.
Lyžařské brýle Rollei 135 Full–HD
Technické údaje
•
•
•
•
•
•
Rozlišení CMOS senzoru 5 megapixelů.
Podpora karty microSD/SDHC třídy 4 nebo vyšší a kompatibilní do 32 GB (není přiložena).
Ukládání videa:
1080 p = 1 920 ×1 080 p (16:9), 30 snímků/s, datová rychlost ~12 Mb/s, 12
minut videozáznamu na 1 GB
720 p = 1 280 × 720 p (16:9), 60 snímků/s, datová rychlost ~12 Mb/s, 12 minut
videozáznamu na1 GB
Délka záznamu se bude lišit podle nahrávaných objektů a prostředí.
Rozsah zaostření: 0,8 m ~ nekonečno.
Dobíjecí baterie (zabudovaná)
Rozměry: 227×95×130 mm
Hmotnost: 230 g
Požadavky na počítačový systém
•
•
•
•
•
720 P při 60 FPS, 1 080 P při 30 FPS
Vodotěsné, stupeň krytí IP 68
Doba záznamu 1,5 h
Široký úhel, 135 stupňů
Formát videa H.264
Minimální systémové požadavky
OS Windows: 3.0 GHz Intel Pentium D (dvojjádrový) nebo rychlejší.
•
OS Mac: Dual 2.0 GHz PowerMac G5 nebo rychlejší; 2.0 GHz Intel Core Duo
•
nebo rychlejší
Windows XP (Service Pack 2 nebo novější), Windows Vista, Windows 7,
•
Windows 8, nebo Apple Mac X 10.6 nebo vyšší.
2 GB paměti RAM.
•
1 G volného místa na pevném disku.
•
1GB nebo větší grafická karta.
•
QuickTime 7.
•
Podpora videa s rozlišením 1024×768 (32 bit).
•
16bitové zvukové zařízení, kompatibilní s Windows.
•
(V některých případech může být frekvence snímků automaticky snížena za
účelem zvýšení paměti.)
Součást balení
1. Kamera
2. Návod
3. Kabel USB
4. Plastová pinzeta
Popis výrobku
Používání kamery
Hlavní části kamery
1. Nahrávání
A)Nasaďte si brýle s kamerou a zaměřte se na to, co chcete nahrát.
B)Krátce stiskněte tlačítko ZAP/VYP na kameře. Když se zelené LED kontrolky
rozsvítí a pocítíte krátké zavibrování, kamera je v pohotovostním režimu.
C)Znovu stiskněte tlačítko ZAP/VYP. Kamera zavibruje, modrá LED kontrolka
se rozbliká jednou za vteřinu a kamera nahrává.
D)K dyž je kamera v pohotovostním režimu, stisknutím tlačítka ZAP/VYP/
zahájíte nahrávání.
E)Kameru vypnete stisknutím tlačítka ZAP/VYP na cca tři vteřiny. Brýle zavibrují
poněkud déle a LED kontrolka i kamera se vypnou.
2. Fotografování
A)Stiskněte tlačítko ZAP/VYP. Když uslyšíte krátké zavibrování, kamera se
přepne do pohotovostního režimu, zelená LED kontrolka se rozsvítí.
B)Krátkým stisknutím tlačítka fotografování pořídíte snímek. Když modrá LED
kontrolka jednou blikne, znamená to, že fotografie byla úspěšně pořízena.
3. Kamera k počítači
Když připojíte kameru k počítači, dlouze stiskněte tlačítko fotografování, symbol
vyměnitelného disku zmizí a kamera je v režimu počítačové kamery PC CAM.
4. RESETOVÁNÍ
Pokud kamera nepracuje správně, stiskněte na 1 vteřinu tlačítko resetování,
systém se vypne. Opětovným stisknutím tlačítka ZAP/VYP se vrátíte do běžného
provozu.
Kamera
1. Tlačítko fotografování
2. Tlačítko ZAP/VYP/nahrávání
3. Slot na microSD kartu
4. USB slot
5. Tlačítko resetování
6. LED kontrolka –zabudovaná
do vnitřní strany brýlí. Je vidět v
pravém horním rohu.
Menu nastavení
1. EV
Vyšší EV zvýší brilanci kvality videa.
2. Světelná frekvence
Aby při použití kamery uvnitř nedocházelo k blikání, je třeba nastavit správnou
frekvenci.
3. Časové razítko
Po nastavení časového razítka se na videu a fotografii zobrazí přesný čas.
4. Rozlišení
Rozlišení lze měnit mezi 1 080 a 720 p.
Setting.txt
1.Kameru připojte k počítači pomocí USB kabelu.
2.Po otevření vyměnitelného tisku vyhledejte soubor setting.txt.
3.Vyberte aktualizaci s „Y", což znamená, že můžete aktualizovat nová data.
Výchozí nastavení je „N". Pro aktivaci nastavení kameru restartujte.
Setting.txt
Stav
0
1
EV
Světelná
frekvence
0–12
0–12
Výchozí
nastavení
6
60 HZ
50 HZ
0
časové razítko
vypnuté
1080 P
časové razítko
zapnuté
720 P
RTC displej
Rozlišení
1
0
POZNÁMKA: Uživatelé mohou vybrat mezi 50 HZ nebo 60 HZ, aby se vyvarovali
blikání videa při nahrávání uvnitř. Toto nastavení je třeba přizpůsobit frekvenci
zdroje světla.
Stavová LED
Stav
Zelené světlo
Modré světlo
Zapnuto
zůstává zapnuto
vypnuto
Červené
světlo
vypnuto
Vypnuto
vypnuto
vypnuto
vypnuto
vibrace 2 s
Nahrávání
Není karta
nebo je plná
paměť
svítí
bliká 1× za s
vypnuto
vibrace 0,5 s
rychle 5× zabliká a
vypne se
rychle 5× zabliká a
vypne se
vypnuto
vibruje 2 s, pak
se vypne
Nabíjení
rychle bliká 5–10 s,
pak se vypne
vypnuto
Plně nabito
vypnuto
Slabá baterie
Vibrace
vibrace 1 s
vypnuto
vypnuto
vypnuto
zapnuto
vibruje 3×, pak
se vypne
není
vypnuto
vypnuto
není
Nastavení času
1. V programu Microsoft Word, Word Pad nebo jiném softwaru na zpracování textu
vytvořte dokument ve formátu .txt s názvem „settime.txt”.
2. Nový textový dokument otevřete, zadejte aktuální místní čas podle následujícího
vzoru. Příklad: Aktuální čas v Praze je: 06:09:01, datum 8. července 2013.
Syntax vstupu musí vypadat takto: 2013 07 08, 06 09 01 (mezi každým číslem je
nutná mezera). Poté soubor uložte a ukončete program.
3. Brýle připojte k počítači a otevřete vyměnitelný disk. Soubor „Settime.txt”
zkopírujte do kořenového adresáře paměťové karty microSD.
4. Kameru odpojte od počítače.
5. Při příštím zapnutí brýlí kamera automaticky použije nové datum a čas.
6. Aby bylo na vašem videu a fotografiích vidět časové razítko, musíte aktivovat
funkci časového razítka podle popisu na straně 6, kapitola „Menu nastavení".
Nabíjení pomocí USB kabelu
Kameru vypněte, pak ji s dobíjitelnou baterií připojte k počítači pomocí přiloženého
USB kabelu.
Modrá LED kontrolka se rozsvítí. To znamená, že se baterie nabíjí.
Modrá LED se vypne, jakmile bude baterie zcela nabitá.
Dobíjitelná baterie může pracovat téměř 90–100 minut při 1 080 p a 30 snímcích/s
nebo 720 p a 60 snímcích/s; kompletní nabití trvá 2–3 hodiny.
POZNÁMKA
Zkontrolujte, zda je karta správně vložena.
Nedotýkejte se kontaktů na zadní části microSD karty.
Pokud není karta zcela zasunuta, může dojít k jejímu poškození.
Pokud microSD kartu vložíte nebo vyjmete a kamera je zapnutá, může dojít k
poškození karty a dat.
Nedotýkejte se zástrčky kabelu, může to ovlivnit výkon a funkčnost kamery.
Tato kamera podporuje karty microSD/SDHC třídy 4 nebo vyšší a kompatibilní do 32 GB.
MicroSD karty s nižší třídou mohou způsobit pokles výkonu během nahrávání.
Připojení k počítači
1. Kameru zapněte.
2. Pomocí dodaného USB kabelu připojte kameru k počítači.
3. Po úspěšném připojení se zobrazí symbol vyměnitelného disku.
4. Ke zpracování videa nebo fotografií použijte počítačový software.
5. Před ukončením programu klikněte na symbol vyměnitelného disku a poté
odpojte USB kabel.
Vodotěsná funkce
Tato kamera splňuje vodotěsnost stupně IP68. Nejsme odpovědní za nefunkčnost
kamery, pokud dojde k vniknutí tekutiny do kamery, které bylo způsobeno chybným
použitím ze strany uživatele.
Tekutina se může dostat dovnitř kamery, pokud USB port není řádně uzamčený.
Pokud se kamera namočí, tekutinu co nejdříve otřete suchým hadříkem.
Jiné příslušenství ke kameře nemusí být vodotěsné.
(Kameru nepoužívejte v extrémních teplotách, může to způsobit její nefunkčnost.)
1. Upozornění ke kameře
Před použitím této kamery si přečtěte níže uvedené pokyny:
Dobíjecí baterii nemačkejte, ani ji nevystavujte otřesům nebo působení síly, např.
tlučením kladivem, upadnutím či šlápnutím.
Před vyjmutím microSD karty nejprve vypněte kameru, jinak může dojít k poškození
souborů nebo microSD karty. Pokud chcete microSD kartu vyjmout, zatlačte kartu
znovu do slotu, poté se karta uvolní. Pro úplné vyjmutí microSD karty použijte
plastovou pinzetu.
Před odložením kamery na dlouhou dobu microSD kartu vyjměte. Uchovávejte ji na
dobře větraném místě.
Zánik záruky
① . Neotevírejte.
② . USB port otevírejte podle směru šipky.
Kameru nepokládejte na vlhké a prašné místo, může dojít k poškození souboru
nebo k zasažení elektrickým proudem.
Kameru nenechávejte po delší dobu na místech s velmi vysokými teplotami, např.
na přímém slunečním světle. Může dojít k poškození pouzdra kamery a vnitřních
součástí.
K odstranění otisků prstů a prachu s objektivu použijte měkký hadřík.
Pokud budete s dobíjecí baterií špatně zacházet, může explodovat, způsobit požár
nebo dokonce poleptání chemickými látkami.
Věnujte pozornost těmto výstražným upozorněním:
Nedemontujte.
Záruka pokrývá pouze výrobní vady. Pokud by došlo k závadě kamery při účasti
na vysoce rizikových sportech či aktivitách, které nejsou námi schváleny nebo
doporučeny, nebude závada pokryta zárukou.
XV) Závady a jejich odstraňování
Kameru nelze zapnout.
Zkontrolujte, zda je dostatečně nabitá baterie.
Po připojení k počítači nelze v adresáři TENTO POČÍTAČ najít vyměnitelný disk.
Zkontrolujte, zda je USB připojení správné.
Zkontrolujte, zda je USB kabel v pořádku.
Zkuste použít jiný USB kabel. Pokud stále nebude možné vyměnitelný disk nalézt,
kamera může být porouchaná. Kontaktujte svého prodejce nebo výrobce.
Nelze nahrávat video.
Zkontrolujte, zda je na microSD kartě dostatek místa, pokud ne, kartu formátujte a
poté začněte nahrávat.
Zkontrolujte, zda je dostatečné napájení, pokud je baterie slabá, kameru dobijte a
pak nahrávejte.
Nevychází žádný nebo slabý zvuk.
Zkontrolujte, zda je správně nastaven zvuk.
Zkontrolujte, zda je správně nastaven zvuk v počítači a zkuste spustit jiná videa,
zda zvuk funguje.
Kameru nelze nabít.
Zkontrolujte podle LED indikátoru, zda napájecí adaptér správně pracuje. Kameru
nenabíjejte jinými adaptéry. Pokud ji nelze nabít běžných způsobem, zkuste připojit
USB kabel k počítači.
Zkontrolujte, zda je USB připojení v pořádku. Ke kameře nepřipojujte žádné jiné
USB kabely.
Technické údaje
Obrazový snímač
5 mega pixel CMOS senzor
Pixely pro fotografování
Napájení
3 MP
1 920 × 1 080 p při 30 snímcích/s; 1 280 × 720 p při
60 snímcích/s
zabudovaná 660mAh lithium-polymerová baterie
Kapacita baterie
1,5 hodiny
Příkon
<1,5 W
Paměť
TF karta s max. rychlostí 32 GB
Fotografický úhel
135 stupňů
Formát videa
H.264
Pracovní teplota
–10 až 50 C
Skladovací teplota
–20 až 60 C
Stupeň vodotěsnosti
IP 68
Zapnutí/vypnutí vibrací
ano
Hmotnost
230 g
Rozměry:
227 × 95 × 130 mm
USB
2.0(HS)
Přehrávač
KM Player; Quick Time7.6; Storm2012; RealPlayer11
Operační systém
Win8/Win7/Win XP/Vista/Mac Os10.7 nebo vyšší
Rozlišení
Rollei Ski Goggles/Skibrille 135 Full - HD
•
•
•
•
•
720P@60FPS, 1080P@30FPS
Vandtæt IP68
1.5T optagelængde
135 grader bred vinkel
Video Format H.264
Tak, fordi du købte denne bærbare kamerabrille. Læs venligst denne brugervejledning
før brug.
4. Plastik pincet
Tekniske specifikationer
Kameraets hoveddele
•
•
•
•
•
5 MP CMOS-sensor.
Understøtter op til 32 GB micro SD/SDHC kort, klasse 4 eller højere (medfølger ikke).
Lagerkapacitet:
1080i=1920x1080p (16:9), 30fps, ~ 12 Mbit/s dataoverføringshastighed,
svarende til 12 min. video optagelse pr 1GB
720i=1280x720p (16:9), 60fps, ~ 12 Mbit/s dataoverføringshastighed,
svarende til 12 min. video optagelse pr 1GB
Optagelsens varighed afhænger af det, der filmes og af omgivelserne.
Fokusområde: 0.8m~uendeligt.
Genopladeligt batteri (indbygget)
Størrelse: 227*95*130mm
Vægt: 230g
Krav til styresystemet
Mindste systemkrav
Windows Environment: 3.0 GHz Intel Pentium D(dual-core) eller hurtigere.
•
Mac Environment: Dual 2.0 GHz PowerMac G5 eller hurtigere; 2.0 GHz Intel
•
Core Duo eller hurtigere.
Windows XP (Service Pack 2 eller senere),Windows Vista, Windows7,
•
Windows 8 eller Apple Mac X 10.6 eller højere.
2GB RAM.
•
1G ledig plads på harddisk’en.
•
1GB eller større video kort.
•
QuickTime 7.
•
Understøtter 1024x768 video opløsning (32 bit).
•
16 bit Windows kompatibelt lyd udstyr.
•
(I nogle tilfælde formindskes billedformatet automatisk for at maksimere
brugerhukommelsen)
Beskrivelse af delene
1. Kamera
2. Brugervejledning
3. USB kabel
Produkt design
Kamera
1. Udløser knap
2. Tænd/sluk/optager knap
3. microSD kort slot
4. USB port
5. Nulstil
6. LED Indikator – LED indikatoren
er samlet inden i brillen. Du kan se
LED’en oppe i højre hjørne.
Sådan bruger du dit kamera
1. At starte en optagelse
A)Tag kamerabrillen på, og fokusér på det, du vil optage.
B)Tryk kort på tænd/sluk knappen for at tænde for kameraet, når de grønne
LED indikatorer er tændte og efter en kort vibration, betyder det, at kameraet
er i standby modus.
C)Tryk igen på TÆND/SLUK knappen, og der kommer et vibrations signal,
efterfulgt af et blåt LED lys blink hvert sekund, og kameraet optager.
D)Hvis kameraet befinder sig i standby modus, tryk på optager knappen for at
starte optagelsen.
E)For at slukke for kameraet, tryk på tænd/sluk knappen i ca. tre sekunder.
Brillen vibrerer længere, og LED og kamera slukkes.
2. At tage et foto
A)Tryk på tænd/sluk knappen, kameraet går i standby modus, når vi hører en
kort vibration og det grønne LED lys er tændt.
B)Tryk kort på udløser knappen for at tage et foto, når det blå LED lys blinker én
gang, er fotoet taget.
3. PC kamera
For at forbinde kameraet med pc’en, tryk på udløserknappen i lang tid, den
flytbare disk forsvinder, og kameraet er i PC CAM modus.
4. NULSTIL
Hvis kameraet ikke fungerer korrekt, tryk på nulstil knappen i 1 sekund. Systemet
slukkes, tryk igen på tænd/sluk knappen for normal drift.
Indstillings menu
1. EV
Højere EV kan forøge videoens lyskvalitet.
2. Lysfrekvens
For at undgå flimmer ved indendørs brug, er det nødvendigt at indstille den
rigtige frekvens.
3. Tidsmarkering
Indstil tidsmarkeringen, så vises den nøjagtige tid på video og foto.
4. Opløsning
Skift opløsning mellem 1080p og 720p.
Setting.txt
1.Tilslut kameraet til pc’en med et USB kabel
2.Find setting.txt ved at åbne den flytbare disk
3.Vælg opdater med “Y”, hvilket betyder, at du kan opdatere de nye data, standard
indstilling er “N”, genstart kameraet for at aktivere indstillingerne
Setting.txt
Status
0
1
Standard indstilling
EV
0-12
0-12
6
Lys frekvens
60 HZ
50 HZ
0
RTC display
tidsmarkering
slukket
tidsmarkering
tændt
1
Opløsning
1080p
720p
0
BEMÆRK: Brugere kan vælge mellem 50HZ eller 60HZ ved denne indstilling for
at undgå flimmer på videoen under indendørs optagelser; du skal justere denne
indstilling, så den passer til lyskildens frekvens
LED Status
Status
Grønt lys
Blåt lys
Rødt lys
Vibration
Tændt
Tændt
Slukket
Slukket
Vibrerer 1 sek
Slukket
Slukket
Slukket
Vibrerer 2 sek
Optager
Tændt
Slukket
Vibrerer 0,5 sek
Intet kort
eller fuld
hukommelse
Hurtige blink 5
gange og slukkes
Slukket
Blinker en gang
i sek.
Hurtige blink
5 gange og
slukkes
Slukket
Vibrerer 2 sek,
og slukkes
Lavt batteri
Hurtige blink i 5-10
sek, og slukkes
Oplader
Fuldt batteri
Slukket
Slukket
Slukket
Slukket
Tændt
Vibrerer 3
gange, og
slukkes
Ikke relevant
Slukket
Slukket
Slukket
Ikke relevant
Tidsindsstilling
1. Opret et .txt dokoment og navngiv det “settime.txt” med Microsoft Word, Word
Pad eller andet
tekstbehandlingsprogram.
2. Åben det nye tekstdokument, indtast den lokale realtid som vist i det følgende.
For eksempel: Klokken er i London lige nu: 06:09:01, 8. jul, 2013, inputets
opbygning skal se sådan ud: 2013 07 08, 06 09 01(der skal være et mellemrum
mellem hvert tal). Når det er gjort, gem dokumentet og afslut.
3. Tilslut brillen til din pc og åben den flytbare disk. Kopiér “Settime.txt” filen til
microSD kortets root fortegnelse.
4. Afbryd kameraet fra din pc.
5. Kameraet bruger automatisk den nye dato og klokkeslet næste gang, du tænder
for brillen.
6. For at se tidsmarkeringen på din video og fotos, skal du indrette tidsmarkerings
funktionen som beskrevet på side 6 i kapitlet “Indstillingsmenu”.
Vandtæt funktion
Dette kamera er IP68 vandtæt; vi vil ikke være ansvarlige over for funktionsfejl hos
kameraet forårsaget af indtrængt væske som et resultat af fejlagtig brug af kameraet.
Væske kan trænge ind i kameraet, hvis USB porten ikke er lukket ordentligt.
Hvis kameraet bliver vådt, tør væsken af med en tør klud så hurtigt som muligt.
Andet kameratilbehør er måske ikke vandtæt.
(Brug ikke kameraet ved ekstreme temperaturer, da det kan føre til funktionsfejl).
1. Kamera forholdsregler
Læs venligst instruktionerne nedenfor før kameraet tages i brug
Oplad med USB kabel
Sluk for kameraet, og tilslut kameraet med det genopladelige batteri til en computer med det
medleverede USB kabel.
Det blå LED vil lyse for at vise, at batteriet oplader.
Det blå LED slukkes, når batteriet er fuldt opladet.
Det genopladelige batteri kan arbejde i næsten 90-100 minutter under 1080P@30FPS eller
720p@60fps; det vil tage 2-3 timer at lade batteriet helt op.
BEMÆRK
Vær sikker på, at kortet er sat korrekt ind
Rør ikke ved forbindelsesterminalerne på bagsiden af microSD kortet
Kortet kan blive ødelagt, hvis det ikke er sat helt ind
Kort og data kan blive ødelagt, hvis microSD kortet er indsat eller fjernet, mens
kameraet er tændt
Rør ikke ved kabelforbindelsen, da det kan påvirke kameraets ydelse og funktioner
Kameraet understøtter op til 32 GB microSD/SDHC kort, klasse 4 eller højere.
Micro SD kort med lavere klasser kan forårsage ydelsestab under optagelsen.
Tilslutning til en computer
Du kan oploade dit optagede videomateriale og dine fotos på en computer, når
computer og kamera indrettes hertil.
1. Tænd for kameraet.
2. Tilslut dit kamera til en computer ved hjælp af USB kablet.
3. Den vil vise den flytbare disk, hvis forbindelsen er foretaget korrekt.
4. Brug computer softwaren til at bearbejde videoen og fotoet.
5. For at afslutte, klik venligst på den flytbare disk og fjern da USB kablet.
① . Må ikke åbnes
② . Åben venligst USB porten ved at følge pilenes retning
Placér ikke kameraet på et vådt og støvet sted, da det kan forårsage ødelæggelse
af filer eller få et elektrisk stød.
Efterlad ikke kameraet på steder som er udsatte for ekstremt høje temperature,
som f.eks. direkte sollys over længere tid. Dette kan påvirke kameraets hus og
indre komponenter.
Rengør venligst linserne med en blød klud for at fjerne fingeraftryk eller støv.
Hvis det genopladelige batteri udsættes for slag eller stød, kan det gå i stykker,
forårsage brand eller endda kemiske brandsår.
Bemærk venligst følgende forholdsregler:
Skil det ikke ad.
Knus ikke og udsæt ikke det genopladelige batteri for noget chok eller
kraftudfoldelse ved f.eks. at slå på det med en hammer, tabe eller træde på det.
Før du fjerner microSD kortet, sluk venligst kameraet, ellers kan det føre til skade
på filer eller microSD kortet. For at fjerne microSD kortet, skub kortet tilbage i
slotten igen, og kortet frigives. Brug plastik pincetten til at tage microSD kortet helt ud.
Fjern microSD kortet når kameraet ikke er i brug over en længere periode. Opbevar
det på et godt ventileret sted.
Ansvarsfraskrivelse
Garantien dækker udelukkende produktionsfejl. Skulle kameraets fejlfunktion opstå
under deltagelse i hvilken som helst høj-risiko sportsudøvelse eller aktiviteter, som
ikke er accepteret eller anbefalet af os, vil den ikke blive dækket af garantien
XV) Problemsøgning
Kameraet tænder ikke
Efterse venligst om der er tilstrækkeligt batteri.
Efter tilslutning til pc’en, kan den flytbare disk ikke findes i MY COMPUTER.
Efterse om USB forbindelsen er korrekt eller ej.
Efterse om USB kablet er normalt
Prøv et andet USB kabel. Hvis den flytbare disk stadigvæk ikke kan findes, har
kameraet måske et problem. Kontakt venligst din forhandler eller producenten.
Kan ikke optage en video
Efterse om microSD kortet har tilstrækkelig kapacitet, hvis ikke, formatér venligst
microSD kortet og start derefter optagelsen
Kontrollér om der er strøm nok, hvis der ikke er strøm nok, oplad venligst kameraet
og optag derefter.
Ingen lyd eller lav styrke.
Kontrollér om audio tilslutningen er korrekt
Kontrollér om audio tilslutningen til pc’en er korrekt, og forsøg af afspille andre
videoer for at se, om der er lyd.
Kameraet oplader ikke.
Kontrollér om opladeren overhovedet arbejder ved hjælp af LED lys indikatoren.
Oplad venligst ikke kameraet med en anden oplader, hvis den ikke oplader normalt,
prøv at oplade ved USB kabelforbindelsen til pc’en.
Efterse venligst om USB forbindelsen er korrekt. Benyt ikke et andet USB kabel til
dette kamera.
Specifikationer
Billedsensor
5 MP CMOS-sensor
Pixels til fotografering
3MP
Opløsning
1920x1080P@30fps ; 1280x720P@60fps
Strømforsyning
Indbygget 660mAh Li-polymer batteri
Strømvarighed
1.5 timer
Strømforbrug
<1.5W
Hukommelse
Understøtter op til 32 GB (maks. hastighed) TF kort
Fotograferingsvinkel
135 grader
Video Format
H.264
Arbejdstemperatur
-10℃ –50℃
Opbevaringstemperatur
-20℃ -60℃
Vandtæthedsgrad
IP 68
Tænd/sluk vibration
Ja
Fysisk vægt
230g
Produkt størrelse
227*95*130mm
USB
2.0(HS)
Player
KM Player; Quick Time7.6;Storm2012;RealPlayer11
Styresystem
Win8/Win7/Win XP/Vista/Mac Os10.7 or above