Download Untitled
Transcript
Índice Antes de conectar el equipo ................................................................................................... 2 Avisos de seguridad ............................................................................................................................................ 2 Precauciones ...................................................................................................................................................... 2 Conexión ................................................................................................................................ 3 Conexión al televisor ........................................................................................................................................... Conexión a los altavoces .................................................................................................................................... Conexión a la antena de FM ............................................................................................................................... Conexión al televisor mediante un conector HDMI .............................................................................................. Conexión al equipo auxiliar ................................................................................................................................. Conexión al amplificador con terminal de entrada de señal digital ...................................................................... Conexión al cable de alimentación ...................................................................................................................... 3 3 4 4 4 5 5 Ubicación de los controles ..................................................................................................... 6 El reproductor de DVD ......................................................................................................................................... 6 El amplificador .................................................................................................................................................... 6 Mando a distancia ............................................................................................................................................... 7 Instalación de las pilas en el mando a distancia .................................................................... 8 Encendido y apagado.............................................................................................................. 8 Funciones de los botones ...................................................................................................... 8 Funcionamiento general ...................................................................................................................................... 8 Reproducción de CD de imágenes ................................................................................................................... 12 Opciones de menú del DVD ............................................................................................................................. 12 Utilización del USB .......................................................................................................................................... 16 Cómo escuchar emisoras de radio ................................................................................................................... 16 Recepción RDS (Radio Data System) .............................................................................................................. 17 Funciones de reloj/temporizador ......................................................................................... 18 Ajuste del reloj ................................................................................................................................................. 18 Ajuste del temporizador de encendido diario .................................................................................................... 18 Ajuste del temporizador de apagado ................................................................................................................ 19 Cuidado de los discos ......................................................................................................... 19 Resolución de problemas..................................................................................................... 20 Especificaciones ................................................................................................................. 21 Accesorios ........................................................................................................................... 22 Fabricado bajo licencia de Dolby Laboratories. “Dolby” y el símbolo de la D doble son marcas comerciales de Dolby Laboratories. -1- Antes de conectar el equipo Gracias por comprar este sistema de DVD con componente de 2 canales. Para obtener el máximo rendimiento de este sistema, lea este manual de instrucciones detenidamente antes de utilizarlo. Avisos de seguridad Precauciones 1. Antes de comenzar a utilizarlo, compruebe que el voltaje del equipo y del suministro local sea idéntico. 2. Si no va a usar el equipo durante una temporada, desconéctelo de la toma de corriente. Para desconectar el cable, tire de él agarrándolo por el enchufe. 3. Prohibido abrir la carcasa por personal no cualificado. Peligro de descarga eléctrica. 4. El interior no contiene partes que puedan ser reparadas por el usuario. En caso de que el equipo falle, desenchufe el cable de alimentación y consulte a su distribuidor. 5. La ventilación debe funcionar perfectamente; no obstruya las aberturas de ventilación con objetos, como por ejemplo, periódicos, manteles, cortinas, etc. 6. Evite exponer el equipo a goteras o salpicaduras, y no coloque encima del mismo ningún objeto que contenga líquidos, como por ejemplo, jarrones. 7. Para evitar incendios o cortocircuitos, no exponga el equipo al calor, la lluvia, la humedad, o el polvo. 8. Cuando esté utilizando el equipo, evite acercarse a fuentes de agua como bañeras, máquinas de lavado, lavavajillas o lavadoras; tampoco utilice este equipo en bases húmedas, cerca de piscinas o similares. 9. No coloque el equipo cerca de campos magnéticos de gran intensidad. 10. No coloque el equipo cerca de un humidificador o la humedad afectará negativamente a la vida útil del cabezal láser. 11. Si transporta el equipo directamente desde un entorno frío a un entorno cálido o lo coloca en una habitación demasiado húmeda, la humedad podría condensarse en las lentes que se encuentran en el interior del reproductor. Si esto ocurriese, el equipo dejaría de funcionar correctamente. Retire el disco y deje el equipo encendido durante aproximadamente una hora, hasta que la humedad se haya evaporado. 12. En caso de que alguna sustancia sólida o líquida entre en el equipo, desconéctelo y deje que lo revise personal cualificado antes de volver a utilizarlo. 13. Antes de limpiar el equipo, desconéctelo de la toma de corriente. No utilice limpiadores líquidos o aerosoles (p. ej. insecticidas). Puede utilizar un paño limpio para limpiar el equipo. 14. Por favor, utilice el cable de conexión para conectar el equipo. No emplee accesorios adicionales que no hayan sido recomendados por el fabricante ya que podría causar una descarga eléctrica al utilizarlos. 15. Si el conector del equipo se emplea como dispositivo desconectado, éste deberá permanecer listo para su uso. 16. Una presión sonora excesiva por uso de auriculares puede generar pérdida de audición. PRECAUCIÓN RIESGO DE DESCARGA ELÉCTRICA. NO ABRIR PRECAUCIÓN: PARA REDUCIR EL RIESGO DE DESCARGAS ELÉCTRICAS NO RETIRE LA CUBIERTA. EL INTERIOR NO CONTIENE PARTES QUE PUEDAN SER REPARADAS POR EL USUARIO. CONSULTE EL MANTENIMIENTO DE LA UNIDAD CON PERSONAL TÉCNICO CUALIFICADO. Este símbolo indica que la unidad contiene voltaje peligroso que presenta riesgo de descarga eléctrica. Este símbolo indica instrucciones de funcionamiento y mantenimiento importantes en la documentación que se incluye con esta unidad. Precaución: Para evitar peligro de incendio o de descargas eléctricas, no exponga el equipo a la lluvia o a la humedad. Alimentación eléctrica Puesto que los requisitos de suministro de los productos eléctricos varían de un país a otro, antes de utilizar este producto asegúrese de que los requisitos de suministro eléctrico de este producto son los mismos que los del suministro de su país. Producto láser Este producto contiene equipamiento láser de baja potencia en su interior. Para su propia seguridad, no abra la cubierta ni desmonte el producto. Póngase en contacto con personal cualificado para su reparación. CLASE 1 PRODUCTO LÁSER Precaución: Este producto contiene equipamiento láser de baja potencia en su interior. Para su propia seguridad, no abra la protección contra la radiación láser. No mire directamente a la zona de radiación de láser cuando el equipo esté funcionando. -2- Conexión Precaución: desenchufe el equipo antes de realizar las conexiones. Conexión al televisor Precauciones de seguridad 1. Este equipo dispone de modos de salida de vídeo y terminal S. Seleccione uno para conectarlo al terminal del televisor. (Use la salida del terminal S para obtener una imagen más clara). 2. Si su televisor tiene un terminal de entrada de componente, puede usar el cable de conexión de la señal para conectarlo al terminal de salida de componente del equipo. De este modo, la imagen será más nítida. 3. Para evitar que afecte a la imagen, no conecte el vídeo, el terminal S y el componente al mismo tiempo. 4. Ajuste del reproductor de DVD Es necesario realizar algunos ajustes en el equipo dependiendo de la conexión al televisor. * Seleccione el sistema de color del televisor en la configuración de la función de “Pantalla del televisor” (TV Display) de acuerdo con la configuración de éste. * Si el equipo está conectado a un televisor de pantalla panorámica, configure la “Pantalla del televisor” (TV Display) como “Panorámica” (Wide) en el menú de configuración de funciones. * Si el equipo está conectado a un televisor, configure la “Pantalla del televisor” (TV Display) como “Normal/PS” o “Normal/LB” en el menú de configuración de funciones. Panel de conectores del reproductor de DVD Panel de conectores del televisor Conexión a los altavoces Altavoz derecho Altavoz izquierdo Conecte los cables de los altavoces entre los terminales como se muestra continuación. Precauciones para la conexión 1. La salida del equipo cuenta con un rango dinámico ancho, por lo que el volumen del amplificador debe ser moderado. Si se usan otros altavoces, deben cerrarse correctamente de acuerdo con la especificación de nuestros altavoces; de lo contrario, podrán resultar dañados por el exceso de volumen. 2. Antes de conectar o desconectar la alimentación eléctrica del equipo, reduzca primero el volumen al mínimo o podría dañar los altavoces. -3- Conexión a la antena de FM Panel de conectores del reproductor de DVD Conecte el cable de la antena de FM al enchufe de la antena de FM en el equipo. Panel de conectores del reproductor de DVD Si la calidad de la recepción es mala, conecte la antena externa. Nota: Antes de conectar un cable coaxial de 75 ohmios (cables con un alambre redondo que conectan a una antena externa), desconecte el cable de la antena de FM que se incluye con el equipo. Precaución: Para evitar la presencia de ruido, mantenga las antenas alejadas del equipo, del cable de conexión y del cable de alimentación eléctrica. Conexión al televisor mediante un conector HDMI Panel de conectores del reproductor de DVD El cable HDMI transmite imágenes digitalmente y sonido sin comprimir ni manipular para obtener la máxima nitidez y calidad. Dispone de una función que no requiere instalación y que utiliza un único cable para las salidas de audio y vídeo. Use un cable HDMI (no incluido) para conectar el conector HDMI del reproductor de DVD a la entrada HDMI IN en un dispositivo HDMI compatible (por ejemplo: televisor, proyector, adaptador). Panel de conectores del televisor Conexión al equipo auxiliar Panel de conectores del reproductor de DVD Este reproductor de DVD dispone de un grupo de terminales de entrada de audio. Puede usar el cable de señal para conectar los terminales de entrada de audio de este equipo y los terminales de salida de audio del equipo auxiliar respectivamente para poder escuchar las fuentes de sonido. Panel de conectores del equipo auxiliar -4- Panel de conectores del reproductor de DVD Esta unidad también incluye un grupo de terminales de salida de audio. Puede usar el cable de señal para conectar los terminales de salida de audio de este equipo y los terminales de entrada de audio del equipo auxiliar respectivamente para enviar las fuentes de sonido externas a otros equipos auxiliares. Panel de conectores del equipo auxiliar Conexión al amplificador con terminal de entrada de señal digital Panel de conectores del reproductor de DVD Use un cable de señal coaxial para conectar el conector de salida coaxial del reproductor de DVD con el conector de entrada coaxial de otro amplificador; de este modo podrá percibir el efecto de un excelente sonido digital. Panel del terminal del amplificador para la decodificación de la señal Dolby Digital del terminal de la señal digital Conexión al cable de alimentación 1. Con la unidad desconectada de la alimentación eléctrica, conecte el cable de alimentación al reproductor de DVD y al amplificador mediante las conexiones en la parte posterior del equipo como se muestra en la imagen. 2. Inserte el cable de alimentación eléctrica (CA) en el enchufe de corriente y el equipo estará a su disposición. Precaución: Asegúrese de que ha desconectado el cable de alimentación del enchufe principal cuando se ausente o cuando no vaya a usar el equipo durante un periodo prolongado de tiempo. -5- Ubicación de los controles El reproductor de DVD 1. 2. 3. 4. 5. 6. 7. 8. 9. 10. 11. 12. 13. 14. 15. 16. 17. 18. 19. 20. 21. El amplificador 1. 2. 3. 4. 5. 6. 7. 8. -6- Botón de standby Bandeja del disco Botón del reloj Botón de modo (repetición) Botón de selección mono/estéreo Sensor del mando a distancia Lente de la pantalla VFD Botón de parada Botón de sintonización hacia atrás Botón de reproducción/pausa Botón de sintonización hacia delante Botón anterior Botón de selección de canal hacia atrás Botón siguiente Botón de selección de canal hacia delante Botón de apertura/cierre Terminal de salida de coaxial Terminal de salida de vídeo Puerto USB Conector del cable de control Conector de antena FM Puerto HDMI Terminal de salida de S-vídeo Terminales de salida de componente Terminales de salida de audio Terminales de entrada auxiliar Botón de control de bajos Botón de control de agudos Botón para ajustar el volumen Botón de selección de función Conector para auriculares Cable de alimentación (CA) Conector del cable de control Terminales de salida de los altavoces (I/D) Mando a distancia 1. 2. 3. 4. 5. 6. 7. 8. 9. 10. 11. 12. 13. 14. 15. 16. 17. 18. 19. 20. 21. 22. 23. 24. 25. 26. 27. 28. 29. 30. 31. 32. 33. 34. 35. 36. 37. -7- Botón de standby Botón de función de sintonización Botón de función auxiliar Botón de sonoridad Botón de subtítulos Botón siguiente Botón de selección de canal hacia delante Botón anterior Botón de selección de canal hacia atrás Botón de temporizador de apagado Botón de temporizador de encendido Botón de configuración de funciones Botón de confirmación Botón de dirección Botón de dirección Botón de reproducción/pausa Botón de silencio Botón de avance rápido hacia atrás Botón de sintonización hacia atrás Botón de menú en pantalla del DVD Botón RDS Botón de modo (repetición) Botón de selección mono/estéreo Botones numéricos Botón de apertura/cierre Botón de función del DVD Botón de función del USB Botón de preajustes del ecualizador Botón de atenuación de la iluminación Botón de extrabajos Botón de títulos Botón de zoom Botón de selección de modo vocal Botón de selección de idioma Botón del reloj Botón de aumento del volumen Botón de reducción del volumen Botón PBC Botón de menú principal Botón de dirección Botón de dirección Botón de parada Botón de avance rápido hacia delante Botón de sintonización hacia delante Botón de programación Botón de memoria Botón de búsqueda de minuto Instalación de las pilas en el mando a distancia 1. Extraiga la tapa del compartimento de las pilas. 2. Introduzca correctamente dos pilas (tamaño AAA), de modo que los polos + y - coincidan con los dibujos de las polaridades en el compartimento de las pilas. * La duración de las pilas estándar es de aproximadamente medio año haciendo un uso normal. * Al gastarse las pilas, el mando a distancia dejará de funcionar. Sustituya todas las pilas por otras nuevas. * No mezcle las pilas viejas con las nuevas. * No mezcle diferentes tipos de pilas. * Si no va a utilizar el equipo durante un largo periodo de tiempo, extraiga las pilas para evitar daños causados por fugas o corrosión de las mismas. * No deben exponerse las pilas (el paquete de batería instalado) a temperaturas excesivas como la incidencia directa del sol, fuego o similares. Encendido y apagado Puede usar todas las funciones en el panel del equipo o en el mando a distancia una vez conectada a la alimentación eléctrica (llamado modo de standby). Nota: en el modo de standby, si no se usa ninguna función del equipo durante 15 minutos, éste entrará en el modo de standby de ahorro de energía ECO automáticamente. Cómo encender el equipo Pulse el botón de standby ( STANDBY) para encender el equipo en el modo de standby. Precaución: al encender el equipo, volverá al modo en el que se encontraba cuando se apagó por última vez. Cómo apagar el equipo Pulse el botón de standby ( STANDBY) de nuevo para apagar el equipo y entrar en el modo de standby. Precaución: desconecte el cable de la alimentación eléctrica si no va a utilizar el equipo durante un periodo de tiempo largo. Funciones de los botones Funcionamiento general En el modo encendido, pulse el botón de función del DVD (DVD) para seleccionar esta función. (También puede utilizar la tecla de función “FUNCTION” en el panel del equipo.) Pulse el botón de apertura/cierre en el equipo para abrir la bandeja del disco e introducirlo en ella (con la cara impresa hacia arriba). Vuelva a pulsar el botón, para cerrar la bandeja; la unidad leerá el disco y en la pantalla del televisor aparecerá el tipo de disco. La reproducción del disco debería iniciarse automáticamente. (También puede utilizar la tecla en el panel del equipo.) Pulse los botones de dirección para mover el cursor y resaltar la selección deseada. Pulse el botón de confirmación (ENTER) para confirmar la selección del menú. -8- En el modo de parada, pulse el botón de reproducción/pausa para iniciar la reproducción del disco. para Durante la reproducción el disco, pulse el botón de reproducción/pausa detenerla temporalmente. Vuelva a pulsar el botón, para continuar la reproducción. (También puede utilizar la tecla en el panel del equipo.) Pulse el botón de parada para detener la reproducción; la unidad conservará el último tiempo de reproducción en la memoria automáticamente; a continuación, pulse el botón y el equipo la reiniciará automáticamente a partir del último tiempo guardado en la memoria. dos veces para detener por completo la reproducción del disco. Pulse el botón de parada (También puede utilizar la tecla en el panel del equipo.) Pulse el botón de aumento del volumen para aumentarlo. Pulse el botón de reducción del volumen para bajarlo. (También puede utilizar el mando de control “- VOLUME +” en el panel del equipo.) Gire el control de bajos (BASS) en el equipo hacia la derecha o hacia la izquierda para aumentar/reducir los bajos. Gire el control de agudos (TREBLE) en el equipo hacia la derecha o izquierda para aumentar/reducir los agudos. Si pulsa el botón de silencio durante el modo de reproducción, el sonido quedará silenciado. Vuelva a pulsarlo de nuevo o pulse los botones “VOL -, VOL +” para recuperar el sonido. La función de sonoridad controla estos tonos para mejorar la calidad del sonido reproducido. Esta función está operativa únicamente durante la reproducción del sonido. Este equipo incluye tres niveles de intensidad para ajustar la luminosidad de la pantalla. Pulse el botón de atenuación de la iluminación (DIM) para obtener la intensidad deseada. Es posible configurar el sonido reproducido simplemente seleccionando los diferentes ajustes del ecualizador. Cada vez que pulse el botón de preajustes del ecualizador (P-EQ) se seleccionará una de las siguientes opciones: FLAT POPS JAZZ CLASSIC ROCK FLAT POPS JAZZ CLASSIC ROCK : : : : : Sonido normal Los sonidos vocales se intensifican Para jazz Para música clásica Para rock Pulse el botón del menú en pantalla para ver la información sobre el disco que se está reproduciendo en la pantalla del televisor. Si el CD de vídeo tiene un menú, puede configurarse la función de control de reproducción al modo “PBC ON” pulsando el botón de menú (MENU). El equipo leerá el disco y el menú aparecerá en la pantalla del televisor. A continuación, use los botones numéricos para seleccionar la pista que desee. • Al reproducir discos DVD, pulse el botón de menú principal (MENU) para volver al menú principal de la capa anterior. • -9- • Cargue un CD de vídeo en el modo PBC ON (el botón MENU activará y desactivará (ON/OFF) la función PBC). Puede seleccionar pistas o capítulos mediante los botones numéricos (0-9,10+). * Si el número de la pista o del capítulo es inferior a 9, pulse los botones numéricos 0-9. * Si el número de la pista o del capítulo es superior a 9, pulse el botón 10+ y, a continuación, el botón correspondiente al segundo número usando los botones numéricos 0-9. (p.ej.: si la pista o el número del capítulo es 28, pulse el botón 10+ dos veces y el botón numérico 8.) • Si está reproduciendo un disco MP3, puede pulsar directamente los botones numéricos 0-9, 10+ para seleccionar el número de la pista y a continuación pulse el botón ENTER para iniciar la reproducción. (Por ejemplo: si la pista o el número del capítulo es 28, pulse el botón 10+ dos veces y el botón numérico 8.) • Si el disco DVD contiene uno o más capítulos o títulos de música, puede configurar el orden de reproducción del disco usando este botón. Pulse el botón de programación; la pantalla de televisor mostrará la siguiente imagen: Nota: TT: Título CH: Capítulo * Use los botones 0-9, 10+ para introducir la secuencia de los números cuya reproducción desea programar (la primera selección corresponde al título y la segunda al capítulo del menú de la programación). Una vez finalizada la programación, pulse los botones para seleccionar la reproducción con "PLAY"; a continuación ENTER para iniciar la reproducción programada. • Si se está reproduciendo un CD, la pantalla del televisor mostrará la siguiente imagen: * Use los botones 0-9, 10+ para introducir la secuencia de los números cuya reproducción desea programar. Una vez finalizada la programación, pulse los botones para seleccionar "PLAY" y, a continuación, pulse el botón ENTER para iniciar la reproducción programada. Si se está reproduciendo un DVD, puede pulsarse repetidamente el botón de subtítulos (SUBTITLE) para seleccionar el idioma que se visualizará en la pantalla, en caso de estar disponible. Subtitle 1/3 Subtitle 2/3 Subtitle 3/3 Subtitle Off (Subtítulos desactivados) En el modo de reproducción, pulse el botón de título (TITLE), para volver al menú de título. • Al reproducir un CD de vídeo, puede seleccionar la salida de audio MONO (Mono izq., Mono der.), "STEREO" (Estéreo) o "Mix-Mono" (Mezcla mono) pulsando el botón de selección de modo vocal (AUDIO). • Al reproducir DVD grabados con múltiples idiomas, puede pulsar repetidamente el botón de selección de idioma (AUDIO) para seleccionar el idioma que desea escuchar. Audio 1 Audio 2 Audio 3 Audio 4 - 10 - • Al reproducir un DVD, esta función puede usarse para reproducir un título, capítulo o disco ininterrumpidamente. Pulse repetidamente el botón de modo (repetición) (MODE), la pantalla mostrará lo siguiente: TITLE CHAPTER ALL SHUFFLE No display (Capítulo/Ttulo/Todo/Aleatorio/Nada) • Al reproducir un MP3, esta función puede usarse para reproducir una pista o carpeta ininterrumpidamente. Pulse repetidamente el botón de modo (repetición) (MODE), la pantalla mostrará: REPEAT ONE REPEAT FOLDER SHUFFLE OFF (Repetir uno/Repetir carpeta/Aleatorio/Desact.) • Para repetir una pista o disco siga los siguientes pasos. Pulse repetidamente el botón de modo (repetición) (MODE), la pantalla mostrará lo siguiente: TRACK ALL SHUFFLE No display (Pista/Todo/Aleatorio/Nada) (También puede utilizar la tecla de función "MODE" en el panel del equipo.) También puede introducir directamente un minuto, título o número de capítulo para ir a un punto determinado del disco. El equipo iniciará la reproducción a partir de este punto. 1. Pulse el botón de búsqueda de minuto (GOTO) en el mando a distancia. 2. Pulse los botones 0-9 en el mando a distancia, introduzca el minuto, título o número de capítulo para buscar la escena que desea. Nota: Si el minuto buscado es superior a la duración total del disco o si el elemento buscado es inferior al disco grabado, el texto" input invalid" (entrada no válida) aparecerá en la pantalla del televisor para indicar que la operación no es válida o es incorrecta. Pulse el botón de avance rápido repetidamente para seleccionar una de las diferentes velocidades de avance de la reproducción o seleccione la velocidad normal de reproducción. Cada vez que pulse el botón, la pantalla mostrará lo siguiente: 2X Nota: pulse el botón 4X 16X BX 32X para reiniciar la reproducción normal. Pulse el botón de avance rápido hacia atrás repetidamente para seleccionar una de las diferentes velocidades para hacer avanzar la reproducción de forma rápida hacia atrás o para seleccionar la velocidad de reproducción normal. Cada vez que pulse el botón, la pantalla mostrará lo siguiente: 2X Nota: pulse el botón 4X 16X 8X 32X para reiniciar la reproducción normal. • Al reproducir un disco DVD, pulse el botón siguiente para pasar al siguiente capítulo o título. • Al reproducir un disco CD de vídeo, pulse el botón siguiente para pasar a la siguiente pista. para pasar al capítulo o título anterior. • Al reproducir un disco DVD, pulse el botón anterior para pasar a la pista • Al reproducir un disco CD de vídeo, pulse el botón siguiente en el panel del equipo). anterior. (También puede utilizar la tecla Esta función puede usarse durante la reproducción de una película o imágenes estáticas. Al pulsar el botón de zoom (ZOOM) repetidamente durante la reproducción, la pantalla mostrará: 2X 3X 4X 1/2 1/3 1/4 * Use los botones para desplazarse por la imagen ampliada. Nota: esta función no está disponible para la reproducción de CD ni MP3. - 11 - Reproducción de CD de imágenes Pulse el botón en el equipo para abrir la bandeja del disco e introducir el CD con las imágenes (con la cara impresa hacia arriba). Pulse de nuevo este botón para cerrar la bandeja; la unidad leerá el disco y lo reproducirá automáticamente. CD de imágenes: el disco se ha grabado con imágenes Cuando la lista del menú o las imágenes aparecen en pantalla, puede pulsar los botones 0-9 para seleccionar la imagen que desea y pulsar el botón ENTER para confirmar la selección en el disco e iniciar la reproducción. Nota: la reproducción se detendrá temporalmente cuando se hayan mostrado todas las imágenes seleccionadas. Durante la reproducción de las imágenes, pulse el botón y el botón para ir a la imagen anterior. para ir a la siguiente imagen Pulse el botón para invertir la imagen; pulse el botón para reflejarla; pulse el botón para rotarla hacia la izquierda y pulse el botón para rotarla hacia la derecha. Pulse el botón PROGRAM para seleccionar un efecto de transición para la reproducción de las imágenes. (Por ejemplo: Wipe Top (barrido desde arriba), Diagonal Wipe Left Top (barrido en diagonal desde arriba a la izquierda), Window H (ventana en H), etc.) Pulse el botón ZOOM repetidamente para mostrar la imagen en diferentes tamaños. Use los botones para desplazarse por la imagen ampliada. Use el botón para entrar en el modo de imágenes en miniatura "Thumbnail Mode". (Use los botones o para mostrar las 12 imágenes anteriores o siguientes del disco. Pulse el botón MENU para salir del modo de imágenes en miniatura "Thumbnail Mode" y volver a la lista del menú. Pulse el botón para reiniciar la reproducción normal.) Opciones de menú del DVD Nota: la estructura del menú puede ser diferente del ejemplo que se incluye a continuación. • Funciones básicas 1. Pulse el botón de configuración de funciones (SETUP) para entrar en el menú de configuración. para seleccionar la página que desea configurar. 2. Pulse el botón para resaltar una opción. 3. Pulse el botón 4. Pulse el botón o ENTER para entrar en el submenú. para mover el cursor y entrar en el elemento seleccionado. 5. Pulse el botón Nota: cuando desee configurar los valores, pulse para configurarlos. 6. Pulse el botón ENTER para confirmar la selección. Nota: Pulse el botón para volver al menú del nivel superior. Cuando desee configurar los valores, pulse el botón ENTER. - 12 - Página de configuración general Pulse el botón SETUP para salir del menú. (La configuración se almacenará en la memoria del reproductor incluso si el reproductor está apagado.) (Nota: si el elemento aparece en color gris, quiere decir que no puede configurarse y que la función no existe en el disco.) • Página de configuración general Pantalla TV TV Display (Pantalla del televisor) Normal/PS --- Al seleccionar este modo, las imágenes panorámicas mostradas en pantalla se cortarán automáticamente. Normal/LB --- Al seleccionar este modo, las imágenes panorámicas mostradas en pantalla mostrarán una zona negra en la parte de superior e inferior. Wide (Panorámica) --- Seleccione este modo, si el equipo está conectado a un televisor de pantalla panorámica. OSD Language (Idioma OSD) Este menú permite al usuario seleccionar el idioma del menú en pantalla. Screen Saver (Salvapantallas) Activa o desactiva el salvapantallas. Normal/PS Normal/LB Wide (Panorámica) Idioma OSD Inglés Español Salvapantallas On (Activado) Off (Desactivado) • Página de configuración de audio Página de configuración de audio Conf. de SPDIF Salida SPDIF Off (Desact.) SPDIF/RAW SPDIF/PCM Conf. de Dolby Digital Mono dual Estéreo Mono Izd. Mono Dcho. Procesamiento 3D Modo reverb. Off (Desact.) Concierto Sala de estar Vestíbulo Cuarto de baño Cueva Estadio Iglesia Audio SYNC SPDIF Output (Salida SPDIF) Puede seleccionar el modo de salida para la reproducción de diferentes discos. OFF --- Desactiva la salida SPDIF. SPDIF/RAW --- Si tiene conectada la salida digital DIGITAL OUT (COAXIAL) a un descodificador/receptor multicanal. SPDIF/PCM --- sólo si su receptor no puede decodificar audio multicanal. DUAL MONO (Mono dual) Seleccione el ajuste que coincida con el número de altavoces que tiene conectados. STEREO (Estéreo) --- el sonido mono izquierdo enviará señales de salida al altavoz izquierdo y el sonido mono derecho enviará señales de salida al altavoz derecho. L-MONO (Mono Izdo.) --- el sonido mono izquierdo enviará señales de salida a los altavoces izquierdo y derecho. R-MONO (Mono Dcho.) --- el sonido mono derecho enviará señales de salida a los altavoces izquierdo y derecho. Reverb Mode (Modo de reverberación) El modo de reverberación proporciona una experiencia de sonido envolvente virtual usando solamente dos altavoces. Audio SYNC Este menú le ayuda a configurar el tiempo de retardo cuando no es posible reproducir la imagen y el sonido al mismo tiempo. Retardo de audio: 0ms~200ms. - 13 - • Página de configuración de vídeo Componente Página de configuración de vídeo Modo TV Calidad S-Video Pr/Cr Pb/Cb Y Progresivo Interlace Nitidez Alto Medio Bajo Brillo -20 - 20 Contraste -16-16 Alto Medio Bajo Ninguno -9-9 Tono Saturación -9-9 Gamma Conf. HDMI Retardo de luminancia HDMI Resolución 0T 1T Automático Off (Desact.) 480p (60Hz) 720p (60Hz) 1080i (60Hz) 1080p (60Hz) S76p (720) 720p (50Hz) 10801 (50Hz) 1080p (50Hz) Component (Componente) Ajusta la salida de vídeo de acuerdo con la conexión al vídeo. Esta configuración no es necesaria si se usa el conector de salida de vídeo VIDEO OUTPUT (amarillo) para conectar el microsistema de DVD al televisor. S-Video --- seleccione esta configuración si el microsistema de DVD está conectado al televisor mediante un conector S-Video. Pr/Cr Pb/Cb Y --- seleccione esta configuración si el microsistema de DVD está conectado al televisor mediante un conector de componente de vídeo. Modo del televisor Selecciona el modo de salida de vídeo progresivo o entrelazado al seleccionar Pr/Cr Pb/Cb Y. En el modo de escaneado progresivo, se disfruta de una calidad de imagen alta con menos parpadeo. Tan sólo funciona si se conectan las clavijas Y Pb Pr del reproductor de DVD a un televisor compatible con la entrada de vídeo progresiva. De lo contrario, se visualizará una imagen distorsionada en el televisor. Quality (Calidad) Este menú ayuda a configurar la calidad de vídeo. Sharpness (Nitidez) Ajusta el nivel de nitidez. High (Alta) Medium (Media) y Low (Baja) Brightness (Brillo) Ajusta el nivel de brillo. Intervalo: -20-+20. Contrast (Contraste) Ajusta el nivel de contraste. Intervalo: -16-+16. Gamma (Gamma) Ajusta el nivel gamma. High (Alto), Medium (Medio), Low (Bajo) y None (Ninguno). Hue (Tono) Ajusta el nivel de tono. Intervalo: -9-+9. Saturation (Saturación) Ajusta el nivel de saturación. Intervalo: -9-+9. Luma Delay (Retardo de luminancia) Ajusta el retardo de luminancia. 0T y 1T HDMI Setup (Configuración HDMI) Esta opción se usa para activar/desactivar la salida HDMI. HDMI Auto --- activa la salida automática de HDMI. Off --- desactiva la salida de HDMI. RESOLUTION (Resolución) Las opciones de resolución incluyen 480p (60Hz), 720p (60Hz), 1080i (60Hz), 1080p (60Hz), 576p (50Hz), 720p (50Hz), 1080i (50Hz) y 1080p (50Hz). Notas: si no aparece ninguna imagen en la pantalla del televisor debido a una resolución incompatible, reconecte cualquier salida de vídeo entrelazado disponible a la pantalla y reconfigure los ajustes de la resolución como 480p/ 576p. - 14 - • Página de configuración de preferencias Tipo TV PAL AUTO NTSC Audio Inglés Francés Español Chino Japonés Coreano Ruso Tailandés Inglés Francés Español Chino Japonés Coreano Ruso Tailandés Inglés Francés Español Chino Japonés Coreano Ruso Tailandés 1 KID SAF 2 G 3 PG 4 PG13 5 PGR 6 R 7 NC17 8 ADULT China Francia China, Hong Kong Japón China, Taiwán Gran Bretaña EE.UU. Restablecer Subtítulos Página de preferencias Menú del disco Control parental Región Predeterminado TV Type (Tipo de televisor) PAL --- seleccione esta opción, si el televisor conectado tiene sistema PAL. Cambiará la señal de vídeo y la salida de los discos NTSC al formato PAL. AUTO --- seleccione esta opción, si el televisor conectado es compatible tanto con NTSC como con PAL (multisistema). El formato de salida se realizará de acuerdo con la señal de vídeo del disco. NTSC --- seleccione esta opción, si el televisor conectado tiene el sistema NTSC. Cambiará la señal de vídeo y la salida de los discos al formato NTSC. Audio, subtítulos y menú del disco Sólo está disponible para los discos compatibles con esta función. Audio --- banda sonora del disco Subtitle --- subtítulos del disco Disc Menu --- menú del disco Parental (Control parental) Es posible que algunos discos DVD incluyan un nivel de control parental asignado a la totalidad del disco o a determinadas escenas en él. Esta función permite ajustar un nivel de limitación en la reproducción. Los niveles de clasificación van del 1 al 8 y dependen de cada país. Puede prohibir la visualización de ciertos discos que no son adecuados para sus hijos o disponer de ciertos discos que incluyen escenas alternativas. 1 KID SAF --- material infantil; especialmente recomendado para niños y para espectadores de todas las edades. 2 G --- audiencia general; recomendado como aceptable para espectadores de todas las edades. 3 PG --- supervisión parental recomendada. 4 PG 13 --- material no adecuado para niños menores de 13 años. 5-6 PGR, R --- supervisión parental - restringida; se recomienda la restricción parental a menores de 17 años o que los padres permitan su visionado únicamente bajo la supervisión de un padre o adulto. 7 NC-17 --- no apto para niños menores de 17 años; no se recomienda su visualización para niños menores de 17 años. 8 Adult --- materiales de contenido adulto; sólo debe ser visto por adultos debido a la presencia de material sexual gráfico, violencia o lenguaje empleado. Default (Predeterminado) El ajuste de la función "DEFAULT (Predeterminado)" reiniciará todas las opciones y sus ajustes personales a los ajustes de fábrica, eliminándose así todos sus ajustes personales. Precaución: Cuando esta función está activada, todos los ajustes se restablecen a la configuración original de fábrica. - 15 - Página de configuración de la contraseña Página de configuración de la contraseña • Modo contraseña Contraseña On (Activ.) Off (Desact.) Cambiar Password Mode (Modo de contraseña) Esta función se utiliza para activar/desactivar la contraseña mediante la selección de “On”/”Off”. Password (Contraseña) Seleccione esta opción para configurar una contraseña nueva para el equipo, siga las instrucciones en pantalla e introduzca una contraseña nueva. La contraseña original es 1234. Utilización del USB Al conectar un dispositivo de almacenamiento masivo USB (incluidas las memorias flash USB, los reproductores flash USB y las tarjetas de memoria) al sistema de alta fidelidad, puede disfrutar de la música guardada en el dispositivo a través de los potentes altavoces del equipo. 1. Introduzca el conector del dispositivo USB en el enchufe en el panel del equipo. 2. Pulse el botón USB para seleccionar esa función. 3. Se iniciará automáticamente la reproducción de la música guardada en el dispositivo. • Para los dispositivos con cables USB: del equipo. 1. Introduzca un conector de cable USB (no incluido) en el conector 2. Inserte el otro extremo del cable USB en la terminal de salida USB del dispositivo USB. • Para la tarjeta de memoria: 1. Introduzca la tarjeta de memoria en el lector de tarjetas (no incluido). del equipo. 2. Utilice un cable USB (no incluido) para conectar el lector de tarjetas al conector Cómo escuchar emisoras de radio Precaución: antes de escuchar la radio, compruebe que las antenas de FM están correctamente conectadas. Pulse el botón de función de sintonización (TUNER) para seleccionar la función TUNER. (También puede utilizar la tecla de función “FUNCTION” en el panel del equipo.) • Pulse el botón de sintonización hacia delante repetidamente para avanzar de una frecuencia a otra hasta que encuentre la emisora que desea. durante un segundo o más; la frecuencia • Mantenga pulsado el botón de sintonización hacia delante cambiará automáticamente hacia delante hasta encontrar la siguiente emisora. (También puede utilizar la tecla en el panel del equipo.) • Pulse el botón de sintonización hacia atrás repetidamente para avanzar de una frecuencia a otra hasta que encuentre la emisora que desea. durante un segundo o más; la frecuencia • Mantenga pulsado el botón de sintonización hacia atrás cambiará automáticamente hacia atrás hasta encontrar la siguiente emisora. (También puede utilizar la tecla en el panel del equipo.) - 16 - Puede guardar la emisora bien sintonizada pulsando el botón de memoria (PROGRAM). (Pueden programarse hasta 16 emisoras de FM.) • Sintonice la emisora que desea y, a continuación, pulse el botón de memoria (PROGRAM). • Use el botón o el botón en el mando a distancia repetidamente para seleccionar el número programado. en el panel del equipo.) (También puede utilizar la tecla • Pulse el botón de memoria (PROGRAM) para memorizar la emisora. Transcurrido 1 segundo, la pantalla VFD volverá a mostrar la frecuencia de la emisión. Nota: si se desenchufa el sistema o si se produce un corte en el suministro eléctrico, las emisoras programadas quedarán guardadas en la memoria. • Pulse el botón de selección de canal hacia delante repetidamente para seleccionar el número programado después de programar las emisoras. Se mostrarán la banda y la frecuencia en la pantalla VFD. Pulse el botón de selección de canal hacia delante repetidamente para seleccionar el número programado cuando la emisora está guardada en memoria. • Pulse el botón de selección de canal hacia atrás repetidamente para seleccionar el número programado antes de programar las emisoras. Se mostrarán la banda y la frecuencia en la pantalla VFD. Pulse el botón de selección de canal hacia atrás repetidamente para seleccionar el número programado cuando la emisora está guardada en memoria. (También puede utilizar la tecla de función “PRESET +” en el panel del equipo.) Pulse el botón de selección de estéreo/mono (MODE) para seleccionar el canal estéreo o MONO para recibir el modo de radio FM y obtener el mejor efecto. Recepción de RDS (Radio Data System) Muchas emisoras de FM transmiten datos añadidos compatibles con el sistema de radiodifusión de datos (en inglés Radio Data System, RDS). Este aparato de radio ofrece cómodas funciones que hacen uso de esos datos. ♦ PS (Nombre de la red de emisoras) Al recibir una emisora RDS, las luces indicadoras de RDS se iluminan y muestran automáticamente el nombre de la emisora en lugar de la frecuencia. Cuando se pulsa el botón de visualización en pantalla de RDS en el mando a distancia durante la visualización de PS, el sistema de fecha y hora (CT) se mostrará durante 3 segundos; a continuación, volverá a verse la pantalla PS. ♦ PTY (Tipo de emisora) Señal de identificación de tipo de emisora. (Por ejemplo: noticias, rock, música clásica.) ♦ CT (Sistema de fecha y hora) Es posible que la fecha y hora no funcione correctamente en las zonas donde el servicio de fecha y hora RDS no esté disponible. Una vez se ha recibido la información de fecha y hora, el sistema continuará funcionando. En las zonas en las que no existe ningún servicio de fecha y hora disponible se mostrará el texto “RDS CLOCK”. ♦ Cómo cambiar la información en pantalla Durante la visualización del nombre de la red emisoras, pulse el botón de información en pantalla de RDS en el mando a distancia repetidamente para seleccionar la fecha y hora, el tipo de emisora o la frecuencia. Esta información se mostrará en la pantalla durante 3 segundos y, a continuación, volverá visualizarse el nombre de la red de emisoras. - 17 - Funciones de reloj/temporizador Ajuste del reloj El reloj incorporado muestra la hora correcta en la pantalla. - En el modo standby, pulse el botón del reloj (CLOCK); el indicador de la hora parpadeará. - Ajuste la hora utilizando los botones VOL- o VOL+. - Pulse el botón del reloj (CLOCK); el indicador de los minutos parpadeará. - Ajuste los minutos utilizando los botones VOL- o VOL+. - Pulse el botón del reloj (CLOCK); el reloj integrado empezará a funcionar y los segundos empezarán a contar a partir de 0. Nota: * El temporizador de encendido diario sólo puede configurarse en el modo standby. * No deberá tardar más de 10 segundos en realizar cada uno de los pasos o, de lo contrario, el equipo volverá a la pantalla original. * Si se produce un fallo o se desconecta la alimentación eléctrica del equipo, el reloj perderá la configuración efectuada. Cómo confirmar la hora del reloj * En el modo standby, al pulsar el botón del reloj (CLOCK), se mostrará la hora. Espere unos segundos hasta que el equipo vuelva a la pantalla original. * En el modo standby de ahorro energético ECO, al pulsar el botón del reloj (CLOCK) o el botón del temporizador (TIMER), se mostrará la hora. Espere unos segundos hasta que el equipo vuelva a la pantalla original. Ajuste del temporizador de encendido diario • En el modo standby, puede usarse el ajuste del temporizador de encendido diario para encender el equipo automáticamente a una hora determinada todos los días en el modo standby. Cuando el temporizador de encendido diario está activado, se visualizará su indicador en la pantalla VFD; no obstante, el reloj debe estar correctamente configurado para que la función del temporizador funcione. - En el modo standby, pulse el botón del temporizador (TIMER); el indicador de la hora parpadeará. - Ajuste la hora utilizando los botones VOL- o VOL+. - Pulse el botón del temporizador (TIMER); el indicador de los minutos parpadeará. - Ajuste los minutos utilizando los botones VOL- o VOL+. - Pulse el botón del temporizador (TIMER); la hora seleccionada quedará fijada. A continuación, ajuste el temporizador de encendido diario a “ON”(el temporizador queda activado) u “OFF” (el temporizador queda desactivado) pulsando los botones VOL- o VOL+. Nota: * El temporizador de encendido diario sólo puede configurarse en el modo standby. * No deberá tardar más de 10 segundos en realizar cada uno de los pasos o, de lo contrario, el equipo volverá a mostrar la hora. * La fuente de sonido en el modo de temporizador activado es la misma que se estaba usando la última vez que se apagó el equipo con el modo standby. Para confirmar la hora del temporizador de encendido diario Pulse el botón del temporizador (TIMER) en el modo standby; se mostrará la hora de encendido diario. Espere un segundo hasta que la pantalla vuelva a mostrar la hora. Para cancelar el ajuste del temporizador de encendido diario En el modo standby, pulse repetidamente el botón del temporizador (TIMER) hasta que la palabra “ON” (Activado) aparezca en la pantalla VFD; a continuación podrá configurar el temporizador de encendido diario como “OFF” (Desactivado) pulsando los botones VOL- o VOL+ (el temporizador de encendido diario quedará cancelado). Al apagar el equipo también se cancela el temporizador de encendido diario. - 18 - Ajuste del temporizador de apagado • Use el temporizador de apagado para apagar el sistema una vez transcurrido un tiempo de reproducción determinado. Al ajustar el temporizador de apagado, podrá quedarse dormido sabiendo que el equipo se apagará sólo en lugar de continuar funcionando toda la noche. - Reproduzca un disco o sintonice la emisora que desee. - Si configura el temporizador de apagado primero, cada vez que pulse el botón correspondiente (SLEEP), éste cambiará el número de minutos mostrados en la pantalla VFD del siguiente modo: 10 20 80 90 OFF (Desactivado) Tras ajustar el número de minutos del temporizador de apagado, la pantalla volverá a mostrar la misma información que antes de ajustar el temporizador de apagado. El sistema queda configurado para apagarse una vez transcurrido el tiempo que usted ha fijado. Para confirmar la hora del temporizador de apagado Al pulsar el botón del temporizador de apagado (SLEEP), se mostrará el tiempo restante. Al cabo de unos segundos que el equipo volverá a la pantalla original Para cancelar el ajuste del temporizador de apagado Pulse repetidamente el botón del temporizador de apagado (SLEEP) hasta que aparezca “OFF” (Desactivado) en la pantalla VFD.El temporizador de apagado también quedará cancelado, si se reinicia el reloj o si se apaga el equipo. Cuidado de los discos 1. Para mantener los discos limpios, no toque su superficie al sostenerlos. Debería sostenerlos por los bordes. 2. Si el disco está sucio, esto afectará a la calidad del sonido. Use un paño limpio y suave para limpiar el disco con un movimiento uniforme desde el centro hacia los extremos. No frote los discos con un movimiento circular. 3. 4. 5. 6. 7. No pegue papeles en los discos. No exponga los discos a la luz directa del sol ni próximos a fuentes de calor. Después de terminar con el disco, métalo en su funda original. Para evitar que se deformen o se dañen, no apile los discos. No reproduzca discos que tengan defectos o deformaciones, ya que esto puede provocar daños en el reproductor. Utilice sólo un paño suave y seco para limpiar los discos. No utilice productos químicos como bencina, disolvente, pulverizadores antiestáticos o para discos de vinilo, ya que éstos pueden provocar daños en la superficie del disco. - 19 - Resolución de problemas Si tiene problemas con su equipo, consulte esta lista para identificar posibles soluciones antes de contactar con la asistencia técnica. Si no logra solucionar el problema con los consejos facilitados aquí o si el sistema ha sufrido daños, póngase en contacto con un técnico cualificado, como su distribuidor, para repararlo. Síntoma No hay sonido No hay imagen Posible causa Solución Las conexiones se han realizado incorrectamente o están sueltas El televisor o el amplificador de potencia funcionan incorrectamente La posición de recepción de la señal del amplificador es incorrecta El volumen se encuentra al mínimo Las conexiones son incorrectas o están sueltas El funcionamiento y la configuración del televisor son incorrectos Mala calidad de sonido Las conexiones de audio son incorrectas La imagen baila o no tiene color El sistema del reproductor de DVD no coincide con el del televisor El disco no funciona No hay ningún disco en la bandeja El disco está al revés El disco está sucio o rayado Hay humedad en el interior del equipo Mala recepción de la radio La antena está desconectada La antena de cable de FM no está extendida ni posicionada correctamente El disco está sucio El disco está del revés La pausa está activada El disco no funciona El mando a distancia no funciona Las funciones están desactivadas La trayectoria entre el mando a distancia y el sensor del equipo está bloqueado Las pilas están gastadas El microprocesador integrado no funciona debido a una interferencia eléctrica externa - 20 - Compruebe todas las conexiones y realice los ajustes necesarios Compruebe si el funcionamiento es correcto Compruebe la posición de la señal de recepción Ajuste el volumen Compruebe todas las conexiones y realice los ajustes necesarios Compruebe si el funcionamiento y la configuración son correctos Compruebe que las conexiones de audio son correctas Seleccione el sistema de color adecuado en la configuración de la función del “TV System” (Sistema del Introduzca un disco Coloque el disco con la cara impresa hacia arriba Limpie o cambie el disco Extraiga el disco y deje el equipo funcionando durante aproximadamente una Conecte la antena firmemente Extienda el cable de la antena FM y encuentre la mejor posición de recepción Limpie o cambie el disco Introduzca el disco con la cara impresa hacia arriba Cancele la función de pausa Elimine la obstrucción Cambie las pilas Desenchufe el equipo y vuelva a enchufarlo Especificaciones Sistema Alimentación ................................................................... ~230V / 50 Hz Consumo de energía ...................................................... ≤ 70W Potencia de salida .......................................................... 100W x 2 Separación de canales ................................................... ≥ 40dB Distorsión........................................................................ ≤ 1% Tamaño .......................................................................... 215 (Ancho) x 205 (Alto) x 275 (Largo) mm Respuesta de frecuencia ................................................ 50Hz-20kHz (±3dB) Salida de vídeo ............................................................... 1 VP–P Definición horizontal ....................................................... ≥ 500 (TV) Tamaño de los discos ..................................................... Φ80mm, Φ120mm Ratio S/N ......................................................................... ≥ 65dB Rango de frecuencia de FM .............................................. 87.5-108 Mhz Sensibilidad de límite de ruido de FM............................. ≤ 20µV FM S/N .............................................................................................. ≥ 45dB Altavoz Impedancia .................................................................... 4Ω Potencia de entrada ....................................................... 100W Sensibilidad..................................................................... 80 ± 4dB Respuesta de frecuencia ................................................ 50Hz-20kHz (±3dB) Tamaño .......................................................................... 208 (Ancho) x 300 (Alto) x 250 (Largo) mm Mando a distancia Distancia......................................................................... 6 m Ángulo ........................................................................................................± 30O - 21 - Accesorios Antena FM ........................................................................... Línea de conexión de las cajas de los altavoces ................. Línea de señal de vídeo ...................................................... Cable de cinta ...................................................................... Pilas ......................................................................................... Mando a distancia ................................................................ Manual de instrucciones ...................................................... 1 2 1 1 2 1 1 Nota: las especificaciones y el diseño están sujetos a cambios sin previo aviso. - 22 - 41008486 Table of Contents Before Connection .................................................................................................................. 2 For your safety .......................................................................................................................................... 2 Precautions .............................................................................................................................................. 2 Connection ..............................................................................................................................3 Connect to the TV ................................................................................................................................... 3 Connecting the Speakers ........................................................................................................................ 3 Connect to the FM Antenna .................................................................................................................... 4 Connecting to a TV with HDMI Jack ....................................................................................................... 4 Connect to the assistance equipment .................................................................................................... 4 Connect to the amplifier with digital signal input terminal .................................................................. 5 Connecting the AC Power Cord .............................................................................................................. 5 Control Locations .................................................................................................................... 6 The DVD Player ....................................................................................................................................... 6 The Amplifier ........................................................................................................................................... 6 Remote control ........................................................................................................................................ 7 Installation of Batteries in the Remote Control ....................................................................... 8 Turning the Power On and Off ................................................................................................. 8 Button Functions ..................................................................................................................... 8 General Operate ...................................................................................................................................... 8 Playing picture CD disc ......................................................................................................................... 12 DVD Menu Options ................................................................................................................................ 12 Use the USB ........................................................................................................................................... 16 Listening to Radio Broadcasts .............................................................................................................. 16 RDS (Radio Data System) Reception ................................................................................................... 17 Clock/Timer Functions ......................................................................................................... 18 Setting the Clock ................................................................................................................................... 18 Setting the Daily Timer ......................................................................................................................... 18 Setting the Sleep Timer ....................................................................................................................... 19 Protect the Disc .................................................................................................................... 19 Troubleshooting ................................................................................................................... 20 Specification ......................................................................................................................... 21 Accessories .......................................................................................................................... 22 Manufactured under license from Dolby Laboratories. “Dolby” and the double-D symbol are trademarks of Dolby Laboratories. - 1 - 1506D-e(#EJS89S,re-11)-1.p65 1 2009-10-27, 11:05 Before Connection Thank you for purchasing this DVD 2 channel component system, in order to fully utilize this system, please read this instruction book carefully before use it. For your safety Precautions 1. Before operating this system, check the voltage of this system to see if it is identical with the voltage of your local power supply. 2. Unplug the system from the wall outlet if it is not used for a long time. To disconnect the cord, pull it out by grasping the plug 3. To avoid electric shock, do not open the cabinet by unqualified personnel 4. There is no user serviceable parts inside. In case of system failure, unplug the power cord and consult your dealer 5. The ventilation should not be impeded by covering the ventilation openings with items such as newspaper, table-cloths, curtains etc. 6. The apparatus shall not be exposed to dripping or splashing and that no objects filled with liquids, such as vases, shall be placed on the apparatus. 7. To prevent fire or shock hazard, do not expose this equipment to hot places, rain, moisture or dust. 8. Don’t get close to the water source when using this unit, such as near bathtub, bath slot, ish-washing slot, washing machine to use it; also, don’t use this unit on damp plinth or nearby swimming pool or similar close to the water source. 9. Do not place this unit close to strong magnetic field. 10. Don’t place this unit close to the damper, or the moisture will affect the life of the laser head. 11. If the system is brought directly from a cold to a warm location, or is placed in a very damp room, moisture may condense on the lens inside the player. Should this occur, the system will not operate properly. Remove the disc and leave the system turned on for about an hour until the moisture evaporates. 12. Should any solid object or liquid fall into the system, unplug the system and have it checked by qualified personnel before operating it any further. 13. Before cleaning this unit, unplug the system from the wall outlet first. Don’t use the cleaner which is with liquid or aerosol (e.g. pesticide). You can use a clean cloth to clean this unit. 14. Please use the connection cable to connect to unit. Don’t use accessorial equipment recommended by non manufacturer. It may course an electric shock by using this equipment. 15. Where the appliance coupler is used as the disconnect device, the disconnect device shall remain readily operable. 16. Excessive sound pressure from earphone and headphone can cause hearing loss. CAUTION RISK OF ELECTRIC SHOCK DO NOT OPEN CAUTION: TO REDUCE THE RISK OF ELECTRIC SHOCK, DO NOT REMOVE COVER. NO USER SERVICEABLE PARTS INSIDE, REFER SERVICING TO QUALIFIED SERVICE PERSONNEL. This symbol indicates that dangerous voltage constituting a risk of electric shock is present within this unit. This symbol indicates that there are important operating and maintenance instructions in the literature accompanying this unit. Caution: To prevent fire or shock hazard, do not expose this equipment to rain or moisture place. Power Requirement Because the power requirement of the electric products is different in various places, before you use this product, make sure that the power requirement of the product is complied to the power that the native district supplies. Laser Product This product is equipped with low power laser equipment inside, for using safely, don’t take apart any covers or try to take apart the product inside. Please contact the qualified personnel for repairing. CLASS 1 LASER PRODUCT Caution: This product is equipped with low power laser equipment inside, for your safety, don’t open the laser radiation protective equipment. Don’t look at the laser radiation district when the equipment is operating. - 2 - 1506D-e(#EJS89S,re-11)-1.p65 2 2009-10-27, 11:05 Connection Caution: Please turn off all the equipment power before connecting. Connect to the TV Safety precautions Terminal board for the DVD player 1. This unit has video and S terminal output modes, please choose one to connect with the TV terminal. (Use S terminal output to get clearer picture.) 2. If your TV has component input terminal, then you can use the signal connecting cable to connect with the unit’s component output terminal. By doing so, the picture will be more clear. 3. To avoid affecting the picture output, don’t connect video, S terminal, component at the same time. 4. DVD Player setting Some settings should be made for the unit according to the TV connection. * According to the colour system setting of TV, select the colour system in the “TV Display” function setting. * If the unit is connected to a wide screen TV, then set the “TV display” to “Wide” in the function setting menu. * If the unit is connected to a TV, then set “TV display” to “Normal/PS” or “Normal/LB” in the function setting item. Terminal board for the TV Connecting the Speakers Connect the speaker cords between the terminals as shown below. Right Speaker Box Left Speaker Box Connection precautions 1. The unit’s output has wide dynamic range, so the amplifier’s volume should be moderated, if other speakers are used, they must be closed correctly according to our speaker’s specification, or the loud speaker will be damaged by the heavy volume. 2. Before connect or cut short the unit’s power, please turn the volume to minimum firstly or it may damage the loudspeaker. - 3 - 1506D-e(#EJS89S,re-11)-1.p65 3 2009-10-27, 11:05 Connect to the FM Antenna Terminal board for the DVD player Connect the supplied FM wire antenna to the FM Antenna socket on the unit. Terminal board for the DVD player If reception is poor, connect the outside antenna. Note: Before attaching a 75 ohm coaxial lead (the kind with a round wire going to an outside antenna), disconnect the supplied FM wire antenna. Caution: To avoid noise, keep antennas away from the system, the connecting cord and the AC power cord. Connecting to a TV with HDMI Jack Terminal board for the DVD player HDMI connects untouched and uncompressed digital transmission for the highest and crispest sound/image quality. It has plug and play capability using only one cable for both audio/video output. Use a HDMI cable (not supplied) to connect the HDMI jack on the DVD Player to HDMI IN on a HDMI compatible device (e.g.; TV, Projector, Adaptor). Terminal board for the TV Connect to the assistance equipment Terminal board for the DVD player This DVD player has a groups of audio input terminals, you can use signal line to connect audio input terminals of this unit and audio output terminals of assistance equipment respectively, then you can hear the sound sources. Terminal board for the assistance equipment - 4 - 1506D-e(#EJS89S,re-11)-1.p65 4 2009-10-27, 11:05 Terminal board for the DVD player This unit also has a group of audio output terminals, you can use signal line to connect this unit’s audio output terminal and assistance equipment’s audio input terminal respectively, then you can output the outer sound sources to other assistance equipment. Terminal board for the assistance equipment Connect to the amplifier with digital signal input terminal Terminal board for the DVD player Use coaxial signal wire to connect coaxial output jack of the DVD player with coaxial input jack of other amplifier, then you can feel the super digital sound effect. With digital signal input terminal’s Dolby Digital signal decode amplifier terminal board Connecting the AC Power Cord 1. With the unit unplugged from the mains connect the power control cable to the DVD player and the amplifier via the connections on the rear of the units as shown . 2. Insert the AC power cord into a wall outlet, and your system is at your command! Caution: Be sure to unplug the power cord from the outlet when going away or when the system is not in use for an extended period of time. - 5 - 1506D-e(#EJS89S,re-11)-1.p65 5 2009-10-27, 11:05 Control Locations The DVD Player 1. 2. 3. 4. 11. 12. 13. 14. 15. 16. 17. 18. 19. 20. 21. Standby Button Disc Tray Clock Button Mode (Repeat) Button MONO/Stereo Select Button Remote Sensor VFD Display Lens Stop Button Tuning Backward Button Play/Pause Button Tuning Forward Button Previous Button Channel Select Backward Button Next Button Channel Select Forward Button Open/Close Button Coaxial Output Terminal Video Output Terminal USB Port Control Cable Connector FM Antenna Socket HDMI Port S-Video Output Terminal Component Output Terminals Audio output Terminals AUX Input Terminals 1. 2. 3. 4. 5. 6. 7. 8. Bass Control Knob Treble Control Knob Volume Control Knob Function Select Button Headphone Jack AC Cord Control Cable Connector Speaker Output Terminals (L&R) 5. 6. 7. 8. 9. 10. The Amplifier - 6 - 1506D-e(#EJS89S,re-11)-1.p65 6 2009-10-27, 11:05 Remote control 1. 2. 3. 4. 5. 6. 7. 8. 9. 10. 11. 12. 13. 14. 15. 16. 17. 18. 19. 20. 21. 22. 23. 24. 25. 26. 27. 28. 29. 30. 31. 32. 33. 34. 35. 36. 37. Standby Button TUNER Function Button AUX Function Button Loudness Button Subtitle Button Next Button Channel Select Forward Button Previous Button Channel Select Backward Button Sleep Button Timer Button Function Setting Button Confirm Button Direction Button (t) Direction Button (q) Play/Pause Button Mute Button Fast Backward Button Tuning Backward Button DVD OSD Button RDS Button Mode (Repeat) Button MONO/Stereo Select Button Number Buttons Open/Close Button DVD Function Button USB Function Button Preset Equalizer Button Dimmer Button Super Bass Button Title Button Zoom Button Vocal Mode Select Button Language Select Button Clock Button Volume Up Button Volume Down Button PBC Button Root Button Direction Button (p) Direction Button (u) Stop Button Fast Forward Button Tuning Forward Button Program Button Memory Button Time Search Button - 7 - 1506D-e(#EJS89S,re-11)-1.p65 7 2009-10-27, 11:05 Installation of Batteries in the Remote Control 1. Remove the battery compartment cover. 2. Insert two batteries (size AAA) correctly, so that the + and - polarities match the polarity diagrams in the battery compartment. * About half a year of normal operation can be expected when using standard batteries. * When the batteries are exhausted, the remote will not function. Replace both batteries at the same time with new ones. * Don’t mix old and new batteries. * Don’t mix different types of batteries. * When the unit is not used for a long period of time, remove the batteries to avoid damage caused by battery leakage and corrosion. * The batteries (battery pack of batteries installed) shall not be exposed to excessive heat such as sunshine, fire or the like. Turning the Power On and Off You can use all the functions on the panel of the unit or the remote control after connecting to power supply (called Standby Mode). Note: In standby mode, if you don’t use any function of the unit for 15 minutes, the unit will switch to ECO power standby mode automatically. Turning the System On Press the standby button ( STANDBY) to turn the system on from standby mode. Caution: When turning the system on, the system will continue in the mode it was in when it was turned off last time. Turning the System Off Press the standby button ( STANDBY) again to turn the system off and go to standby mode. Caution: Be sure to unplug the power cord from the outlet when the system is not in use for an extended period of time. Button Functions General Operate In power on mode, press the DVD function button (DVD) to select DVD function. (You can also operate the key “FUNCTION” on the panel of unit.) Press the open/close button (K) on the unit to open the disc tray then place the disc on the disc tray (with the printed side up). Press this button again to close the disc tray, the unit will read the disc and the disc type will display on the TV screen. The disc should play automatically. (You can also operate the key “K” on the panel of unit.) Press the direction buttons (p,q,t, u) to move the cursor to illuminate the desired selection. Press the confirmation button (ENTER) to confirm the menu selection. - 8 - 1506D-e(#EJS89S,re-11)-1.p65 8 2009-10-27, 11:05 In stop mode, press the play/pause button (BF) to start playing the disc. When playing disc, press the play/pause button ( BF ) to temporarily stop the playing, press the button again, it will continue to play. (You can also operate the key “BF” on the panel of unit.) Press the stop button (L ) to stop playing, the unit will store the last playing time in the memory automatically, then press the BF button, the unit will resume to last memory time and continue playback automatically. If you press the stop button (L) twice to stop the disc playing. (You can also operate the key “L” on the panel of unit.) Press the volume up button to increase the volume. Press the volume down button to decrease the volume. (You can also operate the control knob “- VOLUME +” on the panel of unit.) Rotate the bass control (BASS) on the unit clockwise or anticlockwise to increase/decrease the bass. Rotate the treble control (TREBLE) on the unit clockwise or anticlockwise to increase/decrease the treble. Press the mute button in play mode, all sound will be muted, press the button again or press the “VOL -, VOL +” buttons to resume sound. The loudness function controls the bass to improve the output sound. This function only works when the unit is playing. This unit has three brightness levels for adjusting the display brightness. Press the dimmer button (DIM), for the desired brightness level. You can adjust the sound reproduced simply by choosing from different preset equalizations. Each press of the preset equalizer button (P-EQ) will select one of the following different preset equalizations: FLAT POPS JAZZ CLASSIC ROCK : : : : : Normal sound Vocal sound is intensified For jazz For classic For rock Press the OSD button to display the playing information of the disc on the TV screen. l l If the Video CD has a menu, you can set the playback control function to “PBC ON” mode by pressing the menu button (MENU). The unit reads the disc and the menu will display on the TV screen, then use the number buttons to select the desired track. When playing DVD disc, press the root button (MENU) to return to the root menu for previous layer. - 9 - 1506D-e(#EJS89S,re-11)-1.p65 9 2009-10-27, 11:05 l l l Load a Video CD, disc in PBC ON mode (the MENU button turns the PBC function ON/ OFF). You can select tracks or chapters with the number buttons (0-9,10+). * If the track or chapter number is less than 9, press the number buttons 0-9. * If the track or chapter number is over 9, press 10+ button and press the one of the number buttons 0-9. (For example: The track or chapter number is 28, press 10+ button twice and press the number button 8.) If playing a MP3 disc, you can directly press the 0-9,10+ buttons to select the track number then press ENTER button to play it. (For example: The track or chapter number is 28, press 10+ button twice and press the number button 8.) If your DVD disc has one or more music chapters or titles, you can setup playing order for the disc using this button. Press the program button, TV display will be as follows: Note: TT: Title CH: Chapter l * Use the 0-9,10+ buttons to input the sequence number which you want to program playing (the first selection is title and the second selection is chapter of the programs menu.). After finishing program, Press the p,q,t, u buttons to select “PLAY” then press the ENTER button to start programmed play. If you are playing a disc, the TV display will be as follows: * Use the 0-9,10+ buttons to input the sequence number you want to program playing. After the program has been entered, Press the p,q,t, u buttons to select “PLAY” then press the ENTER button to start programmed play. When you are playing the DVD disc, you can repeatedly press the subtitle button (SUBTITLE) to select the subtitle language to display on the TV screen if available. Subtitle 1/3 Subtitle 2/3 Subtitle 3/3 Subtitle Off In play mode, press the title button (TITLE), to go back to the title menu. l l When playing a the Video CD, you can choose MONO (Mono Left, Mono Right), “STEREO” or “Mix-Mono” audio output by pressing vocal mode select button (AUDIO). When playing DVD disc recorded with several languages, you can repeatedly press the language select button (AUDIO) to select one of language to play. - 10 - 1506D-e(#EJS89S,re-11)-1.p65 10 2009-10-27, 11:05 l When playing a DVD disc, this function can be used to play a title, chapter or disc repeatedly. Repeatedly press the mode (repeat) button (MODE), the screen shows : l When playing MP3 disc, this function can be used to play a track or folder repeatedly. Repeatedly press the mode (repeat) button (MODE), the screen shows : l You may repeat a track or disc according to the following steps. Repeatedly press the mode (repeat) button (MODE), the screen shows : (You can also operate the key “MODE” on the panel of unit.) You may directly enter a time, title or chapter number to go to a particular point on the disc. The unit will play from this point. 1. Press the time search button (GOTO) on the remote control. 2. Press the 0-9 buttons on the remote control, enter the time, title or chapter numbers to look for desired scene. Note: If the search time exceeds the total time on the disc or the item set falls short of the disc recorded, the “ input invalid” will display on TV screen, indicating the operation is invalid or incorrect. Press the fast forward button (C) repeatedly to select one of the variety of different speeds to fast forward play or select normal speed to play. Each time you press the button, the screen shows. Note: Press the BF button to resume normal playback. Press the fast reverse button (D ) once by once to select one of the variety of different speeds to fast backward play or select normal speed to play. Each time you press the button, the screen shows. Note: Press the l l BF button to resume normal playback. When playing a DVD disc, press the next button (G) to skip to the next chapter or title. When playing a Video CD disc, press the next button (G) to skip to the next track. When playing DVD disc, press the previous button (H) to skip to the previous chapter or title. l When playing Video CD disc, press the previous button (H) to skip to the previous track. (You can also operate the key “G,H” on the panel of unit.) l This function can be used while playing a film or a still picture. Press the zoom button (ZOOM) repeatedly when playing, the screen shows: * Use the p,q,t, u buttons to move around the enlarged picture. Note: This function is not available for CD or MP3 playback. - 11 - 1506D-e(#EJS89S,re-11)-1.p65 11 2009-10-27, 11:05 Playing picture CD disc Press the K button on the unit to open the disc tray and place the picture CD on the disc tray (with the printed side up). Press this button again to close the disc tray, the unit will read the disc and play it automatically. Picture CD: The disc is recorded in picture When menu list display or the picture displaying on the screen, you can press the 0-9 buttons to select the desired picture and press the ENTER button to confirm in the disc to start playing. Note: The playback will temporarily stopped when the selected pictures have been played. During picture playback, press the G button to go to the next picture, and press the button to go to the previous picture. H Press the p button to invert the picture, press the q button to mirror the picture, press the t button to rotate picture in anti-clockwise direction, press the u button to rotate picture in clockwise direction. Press PROGRAM button to select one of the transition effect for picture playback. (Example: Wipe Top, Diagonal Wipe Left Top, Window H etc.) Press the ZOOM button repeatedly to display to picture with different scales. Use the pqt u buttons to view the zoomed picture. Use the L button to enter the “Thumbnail Mode”. (Use the H or G buttons to display previous or next 12 pictures of disc. Press the MENU button to exit the “Thumbnail Mode” and return to menu list. Press the BF button to resume to normal playing.) DVD Menu Options Please note: The menu structure may differ from the example below. l Basic operations Press function setting button (SETUP) to enter the Setup Menu. Press t, u button to select a page to be set. Press p,q button to highlight an option. Enter its submenu by pressing u button or ENTER button. Move the cursor by pressing p,q button to highlight the selected item. Note: In cases of value setting, press t, u to adjust values. 6. Press ENTER button to confirm. Note: Press t button to return to the upper-level menu. When in cases of value setting, please press ENTER button. 1. 2. 3. 4. 5. - 12 - 1506D-e(#EJS89S,re-11)-1.p65 12 2009-10-27, 11:05 Press SETUP button to exit from the menu. (The settings will be stored in the player’s memory even if the player is switched off.) (Note: If the item displays in gray, that means that it can’t be setup and there isn’t this function in the disc.) l General Setup Page TV Display Normal/PS --- When selecting this mode, wide picture displayed on the screen will be cut automatically. Normal/LB --- When selecting this mode, wide picture displayed on the screen will have black top and bottom area. Wide --- If this system connects wide screen TV, selecting this mode. OSD Language This menu allows the user to select the language for the on-screen display. Screen Saver Set the screen saver to activate or cancel. l Audio Setup Page SPDIF Output You can choose output mode when playing different disc. OFF --- Turns off the SPDIF output. SPDIF/RAW --- If you have connected your DIGITAL OUT (COAXIAL) to a multi-channel decoder/receiver. SPDIF/PCM --- Only if your receiver is not capable of decoding multi-channel audio. DUAL MONO Select the setting that matches the number of speakers you have connected. STEREO --- Left mono sound will send output signals to Left speaker and Right mono sound will send output signals to Right speaker. L-MONO --- Left mono sound will send output signals to Left speaker and Right speaker. R-MONO --- Right mono sound will send output signals to Left speaker and Right speaker. Reverb Mode Reverb mode provides a virtual surround sound experience using just two speakers. AUDIO SYNC This menu helps you to set the delay time when the image and the sound can not be played in the same time. Audio Delay: 0ms~200ms. - 13 - 1506D-e(#EJS89S,re-11)-1.p65 13 2009-10-27, 11:05 l Video Setup Page Component Sets the video output according to your video connection. This setting is not required if you are using the VIDEO OUTPUT jack (yellow) to connect the DVD micro system to your TV. S-Video --- Select this if you have connected the DVD micro system to your TV using S-Video jack. Pr/Cr Pb/Cb Y --- Select this if you have connected the DVD micro system to your TV using Component video jacks. TV MODE Selects Progressive or interlace video output mode when Pr/Cr Pb/Cb Y is selected. In the progressive scan mode, you can enjoy the high quality picture with less flickers. It only works when you have connected the DVD player's Y Pb Pr jacks to your TV that supports the progressive video input. Otherwise, a distorted picture will appear on the TV. Quality This menu helps you to set the video quality. Sharpness Adjusts the sharpness level. High, Medium and Low. Brightness Adjusts the brightness level. Range: -20-+20. Contrast Adjusts the contrast level. Range: -16-+16. Gamma Adjusts the gamma level. High, Medium, Low and None. Hue Adjusts the hue level. Range: -9-+9. Saturation Adjusts the saturation level. Range: -9-+9. Luma Delay Adjusts the luma delay. 0 T and 1 T. HDMI Setup This option is used to enable/disable HDMI output. HDMI Auto --- Enables HDMI output automatically. Off --- Disables HDMI output. RESOLUTION The resolution options include 480p(60Hz), 720p (60Hz), 1080i(60Hz), 1080p(60Hz), 576p(50Hz), 720p (50Hz), 1080i(50Hz) and 1080p(50Hz). Notes: If no display appears on the TV screen due to unsupported resolution, reconnect any available interlace video output to your display and re-adjust the resolution settings to 480p/ 576p. - 14 - 1506D-e(#EJS89S,re-11)-1.p65 14 2009-10-27, 11:05 l Preference Setup Page TV Type PAL --- Select this if the connected TV is PAL system. It will change the video signal of a NTSC disc and output in PAL format. AUTO --- Select this if the connected TV is compatible with both NTSC and PAL (multi-system). The output format will be in accordance with the video signal of the disc. NTSC --- Select this if the connected TV is NTSC system. It will change the video signal of a PAL disc and output in NTSC format. Audio, Subtitle, Disc Menu Only available if the disc supports that function. Audio --- disc’s soundtrack Subtitle --- disc’s subtitles Disc Menu --- disc’s menu Parental Some DVDs may have a parental level assigned to the complete disc or to certain scenes on the disc. This feature lets you set a playback limitation level. The rating levels are from 1 to 8 and are country dependent. You can prohibit the playing of certain discs that are not suitable for your children or have certain discs played with alternative scenes. 1 KID SAF --- Kids material; recommended especially for children and viewers of all ages. 2 G --- General Audience; recommended as acceptable for viewers of all ages. 3 PG --- Parental Guidance suggested. 4 PG 13 --- Material is unsuitable for children under age13. 5-6 PGR, R --- Parental Guidance - Restricted; recommended that parents restrict children under 17 from viewing or allow to view only when supervised by a parent or adult guardian. 7 NC-17 --- No children under age 17; not recommended viewing for children under age 17. 8 Adult --- Mature materials; should be viewed only by adults due to graphic sexual material, violence or language. Default Setting the “DEFAULT” function will reset all options and your personal settings to the factory defaults and all your personal settings will be erased. Caution! When this function is activated, all settings will be reset to factory defaults. - 15 - 1506D-e(#EJS89S,re-11)-1.p65 15 2009-10-27, 11:05 
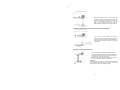
l Password Setup Page Password Mode This feature is used to enable/disable password by selecting “On”/”Off”. Password Select this item to set new password for this unit, follow the screen’s indication and enter a password. The original password is 1234. Use the USB By connecting a USB mass storage device (including USB flash memory, USB flash players or memory cards) to the Hi-Fi system, you can enjoy the device's stored music through the powerful speakers of Hi-Fi system. socket on the panel of unit. 1. Insert the USB device's USB plug into the 2. Press the USB button to select the USB function. 3. The device's stored music will be played automatically. l For the devices with USB cables: socket on the set. 1. Insert one plug of the USB cable (not supplied) to the 2. Insert the other plug of the USB cable to the USB output terminal of the USB device. l For the memory card: 1. Insert the memory card into a card reader (not supplied). 2. Use a USB cable (not supplied) to connect the card reader into the socket on the set. Listening to Radio Broadcasts Caution: Before listening to the radio, please check if FM antennas are correctly connected. Press tuner function button (TUNER) to select TUNER function. (You can also operate the key “FUNCTION” on the panel of unit.) Press the tuning forward button (C) repeatedly to move from frequency to frequency until you find the station you want. l Press and hold the tuning forward button (C) for one second or more, the frequency will change up automatically until the next station is found. (You can also operate the key “BF” on the panel of unit.) l Press the tuning backward button (D) repeatedly to move from frequency to frequency until you find the station you want. l Press and hold the tuning backward button (D) for one second or more, the frequency will change down automatically until the next station is found. (You can also operate the key “L” on the panel of unit.) l - 16 - 1506D-e(#EJS89S,re-11)-1.p65 16 2009-10-27, 11:05 You can store the well tuned station by pressing the memory button (PROGRAM). (You can preset up to 16 FM stations.) l Tune in the desired station, then press the memory button (PROGRAM). l Use the H button or G button on the remote control once by once to select the preset number. (You can also operate the key “G,H” on the panel of unit.) l Press the memory button (PROGRAM) to store the station. After 1 second, the VFD returns to the broadcast frequency display. Note: If the system is unplugged or if a power failure occurs, the preset stations will remain stored in the memory. Press the channel select forward button (G ) once by once to select preset number after presetting station. Its band and frequency are displayed on the VFD. Press the channel select forward button (G) once by once to select the preset number when in store the station. l Press the channel select backward button (H) once by once to select preset number before presetting station. Its band and frequency are displayed on the VFD. Press the channel select backward button (H) once by once to select the preset number when in store the station. (You can also operate the key “- PRESET +” on the panel of unit.) l Press the stereo/mono select button (MODE) to select the Stereo or MONO channel to receive the FM radio mode, it can get the best effect. RDS (Radio Data System) Reception Many FM stations are broadcasting added data compatible with RDS. This radio set offers convenient functions using such data. w PS (Program Service Name) When an RDS station is received, the RDS indicator lights and automatically displays the name of that station instead of the frequency. When RDS display button (RDS) on the remote control is pressed during PS display, the CT is displayed for 3 seconds, then PS display returns. w PTY (Program Type) Program type identification signal. (Example: News, Rock, Classical music.) w CT (Clock Time System) The CT system may not properly operate in areas where RDS CT service is not available. Once CT service is received, the CT system keeps operating. “RDS CLOCK” is displayed in areas where no CT services are available. w Changing Display During PS display, press the RDS display button (RDS) on the remote control repeatedly to select the CT, PTY or Frequency. They will be displayed for 3 seconds, then the PS display returns. - 17 - 1506D-e(#EJS89S,re-11)-1.p65 17 2009-10-27, 11:05 Clock/Timer Functions Setting the Clock The built-in clock shows the correct time in the display. - In standby mode, press the clock button (CLOCK), hour indicator will blink. - Set the hour with the VOL- button or VOL+ button. - Press the clock button (CLOCK), minute indicator will blink. - Set the minute with the VOL- button or VOL+ button. - Press the clock button (CLOCK), the built-in clock starts operating and the seconds start counting from 0. Note: * You can only set the daily timer only in standby mode. * The operating time of every step shouldn’t be longer than 10 seconds or it will return to the original display. * If there is a power failure or the power system is turned off, the clock will lose its setting. To confirm the clock time * In standby mode, when you press the clock button (CLOCK), the clock time is displayed. Wait for a few seconds until the display returns to the original display. * In ECO power standby mode, when you press the clock button (CLOCK) or timer button (TIMER), the clock time is displayed. Wait for a few seconds until the display returns to the original display. Setting the Daily Timer In standby mode, you can use the daily timer setting to turn the unit on automatically at a certain time everyday under standby mode. When the setting timer is on, the timer indictor “ ” will display on the VFD, however the clock must be set correctly for the timer function to work. - In standby mode, press the timer button (TIMER), hour indicator will blink. - Set the hour with the VOL- button or VOL+ button. - Press the timer button (TIMER), minute indicator will blink. - Set the minute with the VOL- button or VOL+ button. - Press the timer button (TIMER), the selected time is set. Then set the daily timer to “ON” (daily timer set is in effect) or “OFF” (daily timer set is to cancel) by pressing the VOLbutton or VOL+ button. Note: * You can only set the daily timer only in standby mode. * The operating time of every step shouldn’t be longer than 10 seconds or it will return to time display. * The sound source of the “timer on” mode is the same as the sound source when the unit was turned off by the standby switch. To confirm the daily time Press the timer button (TIMER) in standby mode, the daily time is displayed. Wait for a second until the display returns to the time display. To cancel the daily timer setting In standby mode, repeatedly press the timer button (TIMER) until the “ON” will display on the VFD, then you can set the daily timer to “OFF” by pressing the VOL- button or VOL+ button (the daily timer will be cancelled). Turning off the system also cancels the daily timer. l - 18 - 1506D-e(#EJS89S,re-11)-1.p65 18 2009-10-27, 11:05 Setting the Sleep Timer Use the sleep timer to turn the system off after a some time when playing. By setting the sleep timer, you can fall asleep and know that your system will turn off by itself rather than playing all night. - Play a disc or tune in to the desired station. - If you set the sleep timer first, each time you press the sleep button (SLEEP), it changes the number of minutes shown on the VFD in this sequence: l -- 10 20 ... 80 90 OFF After setting the number of minutes for the sleep timer, the display will return to the display as before setting the sleep timer. The system is now set to turn off after the number of minutes you set. To confirm the sleep time When pressing the sleep button (SLEEP), the remaining sleep time is displayed. After a few seconds the display returns to the original display. To cancel the sleep timer setting Repeatedly press the sleep button (SLEEP) until the “OFF” displays on the VFD. It can also cancel the sleep timer by restart set the clock or turning off the system. Protect the Disc 1. To keep the disc clean, please don’t touch the disc’s surface when you are holding it. You should hold the edge. 2. If the disc is dirty, it will affect the sound quality. Please use the clean and soft cloth to wipe the disc from inside to outside. Don’t wipe the disc in circular motion. 3. Don’t stick paper on the disc. 4. Don’t place discs in direct sunlight or near or on heat sources. 5. After you have finished with the disc, please place it back in its original case. To avoid warping or damage, do not stack discs. 6. Don’t play the disc which has flaw or deformation, in case of damaging this player. 7. Clean your discs using only a soft dry cloth. Do not use any chemicals such as benzine, thinner, antistatic or record sprays as these can damage the disc surface. - 19 - 1506D-e(#EJS89S,re-11)-1.p65 19 2009-10-27, 11:05 Troubleshooting If you are having a problem with your system, check this list for a possible solution before calling for service. If you can not solve the problem from the hints give here, or the system has been physically damaged, call a qualified person, such as your dealer, for service. Symptom No sound is heard No picture Bad sound quality Picture roll or without color Possible Cause Connections are incorrect, or loose TV or power amplifier operates incorrectly The amplifier’s receiving signal position is wrong Volume setting to minimum Connections wrong or loose TV Operation and setting is wrong Audio connects wrong DVD Player doesn’t match the TV system The disc does not play No disc in the tray The disc is upside down The disc is dirty or scratched The unit is foggy inside Poor radio reception The antenna is disconnected The FM wire antenna is not properly extended and positioned Dirty disc The disc is upside down Pause is engaged The path between the remote control and the sensor of the unit is blocked The batteries have lost their charge The built-in microprocessor has malfunctioned due to external electrical interference The disc does not play Unable to operate the remote control Operations are disabled Action Check all connections and make corrections Check whether the operation is right Check the position of receive signal Adjust volume Check all connections and correct it Check whether operation and setting is right Check whether audio connections are right Select the colour system in the “TV System” function setting to select suitable system Place a disc Place the disc with the printed side up Clean or replace the disc Take out the disc, turn on the unit for about an hour Reconnect the antenna securely Extend FM wire antenna to the best reception position Clean or replace the disc Put the disc in with the label side up Cancel the pause function Remove the obstruction Replace the batteries Unplug the system then plug it back in - 20 - 1506D-e(#EJS89S,re-11)-1.p65 20 2009-10-27, 11:05 Specification System AC Power supply ............................................................. ~230V / 50 Hz Power consumption ........................................................ £ 70W Output power ................................................................... 100W x 2 Channel Separation ........................................................ ³ 40dB Distortion ......................................................................... £ 1% Dimensions ..................................................................... 215(W) x 205(H) x 275(D) mm Frequency response ....................................................... 50Hz-20kHz (±3dB) Video output ..................................................................... 1 VP-P Horizontal definition ......................................................... ³ 500 (TV) Disc Size .......................................................................... F80mm, F120mm S/N Ratio ......................................................................... ³ 65dB FM Frequency range ........................................................ 87.5-108 MHz FM Noise limit sensitivity ................................................. £ 20mV FM S/N ............................................................................. ³ 45dB Speaker Impedance ...................................................................... 4W Input power ...................................................................... 100W Sensitivity ......................................................................... 80 ± 4dB Frequency response ....................................................... 50Hz-20kHz (±3dB) Dimensions ..................................................................... 208(W) x 300(H) x 250(D) mm Remote Distance .......................................................................... 6 m Angle ................................................................................ ± 30O - 21 - 1506D-e(#EJS89S,re-11)-1.p65 21 2009-10-27, 11:05 Accessories FM antenna ........................................................................... Speaker box connect line ..................................................... Video signal line ................................................................... Ribbon cable ........................................................................ Battery ................................................................................... Remote control ..................................................................... Instructions manual ............................................................. 1 2 1 1 2 1 1 Note: Design and specifications are subject to change without prior notice. - 22 - 1506D-e(#EJS89S,re-11)-1.p65 22 41008486 2009-10-27, 11:05