1
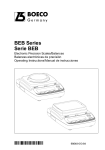
BOECO
BBL Models
Electronic Precision Balances
and Gold Scales
Operating Instructions
Modelos BBL
Balanzas electrónicas de precisión
para metales preciosos
Manual de instrucciones
98648-012-04
English – page 3
Español – página 13
2
Intended Use
Warning and Safety Information
The BBL Series from BOECO offers precision balances with
capacities ranging from 0.1 mg to 6 kg.
Read these operating instructions thoroughly before
using your balance to prevent damage to the equipment.
Keep these instructions in a safe place.
These balances meet the highest requirements on
the accuracy and reliability of weighing results through
the following features:
Follow the instructions below to ensure safe and trouble-free
operation of your balance:
! Make sure that the voltage rating printed on the AC
– Efficient filtering-out of unfavorable ambient conditions
such as vibrations, drafts, etc.
– Stable and reproducible results
– Rugged, durable weighing system
adapter is identical to your local line voltage
! Use only a commercially available 9-volt battery or
rechargeable battery
BBL balances save work and speed up simple routine
applications through:
! Do not use this balance in a hazardous area/location
– Ultrafast response times
– Easy operation
– The only way to turn the power off completely is
to disconnect the AC adapter
You can also choose from the following extra functions
for simple applications:
– Connect only BOECO accessories and options, as these
are optimally designed for use with your balance.
–
–
–
–
–
– Protect the AC adapter from contact with liquid.
Toggling between weight units
Net-total formulation (tare memory)
Counting
Weighing in percent
Averaging
Do not open the balance housing. If the seal is broken,
this will result in forfeiture of all claims under the
manufacturer’s warranty.
Contents
Getting Started
Page
Intended Use
3
Contents
3
Warning and Safety Information
3
Getting Started
3
Operation
Basic Weighing Function
Calibration/Adjustment
5
5
Application Programs
Counting
Weighing in Percent
Averaging
Net-Total Formulation/Second Tare Memory
Toggle between Weight Units
6
6
7
8
8
Configuration
Setting the Parameters (Menu Codes)
Balance Operating Menu (Overview)
9
9
Error Codes
10
Care and Maintenance
11
Instructions for Recycling
11
Overview
Specifications
C Marking
12
12
Storage and Shipping Conditions
Do not expose the balance to shocks, vibrations,
moisture or extreme temperatures.
Unpacking the Balance
§ After unpacking the balance, check it immediately
for any visible damage as a result of rough handling
during shipment.
$ If you see any sign of damage, proceed as directed
in the chapter entitled “Care and Maintenance,” under the
section on “Safety Inspection.”
Save the box and all parts of the packaging until you
have successfully installed your balance. Only the original
packaging provides the best protection for shipment.
Before packing your balance, unplug all connected cables
to prevent damage.
Equipment Supplied
The equipment supplied includes the components
listed below:
– Balance
– Weighing pan/load plate
– Pan support (only with models that have a round
weighing pan)
– Shield ring (only for BBL31-32)
– Shield plate (only for BBL31-32)
– Glass draft shield (only with model BBL42)
– AC adapter
– Dust cover (only for BBL31-32)
– Operating instructions (this manual)
3
Connecting the Balance to AC Power/Safety Precautions
Installation Instructions
Your balance is designed to provide reliable weighing results
under normal ambient conditions. When choosing a location
to set up your balance, observe the following so that you will
be able to work with added speed and accuracy:
– Set up the balance on a stable, even surface
– Avoid placing the balance in close proximity to a heater or
otherwise exposing the balance to heat or direct sunlight
– Protect the balance from drafts that come from open
windows or doors
– Avoid exposing the balance to extreme vibrations during
weighing
– Protect the balance from aggressive chemical vapors
– Do not expose the balance to extreme moisture over long
periods
Conditioning the Balance:
Moisture in the air can condense on the surfaces of a cold
balance whenever it is brought into a substantially warmer
place. If you transfer the balance to a warmer area, make
sure to condition it for about 2 hours at room temperature,
leaving it unplugged from AC power.
–
–
–
–
for Europe: 6971948
for the US: 6971947
for the RSA: 6971949
for Australia: 6971950
§ Insert the right-angle plug into
the jack
§ The AC adapter rated to
Class 2 can be plugged into
any wall outlet without
requiring any additional safety
precautions
The ground is connected to the balance housing, which can
be additionally grounded for operation.
Using a (Rechargeable) Battery
(not for models BBL31, BBL32, BBL42 or BBL52)
$ Battery is not included with
the equipment supplied
Setting up the Balance
Balances with an Analytical Draft
Shield Chamber:
§ Place the components listed
below inside the chamber in
the order given:
– Shield plate
– Shield ring
– Pan support
– Weighing pan
Balances with a Glass
Draft Shield:
§ Place the components listed
below on the balance in the
order given:
– Shield ring – place it on the
balance so that the edge for
fitting the glass draft shield
faces upwards and turn it until
it is firmly in place.
– Pan support
– Weighing pan
– Glass draft shield
– Draft shield cover
Balances with a Round Weighing
Pan Ø 115 mm
§ Place the components
listed below on the balance
in the order given:
– Pan support
– Weighing pan
Balances with a Round Weighing
Pan Ø 150 mm
§ Place the weighing pan
on the balance
4
Use only original AC adapters:
! Use only a commercially
available (rechargeable)
9-volt battery
! When using a rechargeable
battery, always use an
external recharging device
to recharge the battery
§ Lay the balance on its side
§ Open the battery compartment: Lift the compartment
cover
§ Insert the 9-volt
(rechargeable) battery in
the compartment
$ Make sure to connect
the positive and negative
poles correctly
! All used batteries are
classified as waste that
requires special handling
(not “household” waste).
Dispose of rechargeable
batteries in accordance with
the applicable special waste
disposal regulations.
§ Close the battery compartment: Press down on the
cover until it clicks into place
Leveling the Balance
(only for models BBL31, BBL32, BBL42 or BBL52)
Level the balance any time you
set it up in a new location.
Use only the 2 front feet of the
balance for leveling.
§ Turn the 2 rear feet until they
are in position
(only on model BBL52)
§ Turn the 2 front feet as shown
here in the illustration until the
air bubble is centered in the
level indicator
Example
Basic weighing
Menu code settings: Factory-set codes
Step
Key (or instruction) Display
1. Turn on the balance
[ON/OFF]
Self-test is performed
2. Place container on balance
(here: 52 g)
3. Tare the balance
t
4. Place sample in container
on balance (here: 150.2 g)
+
52.0
g
+
0.0
g
+
150.2
g
> In most cases this will require
several adjustment steps
Calibration/Adjustment*
Anti-theft Locking Device
To protect against theft, use the
mounting lug on the rear panel of
the balance.
§ Secure the balance at the
place of installation,
for example with a chain
or a lock
Always calibrate/adjust the balance after setting it up in
a new location.
Available Features
Calibration/adjustment can only be performed when
– there is no load on the balance,
– the balance is tared, and
– the internal signal is stable.
If these conditions are not met, an error message
is displayed. Otherwise, the weight required for calibration/
adjustment is displayed.
Operation
Basic Weighing Function
Available Features
– Taring the balance
You can tare the balance within the entire weighing range.
Preparation
§ Turn on the balance: Press [ON/OFF]
§ To change configurations: See the chapter entitled
“Configuration”
§ To load factory-set configurations:
See “Configuration,” parameter 9 – 1
$ To tare the balance: Press t
Additional Functions
§ To turn off the balance: Press [ON/OFF]
Warmup Time
To deliver exact results, the balance must warm up for
at least 30 minutes after initial connection to AC power. Only
after this time will the balance have reached the required
operating temperature.
Calibration/adjustment can be performed with any of three
weight units: g, kg1), or lb (menu code 1. 4. x)
Factory setting: Grams (menu code 1. 4. 1)
1) not for models with a readability of 0.1 mg
Example
Calibrate the balance
Menu code settings: Factory-set codes
Step
Key (or instruction) Display
1. Turn on the balance
[ON/OFF]
2. Tare the balance
t
3. Begin calibration
[CAL/CF]
0.0
g
+ 1000.0
Calibration weight is
displayed without
weight unit (here: 1000 g)
4. Place the indicated
calibration weight
on the balance
After calibration, the
calibration weight
is displayed with wt. unit
5. Remove the
calibration weight
1000.0
+ 1000.0 g
0.0
g
* “Calibration” technically means to determine the difference between the
balance readout and the actual weight on the pan to determine the accuracy.
Adjustment means to bring a balance into the state of accuracy required for
its use. Therefore, “calibration,” as used in this manual, actually means
“adjustment.”
5
Application Programs
Counting
Purpose
With the Counting program you can determine the number
of parts that each have approximately equal weight.
Example
Determine an unknown piece count; weigh the preset
reference sample quantity
Settings (changes in the factory settings required for
this example):
Menu: Application program: Counting (2 1 4)
Reference sample quantity: 20 pcs (3. 3. 3)
Available Features
Step
– Store the current weight value to have it loaded as the
preset reference sample quantity next time you initialize
the Counting application
– The reference sample quantity can be changed in the
operating menu: See “Configuration”
– The average piece weight is automatically output via the
optional data interface port after initialization, if the menu
code for “Printout with data ID codes” is set
– Press [FUNCTION] to toggle the display between piece
count and weight
Factory Settings
Reference sample quantity: 10 (menu code 3. 3. 2)
Preparation
§ Configure the Counting application in the operating menu:
See “Configuration”
Counting
Menu code 2. 1. 4
§ Reference sample quantity:
Menu code 3. 3. 1
5 pcs
10 pcs
Menu code 3. 3. 2
Menu code 3. 3. 3
20 pcs
50 pcs
Menu code 3. 3. 4
Menu code 3. 3. 5
100 pcs
Key (or instruction) Display
1. Turn on the balance
[ON/OFF]
2. Tare the balance
t
3. Display the reference
sample quantity
(here: 20 pcs)
[FUNCTION]
> 2 sec.
4. Place the reference sample
quantity (20 pcs) on the
balance (here: 66 g)
5. Start the application;
if the print format is set
to include data ID codes,
the following is printed
0.0
ref 20
20
+
wRef
6. Weigh uncounted parts
(here: 174 pcs)
(briefly)
66.0 g
+
[FUNCTION]
g
pcs
+
3.300 g
+
174
pcs
7. Display weight
[FUNCTION]
+
574.2
pcs
8. Display quantity
[FUNCTION]
+
174
pcs
0
pcs
9. Unload the balance
10. Delete the reference
value
[CAL/CF] > 2 sec.
11. Repeat the procedure
starting from Step 6,
if desired.
Weighing in Percent
See also “Configuration”
Purpose
This application program allows you to obtain weight readouts in percent which are in proportion to a reference weight.
Available Features
– Store the current weight value to have it loaded as
the preset reference percentage next time you initialize
the Weighing in Percent application
– The reference percentage can be changed in the
operating menu: See “Configuration”
– The reference percentage is automatically output via the
optional data interface port after initialization, if the menu
code for “Printout with data ID codes” is set
– Press [FUNCTION] to toggle the display between
percentage and weight
Factory Settings
Reference percentage: 10 (menu code 3. 3. 2)
6
Preparation
Available Features
§ Configure the Weighing in percent application
in the operating menu: See “Configuration”
Menu code 2. 1. 5
Weighing in percent
– The measured result displayed is the arithmetic mean
shown in the selected weight unit; a triangle under the plus
or minus sign indicates that this is a calculated value
§ Reference percentage:
Menu code 3. 3. 1
Menu code 3. 3. 2
Menu code 3. 3. 3
Menu code 3. 3. 4
Menu code 3. 3. 5
– You can set the number of subweighing operations
performed in the operating menu: See “Configuration”
5%
10 %
20 %
50 %
100 %
– Press [FUNCTION] for at least 2 sec. to display
the pre-set number of subweighing operations
– Press [FUNCTION] to toggle the display between
the calculated result and the weight
See also “Configuration”
Example
Factory Settings
Determine an unknown percentage; store the weight on
the balance as a reference percentage
Number of subweighs for averaging: 10 (3. 3. 2)
Preparation
Settings (changes in the factory settings required for
this example):
Menu: Application program: Weighing in percent (2 1 5)
Menu: Reference percentage 100 % (3 3 5)
Step
Key (or instruction) Display
1. Turn on the balance
[ON/OFF]
2. Tare the balance
t
3. Display the reference
percentage
[FUNCTION]
> 2 sec.
0.0
g
ref100
§ Configure the Averaging application in the operating
menu: See “Configuration”
Menu code 2. 1.12
Averaging
– Number of subweighs for averaging:
3. 3. 1
5 subweighs
3. 3. 2
10 subweighs
3. 3. 3
20 subweighs
3. 3. 4
50 subweighs
3. 3. 5
100 subweighs
See also “Configuration”
4. Place the reference weight
for 100% on the balance
(here: 222.5 g)
5. Start application;
if the print format is set
to include data ID codes,
the following is printed
+
222.5
g
Example
[FUNCTION]
+ 100.00 %
Wxx% + 222.500 g
+ 144.94 %
6. Place an unknown weight
on the balance
(here: 322.5 g)
322.5
g
7. Display weight
[FUNCTION]
+
8. Display percentage
[FUNCTION]
+144.94 %
0.00
9. Unload the balance
10. Delete the reference
percentage
Determine the weight of a sample in extremely
unstable ambient conditions by calculating the average
of 10 subweighing operations.
Settings (changes in the factory settings required
for this example):
Menu: Application program: Averaging (menu code 2. 1.12)
Step
Key (or instruction) Display
1. Turn on the balance
[ON/OFF]
2. Tare the balance
t
3. Display the number
of subweighs (here: 10)
[FUNCTION]
> 2 sec.
%
[CAL/CF] > 2 sec.
11. Repeat the procedure
starting from Step 6,
if desired.
Averaging
4. Place sample on the balance
(weight readout fluctuates;
here: around 275 g)
5. Start measurement
[FUNCTION]
0.0
ref 10
+
8888
+
8888
10
9
(briefly)
8
Purpose
Use this program to determine weights under unstable
ambient conditions. In this program, the balance calculates
the weight as the average value from a defined number of
individual weighing operations. These weighing operations
are also known as “subweighing operations” or “subweighs.”
g
...
1
275.5
After 10 subweighs
+
If the print format is set
to include data ID codes,
the following is printed
RES
275.5 g
+ 275.5 g G
(stable display)
6. Unload the balance
7. Delete the result
+
g G
[CAL/CF] > 2 sec.
8. Repeat the procedure starting
from Step 4, if desired.
7
Net-Total Formulation/Second Tare
Memory
Toggle between Weight Units
With this application program you can weigh in components
for formulation of a mixture.
Preparation
Configure the “Toggle weight units” application in the
operating menu:
See “Configuration” menu code 2.1. 2 Toggle weight units
Configure the Net-total formulation/Second tare memory
application in the operating menu: See “Configuration”
Menu code 2.1. 3
Menu code
Example
Step
1. Turn on the balance
Key (or instruction) Display
[ON/OFF]
2. Place an empty container
on the balance
3. Tare the balance
+
5. Store the first component
weight
65.0
g
t
4. Add the first component
+
N1
6. Add the next component
+
7. Store the 2nd component
weight
[FUNCTION]
8. Add further components,
if desired
As described
for Steps 5 and 6
9. Display total weight
and fill to desired
final weight
[CAL/CF] > 2 sec.
120,5
0.0
[FUNCTION]
If the print format is set
to include data ID codes,
the following is printed
8
With this application program you can toggle the display
of a weight value back and forth between two weight units.
g
gNET
+
70,5
0.0
120.5 g
g
gNET
Unit
Conversion factor
Abbr. on
printout
1. 7. 2 o
3. 1. 2 o
Grams
1.00000000000
g
1. 7. 31)
3. 1. 31)
Kilograms
0.00100000000
kg
1. 7. 4
3. 1. 4
Carats
5.00000000000
ct
1. 7. 5
3. 1. 5
Pounds
0.00220462260
lb
1. 7. 6
3. 1. 6
Ounces
0.03527396200
oz
1. 7. 7
3. 1. 7
Troy ounces
0.03215074700
ozt
1. 7. 8
3. 1. 8
Hong Kong taels
0.02671725000
tlh
1. 7. 9
3. 1. 9
Singapore taels
0.02645544638
tls
1. 7. 10
3. 1. 10
Taiwanese taels
0.02666666000
tlt
1. 7. 11
3. 1. 11
Grains
1. 7. 12
3. 1. 12
Pennyweights
1. 7. 13
3. 1. 13
Milligrams
1. 7. 14
3. 1. 14
Parts per pound
1.12876677120
/lb
1. 7. 15
3. 1. 15
Chinese taels
0.02645547175
tlc
1. 7. 16
3. 1. 16
Mommes
0.26670000000
mom
1. 7. 17
3. 1. 17
Austrian carats
5.00000000000
K
1. 7. 18
3. 1. 18
Tola
0.08573333810
tol
1. 7. 19
3. 1. 19
Baht
0.06578947437
bat
1. 7. 20
3. 1. 20
Mesghal
0.21700000000
MS
15.43235835000
GN
0.64301493100
dwt
1000.00000000000
mg
o = Factory setting
1) = not for models with a readability of 0.1 mg
Function
§ To toggle the display between the 1st and 2nd weight
units: Press the [FUNCTION] key
+
191,0
g
Balance Operating Menu (Overview)
Configuration
o Factory setting
√ User setting
Setting the Parameters (Menu Codes)
You can configure your BBL balance to meet individual
requirements by selecting from the parameters available
in the menu.
Menu
1
vel
u le
Men
2
vel
u le
Men
ing el 4
3
sett
v
vel
u le actory enu le
n
e
M
F
M
1. Balance
functions
1.1. Adapt filter
1.1.1
Minimum vibration
1.1.2 o Normal vibration
1.1.3
Strong vibration
1.1.4
Extreme vibration
1.3. Stability range
1.3.1
1/4 digit
1.3.2
1/2 digit
1.3.3
1 digit
1.3.4 o 2 digits
1.3.5
4 digits
1.4. Weight unit
for calibration
weight
1.4.1 o Grams
1.4.2
Kilograms*
1.4.3
Pounds
1.6. Auto zero
1.6.1 o On
1.6.2
Off
1.7. Weight unit 1
See “Toggle between
Weight Units”
Example: Adapt the balance to unstable ambient
conditions: Menu code 1 1 4
Step
Key (or instruction) Display
1. Turn off the balance
[ON/OFF]
2. Turn the balance back on
[ON/OFF]
while all segments
are displayed
t briefly
1.
2.
...
9.
1.
$ To navigate within a menu
level; the last menu
option is followed by the
first option
t
repeatedly
3. Select the 2nd menu level
[PRINT]
1. 1.
4. Select the 3rd menu level
[PRINT]
1. 1. 2 o
2. Application
programs
2.1. Program
selection
see the desired application
program description
5. In Menu Level 3:
Select the desired option
t
repeatedly
1. 1. 4
3. Application
3.1. Weight unit 2
see “Toggle between
Weight Units”
3.3. Reference qty
or %
see the desired application
program description
6. Confirm new setting; the
“o” indicates the currently
set option
[PRINT] for 2 sec.
$ Select the next menu level
(here: move from the 3rd to
the 1st level)
[PRINT]
$ Set other menu codes,
if desired
[PRINT], t
7. Store parameter settings
and exit operating menu
t
for 2 sec.
1. 1. 4 o
1.
5. through 7.
applies only if an interface is installed;
see the corresponding instructions
8. Extra
functions
8.1. Menu
8.1.1 o Parameter settings
alterable
8.1.2
Parameter settings
read only
8.2. External
switch function
applies only if an interface
is installed; see the
corresponding instructions
8.3. Power-on
mode
8.3.1
9.– Factory
settings
9.– 1
Reset
9.– 2 o Do not reset
or
$ Exit operating menu without
storing changes
[ON/OFF]
> Restart the application
0.0
g
9. Reset menu
Off/on (battery
shuts off
automatically after
3 min)
8.3.2 o Stand-by/on
* = not for models with a readability of 0.1 mg
9
Error Codes
Error codes are shown on the main display for approx. 2 seconds, after which the program automatically returns
to the weighing mode.
Display
Cause
Solution
No segments appear on
the display
No AC power is available
The AC adapter is not plugged in
Battery is dead
Check the AC power supply
Plug in the AC adapter
Replace the battery
Recharge the battery using
an external recharging device
h
The load exceeds the
balance capacity
Unload the balance
l
The weighing pan/load plate
is not in place
Something is touching the
weighing pan/load plate
Place the weighing pan/load plate
on the balance
Move the object that is touching the
weighing pan/load place
e 01
Display capacity exceeded:
Value to be output cannot be
shown on the display
Decrease the weight on the scale
e 02
Calibration parameter
not met; e.g.:
– balance not zeroed
– balance is loaded
Calibrate only when zero is displayed
Press t to tare the balance
Unload the balance
e 09
When gross < zero, no tare
Tare the balance
e 10
The t key is blocked
when there is data in
the second tare memory
(net-total) – only 1 tare function
can be used at a time
Press [CAL/CF] > 2 sec. to clear the tare
memory and release the tare key
e 11
Value input is not allowed for
second tare memory
Press t
e 22
Weight is too light or there is
no sample on the balance
Increase the reference quantity
e 30
Interface port for printer
output is blocked
Contact your local
Service Center
Max. weighing range is less
than indicated under ”Specifications”
The balance was turned on
without the weighing pan in place
Place the weighing pan on
on the balance and press [ON/OFF]
to turn on the balance
The weight readout
is obviously wrong
The balance has not
been calibrated/adjusted
The balance was not
tared before weighing
Calibrate/adjust the balance
If any other errors occur, contact your local Service Center!
10
Tare before weighing
Care and Maintenance
Repairs
Repair work must be performed by trained service
technicians. Any attempt by untrained persons to perform
repairs may lead to hazards for the user.
Cleaning
! Disconnect the balance from the AC adapter and unplug
any data cables that are connected to the balance
Instructions for Recycling
the Packaging
To ensure safe shipment, your balance has been packaged
using environmentally friendly materials. After successful
installation of the balance, you should return this packaging
for recycling.
For information on recycling options, including recycling
of old weighing equipment, contact your municipal waste
disposal center or local recycling depot.
! Make sure that no liquid enters the balance housing
! Do not use any aggressive cleaning agents
(solvents or similar agents)
§ Clean the balance using a piece of cloth which has been
wet with a mild detergent (soap)
§ After cleaning, wipe down the balance with a soft,
dry cloth
Removing and Cleaning the
Weighing Pan:
§ Lift up and remove the
weighing pan together with
the pan support by gripping
them from under the shield
ring. Make sure that you
do not damage the weighing
system in doing so.
Safety Inspection
If there is any indication that safe operation of the balance
with the AC adapter is no longer warranted:
§ Turn off the power and disconnect the equipment
from AC power immediately
> Lock the equipment in a secure place to ensure
that it cannot be used for the time being
Safe operation of the balance with the AC adapter is no
longer ensured when:
– there is visible damage to the AC adapter
– the AC adapter no longer functions properly
– The AC adapter has been stored for a relatively long
period under unfavorable conditions
In this case, notify your nearest Service Center or the
International Technical Support Unit. Maintenance and repair
work may only be performed by service technicians who are
authorized by BOECO and who
– have access to the required maintenance manuals
– have attended the relevant service training courses
11
BBL Series
Overview
Model
Specifications
General specifications:
AC power source/power
requirements
AC adapter, 230 or 115 V,
+ 15%...–20%
Frequency
48–60 Hz
Power requirements,
direct current
BBL61 BBL62 BBL63 BBL64 BBL71
Weighing capacity
g
6,100
3,100
1,500
610
6,000
Readability
g
0.1
0.1
0.1
0.1
1
Tare range (subtractive)
g
6,100
3,100
1,500
610
6
Repeatability
≤±g
0.1
0.1
0.1
0.1
1
0.2
0.2
0.2
0.2
2
Linearity
≤±g
Sensitivity drift within
+10…+30 °C/+50…+86°F
≤±/K 0,5·10–5 1·10–5
2·10–5
5·10–5
5·10–5
10 to 20
Response time (average)
s
2
2
2
2
2
Adaption to ambient
conditions
By selection of 1 of 4 optimized
filter levels
External calibration weight
(of at least accuracy class…)
g
Display update (depends on
the filter level selected)
1,000
(F2)
2,000
(M1)
1,000
(M1)
2,000
(M1)
500
(M1)
1,000
(M1)
5,000
(M1)
10,000
0.1–0.4
5,000
(F2)
10,000
(F2)
1.4
1.4
1.4
1.4
V
lb
(F2)
Specifications for the individual models:
BBL Series
Model
BBL31
g
210
120
Readability
mg
0.1
0.1
Tare range (subtractive)
g
210
120
Repeatability
≤±mg
0.1
0.1
Linearity
≤±mg
0.2
0.2
Sensitivity drift within
+10…+30 °C/+50…+86°F
≤±/K
2·10–6
2·10–6
Response time (average)
s
3
3
External calibration weight
(of at least accuracy class…)
g
lb
200 (E2) 100 (E2)
0.4 (E2) 0.2 (E2)
Net weight, approx.
kg
3.0
3.0
Pan size
mm
80 Ø
80 Ø
150 Ø
h
11
11
11
11
11
h
2.5
2.5
2.5
2.5
2.5
Operating temperature range
Dimensions (W×D×H)
0.75
0…+40 °C (263…313 K, 32 °F…104 °F)
mm
189 ×251×70
(without glass draft shield cylinder)
C Marking
The C marking affixed to the equipment indicates that the
equipment meets the requirements of the following Directive(s):
1.0
Operating temperature range
+10…+30 °C (273…303 K)
(50…86 °F)
mm
1.4
mm
Power consumption (average) W
Power consumption (average) W
Dimensions (W×D×H)
kg
Pan size
Hours of operation:
– with 9-volt battery, approx.
– with fully charged
rechargeable 9-volt battery,
approx.
BBL32
Weighing capacity
Net weight, approx.
Council Directive 89/336/EEC
“Electromagnetic compatibility (EMC)”
189 ×251×300
Applicable European Standards:
BBL Series
Model
BBL42
BBL52
BBL53
BBL54
Weighing capacity
g
150
1,500
610
310
Readability
g
0.001
0.01
0.01
0.01
Tare range (subtractive)
g
150
1,500
610
310
Repeatability
≤±g
0.0015
0.015
0.01
0.01
Linearity
≤±g
0.003
0.03
0.02
0.02
Sensitivity drift within
+10…+30 °C/+50…+86°F
≤±/K
3.3·10–6 3.3·10–6 0.5·10–5 1·10–5
Response time (average)
s
2.5
External calibration weight
(of at least accuracy class…)
g
lb
100 (F1) 1000 (F1) 500 (F2) 100(F2)
0.2 (F1) 2 (F1)
1 (F2)
0.2 (F2)
2.5
2
2
Net weight, approx.
kg
1.6
1.4
1.1
1.1
Pan size
mm
100 Ø
150 Ø
115 Ø
115 Ø
Hours of operation:
– with 9-volt battery, approx.
h
– with fully charged rechargeable
9-volt battery, approx.
h
–
–
11
11
–
–
2.5
2.5
Power consumption (average) W
0.75
Operating temperature range
0…+40 °C (263…313 K, 32 °F…104 °F)
Dimensions (W×D×H)
mm
189×251×70
(without glass draft shield cylinder)
Limitation of emissions:
According to Product Standard EN61326-1 Kl.B
(Residential environment)
Defined Immunity to Interference:
According to Product Standard EN61326-1
(Industrial environment)
Important Note:
The operator shall be responsible for any modifications to
BOECO equipment and for any connections of cables or
equipment not supplied by BOECO and must check and,
if necessary, correct these modifications and connections.
On request, BOECO will provide information on the minimum
operating specifications (in accordance with the Standards
listed above for defined immunity to interference).
Council Directive 73/23/EEC
“Electrical equipment designed for use within
certain voltage limits”
Applicable European Standards:
EN 60950
EN 61010
Safety of information technology equipment
including electrical business equipment
Safety requirements for electrical equipment
for measurement, control and laboratory use
Part 1: General requirements
If you use electrical equipment in installations and under
ambient conditions requiring higher safety standards,
you must comply with the provisions as specified in the
applicable regulations for installation in your country.
12
Uso
Advertencias de seguridad
La serie BBL está compuesta de balanzas para la pesada
de muestras desde 0,1 mg hasta 6 kg.
Lea atentamente las instrucciones de manejo, antes de
la puesta en funcionamiento del aparato. De esta manera
se evitarán daños. Conserve y cuide este manual de
instrucciones.
Las balanzas garantizan resultados de pesada fiables
mediante:
– filtración de las condiciones ambientales desfavorables,
p. ej. vibraciones, corrientes de aire, etc.
– resultados de pesada reproducibles
– diseño robusto
Han de observarse las siguientes advertencias para
un funcionamiento seguro y sin problemas de la balanza:
! el valor de tensión impreso en el adaptador de CA
debe concordar con la tensión de red local
Las balanzas BBL simplifican y aceleran los procesos
de rutina mediante:
! utilizar sólo baterías block de 9 voltios, o bien, equipo
– tiempos de medición breves
– manejo fácil
! no emplear en áreas con peligro de explosión
de baterías recargables
– las conexiones en la balanza deben realizarse sólo con
balanza desconectada de la red de alimentación
Una función adicional para aplicaciones simples
a seleccionar entre:
–
–
–
–
–
– utilizar accesorios y opciones de BOECO, ya que estos
se ajustan en forma óptima a la balanza
conmutación de unidad de peso
total-neto (segunda memoria de tara)
conteo
pesada en porcentaje
formación del valor promedio
– proteger el adaptador de CA contra la humedad
No abrir la balanza. Al violarse las marcas de sello,
los derechos de garantía carecerán de validez.
Contenido
Puesta en funcionamiento
Página
Uso
13
Contenido
13
Advertencias de seguridad
13
Puesta en funcionamiento
14
Funcionamiento
Función básica “Pesar”
Calibrar/ajustar
15
15
Programas de aplicaciones
Conteo
Pesada en porcentaje
Formación del valor promedio
Total neto/segunda memoria de tara
Conmutación de unidades
16
16
17
18
18
Ajustes previos
Ajustar parámetros (menú)
Ajustes de parámetros (sinopsis)
19
19
Mensajes de error
20
Cuidado y mantenimiento
21
Eliminación de desechos, reciclado
21
Sinopsis
Datos técnicos
Marca C
22
22
Condiciones de transporte y almacenamiento
No exponga el aparato a temperaturas extremas,
golpes, vibraciones y humedad.
Desembalar
§ Controle el aparato de inmediato al desembalar, para
detectar daños eventuales visibles exteriormente
$ En caso de existir algún daño, ver en
“Controles de seguridad”
Conserve todas las partes del embalaje para algún envío
eventual necesario, ya que un transporte libre de riesgos
se garantiza sólo con embalaje original; al enviar, separe
todas las conexiones de cables, con el fin de evitar daños
innecesarios.
Equipo suministrado
Se suministran los siguientes componentes
– balanza
– platillo de pesada
– soporte de platillo (sólo en los modelos con platillo
redondo)
– protector de vidrio contra corrientes de aire
(sólo para el modelo BBL42)
– anillo de blindaje (sólo en BBL31-32)
– placa de blindaje (sólo en BBL31-32)
– adaptador de CA
– cubierta protectora (sólo en BBL31-32)
– manual de instrucciones
13
Advertencias de instalación
La balanza está construida de tal manera que, al funcionar
bajo condiciones normales de empleo, se obtendrán
resultados fiables de medición. La balanza trabaja en forma
exacta y rápida, si se ha elegido el lugar apropiado de
instalación:
– colocar la balanza sobre una superficie plana y estable
– evitar los calores extremos que se producen al instalar
la balanza cerca de calefactores o al exponerla
directamente a los rayos solares
– proteger la balanza contra las corrientes directas de aire
(ventanas y puertas abiertas)
– evitar las vibraciones fuertes durante la medición
– proteger la balanza contra emanaciones químicas agresivas
– evitar humedades extremas
Aclimatar la balanza:
Una condensación (de la humedad del aire en el aparato)
se puede producir, si un aparato que está frío se instala en
un ambiente mucho más temperado. Dejar que el aparato,
separado de la tensión de red, se aclimate por aprox. 2
horas a la temperatura del ambiente.
Conexión a la red/medidas de protección
Utilice sólo adaptadores de
CA originales
– en Europa:
– en EE.UU.:
– en la República
Sudafricana:
– en Australia:
6971948
6971947
6971949
6971950
§ insertar enchufe angular en
la balanza
§ los adaptadores de CA de la
clase de protección 2 pueden
conectarse en cualquier
enchufe tomacorriente, sin
necesidad de tomar medidas
de seguridad especiales
La tensión de salida está puesta a tierra mediante un polo
que se conecta con la carcasa de la balanza. La carcasa
de la balanza, por motivos funcionales, también puede ser
puesta a tierra.
Instalar la balanza
Balanzas con protector contra
corrientes de aire rectangular:
§ Montar los componentes
en el siguiente orden:
– placa de blindaje
– anillo de blindaje
– soporte de platillo
– platillo de pesada
Balanzas con protector
de vidrio contra corrientes de
aire redondo
Utilización de batería/equipo de baterías
(excepto en los modelos BBL31, BBL32, BBL42 ó BBL52)
$ La batería o equipo de
baterías no pertenecen al
suministro de balanza
! Utilizar sólo baterías block
de 9 voltios adquiribles
en el comercio o equipo de
baterías
! Cargar equipo de baterías con
aparato de recargar externo
§ Volcar la balanza
§ Montar componentes:
– colocar en la balanza la tapa
inferior con el borde hacia
arriba y girar, hasta quedar fijo
– soporte del platillo de pesada
– platillo de pesada
– protector de vidrio contra las
corrientes de aire
– tapa superior con el borde
hacia abajo
Balanzas con platillo de pesada
redondo Ø 115 mm
§ Montar componentes:
– soporte del platillo de pesada
– platillo de pesada
§ Abrir compartimento para
batería: quitar tapa del
compartimento
§ Colocar batería block de
9 voltios o equipo de baterías
en el compartimento
$ Observar la polaridad
! Baterías utilizadas o equipos
de baterías son desechos
especiales (no es basura
domiciliaria): eliminar equipos
de baterías en forma especial,
según la reglamentación para
los residuos industriales
§ Cerrar compartimento para
baterías: insertar la tapa del
compartimento, presionándola
Balanzas con plato de pesada
redondo Ø 150 mm
§ Montar el plato de pesada
14
Nivelar la balanza
(sólo en los modelos BBL31, BBL32, BBL42 ó BBL52)
Nivelar la balanza cada vez que
se cambie de lugar de instalación.
La nivelación se realiza girando
sólo las dos patas de regulación
delanteras.
Ejemplo
Determinar valor de peso
Ajustes previos: los ajustes de fábrica
Paso
Pulsar tecla
1. encender balanza
[ON/OFF]
Indicación
se realiza test automático
§ Apretar girando las patas
de apoyo traseras (sólo en los
modelos BBL52)
2. colocar recipiente para la
muestra (aquí p. ej. 52 g)
§ Girar las patas atornillables
delanteras, como lo representa
el dibujo adjunto, hasta que la
burbuja del nivel quede en el
centro del círculo
3. tarar balanza
> Por regla general, se requieren
varios pasos para nivelar
Calibrar/ajustar
t
4. poner muestra en el
recipiente
(aquí p. ej. 150,2 g)
+
52.0
g
+
0.0
g
+
150.2
g
Calibrar/ajustar la balanza después de realizada
la instalación.
Seguro antirrobo
Como seguro antirrobo utilizar la
orejeta para la fijación, en la parte
trasera de la balanza
§ Fijar la balanza en el lugar
de instalación con una cadena
o candado
Características
El proceso de calibración puede activarse sólo, si
– la balanza está descargada
– la balanza está tarada
– la señal interna de pesada es estable
Si estas condiciones no se cumplen, aparece un mensaje
de error. El peso requerido para la calibración aparece
indicado.
Función básica “Pesar”
La calibración puede realizarse en los modelos BBL con
unidades de peso diferentes: g, kg1) , lb (código 1. 4. x)
Ajuste de fábrica: gramos (código 1. 4. 1)
1) excepto en modelos con legibilidad 0,1 mg
Características
Ejemplo
– Tarar balanza
La tara puede realizarse dentro del rango completo de
pesada de la balanza.
Calibrar balanza
Ajustes previos: como los ajustes de fábrica
Funcionamiento
Paso
Pulsar tecla
1. en caso dado, encender
[ON/OFF]
2. tarar balanza
t
3. activar proceso
calibración
[CAL/CF]
Indicación/salida
Preparación
§ Encender balanza: pulsar tecla [ON/OFF]
§ En caso dado, modificar ajustes previos:
ver en “Ajustes previos”
§ En caso dado, cargar ajustes de fábrica:
ver en “Ajustes previos”, parámetro 9. – 1
$ En caso dado, tarar la balanza: pulsar tecla t
0.0
g
+ 1000.0
se indica peso para
calibrar sin unidad peso
(aquí 1000 g)
4. colocar peso indicado
para la calibración
1000.0
Otra función:
§ Apagar balanza: pulsar tecla [ON/OFF]
después de calibrar
aparece el peso para
calibrar con unidad
+ 1000.0 g
Calentamiento previo
5. retirar peso de calibración
0.0
g
Para resultados exactos la balanza necesita un calentamiento previo de aprox. 30 min., después de la conexión
a la red. Recién entonces, la balanza ha alcanzado
la temperatura necesaria de funcionamiento.
15
Programas de aplicación
Ejemplo
Conteo
Determinación de una cantidad desconocida de piezas:
pesar cantidad definida de piezas de referencia
Uso
Ajustes previos (desviaciones respecto al ajuste de fábrica):
Con este programa de aplicación puede determinarse la
cantidad de piezas con igual peso individual.
Menú: programa de aplicación “Conteo” (código 2 1 4)
Cantidad piezas de referencia 20 (código 3. 3. 3)
Características
Paso
– Memorización del valor actual de peso como cantidad
de piezas ajustada para la inicialización al activar
el programa “Conteo”
– Modificación de la cantidad de referencia en el menú,
posible: ver en “Ajustes previos”
– Salida automática del peso de piezas a través de interfaz
de datos opcional, al finalizar la inicialización, si en el
menú existe el ajuste impresión con identificación
– Conmutación entre lectura cantidad de piezas y lectura
valor de peso, con la tecla [FUNCTION]
Pulsar tecla
1. en caso dado,
encender bal.
[ON/OFF]
2. en caso dado,
tarar balanza
t
3. información: indicar
cant. piezas ref.
(aquí, 20 piezas))
[FUNCTION]
largo
4. colocar cant. piezas
refer. (20 piezas)
(aquí p. ej. 66 g)
5. iniciar aplicación; si está
seleccionada impresión
con identificación,
se imprime
Indicación/salida
0.0
ref 20
20
+
wRef
Ajuste de fábrica de parámetros
(brevemente)
66.0 g
+
[FUNCTION]
g
pcs
+
3.300 g
+
174
pcs
Cantidad de referencia: 10 (código 3. 3. 2)
6. colocar cant. pcs.
desconocida
(aquí, p. ej. 174 piezas)
Preparación
7. indicar peso
[FUNCTION]
+
574.2
pcs
§ Ajustar en el menú programa de aplicación “Conteo”:
ver en “Ajustes previos”
Conteo
Código 2. 1. 4
8. indicar cant. piezas
[FUNCTION]
+
174
pcs
0
pcs
§ Cantidad piezas de referencia:
Código 3. 3. 1
5 piezas
10 piezas
Código 3. 3. 2
Código 3. 3. 3
20 piezas
50 piezas
Código 3. 3. 4
Código 3. 3. 5
100 piezas
ver también en “Ajustes previos”
9. descargar balanza
10. borrar valor de referencia
[CAL/CF] > 2 seg.
11. en caso dado,
seguir desde 6
Pesada en porcentaje
Uso
Con este programa de aplicación puede determinarse el
porcentaje de muestra con relación a un peso de referencia.
Características
– Memorización del valor actual de peso como porcentaje
ajustado para la inicialización al activar el programa
“Pesada en porcentaje”
– Modificación de la cantidad porcentaje de referencia en
el menú, posible: ver en “Ajustes previos”
– Salida automática del peso de referencia a través
de la interfaz de datos opcional, después de finalizar
la inicialización, si en el menú está ajustado
“Impresión con identificación”
– Conmutación entre indicación en porcentaje e indicación
valor de peso, con la tecla [FUNCTION]
Ajustes de fábrica de parámetros
Cantidad porcentaje de referencia: 10 (código 3. 3. 2)
16
Preparación
Características
§ Ajustar en el menú programa de aplicación
“Pesada en porcentaje”: ver en “Ajustes previos”
Código 2. 1. 5
Pesada en porcentaje
– El resultado de medición (valor promedio aritmético)
aparece como lectura definitiva en la unidad de peso
seleccionada e identificado mediante “triángulo”
§ Cantidad porcentaje de referencia:
Código 3. 3. 1
5%
Código 3. 3. 2
10 %
20 %
Código 3. 3. 3
Código 3. 3. 4
50 %
Código 3. 3. 5
100 %
– La cantidad de mediciones puede ser ajustada en el
menú: ver en “Ajustes previos”
– La indicación de la cantidad de mediciones para la formación del valor promedio (pulsar largo tecla [FUNCTION])
– Conmutar entre lectura resultado de medición y lectura
normal de peso, con la tecla [FUNCTION]
ver también en “Ajustes previos”
Ejemplo
Ajustes de fábrica de parámetros
Determinar valor de porcentaje con: memorización del peso
colocado como peso de referencia
Cantidad de mediciones para la formación del valor
promedio: 10 (3. 3. 2)
Ajustes previos (desviaciones con respecto al ajuste
de fábrica):
Menú: programa de aplicación “Pesada en porcentaje”
(código 2 1 5)
Menú: cantidad porcentaje de referencia 100 %
(código 3 3 5)
Preparación
Paso
Pulsar tecla
1. caso dado,
encender balanza
[ON/OFF]
2. tarar balanza
t
3. infomación:
indicar cant. pct. refer.
[FUNCTION]
largo
Indicación/salida
0.0
g
ref100
§ Ajustar en el menú programa de aplicación
“Formación del valor promedio”: ver en “Ajustes previos”
Código 2. 1.12
formación del valor promedio
– Cantidad de mediciones para la formación del valor
promedio:
3. 3. 1
5 mediciones
3. 3. 2
10 mediciones
3. 3. 3
20 mediciones
3. 3. 4
50 mediciones
3. 3. 5
100 mediciones
ver también en “Ajustes previos”
4. colocar peso refer
para 100% (aquí 222,5 g)
5. iniciar aplicación, si está
seleccionado impresión
con identificación,
se imprime
+
222.5
g
Ejemplo
[FUNCTION]
+ 100.00 %
Wxx% + 222.500 g
+ 144.94 %
6. colocar peso desconocido
(aquí, p. ej. 322,5 g)
322.5
g
7. indicar peso
[FUNCTION]
+
8. indicar cant. pct.
[FUNCTION]
+144.94 %
0.00 %
9. descargar balanza
10. borrar cant. pct. refer.
[CAL/CF] > 2 seg.
11. caso dado, seguir
desde 6.
Formación del valor promedio
Uso
Con este programa de aplicación, es posible pesar muestras
en ambientes con extrema intranquilidad. En tales casos,
se determina un valor promedio a través de varios ciclos de
medición.
Determinar valor de peso en ambiente de extrema intranquilidad con 10 mediciones para la formación del valor promedio.
Ajustes previos (desviaciones respecto al ajuste de fábrica):
Menú: programa de aplicación formación del valor promedio
(código 2. 1.12)
Paso
Pulsar tecla
1. caso dado,
encender balanza
[ON/OFF]
2. tarar balanza
t
3. indicar la cantidad de
mediciones parciales
(aquí p. ej. 10 mediciones)
[FUNCTION]
largo
4. colocar muestra (valor
peso indicado oscila,
aquí p. ej. aprox. 275 g)
5. iniciar mediciones
[FUNCTION]
Indicación
0.0
ref 10
+
8888
+
8888
10
9
g
(brevemente)
8
después de 10 mediciones
+
...
1
275.5
RES
275.5 g
+ 275.5 g G
(indicación fija)
6. descargar balanza
7. borrar resultado medición
+
g G
[CAL/CF] > 2 seg.
8. en caso dado, seguir desde 4.
17
Total neto/segunda memoria de tara
Conmutación de unidades
Con este programa de aplicación pueden determinarse
los pesos de componentes para una mezcla.
Con este programa de aplicación puede indicarse un valor
de medición en dos unidades diferentes.
Preparación
Ajustar en el menú programa de aplicación
“Conmutación de unidades”:
ver en “Ajustes previos”, código 2.1. 2
“Conmutación de unidades”
Ajustar en el menú programa de aplicación “Total neto/
segunda memoria de tara”: ver en “Ajustes previos”,
código 2.1. 3
Ejemplo
Paso
Pulsar tecla
1. en caso dado,
encender bal.
[ON/OFF]
2. colocar recipiente vacío
para llenar con los
componentes
3. tarar
+
+
N1
+
7. memorizar componente
[FUNCTION]
8. en caso dado, dosificar
los demás componentes
repetir pasos 6 y 7
tantas veces como
corresponda
9. indicar peso total y,
en caso dado, dosificar
hasta el peso final
deseado
[CAL/CF] > 2 seg.
120,5
0.0
[FUNCTION]
6. dosificar sig. componente
18
65.0
g
t
4. dosificar el primer
componente
5. memorizar componente
si está ajustado impresión
con identificación,
se imprime
Indicación
g
gNET
+
70,5
0.0
120.5 g
g
gNET
Item de menú
Unidad
1. 7. 2 o
Gramos
3. 1. 2 o
Conversión
1,00000000000
Símbolo
g
1. 7. 31)
3. 1. 31)
Kilogramos
0,00100000000
kg
1. 7. 4
3. 1. 4
Quilates
5,00000000000
ct
1. 7. 5
3. 1. 5
Libras
0,00220462260
lb
1. 7. 6
3. 1. 6
Onzas
0,03527396200
oz
1. 7. 7
3. 1. 7
Onzas Troy
0,03215074700
ozt
1. 7. 8
3. 1. 8
Taeles Hongkong
0,02671725000
tlh
1. 7. 9
3. 1. 9
Taeles Singapur
0,02645544638
tls
1. 7. 10
3. 1. 10
Taeles Taiwan
0,02666666000
tlt
1. 7. 11
3. 1. 11
Granos
1. 7. 12
3. 1. 12
Pennyweight
1. 7. 13
3. 1. 13
Miligramos
1. 7. 14
3. 1. 14
Piezas por libra
1,12876677120
/lb
1. 7. 15
3. 1. 15
Taeles China
0,02645547175
tlc
1. 7. 16
3. 1. 16
Mommes
0,26670000000
mom
1. 7. 17
3. 1. 17
Quilates austriacos
5,00000000000
K
1. 7. 18
3. 1. 18
Tolas
0,08573333810
tol
1. 7. 19
3. 1. 19
Bahts
0,06578947437
bat
1. 7. 20
3. 1. 20
Mesghales
0,21700000000
MS
15,43235835000
GN
0,64301493100
dwt
1000,00000000000
mg
o = ajuste de fábrica
1) = excepto en modelos con legibilidad 0,1 mg
Función
+
191,0
g
§ Conmutar entre unidad de peso 1 y unidad de peso 2:
pulsar tecla [FUNCTION]
Ajustes de parámetros (sinopsis)
Ajustes previos
o ajuste de fábrica
√ ajuste de usuario
Ajustar parámetros (menú)
Configuración de la balanza significa adaptarla
a las necesidades del usuario seleccionando en un menú
parámetros predefinidos.
Menú
l2
Nive
1 Pesar
1.1. Adaptación
de filtro
ambiente muy
tranquilo
1.1.2 o ambiente tranquilo
1.1.3
ambiente intranquilo
1.1.4
ambiente muy
intranquilo
1.3. Rango
estabilidad
1.3.1
1/4 de dígito
1.3.2
1/2 dígito
1.3.3
1 dígito
1.3.4 o 2 dígitos
1.3.5
4 dígitos
1.4. Unidad peso
para la
calibración
1.4.1 o gramos
1.4.2
kilogramos*
1.4.3
libras
1.6. Auto-cero
1.6.1 o activada
1.6.2
desactivada
1.7. Unidad
peso 1
ver en “Conmutación
de unidades”
2. Programas
de aplicación
2.1. Selecc.
programa
ver en progr. aplicación
correspondiente
3. Parámetros
de aplicación
3.1. Unidad
peso 2
ver en “Conmutación
de unidades”
3.3. % piezas/
referencia
ver en progr. aplic.
correspondiente
Ejemplo: seleccionar adaptación al lugar de instalación
“Ambiente muy intranquilo” código 1. 1. 4
Paso
Pulsar tecla
1. apagar balanza
[ON/OFF]
2. encender balanza
y durante
[ON/OFF]
la indicación de todos
los segmentos
breve t
1.
2.
...
9.
1.
repetidam. t
3. seleccionar nivel menú 2
[PRINT]
1. 1.
4. seleccionar nivel menú 3
[PRINT]
1. 1. 2 o
5. nivel menú 3:
seleccionar ítem de menú
repetidam. t
1. 1. 4
$ retorno al nivel de menú
superior (desde el 3. nivel)
2 segundos
largo [PRINT]
[PRINT]
$ en caso dado, ajustar
otros ítems de menú
[PRINT], t
7. memorizar ajuste parámetro y abandonar menú
2 segundos
largo [PRINT]
1. 1. 4 o
1.
5. hasta 7.
relevante sólo con interf. datos incorporada:
ver instrucc. correspondientes
8. Funciones
8.1. Menú
adicionales
.
> reinicio de la aplicación
8.1.1 o ajuste de parámetro modificable
8.1.2
sólo leer parámetro
8.2. Función interruptor ext. relevante
sólo con interf. incorporada
o bien,
$ abandonar ajuste parámetro sin memorizar
1.1.1
Indicación
$ moverse dentro de un
nivel de menú; después
del último ítem de menú
aparece otra vez primer
ítem de menú
6. confirmar modific. ajuste;
“o” indica ítem de menú
ajustado
ica
ábr
de f 4
s
3
e
l
l
t
Nive
Nive Ajus
l1
Nive
8.3. Encendido
de la balanza
8.3.1
9.- Ajuste
de fábrica
9.- 1
restituir
9.- 2 o no restituible
[ON/OFF]
0.0
g
9. Reset-menú
Off/On (batería
apaga autom.
después de 3 min.)
8.3.2 o standby/On
* = excepto en modelos con legibilidad 0,1 mg
19
Mensajes de error
Mensajes de error aparecen por 2 segundos en la indicación principal. Luego, el programa retorna automáticamente al modo
de pesada.
Indicación
Causa
Solución
no aparecen segmentos
no hay tensión de red
no está conectado
el adaptador de CA
batería o equipo de
baterías descargados
controle alimentación de red
conecte adaptador de
CA a la tensión de red
recambie batería, recargue
equipo de baterías con un
aparato recargador externo
h
excedida capac. de carga
descargue el platillo de pesada
l
platillo pesada sin colocar
roce entre platillo de pesada
y componentes adyacentes
coloque platillo de pesada correctamente
platillo no debe rozar con otros componentes
e 01
desborde de lectura:
valor no representable
disminuya la muestra
e 02
condición de calibración
no fue observada, p. ej.:
– puesta a cero
– platillo con carga
descargue el platillo de pesada
tare con la tecla t
calibre con lectura cero
e 09
con bruto < cero sin tara
Tare la balanza
e 10
tecla t bloqueada con
segunda memoria tara cubierta
(total-neto) funciones de tara
bloqueadas entre sí
recién después de borrar
memoria de tara mediante [CAL/CF]
> 2 seg. está nuevamente en función
la tecla de tara
e 11
valor no permisible para
la segunda mem. de tara
pulse la tecla t
e 22
peso muy liviano, o bien,
no hay carga puesta en el
platillo de pesada en los
programas de aplicación
aumente el peso
e 30
interfaz de datos bloqueada
para la salida de impresión
comunique al serv. tec.
BOECO
capac. carga máx. menor
que lo indicado en
“Datos técnicos”
balanza encendida sin
colocar platillo de pesada
coloque platillo de pesada
apague y vuelva a encender
con la tecla [ON/OFF]
resultado de pesada
obviamente falso
balanza sin calibrar
faltó tarar antes de pesar
calibre
tare
En caso de aparecer otros mensajes de error, comunique al servicio técnico de BOECO
20
Cuidado y mantenimiento
Reparaciones
Las reparaciones deben ser realizadas sólo por técnicos
autorizados. A causa de reparaciones inapropiadas pueden
producirse graves peligros para el usuario.
Limpieza
! Separar la alimentación de tensión, en caso dado,
Eliminación de desechos, reciclado
Para el transporte, nuestros productos están protegidos por
el embalaje. El embalaje está compuesto de materiales no
contaminantes, los que pueden ser entregados al organismo
correspondiente para el reciclado, puesto que se trata de
valiosa materia prima secundaria.
Sobre el reciclado en general y de aparatos que ya no
se utilizan, rogamos consultar a las autoridades locales
pertinentes.
desenchufar cable de datos en la balanza
! No debe infiltrarse líquido en la balanza
! No utilizar detergentes agresivos (solventes, o similares)
§ Limpiar la balanza con un paño suave humedecido
en agua jabonosa
§ Secar la balanza con un paño suave
Retirar platillo de pesada
y limpiar:
§ Asir por debajo del anillo de
blindaje y levantar junto con el
soporte de platillo, para no
dañar el sistema de medición
Controles de seguridad
Si por algún motivo un funcionamiento libre de riesgo
ya no se garantiza:
§ Desconectar adaptador de CA de la tensión de red
> asegure la balanza contra el uso ulterior
Un funcionamiento libre de riesgo del adaptador de CA
ya no se garantiza si:
– el adaptador de CA presenta daños visibles
– el adaptador de CA ya no funciona correctamente
– el adaptador de CA ha estado almacenado por
largo tiempo, bajo condiciones inapropiadas
En estos casos, comunique al servicio técnico de
BOECO. Las reparaciones sólo pueden ser realizadas
por especialistas que:
– tienen a su disposición los documentos e instrucciones
necesarias y que
– han recibido instrucción correspondiente
21
Serie BBL
Sinopsis
Modelo
Datos técnicos
Datos técnicos generales:
Conexión de red, tensión de red a través de adaptador de CA 230 V
o 115 V, +15% … – 20%
Frecuencia de red
Conexión de red,
corr. continua
48 – 60 Hz
BBL61 BBL62 BBL63 BBL64 BBL71
Capacidad de pesada
g
6100
3100
1500
610
6000
Legibilidad
g
0,1
0,1
0,1
0,1
1
Rango de tara (substractivo)
g
6100
3100
1500
610
6
Repetibilidad
≤±g
0,1
0,1
0,1
0,1
1
Linealidad
≤±g
0,2
0,2
0,2
0,2
2
Deriva de sensibilidad
dentro de +10 ... +30 °C
≤±/K 0,5·10–5 1·10–5
2·10–5
5·10–5
5·10–5
1,5
1,5
1,5
10 hasta 20
Adaptación a las condiciones
ambientales y de funcionamiento
Respuesta de medición
(típico)
s
2
4 escalas optimizadas de filtro
Secuencia de indicación
(según escala ajustada de filtro) s
Valor pesa calibración ext.
(clase precisión, mínima)
kg
lb
5 (F2) 1 (F2)
10 (F2) 2 (F2)
1 (M1) 0,5 (M1) 5 (M1)
2 (M1) 1 (M1) 10 (M1)
0,1 – 0,4
Peso neto, aprox.
kg
1,4
1,4
1,4
1,4
1,4
Dimensiones platillo pesada
mm
150 Ø
h
11
11
11
11
11
h
2,5
2,5
2,5
2,5
2,5
W
0,75
V
2
BBL31
BBL32
Horas funcionamiento:
– batería 9 voltios, aprox.
– batería recargable 9 voltios,
carga completa, aprox.
Capacidad de pesada
g
210
120
Consumo eléctrico (típico)
Legibilidad
mg
0,1
0,1
Rango de temperatura de empleo
0…+40 °C (263…313 K, 32 °F…104 °F)
Rango de tara (substractivo)
g
210
120
Dimensiones (A×P×A)
Repetibilidad
≤±mg 0,1
0,1
189×251×70 (sin protector de
vidrio contra las corrientes de aire)
Desviación de linealidad
≤±mg 0,2
0,2
Deriva de sensibilidad
dentro de +10 ... +30 °C
≤±/K
2·10–6
2·10–6
Respuesta de medición (típico)
s
3
3
Valor pesa calibración ext.
(clase precisión, mínima)
g
lb
200 (E2) 100 (E2)
0,4 (E2) 0,2 (E2)
Peso neto, aprox.
kg
3,0
3,0
Dimensiones platillo pesada
mm
80 Ø
80 Ø
Consumo eléctrico (típico)
W
1,0
Datos técnicos para modelos específicos:
Serie BBL
Modelo
Marca C
La marca CE puesta en los aparatos indica que estos
cumplen con los requisitos de las siguientes Directivas del
Consejo de la Unión Europea:
Rango de temperatura de empleo
+10…+30 °C (273…303 K)
Dimensiones (A×P×A)
189 ×251×300
mm
89/336/CEE “Compatibilidad electromagnética (CEM)”
Normas Europeas aplicables (EN):
Serie BBL
Modelo
BBL42
BBL52
BBL53
BBL54
Capacidad de carga
g
150
1500
610
310
Legibilidad
g
0,001
0,01
0,01
0,01
Rango de tara (substractivo)
g
150
1500
610
310
Repetibilidad
≤±g
0,0015
0,015
0,01
0,01
Desviación de linealidad
≤±g
0,003
0,03
0,02
0,02
Deriva de sensibilidad
dentro de +10…+30 °C
≤±/K
3,3·10–6 3,3·10–6 0,5·10–5 1·10–5
Respuesta de medición (típico)
s
2,5
Valor pesa calibración ext.
(clase de precisión, mínima)
g
lb
100 (F1) 1000 (F1) 500 (F2) 100 (F2)
0,2 (F1) 2 (F1)
1 (F2)
0,2 (F2)
Peso neto, aprox.
kg
Consumo eléctrico (típico)
2
2
1,6
1,4
1,1
1,1
100 Ø
150 Ø
115 Ø
115 Ø
–
–
11
11
h
–
–
2,5
2,5
W
0,75
Dimensiones platillo de pesada mm
Horas funcionamiento:
– batería 9 voltios, aprox.
– batería recargable 9 voltios,
carga completa, aprox.
2,5
h
Rango de temperatura de empleo
0 ... +40 °C
(263 ... 313 K, 32 °F ... 104 °F)
Dimensiones (A×P× A)
189 ×251×70 (sin protector de
vidrio contra las corrientes de aire)
mm
mm
Limitación de las fuentes de distorsión:
según norma EN61326-1, clase B
(área residencial)
Inmunidad definida:
según norma EN61326-1, clase B
(área industrial)
Advertencia:
Modificaciones en los aparatos o la conexión de cables
o aparatos no suministrados por BOECO es de responsabilidad del usuario y deben ser controladas por el mismo y,
en caso necesario, realizar las correcciones pertinentes.
BOECO pone a disposición, según consultas, informaciones
sobre los datos mínimos del funcionamiento de los aparatos
(según las normas sobre inmunidad, más arriba mencionadas).
73/23/CEE “Material eléctrico a utilizarse con
determinados límites de tensión”
Normas Europeas aplicables (EN):
EN 60950
EN 61010
Seguridad de los equipos de tratamiento
de la información incluyendo los equipos
eléctricos de oficina
Requisitos de seguridad de equipos eléctricos
de medida, control y uso en laboratorio
Parte 1: Requisitos generales
Al utilizarse equipo eléctrico en instalaciones, bajo
condiciones ambientales que requieren altas medidas
de seguridad, han de observarse las prescripciones
correspondientes para la instalación.
22
Boeckel+Co
(GmbH+Co.) scientific equipment
Brandstwiete 4, 20457 Hamburg
t (040) 32 56 270
f (040) 32 56 2741
E-Mail: [email protected]
98648-012-04
Publication No.: WXX6050-al03091
W1A000.BOECO BBL