1
CABLE TESTER
CABLE TESTER
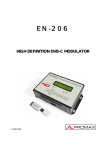
TC – 471
00MI0858
MI1982
10/2002
07/2013
MANUAL DE INSTRUCCIONES TC-471
INDICE
1. GENERALIDADES .................................................. 1
1.1 Descripción ........................................................ 1
1.2 Especificaciones ................................................ 1
2. INSTALACIÓN ........................................................ 2
2.1 Alimentación ..................................................... 2
3. INSTRUCCIONES DE UTILIZACIÓN ....................
3.1 Descripción de los mandos y elementos ..........
3.2 Ahorro automático de energía ..........................
3.3 Test del cableado ............................................
3.4 Memorización de cableados personalizados ...
2
2
3
4
8
4. MANTENIMIENTO .................................................10
4.1 Sustitución de la batería ....................................10
4.2 Recomendaciones de Limpieza .......................11
5. CERTIFICADO DE GARANTIA .............................11
07/2013
MANUAL DE INSTRUCCIONES TC-471
CABLE TESTER
TC-471
1 GENERALIDADES
1.1 Descripción
El TC-471 es un instrumento portátil que permite
testear el cableado de redes de comunicaciones.
Entre sus funciones destacan la de identificar
cableado utilizando terminadores, la de verificar
cortocircuitos y la de verificar circuitos abiertos.
Puede reconocer múltiples conexionados de redes
tipo UTP (RJ45) y COAXIAL (BNC). Tambi én se puede
comprobar cableados telefónicos analógicos y digitales
(RDSI). Permite memorizar hasta 4 cableados
personalizados.
El instrumento efectúa la comprobación e
identificación tipológica de latiguillos de forma local e
instalaciones con una longitud máxima de hasta 1 Km.
1.2 Especificaciones
GENERAL
Indicador LCD
Tipos de conexionados
Batería
10/2002
07/2013
2 líneas por 12 caracteres.
T568A/B, 10BASE-T, USOC,
BNC/10BASE-2,
TOKEN
RING y TP-PMD.
Pila de 9 V 6F22 (incluida).
Página 1
MANUAL DE INSTRUCCIONES TC-471
CARACTERÍSTICAS MECÁNICAS
A. 65 x Al. 150 x Pr. 35 mm.
Dimensiones
180 g netos
Peso
ACCESORIOS INCLUIDOS
1 x batería 9 V 6F22 (instalada)
2 x Adaptadores BNC-RJ45
2 x Terminadores LCT-T1 y LCT-T2
1 x Funda para transporte
2 INSTALACIÓN
2.1 Alimentación
El TC-471 se alimenta mediante una batería.
Cuando la batería esté descargada aparecer á en la
pantalla la indicación de batería baja
.
Una vez la batería se ha descargado debe
procederse a su sustitución.
3 INSTRUCCIONES DE UTILIZACIÓN
3.1 Descripción de los Mandos y Elementos
[1]
[2]
[3]
[4]
[5]
[6]
Interruptor ON/OFF
OUT. Conector de salida.
LOOPBACK IN. Conector de entrada.
ESC. Botón de cancelación.
ENTER. Botón de validación.
MODE/SEL. Botón de selección de modo (test o
configuración de las 4 memorias), posición de pin
out o memoria y pantalla de resultados y de pin
out.
Página 2
07/2013
MANUAL DE INSTRUCCIONES TC-471
Figura 1.- Vista frontal.
3.2 Ahorro Automático de Energía
El TC-471 incorpora un control de la alimentación
para alargar la vida de la batería. La iluminación
posterior del display es, con mucho, el componente
que consume más energía. Su uso, por tanto, debe
limitarse a casos en que exista poca luz ambiental. La
iluminación posterior del display puede activarse /
desactivarse presionando al mismo tiempo las teclas
MODE/SEL [6] y ESC [4]. Además, ésta también se
desconecta si no se selecciona ninguna función del
menú o de test durante 30 segundos.
se
Cuando la indicación de batería baja
muestra en el display, no es posible seleccionar la
iluminación posterior.
07/2013
Página 3
MANUAL DE INSTRUCCIONES TC-471
El ahorro automático de energía dispone, además, del
modo “sleep” (dormido) y del modo “power off” automático
(autodesconexión). El equipo automáticamente entra en el
modo “sleep” si no se pulsa ninguna tecla durante tres
minutos.
En este modo, se desconecta la alimentación de
todos los circuitos y del display por lo que el equipo
consume muy poca energía. Al presionar cualquier
botón el instrumento se “despertará” pasando a un
estado de pleno funcionamiento. No obstante, si no
existe ninguna actividad durante 10 minutos, el
instrumento se autodesconectará.
Para reconectar el instrumento, primero deberá
mover el interruptor [1] a la posición OFF y,
posteriormente volver a moverlo a la posición ON.
En el modo autodesconexión el consumo de
energía es prácticamente nulo. Esta prestación es
especialmente útil cuando el instrumento permanece
encendido involuntariamente.
3.3 Test del cableado
El TC-471 puede realizar el test de cables en
cualquiera de los siguientes cuatro modos:
PRECAUCIÓN
No conectar el TC-471 a circuitos activos de
sistemas telefónicos digitales. Esta conexión
podría causar graves desperfectos al equipo.
Modo Test Local: (figura 2a)
Consiste en conectar los dos extremos del cable bajo
test a los conectores OUT [2] y LOOPBACK IN [3] del
TC-471. En este caso el display aparecerá Id:0.
Modo Test Remoto: (figura 2b)
Página 4
10/2002
07/2013
MANUAL DE INSTRUCCIONES TC-471
Este modo utiliza dos TC-471, con el cable
conectado a la salida OUT [2] de una unidad y a la
entrada LOOPBACK IN [3] de la otra unidad. La
unidad remota indicará id:0.
Figura 2a
Figura 2b
Figura 2c
Modo Terminador-Loopback: (figura 2c)
Este modo utiliza el terminador con identificación
proporcionado. El extremo remoto del cable se conecta
al terminador mientras que el otro extremo se conecta
a la salida OUT [2] del TC-471.
Modo Test 10BASE-2: (figura 3)
Este modo utiliza los adaptadores BNC-RJ45
proporcionados. En este modo los dos adaptadores
pueden conectarse a los dos conectores RJ45 del TC-471
para realizar el test en el modo Test Local o uno a la
salida OUT [2] del TC-471 y otro al terminador para realizar
el test en el modo Terminador-Loopback, o una a la
salida de un TC-471 y otro a la entrada de otro TC-471
para realizar el test en modo Remoto.
Figura 3
07/2013
Página 5
MANUAL DE INSTRUCCIONES TC-471
Una vez seleccionado el modo de test y realizadas
la conexiones pertinentes, encender el instrumento. Al
encenderse, aparecerá iluminado y durante 3
segundos, el logo de inicio. Posteriormente se mostrará
el menú principal del cable-tester.
PROMAX
TC471
V 3.0
Pantalla inicial
MODE SEL:
cable test
Menú principal
Para iniciar el test pulsar el botón ENTER [5]. En
cualquier modo de test, la primera pantalla (Pin out)
muestra en la línea superior la salida y en la inferior la
entrada de las conexiones numeradas de la 1 a la 8 y
de la de masa durante el scan.
Una vez finalizado éste, aparece la pantalla de
resultados en la que se indica en la línea superior el
tipo de conexionado y en la línea inferior el tipo de
cableado UTP(RJ45), FTP o COAX (BNC) y el número
de identificación del terminador id.
Tipo
Pin out
o12345678G
i 36145278
Pantalla Pin out
UTP. FTP o COAX
1 0 0 BASE / HUB
UTP
i d: 1
Nº identificac ión
del term inador
Pantalla de resultados
Para conmutar entre la pantalla de Pin out y la de
resultados, pulsar el botón MODE/SEL [6] y para volver
al menú principal pulsar el botón ESC [4].
En la pantalla de resultados se mostrará “ NO
CONNECT” (sin conexión) si, como mínimo, un par no
está conectado. Se mostrará “ CABLE SHORT” si hay,
como mínimo, un cortocircuito.
Página 6
07/2013
MANUAL DE INSTRUCCIONES TC-471
Ejemplos de sin conexión y cortocircuito:
En el ejemplo de la izquierda el Pin 1 y el Pin 2
están cortocircuitados y en el ejemplo de la derecha
como mínimo existen un par de cables no conectados.
MODE SEL:
cable test
MODE SEL:
cable test
ENTER
ENTER
o12345678G
i 36145278
o12345678G
i
CABLE SHOR T
id : 1
NO CONNECT
Figura 4.- ejemplos.
Esquemas de conexionado reconocidos.
A continuación se muestran algunos de los
esquemas de los conexionados que el TC-471 tiene
memorizados y que reconoce automáticamente.
10/2002
07/2013
Página 7
MANUAL DE INSTRUCCIONES TC-471
BL = azul, BR = marrón, G = verde, O = naranja, WBL = blanco
y azul, WBR = blanco y marrón, WG = blanco y verde,
WO = blanco y naranja.
Figura 5
3.4 Memorización de Cableados Personalizados
El TC-471 dispone de cuatro memorias para
almacenar cableados personalizados. Estos pueden
definirse mediante dos procedimientos: introducción
manual o utilizando un cableado desconocido como
fuente.
Introducción manual.
En el menú principal (el que aparece justo
después de completarse el encendido) seleccionar el
menú USER DEF pulsando el botón MODE/SEL [6].
Página 8
10/2002
07/2013
MANUAL DE INSTRUCCIONES TC-471
MODE SEL:
cable test
MODE/SEL MODE SEL:
user defined
Pulsar ENTER [5] para confirmar la selección. A
continuación mover el cursor hasta una de las cuatro
memorias disponibles mediante el botón MODE/SEL
[6] y seleccionarla pulsando el botón ENTER [5].
MODE/SEL y
después ENTER
USER DEF.
ENTER # 1 / 2 / 3 / 4
A continuación aparecerá la pantalla en la que se
define el conexionado del nuevo cableado:
o12345678G
i
Seleccionar un dígito del 1 al 8 o G o en blanco (no
conectado) mediante el botón ENTER [5] y desplazar el
cursor a la siguiente posición mediante el botón
MODE/SEL [6]. Una vez finalizada la introducción del
conexionado, presionar ESC [4]. Aparecerá la pantalla
de confirmación de memorización. Para confirmar pulsar
el botón ENTER [5] y para salir sin guardar pulsar el
botón ESC [4].
o12345678G
i 36145278
Pin out
definid o
ESC
SAVE TO USER
DEF. #2 ?
Si se confirma, en el display aparecerá el mensaje
SAVE OK| indicando que la operación se ha
completado con éxito.
07/2013
Página 9
MANUAL DE INSTRUCCIONES TC-471
Introducción a partir de un cableado desconocido
Si el cableado bajo test no es reconocido como
ninguno de los predefinidos, en el display aparecerá el
mensaje UNKNOWN:
UNKNOWN DEF.
UTP
id: 1
Para memorizar este nuevo cableado, pulsar la
tecla MODE/SEL [6]. Aparecerá una pantalla
preguntando si se quiera memorizar el nuevo cableado.
Para aceptar pulsar la tecla ENTER [5]. Una vez
aceptado y utilizando la tecla MODE/SEL [6] se podrá
seleccionar en que memoria se desea guardar. Una
vez seleccionada, confirmar pulsando el botón ENTER
[5]. En el display aparecerá el mensaje SAVE OK|
indicando que la operación se ha completado con éxito.
4 MANTENIMIENTO
4.1 Sustitución de la Batería
La batería debe ser sustituida cuando se aprecie
que su capacidad ha disminuido considerablemente.
Para
reemplazar
la
batería,
procedimiento a continuación expuesto:
seguir
el
1. Apagar el equipo.
2. Retirar la tapa posterior. Para ello extraer el
tornillo de sujeción.
3. Desconectar la batería del equipo.
4. Reemplazar la batería por una nueva.
5. Conectar la batería al equipo.
Página 10
10/2002
07/2013
MANUAL DE INSTRUCCIONES TC-471
6. Colocar y fijar la tapa posterior mediante el
tornillo.
4.2 Recomendaciones de Limpieza
PRECAUCIÓN
No use para la limpieza hidrocarburos aromáticos o
disolventes clorados. Estos productos pueden atacar
a los plásticos utilizados en la construcción de la caja.
La caja se limpiará con una ligera solución de
detergente con agua y aplicada mediante un paño suave.
Secar completamente antes de volver a usar el equipo.
PRECAUCIÓN
No usar para la limpieza del panel frontal y en particular
de los visores, alcohol o sus derivados, estos
productos pueden atacar las propiedades mecánicas
de los materiales y disminuir su tiempo de vidaútil.
5 CERTIFICADO DE GARANTIA
PROMAX garantiza este equipo contra todo
defecto de fabricación por el período de UN A ÑO a
partir de la fecha de compra por el primer comprador.
Se excluye de esta garantía, todo daño producido por
uso inadecuado del equipo o manipulación interna sin
autorización. El cliente será responsable del embalaje y
de los gastos de envío y de retorno. PROMAX se
reserva el derecho a reparar el equipo que ha
presentado el defecto o a sustituirlo en todo o en parte
por uno nuevo o reacondicionado. Esta garantía se
limita a la reparación del equipo con exclusión de
responsabilidad por cualquier otro daño.
07/2013
10/2002
Página 11
USER’S MANUAL TC-471
TABLE OF CONTENTS
1. GENERAL ............................................................... 1
1.1 Description ......................................................... 1
1.2 Specifications..................................................... 1
2. INSTALLATION ...................................................... 2
2.1 Power Supply .................................................... 2
3. OPERATING INSTRUCTIONS ..............................
3.1 Description of the Controls and Elements ........
3.2 Automatic Power Saving Features ...................
3.3 Cable Testing ...................................................
3.4 User Defined Cable ..........................................
2
2
3
4
8
4. MAINTENANCE .....................................................10
4.1 Replacing the Battery ........................................10
4.2 Cleaning Recommendations ............................11
5. CERTIFICATE OF WARRANTY ............................11
07/2013
USER’S MANUAL TC-471
CABLE TESTER
TC-471
1 GENERAL
1.1 Description
The TC-471 is a portable instrument ideal for cable
testing of communications networks.
This instrument allows automatic cable identification
(Cable type search), to identify and trace the other end’s
ID (by means of the terminators) and to verify cable
continuity: open, short, and mismatches.
TC-471 recognises many LAN wiring of UTP (RJ45)
and COAXIAL (BNC) type. It can check analogue and
digital (ISDN) telephone cabling too. Up to 4 user
defined cable wirings can be memorised in its CPU.
The instrument checks and identifies cables locally
and in installations with a maximum length of 1 Km.
1.2 Specifications
GENERAL
LCD display
Wiring types
Battery
10/2002
07/2013
2 lines by 12 characters.
T568A/B, 10BASE-T, USOC,
BNC/10BASE-2,
TOKEN
RING & TP-PMD.
9 V 6F22 battery (included).
Page 1
USER’S MANUAL TC-471
MECHANICAL FEATURES
65 (W) x 150 (H) x 35 (D) mm.
Dimensions
180 g net.
Weight
INCLUDED ACCESSORIES
1 x 9 V 6F22 battery (installed)
2 x BNC-RJ45 adapters
2 x LCT-T1 and LCT-T2 terminators
1 x Carrying bag
2 INSTALLATION
upp
The TC-471 is powered by a dry cell battery. When
the battery is discharged the low battery indication
will be displayed.
Replace the battery when it is discharged.
3 OPERATING INSTRUCTIONS
3.1 Description of the Controls and Elements
[1]
[2]
[3]
[4]
[5]
[6]
ON/OFF switch.
OUT. Output connector.
LOOPBACK IN. Input connector.
ESC. Cancel button.
ENTER. Validation button.
MODE/SEL. Mode selection button (test or
configuration of the 4 memories), pin out or
memory position and toggle between cable pin out
screen and result display.
Page 2
07/2013
USER’S MANUAL TC-471
Figure 1.- Front view.
3.2 Automatic Power Saving Features
The TC-471 has built in power management
features intended to extend battery life. By far, the LCD
back light is the most power hungry component. Use of
the LCD back light should therefore be limited to low
ambient light applications. The back light may be
toggled ON/OFF by simultaneously pressing the
MODE/SEL [6] and ESC [4] function keys. If there is no
further menu selection or function testing within thirty
(30) seconds, the back light will be automatically
extinguished.
The back light can not be activated when the low
battery icon
07/2013
10/2002
is displayed.
Page 3
USER’S MANUAL TC-471
Additional power management functions include
both a “sleep” mode and an auto “power off” mode. If
there is not any activity for three (3) minutes, the unit
will automatically enter “sleep” mode.
All interface circuitry and the LCD display will be
powered down. In this mode the unit draws very little
power. Pressing any key will cause the unit to “wake
up” to a full functioning state. However, if there is no
key activity for ten (10) minutes, the unit will
automatically “power off”.
To recover from the “power off” mode, the unit must
have its power switch [1] cycled OFF and then ON.
In the “power off” mode the power usage is close
to nil. This feature is especially useful if the unit is
inadvertently left powered on.
3.3 Cable Testing
The TC-471 is capable of testing cables in any one
of four modes:
WARNING
Do not connect Cable Tester to a live circuit of
digital telephone system as it may damage the
tester.
Test Local mode: (figure 2a)
This mode is accomplished by connecting both ends of
the cable under test to the TC-471’s OUT [2] and
LOOPBACK IN [3] ports. Local unit displays and ID
equal to zero.
Page 4
10/2002
07/2013
USER’S MANUAL TC-471
Remote Test mode: (figure 2b)
This mode uses two TC-471 units, with the cable
connected between one unit’s OUT [2] and the other
unit’s LOOPBACK IN [3]. Remote unit displays and ID
equal to zero.
Figure 2a
Figure 2b
Figure 2c
Terminator-Loopback mode: (figure 2c)
This mode uses the supplied terminator ID block
connected at the remote end of the cable, while the
other end of the cable is connected to the TC-471’s
OUT [2].
10BASE-2 Test mode: (figure 3)
This mode uses the supplied RJ45 to BNC adapters.
The adapters may both be placed in the in the TC-471’s
RJ45 jacks for local test or one may be placed at the
TC-471’s OUT [2] while the other is placed on the
terminator for Terminator-Loopback testing, or one
may be placed at the TC-471’s OUT [2] while the other
is placed on the other unit’s LOOPBACK IN [3] for
Remote testing.
Figure 3
07/2013
Page 5
USER’S MANUAL TC-471
Once the test mode is selected and the
appropriate connections are established, turn power
switch on. Following initial power on of the TC-471, the
unit will display the start-up logo with back light for 3
seconds, then will display the top menu for “cable test”.
PROMAX
TC471
V 3.0
Start-up menu
MODE SEL:
cable test
Test menu
Press ENTER [5] to test the cable. During any
mode of cable testing, the first screen display will show
the top line out and bottom line in of connections 1
through 8 plus G (shield) as they are scanned.
Following this screen page will be the cable
identification information.
Type
Pin out
o12345678G
i 361 45278
Pin out screen
UTP. FTP or COAX
1 0 0 BASE / HUB
UTP
i d: 1
Terminator ID
Result display
Use MODE/SEL [6] to toggle between cable pin
out screen and result display, press ESC [4] back to
test menu.
If at least one wire pair is not connected, the
display will read “NO CONNECT”. A shorted cable will
read “SHORT”. A question mark in the pin out display
indicates a short. An unknown is not in the standard
known pin outs or in the user defined memory.
Page 6
07/2013
USER’S MANUAL TC-471
Cable Fault Indication Examples:
In the left example, Pin 1 and Pin 2 were found to
be shorted. In the right example, if at least one pair of
wires is not connected, the test result will show as “NO
CONNECT”.
MODE SEL:
cable test
MODE SEL:
cable test
ENTER
ENTER
o12345678G
i 36145278
o12345678G
i
CABLE SHOR T
id : 1
NO CONNECT
Figure 4.- Examples.
Recognised Wiring Schemes.
Following, some of the wiring schemes that the
TC-471 have in memory and that can automatically
recognise are showed.
10/2002
07/2013
Page 7
USER’S MANUAL TC-471
BL=blue, BR=brown, G=green, O=orange, WBL=white & blue,
WBR=white & brown, WG=white & green, WO=white & orangea.
Figura 5
3.4 User Defined Cable
The TC-471 can memorise four user defined cable
wirings. Two methods are available for defining a cable.
The first method is manual entry, while the second uses
and “UNKNOWN” cable as the pin out source.
Manual Source.
From the very top of the TC-471 menu (just after
power on is completed) select the USER DEF menu by
pressing the MODE/SEL [6] button.
Page 8
07/2013
USER’S MANUAL TC-471
MODE SEL:
cable test
MODE/SEL MODE SEL:
user defined
Press ENTER [5] to validate. The MODE/SEL [6]
button will now move the cursor to select one of four
user memory locations. Press ENTER [5] to select the
memory location that the cursor is on.
MODE/SEL &
the ENTER
USER DEF.
ENTER # 1 / 2 / 3 / 4
The define cable display will show:
o12345678G
i
Use the ENTER [5] key to set digits 1 to 8, G or
blank (not connected), then press MODE/SEL [6] to
move to the next space. When completed, press
ESC [4]. The save to user defined confirmation screen
will be displayed. To save your definition press
ENTER [5]. To exit without saving press ESC [4].
o12345678G
i 36145278
Pin out
defined
ESC
SAVE TO USER
DEF. #2 ?
If validated, “SAVE OK!” message will be
displayed, indicating that the operation has concluded
successfully.
Memorise an unknown cable
If the wiring under test is not recognised as any of
the pre-defined types, the message UNKNOWN will be
displayed.
07/2013
Page 9
USER’S MANUAL TC-471
UNKNOWN DEF.
UTP
id: 1
To memorise this new wiring, press the
MODE/SEL [6] key. A screen asking if you want to save
this new wiring will be displayed.
To accept press ENTER [5] key. When accepted
and using the MODE/SEL [6] you can select a memory
location. When selected, press ENTER [5] to confirm.
“SAVE OK!” message will be displayed, indicating that
the operation has concluded successfully.
4 MAINTENANCE
4.1 Replacing the Battery
The battery must be replaced when it is found that
its capacity has considerably reduced.
To replace the battery, follow the steps detailed
below:
1.
2.
3.
4.
5.
6.
Turn off the TC-471
Remove the rear cover. To do this, remove the
securing screw.
Disconnect the battery from the unit.
Replace the battery for a new one.
Connect the battery to the unit.
Replace and secure the rear cover with the
screw.
Page 10
10/2002
07/2013
USER’S MANUAL TC-471
4.2 Cleaning Recommendations
CAUTION
Do not use hydrocarbons or chlorized solvents.
Such products may attack the plastics used in the
constructions of the cover.
The cover should be cleaned by means of a light
solution of detergent and water applied with a soft cloth.
Dry thoroughly before using the system again.
CAUTION
Do not use for the cleaning of the front panel
particularly the viewfinders, alcohol or
derivatives, these products can attack
mechanical properties of the materials
diminish their useful time of life.
and
its
the
and
5 CERTIFICATE OF WARRANTY
PROMAX guarantees this equipment against any
manufacturing defect for a period of ONE YEAR from
the date of purchase by the original purchaser.
Excluded from this warranty is any damage caused by
the incorrect use of the equipment or internal handling
without authorization. The customer shall be
responsible for the packing, shipping and return
shipping costs. PROMAX reserves the right to repair
the equipment in which the defect is present or to its
complete or partial replacement by a new or
reconditioned machine. This warranty is limited to the
repair of the equipment, with the exclusion of
responsibility for any other damage.
07/2013
10/2002
Page 11
USER’S MANUAL TC-471
Page 12
07/2013
PROMAX ELECTRONICA, S. L.
Francesc Moragas, 71-75
08907 L'HOSPITALET (Barcelona)
SPAIN
Tel.: 93 184 77 00; Tel. Intl.: (+34) 93 184 77 02
Fax: 93 338 11 26; Fax Intl.: (+34) 93 338 11 26
http://www.promaxelectronics.com
e-mail : [email protected]