1
!
5654..
D
5654..
5654..
NL
5654..
E
5654..
F
ARGUS 220 Connect
2
4
6
A
14
8
10 12 14 16m
B
C
12
8
6
4
ARGUS 220 Connect
ARGUS 220 Connect
*kostenpflichtig / fee required
GB
0,8m
0
4
10
ARGUS 220 Connect
5654..
2
0
2
4
6
8
I
10
12
ARGUS 220 Connect
5654..
14
4
S
2
0
2
4
6
8
10 12 14 16m
„
§
&
OK
B
A
B
A
V5654-584-02 08/05
Bei technischen Fragen wenden Sie sich bitte an unsere
InfoLine:
Telefon: +49 1805 212581* oder +49 800 63783640
Telefax: +49 1805 212582* oder +49 800 63783630
E-Mail: [email protected]
%
2,5m
0
ARGUS 220 Connect
Bei Warenrücksendungen auf Grund von Beanstandungen wenden Sie sich bitte an unser Service Center:
Merten GmbH & Co. KG, Lösungen für intelligente Gebäude,
Service Center, Fritz-Kotz-Straße 8, Industriegebiet BomigWest, D-51674 Wiehl
Telefon: +49 2261 702-204
Telefax: +49 2261 702-136
E-Mail: [email protected]
Internet: www.merten.de
$
ARGUS 220 Connect
m
ARGUS 220 Connect
OK
OK
OK
C
OK
B
C
/
)
=
?
L N
A
B
>
*
ARGUS 220 Connect
5654
16A 230V 50Hz
D
E
(
10 sec.
Funkbetrieb
A
B
K
C
H
D
G
F
E 40
F
80
20
3
1s
8
min
S
C
9˚
12˚ 12˚
24˚
B
A
12˚
A
B
4˚ 29˚
;
C
12˚
8,5˚ 8,5˚
25˚
25˚
_
D
40
80
40
20
3 20
1s
8 1s
min
1,2sec
80
40
3
8 1s
min
20,5sec
80
40
3
20
80
8 1s
min
41sec
40
3
20
82sec
80
40
80
20
3 20
3
8 1s
min
8 1s
min
8
min
2min 44sec
8min 10sec
A
:
E
F
•
C
3 LUX
1000 LUX
A
B
B
Das können Sie mit dem ARGUS 220 Connect tun
Gebrauchsanweisung
2
D
Das können Sie mit dem ARGUS 220 Connect tun
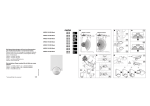
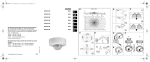
Der ARGUS 220 Connect (im Folgenden ARGUS genannt) ist ein elektronischer Bewegungsmelder für den Innen- und Außenbereich. Er registriert bewegte Wärmequellen, z. B. Personen, innerhalb einer
bestimmten Reichweite (Bild !):
Operating instructions
12
Gebruiksaanwijzing
22
NL
Instrucciones de servicio
32
A Innere Sicherheitszone:
Überwachungsbereich 360°, Radius ca. 4 m.
E
B Mittlere Sicherheitszone:
Erfassungswinkel 220°, Erfassungsbereich ca. 9 m x 18 m.
Notice d'utilisation
42
F
C Äußere Sicherheitszone:
Erfassungswinkel 220°, Erfassungsbereich ca. 16 m x 28 m.
Istruzioni d'uso
52
I
Bruksanvisning
62
S
GB
Hinweis: Die angegebenen Reichweiten beziehen sich auf durch-
| schnittliche Verhältnisse bei einer Montagehöhe von 2,5 m und sind
deshalb als Richtwerte anzusehen. Die Reichweite kann bei wechselnden Temperaturverhältnissen stark schwanken.
Der ARGUS schaltet beim Erkennen einer Bewegung angeschlossene
Verbraucher. Dies können ohmsche Lasten (z. B. 230-V-Glüh- und Halogenlampen), kapazitive Lasten (z. B. elektronische Trafos) oder induktive
Lasten (z. B. Niedervolt-Halogen-Lampen mit induktivem Trafo) sein.
Mögliche Anschlussvarianten finden Sie im Abschnitt „So installieren Sie
den elektrischen Anschluss“, A – F..
Wenn Sie den ARGUS zusätzlich mit einem Funkmodul für ARGUS 220
Bewegungsmelder (565495) ausrüsten, können Sie mehrere ARGUS 220
Connect oder ARGUS 220 Timer drahtlos vernetzen. Eine erkannte Bewegung eines Bewegungsmelders wird über das Funkmodul an alle angelernten Bewegungsmelder oder Empfänger gesendet, diese schalten
dann ihre angeschlossenen Verbraucher ebenfalls ein.
Hinweis: Der ARGUS ist nicht als Komponente einer Alarmanlage
| geeignet, da er netzabhängig versorgt wird und bei Ausfall und Wiederkehr der Netzspannung den angeschlossenen Alarmmelder
schaltet, unabhängig von einer Bewegung (Fehlalarm).
2
So wählen Sie den Montageort
So montieren Sie den ARGUS
So wählen Sie den Montageort
So montieren Sie den ARGUS
Bild „:
¼
Lebensgefahr durch elektrischen Strom.
Der ARGUS darf nur von Elektrofachkräften montiert und angeschlossen werden. Beachten Sie die länderspezifischen Vorschriften.
½
Achtung: Bei falscher Montage kann Wasser in den ARGUS eindringen und ihn beschädigen. Montieren Sie den ARGUS immer
nur mit der Kugel nach unten.
A Montagehöhe: zwischen 2 m und 3 m, optimal 2,5 m, auf festem
und ebenem Untergrund.
Beachten Sie bei Verwendung des Funkmoduls und gleichzeitiger
Montage an einer Außenwand, dass der ARGUS nicht auf Höhe
der Geschossdecke montiert wird, da sonst die Funksignale stark
gedämpft werden können und möglicherweise den Empfänger
nicht erreichen. Nähere Informationen hierzu finden Sie in der
Merten-Funkfibel.
B Abstand zu optischen Störquellen: ca. 5–6 m.
C Wenn sich die geschaltete Leuchte im Erfassungsbereich des ARGUS befindet, dann sollte der Abstand von ARGUS zu Leuchte
mindestens 5 m betragen. Montieren Sie die Leuchte nicht unterhalb, sondern oberhalb des ARGUS. Ansonsten verwenden Sie die
Segmente zur Abschattung (siehe Abschnitt „So blenden Sie einzelne Bereiche aus“).
Mehrere ARGUS montieren:
Um eine lückenlose Überwachung sicherzustellen, platzieren Sie die einzelnen Bewegungsmelder so, dass sich ihre Strahlengänge überschneiden (Bild %).
ARGUS an Decke montieren:
Bild &:
Für die Deckenmontage den Sensorkopf wie folgt drehen (an den Endanschlägen die Drehrichtung wechseln):
– Sensorkopf bis zum Anschlag nach oben drehen A.
Für eine optimale Bewegungserfassung montieren Sie den ARGUS seitlich zur Gehrichtung (Bild §).
Der ARGUS besitzt die Schutzart IP 55 und ist somit auch für den Außenbereich geeignet. Damit das Einschalten der Beleuchtung durch Umwelteinflüsse vermieden wird, sollten Sie den ARGUS möglichst vor Regen
und direkter Sonneneinstrahlung geschützt anbringen (z. B. Regentropfen, die über die Linse ablaufen, können zum Schalten des Bewegungsmelders führen) (Bild $).
Weitere Hinweise finden Sie in „Merten Technische Informationen“, Abschnitt „ARGUS Bewegungsmelder“.
– Sensorkopf bis zum Anschlag im Uhrzeigersinn drehen B.
– Sensorkopf ausrichten C.
½
Achtung: Bei falscher Montage kann Kondenswasser den ARGUS
beschädigen:
ARGUS bei geneigten Decken immer nur mit der Kugel nach unten
montieren, damit das Kondenswasser ablaufen kann.
ARGUS in einem Neigungswinkel zwischen 15° bis 90° montieren,
ansonsten ist die Schutzart von IP 55 nicht mehr gewährleistet.
ARGUS an Innen-/Außenecken oder ortsfesten Rohren montieren:
Bild /: Mit dem Montagewinkel Art.-Nr. 565291/..92/..93 können Sie
den ARGUS an Innen-/Außenecken oder ortsfesten Rohren befestigen.
Die Anschlussleitung können Sie dabei durch den Montagewinkel von
hinten in das Gerät führen.
3
4
So installieren Sie den elektrischen Anschluss
So montieren Sie das ARGUS-Oberteil
Mögliche Installationsarten (Bild )):
ARGUS am Wandanschlusskasten montieren:
Bild (:
A ARGUS ständig am Netz:
ARGUS überwacht ständig seinen Bereich.
1 Um eine von oben kommende Anschlussleitung von hinten in das
Gerät einzuführen, setzen Sie die vier beiliegenden Abstandhalter auf
den Wandanschlusskasten.
B ARGUS kombiniert mit Wechselschalter:
Je nach Schalterstellung ergibt sich Dauerlicht- oder Automatikbetrieb.
Anschlussleitung von hinten zuführen:
– Beiliegende Gummitülle A über die abgemantelte Anschlussleitung
schieben.
C ARGUS kombiniert mit Öffner:
ARGUS ist ständig betriebsbereit. Durch Tastendruck (kurzzeitige
Spannungsunterbrechung 2–3 Sekunden) schalten Sie den ARGUS für die eingestellte Zeit ein. Jede weitere Bewegung verlängert die Schaltdauer.
Anschlussleitung von unten zuführen:
– Beiliegenden Gummieinsatz B entsprechend der Kabeldicke aufschneiden.
D ARGUS parallel:
Mehrere ARGUS können eine Lampengruppe schalten, wenn die
maximale Schaltleistung eines Gerätes nicht überschritten wird.
Dazu müssen Sie die Empfindlichkeit der Geräte reduzieren. Die
Bildung größerer Gerätegruppen mit mehr als vier ARGUS ist technisch und funktionell ungünstig.
– Gummieinsatz in den Wandanschlusskasten einsetzen
– Anschlussleitung durchschieben
2 Den Wandanschlusskasten mit beiliegenden Schrauben montieren.
So installieren Sie den elektrischen Anschluss
Hinweis: Sichern Sie den ARGUS über einen 16-A-Leitungsschutz-
E ARGUS kombiniert mit Serienschalter:
Je nach Schalterstellung ergibt sich Hand-, Automatikbetrieb oder
“AUS”. In Stellung A wird die Leuchte über den ARGUS (Automatik) und in Stellung B dauernd (Hand) eingeschaltet.
| schalter ab.
Bild ):
1 Anschlussleitungen auf 14 mm abisolieren.
F ARGUS parallel mit Treppenlichtautomat:
Entweder schaltet der ARGUS oder der Treppenlichtautomat für
bestimmte Zeit die Leuchten ein.
2 Den Außenleiter in Klemme „L” stecken.
3 Den Neutralleiter in Klemme „N” stecken.
4 Den geschalteten Außenleiter in Klemme „↓“ stecken.
So montieren Sie das ARGUS-Oberteil
Eine „Durchverdrahtung” zu anderen Verbrauchern ist zulässig.
Hinweis! Beim Schalten von induktiven Lasten wie z. B. Transfor-
| matoren, Relais, Schütze oder Leuchtstofflampen entstehen Spannungsspitzen, die zum Wiedereinschalten führen können
(„Dauerlichteffekt“). Schalten Sie an der induktiven Last einen Kondensator (542895) parallel, um diese Spannungsspitzen zu verringern.
5
Bild =:
1 ARGUS-Oberteil auf den Anschlusskasten aufsetzen und mit zwei
beiliegenden Schrauben befestigen (A). Die elektrische Verbindung
vom Klemmblock zu den Stiften wird automatisch beim Festschrauben hergestellt.
6
So nehmen Sie den ARGUS in Betrieb
2 Abdeckplatte an den seitlichen Markierungen aufsetzen und abwärts
führen (B).
So nehmen Sie den ARGUS in Betrieb
So nehmen Sie den ARGUS in Betrieb
ARGUS ausrichten:
1 Bild *: Den Sensorkopf auf den zu überwachenden Bereich ausrichten (an den Endanschlägen ist die Drehrichtung zu wechseln).
Bild ?:
1 Versorgungsspannung zuschalten.
2 Gehen Sie vom Rand her in den Überwachungsbereich hinein
(Bild §), um zu überprüfen, ob der ARGUS den Verbraucher und die
Funktionsanzeige wie gewünscht schaltet.
Der Verbraucher wird für ca. 10 s bzw. die eingestellte Zeit eingeschaltet.
Die Funktionsanzeige leuchtet ca. 10 s lang.
Empfindlichkeit einstellen:
Bedienelemente verwenden:
Hierüber (Bild >E) können Sie stufenlos einstellen, bis zu welcher Entfernung der ARGUS Bewegungen erkennen kann (bis max. 16 m).
Alle Einstellungen wie Empfindlichkeit oder Schaltdauer nehmen Sie an
den Bedienelementen des ARGUS vor, die sich geschützt unter der Abdeckplatte befinden. Zum Öffnen:
1 Empfindlichkeit einstellen (Bild ;).
1 Abdeckplatte bis zum fühlbaren Anschlag (ca. 5 mm) hochschieben
und abziehen.
Hier (Bild >C) stellen Sie stufenlos ein, ab welcher Umgebungshelligkeit Bewegungen als solche erkannt und ein Schalten ausgelöst werden
soll.
Anzeigen und Bedienelemente des ARGUS:
Helligkeitsschwelle einstellen:
1 Helligkeitsschwelle einstellen (Bild :):
Bild >:
– Rechtsanschlag (Sonnensymbol): Tag- und Nachtbetrieb (ca. 1000
Lux), alle Bewegungen im Erfassungsbereich werden erkannt, unabhängig von der Außenhelligkeit.
A Funktionsanzeige: leuchtet bei jeder erkannten Bewegung
B Helligkeitssensor: darf nicht abgedeckt werden
C Helligkeitsschwelle einstellen
– Linksanschlag (Mondsymbol): Nachtbetrieb (ca. 3 Lux), Bewegungen
werden nur bei Dunkelheit erkannt.
D Schaltdauer einstellen
E Empfindlichkeit einstellen
Schaltdauer einstellen:
F Funkbetrieb: Zum Anbinden von Funksendern (siehe Gebrauchsanweisung des Funkmoduls Art.-Nr. 565495)
Hierüber (Bild >D) können Sie einstellen, wie lange der an den ARGUS
angeschlossene Verbraucher eingeschaltet sein soll. Bei Erkennen einer
Bewegung durch den ARGUS wird der Verbraucher eingeschaltet und
leuchtet so lange, bis die eingestellte Zeit verstrichen ist. Jede registrierte Bewegung startet die Schaltdauer neu.
ARGUS für Funktionstest einstellen:
1 Helligkeitsschwelle (Bild >C) auf Tagbetrieb (Sonnensymbol/
Rechtsanschlag) einstellen.
Hinweis: Der ARGUS ignoriert nach dem Einschalten des Verbrau-
| chers den Dämmerungsschalter. Wenn der Bewegungsmelder
2 Schaltdauer (Bild >D) auf 1 Sekunde (Linksanschlag) einstellen.
nicht mehr ausschaltet, dann liegt die Ursache wahrscheinlich darin,
dass der ARGUS ständig neue Bewegungen erfasst und so die
Schaltdauer immer wieder neu startet.
7
8
So blenden Sie einzelne Bereiche aus
1 Schaltdauer einstellen (Bild _):
Technische Daten
Eigenverbrauch:
Anschlussklemmen:
– Linksanschlag: Schaltdauer ca. 1 s
– Rechtsanschlag: Schaltdauer ca. 8 min
So blenden Sie einzelne Bereiche aus
Wenn sich Störquellen wie z. B. Bäume, Sträucher oder Lichtquellen im
Erfassungsbereich des ARGUS befinden und ungewolltes Schalten des
Verbrauchers auslösen, dann können Sie diese durch Aufsetzen der mitgelieferten Segmente ausblenden (Bild •):
1 Setzen Sie die Segmente genau auf die Bereiche des Sensorkopfes
(A), die aus der Überwachung ausgeblendet werden sollen, und
drücken Sie sie an den Sensorkopf an (B).
Hinweis: Der Dämmerungssensor C im frontalen Bereich darf
| nicht durch Segmente verdeckt werden, da sich sonst die Lichtempfindlichkeit reduziert.
Technische Daten
½
Achtung! Betrieb nur mit sinusförmigen Netzspannungen möglich.
Phasenanschnittdimmer oder Wechselrichter mit rechteckigem
oder trapezförmigen Spannungsverlauf schädigen das Gerät!
Netzspannung:
AC 230 V ±10%, 50 Hz.
Der ARGUS ist über einen 16-A-Leitungsschutzschalter abzusichern.
Max. Schaltstrom:
Nennleistung:
Glühlampen AC 230V:
Halogenlampen AC 230V:
Leuchtstofflampen AC
230V:
Kapazitive Last:
Trafolast:
16 A, AC 230 V, cos ϕ = 1
max. 2000 W
max. 2000 W
Außendurchmesser einer
Leitung:
max. 14,5 mm
Schnittstelle:
zur Erweiterung mit einem Funkmodul
(565495) für drahtlose Verbindung mehrerer Geräte
Überwachungsbereich:
220°
Reichweite:
max. 16 m
Anzahl der Ebenen:
7
Anzahl der Zonen:
112 mit 448 Schaltsegmenten
Mindestanbauhöhe:
1,7 m
Empfohlene Anbauhöhe: 2,5 m
Empfindlichkeit:
stufenlos einstellbar
Lichtfühler:
stufenlos von außen einstellbar,
ca. 3–1000 Lux.
Schaltdauer:
in 6 Stufen von außen einstellbar,
ca. 1 s – ca. 8 min
Einstellmöglichkeit des
Sensorknopfes
Wandmontage:
9° auf, 24° ab, 12° rechts/links, ±12° axial
Deckenmontage:
4°auf, 29° ab, 25° rechts/links, ±8,5° axial
Schutzart:
IP 55 bei einem Neigungswinkel von 15°
bis 90°
EG-Richtlinien:
Niederspannungs-Richtlinie 73/23/EWG,
EMV-Richtlinie 89/336/EWG
max. 1200 W, unkompensiert
max. 35 µF
max. 600 VA
9
<1W
für 2 x 1,5 mm2 oder 2 x 2,5 mm2 starre
Leiter, Abisolierlänge 14 mm
10
Technische Daten
What you can do with the ARGUS 220 Connect
What you can do with the ARGUS 220 Connect
The ARGUS 220 Connect (hereafter called ARGUS) is an electronic
movement detector for indoor and outdoor use. It registers moving
sources of heat, such as people, within a defined range (Figure !):
A Inner security zone:
area of detection 360°, radius approx. 4 m.
B Middle security zone:
angle of detection 220°, area of detection approx. 9 m x 18 m.
C Outer security zone:
angle of detection 220°, area of detection approx. 16 m x 28 m.
Note:The specified ranges refer to average conditions and a
| mounting height of 2.5 m and should therefore be taken as guide
values. The range can vary greatly depending on the weather.
The ARGUS switches a connected load whenever it detects a
movement. These could be ohmic loads (e. g. 230 V incandescent and
halogen lamps), capacitive loads (e. g. electronic transformers) or
inductive loads (e. g. low-voltage halogen lamps with inductive
transformer).
The various connection options are described in the section "How to
install the electrical connection", A – F.
If you additionally equip the ARGUS with an ARGUS 220 movement
detector radio module (565495), you can connect several ARGUS 220
Connect or ARGUS 220 Timer devices wirelessly. When a movement
detector detects a movement, a signal is sent via the radio module to all
taught-in movement detectors or receivers which then also switch on
their connected loads.
Note:The ARGUS is not suitable for use as a component of an
| alarm system since it is supplied from the mains and will switch the
connected alarm whenever the mains supply fails and recovers,
regardless of whether or not a movement is detected (false alarm).
11
12
How to choose an installation site
How to mount the ARGUS
How to choose an installation site
How to mount the ARGUS
Figure „:
¼
Risk of electrocution.
The ARGUS may only be installed and connected by skilled
electricians. Please observe the relevant regulations in your own
country.
½
Caution: If the installation is not carried out correctly, water can
penetrate into the ARGUS and damage it. Always mount the
ARGUS with the spherical head pointing downwards.
A Mounting height: beween 2 m and 3 m, optimal is 2.5 m, on a solid
and flat surface.
When using the radio module and installing on an outside wall,
make sure that the ARGUS is not mounted at the height of the
ceiling, since this results in the radio signals being significantly
dampened and could mean that they do not reach the receiver.
Further information can be found in the Merten radio guideline.
B Distance from sources of optical interference: approx. 5–6 m
C If the luminaire to be switched is located within the area of
detection of the ARGUS, there should be a distance of at least 5 m
between the ARGUS and the luminaire. Mount the luminaire
above the ARGUS, not below it. Otherwise, use the segments
provided to shade it (see the section "How to mask individual
areas").
Installing several ARGUS devices:
To ensure complete coverage, position the individual movement
detectors so that their detection areas overlap (Figure %).
Mounting the ARGUS on the ceiling:
Figure &:
To mount on the ceiling, turn the sensor head as follows (change the
direction of rotation when you have turned it as far as the stop):
– Turn the sensor head upwards as far as it will go A.
For optimum movement detection, mount the ARGUS sideways to the
direction of motion (Figure §).
The ARGUS has protection type IP 55 and is therefore suitable for use in
outdoor areas as well. To make sure that the lighting is not switched on
by environmental influences, you should make sure that the ARGUS is
sheltered from rain and direct sunlight (for example, raindrops running
down the lens could cause the movement detector to be switched)
(Figure $).
– Turn the sensor head clockwise as far as it will go B.
– Align the sensor headC:
½
Further information can be found in the "Merten Technical Information", in
the section "ARGUS movement detector".
Caution: If not installed correctly, the ARGUS can be damaged by
condensation.
If the ceiling is inclined, always mount the ARGUS with the
spherical head facing downwards, so that condensation water can
drain.
Mount the ARGUS at an angle of inclination between 15° and 90°;
otherwise, protection type IP 55 is not guaranteed.
Mounting the ARGUS on inner/outer corners or on fixed pipes.
Figure /: You can attach the ARGUS to inner/outer corners or fixed pipes
using the Merten mounting bracket, art. no. 565291/..92/..93. The
connecting cable can be fed into the device from behind through the
mounting bracket.
13
14
How to install the electrical connection
How to mount the ARGUS upper section
B ARGUS combined with two-way switch:
depending on the switch position, either maintained light or
automatic mode.
Mounting the ARGUS in wall connection boxes:
Figure (:
1 In order to lead the connecting cable into the back of the device from
above, attach the four spacers supplied to the wall-mounting bracket.
C ARGUS combined with break contact:
ARGUS is always ready for operation. By pressing the push-button
(the power is briefly disconnected for 2–3 seconds), the ARGUS is
switched on for the set time. Every further movement increases
the switching duration.
Feeding in the connection cable from behind:
– push the rubber sleeves supplied A over the stripped connecting
cable.
Feeding in the connection cable from below:
– cut the rubber insert supplied B according to the cable thickness.
D ARGUS in parallel:
several ARGUS devices working together can switch a lamp group
if the maximum switching capacity of one device is not exceeded.
To achieve this, you must reduce the sensitivity of the devices. For
technical and functional reasons, we do not advise forming larger
device groups using more than four ARGUS devices.
– Insert the rubber insert into the wall connection box
– Push through the connection cable
2 Mount the wall connection box using the screws supplied.
E ARGUS combined with two-circuit switch:
depending on the switch position, either automatic mode or "OFF".
In position A, the luminaire is switched on by the ARGUS
(automatic) and in position B, it is switched on continuously
(manual).
How to install the electrical connection
|
Note: Fuse the ARGUS using a 16 A automatic circuit-breaker.
Figure ):
1 Strip the connecting cable insulation by a length of 14 mm.
F ARGUS parallel to the staircase timer:
either the ARGUS or the staircase timer switches the lights on for
a certain period.
2 Insert the external conductor into terminal "L".
3 Insert the neutral conductor into terminal "N".
4 Insert the connected external conductor into terminal "↓".
How to mount the ARGUS upper section
"Through-wiring" to other loads is permitted.
Note When switching inductive loads such as transformers, relays,
| contactors or fluorescent lamps, spikes occur which could lead to
the load being switched on again ("maintained light effect").
Connect a capacitor (542895) parallel to the inductive load in order
to reduce these spikes.
Figure =:
1 Place the ARGUS upper section onto the connection box and fasten
it using the two screws provided (A). The electrical connection from
the terminal box to the pins is established automatically when the
screws are tightened.
2 Position the cover plate at the markings on the side, and guide it
upwards (B).
Installation options (Figure )):
A ARGUS constantly connected to the mains:
ARGUS monitors its area constantly.
15
16
How to put the ARGUS into operation
How to put the ARGUS into operation
How to put the ARGUS into operation
Aligning the ARGUS:
Figure ?:
1 Connect the supply voltage
1 Figure *: Align the sensor head with the area to be monitored
(change the direction of rotation when you have turned it as far as the
stop).
The load is switched on for approx. 10 s or for the set period.
The functional display lights up for approx. 10 s.
2 Step from the edge of the detection area into it (Figure §) to check
whether the ARGUS switches the load and the functional display as
required.
Using operating elements:
All settings, such as sensitivity and switching time, can be adjusted using
the ARGUS operating elements: these are located underneath the cover
plate, which protects them. To open:
1 Push up the cover plate until you feel it hit the stop (approx. 5 mm)
and pull it off.
Setting the sensitivity:
Here (Figure >E) you can set the distance up to which the ARGUS
detects movements (you can set this at any point up to max. 16 m).
1 Set the sensitivity (Figure ;).
ARGUS displays and operating elements:
Setting the brightness threshold:
Figure >:
A Functional display: lights up whenever movement is detected
Here (Figure >C) you can infinitely adjust the ambient brightness level
at which movements should be detected and a switching procedure
should be triggered.
B Brightness sensor: must not be covered
1 Set the brightness threshold (Figure :):
C Setting the brightness threshold
D Setting the sensitivity
– Right stop (sun symbol): Day and night operation (approx. 1000 lux),
all movements in the area of detection will be detected, independent
of the external brightness.
F Radio operation: To connect radio transmitters (see the operating
instructions for the radio module, art. no. 565495)
– Left stop (moon symbol): Night operation (approx. 3 lux), movement
are only recognised in the hours of darkness.
D Setting the switching duration
Setting the ARGUS for the function test:
Setting the switching duration:
1 Set the brightness threshold (Figure >C) to daytime operation (sun
symbol/right stop).
Here (Figure >D) you can set how long the loads connected to the
ARGUS are switched on for. When the ARGUS detects a movement, the
load (e.g. ceiling light) is switched on and stays switched on until the set
period has elapsed. Every further movement restarts the switching
duration.
2 Set the switching duration (Figure >D) to 1 s (left stop).
Note: The ARGUS ignores the light-sensitive switch after the load
| has been switched on. If the movement detector does not switch
the load off again, the reason is probably that the ARGUS has
17
18
How to mask individual areas
detected further movements and has restarted the switching
duration several times.
Technical data
Capacitive load:
Transformer load:
Power consumption:
Connecting terminals:
1 Setting the switching duration (Figure _):
– Left stop: switching duration approx. 1 s
– Right stop: switching duration approx. 8 min
How to mask individual areas
When there are sources of interference such as trees, bushes or lights in
the area of detection of the ARGUS, and these trigger the load
accidentally, you can mask them using the segments supplied
(Figure •):
1 Place the inserts exactly on those areas of the sensor head (A)
which should be masked from detection, and press them onto the
sensor head (B).
Note:The light-sensitive sensor C at the front must not be covered
| by segments, since this reduces the light sensitivity.
Technical data
½
Caution! Operation only possible with sinusoidal mains voltages.
Phase control dimmers or inverters with square wave or trapezoidal
voltage curves will damage the device.
Mains voltage:
AC 230 V ±10%, 50 Hz.
Fuse the ARGUS using a 16 A automatic
circuit-breaker.
Max. switching current:
Nominal capacity:
Incandescent lamps AC
230 V:
Halogen lamps AC 230V:
Fluorescent lamps AC
230 V:
16 A, AC 230 V, cos ϕ = 1
max. 2000 W
max. 2000 W
External diameter of a
cable:
Interface:
max. 14.5 mm
for expansion with a radio module (565495)
for wireless connection of several devices
220°
max. 16 m
7
112 with 448 switching segments
1.7 m
Area of detection:
Range:
Number of levels:
Number of zones:
Minimum mounting
height:
Recommended mounting 2.5 m
height:
Sensitivity:
infinitely adjustable
Light sensor:
infinitely adjustable externally
approx. 3–1000 lux
Switching duration:
can be set externally at 6 levels
approx. 1 s – approx. 8 min
Possible settings for
sensor head
Wall mounting:
9° up, 24° down, 12° left/right, ± 12° axial
Ceiling mounting:
4° up, 29° down, 25° left/right, ± 8.5° axial
Type of protection:
IP 55 at an angle of inclination from 15° to
90°
EC guidelines:
Low-voltage guideline 73/23/EEC and EMC
guideline 89/336/EEC
max. 1200 W, uncompensated
19
max. 35 µF
max. 600 VA
<1W
for 2 x 1.5 mm2 or 2 x 2.5 mm2 rigid
conductor, stripped to 14 mm
20
Technical data
Mogelijkheden van de ARGUS 220 Connect
Mogelijkheden van de ARGUS 220 Connect
De ARGUS 220 Connect (hierna ARGUS genoemd) is een elektronische
bewegingsmelder voor gebruik binnen- en buitenshuis. Hij registreert
bewegende warmtebronnen, bijv. personen, binnen een bepaald bereik
(afbeelding !):
A Binnenste veiligheidszone:
Detectiebereik 360°, radius ca. 4 m.
B Middelste veiligheidszone:
Detectiehoek 220°, detectiebereik ca. 9 m x 18 m.
C Buitenste veiligheidszone:
Detectiehoek 220°, detectiebereik ca. 16 m x 28 m.
Aanwijzing: De genoemde bereiken gelden onder gemiddelde
| omstandigheden bij een montagehoogte van 2,5 m en zijn derhalve
slechts richtwaarden. Het bereik kan bij wisselende temperaturen
sterk schommelen.
De ARGUS schakelt, bij het herkennen van een beweging, aangesloten
verbruikers. Dit kunnen ohmse lasten (bijv. 230-V-gloei- en
halogeenlampen), capacitieve lasten (bijv. elektronische
transformatoren) of inductieve lasten (bijv. laagspanninghalogeenlampen met inductieve transformator) zijn.
Mogelijke aansluitvarianten vindt u in paragraaf „Zo installeert u de
elektrische aansluiting“, A – F..
Als de ARGUS bovendien met een RF module voor ARGUS 220
bewegingsmelder (565495) wordt uitgerust, kunnen meerdere ARGUS
220 Connect of ARGUS 220 Timer draadloos aan elkaar worden
gekoppeld. Een door een bewegingsmelder herkende beweging wordt
via de RF module aan alle aangeleerde bewegingsmelders of ontvangers
verzonden. Deze schakelen dan hun aangesloten verbuikers ook in.
21
22
Zo kiest u de montageplaats
Aanwijzing: De ARGUS is niet geschikt als component in een
| alarminstallatie, aangezien het apparaat van het stroomnet
Zo monteert u de ARGUS
Zo monteert u de ARGUS
afhankelijk is en bij uitval en terugkeer van de netspanning de
aangesloten alarmmelder activeert, onafhankelijk van een
beweging (vals alarm).
Zo kiest u de montageplaats
Afbeelding „:
A Montagehoogte: tussen 2 m en 3 m, optimaal 2,5 m, op vaste en
gelijkmatige ondergrond.
Bij gebruik van de RF module en gelijktijdige montage aan een
buitenwand dient erop gelet te worden, dat de ARGUS niet op de
hoogte van de etagevloer wordt gemonteerd, omdat anders de RF
signalen sterkt gedempt kunnen worden en de ontvanger
eventueel niet bereiken. Meer informatie hierover vindt u in de
beknopte handleiding voor Merten-zenders.
B Afstand tot optisch storende factoren: ca. 5–6 m.
C Als de geschakelde lamp zich in het detectiebereik van de ARGUS
bevindt, dan moet de afstand van ARGUS tot lamp minstens 5 m
bedragen. Monteer de lamp niet onder, maar boven de ARGUS.
Anders gebruikt u de segmenten ter afdekking (zie paragraaf „Zo
worden afzonderlijke bereiken afgeschermd“).
Voor een optimale bewegingsdetectie dient de ARGUS zijdelings van de
looprichting gemonteerd te worden (afbeelding §).
De ARGUS beschikt over beschermingsklasse IP 55 en kan daarom ook
buitenshuis gebruikt worden. Om het inschakelen van de verlichting door
invloeden van buitenaf te vermijden, dient de ARGUS zoveel mogelijk
beschermd tegen regen en direct zonlicht te worden aangebracht
(bijv. regendruppels die over de lens lopen, kunnen de bewegingsmelder
activeren) (afbeelding $).
Aanvullende informatie vindt u in de technische informatie van Merten,
paragraaf „ARGUS bewegingsmelder“.
23
¼
Levensgevaar door elektrische stroom.
De ARGUS mag uitsluitend door elektriciens gemonteerd en
aangesloten worden. De nationale voorschriften dienen in acht
genomen te worden.
½
Let op: Bij verkeerde montage kan water in de ARGUS dringen en
hem beschadigen. Monteer de ARGUS steeds uitsluitend met de
bol naar beneden.
Meerdere ARGUS monteren:
Om een volledige bewaking te garanderen, dienen de afzonderlijke
bewegingsmelders zo gepositioneerd te worden, dat hun stralenbundels
elkaar overlappen (afbeelding %).
ARGUS aan plafond monteren:
Afbeelding &:
Voor de plafondmontage de sensor als volgt draaien (aan de
eindaanslagen de draairichting wijzigen):
– Sensor tot aan de aanslag naar boven draaien A.
– Sensor tot aan de aanslag met de wijzers van de klok mee draaien
B.
– Sensor uitrichten C.
½
Let op: Bij verkeerde montage kan condenswater de ARGUS
beschadigen:
Monteer de ARGUS bij schuine plafonds altijd met de bol naar
beneden, zodat het condenswater weg kan lopen.
ARGUS in een hoek tussen 15° en 90° monteren, anders is
beschermingsgraad IP 55 niet meer gegarandeerd.
ARGUS aan binnen-/buitenhoeken of aan regenpijpen monteren:
Afbeelding /: Met de montagehoek art.-nr. 565291/..92/..93 kan de
ARGUS aan binnen-/buitenhoeken of regenpijpen worden bevestigd. Het
aansluitsnoer kan hierbij door de montagehoek langs achter in het toestel
gevoerd worden.
24
Zo installeert u de elektrische aansluiting
Zo monteert u het bovenste deel van de ARGUS
Mogelijke installatiesoorten (afbeelding )):
ARGUS aan wandaansluitkast monteren:
Afbeelding (:
A ARGUS permanent aan het net:
ARGUS bewaakt zijn bereik permanent.
1 Om een aansluitsnoer van bovenaf aan de achterzijde in het apparaat
te voeren, plaatst u de vier meegeleverde afstandhouders op de
wandaansluitkast.
B ARGUS gecombineerd met wisselschakelaar:
Afhankelijk van de schakelaarstand is er sprake van continu licht of
automatische werking.
Aansluitsnoer langs achter toevoeren:
– Meegeleverde rubbertule A over het niet-geïsoleerde aansluitsnoer
schuiven.
C ARGUS gecombineerd met verbreekcontact:
ARGUS is permanent bedrijfsklaar. Door een druk op de
impulsdrukker (kortstondige spanningsonderbreking 2–3
seconden) wordt de ARGUS gedurende de ingestelde tijd
ingeschakeld. Elke andere beweging verlengt de schakelduur.
Aansluitsnoer langs onder toevoeren:
– Meegeleverde rubberen afdekking B overeenkomstig de kabeldikte
snijden.
D ARGUS parallel:
Meerdere ARGUS kunnen een verlichtingsgroep schakelen, als
het maximale schakelvermogen van één toestel niet wordt
overschreden. Hiervoor moet de gevoeligheid van de toestellen
gereduceerd worden. Het vormen van grotere groepen met meer
dan vier ARGUS is technisch en functioneel niet gunstig.
– Rubberen afdekking in de wandaansluitkast plaatsen
– Aansluitsnoer doorschuiven
2 De wandaansluitkast met meegeleverde schroeven monteren.
Zo installeert u de elektrische aansluiting
Aanwijzing: Beveilig de ARGUS met een 16-A-
E ARGUS gecombineerd met serieschakelaar:
Afhankelijk van de schakelaarstand is er sprake van handmatige of
automatische werking, of “UIT”. In stand A wordt de lamp via de
ARGUS (automatisch) en in stand B continu (hand) ingeschakeld.
| overspanningsbeveiliging.
Afbeelding ):
1 Aansluitsnoeren op 14 mm aanstrippen.
F ARGUS parallel met trappenhuisautomaat:
Ofwel de ARGUS of de trappenhuisautomaat schakelt de lampen
voor een bepaalde tijd aan.
2 De fasedraad in klem „L” steken.
3 De nuldraad in klem „N” steken.
4 De schakeldraad in klem „↓“ steken.
Zo monteert u het bovenste deel van de ARGUS
„Doorverdraden” naar andere verbruikers is toegelaten.
Afbeelding =:
Opmerking! Bij het schakelen van inductieve lasten,
| bijv. transformatoren, relais of TL-lampen, ontstaan
spanningspieken die tot herinschakeling kunnen leiden ("effect van
continu licht"). Om deze spanningspieken te verminderen dient een
een condensator (542895) parallel aan de inductieve last te worden
geschakeld.
25
1 Bovenste deel van de ARGUS op de aansluitkast plaatsen en met de
twee meegeleverde schroeven bevestigen (A). De elektrische
verbinding van het klemmenblok naar de stiften wordt automatisch
bij het vastschroeven gerealiseerd.
26
Zo neemt u de ARGUS in gebruik
2 Afdekplaat aan de markering aan de zijkant plaatsen en neerwaarts
schuiven (B).
Zo neemt u de ARGUS in gebruik
Zo neemt u de ARGUS in gebruik
ARGUS richten:
1 Afbeelding *: De sensor op het te bewaken bereik richten (aan de
eindaanslagen moet de draairichting gewisseld worden).
2 Ga vanaf de rand in het detectiebereik (afbeelding §) om te
controleren, of de ARGUS de verbruiker en de functie-indicatie
schakelt zoals gewenst.
Afbeelding ?:
1 Voedingsspanning inschakelen.
De verbruiker wordt gedurende ca. 10 s resp. de ingestelde tijd
ingeschakeld.
De functie-indicatie brandt hierbij gedurende ca. 10 s.
Gevoeligheid instellen:
Hiermee (afbeelding >E) kunt u traploos instellen, tot welke afstand de
ARGUS bewegingen kan herkennen (tot max. 16m).
Bedieningselementen gebruiken:
1 Gevoeligheid instellen (afbeelding ;):
Alle instellingen zoals gevoeligheid of schakelduur voert u aan de
bedieningselementen van de ARGUS uit, die zich beschermd onder de
afdekplaat bevinden. Om te openen:
Lichtsterktedrempel instellen:
1 Afdekplaat tot de voelbare aanslag (ca. 5 mm) omhoog schuiven en
lostrekken.
Hier (afbeelding >C) kunt u traploos instellen vanaf welke
omgevingslichtsterkte bewegingen herkend dienen te worden en
verbruikers geschakeld dienen te worden.
Displays en bedieningselementen van de ARGUS:
1 Lichtsterktedrempel instellen (afbeelding :):
– aanslag rechts (zonsymbool): dagstand/nachtbedrijf (ca. 1000 lux),
alle bewegingen in het detectiebereik worden herkend, onafhankelijk
van de helderheid buiten.
Afbeelding >:
A Functie-indicatie: brandt bij elke herkende beweging
B Helderheidssensor: mag niet worden afgedekt
– aanslag links (maansymbool): nachtbedrijf (ca. 3 lux), bewegingen
worden alleen in het donker herkend.
C Lichtsterktedrempel instellen
D Schakelduur instellen
Schakelduur instellen:
E Gevoeligheid instellen
Hiermee (afbeelding >D) kunt u instellen hoe lang de aan de ARGUS
aangesloten verbruiker ingeschakeld dient te zijn. Bij waarneming van
een beweging door de ARGUS wordt de verbruiker ingeschakeld en blijft
branden tot de ingestelde tijd verstreken is. Elke geregistreerde
beweging start de schakelduur opnieuw.
F RF bedrijf: Voor het koppelen van RF zenders (zie
gebruiksaanwijzing van de RF module art.nr. 565495)
ARGUS voor functietoets instellen:
1 Lichtsterktedrempel (afbeelding >C) op dagstand (zonsymbool/
aanslag rechts) instellen.
Aanwijzing: De ARGUS negeert de schemerschakelaar na het
2 Schakelduur (afbeelding >D) op 1 seconde (aanslag links) instellen.
27
| inschakelen van de verbruiker. Indien de bewegingsmelder niet
meer uitschakelt, dan ligt dit waarschijnlijk aan het feit dat de
ARGUS constant nieuwe bewegingen detecteert en zo de
schakelduur steeds opnieuw start.
28
Zo worden afzonderlijke bereiken uitgeschakeld
1 Schakelduur instellen (afbeelding _):
Technische gegevens
Capacitieve last:
Transformatorlast:
Eigen verbruik:
Aansluitklemmen:
– aanslag links: schakelduur ca. 1 s
– aanslag rechts: schakelduur ca. 8 min
Zo worden afzonderlijke bereiken uitgeschakeld
Als zich storende factoren zoals bijv. bomen, struiken of lichtbronnen in
het detectiebereik van de ARGUS bevinden en onbedoeld schakelen van
de verbruiker veroorzaken, kunt u deze door montage van de
meegeleverde segmenten laten verdwijnen (afbeelding •):
1 Plaats de segmenten precies op de bereiken van de sensor (A), die
uit de bewaking moeten worden weggelaten en druk ze aan de
sensor aan (B).
Aanwijzing: De schemersensor C aan de voorzijde mag niet door
| segmenten worden afgedekt, omdat de lichtgevoeligheid dan
afneemt.
Technische gegevens
½
Let op! Bedrijf alleen met sinusvormige netspanningen mogelijk.
Faseaansnijdingsdimmer of wisselgenerator met rechthoekig of
trapeziumvormig spanningsverloop beschadigen het toestel!
Netspanning:
Max. schakelstroom:
Nominaal vermogen:
Gloeilampen AC 230V:
Halogeenlampen AC
230V:
TL-lampen AC 230V:
AC 230 V ±10%, 50 Hz.
De ARGUS dient met een 16-Aoverspanningsbeveiliging te worden
beveiligd.
Buitendiameter van een
kabel:
Interface:
Detectiebereik:
Bereik:
Aantal niveaus:
Aantal zones:
Minimum
montagehoogte:
Aanbevolen
montagehoogte:
Gevoeligheid:
Lichtsensor:
Schakelduur:
max. 35 µF
max. 600 VA
<1W
voor 2 x 1,5 mm2 of 2 x 2,5 mm2 starre
geleider, isolatielengte 14 mm
max. 14,5 mm
voor de uitbreiding met een RF module
(565495) voor draadloze verbinding van
meerdere toestellen
220°
max. 16 m
7
112 met 448 schakelsegmenten
1,7 m
2,5 m
traploos instelbaar
vanaf de buitenkant traploos instelbaar,
ca. 3–1000 lux.
in 6 trappen vanaf de buitenkant instelbaar,
ca. 1 s – ca. 8 min
Instelmogelijkheid van de
sensorknop
Wandmontage:
9° op, 24° neer, 12° rechts/links, ±12°
axiaal
Plafondmontage:
4°op, 29° neer, 25° rechts/links, ±8,5°
axiaal
Beschermingsgraad:
IP 55 bij een hoek van 15° tot 90°
EG richtlijnen:
laagspanningsrichtlijn 73/23/EEG en EMCrichtlijn 89/336/EEG
16 A, AC 230 V, cos ϕ = 1
max. 2000 W
max. 2000 W
max. 1200 W, ongecompenseerd
29
30
Technische gegevens
Utilidades del ARGUS 220 Connect
Utilidades del ARGUS 220 Connect
El ARGUS 220 Connect (a continuación llamado ARGUS) es un detector
de movimiento electrónico para interiores y exteriores. Este detector
registra fuentes de calor en movimiento, p. ej., personas, dentro de un
alcance determinado (Figura !):
A Zona de seguridad interior:
área vigilada 360°, radio aprox. 4 m.
B Zona de seguridad central:
ángulo de cobertura 220°, área de cobertura aprox. 9 m x 18 m.
C Zona de seguridad exterior:
ángulo de cobertura 220°, área de cobertura aprox. 16 m x 28 m.
Indicación: Los alcances indicados se han calculado a partir de las
| proporciones medias a una altura de montaje de 2,50 m. Por tanto,
no son más que valores orientativos. El alcance puede variar en
gran medida dependiendo de los cambios de temperatura.
El ARGUS activa los consumos conectados cuando registra un
movimiento. Éstos pueden ser cargas óhmicas (p. ej., lámparas
incandescentes y halógenas de 230 V), cargas capacitivas (p. ej.,
transformadores electrónicos) o cargas inductivas (p. ej., lámparas
halógenas de bajo voltaje con transformador inductivo).
Para las variantes de conexión, consulte el apartado "Instalación de la
conexión eléctrica", A – F.
Si además incorpora un módulo por radio para detectores de movimiento
ARGUS 220, puede conectar en red sin cables varios ARGUS 220
Connect o ARGUS 220 Timer. Cuando el detector registra un
movimiento, el módulo por radio envía una señal a todos los detectores
de movimiento o receptores programados. Éstos, a su vez, activan los
consumos conectados.
31
32
Cómo seleccionar el lugar de montaje
Indicación: el ARGUS no está indicado para ser utilizado como un
| componente de una instalación de alarma, dado que se alimenta a
través de la red eléctrica. En caso de caída y posterior recuperación
de la tensión de red, el detector se conecta independientemente
de si detecta movimientos o no (falsa alarma).
Cómo seleccionar el lugar de montaje
Montaje del ARGUS
Montaje del ARGUS
¼
Peligro de muerte por descarga eléctrica.
El ARGUS sólo debe ser montado y conectado por electricistas.
Tenga en cuenta la normativa específica del país.
½
Atención: si no se monta correctamente, puede entrar agua en el
ARGUS y dañarlo. Monte siempre el ARGUS con la esfera hacia
abajo.
Figura „:
A Altura de montaje: entre 2 y 3 m, altura óptima 2,5 m, sobre una
base fija y plana.
Si utiliza el módulo por radio y, al mismo tiempo, realiza el montaje
en una pared exterior, asegúrese de que el ARGUS no se instala a
la altura del techo, porque las señales de radio podrían
amortiguarse tanto que no alcanzarían el receptor. Para más
información al respecto consulte la guía de instalación para
sistemas vía radio de Merten.
B Distancia a fuentes de interferencias ópticas: aprox. 5–6 m.
C Cuando la lámpara conectada se encuentra dentro del área de
cobertura del ARGUS, la distancia del ARGUS a la lámpara debe
ser de 5 m como mínimo. No monte la lámpara por debajo, sino
por encima del ARGUS. De lo contrario, utilice los segmentos para
el oscurecimiento (véase el apartado "Cómo ocultar las diferentes
áreas").
Para una detección óptima del movimiento, monte el ARGUS
perpendicular a la dirección de paso (Figura §).
El ARGUS tiene un tipo de protección IP 55 y, por tanto, también es
apropiado para exteriores. Para evitar que los agentes climáticos
enciendan la iluminación, coloque el ARGUS lo más protegido posible de
la lluvia y de la luz directa del sol (p. ej., las gotas de lluvia al deslizarse
por la lente pueden provocar que se conecte el detector de movimiento)
(Figura $).
Si desea más información, puede consultar la "Información Técnica
Merten", apartado "Detectores de movimiento ARGUS".
33
Montaje de varios ARGUS:
para que no haya ángulos muertos en el área de vigilancia, coloque cada
uno de los detectores de movimiento de manera que la trayectoria de los
rayos se superponga (Figura %).
Montaje del ARGUS en el techo:
Figura &:
Para el montaje en el techo, gire el cabezal del sensor como se indica
(cambie el sentido de giro en los topes finales):
– Gire hacia arriba el cabezal del sensor hasta el tope A.
– Gire el cabezal del sensor en sentido de las agujas del reloj hasta el
tope B.
– Oriente el cabezal del sensor C.
½
Atención: si no se monta correctamente, el agua de condensación
puede dañar el ARGUS:
En techos inclinados, el ARGUS se debe montar siempre con la
esfera hacia abajo para que se escurra el agua de condensación.
Monte el ARGUS con un ángulo de inclinación entre 15° y 90°, de
lo contrario no se garantiza el tipo de protección IP 55.
Montaje del ARGUS en rincones/esquinas o en tuberías fijas:
Figura /: Con la escuadra de montaje ref. 565291/..92/..93 puede
sujetar el ARGUS a rincones/esquinas o a tuberías. El cable de conexión
se puede introducir desde atrás a través de la escuadra de montaje hasta
llegar al dispositivo.
34
Instalación de la conexión eléctrica
Montaje de la parte superior del ARGUS
Figura (:
A ARGUS conectado constantemente a la red:
ARGUS vigila continuamente el área asignada.
1 Para introducir el cable de conexión que viene de la parte superior en
el dispositivo (desde atrás), coloque los cuatro distanciadores
suministrados sobre la caja de conexión de pared:
B ARGUS combinado con un conmutador:
Según la posición del interruptor, funciona en modo de iluminación
constante o en modo automático.
Montaje del ARGUS en la caja de conexión de pared:
C ARGUS combinado con un contacto n.c.:
ARGUS siempre listo para el funcionamiento. Pulsando una tecla
(breve interrupción de tensión de 2-3 segundos) se enciende el
ARGUS para el tiempo ajustado. Cualquier movimiento adicional
prolonga la duración de conexión.
Introducción del cable de conexión desde atrás:
– Pase el revestimiento de goma suministrado A por encima del cable
de conexión ya pelado.
Introducción del cable de conexión desde abajo:
– Corte el elemento de goma suministrado B según el grosor del
cable.
D ARGUS en paralelo:
Varios ARGUS pueden conectar un grupo de lámparas, si no se
excede la potencia de encendido máxima de un dispositivo. Para
ello, debe reducir la sensibilidad de los dispositivos. La formación
de grupos grandes de dispositivos con más de cuatro ARGUS no
es recomendable desde el punto de vista técnico ni funcional.
– Coloque el elemento de goma en la caja de conexión de pared
– Meta hasta el fondo el cable de conexión
2 Monte la caja de conexión de pared con los tornillos suministrados.
Instalación de la conexión eléctrica
|
E ARGUS combinado con un interruptor doble:
Según la posición del interruptor, funciona en modo manual, en
modo automático, o está apagado. En la posición A la lámpara se
conecta mediante el ARGUS (automático) y en la posición B está
encendido constantemente (manual).
Indicación: proteja el ARGUS con un interruptor automático de 16
A.
Figura ):
1 Pele los cables de conexión a 14 mm.
F ARGUS en paralelo con un minutero de escalera:
El ARGUS o el automático de escalera encienden las lámparas
durante un tiempo determinado.
2 Conecte el conductor exterior en el borne "L".
3 Conecte el conductor neutro en el borne "N".
4 Enchufe el conductor exterior conectado en el borne "↓".
Montaje de la parte superior del ARGUS
Se pueden efectuar "pasos de cableado" a otros consumos.
Figura =:
Indicación Al conectar cargas inductivas como transformadores,
| relés, contactores o lámparas fluorescentes se producen picos de
tensión que pueden provocar una reconexión ("efecto de
iluminación constante“). Para reducir los picos de tensión, conecte
un condensador (542895) en paralelo a la carga inductiva.
Clases de instalación posibles (Figura )):
35
1 Coloque la parte superior del ARGUS sobre la caja de conexión y
sujétela con los dos tornillos suministrados (A). El bloque de bornes
se conecta automáticamente a la toma de tierra al atornillar.
2 Coloque la placa de cobertura en las marcas laterales y empuje hacia
abajo (B).
36
Puesta en funcionamiento del ARGUS
Puesta en funcionamiento del ARGUS
Puesta en funcionamiento del ARGUS
Orientación del ARGUS:
Figura ?:
1 Conecte la tensión de alimentación.
1 Figura *: Oriente el cabezal del sensor hacia el área que se desea
vigilar (el sentido de giro se cambia en los tope de giro).
El consumo se conecta durante aprox. 10 s o durante el tiempo ajustado.
El indicador de funcionamiento se ilumina durante aprox. 10 s.
2 Entre en el área vigilada (Figura §) para comprobar que el ARGUS
conecta el consumo y el indicador de funcionamiento en la forma
deseada.
Utilización de elementos de control:
Ajuste de la sensibilidad:
Todos los ajustes, como la sensibilidad o la duración de conexión, se
efectúan en los elementos de control del ARGUS, situados bajo la
protección de la placa de cobertura. Para abrir:
Aquí, (Figura >E) puede ajustar de forma continua la distancia máxima
de detección de movimientos del ARGUS (hasta máx. 16 m).
1 Levante la placa de cobertura hasta llegar al tope (aprox. 5 mm) y
retírela.
1 Ajuste de la sensibilidad (Figura ;):
Indicadores y elementos de control del ARGUS:
Aquí (Figura >C) se puede ajustar de forma continua a partir de qué
grado de luminosidad del entorno los movimientos se consideran como
tales y cuándo ha de producirse la conexión.
Ajuste del umbral de luminosidad:
Figura >:
A Indicador de funcionamiento: se ilumina cada vez que se detecta
un movimiento
1 Ajuste del umbral de luminosidad (Figura :):
– Tope derecho (icono sol): funcionamiento diurno y nocturno (aprox.
1000 Lux): se reconocen todos los movimientos en el área de
cobertura, independientemente de la luminosidad exterior.
B Sensor de luminosidad: debe estar al descubierto
C Ajuste del umbral de luminosidad
D Ajuste de la duración de conexión
– Tope izquierdo (icono luna): Funcionamiento nocturno (aprox. 3 Lux),
sólo se detectan movimientos en la oscuridad.
E Ajuste de la sensibilidad
F Funcionamiento por radio: para asociar radioemisores (véanse las
instrucciones de servicio del módulo por radio ref. 565495)
Ajuste del ARGUS para la comprobación de funcionamiento:
1 Ajuste el umbral de luminosidad (Figura>C) a funcionamiento
diurno (icono sol/tope derecho).
2 Ajuste la duración de conexión (Figura >D) a 1 segundo (tope
izquierdo).
Ajuste de la duración de conexión:
Aquí, (Figura >D) puede ajustar cuánto ha de durar la conexión del
consumo conectado al ARGUS. Si el ARGUS detecta un movimiento, el
consumo se enciende y permanece encendido hasta que haya
transcurrido el tiempo programado. La duración de conexión se reinicia
cada vez que se detecta un movimiento.
Indicación: El ARGUS ignora el interruptor crepuscular después de
| que se conecta el consumo. Si el detector de movimiento no se
apaga, puede que se deba a que el ARGUS detecta
constantemente movimiento y que, por tanto, la duración de
conexión se reinicia constantemente.
37
38
Cómo ocultar las diferentes áreas
1 Ajuste de la duración de conexión (Figura _):
– Tope izquierdo: duración de conexión aprox. 1 s
– Tope derecho: duración de conexión aprox. 8 min
Cómo ocultar las diferentes áreas
Si en el área de cobertura del ARGUS hay objetos que puedan interferir
en la recepción, p. ej., árboles, matorrales o fuentes de luz, y provocar la
conexión involuntaria del consumo, puede ocultarlos colocando los
segmentos suministrados (Figura •):
1 Coloque los segmentos justo en la zona que desea ocultar en el
cabezal de sensor (A) y presione para ajustarlos (B).
Datos técnicos
Lámparas fluorescentes
de 230 V CA:
Carga capacitiva:
Carga del transformador:
Consumo propio:
Bornes de conexión:
Diámetro exterior de un
cable:
Interface:
Indicación: el sensor crepuscular C de la zona frontal no debe
| taparse con segmentos. De lo contrario, se reduce la sensibilidad a
la luz.
Datos técnicos
½
Atención: el dispositivo sólo funciona con tensiones de
alimentación senoidales. Los dimmers de corte de fase ascendente
o los rectificadores con curvas de tensión rectangulares o
trapezoidales dañan el aparato.
Tensión de alimentación: 230 V CA ±10%, 50 Hz.
Proteja el ARGUS con un interruptor
automático de 16 A.
Área vigilada:
Alcance:
Nº de niveles:
Nº de zonas:
Altura mínima de
instalación:
Altura de instalación
recomendada:
Sensibilidad:
Sensor de luminosidad:
máx. 1200 W, sin compensación
máx. 35 µF
máx. 600 VA
<1W
para conductores rígidos de 2 x 1,5 mm2 o
2 x 2,5 mm2, longitud de aislamiento 14
mm
máx. 14,5 mm
para ampliar con un módulo por radio
(565495) para la conexión sin cable de
varios dispositivos
220°
máx. 16 m
7
112 con 448 segmentos de conexión
1,7 m
2,5 m
ajuste continuo
ajuste continuo desde el exterior,
aprox. 3–1000 Lux,
Duración de la conexión: ajustable desde el exterior en 6 etapas,
aprox. 1 s – aprox. 8 min
Posibilidad de ajuste del
cabezal del sensor
Montaje en la pared:
+9°, -24°, 12° derecha/izquierda, ±12° axial
Montaje en el techo:
+4°, -29°, 25° derecha/izquierda, ±8,5°
axial
Corriente de
16 A, 230 V CA, cos ϕ = 1
conmutación máx.:
Potencia de conexión:
Lámparas
máx. 2000 W
incandescentes 230 V CA:
Lámparas halógenas de máx. 2000 W
230 V CA:
39
40
Datos técnicos
Tipo de protección:
Directivas CE:
IP 55 con un ángulo de inclinación de 15° a
90°
directiva de baja tensión 73/23/CEE,
directiva EMV 89/336/CEE
Voici les possibilités qu'offre l'ARGUS 220 Connect
Voici les possibilités qu'offre l'ARGUS 220 Connect
L'ARGUS 220 Connect (appelé ci-après ARGUS) est un détecteur de
mouvements électronique pour l'intérieur et l'extérieur. Il détecte les
sources de chaleur en mouvement, par exemple des personnes, se
déplaçant à une portée déterminée (figure !) :
A Périmètre de sécurité intérieur :
Zone de détection de 360°, rayon d'env. 4 m.
B Périmètre de sécurité médian :
Angle de détection de 220°, champ de détection d'env. 9 m x
18 m.
C Périmètre de sécurité extérieur :
Angle de détection de 220°, champ de détection d'env. 16 m x
28 m.
Remarque : Les portées indiquées se réfèrent à des conditions
| moyennes pour une hauteur de montage de 2,5 m et ne doivent
donc être considérées qu'à titre de référence. En outre, elles
peuvent fortement fluctuer en cas de variation des températures.
Lorsque l'ARGUS reconnaît un mouvement, il enclenche les
consommateurs raccordés. Il peut s'agir de charges ohmiques (p. ex. de
lampes halogènes et à incandescence 230 V), de charges capacitives
(p. ex. des transformateurs électroniques) ou de charges inductives
(p. ex. de lampes halogènes basse tension avec transformateur inductif).
Vous trouverez les variantes de raccordement possibles au paragraphe «
Comment installer le raccordement électrique ? », A – F.
Si vous équipez en plus l'ARGUS d'un module radio pour détecteur de
mouvements ARGUS 220 (565495), vous pouvez mettre en réseau sans
fil plusieurs ARGUS 220 Connect ou ARGUS 220 Timer. La détection
d'un mouvement par un détecteur de mouvements est transmise par
l'intermédiaire du module radio à tous les détecteurs de mouvements ou
récepteurs étalonnés. Ceux-ci déclenchent alors également leurs
consommateurs raccordés.
41
42
Comment choisir le lieu de montage ?
Remarque : L'ARGUS ne convient pas comme composant d'un
Comment monter l'ARGUS ?
Pour obtenir de plus amples informations, consultez les « Informations
techniques Merten », au chapitre « Détecteurs de mouvements ARGUS
».
| système d'alarme puisque son alimentation dépend du réseau
électrique et que, en cas de coupure et retour de la tension du
réseau, il déclenche l'alarme raccordée indépendamment d'un
mouvement.
Comment monter l'ARGUS ?
Comment choisir le lieu de montage ?
Figure „ :
A Hauteur de montage : entre 2 m et 3 m, hauteur optimale de 2,5
m, sur une surface solide et plane.
Si vous utilisez un module radio et que celui-ci est monté sur un
mur extérieur, veillez à ne pas monter l'ARGUS à hauteur du
plafond, les signaux radio pourraient en effet être alors fortement
atténués et ne pas atteindre le récepteur. Vous trouverez plus
d'informations à ce sujet dans le Guide de la transmission radio de
Merten.
B Ecart par rapport aux sources de perturbation optiques : env. 5-6
m.
C Si la lampe commandée se trouve dans le champ de détection de
l'ARGUS, un écart d'au moins 5 m entre l'ARGUS et la lampe doit
être respecté. Montez la lampe non pas au-dessous, mais audessus de l'ARGUS. Sinon, utilisez les segments permettant de
masquer certaines zones (voir paragraphe « Comment masquer
certaines zones ? »).
Une détection optimale des mouvements est obtenue lorsque l'ARGUS
est monté latéralement au sens de déplacement (figure §).
L'ARGUS possède le degré de protection IP 55, il est donc adapté
également pour l'extérieur. Afin d'éviter la mise en marche de l'éclairage
par des influences environnementales, l'ARGUS devrait si possible être
monté à l'abri de la pluie et de la lumière directe du soleil (les gouttes de
pluie qui coulent sur la lentille peuvent entraîner par exemple le
déclenchement du détecteur de mouvements) (figure $).
43
¼
Danger de mort dû au courant électrique.
Seuls des électriciens sont autorisés à monter et à raccorder
l'ARGUS. Respectez les directives en vigueur dans le pays
concerné.
½
Attention : En cas de montage incorrect, de l'eau peut s'infiltrer
dans l'ARGUS et l'endommager. Montez toujours l'ARGUS avec la
sphère positionnée vers le bas.
Montage de plusieurs ARGUS :
Pour assurer un surveillance sans failles, placez les différents détecteurs
de mouvements de sorte que leurs zones de détection se superposent
(figure %).
Montage de l'ARGUS au plafond :
Figure & :
Pour le montage au plafond, tourner la tête de détection comme suit
(changer de direction en arrivant aux butées) :
– Tourner la tête de détection vers le haut jusqu'à la butée A.
– Tourner la tête de détection dans le sens des aiguilles d'une montre
jusqu'à la butée B.
– Orienter la tête de détection C.
½
44
Attention : En cas de motage incorrect, de l'eau de condensation
peut endommager l'ARGUS :
En cas de plafond en pente, monter l'ARGUS en positionnant
toujours la sphère vers le bas, afin que l'eau de condensation
puisse s'écouler.
Monter l'ARGUS avec un angle d'inclinaison compris en 15° et 90°,
sinon le degré de protection IP 55 n'est plus garanti.
Comment installer le raccordement électrique ?
Montage de l'ARGUS aux coins intérieurs ou extérieurs ou sur des
tuyaux fixes :
Comment installer le raccordement électrique ?
Remarque ! La commutation de charges inductives comme p. ex.
| des transformateurs, des relais, des contacteurs ou des lampes à
tube fluorescent engendre des pics de tension qui peuvent
entraîner un réenclenchement de la charge (« effet de lumière
permanente »). Afin de réduire ces pics de tension, montez un
condensateur (542895) en parallèle sur la charge inductive.
Figure / : A l'aide de l'équerre de montage, réf. 565291/..92/..93, vous
pouvez fixer l'ARGUS au niveau de coins intérieurs ou extérieurs ou sur
des tuyaux fixes. Vous pouvez alors insérer le câble de connexion par
l'arrière de l'appareil, à travers l'équerre de montage.
Modes d'installation possibles (figure )) :
Montage de l'ARGUS sur boîtier de raccordement mural :
A ARGUS branché en permanence :
L'ARGUS surveille en permanence sa zone.
Figure ( :
1 Pour introduire un câble de connexion venant du haut à l'arrière de
l'appareil, placez les quatre écarteurs fournis sur le boîtier de
raccordement mural.
B ARGUS combiné avec interrupteur à deux directions :
Selon la position de l'interrupteur, on obtient le mode lumière
permanente ou le mode automatique.
Introduction du câble de connexion par l'arrière :
– Glisser le passe-fil en caoutchouc fourni A sur le câble de connexion
dénudé.
C ARGUS combiné à un poussoir avec contact normalement fermé :
ARGUS est toujours prêt à fonctionner. Par une pression du
bouton (brève coupure de tension pendant 2 à 3 secondes), vous
enclenchez l'ARGUS pour la durée préréglée. Tout nouveau
mouvement entraîne une prolongation du temps de connexion.
Introduction du câble de connexion par le bas :
– Couper l'insert en caoutchouc fourni B en fonction de l'épaisseur du
câble.
D ARGUS monté en parallèle :
Plusieurs ARGUS peuvent commander un groupe de lampes si la
puissance de raccordement maximale d'un appareil n'est pas
dépassée. Pour cela, vous devez réduire la sensibilité des
appareils. Pour des raisons techniques et fonctionnelles, il est
déconseillé d'installer de grands groupes d'appareils avec plus de
quatre ARGUS.
– Insérer l'insert en caoutchouc dans le boîtier de raccordement mural.
– Introduire le câble de connexion.
2 Monter le boîtier de raccordement mural à l'aide des vis fournies.
Comment installer le raccordement électrique ?
|
Remarque : Protégez l'ARGUS à l'aide d'un disjoncteur de 16 A.
E ARGUS combiné avec interrupteur double allumage :
Selon la position de l'interrupteur, on obtient le mode manuel,
automatique ou « OFF ». En position A, l'éclairage est allumé par
l'ARGUS (mode automatique) et en position B, il est allumé en
continu (mode manuel).
Figure ) :
1 Dénuder les câbles de connexion sur 14 mm.
2 Enficher le conducteur extérieur dans la borne « L ».
3 Enficher le conducteur neutre dans la borne « N ».
F ARGUS monté en parallèle avec minuterie pour cage d'escalier :
L'éclairage est allumé pendant une durée définie soit par l'ARGUS,
soit par la minuterie pour cage d'escalier.
4 Enficher le conducteur extérieur commandé dans la borne « ↓ ».
Un « câblage de passage» vers d'autres consommateurs est autorisé.
45
46
Comment monter la partie supérieure de l'ARGUS ?
Comment mettre l'ARGUS en service ?
Comment monter la partie supérieure de l'ARGUS ?
Réglage de l'ARGUS pour effectuer un test de fonctionnement :
Figure = :
1 Régler le seuil de luminosité (figure >C) sur fonctionnement de
jour (icône soleil/butée droite).
1 Placer la partie supérieure de l'ARGUS sur le boîtier de raccordement
et la fixer à l'aide des deux vis fournies ( A). La liaison électrique
entre le bornier et les broches est effectuée automatiquement
lorsque vous serrez les vis.
Orientation de l'ARGUS :
2 Poser la plaque de recouvrement au niveau des répères latéraux et
la faire glisser vers le bas (B).
1 Figure * : Orienter la tête de détection vers la zone à surveiller
(changer de direction en arrivant aux butées).
Comment mettre l'ARGUS en service ?
2 Aller du bord vers le centre de la zone de détection (figure §) afin de
vérifier que l'ARGUS enclenche le consommateur et l'affichage des
fonctions comme souhaité.
Figure ? :
1 Appliquer la tension d'alimentation.
2 Régler la durée d'allumage (figure >D) sur 1 seconde (butée
gauche).
Réglage de la sensibilité :
Le consommateur est allumé pour env. 10 s ou pour la durée réglée.
L'affichage des fonctions s'allume durant env. 10 secondes.
Vous pouvez régler en continu jusqu'à quelle distance (max.16 m)
l'ARGUS doit détecter des mouvements (figure >E).
Eléments de commande :
1 Régler la sensibilité (figure :).
Effectuer tous les réglages comme sensibilité ou durée d'allumage au
moyen des éléments de commande de l'ARGUS qui sont protégés sous
la plaque de recouvrement. Pour l'ouvrir :
Réglage du seuil de luminosité :
1 Soulever la plaque de recouvrement jusqu'à la butée (env. 5 mm) et
la retirer.
Affichages et éléments de commande de l'ARGUS :
Ici (figure >C), vous pouvez régler en continu le seuil de luminosité
ambiante à partir duquel des mouvements doivent être reconnus comme
tels et la commutation doit être déclenchée.
1 Réglage du seuil de luminosité (figure :) :
– Butée droite (icône soleil) : en fonctionnement de jour et de nuit (env.
1 000 lux), tous les mouvements dans la zone de détection sont
détectés, indépendamment de la luminosité extérieure.
Figure > :
A Affichage des fonctions : s'allume à chaque mouvement détecté
B Capteur de luminosité : ne doit pas être recouvert
– Butée gauche (icône lune) : en fonctionnement de nuit (env. 3 lux),
les mouvements sont uniquement détectés lorsqu'il fait nuit.
C Régler le seuil de luminosité
D Régler la durée d'allumage
Réglage de la durée d'allumage :
E Régler la sensibilité
Vous pouvez régler la durée pendant laquelle le consommateur raccordé
à l'ARGUS doit rester allumé (figure >D). Lorsque l'ARGUS détecte un
mouvement, le consommateur s'allume et reste allumé pour la durée
réglée. Chaque mouvement enregistré redémarre la durée d'allumage..
F Mode radio : pour relier des émetteurs radio (voir notice
d'utilisation du module radio, réf. 565495)
47
48
Comment masquer certaines zones ?
Remarque : Après le déclenchement du consommateur, l'ARGUS
| ignore l'interrupteur crépusculaire. Si le détecteur de mouvements
ne s'éteint plus, c'est probablement dû au fait que l'ARGUS
détecte en permanence de nouveaux mouvements, il redémarre
donc toujours la durée d'allumage.
Caractéristiques techniques
Caractéristiques techniques
½
1 Régler la durée d'allumage (figure _) :
– Butée gauche : durée d'allumage env. 1 s.
Attention ! Fonctionnement possible uniquement avec des
tensions de réseau sinusoïdales. Les variateurs à fermeture en
phase ou convertisseurs continu-alternatif à courbe de tension
angulaire ou trapézoïdale endommagent l'appareil !
Tension du réseau :
CA 230 V ±10 %, 50 Hz
Protéger l'ARGUS à l'aide d'un
disjoncteur de 16 A.
Courant de commutation
max. :
Puissance nominale :
Lampes à incandescence
CA 230 V :
Lampes halogènes CA
230 V :
Lampes à tube
fluorescent CA 230 V :
Charge capacitive :
Transformateurs :
Consommation propre :
Bornes de raccordement :
16 A, CA 230 V, cos ϕ = 1
– Butée droite : durée d'allumage env. 8 min.
Comment masquer certaines zones ?
Si des sources de perturbations (comme p. ex. des arbres, des buissons
ou des sources lumineuses) se trouvent dans le champ de détection de
l'ARGUS et déclenchent involontairement le consommateur raccordé,
vous avez la possibilité de les masquer à l'aide des segments fournis
(figure • :
1 Poser exactement les segments sur les zones de la tête de détection
(A) qui doivent être masquées et ne pas être surveillées, et
appuyez-les sur la tête de détection (B).
|
Remarque : Le capteur crépusculaire C situé dans la zone frontale
ne doit pas être recouvert par les segments. En effet, ceci réduit la
sensibilité à la lumière.
Diamètre extérieur d'un
câble :
Interface :
Zone de détection :
Portée :
Nombre de niveaux :
49
50
max. 2 000 W
max. 2 000 W
max. 1 200 W, non compensées
max. 35 µF
max. 600 VA
<1W
pour conducteurs rigides de 2 x 1,5 mm2
ou 2 x 2,5 mm2, à dénuder sur une
longueur de 14 mm
max. 14,5 mm
pour extension avec un module radio
(565495), pour liaison sans fil de plusieurs
appareils
220°
max. 16 m
7
Caractéristiques techniques
Nombre de zones :
Hauteur de montage
minimale :
Hauteur de montage
recommandée :
Sensibilité :
Capteur de luminosité :
Durée d'allumage :
Ecco cosa è possibile fare con ARGUS 220 Connect
Ecco cosa è possibile fare con ARGUS 220 Connect
112 avec 448 segments de commutation
1,7 m
ARGUS 220 Connect (di seguito denominato ARGUS) è un rivelatore di
movimento elettronico per interni ed esterni. Rileva fonti di calore mobili,
ad es. persone, entro un determinato raggio d'azione (figura !):
2,5 m
A Zona di sicurezza interna:
campo di controllo 360°, raggio circa 4 m.
réglable en continu
réglable en continu de l'extérieur
d'env. 3 à 1 000 lux,
réglable de l'extérieur sur 6 niveaux,
d'env. 1 s à env. 8 min.
B Zona di sicurezza centrale:
angolo di rilevamento 220°, campo di rilevamento circa 9 m x
18 m.
C Zona di sicurezza esterna:
angolo di rilevamento 220°, campo di rilevamento circa 16 m x
28 m.
Possibilité de réglage de
la tête de détection
Montage mural :
9° vers le haut, 24° vers le bas, 12° vers la
droite/gauche, ± 12° axialement
Montage au plafond : 4° vers le haut, 29° vers le bas, 25° vers la
droite/gauche, ± 8,5° axialement
Degré de protection :
IP 55 sous un angle d'inclinaison compris
ente 15° et 90°
Directives européennes : directive basse tension 73/23/CEE,
directive CEM 89/336/CEE.
Avvertenza: I raggi d'azione indicati sono valori medi con un'altezza
| di montaggio di 2,5 m e quindi devono essere considerati valori di
riferimento. Il raggio d'azione può oscillare molto in caso di
temperature variabili.
ARGUS attiva le utenze allacciate nel momento in cui rileva un
movimento. Questi possono essere carichi ohmici (ad es. lampade a
incandescenza ed alogene 230 V), carichi capacitivi (ad es. trasformatori
elettronici) o carichi induttivi (ad es. lampade alogene a basso voltaggio
con trasformatore induttivo).
Le varianti di allacciamento possibili sono descritte al paragrafo „Come
installare l'allacciamento elettrico“, A – F.
Dotando inoltre ARGUS di un modulo radio per rivelatore di movimento
ARGUS 220 (565495), è possibile collegare più ARGUS 220 Connect o
ARGUS 220 Timer senza fili. Il rilevamento di un movimento da parte di
uno dei rivelatori di movimento viene trasmesso attraverso il modulo
radio a tutti gli altri rivelatori di movimento collegati, i quali attivano le
utenze a loro collegate.
51
52
Come scegliere il luogo di installazione
Avvertenza: ARGUS non è concepito quale componente di un
| impianto di allarme in quanto è alimentato dalla rete e in caso di
Come installare ARGUS
Come installare ARGUS
interruzione e successivo ripristino della tensione di rete attiva il
segnalatore di allarme allacciato, indipendentemente dalla
rilevazione di un movimento (falso allarme).
Come scegliere il luogo di installazione
Figura „:
A Altezza di installazione: tra 2 m e 3 m, ottimale 2,5 m, su base
piana e fissa.
Utilizzando il modulo radio nel montaggio su una parete esterna,
fare attenzione a che ARGUS non sia collocato all'altezza di un
solaio, poiché i segnali radio potrebbero risultare fortemente
indeboliti e non raggiungere i ricevitori. Per ulteriori informazioni in
merito consultare il manuale radio della Merten.
B Distanza da fonti di disturbo ottico: circa 5–6 m.
C Se le lampade commutate si trovano nel campo di rilevamento di
ARGUS, la distanza minima tra ARGUS e le lampade dovrebbe
essere almeno 5 m. Non montare le lampade al di sotto, bensì al
di sopra di ARGUS. Altrimenti utilizzate i segmenti per limitare il
raggio d'azione (vedere paragrafo „Come limitare i singoli campi“).
¼
Pericolo di morte a causa della corrente elettrica.
Il montaggio e l'allacciamento di ARGUS devono essere eseguiti
esclusivamente da elettricisti specializzati. Attenersi alle norme in
vigore.
½
Attenzione: In caso di montaggio errato può entrare acqua
all'interno di ARGUS e danneggiarlo. Montare ARGUS sempre con
la sfera rivolta verso il basso.
Montaggio di più ARGUS
Per assicurare una sorveglianza completa, posizionare i singoli rivelatori
di movimento in modo da ottenere un'intersezione dei loro percorsi del
raggio (figura %).
Montaggio a soffitto di ARGUS
Figura &:
Per il montaggio a soffitto ruotare come di seguito la testa del sensore
(cambiare il senso di rotazione alle battute di fine corsa):
– ruotare verso l'alto la testa del sensore fino alla battuta d'arresto A.
– ruotare in senso orario la testa del sensore fino alla battuta d'arresto
B.
– allineare la testa del sensore C.
Per ottenere una rilevazione di movimento ottimale montare ARGUS
lateralmente rispetto alla direzione di marcia (figura §).
ARGUS ha il grado di protezione IP 55 ed è quindi adatto anche agli
esterni. Al fine di evitare l'attivazione dell'illuminazione a causa di influssi
ambientali, si deve collocare ARGUS in un luogo protetto da pioggia e da
luce solare diretta (ad es. le gocce di pioggia, che cadono sulla lente,
possono causare la commutazione del rivelatore di movimento) (figura
$).
½
Attenzione: in caso di montaggio errato, l'acqua di condensa può
danneggiare ARGUS.
In caso di soffitti inclinati montare ARGUS sempre solo con la sfera
verso il basso in modo da consentire il deflusso della condensa.
Montare ARGUS con un angolo d'inclinazione compreso tra 15° e
90°, altrimenti non è più garantito il grado di protezione IP 55.
Montaggio di ARGUS su angoli interni/esterni o tubi fissi
Figura /: Con il supporto di montaggio art. n. 565291/..92/..93 è
possibile fissare ARGUS su angoli interni/esterni o su tubi fissi. Il cavo di
collegamento viene fatto passare nell'apparecchio da dietro attraverso il
supporto di montaggio.
Per ulteriori avvertenze leggere il paragrafo “Rivelatore di movimento
ARGUS“ delle „Informazioni tecniche Merten“.
53
54
Come installare l'allacciamento elettrico
Come installare l'allacciamento elettrico
Possibili modi di installazione (figura )):
Montaggio di ARGUS su scatola di allacciamento da parete:
Figura (:
A ARGUS fisso alla rete:
ARGUS sorveglia costantemente il proprio campo.
1 Per infilare un cavo di allacciamento che proviene dall'alto dal retro
nell'apparecchio, applicare sulla scatola di collegamento da parete i
quattro distanziatori compresi nella fornitura.
B ARGUS combinato con deviatore:
A seconda della posizione dell'interruttore si ha funzionamento a
luce costante o automatico.
Far passare da dietro il cavo di collegamento:
– Spingere l'isolatore passante in gomma A compreso nella fornitura
sul cavo di collegamento scoperto.
C ARGUS combinato con contatto di apertura:
ARGUS è sempre pronto all'uso. Premendo un tasto (breve
interruzione della tensione per 2-3 sec.), ARGUS si attiva per il
tempo impostato. Ogni altro movimento prolunga la durata della
commutazione.
Far passare da sotto il cavo di collegamento:
– Tagliare l'inserto in gomma B a seconda del diametro del cavo.
– Inserire nella scatola di allacciamento da parete l'inserto in gomma
D ARGUS in parallelo:
Più ARGUS possono commutare un gruppo lampade, se non viene
superato il potere di apertura massimo di un apparecchio. A tal fine
è necessario ridurre la sensibilità degli apparecchi. La creazione di
grandi gruppi di apparecchi con più di quattro ARGUS è
svantaggiosa dal punto di vista tecnico e della funzionalità.
– Far passare il cavo di collegamento
2 Montare la scatola di allacciamento da parete con le viti comprese
nella fornitura.
Come installare l'allacciamento elettrico
Avvertenza: Proteggere ARGUS mediante un interruttore
E ARGUS combinato con commutatore unipolare:
A seconda della posizione dell'interruttore si ha funzionamento a
luce costante o automatico oppure “OFF”. In posizione A la
lampada viene accesa dall'ARGUS (funzionamento automatico),
mentre in posizione è B costantemente in funzionamento
manuale.
| automatico da 16 A.
Figura ):
1 Scoprire 14 mm del cavo di collegamento.
2 Inserire il conduttore esterno nel morsetto „L”.
3 Inserire il conduttore neutro nel morsetto „N”.
F ARGUS in parallelo con dispositivo automatico luce scale:
Le lampade vengono commutate o dall'ARGUS o dal dispositivo
automatico luce scale per un tempo determinato.
4 Inserire il conduttore esterno attivato nel morsetto „↓“.
È ammesso un „cablaggio passante” verso altre utenze.
Avvertenza! La commutazione di carichi induttivi, come ad es.
| trasformatori, relè, contattori e lampade fluorescenti comporta dei
picchi di tensione che possono provocare la riattivazione ("effetto
luce fissa"). La commutazione parallela di un condensatore
(542895) per il carico induttivo consente di ridurre i picchi di
tensione.
55
56
Come installare la parte superiore di ARGUS
Messa in funzione di ARGUS
Come installare la parte superiore di ARGUS
Impostazione di ARGUS per il test di funzionamento
Figura =:
1 Impostare la soglia di luminosità (figura >C) sul funzionamento
diurno (simbolo del sole / battuta di arresto a destra).
1 Applicare la parte superiore di ARGUS alla scatola di allacciamento e
fissarla con le due viti comprese nella fornitura (figura A). Il
collegamento elettrico tra la morsettiera e le spine si crea
automaticamente stringendo le viti.
2 Impostare la durata della commutazione (figura >D) su 1 sec.
(battuta di arresto a sinistra).
Allineamento di ARGUS
2 Applicare la piastra di copertura in corrispondenza delle marcature
laterali e spingerla verso il basso (B).
1 Figura *: Allineare la testa del sensore sul campo da sorvegliare
(cambiare il senso di rotazione alle battute di fine corsa).
Messa in funzione di ARGUS
2 Entrare dal margine nel campo di controllo (figura §) per controllare
se ARGUS commuta come desiderato l'utenza e l'indicatore di
funzionamento.
Figura ?:
1 Attivazione della tensione di alimentazione.
Impostazione della sensibilità:
L'utenza si accende per circa 10 sec. o per il tempo impostato.
L'indicatore di funzionamento si illumina per circa 10 sec.
Qui (figura >E) è possibile impostare in continuo fino a quale distanza
ARGUS può riconoscere i movimenti (fino al max. 16 m).
Utilizzo degli elementi di comando
1 Impostazione della sensibilità (figura ;):
Tutte le impostazioni quali sensibilità o durata della commutazione
vengono eseguite mediante gli elementi di comando di ARGUS, che si
trovano protetti sotto la piastra di copertura. Per aprire:
Impostazione della soglia di luminosità
1 spingere la piastra di copertura verso l'alto fino alla battuta d'arresto
percepibile (circa 5 mm) e staccarla.
Elementi di comando e visualizzazione di ARGUS
Qui (figura >C) è possibile regolare a partire da quale grado di
luminosità dell'ambiente i movimenti dovranno essere registrati come
tali con conseguente attivazione del rilevatore.
1 Impostazione della soglia di luminosità (figura :):
– Battuta di arresto a destra (simbolo del sole): funzionamento diurno e
notturno (circa 1000 lux), vengono captati tutti i movimenti all'interno
del campo di rilevamento, indipendentemente dalla luminosità
esterna.
Figura >:
A Indicatore di funzionamento: si illumina ad ogni movimento rilevato
B Sensore luminosità: non deve essere coperto
– Battuta di arresto a sinistra (simbolo della luna): funzionamento
notturno (circa 3 lux), i movimenti vengono rilevati solo nell'oscurità.
C Impostazione della soglia di luminosità
D Impostazione della durata della commutazione
Impostazione della durata della commutazione
E Impostazione della sensibilità
È qui possibile (figura >D) impostare per quanto tempo l'utenza
collegata ad ARGUS deve rimanere accesa. Se ARGUS rileva un
movimento, l'utenza viene attivata e resta accesa per tutta la durata del
F Funzionamento radio: per il collegamento di trasmettitori radio
(vedere le istruzioni d'uso del modulo radio art. n. 565495)
57
58
Come limitare i singoli campi
tempo impostato. Ad ogni movimento registrato, la durata di
commutazione riparte da capo.
|
Dati tecnici
Dati tecnici
Avvertenza: Dopo l'attivazione dell'utenza, ARGUS ignora
l'interruttore crepuscolare. Quando il rivelatore di movimento non si
spegne, è probabile che ciò sia dovuto al continuo rilevamento da
parte di ARGUS di nuovi movimenti, per cui la durata della
commutazione ricomincia sempre da capo.
½
Attenzione! Funzionamento possibile solo con tensioni di rete
sinusoidali. I dimmer con ritardo di fase o gli invertitori con
alimentazione di tensione rettangolare o trapezoidale danneggiano
l'apparecchio!
Tensione di rete:
AC 230 V ±10%, 50 Hz.
Proteggere ARGUS mediante un
interruttore automatico da 16 A.
Tensione max. di
attivazione:
Potenza nominale:
Lampade a
incandescenza AC 230V:
Lampade alogene AC
230V:
Lampade fluorescenti AC
230V:
Carico capacitivo:
Carico trasformatore:
Consumo proprio:
Morsetti di
allacciamento:
Diametro esterno di un
cavo:
Interfaccia:
16 A, AC 230 V, cos ϕ = 1
1 Impostazione della durata della commutazione (figura _):
– Battuta di arresto a sinistra: durata di attivazione circa 1 sec.
– Battuta di arresto a destra: durata di attivazione circa 8 min.
Come limitare i singoli campi
Se nel campo di rilevamento di ARGUS si trovano delle fonti di disturbo
come ad es. alberi, cespugli o fonti luminose, che determinano la
commutazione indesiderata dell'utenza, è possibile limitare questi
disturbi applicando i segmenti compresi nella fornitura (figura •):
1 Applicare i segmenti esattamente in corrispondenza dei campi della
testa del sensore (A), che devono essere esclusi dalla sorveglianza,
e fissarli alla testa del sensore (B).
Avvertenza: Il sensore crepuscolare C nel campo frontale non
| deve venire coperto da alcun segmento, in caso contrario si riduce
la sensibilità alla luce.
Campo di controllo:
Raggio d'azione:
Numero dei livelli:
Numero delle zone:
59
60
max. 2000 W
max. 2000 W
max. 1200 W, senza compensazione
max. 35 µF
max. 600 VA
<1W
per conduttori rigidi 2 x1,5 mm2 o 2 x 2,5
mm2, lunghezza di spelatura 14 mm
max. 14,5 mm
per l'espansione mediante un modulo radio
(565495) per il collegamento senza fili di
più dispositivi
220°
max. 16 m
7
112 con 448 settori
Dati tecnici
Altezza di montaggio
minima:
Altezza di montaggio
consigliata:
Sensibilità:
Sensore di luminosità:
Detta kan ARGUS 220 Connect användas till
Detta kan ARGUS 220 Connect användas till
1,7 m
ARGUS 220 Connect (nedan kallad ARGUS) är en elektronisk
rörelsedetektor för inom- och utomhusbruk. Den registrerar rörliga
värmekällor, t.ex. personer som befinner sig inom ett särskilt område (bild
!):
2,5 m
regolabile in continuo
regolabile in continuo dall'esterno,
circa 3–1000 lux,
regolabile dall'esterno su 6 livelli,
da circa 1 sec. a circa 8 min,
A Inre säkerhetszon:
Övervakningsområde 360°, radie ca 4 m.
Durata della
commutazione:
Possibilità di regolazione
della testa del sensore
Montaggio a parete:
9° su, 24° giù, 12° destra/sinistra, ±12°
assiale
Montaggio a soffitto: 4° su, 29° giù, 25° destra/sinistra, ±8,5°
assiale
Tipo di protezione:
IP 55 ad un angolo di inclinazione da 15° a
90°
Direttive CE:
direttiva sulla bassa tensione 73/23/CEE,
direttiva sulla compatibilità
elettromagnetica 89/336/CEE
B Säkerhetszon i mitten:
Avkänningsvinkel 220°, övervakningsområde ca 9 m x 18 m.
C Yttre säkerhetszon:
Avkänningsvinkel 220°, övervakningsområde ca 16 m x 28 m.
Observera: De angivna räckvidderna gäller för genomsnittliga
| förhållanden vid en monteringshöjd på 2,5 m och är riktvärden.
Räckvidden kan variera mycket beroende på olika temperaturer.
När en rörelse registreras tillkopplar ARGUS de anslutna förbrukarna. Den
kan koppla resistiva laster (t.ex. 230-V-glöd- och halogenlampor),
kapacitiva laster (t.ex. elektroniska transformatorer) eller induktiva laster
(t.ex. lågvoltshalogenlampor med induktiv transformator).
Möjliga anslutningsvarianter finns i avsnittet "Så installeras den elektriska
anslutningen“, A – F..
Om ARGUS utrustas med en radiomodul för ARGUS 220 rörelsedetektor
(565495) kan flera ARGUS 220 Connect eller ARGUS 220 Timer kopplas
ihop trådlöst. Om en rörelsedetektor registrerar en rörelse skickas en
signal via radiomodulen till alla anslutna rörelsedetektorer eller
mottagare. Dessa tillkopplar sedan de anslutna förbrukarna.
Observera: ARGUS är inte lämplig som komponent i en
| larmanläggning, då den är ansluten till elnätet. Efter
spänningsavbrott och -återkomst aktiveras detektorn, även om den
inte registrerat något objekt (falskt alarm).
61
62
Val av monteringsplats
Så monteras ARGUS
Val av monteringsplats
Så monteras ARGUS
Bild „:
¼
Livsfara p.g.a. elektrisk ström.
ARGUS får endast monteras och anslutas av elektriker. Följ alla
nationella bestämmelser.
½
Observera: Om ARGUS monteras felaktigt kan vatten tränga in och
skada den. Montera alltid ARGUS med kulan nedåt.
A Monteringshöjd: mellan 2 m och 3 m, optimalt 2,5 m, på ett fast
och jämnt underlag.
Om en radiomodul monteras och används på en yttervägg, måste
man se till att ARGUS inte monteras i höjd med ett bjälklag
eftersom radiosignalerna kan försvagas kraftigt och eventuellt inte
når mottagaren. Ytterligare information finns i "Allt du behöver veta
om trådlös styrning".
B Avstånd till de optiska störningskällorna: ca 5–6 m.
C Om en tänd lampa befinner sig i ARGUS övervakningsområde,
måste avståndet från ARGUS till lampan vara minst 5 m. Montera
inte lampan under utan ovanför ARGUS. Använd istället
linsavskärmningar för att skärma av (se avsnitt "Så skärmar man av
enstaka områden“).
Montera flera ARGUS:
Placera de enskilda rörelsedetektorerna så att övervakningsområdena
överlappar varandra (bild %) för att garantera en heltäckande
övervakning.
Montera ARGUS i taket:
Bild &:
Vrid enligt följande för att montera sensorhuvudet i taket (vrid åt andra
hållet vid ändlägena):
Montera ARGUS på sidan mot gångriktningen (bild §) för en optimal
rörelseregistrering.
– Vrid sensorhuvudet uppåt till anslag A.
ARGUS har kapslingsklass IP 55 och kan därför också användas utomhus.
Placera ARGUS så att den skyddas så bra som möjligt mot regn och direkt
solljus. Belysningen kan annars tändas på grund av väderförhållanden
(t.ex. kan regndroppar som rinner över linsen få rörelsedetektorn att
reagera) (bild $).
– Justera sensorhuvudet C.
– Vrid sensorhuvudet medurs till anslag B.
½
Fler tips finns i "Mertens tekniska information", avsnitt "ARGUS
rörelsedetektorer".
Observera: Vid felaktig montering kan kondensvattnet skada
ARGUS:
På sluttande tak ska ARGUS alltid monteras med kulan neråt, så att
kondensvattnet kan rinna av.
Montera ARGUS i en lutningsvinkel mellan 15° och 90°, annars är
kapslingsklass IP 55 inte längre garanterad.
Montera ARGUS på inner-/ytterhörnet eller på fasta rör:
Bild /: ARGUS kan fästas på inner-/ytterhörnet eller på fasta rör med
monteringsvinkeln art.nr 565291/..92/..93. Anslutningsledningen kan
föras in i apparaten bakifrån med monteringsvinkeln.
Montera ARGUS på bakstycket:
Bild (:
63
64
Så installeras den elektriska anslutningen
Så monteras ARGUS-överdelen
1 För införing av en anslutningsledning uppfrån på apparatens baksida
ska de fyra bifogade distansklossarna sättas på bakstycket.
B ARGUS kombinerad med trappströmställare:
Beroende på strömställarläge fås drift med konstant ljus eller
automatikdrift.
För in anslutningsledningen bakifrån:
– Skjut den bifogade gummigenomföringen A över den avskalade
anslutningsledningen.
C ARGUS kombinerad med brytande kontakt:
ARGUS är ständigt driftklar. Genom att trycka på tryckknappen
(kort spänningsavbrott 2–3 sekunder) tillkopplas ARGUS för den
inställda tiden. Alla ytterligare rörelser förlänger kopplingstiden.
För in anslutningsledningen underifrån:
– Skär upp den bifogade gummiinsatsen B så att den passar till
kabelns tjocklek.
D ARGUS parallell:
Flera ARGUS kan styra en lampgrupp om den maximala
bryteffekten hos en lampa inte överskrids. Lampornas känslighet
måste då minskas. Det är varken tekniskt eller praktiskt lämpligt
att skapa lampgrupper med fler än fyra ARGUS.
– Sätt in gummiinsatsen i bakstycket
– Skjut igenom anslutningsledningen
2 Montera bakstycket med de bifogade skruvarna.
E ARGUS kombinerad med kronströmställare:
Beroende på strömställarläge fås manuell drift, automatikdrift eller
“FRÅN”. I läge A styrs lampan via ARGUS (automatik) och i läge B
konstant (manuell).
Så installeras den elektriska anslutningen
|
Observera: Säkra ARGUS med en 10/16-A-säkring.
Bild ):
F ARGUS parallell med trappautomat:
Antingen tänder ARGUS eller trappautomaten ljuset för en
bestämd tid.
1 Skala av anslutningsledningarna 14 mm.
2 Stick in ytterledaren i klämma "L".
3 Stick in nolledaren i klämma "N".
Så monteras ARGUS-överdelen
4 Stick in den kopplade ytterledaren i klämma "↓“.
Bild =:
"Genomförbindning" till andra förbrukare är tillåten.
|
Observera! Vid koppling av induktiva laster som t.ex.
transformatorer, relän, skydd eller lysrör uppstår spänningsspikar
som kan leda till att lasten tillkopplas igen ("permanentljuseffekt").
Parallellkoppla en kondensator (542895) till den induktiva lasten för
att minska dessa spänningsspikar.
1 Sätt på ARGUS-överdelen på anslutningsboxen och skruva fast den
med de båda bifogade skruvarna (A). Den elektriska förbindningen
från klämblocket till stiften skapas automatiskt när överdelen skruvas
fast.
2 Sätt på täckplattan på sidomarkeringarna och tryck ned den (B).
Möjliga typer av installation (bild )):
A ARGUS ständigt ansluten till nätet:
ARGUS övervakar ständigt sitt område.
65
66
Så här tas ARGUS i drift
Så här tas ARGUS i drift
Så här tas ARGUS i drift
Inställning av känslighet:
Bild ?:
1 Tillkoppla försörjningspänningen.
Här (bild >E) kan man steglöst ställa in räckvidden för ARGUS
rörelseregistrering (max. 16 m).
1 Inställning av känslighet (bild :):
Förbrukaren tillkopplas i ca 10 sekunder eller under den inställda tiden.
Funktionsindikeringen lyser i ca 10 s.
Inställning av ljusnivåtröskeln:
Här (bild >C) kan man ställa in steglöst fr.o.m. vilken ljusnivå som
rörelser ska registreras och därmed utlösa en kopplingsfunktion.
Använd manöverelementen:
Alla inställningar som känslighet eller kopplingstid utförs på
manöverelementen på ARGUS som sitter skyddade under täckplattan.
För att öppna:
1 Ställ in ljusnivåtröskeln (bild :):
– Högeranslag (solsymbol): Dag- och nattdrift (ca 1000 Lux), alla
rörelser i övervakningsområdet registreras oberoende av dagsljuset.
1 Skjut upp täckplattan till ändläget (ca 5 mm) och dra av den.
– Vänsteranslag (månsymbol): Nattdrift (ca 3 Lux), rörelser registreras
endast i mörkret.
Indikeringar och manöverelement på ARGUS:
Bild >:
A Funktionsindikering: lyser när en rörelse har registrerats
Inställning av kopplingstiden:
B Ljussensor får inte täckas över
Här (bild >D) kan man ställa in hur länge den förbrukare som tillkopplas
av ARGUS skall vara tänd. När ARGUS registrerar en rörelse aktiveras
förbrukaren och är tänd tills den här inställda tiden har gått ut. Varje
rörelse som registreras startar om kopplingstiden.
C Inställning av ljusnivåtröskeln
D Inställning av kopplingstiden
E Inställning av känslighet
Observera: Efter att förbrukaren har tillkopplats ignorerar ARGUS
F Radiodrift: för anslutning av radiosändare (se bruksanvisningen till
radiomodulen art.nr 565495)
Ställ in ARGUS för funktionstestet:
| skymningsreläet. Om rörelsedetektorn inte längre slår ifrån, beror
det antagligen på att ARGUS hela tiden registrerar nya rörelser så
att kopplingstiden hela tiden startar om.
1 Ställ in kopplingstiden (bild _):
1 Ställ in ljusnivåtröskeln (bild >C) på dagdrift (solsymbol/
högeranslag).
– Vänsteranslag: Kopplingstid ca 1 s
– Högeranslag: Kopplingstid ca 8 min
2 Ställ in kopplingstiden (bild >D) på 1 sekund (vänsteranslag).
Inställning av ARGUS:
1 Bild *: Rikta in sensorhuvudet mot området som ska övervakas
(vrid åt andra hållet vid ändläget).
2 Gå in i övervakningsområdet (bild §) för att kontrollera om ARGUS
tänder lampan och aktiverar funktionsindikeringen enligt önskemål.
67
68
Så skärmar man av enstaka områden
Så skärmar man av enstaka områden
Gränssnitt:
Om det finns störande hinder som t.ex. träd, buskar eller ljuskällor i
ARGUS övervakningsområde som av misstag kan utlösa förbrukaren, kan
dessa skärmas av med de medföljande segmenten (bild •):
1 Placera segmenten på de områden (A) på sensorhuvudet som ska
skärmas av från övervakning och tryck på dem på sensorhuvudet
(B).
Observera: Skymningsreläet C i främre området får inte täckas
| över, eftersom detta gör att ljuskänsligheten reduceras.
Tekniska data
½
Observera! Drift är endast möjlig med sinusformad nätspänning.
Framkantsdimmer eller växelriktare med rektangulär eller
trapetsformad spänning skadar apparaten!
Nätspänning:
Tekniska data
Övervakningsområde:
Räckvidd:
Antal nivåer:
Antal zoner:
Min. monteringshöjd:
Rekommenderad
monteringshöjd:
Känslighet:
Ljussensor:
Kopplingstid:
Inställningsmöjligheter
för sensorhuvudet
Väggmontage:
230 V AC ±10%, 50 Hz.
ARGUS måste säkras med en 10/16Asäkring.
Takmontage:
Max. brytström:
16 A, 230 V AC, cos ϕ = 1
Märkeffekt:
Glödlampor 230V AC:
max. 2000 W
Halogenlampor 230V AC: max. 2000 W
Halogenlampor 230V AC:
max. 1200 W, okompenserat
Kapacitiv last:
max. 35 µF
Transformatorlast:
max. 600 VA
Egenförbrukning:
<1W
Anslutningsklämmor:
för 2 x 1,5 mm2 eller 2 x 2,5 mm2 stel
ledare, avisoleringslängd 14 mm
Utvändig diameter för en
ledning:
max. 14,5 mm
Kapslingsklass:
EU-direktiv:
69
70
för utökning med en radiomodul (565495)
för trådlös förbindelse med flera apparater
220°
max. 16 m
7
112 med 448 kopplingssegment
1,7 m
2,5 m
Steglöst inställbar
steglös inställning utifrån,
ca 3–1000 Lux.
inställning utifrån i 6 steg,
mellan ca 1 s och 8 min
9° uppåt, 24° nedåt, 12° höger/vänster,
±12° axialt
4° uppåt, 29° nedåt, 25° höger/vänster,
±8,5° axialt
IP 55 vid en lutningsvinkel på 15° till 90°
lågspänningsdirektivet 73/23/EEG, EMCdirektivet 89/336/EEG