1
WIRELESS-N
ACCESS POINT
QUICK INSTALL GUIDE
MODELS 524704,
524728 & 524735
ENGLISH
DEUTSCH
ESPAÑOL
FRANÇAIS
POLSKI
ITALIANO
Model 524704: 150N
INT-524704/524728/524735-QIG-ML1-0809-02
Wireless N Access Point • Quick Install Guide
English
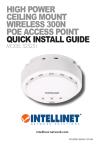
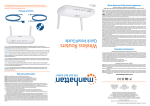
Thank you for purchasing this INTELLINET NETWORK SOLUTIONS™ Wireless N Access
Point: Model 524704 (150N); 524728 (300N); or 524735 (300N PoE).
This quick install guide presents basic installation steps. For operation details and
specifications, refer to the user manual on the included CD or at www.intellinetnetwork.com.
CONNECTIONS
1. Use the included Ethernet cable to connect your router or switch/hub to the LAN
port on the back panel of the access point.
2. Attach the antenna(s). NOTE: Model 524704 features only one antenna.
3. Connect the A/C power adapter to a wall socket, then connect it
to the power socket of the access point. NOTE: Model 524735 allows
you to power the access point through the LAN port when connected
to an IEEE802.3af PoE-compliant power source.
4.
Check all LEDs on the front panel. The PWR and LAN LEDs should both be on to
indicate the access point is powered and connected properly. The WLAN LED will
light when WPS mode is enabled (refer to the user manual); both the LAN and WLAN
LEDs will blink data is transmitted.
OPERATION
1.
2.
Enter http://192.168.2.1 on your Web browser to display a login window for the Web
management interface, where all functions
and settings for the access point are
configured.
User name:
Enter “admin” for username and “1234” for
Password:
password, then click “OK” to display the
home page of the interface. Refer to the user
manual for further instructions.
2
ENGLISH
Wireless N Access Point • Kurzanleitung
Deutsch
Vielen Dank für den Kauf des INTELLINET NETWORK SOLUTIONS™ Wireless N Access
Points: Modell 524704 (150N); 524728 (300N); oder 524735 (300N PoE).
Diese Kurzanleitung zeigt die grundlegenden Installationsschritte. Details zur Anwendung
sowie die Spezifikationen finden Sie im Benutzerhandbuch auf der beiliegenden CD
und auf www.intellinet-network.com.
ANSCHLÜSSE
1. Schließen Sie Ihren Router oder Switch/Hub über das beiliegende Ethernet-Kabel an
den LAN-Port auf der Rückseite des Access Points an.
2. Bringen Sie den/die Antenne(n) an. HINWEIS: Modell 524704 enthält nur eine Antenne.
3. Schließen Sie das Netzteil an eine Steckdose und an die Strombuchse
des Access Points an. HINWEIS: Modell 524735 ermöglicht die
Stromversorgung des Access Points über den LAN-Port, wenn dieser
an eine IEEE802.3af PoE-kompatible Stromquelle angeschlossen ist.
4.
Prüfen Sie alle LEDs auf der Vorderseite. Die PWR- und LAN-LEDs sollten beide
leuchten und zeigen so die ordnungsgemäße Stromversorgung und Verbindung
an. Die WLAN-LED leuchtet, wenn der WPS-Modus aktiviert ist (siehe Benutzerhandbuch); die LAN- und WLAN-LEDs blinken, wenn Daten übertragen werden.
BETRIEB
1.
2.
Geben Sie http://192.168.2.1 in die Adresszeile Ihres Webbrowsers ein, um ein LoginFenster aufzurufen. Über dieses gelangen Sie zur Benutzeroberfläche, auf der Sie
alle Funktionen und Einstelllungen des
Access Points zugreifen können.
Geben Sie “admin” als Benutzernamen und
User name:
“1234” als Passwort ein, dann klicken
Password:
Sie auf “OK”. So gelangen Sie ins
Einstellungshauptmenü. Details hierzu
finden Sie im Benutzerhandbuch.
DEUTSCH
3
Access Point N • Guía de Instalación Rápida
Español
Gracias por comprar el Access Point N de INTELLINET NETWORK SOLUTIONS™, Modelo
524704 (150N); 524728 (300N); o 524735 (300N PoE).
En esta guía de instalación rápida se presentan los pasos básicos para su instalación.
Para detalles de operación y más especificaciones, refiérase al manual de usuario
incluido en el CD o visite www.intellinet-network.com.
CONEXIONES
1. Utilice el cable Ethernet incluido para conectar su router, switch o hub al puerto
LAN en el panel trasero del Access Point.
2. Conecte la(s) antena(s). NOTA: El Modelo 524704 solo tiene una antena.
3. Conecte el cargador a una toma de corriente, después conéctelo al
access point. NOTA: El Modelo 524735 le permite alimentarlo a través
del puerto LAN, cuando este sea conectado a una fuente de
alimentación compatible con PoE - IEEE802.3af.
4.
Verifique todos los LEDs en el panel frontal. Los LEDs PWR y LAN deben estar
encendidos, indicando que el Access Point está conectado adecuadamente. El LED
WLAN se encenderá cuando el modo WPS este activado (refiérase al manual de
usuario); Tanto el LED de LAN como el de WLAN parpadean al transmitir datos.
OPERACIÓN
1.
2.
En su navegador web entre a http://192.168.2.1 para abrir la ventana de inicio de
sesión del Administrador Web, donde puede
configurar todas las funciones y ajustes del
Access Point.
User name:
Ingrese como usuario “admin” y contraseña
Password:
“1234” haga clic en “Aceptar” para mostrar la
página de inicio de la interface. Refiérase al
manual de usuario para más instrucciones.
4
ESPAÑOL
Point d’accès sans fil N • Guide d’installation rapide
Français
Merci d’avoir acheté le Point d’accès sans fil N INTELLINET NETWORK SOLUTIONS™
Modèle 524704 (150N); 524728 (300N); ou 524735 (300N PoE).
Ce guide décrit les bases pour installer le dispositif. Vous trouvez les détails et spécifications dans le manuel utilisateur sur le CD inclus ou sur www.intellinet-network.com.
CONNEXIONS
1. Utilisez le câble Ethernet pour connecter votre routeur ou switch/hub au port LAN
au panneau arrière du point d’accès.
2. Attachez l’(es) antenne(s). REMARQUE: Modèle 524704 contient seulement une antenne.
3. Connectez l’adaptateur secteur C/A à une prise de courant, puis connectez-le à
l’entrée d’alimentation du point d’accès. REMARQUE: Modèle 524735
permet alimenter le point d’accès via le port LAN s’il est branché à une
source d’alimentation compatible PoE IEEE802.3af.
4.
Vérifiez toutes les DELs au panneau avant. Les DELs PWR et LAN devraient être
allumées pour afficher que le point d’accès est alimenté et connecté correctement.
La DEL WLAN s’allume si le mode WPS est activé (veuillez lire le manuel utilisateur);
les DELs LAN et WLAN clignotent si des données sont transmises.
UTILISATION
1.
2.
Saisissez http://192.168.2.1 dans votre navigateur Web, pour afficher une fenêtre de
login pour l’interface de gestion Web où toutes les fonctions et paramètres du point
d’accès peuvent être configurés.
Saisissez “admin” comme nom d’utilisateur
et “1234” comme mot de passe, puis cliquez User name:
sur “OK” pour afficher le menu général de
Password:
l’interface. Veuillez lire le manuel utilisateur
pour plus d’instructions.
FRANÇAIS
5
Access Point Bezprzewodowy N • Instrukcja szybkiej instalacji
Polski
Dziękujemy za zakup Access Pointa Bezprzewodowego N INTELLINET NETWORK
SOLUTIONS™, model 524704 (150 N); 524728 (300 N); lub 524735 (300 N PoE).
Niniejsza instrukcja szybkiej instalacji przedstawia podstawowe kroki potrzebne do
uruchomienia urządzenia. Aby uzyskać szczegółowe informacje techniczne oraz
podręcznik użytkownika, zapoznaj się z zawartością dołączonej płyty CD lub odwiedź
stronę www.intellinet-network.com.
PODŁĄCZENIE
1. Użyj dołączonego kabla Ethernet, aby połączyć router lub przełącznik z portem LAN
na tylnym panelu Access Pointa.
2. Przykręć anteny. UWAGA: Model 524704 posiada tylko jedną antenę.
3. Podłącz zasilacz do sieci elektrycznej, a następnie do gniazda zasilania
Access Pointa. UWAGA: Model 524735 może być zasilany poprzez port
LAN przy użyciu zgodnego ze standardem IEEE802.3af zasilacza PoE.
4.
Sprawdź aktywność diod na przednim panelu urządzenia. Diody PWR oraz LAN powinny
świecić sygnalizując zasilanie oraz poprawne połączenie. Dioda WLAN będzie świecić,
gdy włączona jest funkcja WPS (zapoznaj się z instrukcją użytkownika, aby uzyskać
więcej informacji); diody LAN oraz WLAN będą migać podczas transmisji danych.
OBSŁUGA
1.
2.
W pasek adresu przeglądarki internetowej wpisz adres http://192.168.2.1, aby
wyświetlić okno logowania, a następnie opcje konfiguracyjne urządzenia.
W pole nazwa użytkownika wpisz „admin”, w
pole hasło wpisz „1234”, następnie wciśnij
„OK”. Wyświetlona zostanie strona główna
User name:
urządzenia. Zapoznaj się z instrukcją
Password:
użytkownika, aby uzyskać dodatkowe
informacje.
6
POLSKI
Punto di Accesso Wireless N • Guida rapida all’installazione
Italiano
Grazie per aver scelto il Punto di Accesso Wireless N INTELLINET NETWORK SOLUTIONS™
Wireless N Access Point: Modello 524704 (150N); 524728 (300N); o 524735 (300N PoE).
Questa guida rapida all’installazione fornisce solo i passaggi basilari per l’installazione.
Per ulteriori dettagli e specifiche relativamente al funzionamento, fare riferimento al
manuale d’istruzione incluso nel CD o visitare il sito www.intellinet-network.com.
CONNECTIONS
1. Utilizzare il cavo di rete incluso per collegare il vostro router o switch/hub alla porta
LAN sul pannello posteriore del punto di accesso.
2. Collegare l’antenna(e). NOTA: Il modello 524704 presenta una sola antenna.
3. Collegare l’alimentatore A/C alla presa di corrente, quindi collegarlo alla
presa di alimentazione del punto di accesso. NOTA: Il modello 524735
permette di alimentare il punto di accesso attraverso la porta LAN
quando connesso ad una sorgente conforme IEEE802.3af PoE.
4.
Verificare tutti i LED sul pannello frontale. Il LED PWR e LAN dovrebbero essere per
indicare che il punto di accesso è alimentato e connesso correttamente. Il LED WLAN si
illuminerà quando la modalità WPS è attivata (fare riferimento al manuale d’istruzione);
sia il LED LAN che il LED WLAN lampeggeranno quando i dati sono trasmessi.
FUNZIONAMENTO
1.
2.
Inserire http://192.168.2.1 sul Web browser per visualizzare una finestra di login per
la gestione dell’interfaccia Web, dove tutte le funzioni e le impostazioni per il punto
di accesso sono configurate.
Inserire “admin” come username e “1234”
come password, quindi cliccare “OK” per
User name:
visualizzare l’home page dell’interfaccia. Fare
Password:
riferimento al manuale d’istruzione per
ottenere ulteriori istruzioni.
ITALIANO
7
WASTE ELECTRICAL & ELECTRONIC EQUIPMENT
Disposal of Electric and Electronic Equipment
(applicable in the European Union and other European countries with separate collection systems)
ENGLISH
This symbol on the product or its packaging indicates that this product shall not be treated as household waste.
Instead, it should be taken to an applicable collection point for the recycling of electrical and
electronic equipment. By ensuring this product is disposed of correctly, you will help prevent
potential negative consequences to the environment and human health, which could otherwise
be caused by inappropriate waste handling of this product. If your equipment contains easily
removable batteries or accumulators, dispose of these separately according to your local
requirements. The recycling of materials will help to conserve natural resources. For more
detailed information about recycling of this product, contact your local city office, your household waste
disposal service or the shop where you purchased this product. In countries outside of the EU: If you wish
to discard this product, contact your local authorities and ask for the correct manner of disposal.
DEUTSCH
Dieses auf dem Produkt oder der Verpackung angebrachte Symbol zeigt an, dass dieses Produkt nicht mit
dem Hausmüll entsorgt werden darf. In Übereinstimmung mit der Richtlinie 2002/96/EG des Europäischen
Parlaments und des Rates über Elektro- und Elektronik-Altgeräte (WEEE) darf dieses Elektrogerät nicht
im normalen Hausmüll oder dem Gelben Sack entsorgt werden. Wenn Sie dieses Produkt entsorgen
möchten, bringen Sie es bitte zur Verkaufsstelle zurück oder zum Recycling-Sammelpunkt Ihrer Gemeinde.
ESPAÑOL
Este símbolo en el producto o su embalaje indica que el producto no debe tratarse como residuo doméstico.
De conformidad con la Directiva 2002/96/CE de la UE sobre residuos de aparatos eléctricos y electrónicos
(RAEE), este producto eléctrico no puede desecha se con el resto de residuos no clasificados. Deshágase
de este producto devolviéndolo a su punto de venta o a un punto de recolección municipal para su
reciclaje.
FRANÇAIS
Ce symbole sur Ie produit ou son emballage signifie que ce produit ne doit pas être traité comme un
déchet ménager. Conformément à la Directive 2002/96/EC sur les déchets d’équipements électriques
et électroniques (DEEE), ce produit électrique ne doit en aucun cas être mis au rebut sous forme de
déchet municipal non trié. Veuillez vous débarrasser de ce produit en Ie renvoyant à son point de
vente ou au point de ramassage local dans votre municipalité, à des fins de recyclage.
ITALIANO
Questo simbolo sui prodotto o sulla relativa confezione indica che il prodotto non va trattato come un rifiuto
domestico. In ottemperanza alla Direttiva UE 2002/96/EC sui rifiuti di apparecchiature elettriche ed
elettroniche (RAEE), questa prodotto elettrico non deve essere smaltito come rifiuto municipale misto. Si
prega di smaltire il prodotto riportandolo al punto vendita o al punto di raccolta municipale locale per un
opportuno riciclaggio.
POLSKI
Jeśli na produkcie lub jego opakowaniu umieszczono ten symbol, wówczas w czasie utylizacji nie wolno
wyrzucać tego produktu wraz z odpadami komunalnymi. Zgodnie z Dyrektywą Nr 2002/96/WE w sprawie
zużytego sprzętu elektrycznego i elektronicznego (WEEE), niniejszego produktu elektrycznego nie wolno
usuwać jako nie posortowanego odpadu komunalnego. Prosimy o usuniecie niniejszego produktu
poprzez jego zwrot do punktu zakupu lub oddanie do miejscowego komunalnego punktu zbiórki
odpadów przeznaczonych do recyklingu.
8
WARRANTY INFORMATION
ENGLISH: For warranty information, go to www.intellinet-network.com/warranty.
DEUTSCH: Garantieinformationen finden Sie unter www.intellinet-network.com/warranty.
ESPAÑOL: Si desea obtener información sobre la garantía, visite www.intellinet-network.com/warranty.
FRANÇAIS: Pour consulter les informations sur la garantie, visitez www.intellinet-network.com/warranty.
POLSKI: Informacje dotyczące gwarancji znajdują się na stronie www.intellinet-network.com/warranty.
ITALIANO: Per informazioni sulla garanzia, accedere a www.intellinet-network.com/warranty.
EN MÉXICO: Póliza de Garantía INTELLINET — Datos del importador y responsable ante el consumidor
IC Intracom México, S.A. de C.V. • Av. Interceptor Poniente # 73, Col. Parque Industrial La Joya, Cuautitlan
Izcalli, Estado de México, C.P. 54730, México. • Tel. (55)1500-4500
La presente garantía cubre este producto por 3 años contra cualquier defecto de fabricación en sus
materiales y mano de obra, bajo las siguientes condiciones:
1. Todos los productos a que se refiere esta garantía, ampara su cambio físico, sin ningún cargo para
el consumidor.
2. El comercializador no tiene talleres de servicio, debido a que los productos que se garantizan no
cuentan con reparaciones, ni refacciones, ya que su garantía es de cambio físico.
3. La garantía cubre exclusivamente aquellas partes, equipos o sub-ensambles que hayan sido instaladas
de fábrica y no incluye en ningún caso el equipo adicional o cualesquiera que hayan sido adicionados
al mismo por el usuario o distribuidor.
Para hacer efectiva esta garantía bastará con presentar el producto al distribuidor en el domicilio donde
fue adquirido o en el domicilio de IC Intracom México, S.A. de C.V., junto con los accesorios contenidos
en su empaque, acompañado de su póliza debidamente llenada y sellada por la casa vendedora
(indispensable el sello y fecha de compra) donde lo adquirió, o bien, la factura o ticket de
compra original donde se mencione claramente el modelo, número de serie (cuando aplique) y
fecha de adquisición. Esta garantía no es válida en los siguientes casos: Si el producto se hubiese
utilizado en condiciones distintas a las normales; si el producto no ha sido operado conforme a los
instructivos de uso; o si el producto ha sido alterado o tratado de ser reparado por el consumidor o
terceras personas.
9
REGULATORY STATEMENTS
FCC Class B
This equipment has been tested and found to comply with the limits for a Class B digital device,
pursuant to Part 15 of Federal Communications Commission (FCC) Rules. These limits are designed
to provide reasonable protection against harmful interference in a residential installation. This
equipment generates, uses and can radiate radio frequency energy, and if not installed and used
in accordance with the instructions may cause harmful interference to radio communications.
However, there is no guarantee that interference will not occur in a particular installation. If this
equipment does cause harmful interference to radio or television reception, which can be determined
by turning the equipment off and on, the user is encouraged to try to correct the interference by one or
more of the following measures:
• Reorient or relocate the receiving antenna.
• Increase the separation between the equipment and the receiver.
• Connect the equipment to an outlet on a circuit different from the receiver.
• Consult the dealer or an experienced radio/TV technician for help.
CE / R&TTE
ENGLISH
This device complies with the requirements of the R&TTE Directive 1999/5/EC.
DEUTSCH
Dieses Gerät enspricht der Direktive R&TTE Direktive 1999/5/EC.
ESPAÑOL
Este dispositivo cumple con los requerimientos de la Directiva R&TTE 1999/5/EC.
FRANÇAIS
Cet appareil satisfait aux exigences de la directive R&TTE 1999/5/CE.
POLSKI
Urządzenie spełnia wymagania dyrektywy R&TTE 1999/5/EC.
ITALIANO
Questo dispositivo è conforme alla Direttiva 1999/5/EC R&TTE.
10
INTELLINET NETWORK SOLUTIONS™ offers a complete line of active and passive networking products.
Ask your local computer dealer for more information or visit www.intellinet-network.com.
All products mentioned are trademarks or registered trademarks of their respective owners.
INTELLINET NETWORK SOLUTIONS™ bietet ein vollständiges Sortiment aktiver und passiver
Netzwerkkomponenten. Für weitere Informationen wenden Sie sich bitte an Ihren Händler oder
nutzen Sie die Webseite www.intellinet-network.com.
Alle erwähnten Produkte sind registrierte Marken und Eigentum Ihrer jeweiligen Besitzer.
INTELLINET NETWORK SOLUTIONS™ ofrece una línea completa de productos de red activa y pasiva.
Pregunte a su distribuidor para obtener mayor información o visite:
www.intellinet-network.com.
Todos los productos mencionados son marcas comerciales o marcas registradas de sus respectivos propietarios.
INTELLINET NETWORK SOLUTIONS™ offre un assortiment complet de produits de réseau actifs et
passifs. Pour plus d’informations veuillez contacter votre revendeur ou utiliser la page d’accueil
www.intellinet-network.com.
Tous les produits mentionnés sont des marques commerciales ou des marques déposées de leurs
propriétaires respectifs.
INTELLINET NETWORK SOLUTIONS™ to kompletna linia aktywnych oraz pasywnych komponentów
sieciowych. Poproś lokalnego dealera o więcej informacji lub odwiedź stronę
www.intellinet-network.com.
Wszystkie nazwy handlowe i towarów są nazwami i znakami towarowymi
zastrzeżonymi odpowiednich firm odnośnych właścicieli.
INTELLINET NETWORK SOLUTIONS™ offre una linea completa di prodotti di rete attivi e passivi.
Chiedi maggiori informazioni al tuo rivenditore di computer o visita il sito
www.intellinet-network.com.
Tutti i prodotti sopracitati sono marchi di fabbrica o marchi registrati depositati dai proprietari.
11
Copyright © INTELLINET NETWORK SOLUTIONS