1
ENGLISH
Introduction
Congratulations on your purchase and welcome
to Philips! To fully benefit from the support that
Philips offers, register your product at www.philips.
com/welcome.
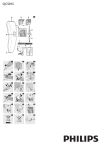
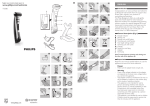
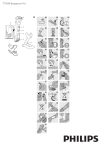
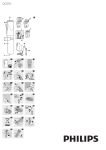
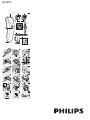
General description (Fig. 1)
A Cutting element
B On/off switch
C Socket for appliance plug
D Hair clipping comb attachment
E Beard trimming comb attachment
F Adjustment button
G Cleaning brush
H Scissors
I Hairdresser’s comb
J Appliance plug
K Adapter
L Charging light
M Hair removal groove
Important
Read this user manual carefully before you use the
appliance and save it for future reference.
-
-
-
-
Do not charge the appliance for more than 24
hours.
-
Note:The appliance cannot be run directly from the
mains.
Charge the appliance for at least 10 hours (NiCd
battery) or 18 hours (NiMh battery) before you
use it for the first time.
-
1 Make sure the appliance is switched off when
you charge it.
Caution
Never immerse the handle in water or any
other liquid, nor rinse it under the tap.
Do not use the appliance in the bath or in the
shower.
Use, charge and store the appliance at a
temperature between 15°C and 35°C.
Only use the adapter supplied to charge the
appliance.
If the adapter is damaged, always have it
replaced with one of the original type in order
to avoid a hazard.
Do not use the appliance when the clipping
attachment or one of the combs is damaged or
broken as this may cause injury.
This appliance is only intended for clipping
human scalp hair. Do not use it for any other
purpose.
Compliance with standards
This Philips appliance complies with all standards
regarding electromagnetic fields (EMF). If handled
properly and according to the instructions in this
user manual, the appliance is safe to use based on
scientific evidence available today.
Preparing for use
Charging
When the appliance is fully charged, it has a
cordless trimming time of up to 35 minutes (NiCd
battery) or 50 minutes (NiMh battery).
4203.000.5742.3
-
2 Insert the appliance plug into the appliance
and insert the adapter into the wall
socket. (Fig. 2)
, The charging light on the adapter goes on to
indicate that the appliance is charging (Fig. 3).
Note:The charging light does not indicate when the
appliance is fully charged.
Note: If the appliance has not been used for a long
time, it must be recharged for at least 10 hours
(NiCd battery) or 18 hours (NiMh battery).
Optimising the lifetime of the battery
Discharge the battery completely twice a year
by letting the motor run until it stops.
Remove the adapter from the wall socket
when the battery is fully charged.
-
Danger
Make sure the adapter does not get wet.
Warning
Check if the voltage indicated on the adapter
and on the appliance corresponds to the
local mains voltage before you connect the
appliance.
The adapter contains a transformer. Do not cut
off the adapter to replace it with another plug,
as this causes a hazardous situation.
This appliance is not intended for use by
persons (including children) with reduced
physical, sensory or mental capabilities, or lack
of experience and knowledge, unless they
have been given supervision or instruction
concerning use of the appliance by a person
responsible for their safety.
Children should be supervised to ensure that
they do not play with the appliance.
Make overlapping passes over the head to
ensure that the appliance catches all the hairs
that need to be cut.
Make sure that the flat part of the hair clipping
comb attachment is fully in contact with the
scalp to obtain an even cutting result.
To achieve a good result with curly, sparse or
long hair, you can use a comb to guide the hair
towards the appliance.
Regularly remove cut hair from the comb
attachment. If a lot of hair has accumulated
in the comb attachment, remove it from the
appliance and blow and/or shake the hair out
of it.
Using the appliance
Clipping with the hair clipping comb
attachment
Note: Make sure your hair is clean and dry. Do not
use the appliance on freshly washed hair.
1 Comb your hair with a styling comb in the
direction of hair growth. (Fig. 4)
2 Slide the comb attachment into the guiding
grooves of the appliance (‘click’). (Fig. 5)
Make sure that the comb attachment has been
properly slid into the grooves on both sides.
3 To set the comb attachment to the desired
hair length, press the adjustment button (1)
and slide the comb attachment to the desired
hair length setting (2). (Fig. 6)
Hair length settings
With the hair clipping comb attachment attached,
the appliance has 7 different hair length settings:
Hair length setting
Resulting hair length
1
3mm
2
6mm
3
9mm
4
12mm
5
15mm
6
18mm
7
21mm
Contouring without hair clipping comb
attachment
You can use the appliance without comb
attachment to cut your hair very close to the skin
(0.8mm) or to contour the neckline and the area
around the ears.
Note:When you use the appliance without comb
attachment, it cuts the hair very close to the skin.
1 To remove the comb attachment, press the
adjustment button (1) and pull the comb
attachment off the appliance (2). (Fig. 8)
2 Before you start to contour the hairline
round the ears, comb the hair ends over the
ears.
3 Tilt the appliance in such a way that only one
edge of the cutting element touches the hair
ends. (Fig. 9)
4 Only cut the hair ends. The hairline has to be
close to the ear.
5 To contour the neckline and sideburns,
turn the appliance and make downward
strokes. (Fig. 10)
6 Move the appliance slowly and smoothly.
Follow the natural hairline.
Trimming with the beard trimming
comb attachment
1 Always comb your beard or moustache with
a fine comb before you start to trim.
2 Slide the comb attachment into the guiding
grooves of the appliance (‘click’). (Fig. 11)
Make sure that the comb attachment has been
properly slid into the grooves on both sides.
3 To set the comb attachment to the desired
hair length, press the adjustment button on
the back of the appliance (1) and slide the
comb attachment to the desired hair length
setting (2). (Fig. 12)
Beard hair length settings
With the beard trimming comb attachment
attached, the appliance has 7 different hair length
settings:
4 Slide the on/off switch to the ‘on’ position.
Hair length setting
Resulting hair length
5 Move the appliance through the hair slowly.
1
2mm
2
4mm
3
6mm
4
8mm
5
10mm
6
12mm
7
14mm
-
Tips:
Start to clip at the highest setting of the comb
attachment and reduce the hair length setting
gradually.
Write down the hair length settings you
selected to create a certain hairstyle as a
reminder for future clipping sessions.
To clip in the most effective way, move
the appliance against the direction of hair
growth. (Fig. 7)
Try different directions (upward, downward
or across), because hair doesn’t all grow in the
same direction.
4 Slide the on/off switch to the ‘on’ position.
2/9