1
F567134
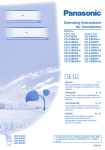
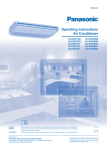
Operating Instructions
Air Conditioner
Indoor Unit
Outdoor Unit
CS-PC9KKQ
CS-PC12KKQ
CS-PC18KKQ
CS-PC24KKQ
CU-PC9KKQ
CU-PC12KKQ
CU-PC18KKQ
CU-PC24KKQ
ENGLISH
2~7
Before operating the unit, read these operating
instructions thoroughly and keep them for future
reference.
ESPAÑOL
8 ~ 13
Antes de utilizar la unidad, sírvase leer
atentamente estas instrucciones de
funcionamiento y conservarlas como futuro
elemento de consulta.
QUICK GUIDE
GUÍA RÁPIDA
© Panasonic HA Air-Conditioning (M) Sdn. Bhd. 2009.
Unauthorized copying and distribution is a violation
of law.
SAFETY PRECAUTIONS
Thank you for purchasing
Panasonic Air Conditioner
To prevent personal injury, injury to others, or property damage, please
comply the following.
Incorrect operation due to failure to follow instructions may cause harm or
damage, the seriousness of which is classified as below:
TABLE OF CONTENTS
SAFETY PRECAUTIONS
REMOTE CONTROL
4~5
6
TROUBLESHOOTING
7
14~15
QUICK GUIDE
BACK COVER
NOTE
The illustrations in this manual are for
explanation purposes only and may
differ from the actual unit. It is subjected
to change without notice for future
improvement.
OPERATION CONDITION
Use this air conditioner under the following
temperature range
Temperature (°C)
COOLING
Max.
Min.
Temperature (°C)
COOLING
Max.
Min.
Indoor
*DBT *WBT
32
23
16
11
Outdoor
*DBT *WBT
43
26
16
11
* DBT: Dry bulb temperature
* WBT: Wet bulb temperature
2
This sign warns of death or serious injury.
CAUTION
This sign warns of injury or damage to
property.
2~3
INDOOR UNIT
INFORMATION
WARNING
The instructions to be followed are classified by the following symbols:
This symbol denotes an action that is
PROHIBITED.
These symbols denote an actions that
is COMPULSORY.
WARNING
INDOOR UNIT AND OUTDOOR UNIT
This appliance is not intended for use by persons (including
children) with reduced physical, sensory or mental
capabilities, or lack of experience and knowledge, unless
they have been given supervision or instruction concerning
use of the appliance by a person responsible for their safety.
Children should be supervised to ensure that they do not
play with the appliance.
Please consult authorized dealer or specialist to repair,
install, remove and reinstall the unit. Improper installation
and handling will cause leakage, electric shock or fire.
Do not install the unit in a potentially explosive or flammable
atmosphere. Failure to do so could result in fire accident.
Do not insert your fingers or other objects into the
air conditioner indoor or outdoor unit, rotating parts
may cause injury.
Do not touch the outdoor unit during lightning, it may cause
electric shock.
REMOTE CONTROL
Do not allow infants and small children to play with the
remote control to prevent them from accidentally swallowing
the batteries.
POWER SUPPLY
Do not use modified cord,
joint cord, extension cord or
unspecified cord to prevent
overheat and fire.
Do not share the same power outlet with other
equipment to prevent overheat and fire.
Do not operate with wet hands to prevent electric
shock.
If the supply cord is damage, it must be replaced
by the manufacturer, its service agent or similarly
qualified persons in order to avoid a hazard.
Strongly recommended to be installed with Earth
Leakage Circuit Breaker (ELCB) or Residual
Current Device (RCD) to prevent electric shock
or fire.
This equipment must be earthed to prevent
electrical shock or fire.
In case of emergency or abnormal conditions
(burnt smell, etc), turn off the power supply, and
please consult authorized dealer.
Prevent electric shock by switch off the power
supply when:
- Before cleaning or servicing.
- Extended non-use.
- Abnormally strong lightning activity.
CAUTION
INDOOR UNIT AND OUTDOOR UNIT
Do not wash the indoor unit with water, benzene,
thinner or scouring powder.
Do not use for other purpose such as
preservation of food.
Do not use any combustible equipment in front of
the airflow outlet to avoid propagate fire.
Do not expose directly to cold air for a long
period.
Do not sit or step on the unit, you may
fall down accidentally.
ENGLISH
WARNING
Do not touch the sharp aluminium fin,
sharp parts may cause injury.
Do not switch ON the indoor when waxing the
floor. After waxing, aerate the room properly
before operating the unit.
Do not install the unit in oily and smoky areas.
Ensure drainage pipe is connected properly.
Otherwise, leakage may occur.
Aerate the room regularly.
After long period of use, make sure the
installation rack is not deteriorate to prevent the
unit falls down.
REMOTE CONTROL
Do not use rechargeable (Ni-Cd) batteries.
It may damage the remote control.
Remove the batteries if the unit is not going to be
used for a long period of time.
New batteries of the same type must be inserted
following the polarity stated to prevent
malfunction of the remote control.
Remote
Control
Indoor
Unit
Air inlet
Air Outlet
Power
Supply
Outdoor Air inlet
Unit
Air inlet
Air Outlet
3
REMOTE CONTROL
4
TO SELECT FAN SPEED (3 OPTIONS)
FAN SPEED
• For AUTO, the indoor fan speed is automatically adjusted
according to the operation mode.
Maximum distances: 8m
5
TO ADJUST VERTICAL AIRFLOW DIRECTION
(5 OPTIONS)
AIR SWING
INDICATOR
(Green)
TIMER
(Orange)
POWER
Press the remote control’s button
1
TO TURN ON OR OFF THE UNIT
• Please be aware of the OFF indication on the remote
control display to prevent the unit from starting/stopping
improperly.
2
• Keeps the room ventilated.
• In COOL/DRY mode, if AUTO is set, the louver swing
up/down automatically.
6
Press and hold for 5 seconds to dim or restore the
unit’s indicator brightness.
7
Press and hold for approximately 10 seconds to
show temperature setting in °C or °F.
8
Press to restore the remote control’s default setting.
9
Not used in normal operations.
TO SET TEMPERATURE
• For cool and dry modes, the range of temperature for
selection is 16˚C ~ 30˚C.
• Operating the unit within the recommended temperature
could induce energy saving.
COOL mode : 26˚C ~ 28˚C.
DRY mode : 1˚C ~ 2˚C lower than room temperature.
3
Remote Control display
TO SELECT OPERATION MODE
AUTO mode - For your convenience
• Unit selects the operation mode according to the room
temperature.
• Once auto mode is selected, the unit will operate at the
standard setting temperature.
Room
temperature
23˚C & above
Below 23˚C
Operation mode
Cool
Dry
Standard setting
temperature
25˚C
22˚C
• Press
for “HI” to +2˚C or
for “LO” to -2˚C to the
standard setting temperature.
COOL mode - To enjoy cool air
• Use curtains to screen off sunlight and outdoor heat to
reduce power consumption during cool mode.
DRY mode - To dehumidify the environment
• Unit operates at low fan speed to give a gentle cooling
operation.
4
AUTO
COOL
DRY
FAN
SPEED
AIR
SWING
OFF
TIMER
OFF/O
ON
TIMER
N
1
MODE
3
FAN SP
EED
TEMP
2
5
TIMER
ON
SET
6
1
7
OFF
9
4
AIR SW
ING
2
3
CANCE
L
SET
CLOCK
8
RESET
ENGLISH
TO SET THE TIMER
• To turn ON or OFF the unit at a preset time.
ON
1
2
SET
OFF
Select ON or
OFF timer
Set the time
Confirm
ON
• To cancel ON or OFF timer, press
or OFF then
press CANCEL.
• When ON Timer is set, the unit may start earlier (up
to 15 minutes) before the actual set time in order to
achieve the desired temperature on time.
• Timer operation is based on the clock set in the
remote control and repeats daily once set. For clock
setting, please refer to Remote Control Preparation at
back cover.
• If timer is cancelled manually or due to power failure,
you can restore the previous setting (once power is
SET
resumed) by pressing
.
5
INDOOR UNIT
CAUTION
• Switch off the power supply before cleaning.
• Do not touch the aluminium fin, sharp parts may cause injury.
WASHING INSTRUCTIONS
HINT
• Do not use benzene, thinner or scouring powder.
• Use only soap ( pH7) or neutral household detergent.
• Do not use water hotter than 40°C.
• To ensure optimal performance of the unit, cleaning
maintenance have to be carried out at regular intervals.
Please consult authorized dealer.
2
4
1
7
8
3
5
6
1
INDOOR UNIT
• Wipe the unit gently with a soft, dry cloth.
2
FRONT PANEL
Remove Front Panel
• Raise and pull to remove the front panel.
• Wash gently and dry.
Close Front Panel
• Press down both ends of the front panel to close it
securely.
3
RECEIVER
4
ALUMINIUM FIN
5
HORIZONTAL AIRFLOW DIRECTION LOUVER
• Manually adjustable.
6
6
VERTICAL AIRFLOW DIRECTION LOUVER
• Do not adjust by hand.
7
AUTO OFF/ON BUTTON
• Use when remote control is misplaced or malfunction.
Action
Press once.
Press and hold until 1 beep is heard,
then release.
Press the button to turn off.
8
Mode
Auto
Cooling
AIR FILTERS
• Air filters cleaning is needed every two weeks.
• Wash/rinse the filters gently with water to avoid damage
to the filter surface.
• Dry the filters thoroughly under the shade, away from
fire or direct sunlight.
• Replace any damage filter.
SYMPTOM
Mist emerges from indoor unit.
Water flowing sound during operation.
The room has a peculiar odour.
Indoor fan stops occasionally during automatic fan speed
setting.
Operation is delayed a few minutes after restart.
Outdoor unit emits water/steam.
Timer indicator is always on.
Cracking sound during operation.
CAUSE
► • Condensation effect due to cooling process.
► • Refrigerant flow inside the unit.
► • This may due to damp smell emitted by the wall, carpet,
furniture or clothing.
► • This helps to remove the surrounding odours.
►
►
►
►
•
•
•
•
ENGLISH
TROUBLESHOOTING
The following symptoms do not indicate malfunction.
The delay is a protection to the unit’s compressor.
Condensation or evaporation occurs on pipes.
The timer setting repeats daily once set.
Changes of temperature cause the expansion/contraction
of the unit.
Check the following before calling for servicing.
SYMPTOM
Cooling operation is not working efficiently.
Noisy during operation.
CHECK
► •
•
•
•
► •
•
Set the temperature correctly.
Close all doors and windows.
Clean or replace the filters.
Clear any obstruction at the air inlet and air outlet vents.
Check if the unit has been installed at an incline.
Close the front panel properly.
Remote control does not work.
(Display is dim or transmission signal is weak.)
► • Insert the batteries correctly.
• Replace weak batteries.
The unit does not work.
► • Check if the circuit breaker is tripped.
• Check if timers have been set.
The unit does not receive the signal from the remote
control.
► • Make sure the receiver not obstructed.
• Certain fluorescent lights may interfere with signal
transmitter. Please consult authorized dealer.
7
PRECAUCIONES DE SEGURIDAD
Muchas gracias por elegir una
unidad de aire acondicionado
Panasonic
CONTENIDO
Para evitar lesiones personales, lesiones a terceros, o daños materiales,
cumpla lo siguiente.
El uso incorrecto por no seguir las instrucciones puede causar daños o
averías; su gravedad se clasifica con las indicaciones siguientes:
Esta indicación advierte del posible peligro
ADVERTENCIA de muerte o de daños graves.
PRECAUCIONES DE
SEGURIDAD
8~9
MANDO A DISTANCIA
10~11
UNIDAD INTERIOR
LOCALIZACIÓN DE
AVERÍAS
12
PRECAUCIÓN
Esta indicación advierte de los posibles
daños o desperfectos materiales.
Las instrucciones que deben seguirse están clasificadas mediante los
siguientes símbolos:
Este símbolo denota una acción
que está PROHIBIDA.
Estos símbolos denotan acciones
que son OBLIGATORIAS.
13
ADVERTENCIA
INFORMACIÓN
14~15
GUÍA RÁPIDA
CUBIERTA TRASERA
NOTA
Las ilustraciones de este manual
sirven únicamente para describir las
explicaciones y pueden no coincidir
exactamente con las del aparato
suministrado. Están sujetas a cambios
sin previo aviso con el fin de mejorar el
producto.
CONDICIONES DE
FUNCIONAMIENTO
Utilice este aparato de aire acondicionado
dentro del siguiente intervalo de
temperaturas
Temperatura (°C)
ENFRIAMIENTO
Máx.
Mín.
Temperatura (°C)
ENFRIAMIENTO
8
Máx.
Mín.
Interior
*DBT *WBT
32
23
16
11
Exterior
*DBT *WBT
43
26
16
11
* DBT: Temperatura de bulbo seco
* WBT: Temperatura de bulbo húmedo
UNIDAD INTERIOR Y UNIDAD EXTERIOR
Este aparato no debe ser utilizado por personas (incluyendo
niños) con discapacidades mentales, sensoriales o físicas, o
falta de experiencia y conocimiento, a menos que hayan recibido
formación o supervisión en relación al uso del aparato por una
persona responsable por su seguridad. Los niños deberían estar
supervisados para asegurar que no juegan con el aparato.
Consulte a un distribuidor autorizado o especialista para reparar,
instalar, retirar y reinstalar la unidad. Una instalación y uso
incorrectos provocarán fugas, descargas eléctricas o incendios.
No instale la unidad en ambientes potencialmente
explosivos o inflamables. En caso contrario, podría
provocar accidentes de incendios.
No introduzca los dedos u otros objetos en la
unidad exterior o interior del aire acondicionado,
ya que las partes rotatorias podrían provocarle
lesiones.
No toque la unidad exterior durante un relámpago, ya que
podría causar una descarga eléctrica.
MANDO A DISTANCIA
No permita que bebés y niños pequeños jueguen con el
mando a distancia para evitar que ingieran accidentalmente
las pilas.
ADVERTENCIA
En caso de emergencia o condiciones anormales (olor
a quemado, etc.), corte la alimentación de energía y
consulte al distribuidor autorizado.
Evite descargas eléctricas desconectando la
alimentación eléctrica cuando:
- Antes de limpiarlo o repararlo.
- Largo periodo en desuso.
- Tormentas eléctricas especialmente violentas.
UNIDAD INTERIOR Y UNIDAD EXTERIOR
No limpie la unidad interior con agua, benceno,
disolvente o limpiador en polvo.
No utilice la unidad para otros fines, como la
conservación de alimentos.
No utilice ningún equipo combustible delante de
la salida de aire pare evitar que se propague un
incendio.
No se exponga directamente al aire frío durante un
periodo prolongado de tiempo.
No se siente o pare sobre la unidad, se
podría caer accidentalmente.
ESPAÑOL
FUENTE DE ENERGÍA
No utilice un cable modificado,
unido con otro, un cable
de extensión o un cable
no especificado para evitar
sobrecalentamiento e incendios.
No comparta la misma salida eléctrica con otros
equipos para evitar el calentamiento e incendios.
No lo use con las manos mojadas para evitar
descargas eléctricas.
Para evitar riesgos, si el cable de alimentación
está dañado y es necesario cambiarlo, deberá hacerlo
el fabricante, un representante del servicio técnico o
una persona calificada.
Se recomienda altamente instalarlo con un disyuntor
de fuga a tierra (ELCB) o un dispositivo residual actual
(RCD) para evitar descargas eléctricas o incendios.
Este equipo deberá conectarse a tierra para evitar
descargas eléctricas o incendios.
PRECAUCIÓN
No toque la filosa aleta de aluminio, las
piezas filosas pueden causar lesiones.
No encienda la unidad cuando encere el suelo.
Después de encerar, airee la habitación correctamente
antes de usar la unidad.
No instale la unidad en áreas aceitosas y ahumadas.
Asegúrese de que el tubo de drenaje esté conectado
correctamente. Si no es así, se podrían producir
fugas.
Ventile la habitación con regularidad.
Después de un largo periodo de uso, asegúrese
de que la ranura de instalación no se encuentre
deteriorada, para evitar que la unidad se caiga.
MANDO A DISTANCIA
No utilice pilas recargables (Ni-Cd).
Podría dañar el control remoto.
Extraiga las pilas si no va a utilizar la unidad durante
un periodo prolongado de tiempo.
Para que el mando a distancia funcione bien, es
necesario insertar las pilas según la polaridad
indicada.
Mando a
Distancia
Unidad
Interior
Entrada
de aire
Salida
de aire
Unidad
Exterior
Fuente
de
energía
Entrada
de aire
Entrada
de aire
Salida
de aire
9
MANDO A DISTANCIA
4
PARA SELECCIONAR LA VELOCIDAD
DEL VENTILADOR (3 OPCIONES)
FAN SPEED
Distancia máxima: 8m
• Para AUTO (automático), la velocidad de ventilador de
interior es ajustada automáticamente según el modo de
operación.
5
INDICADOR
(Verde)
TIMER
(Naranja)
POWER
PARA AJUSTAR LA DIRECCIÓN
VERTICAL DE LA CORRIENTE DE AIRE
(5 OPCIONES)
AIR SWING
• Mantiene la habitación ventilada.
• En el modo FRÍO/SECAR, si AUTOMÁTICO está
configurado, la rejilla gira hacia arriba/abajo
automáticamente.
Pulse el botón del control remoto
6
Mantenga pulsado por 5 segundos para oscurecer o
restablecer el brillo del indicador de la unidad.
ENCENDER O APAGAR LA
UNIDAD
7
Mantenga pulsado aproximadamente 10 segundos
para mostrar la temperatura en °C o °F.
8
Presione para restablecer el ajuste de fábrica del
mando a distancia.
9
No utilizado en operaciones normales.
1
• Por favor esté al tanto de la indicación OFF en la pantalla
del mando a distancia para impedir que la unidad
arranqueo se detenga incorrectamente.
2
PARA AJUSTAR LA TEMPERATURA
• Para los modos frío y seco, el rango de temperaturas para
seleccionar va de 16°C ~ 30°C.
• El funcionamiento de la unidad dentro de la temperatura
recomendada podría resultar en el ahorro de energía.
MODO FRÍO : 26°C ~ 28°C.
MODO DESHUMIDIFICACIÓN : 1°C ~ 2°C menos que la
temperatura ambiente.
3
Pantalla del mando a distancia
SELECCIONAR MODO DE OPERACIÓN
MODO AUTOMÁTICO - Para su conveniencia
• La unidad selecciona automáticamente el modo de
funcionamiento según la temperatura ambiental.
• Una vez que el modo automático es seleccionado,
la unidad funcionará en la temperatura estándar
programada.
Temperatura
ambiente
Modo de
operación
23°C y más
Menos de 23°C
Frío
Seco
Temperatura
estándar
programada
25˚C
22˚C
• Pulse
para “HI” a +2˚C o
para “LO” a -2˚C para
la temperatura estándar.
MODO FRÍO - Para disfrutar de aire frío
• Use cortinas para proteger de luz solar y el calor exterior y
así reducir el consumo eléctrico durante el modo de frío.
MODO DESHUMIDIFICACIÓN - Para deshumidificar
el ambiente
• La unidad funciona en la velocidad de ventilador baja para
proporcionar una agradable refrigeración.
10
AUTO
COOL
DRY
FAN
SPEED
AIR
SWING
OFF
TIMER
OFF/O
ON
TIMER
N
1
MODE
3
FAN SP
TEMP
2
4
AIR SW
ING
5
TIMER
ON
SET
6
1
7
OFF
9
EED
2
3
CANCE
L
SET
CLOCK
8
RESET
PARA AJUSTAR EL TEMPORIZADOR
ON
1
2
SET
ESPAÑOL
• Encender o apagar la unidad a una hora
predeterminada.
OFF
Ajuste el
temporizador de
encendido (ON)
Ajuste la hora
Confirmar
o de apagado
(OFF)
• Para cancelar el temporizadorONde encendido (ON) o
el de apagado (OFF), pulse
o OFF y, después,
pulse CANCEL.
• Cuando el temporizador es ajustado en ON, la unidad
puede comenzar (hasta 15 minutos) antes de la
hora real programada para alcanzar la temperatura
deseada a tiempo.
• La operación de temporizador está basada en la
hora programada en el mando a distancia y se
repite diariamente. Para el ajuste del reloj, por favor
consulte Preparación del Mando a Distancia en la
contra portada.
• Si el temporizador es cancelado manualmente o por
una caída en el suministro eléctrico, puede restaurar
el ajuste anterior (cuando vuelva la electricidad)
SET
presionando
.
11
UNIDAD INTERIOR
• Apague la unidad antes de limpiarla.
• No toque la aleta de aluminio, las partes afiladas pueden causar
PRECAUCIÓN heridas.
INSTRUCCIONES DE LAVADO
INDICACIONES
• No utilice benceno, disolvente o limpiador en polvo.
• Utilice sólo jabones ( pH7) o detergentes domésticos
neutros.
• No utilice agua con una temperatura superior a 40°C.
• Para garantizar un desempeño óptimo de la unidad,
el mantenimiento de la limpieza se debe realizar
en intervalos regulares. Consulte a un distribuidor
autorizado.
2
4
1
7
8
3
5
6
1
UNIDAD INTERIOR
• Limpie la unidad suavemente con un paño suave y
seco.
2
PANEL FRONTAL
Retire el panel frontal
• Levante y tire del panel frontal para retirarlo.
• Lávelo con cuidado y séquelo.
Cierre el panel frontal
• Pulse hacia abajo los dos extremos del panel frontal
para cerrarlo herméticamente.
3
RECEPTOR
4
ALETA DE ALUMINIO
REJILLA DE DIRECCIÓN DE CORRIENTE DE
AIRE HORIZONTAL
• Manualmente ajustable.
5
12
REJILLA DE DIRECCIÓN DE CORRIENTE DE
AIRE VERTICAL
• No lo ajuste manualmente.
6
BOTÓN DE ENCENDIDO/APAGADO
AUTOMÁTICO (AUTO OFF/ON)
• Utilizado cuando el mando a distancia está extraviado o
funciona mal.
7
Acción
Pulsar una vez.
Presione y mantenga hasta que
escuche un pitido, luego suéltelo.
Presione el botón para apagar.
8
Modo
Funcionamiento
automático
Enfriamiento
FILTRO DE AIRE
• Es necesario limpiar los filtros de aire cada dos
semanas.
• Lave/enjuague los filtros con agua, con cuidado para
evitar dañar la superficie del mismo.
• Secar minuciosamente los filtros a la sombra, lejos del
fuego o la luz solar directa.
• Reemplace los filtros dañados.
LOCALIZACIÓN DE AVERÍAS
Las siguientes señales no indican un mal funcionamiento.
Se escucha un sonido similar a agua fluyendo durante el
funcionamiento.
Hay un olor extraño en la habitación.
El ventilador interior se para de vez en cuando con la
velocidad del ventilador automática.
El aparato tarda varios minutos en funcionar tras volver a
encenderlo.
La unidad exterior emite agua o vapor.
El indicador TIMER siempre está encendido.
Sonido seco (de chasquido) durante el funcionamiento.
CAUSA
► • Efecto de condensación producido durante el proceso de
enfriamiento.
► • Flujo del refrigerante en el interior de la unidad.
► • Puede ocurrir debido al olor a humedad producido por
las paredes, las alfombras, los muebles o las telas de la
habitación.
► • Con esto se eliminan los malos olores del ambiente.
ESPAÑOL
SEÑAL
Sale neblina de la unidad interior.
► • El retraso responde a un dispositivo de protección del
compresor de la unidad.
► • Se produce condensación o evaporación en los tubos.
► • Una vez configurado, el ajuste del temporizador se repite
todos los días.
► • Los cambios de temperatura causan la expansión/
contracción de la unidad.
Compruebe lo siguiente antes de llamar a un técnico.
SEÑAL
COMPRUEBE
La operación frío no funciona eficientemente.
► •
•
•
•
Funcionamiento ruidoso.
► •
•
El mando a distancia no funciona.
► •
(La pantalla está oscura o la señal de transmisión es débil.)
•
Programe la temperatura correctamente.
Cierre todas las puertas y ventanas.
Limpie o sustituya los filtros.
Quite cualquier obstrucción en la entrada y salida de
aire.
Compruebe si la unidad ha sido instalada en una
inclinación.
Cierre el panel delantero correctamente.
Inserte las baterías correctamente.
Reemplace las baterías débiles.
La unidad no funciona.
► • Compruebe si el disyuntor está activado.
• Compruebe si los temporizadores han sido programados.
La unidad no recibe la señal del mando a distancia.
► • Asegúrese de que el receptor no esté obstruido.
• Ciertas luces fluorescentes puede interferir con el
transmisor de señal. Consulte con un distribuidor
autorizado.
13
INFORMATION/INFORMACIÓN
Information for Users on Collection and Disposal of Old Equipment and used Batteries
[Information on Disposal in other Countries
outside the European Union]
These symbols are only valid in the European
Union. If you wish to discard these items,
please contact your local authorities or dealer
and ask for the correct method of disposal.
Pb
Note for the battery symbol (bottom two
symbol examples):
This symbol might be used in combination with
a chemical symbol. In this case it complies with
the requirement set by the Directive for the
chemical involved.
Información para Usuarios sobre la Recolección y Eliminación de aparatos viejos y baterías usadas
[Informacion sobre la Eliminación en otros
Países fuera de la Unión Europea]
Estos símbolos sólo son válidos dentro
de la Unión Europea. Si desea desechar
estos objetos, por favor contacte con sus
autoridades locales o distribuidor y consulte
por el método correcto de eliminación.
14
Pb
Nota sobre el símbolo de la bateria (abajo,
dos ejemplos de símbolos):
Este símbolo puede ser usado en combinación
con un símbolo químico. En este caso,
el mismo cumple con los requerimientos
establecidos por la Directiva para los químicos
involucrados.
FOR SEASONAL INSPECTION AFTER EXTENDED NON-USE
• Checking of remote control batteries.
• No obstruction at air inlet and air outlet vents.
• After 15 minutes of operation, it is normal to have the following
temperature difference between air inlet and air outlet vents:
Cooling: ≥ 8°C
FOR EXTENDED NON-USE
• Turn off the power supply.
• Remove the remote control batteries.
PARA INSPECCIÓN TEMPORAL DESPUÉS DE UN LARGO
PERÍODO EN DESUSO
• Verifique las pilas del mando a distancia.
• Compruebe que las tomas de entrada y salida de las rejillas
de ventilación no estén obstruidas.
• Tras 15 minutos de funcionamiento, es normal que se
produzca la siguiente diferencia de temperatura entre las
tomas de entrada y salida de las rejillas de ventilación:
Enfriamiento: ≥ 8°C
SI NO SE VA A UTILIZAR LA UNIDAD DURANTE UN
PERIODO PROLONGADO DE TIEMPO
• Apague la unidad.
• Extraiga las pilas del mando a distancia.
NON SERVICEABLE CRITERIAS
TURN OFF POWER SUPPLY then please consult
authorized dealer under the following conditions:
• Abnormal noise during operation.
• Water/foreign particles have entered the remote
control.
• Water leaks from Indoor unit.
• Circuit breaker switches off frequently.
• Power cord becomes unnaturally warm.
• Switches or buttons are not functioning properly.
• Timer indicator blinks.
NO UTILICE LA UNIDAD SI
APAGUE EL SUMINISTRO DE ENERGÍA y luego
consulte con el distribuidor autorizado bajo las
siguientes condiciones:
• Si escucha ruidos extraños durante el
funcionamiento.
• Si entra agua o elementos extraños en el mando
a distancia.
• Si hay escapes de agua de la unidad interior.
• Si el interruptor del circuito se abre
frecuentemente.
• El cable de alimentación está demasiado caliente.
• Los interruptores o los botones no funcionan
correctamente.
• El indicador del temporizador parpadea.
15
QUICK GUIDE/GUÍA RÁPIDA
Remote Control Preparation • Preparación Del Mando A Distancia
1
2
3
5
4
TIMER
ON
1
6
Pull out • Quite
2
Insert AAA or R03 batteries (can be used ~ 1 year) •
Inserte pilas AAA o R03 (puede ser usado ~ 1 año)
3
Close the cover • Cierre la tapa
4
Press CLOCK • Presione CLOCK
5
Set time • Ajuste la hora
6
Confirm • Confirmar
SET
3
2
OFF
CANCEL
SET
1
CLOCK
1
RESET
MODE
AUTO
DRY
COOL
AUTO
COOL
DRY
Select the desired mode.
Seleccione el modo deseado.
FAN
SPEED
AIR
SWING
OFF
TIMER
ON
TIMER
OFF/ON
2
2
OFF/ON
Start/stop the operation.
Inicie/detenga el funcionamiento.
MODE
1
TEMP AIR SWING
TIMER
ON
1
3
FAN SPEED
SET
2
OFF
TEMP
SET
3
3
CANCEL
CLOCK
RESET
Select the desired temperature.
Seleccione la temperature deseada.
Panasonic Corporation
Website: http://panasonic.net/
F567134
Printed in Malaysia
OSSC0908-00