1
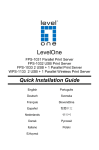
Wired/Wireless Printer Server P-201 / P-201U / P-203N/ WP-201G / WP-203G Quick Setup Guide English Español Deutsch Česky Русский Português ●●● 1 ●●● 7 ●●● 13 ●●● 19 ●●● 25 ●●● 31 日本語 ●●● 37 Slovensky ●●● 43 Romania ●●● 49 Important Information English This print server supports TCP/IP, NetBEUI, IPX/SPX, and AppleTalk protocols. It is the best network printing solutions for various common network operating systems such as: Windows Peer-to-Peer Printing (Windows 95/98/Me/NT/2000/XP/2003) Microsoft Windows NT/2000/2003 Server-Based Printing Novell NetWare 3.x/4.x/5.x Unix/Linux MAC OS With the help of Installation Wizard, you can easily and instantly complete the settings for the printing environment, and start enjoying the fantastic features provided by this print server. This guide is used for quick installation on Windows peer-to-peer printing environments. If you find any problem, please refer to the User’s Manual on the CD-ROM for more detail information. Wired / Wireless Printer Server English 1 Hardware Installation English This package contains the following components: One Print Server One Antenna (Only for Wireless Print Server) One Power Adapter One Quick Installation Guide One CD-ROM (Including all the software utilities, drivers and User’s Manual) 1. Unpack the print server package and verify that all the items listed in the previous section are provided 2. Connect the print server to the printer you want to share on the network. 3. Connect the print server to your network by attached the network cable to the UTP port of the print server 4. Connect the power adapter to the print server. The print server will perform the Power-On-Self-Test (POST) after it is powered on. During the POST, the Printer Port LEDs will be on. When the LEDs are unlighted, the print server is ready. Note: You must use the power adapter shipped along with the print server, do NOT use any other power adapter from other sources.. Driver and Utility installation The Driver and Utility Program executes a wizard-driven procedure that performs the following tasks: Install all necessary Printer Server Network Driver and utilities Automatically add all Network Ports to your PC. Wired / Wireless Printer Server English 2 insert the print server’s Installation CD into the CD-ROM drive. Click “Driver and Utility” from the Auto-Run menu screen. Once executed, the Setup program will extract files to launch the InstallShield Wizard;after choose the destination location of install Printer Server utilities,. follow it step by step to complete the installation process When the installation procedure is completed, you are ready to set up the client’s computer. All network ports of the Print Servers detected on the network will be added to your PC automatically, click “Continue” Wired / Wireless Printer Server English 3 English 1. 2. 3. English Note : if there are no print servers detected in the network currently, please click “Continue” to finish the installation. Following the Start->Program files -> AirLive PrintServer Utilities; you can click the “Network Port Quick Setup” for automatically search the print server, or you can click “Remove Ports” for add / remove Network port manually . Print Server Configuration If you want to setup the Print Server , please click the Start Æ Program files Æ AirLive PrintServer UtiiltiesÆ Print Server Configuration Wired / Wireless Printer Server English 4 English When execute this program, that will searching the print servers on the local network and list on the Server Group, you can click one of this print server to view the status, Click “Setup” icon on the tool bar, the setup items of the current selected print server will be showed on the right side of the window Setup Wired / Wireless Printer Server English 5 English Double click one of the icons to set up the selected print server. A screen will pop up to verify “User Name” and “Password” of the print server. The default values are as follows: User Name: admin Password: airlive For more Print Server configuration details, please refer to User’s Manual. Wired / Wireless Printer Server English 6 Instalación de Controlador y Software Este Servidor de Impresión soporta los protocolos TCP/IP, NetBEUI, IPX/SPX y AppleTalk. Es la mejor solución de impresión en red para varias plataformas de sistemas operativos tales como: Windows Peer-to-Peer Printing (Windows 95/98/Me/NT/2000/XP/2003) Microsoft Windows NT/2000/2003 Server-Based Printing Novell NetWare 3.x/4.x/5.x Unix/Linux MAC OS Con la ayuda del Menú Inteligente de instalación puedes fácil e instantáneamente completar la configuración del ambiente de impresión y comenzar a disfrutar las fantásticas facilidades que ofrece este servidor de impresión. La presente guía puede ser utilizada para una instalación rápida sobre plataforma Windows peer-to-peer printing. Si encuentras alguna dificultad por favor ver el manual de Usuario en el CD-ROM para información más detallada. Wired / Wireless Printer Server Español 7 Español Instalación de Hardware El paquete contiene los siguientes elementos: Español Un Servidor de Impresión Una Antena (solo en servidores inalámbricos) Un adaptador de Corriente Una Guía Rápida de Instalación Un CD-ROM (que incluye software utilitario, controladores y Manual de Usuario) 1. Destape los envoltorios del servidor de impresión y verifica que todos los elementos indicados anteriormente se encuentren allí contenidos. 2. Conecte el Servidor de Impresión a la impresora que deseas compartir en red. 3. Conecte el Servidor de Impresión a la red colocando el cable de red en el Puerto UTP del servidor de impresión y el Puerto del switch/hub de la red. 4. Enchufe y conecte el adaptador de corriente al Servidor de Impresión. El Servidor de Impresión realizará el test de inicio Power-On-Self-Test (POST) luego de ser encendido. Durante este test los LEDs del Servidor de Impresión estarán encendidos. Cuando estos se apaguen el Servidor de Impresión estará listo para operar. Nota: Debes utilizar el adaptador de corriente incluido con el Servidor de Impresión. NO utilice cualquier otro adaptador de otra índole. Instalación de Controlador y Software El programa de instalación del controlador y utilitario ejecuta procedimiento guiado por un menú wizard con las siguientes tareas:: Instala todos los Controladores y Utilitarios del Servidor de Impresión necesarios. Automáticamente agrega todos los puertos de red a tu PC. Wired / Wireless Printer Server Español 8 1. 2. 3. Cuando el procedimiento de instalación haya sido completado, ya esta slisto para configurar el computador cliente. Todos los puertos de los Servidores de Impresión que son detectados en la red son agregados a tu PC automáticamente. Haga click en “Continue”. Wired / Wireless Printer Server Español 9 Español Inserte el CD de Instalación del Servidor de Impresión en el drive de CD-ROM.. Haga Click en “Driver and Utility” en la ventana del menú Auto-ejecutable. Una vez ejecutado, el programa extraerá los archivos para lanzar el InstallShield Wizard. Luego selecciona la ruta de destino de instalación de los utilitarios del Servidor de Impresión. Siga paso por paso para completar el proceso de instalacióninstallation process Español Nota : Si no hay Servidores de Impresión detectados en la red, por favor hacer click en “Continue” para terminar la instalación. Siguiendo la opción Start->Program files -> AirLive PrintServer Utilities; puedes hacer click en “Network Port Quick Setup” para buscar el Servidor de Impresión automáticamente o puedes hacer click en “Remove Ports” para agregar/ remover puertos manualmente . Configuración del Servidor del Impresión Si deseas configurar el Servidor de Impresión, por favor haga click en Start Æ Program files Æ AirLive PrintServer UtiiltiesÆ Print Server Configuration Wired / Wireless Printer Server Español 10 Cuando se ejecute este programa se buscarán los Servidores de Impresión en la red local y se lista los Grupos de Servidores. Puedes hacer click sobre cualquiera de estos para ver su estado Español Haga Click en el ícono “Setup” de la barra de herramientas. En la parte derecha de la ventana se mostrarán los detalles de configuración del servidor de impresión seleccionado Setup Wired / Wireless Printer Server Español 11 Haga doble clicken uno de los íconos para configurar el Servidor de Impresión seleccionado. Una ventana se abrirá para verificar el nombre de Usuario y palabra clave del Servidor de Impresión. Los valores por defecto son los siguientes: Nombre de Usuario: admin Palabra Clave: airlive Español Para más detalles de configuración del Servidor de Impresión, por favor ver el Manual de Usuario. Wired / Wireless Printer Server Español 12 Wichtige Informationen Dieser Printserver unterstützt die Protokolle TCP/IP, NetBEUI, IPX/SPX und AppleTalk. Bei den meisten verbreiteten Netzwerk-Betriebssystemen ist das die optimale Lösung für den Netzwerkdruck. Unterstützt werden: Windows Peer-to-Peer Printing (Windows 95/98/Me/NT/2000/XP/2003) Microsoft Windows NT/2000/2003 serverbasiertes Drucken Novell NetWare 3.x/4.x/5.x Unix/Linux MAC OS Mit der Hilfe des Installations-Wizards können Sie die Einstellungen für die Druckerumgebung schnell und einfach komplettieren und damit beginnen, die fantastischen Möglicheiten dieses Printservers zu erkunden. Diese Anleitung ist für die schnelle Installation in Peer-to-Peer-Umgebungen unter Windows gedacht. Sollten Sie auf Probleme stoßen, so finden Sie im Benutzerhandbuch auf der CD-ROM detailliertere Informationen. Wired / Wireless Printer Server Deutsch 13 Deutsch Installation der Hardware Die Packung beinhaltet die folgenden Komponenten: Ein Printserver Eine Antenne (Nur für Wireless-Printserver) Ein Netzteil Eine Kurzanleitung Eine CD-ROM (Beinhaltet die Software-Utilities, Treiber und das Benutzerhandbuch) Deutsch 1. Entnehmen Sie den Printserver der Verpackung und überprüfen Sie bitte, ob alle im vorherigen Abschnitt aufgeführten Komponenten enthalten sind. 2. Verbinden Sie den Printserver mit dem Drucker, den Sie übers Netzwerk zur Verfügung stellen möchten. 3. Verbinden Sie den Printserver mit Ihrem Netzwerk indem Sie das Netzwerkkabel am UTP-Port des Printservers anschließen. 4. Verbinden Sie das Netzteil mit dem Printserver. Nachdem der Printserver mit Strom versorgt wurde wird er einen Power-On-Selbsttest (POST)durchführen. Während diesem POST werden die Druckerport-LEDs leuchten. Nachdem sie erloschen sind ist der Printserver betriebsbereit. Anmerkung: Benutzen Sie das Netzteil, das mit dem Printserver mitgeliefert wurde. Verwenden Sie NICHT ein Netzteil anderer Herkunft. Installation von Treibern und Utilities Das Programm zur Installation der Treiber und Utilities führt auf Ihrem PC führt im Rahmen einer assistentenbasierten Prozedur die folgenden Schritte aus Installation aller notwendigen Netzwerktreiber und Utilities für den Druckerserver. Automatisches Hinzufügen der betreffenden Netzwerkports auf ihrem PC. Wired / Wireless Printer Server Deutsch 14 1. 2. 3. Legen Sie die Installations-CD des Drucker-Servers in das CD-ROM-Laufwerk Ihres PCs. Klicken Sie im Fenster des Autorun-Menüs auf “Driver and Utility”. Nach seinem Start extrahiert das Setup-Programm ein paar Dateien, um den InstallShield-Wizard aufzurufen. Nachdem Sie das Zielverzeichnis zur Installation der Utilities für den Druckerserver ausgewählt haben, folgen Sie bitte der Intallationsprozedur Schritt für Schritt bis diese abgeschlossen ist. Deutsch Nachdem die Installation durchgeführt wurde können Sie die Client-Computer einrichten. Sämtliche Netzwerkports der Drucker-Server, die im Netzwerk erkannt werden, werden automatisch Ihrem PC hinzugefügt. Klicken Sie danach auf “weiter” Wired / Wireless Printer Server Deutsch 15 Anmerkung: Falls derzeit keine Drucker-Server im Netzwerk erkannt werden schließen Sie die Installation bitte mit einem Klick auf “weiter” ab Deutsch Unter Start->Programme -> AirLive PrintServer Utilities können Sie das Netzwerk durch einen Klick auf “Network Port Quick Setup” automatisch nach dem Drucker-Server durchsuchen. Mit einem Klick auf “Remove Ports” lassen sich Netzwerkports auch manuell hinzufügen oder entfernen.. Konfiguration des Druckerservers Zur Konfiguration des Druckerservers klicken Sie bitte auf Start Æ Programme Æ AirLive PrintServer UtiiltiesÆ Print Server Configuration Wired / Wireless Printer Server Deutsch 16 Dieses Programm durchsucht beim Start das lokale Netzwerk nach Druckerservern, und führt diese in einer Servergruppe auf. Mit einem Klick auf einen dieser Server können sie dessen Status einsehen, Deutsch Klicken Sie auf das “Setup”-Symbol in der Werkzeugleiste. Die Einstellungsmöglicheiten des derzeit ausgewählten Druckerservers werden nun auf der rechten Seite des Fensters angezeigt Setup Wired / Wireless Printer Server Deutsch 17 Mit einem Doppelklick auf eines der Symbole gelangen Sie zur Konfiguration des betreffenden Druckerservers. In einem Pop-Up-Fenster werden Sie zunächst nach Benutzernamen und Passwort dieses Gerätes gefragt. Die werkseitige Vorgabe lautet dabei wie folgt: Benutzername: admin Passwort: airlive Deutsch Weitere Details zur Konfiguration des Druckerservers entnehmen Sie bitte dem Benutzerhandbuch. Wired / Wireless Printer Server Deutsch 18 Důleřité informace Tento print server podporuje TCP/IP, NetBEUI, IPX/SP a AppleTalk protokoly. Je tou nejlepší volbou pro různé typy sítí a operační systémy Windows Peer-to-Peer Printing (Windows 95/98/Me/NT/2000/XP/2003) Microsoft Windows NT/2000/2003 Server-Based Printing Novell NetWare 3.x/4.x/5.x Unix/Linux MAC OS Česky S pomocí instalačního průvodce nainstalujete jednoduše zařízení do vašeho síťového prostředí a můžete začít využívat skvělé možnosti tohoto tiskového serveru. Tato příručku popisuje rychlé nastavení v prostředí Windows Peer-to-peer.. Wired / Wireless Printer Server Czech 19 Hardwarová instalace Balení obsahuje následující komponenty:¨ tiskový server anténu (pouze pro bezdrátový typ) napájecí adaptér stručného průvodce instalací instalační CD-ROM 1. Rozbalte vaše zařízení a zkontrolujte zda obsahuje vše z výše uvedeného seznamu 2. Připojte tiskový server k tiskárně, kterou chcete sdílet v síti. 3. Připojte tiskový server do sítě pomocí síťového kabelu, který zapojíte do UTP portu tiskového serveru 4. Připojte napájecí adaptér tiskového serveru. Po zapnutí provede tiskový server POST test. Během tohoto testu budou tři LED diody portů svítit. Když LED diody pohasnou je tiskový server připraven.. Česky Poznámka: Používejte vždy originální napájecí adaptéry určené přímo k tomuto zařízení, nikdy nezkoušejte použít jiné. Instalace ovladačů a utilit Instalační program provede nainstalování potřebných ovladačů a utilit ve dvou krocích: Instalace síťových ovladačů tiskového serveru Instalace síťových portů. Wired / Wireless Printer Server Czech 20 1. 2. 3. Vložte instalační CD do vaší optické mechaniky. V menu zvolte „Driver and Utility“ Instalační program rozbalí potřebné soubory a spustí průvodce; po zadání cílového instalačního adresáře, postupujte dle průvodce k dokončení instalace Česky Když je instalační procedura dokončena, můžete nastavit klientský počítač. Všechny síťové porty tiskového serveru budou detekovány a automaticky přidány do vašeho počítače, pokračujte stiskem „Continue“ Wired / Wireless Printer Server Czech 21 Poznámka: Pokud není v síti detekován žádný tiskový server, tak prosím pokračujte stiskem „Continue“ k dokončení instalace. Pokračujte Start -> Programy -> AirLive Print Server Utilities: Můžete zvolit „Network Port Quick Setup“ pro automatické vyhledání tiskového serveru, nebo „Remove Ports“ pro ruční přidání síťového portu . Česky Konfigurace tiskového serveru Pokud chcete nastavit váš tiskový server postupujte následovně Start -> Programy -> AirLive Print Server Utilities -> Print Sever Configuration Wired / Wireless Printer Server Czech 22 Po spuštění tohoto programu se automaticky vyhledají tiskové servery v lokální síti, kliknutím na zvolený server se zobrazí jeho stav, Česky Stiskem ikony „Setup“ v liště nástrojů zahájíte konfiguraci zvoleného tiskového serveru Setup Wired / Wireless Printer Server Czech 23 Po spuštění konfigurace budete vyzváni k zadání uživatelského jména a hesla. V základním nastavení zadejte tyto hodnoty Uživatelské jméno: admin Heslo: airlive Česky Pro další možnosti konfigurace využijte prosím uživatelskou příručku. Wired / Wireless Printer Server Czech 24 Основные параметры Этот сервер печати поддерживает протоколы TCP/IP, NetBEUI, IPX/SPX и AppleTalk. Это лучшее устройство сетевой печати, предназначенное для работы в среде широко распространённых сетевых ОС: печать без выделенного сервера в среде Windows (Windows 95/98/Me/NT/2000/XP/2003) печать через выделенный сервер в среде Microsoft Windows NT/2000/2003 Novell NetWare 3.x/4.x/5.x Unix / Linux MAC OS В настоящем руководстве описывается простейшая процедура подключения и настройки печати без выделенного сервера в среде Windows. Wired / Wireless Printer Server Russian 25 Русский Благодаря подсказкам программы Installation Wizard (Мастер установки) вы сможете без особого труда и почти моментально задать параметры сетевой печати, и тут же приступить к использованию поразительного инструментария, которым вас обеспечил сервер печати. Подключение В упаковке должны находиться следующие компоненты: сервер печати — 1 шт. антенна (только для беспроводного сервера печати) — 1 шт. источник питания — 1 шт. «Краткое руководство по введению в эксплуатацию» — 1 шт. оптический диск (содержит всё служебное ПО, драйвер и «Руководство пользователя») — 1 шт. 1. Извлеките сервер печати из упаковки и убедитесь в том, что комплектация соответствует перечню, приведенному в предшествующем разделе. 2. Подключите к серверу печати принтер, который будет использоваться в качестве сетевого. 3. Пользуясь прилагаемым сетевым шнуром, подключите к ЛВС разъём UTP сервера печати. 4. Подключите к серверу печати источник питания. После включения питания сервер печати осуществляет процедуру начального самотестирования (POST). В течение процедуры POST индикаторы всех трёх разъёмов для подключения принтера будут непрерывно светиться. Сервер печати можно считать готовым к работе, когда эти индикаторы погаснут Русский Установка драйвера Программа установки драйвера выполняет следующие операции: Установка драйвера и фирменного программного обеспечения для настройки принт-сервера. Автоматическое добавление всех сетевых портов на ПК. Wired / Wireless Printer Server Russian 26 1. 2. 3. 1. Вставьте установочный компакт-диск в привод CD-ROM. Нажмите «Driver and Utility» («Установка драйвера») в открывшемся окне автозапуска. Запущенная установочная программа распакует необходимые файлы и запустит мастер InstallShield Wizard. . Wired / Wireless Printer Server Russian 27 Русский После завершения установки необходимо настроить клиентский компьютер. Порты всех принт-серверов, найденных в локальной сети, будут автоматически добавлены на компьютер. Нажмите «Continue» («Продолжить») Примечание: если ни один принт-сервер не найден, нажмите «Continue», чтобы закончить настройку. Во вкладке Start->Program files -> AirLive PrintServer Utilities; вы можете нажать «Network Port Quick Setup» («Быстрая настройка сетевых портов») для автоматического поиска принт-серверов, или нажать «Remove Ports» чтобы добавить или удалить сетевые порты вручную. Настройка принт-сервера Русский Если вы хотите настроить принт-сервер: Start («Пуск») Æ Program files («Программы») Æ AirLive PrintServer UtiltiesÆ Print Server Configuration («Настройка принт-сервера») Wired / Wireless Printer Server Russian 28 Запустив программу настройки, вы инициируете поиск всех принт-серверов вашей локальной сети, после чего сможете настроить конкретный принт-сервер, выбрав его. , Нажмите на кнопку «Setup» («Настроить») панели инструментов, параметры выбранного принт-сервера будут отображены в правой части окна Русский Setup Wired / Wireless Printer Server Russian 29 Дважды кликнув на одну из пиктограмм чтобы настроить выбранный принт-сервер. На экране появится всплывающее окно с проверкой доступа (имя пользователя и пароль) к принт-серверу. Удостоверяющие данные по умолчанию: Имя пользователя: admin Пароль: airlive За дополнительной информацией обратитесь к полному руководству пользователя. Русский Wired / Wireless Printer Server Russian 30 Informação Importante Este servidor de impressão suporta os protocolos TCP/IP, NetBEUI, IPX/ISPX e AppleTalk. É a melhor solução de impressão em rede para vários sistemas tais como: Windows Ponto-a-Ponto Printing (Windows 95/98/Me/NT/2000/XP/2003) Microsoft Windows NT/2000/2003 Server-Based Printing Novell NetWare 3.x/4.x/5.x Unix/Linux MAC OS Com a ajuda do Installation Wizard, pode fácil e instantaneamente completar as definições para o ambiente de impressão e começar a apreciar as fantásticas funcionalidades deste servidor de impressão. Este guia é utilizado para Instalação Rápida em ambientes de impressão Windows Ponto-a-Ponto. Se tiver algum problema, consulte o Manual de Utilizador no CD-ROM. Português Wired / Wireless Printer Server Português 31 Instalação de Hardware Este pacote contém: Um servidor de impressão Uma antena (só para servidor de impressão sem fios) Um transformador Um Guia de Instalação Rápida Um CD-ROM (que inclui todos os softwares Utility, Drivers e Manual de Utilizador) 1. Unpack the print server package and verify that all the items listed in the previous section are provided. 2. Ligue o servidor de impressão à impressora que pretende partilhar na rede. 3. Ligue o servidor de impressão à sua rede através de cabo de rede ligado à porta UTP do servidor de impressão 4. Ligue o transformador ao servidor de impressão. O servidor de impressão irá executar o Power-on-Self-Test (POST) após ser ligado. Durante o POST, os LEDS estão acesos. Quando estes se apagarem, o servidor de impressão está pronto. Nota: Deve usar somente o transformador enviado com o servidor de impressão; NÃO USE nenhum outro transformador. Português Instalação de Driver e Utility O Driver e o Utility executam um procedimento wizard-driven que realize as seguintes tarefas: Instalação de todos os Drivers e Utilities necessários ao Servidor de Impressão Acrescentar automaticamente todas as portas de rede ao seu PC. Wired / Wireless Printer Server Português 32 1. 2. 3. Insira o CD de Instalação do Servidor de Impressão na drive de CD do seu computador. Clique em “Driver and Utility” a partir do ecrã de menu Auto-Run. Uma vez executado, o programa Setup irá extrair ficheiros para activar o InstallShield Wizard; após escolher o local de destino dos utilities do Servidor de Impressão, siga passo-a-passo para completar o processo de instalação Quando o procedimento de instalação estiver completo, está pronto para de Impressão detectadas na rede serão automaticamente adicionadas ao PC; clique em “Continue”. Wired / Wireless Printer Server Português 33 Português definir o computador do Cliente. Todas as portas de rede dos Servidores Nota: Se não forem detectados quaisquer Servidores de Impressão na sua rede, clique em “Continue” para terminar a instalação. Seguindo Start->Program files -> AirLive PrintServer Utilities; pode fazer clique em “Network Port Quick Setup” para procurar automaticamente o Servidor de Impressão ou pode fazer clique em “Remove Ports” para adicionar/remover a porta de rede manualmente.. Configuração do Servidor de Impressão Se pretende configurar o Servidor de Impressão, clique em Start Æ Program files Æ AirLive PrintServer UtiiltiesÆ Print Server Configuration Português Wired / Wireless Printer Server Português 34 Enquanto executa este programa, está a procurar os Servidores de Impressão na rede local que serão listados no Server Group, pode fazer clique num deles para visualizar o respectivo estado., Clique em “Setup” na barra de ferramentas, as opções de definição do Servidor de Impressão actualmente seleccionado são exibidas na janela, lado direito. Wired / Wireless Printer Server Português Setup Português 35 Faça duplo clique numa das opções para definir o Servidor de Impressão seleccionado. Surge um ecrã para verificar o “User Name” e “Password” do Servidor de Impressão. Os valores por defeito são: : User Name: admin Password: airlive Para mais detalhes sobre a configuração do Servidor de Impressão, consulte o manual de utilizador.. Português Wired / Wireless Printer Server Português 36 重要情報 日本語 このプリント・サーバは TCP/IP、NetBEUI、IPX/SPX、およ び AppleTalk にプロトコルをサポートします。それ、様々 な一般的なネットワーク OS のための最も良いネットワー ク印刷ソリューショ Windows ピア・ツー・ピア印刷(Windows 95/98/Me/NT/2000/XP/2003) マイクロソフトの Windows NT/2000/2003 のサーバベースの印刷 Novell NetWare 3.x/4.x/5.x Unix/Linux MAC OS インスタレーションウィザードの支援によって、容易に 即座に印刷の環境のためのセッティングを完成すること ができ、このプリント・サーバーによって提供されるフ ァンタスティック的な特徴を楽しみ始めます。 このガイドは Windows ピアツーピア印刷環境への迅速な インストールに使用されます。 どんな問題も見つけるな ら、その他の詳細情報について CD-ROM の上のユーザーズ マニュアルを参照してください。 Wired / Wireless Printer Server 日本語 37 ハードウェアインストール 日本語 このパッケージは以下のコンポーネントを含んでいます: 1 つのプリント・サーバ 1 つのアンテナ(ワイヤレスのプリント・サーバのため) 1 つのパワーアダプター 1 つのインストール・ガイド 1 つの CD-ROM(ソフトウェア・ユーティリィティ、ドライバーお よびユーザーズマニュアルをすべて含んで) 1. プリント・サーバー・パッケージを解いて、前のセクションにリスト されたアイテムがすべて提供されることを確認してください。 2. あなたがネットワーク上で共有したいプリンタにプリント・サーバー を接続してください。 3. あなたのネットワークにプリント・サーバーを接続する、プリント・ サーバーの UTP ポートへネットワーク・ケーブルを付けます。 4. パワーアダプターをプリント・サーバに接続してください。それが電 源が入れられた後、プリント・サーバーはパワー・オン・セルフテス ト(POST)を行なうでしょう。POST に、プリンタポート LED がオンに なるでしょう。LEDs が非点灯されるとき、プリント・サーバは準備 ができています。 注意:プリント・サーバーと共に送られたパワー・アダプターを使用し なければならず、他の出所からの他のパワー・アダプターを使用しませ ん。. ドライバーとユーティリティー・インストール ドライバとユーティリティー・プログラムは以下のタスクを実行するウィ ザードの手順を実行します。 クライアントのために全ての必要なプリント・サーバ Network Driver をインストールしてください。 また、プリンターサーバー構成のためにプリント・サーバ Windows Utility をインストールするかしないかを選択してください。 . Wired / Wireless Printer Server 日本語 38 1. 3. 日本語 2. プリント・サーバのインスタレーション CD を CD-ROM 装置 に挿入します。. Auto-Run 自動起動メニュースクリーンからの「Driver and Utility ドライバーとユーティリティ」をクリックします。 いったん実行されると、Setup プログラムはインストールシー ルド・ウィザードを起動するためにファイルを引き抜きます; インストール Printer Server ユーティリティの目的地の位置を 選び後に、あなたがインストールしたいコンポーネントを選択 することができて、まだはプリント・サーバ Windows Utility のチェックを外して、プリント・サーバ Network Driver だけ をインストールしたこともできます。 インストール手順が完了されるとき、あなたはクライアントのコンピュー タをセットアップすることができます。ネットワーク上で見つけられるプ リント・サーバの全てのネットワークポートは、自動的にあなたの PC に加えられます、が「次に」をクリックしてください。 Wired / Wireless Printer Server 日本語 39 日本語 注意: :ネットワークでプリント・サーバが見つけられないな ら、「次に」をクリックして、インストールを終えてください。 次の通りに Start->Program files -> AirLive プリント・サーバ Utilities;あなた、自動的にプリント・サーバ、またはあなたがそう することができる検索のための「Network Port Quick Setup ネット ワークポートクィックセットアップ」クリックが「Remove Ports ポートを取り外す」クリックは、手動で Network ポートを加える か、または取り外すことができます。 プリントサーバー構成 プリント・サーバをセットアップしたいなら、次の通りに スタート->プログラムファイル-> AirLive PrintServer Utilities; Print Server Configuration。 Wired / Wireless Printer Server 日本語 40 日本語 このプログラムを実行する後、ローカルネットワーク上でプリント・ サーバを捜して、そして Server Group リストに記載します、プリント サーバーの状態を見るためにプリントサーバーのうちの 1 台をクリッ クしてください。, ツールバーの「セットアップ」アイコンをクリックしてくださいと、選 択されたプリント・サーバのセットアップ項目がウインドウの右側で示し Setup Wired / Wireless Printer Server 日本語 41 日本語 選ばれたプリントサーバーをセットアップするために、アイコンのうちの 1 つをダブルクリックしてください。スクリーンは、プリントサーバーの「ユ ーザーName」と「パスワード」を確かめるために現れます。デフォルト値は 以下の通りです。 User Name: admin Password: airlive より詳しいプリント・サーバ構成のために、ユーザーズマニュアル を参照してください。 Wired / Wireless Printer Server 日本語 42 Dôležité informácie Tento tlačový server podporuje prenos dát pomocou protokolov TCP/IP, NetBEUI, IPX/SPX a AppleTalk. Je to najlepšie tlačové riešenie pre rozličné operačné systémy ako je: tlač vo Windows (Windows 95/98/Me/NT/2000/XP/2003) Serverová tlač v Microsoft Windows NT/2000/2003 Novell NetWare 3.x/4.x/5.x Unix/Linux MAC OS S pomocou Sprievodcu inštaláciou môžete jednoducho vykonať nastavenie tlačového prostredia a začať s používaním fantastických možností poskytovaných týmto tlačovým serverom. Tento stručný návod vám pomôže s rýchlou inštaláciou v peer-to-peer prostredí Windows. Ak natrafíte na nejaký problém, prosím prezrite si návod na použitie, ktorý nájdete na CD dodávanom spolu s výrobkom. Wired / Wireless Printer Server Slovensky 43 Slovensky Peer-to-Peer Hardvérová inštalácia V škatuli by ste mali nájsť tieto súčasti: Tlačový server Anténu (platí pre bezdrôtový tlačový server) Slovensky Napäťový adaptér Stručného sprievodcu nastavením CD-ROM (so všetkými utilitami, ovládačmi a návodom na žiti ) 1. Rozbaľte tlačový server a skontrolute či sa v škatuli nachádzajú všetky spomenuté súčasti. 2. Pripojte server k tlačiarni ktorú chcete zdieľať na sieti.. 3. Pripojte tlačový server k sieti pomocou eternetového kábla 4. Pripojte k serveru napäťový adaptér. Zariadenie automatický vykoná všetky potrebné testy. Po zhasnutí LED s popisom Status je zariadenie pripravené na používanie Pozn.: Používajte výhradne napäťový adaptér dodávaný spolu s tlačovým serverom.. Inštalácia ovládačov a programu Program spustí sprievodcu, ktorý vykoná tieto kroky: Nainštaluje všetky ovládače a potrebné programy Automaticky pridá všetky porty tlačových serverov do vášho PC. Wired / Wireless Printer Server Slovensky 44 1. 2. 3. Vložte do PC inštalačné CD. V automaticky spustenom okne kliknite na “Driver and Utility”. Po spustení program rozbalí a spustí program InstallShield Wizard; počkajte na spustenie a nasledujte jeho pokyny až do konca inštalačného procesu Slovensky Po ukončení inštalačnej procedúry môžete začať s nastavovaním klientského počítača. Všetky porty serverov pripojených do siete budú do vášho PC pridané automaticky, kliknite na “Continue” Wired / Wireless Printer Server Slovensky 45 Slovensky Pozn. : ak sa nepodarí nájsť žiadne porty serverov na sieti, kliknite na “Continue” a ukončite inštaláciu.. Po kliknutí na Start->Program files -> AirLive PrintServer Utilities; môžete spustiť “Network Port Quick Setup” a program automaticky vyhľadá dostupné servery. Ak kliknete na “Remove Ports”, môžete pridávať alebo odoberať porty ručne . Print Server Configuration Ak chcete nastaviť tlačový server, kliknite na Start Æ Program files Æ AirLive PrintServer UtiiltiesÆ Print Server Configuration Wired / Wireless Printer Server Slovensky 46 Tento program vyhľadá všetky tlačové servery na vašej lokálnej sieti a zobrazí ich v skupine serverov. Na každý zo serverov môžete kliknúť a uvidíte jeho aktuálny stav,, Slovensky Kliknite na ikonu “Setup” v paneli nástrojov a v pravej časti okna uvidíte možnosti nastavenia vybratého servera Setup Wired / Wireless Printer Server Slovensky 47 Dvojkliknite na ikonu servera. V okne zadajte prístupové meno a heslo k tlačovému serveru. Štandardne nastavené hodnoty Meno: admin Heslo: airlive Slovensky Detailný opis nastavení servera sa nachádza v návode na použitie. Wired / Wireless Printer Server Slovensky 48 Informatii importante Acest print server suporta protocoale TCP/IP, NetBEUI, IPX/SPX si AppleTalk. Este cea mai buna solutie de tiparit in retea pentru diferite sisteme de operare de retea cum ar fi: Tiparire Egal-la-Egal Windows (Windows 95/98/Me/NT/2000/XP/2003) Tiparire tip server in Windows NT/2000/2003 Novell Netware 3.x/4.x/5.x Romania Unix/Linux MAC OS Cu ajutorul Interfetei de Instalare puteti completa usor si instant setarile mediului de tiparire si sa incepeti sa va delectati cu caracterisiticile minunate furnizate de acest print server. Acest ghid este folosit pentru instalarea rapida sub mediu de tiparire Windows de tip egal-la-egal. Daca gasiti orice problema, va rugam recurgeti la Manualul Utilizatorului pe CD-ROM pentru informatii mai detailate. Wired / Wireless Printer Server Romania 49 Instalare Hardware Acest pachet contine urmatoarele componente: Un Print Server O Antena (Doar pentru Print Server Wireless) Un Adaptor de Tensiune Un Ghid de Instalare Rapida Un CD-ROM (Incluzand toate utilitarele software, driver si Manualul Utilizatorului) Romania 1. Despachetati continutul cu print serverul si verificati daca toate obiectele listate in sectiunea precedenta sunt furnizate. 2. Conectati print serverul la imprimanta pe care doriti sa o distribuiti in retea.. 3. Conectati print serverul la reteaua dumneavoastra prin atasarea cablului de retea la portul UTP al print serverului. 4. Conectati cordonul de alimentare al print serverului. Print serverul va executa Autotest-la-Pornire (POST) dupa ce a fost pornit. In timp ce face POST, cele 3 LED-uri vor fi aprinse. Cand LED-urile se vor stinge, print serverul este pregatit. Nota: Trebuie sa folositi cordonul de alimentare furnizat impreuna cu print serverul, NU folositi alt tip de cordon de alimentare din alte surse... Instalare driver si utilitar Driverul si Programul Utilitar executa o procedura automata care indeplineste umatoarea sarcina: Instaleaza toate Driverele Print Serverului de Retea si Utilitare necesare Adauga automat toate Porturile de Retea la PC-ul dumneavoastra. Wired / Wireless Printer Server Romania 50 1. 2. 3. Introduceti CD-ul de instalare in unitatea CD-ROM. Apasati „Driver si Utilitar” din meniul Auto-Rulare. Odata executat, programul de instalare va extrage fisierele pentru a lansa InstallShield (interfata de instalare); apoi alegeti destinatia utilitarului de Print Server, urmariti-l pas cu pas pentru a completa procesul de instalare Romania Cand procedura de instalare s-a terminat, se pot pregati calculatoarele clientilor. Toate porturile de retea vor fi adaugate automat la Pc-ul dumneavoastra, apasati „Continuare” Wired / Wireless Printer Server Romania 51 Nota: Daca nu sunt detectate print servere in reteaua curenta, va rugam apasati „Continuare” pentru a termina instalarea.. Romania Urmarind Start -> Program Files -> AirLive PrintServer Utilities; puteti apasa „Network Port Quick Setup” pentru a cauta automat print serverul, sau puteti apasa “Remove Ports” pentru a adauga/scoate manual portul de Retea. . Configurarea Print Serverului Daca doriti sa instalati Print Serverul, va rugam apasati Start Æ Program files Æ AirLive PrintServer UtiiltiesÆ Print Server Configuration Wired / Wireless Printer Server Romania 52 Cand se executa programul, va cauta print serverul pe reteaua locala si va lista in Grupul de Servere, puteti apasa pe unul din print servere pentru a vizualiza situatia. Romania Apasati iconita „Setup” pe bara de lucru, iar obiectele print serverului selectat vor fi afisate pe partea dreapta a ferestrei Setup Wired / Wireless Printer Server Romania 53 Apasati de doua ori pe una din iconite ale print serverului selectat. Va apare un ecran cu verificarea „Nume Utilizator” si „Parola” print serverului. Valorile implicite sunt urmatoarele: Nume Utilizator: admin Parola: airlive Romania Pentru mai configurari ale Prin Serverului mai detailate, va rugam recurgeti la Manualul Utilizatorului. Wired / Wireless Printer Server Romania 54 EN PT OvisLink Corporation declares that this device is in compliance with the essential requirements and other relevant provisions of directive 1999/5/EC RU OvisLink Corporation declara que el dispositivo cumple con los requerimientos básicos y otras facilidades relevantes de la directriz 1999/5/EC ES Компания OvisLink Corporation заявляет, что это устройство отвечает основным требованиям и прочим родственным условиям, изложенным в директиве 1999/5/EC. A OvisLink Corporation declara que este dispositivo está em conformidade com os requisitos essenciais e outras solicitações relevantes da Directiva 1999/5/EC. PL SK OvisLink Corporation potvrdzuje, že toto zariadenie vyhovuje požiadavkám a ďalším predpisom smernice 1999/5/EC. OvisLink deklaruje zgodność swoich urządzeń z istotnymi wymaganiami oraz innymi istotnymi przepisami dyrektywy 1999/5/E/C JP CZ Ovislink Corporation deklaruje, že toto zařízení vyhovuje základním požadavkům a dalším závazným ustanovením z nařízení 1999/5/EC この装置が指導的な1999/5/EC の必要な条件そし て他の関連した準備に従ってあるとOvisLink Corporation は宣言する DE OvisLink Corporation erklärt hiermit, dass dieses Gerät den grundlegenden Vorschriften und anderen relevanten Bestimmungen der EG-Richtlinie 1995/5/EC entspricht. Tested To Comply With FCC Standards. FOR HOME OR OFFICE USE OvisLink Corp. 2F, No. 8, Lane 130, Min-Chuan Rd, Hsin-Tien City, Taipei, Taiwan