1
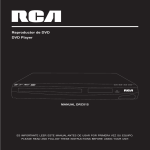
Microsistema con DVD
Micro DVD Player
VOL
DVD Micro System RS2202
POWER
USB
DVD/RADIO
DVD/MPEG4/SVCD/VCD/CD/MP3/CD-R/CD-RW
MANUAL RS2202
ES IMPORTANTE LEER ESTE MANUAL ANTES DE USAR POR PRIMERA VEZ SU EQUIPO.
PLEASE READ AND FOLLOW THESE INSTRUCTIONS BEFORE USING YOUR UNIT.
PARA EVITAR EL RIESGO DE INCENDIO O CHOQUE ELÉCTRICO, NO UTILICE ESTE
ENCHUFE CON UN CABLE DE EXTENSIÓN, RECEPTÁCULO U OTRO TOMACORRIENTE
SALVO QUE LAS PALETAS PUEDAN INTRODUCIRSE COMPLETAMENTE PARA EVITAR
QUE LAS MISMAS QUEDEN EXPUESTAS. PARA EVITAR EL RIESGO DE INCENDIO O
CHOQUE ELÉCTRICO, NO EXPONGA ESTE APARATO A LA LLUVIA O LA HUMEDAD.
PRECAUCIÓN
RIESGO DE CHOQUE ELÉCTRICO
NO ABRIR
El símbolo de rayo con una flecha,
dentro de un triángulo equilátero,
tiene la intención de alertar al
usuario sobre la presencia de
‘voltaje peligroso’ no aislado
dentro del alojamiento del
producto que pudiera ser de una
magnitud suficiente para constituir
un riesgo de choque eléctrico.
ADVERTENCIA: PARA REDUCIR
EL RIESGO DE UN CHOQUE
ELÉCTRICO, NO RETIRE LA TAPA
(NI LA PARTE POSTERIOR). NO
HAY PARTES INTERNAS A LAS
CUALES EL USUARIO PUEDA DAR
SERVICIO. SÓLO EL PERSONAL
CALIFICADO DE SERVICIO DEBERÁ
REPARAR ESTA UNIDAD.
El signo de admiración dentro
de un triángulo equilátero
tiene la intención de alertar
al usuario sobre la presencia
de importantes instrucciones
de operación y mantenimiento
(servicio) incluidas en el folleto
que acompaña a la unidad.
Importantes Instrucciones de Seguridad
1. Lea estas instrucciones.
2. Conserve estas instrucciones.
3. Preste atención a todas las advertencias.
4. Acate todas las instrucciones.
5. No use este aparato cerca del agua.
6. Limpie sólo con un trapo seco.
7. No obstruya ningún orificio de ventilación. Instale en conformidad con las instrucciones del
fabricante.
8. No instale cerca de fuentes térmicas, por ejemplo, radiadores, reguladores de calefacción,
cocinas y otros aparatos que generen calor (incluidos los amplificadores).
9. No anule el propósito de seguridad que tiene el enchufe polarizado o puesto a tierra. Un
enchufe polarizado tiene dos paletas, una más ancha que la otra. Un enchufe puesto a tierra
tiene dos paletas y una espiga de conexión a tierra. La paleta más ancha o la tercera espiga se
ha incluido por su seguridad. Si el enchufe provisto no encaja en su tomacorriente, solicítele a
un electricista que reemplace ese tomacorriente obsoleto.
10. Proteja el cable de alimentación de modo que no resulte pisado ni aprisionado
-2-
especialmente en el enchufe, la caja de contacto y el punto por donde sale del aparato.
11. Use sólo accesorios especificados por el fabricante.
12. Desenchufe este aparato en caso de tormentas o de lapsos prolongados de inactividad.
13. Sólo personal calificado de servicio puede efectuar toda labor de mantenimiento. Es
necesario darle mantenimiento al aparato si ha sido averiado de alguna forma, por ejemplo, si
se ha dañado el cable de alimentación o el enchufe, si se le ha derramado algún líquido
encima, si han caído objetos en su interior, si ha sido expuesto a la lluvia o la humedad, si no
funciona correctamente o si se ha dejado caer.
14. Este aparato no deberá exponerse a goteos o salpicaduras de agua, y no se deberán
colocar objetos que contengan líquidos, como por ejemplo floreros, sobre el mismo.
15. No sobrecargue el tomacorriente mural. Utilice la fuente de alimentación únicamente
según se indica.
16. Utilice repuestos según lo especifique el fabricante.
17. El producto puede montarse en pared sólo si así lo recomienda el fabricante.
18. Una vez terminado el ajuste o reparación de este producto, solicítele al técnico de
mantenimiento que efectúe una comprobación de precaución.
SOLO PERSONAL DE SERVICIO DEBIDAMENTE CALIFICADO DEBERÁ
AJUSTAR O REPARAR ESTA UNIDAD.
-3-
CLASS 1 LASER PRODUCT
PRODUCTO LASER DE CLASE 1
PRODUTO LASER CLASSE 1
PRECAUCIÓN
RADIACIÓN DE LÁSER INVISIBLE
AL ABRIRSE Y BLOQUEOS
ANULADOS.
EVITE LA EXPOSICIÓN AL RAYO.
Este producto contiene un Dispositivo Láser de baja potencia.
Notas Importantes
?
Maneje los controles e interruptores según se describe en el manual.
?
Ántes de ‘Encender’ la unidad, asegúrese que el cable de alimentación esté debidamente
instalado.
?
Guarde sus discos compactos en un área fresca para evitar daños por calor.
?
Cuando mueva la unidad, asegúrese de desconectar primero el cable de alimentación.
?
Evite instalar esta unidad en ubicaciones expuestas a la luz directa del sol o cerca de
fuentes térmicas tales como calentadores eléctricos, encima de equipo estereofónico que
irradie demasiado calor, lugares con poca ventilación o áreas polvorientas, lugares sujetos
a vibración constante y/o áreas húmedas o mojadas.
?
No intente limpiar esta unidad con solventes químicos ya que podrían ocasionar daño al
acabado. Utilice un paño seco y limpio.
Información de la FCC
Este equipo ha sido probado y se considera que cumple con los términos de los aparatos
digitales de Clase B, de acuerdo con lo dispuesto en la Parte 15 de las Normas de FCC. El
objetivo de estos límites es ofrecer una protección razonable contra interferencias nocivas en
una instalación residencial. Este equipo genera, utiliza y puede radiar energía a frecuencia de
radio y en caso de que no se haya instalado y se use de acuerdo con las instrucciones, puede
causar interferencia dañina a las comunicaciones de radio. Sin embargo, no hay garantía de
que no ocurrirá interferencia en una instalación en particular. Si su equipo causa interferencia
nociva en la recepción de radio o televisión, que puede averiguar apagando y encendiendo el
equipo, intente corregirla mediante alguna o varias de las siguientes maneras:
-4-
• Vuelva a orientar o cambie de lugar la antena receptora.
• Aumente la separación entre el equipo y el receptor.
• Conecte el equipo a un tomacorriente en un circuito diferente al que esté conectado el
receptor.
• Consulte al distribuidor o a un técnico experimentado de radio y televisión para solicitar
asistencia.
Este dispositivo cumple con la Parte 15 de las Normas de la FCC. Su funcionamiento está
sujeto a las siguientes dos condiciones:
?
Este dispositivo no debe causar interferencia dañina, y
?
este dispositivo debe aceptar toda interferencia recibida, incluida aquella que puede causar
un funcionamiento no deseado.
-5-
CARACTERÍSTICAS
Gracias por adquirir nuestro producto. Por favor, lea este manual con atención antes de
conectar y operar la unidad. Por favor, guarde este manual para futuras consultas.
Este reproductor de DVD es una nueva generación de reproductores que pueden producir
video y audio de alta calidad. Su rendimiento es mucho mejor que el de cualquier sistema de
reproducción en casa anterior. Le puede proporcionar mayor entretenimiento.
?
Decodificador de audio digital Dolby Digital, LPCM, MPEG, etc.
?
Procesador de audio digital HiFi, 96kHz/24bit o 48kHz/24bit.
?
Actualización inteligente de software.
?
Imagen de alta resolución. Compatible con futuros equipos de video.
?
Salida de audio digital coaxial.
?
Súper compatible con DVD / VCD / CD / MP3 / MPEG4, CD de imágenes .
?
Sistema servo integrado de cuarta generación, que decodifica con tecnología de chip
simple, con alta confiabilidad y estabilidad y súper corrección de errores.
?
Completo funcionamiento con control remoto.
?
Sintonizador de radio estéreo AM/FM.
?
Amplificador incorporado de alta sensibilidad.
-6-
IMPORTANTES INSTRUCCIONES DE SEGURIDAD
1) INSTRUCCIONES DE SEGURIDAD
1. Lea estas instrucciones.
2. Guarde estas instrucciones.
3. Preste atención a todas las advertencias.
4. Siga las instrucciones.
5. No utilice el equipo cerca del agua.
6. Limpie solo con un paño seco.
7. No bloquee ninguna de las aberturas de ventilación. Instale de acuerdo con las instrucciones
del fabricante.
8. No se debe instalar cerca de fuentes de calor como radiadores, salidas de calor, estufas u
otros equipos (incluidos amplificadores) que produzcan calor.
9. No inhabilite la función de seguridad del enchufe polarizado o provisto de conexión a tierra.
Un enchufe polarizado dispone de dos hojas, una más ancha que la otra. Una clavija para
conexión a tierra dispone de dos hojas además de una tercera patilla de conexión a tierra. La
hoja ancha y la tercera patilla cumplen una función de seguridad. Si la clavija suministrada no
encaja en el tomacorriente, solicite a un electricista que lo cambie.
10. Debe protegerse el cable de alimentación de manera tal que no se pise ni quede apretado
por otros objetos, especialmente en los enchufes, los tomas de corriente y los puntos de salida
del equipo.
11. Solo se deben utilizar conexiones/accesorios especificados por el fabricante.
-7-
IMPORTANTES INSTRUCCIONES DE SEGURIDAD
12. Solo se deberá utilizar con un carro, un soporte, trípode o mesa
especificada por el fabricante o comercializado con el aparato. Cuando se
utilice un carro, tenga cuidado al mover la combinación de aparato/carro para
evitar lesiones si se cae.
13. Desenchufe el aparato del tomacorriente durante tormentas eléctricas o cuando no vaya a
utilizarlo por períodos prolongados.
14. Todas las reparaciones deben remitirse a un técnico calificado. Será necesario reparar este
equipo cuando sufra cualquier tipo de daño, como por ejemplo cuando el cable de alimentación
o el enchufe estén dañados, cuando se haya derramado líquido o hayan caído objetos en el
interior del equipo, si el equipo ha quedado expuesto a la lluvia o la humedad, si no funciona
normalmente, o cuando se haya caído.
15. El enchufe, como dispositivo de conexión de la alimentación, deberá estar accesible
durante el uso diario.
16. No deberá exponer el aparato a goteos ni salpicaduras y no se deberán colocar objetos que
contengan líquido, tales como floreros, sobre la unidad.
?
Este equipo debe ubicarse cerca del tomacorriente y este debe estar fácilmente acesible.
?
El aparato no debe quedar expuesto a goteo ni salpicaduras y no debe colocarse sobre el
aparato objetos con líquidos tales como vasos etc.
?
Para reducir el riesgo de incendio o descarga eléctrica, no exponga el equipo a la lluvia o la
humedad.
-8-
IMPORTANTES INSTRUCCIONES DE SEGURIDAD
RISK OF ELECTRIC SHOCK
DO NOT OPEN
ADVERTENCIA:
Para reducir el riesgo de incendio o descarga eléctrica,
no exponga el aparato a lluvias o humedad.
Nota:
Deberá utilizar este producto solamente en lugares
cerrados.
El símbolo del rayo con cabeza de flecha dentro de un triángulo equilátero
tiene por objeto alertar al usuario acerca de la presencia de “voltaje
peligroso” no aislado dentro del producto que puede ser de tal magnitud que
constituya un riesgo de descarga eléctrica para la persona.
El signo de exclamación dentro de un triángulo equilátero tiene por objeto
alertar al usuario acerca de la presencia de importantes instrucciones de
operación y mantenimiento (reparación) en la literatura que acompaña el
equipo.
-9-
ACCESORIOS
Accesorios
Manual de usuario
Control remoto
Antena AM
Cable Audio / Video
Antena FM
Cable de conexión de los altavoces
Use r man ual
Control Remoto
?
Inserte las baterías en el control remoto. El control remoto tiene un rango de funcionamiento
de 8 metros si esta al frente de la unidad y un rango de 6 metros si esta a un lado de la
unidad dentro de los 30º a derecha o izquierda.
?
Retire la batería del control remoto si no lo va a utilizar por un largo período de tiempo.
Esta unidad puede reproducir los siguientes tipos de discos
Tipo de disco
Símbolo
DVD
Audio + Video
MP3
Video-CD
VCD
Audio
COMPACT
DIGITAL VIDEO
VIDEO CD
CD-DA
Audio + Video
Audio
Foto electrónica
Picture CD
MPEG-4
Contenido
V I
Audio + Video
D E O
- 10 -
PANEL
Panel frontal
1 Botón STANDBY
2 Puerto USB
VOL
3 Tapa del disco
4 Botón DVD / RADIO
5 Botón Anterior
STANDBY
USB
6 Botón Siguiente
DVD/RADIO
7 Botón PLAY/PAUSE
8 Botón OPEN/CLOSE
9 Auriculares
10 Perilla de volumen
1
2
3 4
6
5
7
9
8
10
Panel posterior
1 Salida del altavoz
R
2 Salida de video
L
3 Salida de S-video
FM 75 ohm
SPEAKER OUT
ANTENNA
AM LOOP
4 Salida de audio
6~16
POWER
VIDEO
5 Salida digital coaxial
ON
Y
Cb/Pb
Cr/P r
L
R
COAXIAL
6 Componente Y, Pb/Cb, Pr/Cr
OFF
S-VIDEO
~
7 Antena FM
8 Encendido/Apagado
9 Antena AM
1 2
3
4
5
6 7 8
9
- 11 -
CONEXIÓN
Conexión del sistema de video
Las siguientes salidas de video están
S-VIDEO
VIDEO
Entrada Componente
Y
disponibles para esta unidad.
Cb/Pb Cr/Pr
Video compuesto
Utilice el cable AV (terminal amarilla) para
conectar la Terminal de salida de video
compuesto de esta unidad con la terminal de
entrada de video del monitor / TV.
S-video
Utilice el cable S-video para conectar la
terminal de salida de s-video de esta unidad
con la terminal de entrada de s-video del
monitor / TV.
Y
VIDEO
Cb/Pb
S-VIDEO
Salida de video y
de S-video
Video componente (YUV)
Cr/Pr
Utilice el cable AV de 3 puntas para conectar
las terminales de salida componente de esta
Salida de video
componente
unidad con las correspondientes terminales de
entrada del monitor / TV.
Nota:
La conexión real dependerá de la terminal de entrada del monitor / TV.
?
?
No utilice todas las conexiones al mismo tiempo o afectará la imagen.
?
Solo si la conexión física coincide con la configuración de video, podrá producir la imagen
normal (por favor consulte la sección Configuración de Video en Configuración del
sistema).
- 12 -
CONEXIÓN
Sistema de conexión de audio
Hay dos tipos de sistemas de salida de
audio: audio análogo y audio digital
Terminal de entrada del monitor / TV
El
Entrada audio 2CH
audio análogo incluye una salida estéreo
R
de 2 canales. El audio digital incluye una
L
Entrada audio digital
Altavoces
COAXIAL
salida coaxial y la calidad de sonido es
mejor que la de audio análogo.
Blanco
Negro
Salida de 2 CH
Negro
Blanco
Utilice un par de cables de audio (rojo para
derecha / blanco para izquierda) para
R
conectar la terminal de entrada de audio
R
L
L
estéreo de la TV o amplificador AV con la
COAXIA L
DIG ITAL AUDIO
salida de audio de esta unidad.
Salida de audio 2CH
Salida audio /óptica coaxial
Salida de altavoces
Terminal de salida del DVD
Audio digital coaxial
Utilice el cable coaxial especificado para
conectar la terminal de salida coaxial de
esta unidad con la terminal de entrada
coaxial del amplificador de potencia.
Salida de los altavoces
Utilice el cable especifico (blanco + negro )
provisto con los accesorios para conectar
esta unidad con la entrada de las cajas de
sonido.
Nota:
La conexión física deberá coincidir con la configuración de salida de audio de esta unidad. Por
favor, consulte la sección Configuración de Audio en la Configuración del Sistema.
- 13 -
CONFIGURACIÓN DEL SISTEMA
Operación del menú
Pulse el botón [SETUP] en el control remoto y se mostrará el menú principal de
CONFIGURACIÓN.
1.
Después de acceder al menú de CONFIGURACIÖN, pulse los botones
y
hasta el
punto deseado y luego pulse el botón [ENTER] para ingresar al submenú. Utilice los botones
11111y
para seleccionar la opción deseada y pulse el botón [ENTER] para confirmar su
selección. Ahora, la configuración de esta función actual está completa.
2.
Para finalizar la configuración, pulse el botón [SETUP] nuevamente. En el menú de
CONFIGURACIÓN, puede seleccionar cualquiera de las siguientes opciones que desee:
Página de configuración general
Esta opción se utiliza para configurar el formato de la pantalla de TV, las funciones de video y
las funciones de DVD, con opciones de “Pantalla TV”, “Marca de ángulo”, “Idioma menús””,
“Diálogo subtitulado”, “Protector de pantalla” y “Ultima memoria”.
Pantalla TV:
4:3 PANSCAN: Seleccione esta configuración cuando la unidad se conecta con un televisor
normal, la imagen se mostrará en la pantalla completa, pero se cortarán algunas partes
4:3 LETTERBOX: Seleccione esta configuración si su reproductor de DVD está conectado
con un TV normal. Podrá ver la película en toda la pantalla de su TV. Esto significa que abarcará
una parte menor de la pantalla en forma vertical. Es posible que la película se vea con franjas
negras en la parte inferior y superior de la pantalla.
16:9: Seleccione esta configuración si su reproductor de DVD está conectado con una TV de
pantalla ancha.
Reducción de anchura: Seleccione esta configuración si su reproductor de DVD está
conectado con una TV de pantalla ancha.
- 14 -
CONFIGURACIÓN DEL SISTEMA
Marca de ángulo:
Se mostrará la marca de ángulo cuando el disco DVD tenga múltiples ángulos de visión si esta
opción está activada.
Idioma menús:
Seleccione el idioma de la información en pantalla.
Diálogo subtitulado:
Esta opción no funcionará cuando el disco no tiene subtitulado. Si la opción está desactivada,
pulse el botón [SUBTITLE] en el control remoto para activar el subtitulado.
Protector de pantalla:
Si el protector de pantalla está activado y la unidad está encendida sin reproducir ningún disco
por varios minutos, una imagen móvil aparecerá en la pantalla y la unidad entrará en modo de
espera después de 20 minutos. Pulse el botón [STANDBY] en el control remoto para activar la
pantalla.
Última memoria:
Cuando esta función está activada, la unidad puede memorizar el tiempo transcurrido desde la
última vez que reprodujo el disco. Cuando reanude la reproducción del disco, éste comenzará
desde el tiempo memorizado.
Página de configuración de audio
Configuración de audio análogo:
DOWNMIX:
Utilice los botones
y
para desplazarse y seleccionar una opción.
LT/RT: La salida de audio es emitida a través de los canales izquierdo y derecho, incluso si el
sonido original es en formato 5.1CH.
- 15 -
CONFIGURACIÓN DEL SISTEMA
ESTÉREO: La salida de audio es en formato estéreo incluso si el sonido original es en formato
5.1CH.
Configuración de audio digital:
Salida digital:
SPDIF DESACTIVADO: No hay salida digital (desactiva salida coaxial u óptica), solo salida de
audio análogo.
TODO: Si selecciona esta opción, podrá configurar la opción SIN FORMATO.
SOLO PCM: En modo SPDIF / PCM, configure el canal PCM según su preferencia.
Salida LPCM:
Seleccione la frecuencia PCM en 48kHz o 96kHz.
NOTA: Algunos amplificadores no son compatibles con el muestreo de 96kHz y esto afectará
la salida coaxial.
Configuración DOLBY DIGITAL:
DUAL MONO:
Estéreo: Configura la salida de audio como salida estéreo.
L-mono: Configura la salida de audio como mono a través del canal izquierdo.
R-mono: Configura la salida de audio como mono a través del canal derecho.
Mono-mezcla: Configura la salida de audio a través del canal mono-mezcla.
DINÁMICO:
Seleccione esta opción para reducir el volumen general y mantener un sonido de audio
definido.
Página de configuración de video
Salida de video:
DESACTIVAR: Configura la salida de video en video compuesto.
- 16 -
CONFIGURACIÓN DEL SISTEMA
YUV: Configura la salida de video en formato de video componente análogo cuando está
conectado con terminales Y/U/V.
P-YUV: Configura las señales YUV progresivas. La conexión es igual que la conexión YUV.
Nota:
Si la configuración de video difiere de la conexión física, es posible que el televisor no tenga
imagen. En este caso, puede reiniciar la unidad, luego mantenga pulsado el botón [V_MODE]
hasta que la imagen regrese.
Configuración de color:
La configuración del color incluye: DEFINICIÓN, BRILLO, CONTRASTE, GAMMA, TINTE,
SATURACION y RETARDO DE LUMA
Ajuste cada opción en la configuración de color para obtener una salida adecuada de color de
la pantalla de TV.
DEFINICION: Hay tres modos opcionales de salida: ALTO / MEDIO / BAJO. Pulse el botón
[ENTER] y pulse los botones
y
para seleccionar una de las opciones.
BRILLO: Utilice los botones
y
para desplazarse y ajustar el brillo.
CONTRASTE: Utilice los botones
y
para desplazarse y ajustar el contraste.
GAMMA: Hay cuatro modos opcionales de salida: ALTO / MEDIO / BAJO / NINGUNO. Pulse el
botón [ENTER] y pulse los botones
TINTE: Utilice los botones
y
y
para seleccionar una de las opciones.
para desplazarse y ajustar el tinte.
SATURACION: Utilice los botones
y
RETARDO DE LUMA: Utilice los botones
desplazarse y ajustar la saturación.
y
para desplazarse y seleccionar una opción.
0T o 1T.
Página de configuración de preferencia
Tipo de TV:
Esta unidad es compatible con diversos tipos de sistemas de TV. Puede seleccionar uno de los
- 17 -
CONFIGURACIÓN DEL SISTEMA
siguientes: PAL-M o NTSC.
Si su TV solo tiene sistema NTSC o PAL-M, la pantalla parpadeará y no tendrá color si
selecciona el sistema equivocado.
Para mayor información acerca del formato de salida, consulte las instrucciones de su TV.
PAL-M: Este sistema se utiliza en China, Europa, Hong Kong. etc.
MULTI: El sistema de TV cambia automáticamente de acuerdo con el sistema del disco.
NTSC: Este sistema se utiliza en EEUU, Taiwán, Japón, etc.
Nota:
Si el tipo de TV es diferente de la configuración, la imagen s vera en blanco y negro.
PBC: En esta función puede seleccionar ACTIVAR o DESACTIVAR.
Página de idioma de audio, de subtitulado y de menú del disco:
Estas son las configuraciones iniciales de su preferencia. Si el contenido del disco es
compatible con una configuración, funcionará. Si no, el disco no funcionará. Estas
configuraciones se pueden modificar pulsando respectivamente el botón [AUDIO] y
[SUBTITLE] mientras está reproduciendo un disco.
Control paterno:
El nivel de control es para que los padres controlen el contenido y protejan a los niños contra la
violencia y el erotismo. Si el nivel del disco es mayor que la configuración, no se podrá
reproducir.
Configuración predeterminada:
Reestablece las configuraciones iniciales de fábrica.
Configuración de la contraseña
Cambie la contraseña. La contraseña inicial de fábrica es 136900. Puede configurar su
propia contraseña. Si olvida su contraseña, puede utilizar 136900 como contraseña
general.
- 18 -
CONTROL REMOTO
STANDBY
REPEAT
SETUP
Volumen + / -
Botones numéricos
GO TO
Adelanto rápido
Siguiente
Retroceso rápido
Anterior
STOP
MUTE
TITLE (AM/FM)
PLAY/PAUSE
Arriba/abajo/izquierda/derecha
SUBTITLE (AUTO)
AUDIO (MEMORY)
ENTER
ANGLE
MENU (MO / ST)
PBC
V-MODE
PROG
SOURCE
OSD
USB
S-EFFECT
STEP
CH-LEVEL
ZOOM
OPEN/CLOSE
TONE
AB-REPEAT
- 19 -
REPRODUCIR
Las siguientes son las funciones básicas de la unidad utilizando el control remoto.
Algunas funciones están disponibles solo para algunos discos.
STANDBY
Alterna entre el modo de espera / en funcionamiento
SOURCE
Alterna la fuente A/V entre DVD / TUNER (AM/FM).
OPEN/CLOSE
CH-LEVEL
Abrir o cerrar la bandeja de discos.
Pulse este botón para seleccionar un canal y pulse el botón de volumen +/para ajustar el nivel.
TITLE
Regresa al menú superior cuando reproduce discos DVD.
MENU
Regresa al menú anterior cuando reproduce discos DVD.
PBC
V-MODE
Activa o desactiva la función PBC.
Alterna el modo de salida de video. (Si se pierde la imagen o la imagen no es
normal, pulse este botón hasta que obtenga una imagen clara.)
STEP
Cuando reproduce discos DVD o VCD, pulse el botón [STEP] una vez y se
reproducirá el siguiente cuadro de la imagen. Pulse el botón [PLAY] para
reanudar la reproducción normal.
TONE
Pulse el botón [TONE] y luego el botón de volumen +/- para controlar los bajos,
los medios y los agudos.
SUBTITLE
Cuando reproduce discos con múltiples subtítulos, pulse el botón [SUBTITLE]
continuamente para seleccionar el subtítulo deseado.
- 20 -
REPRODUCIR
ANGLE
Cuando reproduce discos con múltiples ángulos, es conveniente cambiar el
ángulo de visión.
1
2
3
4
5
6
7
8
Cuando reproduce discos VCD1.1, CD, después de cargar el disco, utilice los
botones numéricos para seleccionar la pista o capítulo deseado directamente.
10+ 0/10
Pulse el botón 10+ y luego otro botó numérico para seleccionar una pista cuyo
número es mayor que 10.
Puede utilizar los botones numéricos en al selección de PROGRAMA y
MENU.
STOP
Cuando reproduce discos DVD, VCD, CD, pulse el botón STOP una vez y la
unidad memorizará el punto donde finalizó. Pulse el botón PLAY/PAUSE para
reanudar la reproducción. Pulse STOP una segunda vez para detener la
reproducción y borrar la memoria.
Durante la reproducción, pulse PLAY/PAUSE una vez para hacer una pausa.
Pulse este botón nuevamente para reanudar la reproducción.
USB
Inserte un disco U y pulse este botón para cambiar al modo USB. Utilice los
botones de las flechas para seleccionar la carpeta o archivo deseado. Pulse
este botón nuevamente para regresar al modo de reproducción de DVD.
AUDIO
Cuando reproduce discos con más de una salida de audio, pulse este botón
para seleccionar la que desee.
Pulse este botón para buscar rápidamente hacia delante.
Pulse este botón para buscar rápidamente hacia atrás.
- 21 -
REPRODUCIR
Cuando reproduce discos DVD, pulse este botón para ir al capítulo anterior.
Cuando reproduce discos VCD o CD, pulse este botón para ir a la pista
anterior.
Algunos discos MP3, requieren el uso de los botones de las flechas para saltar
pistas.
Cuando reproduce discos DVD, pulse este botón para ir al siguiente capítulo.
Cuando reproduce discos VCD o CD, pulse este botón para ir a la siguiente
pista.
Algunos discos MP3, requieren el uso de los botones de las flechas para saltar
pistas.
PROG
Si el disco tiene 2 o más pistas, capítulos o títulos, establezca el orden de
reproducción según su preferencia. Pulse este botón para ingresar al menú
del programa.
Pulse los botones numéricos para ingresar el número de pista, capítulo o
título. Si programa más de diez pistas pulse el botón SIGUIENTE para
continuar con la programación. (Máximo de 20 items programables.) Utilice
las flechas arriba / abajo / izquierda / derecha para mover el cursor a INICIO.
Pulse el botón ENTER para comenzar la reproducción programada.
REPEAT
Pulse el botón REPEAT para repetir un título, capítulo o pista o todo el disco.
Cuando reproduce discos DVD, pulse el botón REPEAT continuamente para
alternar entre repetir capítulo, repetir título, repetir todo, cancelar repetir.
Cuando reproduce discos VCD o CD, alterne entre repetir pista, repetir todo,
cancelar repetir.
Cuando reproduce discos MP3, alterne entre repetir simple, repetir uno,
repetir carpeta y carpeta.
- 22 -
REPRODUCIR
A-B
Cuando reproduce discos DVD, VCD o CD, pulse el botón A-B para repetir
ciertos contenidos.
Pulse el botón A-B en el punto de inicio (A) y el punto de fin (B) para seleccionar
la parte que desea repetir.
Pulse A-B una tercera vez para cancelar la repetición A-B y regresar a la
reproducción normal.
GOTO
Pulse este botón para seleccionar el tiempo de título, el tiempo de capítulo, el
tiempo de pista para reproducir. Puede utilizar los botones numéricos para
ingresar el tiempo que desea reproducir.
ZOOM
Cuando reproduce discos DVD, VCD, pulse el botón ZOOM para ampliar o
reducir la imagen. Con la imagen ampliada, pulse los botones arriba / abajo /
izquierda / derecha para desplazarse a través de la imagen. No se puede
desplazar en la imagen cuando no está ampliada.
S.EFFEC T
Pulse este botón para obtener diferentes efectos de sonido. Los CDs proveen
un mejor efecto de sonido.
VOLUME
Pulse el botón volumen + para incrementar el volumen.
Pulse el botó volumen – para disminuir el volumen.
Mute
Pulse el botón MUTE para silenciar el sonido y se mostrará el símbolo de
silencio en la pantalla de la TV.
Pulse el botón MUTE nuevamente, se mostrará SILENCIO DESACTIVADO y
el sonido se reanudará.
OSD
Pulse este botón y se mostrará la información relativa al disco en la pantalla.
Nota: Algunos botones no son necesarios con algunos equipos. El funcionamiento normal no
se verá afectado sin estos botones.
- 23 -
REPRODUCIR
Reproducir un disco de imágenes
?
Pulse el botón
y se mostrarán 12 pequeñas imagines en la pantalla del televisor.
?
Pulse los botones
?
Pulse el botón
para seleccionar la imagen deseada.
para hacer una pausa en la reproducción de imágenes. Pulse el botón
nuevamente para regresar a la reproducción normal.
NOTA:
Esta función se utiliza para CDs de imágenes , no para JPEG.
Reproducir un disco MP3
Cuando reproduce un disco MP3, se muestra un menú en la pantalla de TV. Pulse el botón
?
11111o
para seleccionar la pista o carpeta y pulse el botón [ENTER] para reproducir la
pista o carpeta seleccionada (deberá ingresar en la subcarpeta para seleccionar la pista y
pulsar el botón [ENTER] para reproducir dicha pista en algunos discos MP3).
Puede utilizar los botones numéricos en el control remoto para seleccionar la pista (Por
?
ejemplo, pulse el botón [1] y pulse el botón [ENTER] para reproducir la primera pista.
Deberá ingresar en la subcarpeta para seleccionar la pista que desee reproducir).
Hay dos modos de reproducción para los discos MP3: reproducción de carpeta y
?
reproducción de archivo. El modo predeterminado es la reproducción de carpeta. Pulse el
botón [TITLE] para cambiar el modo. En el modo de reproducción de archivos, la pantalla
mostrará el número total de pistas y la pista actual. Utilice los botones numéricos para
seleccionar la pista o utilice los botones
para saltar a la pista y pulse el botón
[ENTER] para reproducir dicha pista.
- 24 -
REPRODUCIR
Reproducir USB
Cuando la unidad reproduce otro disco, inserte el disco U y pulse el botón [USB] para
?
reproducir el contenido correspondiente.
Cuando la unidad no tiene ningún disco, inserte el disco U y pulse el botón [USB] para
?
reproducir el contenido correspondiente.
Por favor, retire el USB después de apagar la unidad.
?
Auriculares
Ajuste el volumen al mínimo e inserte los auriculares en el conector de auriculares. El sonido se
emitirá solo a través de los auriculares.
Si desconecta los auriculares, se reanudará la salida del sonido.
Operación de la radio
AM/FM
Alterna entre AM y FM.
MO/ST
Alterna entre mono y estéreo en el modo FM.
MEMORY
Después de seleccionar una estación y sintonizar una nueva frecuencia, pulse
el botón [MEMORY] para comenzar a guardar la frecuencia y pulse el botón
[MEMORY] nuevamente para confirmar.
AUTO
Busca y preestablece automáticamente las estaciones en modo AM / FM.
- 25 -
REPRODUCIR
1
2
3
4
5
6
7
8
9
10+ 0/10
Pulse los botones numéricos para seleccionar una estación preestablecida. Si
el número de la estación es mayor que 10, deberá pulsar el botón 10+ y el
botón numérico. Si la estación es mayor que 20, deberá pulsar el botón 10+
dos veces.
Si selecciona la estación 15, deberá pulsar 10+ y 5.
SEARCH+
Busca frecuencias hacia arriba.
SEARCH-
Busca frecuencia hacia abajo.
RADIO+
Salta una estación hacia adelante.
RADIO-
Salta una estación hacia atrás.
NOTA:
En el modo de radio, los siguientes botones están disponibles: [VOLUME+/-], [CH_LEVEL],
[MUTE], [TONE] y [S.EFFECT]. Consulte el capítulo REPRODUCIR para más detalles.
- 26 -
SOLUCIÓN DE PROBLEMAS
SÍNTOMA
No enciende
CAUSA
El cable de alimentación no está Conecte bien el cable de
conectado.
alimentación.
Se derritió el fusible.
No hay imagen
SOLUCIÓN
Cambie el fusible por uno con las
mismas especificaciones.
La configuración de video de la TV Seleccione la configuración
no es correcta.
adecuada.
La configuración de video del Seleccione la configuración
reproductor no es la correcta.
adecuada.
El cable de video no está bien Conecte bien el cable.
conectado.
No se oye sonido
El cable de audio no está bien Conecte bien el cable.
conectado.
Seleccionó la fuente incorrecta.
Cambie a la fuente correcta.
La configuración de audio no es Seleccione la configuración de
correcta.
audio adecuada.
Imagen distorsionada
El disco está sucio.
Limpie el disco.
Se encuentra en modo de avance A veces, aparece una pequeña
o retroceso rápido
distorsión.
Luminosidad inestable o imagen I n f l u e n c i a d e l c i r c u i t o d e Conecte la unidad de DVD
con ruido
protección contra copia
directamente al TV.
No se puede reproducir el disco
No hay disco.
Cargue un disco.
El disco está mal.
Limpie o reemplace el disco.
El disco está al revés.
Cargue el disco correctamente.
El disco está sucio.
Limpie el disco.
Se muestra el menú en al pantalla Utilice el botón SETUP para
del TV.
apagar el menú.
Está activado el control paterno
- 27 -
Desactive el control paterno o
cambie la configuración.
SOLUCIÓN DE PROBLEMAS
Los botones funcionan mal
O n d a d e e n e r g í a u o t r a Apague / Encienda la unidad y
interferencia estática.
pruebe nuevamente.
No funciona el control remoto
No funciona.
Apunte el control remoto al
sensor.
El control remoto está muy lejos Utilice el control remoto dentro de
de la unidad de DVD.
un rango de 8 m.
Las pilas están gastadas.
No se puede localizar ningún canal La antena no está conectada
en el modo radio
La fuente seleccionada no es
Radio (TUNER)
- 28 -
Reemplace las pilas.
Conecte la antena
Cambie la fuente a TUNER.
ESPECIFICACIONES
Sistema de combinación mini DVD
100-240 V ca 60/50Hz
Alimentación
Consumo de energía
Ambiente
Salida de disco
Radio
75W
Temperatura
-10 ~ +40Cº
Humedad relativa
5% ~ 90%
Sistema de TV
MULTI / PAL-M / NTSC
Nivel de salida
1V (P-P 75
Nivel de salida
1,0~2,2V (rms 1KHz/0dB)
Respuesta de frecuencia
20Hz ~ 20KHz
S/N (peso A)
>80dB (1KHz)
SINCRONISMO NEGATIVO)
Amplitud de frecuencia
70dB (1KHz)
THD + RUIDO
-60dB (1KHz)
WOW FLUTTER
Debajo del límite de la medida del equipo
Amplitud de frecuencia AM
522KHz ~ 1620KHz (step = 9kHz)
S/N (peso A)
46dB
Amplitud de frecuencia FM
87,5MHz ~ 108MHz
S/N (ESTEREO)
40dB
Respuesta de frecuencia
±1,5dB (20Hz ~ 20KHz)
- 29 -
PÓLIZA DE GARANTÍA DE MÉXICO
Comercializadora de Thomson de México S.A. de C.V. garantiza este producto en todas
sus partes y mano de obra, contra cualquier defecto de fabricación y funcionamiento, a
partir de la fecha de entrega al cliente final. Bajo el siguiente término:
Producto
Partes
Mano de Obra
Equipos de Audio
1 año
1 año
Reproductor de DVD
1 año
1 año
CONDICIONES
1. Para ser efectiva esta garantía se requiere presentar esta póliza o factura de compra
debidamente sellada y requisitada, junto con el producto en cualquiera de nuestras Centros de
Servicios Autorizados, (que se indican en la hoja anexa).
2. Comercializadora Thomson de México se compromete a reparar y/o reponer las piezas y
componentes defectuosos sin cargo al consumidor, o en caso de que a criterio de dicha
empresa no sea posible la reparación, cambiar por uno nuevo, exactamente del mismo
modelo o su similar. Los gastos de transportación dentro de la red de servicios, que se
deriven del cumplimiento de esta póliza de garantía, serán cubiertos por Comercializadora
Thomson de México S.A. de C.V.
3. Todos los productos deberán ser llevados a cualquier Centro de Servicio Autorizado.
4. El tiempo de reparación en ningún caso será mayor a 30 días, contados a partir de la
recepción del producto en el Centro de Servicio Autorizado.
5.Para la adquisición de partes y accesorios, contactar al 01-800-1117221 o acudir a
Comercializadora Thomson de México.
NOTAS:
?
En caso de extravío de la póliza, el consumidor podrá recurrir a su distribuidor para su
reposición, previa presentación de la factura o nota de compra.
?
Para su comodidad, solicite informes sobre la localización del Centro de Servicio
Autorizado más cercano a su domicilio, llamando al:
01-800-1117221
Comercializadora Thomson de México S.A. de C.V.
Alvaro Obregón No. 151 Piso 13, Col. Roma.
No. de Póliza:
México, D.F. C.P. 06700; Apartado Postal 1D-1131
___________
- 30 -
DATOS DEL PRODUCTO
PRODUCTO:
MODELO:
NO. DE SERIE:
DATOS DEL CLIENTE
EXPEDIDA A:
DIRECCIÓN:
NOMBRE:
DIRECCIÓN:
FECHA DE COMPRA:
SELLO Y FIRMA DEL VENDEDOR
Esta garantía no tiene validez en los siguientes casos
Cuando el producto se hubiese utilizado en condiciones distintas a
las normales. Cuando el producto no hubiese sido operado de
acuerdo al instructivo de uso que se le acompaña. Cuando el
producto hubiese sido alterado o reparado por personas no
autorizadas por Comercializadora Thomson de México S.A. de C.V.
- 31 -
RED NACIONAL DE SERVICIO
México, D.F.
Digital Service Prensa
Centro de Servicios Autorizados Express (servicio en 24 horas)
Guadalajara, Jal.
Servicio Especializado de Jalisco
Monterrey. N.L.
Audio Estéreo Aguilar
Prensa No. 1253
Col. Prensa Nal. Ind. Vallejo.
Tlanepantla, E.D.M. C.P. 54170
Tel. (55) 55877599 y 55673972
Fax: (55) 55878971
Enrique Díaz de Leon No. 821
Col. Sagrada Familia
Guadalajara, Jal.
Tel (33) 31267431, 31267430
38253229, 38258262
Gral. Zuazua 738 Nte.
Col. Centro
Monterrey. N.L.
Tel (81) 83724989
83755884
Electronica Tony
AGUASCALIENTES
CHIAPAS
Electrónica JIMSA
Av. Adolfo López Mateos No. 230 Ote.
Col. Centro
Aguascalientes, Ags. C.P.2000
Tel. (449) 915 5181; 978 0757
Fax. (449) 915 8100
KC Vídeo
Oriente 9 No. 182
Col. Reforma
Cd. Neza, Edo. De Mex. C.P. 57840
Tel (55) 58572547
Fax (55) 58576399
DISTRITO FEDERAL
Diag. San Antonio No. 1213
Col. Narvarte
México, D.F. C.P. 03020
Cd. Camargo, Chihuahua. C.P.
Tel/Fax (639) 4743026
Cuahutémoc No. 2A
Col. Centro, C.P. 29200
San. Cristóbal de las Casas, Chis.
Tel/Fax. (967) 6781355
Baja Electronics
Ele Aplicada Serv Digitales
Hacienda de Corralejo No. 2099
Col. Hidalgo
Mexicali, B.C.N. C.P. 21389
Tel/Fax (686) 5619818, 5619808
4a. Av., Sur No. 51
Col. Centro, C.P. 30700
Tapachula, Chis.
Tel. (962) 6269998
Fax. (962) 6256953
Electrónica CIS
Novatron.
COAHUILA
Electrónica Digital
Valdez Sánchez # 824
Col. Topo Chico
Saltillo, Coah C.P. 25286
Tel/Fax (844) 439 39 64
Audio y Video Electronica
Miguel Blanco 307-A
Col Zona Centro.
Monclova, Coahuila. C.P. 25700
Tel/Fax (866) 6339406
ADE Electrónica
Corea No. 79
Col. Romero Rubio
México D.F. C.P. 15400
Tel/Fax (55) 57027223
Electro Digital.
Av. Tláhuac No. 608 BIS. Esq.Calle 9
Col. Santa Cecilia C.P.13010
México D.F.
Tel/Fax (55) 3624 1840
BAJA CALIFORNIA SUR
Electrónica Alfa
Tel (55) 56390812
Fax (55)56391184
Centro de Servicio Electrónico
Nicolás San Juan 806 P.B.
Col. Del Valle
México, D.F. C.P.03100
Tel. 5536-2575, 55367103
Fax. 5687-1305
Digital Service Vallejo
DMR Electrónica.
Tel.01 612 122 95 99, 125 44 06
Av Universidad # 3504
Col. Magisterial.
Chihuahua, Chihuahua.
Torreón, Coah. C.P. 27000
Tel. (871) 722 1551, 718 3905
Fax. (871) 722 1551
CAMPECHE
Tel.01 614 413 36 97
Videoservicio
Eletrónica Union
Serel. S.A.
Periferico Sur No.6700
Pedro Moreno # 18
Col. Barrio Sn. Roman.
Campeche, Camp. C.P.24040
Tel. (981) 816 3333
Fax. (981) 811 0669
Laguna de Tamiahua 7255 local 13
Col.Infonavit San Lorenzo. C.C.Calesa
Cd.Juárez, Chihuahua C.P.32420
Tel/Fax: (656) 6177890
Calle Nueva No.307
Col. González
Piedras Negras, Coahuila. C.P.26000
Tel/Fax (878) 7827104
San Bartolo el Chico Coapa
Mexico DF C.P. 14380
Tel/Fax (55) 26520666, 55941273
Vacom
Tel. (55) 57563785
Fax. (55) 57560883
DURANGO
Macroservicios.
Calle Patoni No. 105 A sur.
SERVICIOS PROFESIONALES
At´n. Juan Carlos Arias Hernandez
Col. Centro
Durango, Dgo.
Tel/Fax (618) 812 26 86
- 32 -
Electrónica Siglo XXI
Calle Parra # 352
Col. Centro.
Irapuato, Guanajuato. C.P. 36500
TEL/FAX: (462) 627 26 95
Tele Servicio Chucho.
Blv Adolfo López Mateos No 510 Pte
Col. Centro, C.P. 38000
Celaya, Gto.
Tele Radio Ortega.
Av. 16 de Septiembre No. 1076
Col. Centro, C.P. 38600
Acambaro, Gto.
Tel/Fax (417) 1720780
GUERRERO
ESTADO DE MEXICO
SHUREE Electrónica
Av. De los Maestros No. 113A
Col. Pensiones, C.P. 50060
Toluca, EDM.
Tel (722) 2149330, 2133424
GUANAJUATO
Blvd. Adolfo López Mateos No. 2820B
Col. Haciendas El Rosario
León, Gto. C.P. 37130
Tel/Fax (477) 4702701
Av. 3 A No. 12, Local 2
Col. Santa Rosa
México, D.F.
CHIHUAHUA
Bodegas # 207 Local. 7
Col. La Bomba
Chalco, Edo. de Mex. C.P. 56600
Tel/Fax (55) 3092 3060
Tecnología Electrónica
SIMEL
Tels (55) 53677347 y 53677349
Rio Churubusco No. 2215
Tel/Fax (55) 53889621
Av. Presidente Carranza # 1752 Ote. Altos Col. Agricola Oriental Tel/Fax (461) 6130591
Col. Centro
Mexico, D.F. C.P. 08500
Reforma # 395.
Col. Centro.
La Paz, B.C. Sur.
TV Servideo
Ahuizotl # 94
Col. La Preciosa
México, D.F. C.P.02460
Tel. 5347 0302, 5561 6943
Fax: 5532 0663
Serv. Elec. Especializado
Electrónica General Internac
Blvd. Insurgentes No. 16174, Loc. 2AC.
Plaza de Abastos Los Almos
Tijuana, BCN C.P. 22440
Tel. / Fax: (664 ) 6212215
CICOSA
TV. Servicio Saturno
Nigromante No. 136 Altos
Col. Centro
Colima, Col. C.P. 28000
Tel/Fax (312) 3145554, Tel (312) 3145000
10a. Norte Oriente No. 153A
Col. Centro
Tuxtla Gutiérrez, Chis. C.P. 29000
Taller Electrónico Tony
Tel/Fax (961) 618 1908; Tel. (961) 618 3643 20 de Noviembre No. 1521
Col. Centro.
BAJA CALIFORNIA NORTE
COLIMA
Av. Tercera Pte. No. 213
Col. Centro
Cd. Delicias, Chihuahua
Tel/Fax (639) 4743026
Nueva Elec. Auditron
Aquiles Serdán No. 14B
Col. Centro
Acapulco, Gro. C.P. 039300
Tel (744) 4826242
Tel/Fax (744) 4832062
RED NACIONAL DE SERVICIO
Ingeniería Electrónica
Multiserv Prof. Zamora
Av. Juarez # 55
Col.Centro
Chilpancingo, Gro. C.P.39000
Tel. (747) 4717273
Tel/Fax. (747) 4948365
Colon No. 181-1 Ote.
Col. Centro
Zamora, Mich. C.P. 59600
Tel/Fax (351) 5155416
MORELOS
HIDALGO
Servicio Electrónica Avanzada
Electronica REPSA
Insurgentes No. 190
Col. Emiliano Zapata
Plaza Comercial Quinta Bonita Loc.11
Fraccionamiento Quinta Bonita
Pachuca, Hgo. C.P. 42083
Tel/Fax (771) 7132436
Electrónica Hertz
Electrónica Especializada
Av.Adolfo Lopez Mateos # 102 - 4
Col. El Vergel
Independencia No. 102 Loc. C
Col. Centro, C.P. 43600
Tulancingo, Hgo,
Tel/Fax (775) 7552654 Tel (775) 7539120
Cuautla, Mor. C.P. 62744
Tel/Fax (735) 3538410 / 1140054
Cuernavaca, Mor. C.P. 62400
Tels (777) 3180236, 3182866
Fax. (777) 3189044
Serv. Esp. De Jalisco
Tel (271) 7127322
TAMAULIPAS
Calle Heroica Veracruz # 914
Col. Las Vegas
Poza Rica, Ver. C.P.93210
Tel/Fax (782) 82 3 51 49, 82 1 74 98
Tel/Fax (222) 2313293
SINALOA
Centro de Servicio P.C.
Serv. Electrónico del Pacifico
Av. Independencia Pte. No. 407
Col. Centro
Tehuacan, Puebla C.P. 75700
Tel/Fax (238) 3823835
Mariano Escobedo No. 1022
Col. Centro
Mazatlán, Sin. C.P. 82000
Tel/Fax (669) 9820155
Fax (271) 7122539
Talleres Maldonado
Electrónica Digital
Independencia No. 112 esq. 11
Col. Centro
Matamoros, Tamps. C.P. 88000
Tel/Fax (868) 8135013
QUERETARO
Reparaciones Electrónicas
Blauton Industrial
Lerdo de Tejada # 905 B.
Electrónica DICA
F. del Paso y Troncoso No. 908
Col. Centro
Veracruz, Ver. C.P. 91700
Tel (229) 9312296
Av. Universidad No. 44B
Col. Pathe
Tel/Fax (667) 7168132, (667) 7165145
Col. Bellavista.
Tel/Fax (229) 9312033
Audio Estéreo Aguilar
Tels (442) 2232266, 2234934
Tel/Fax (442) 2232267
Electrónica Morelos.
Reynosa, Tamaulipas.C.P.88600
Tel.01 899 924 79 94
Seguridad Plus.
Gral. Zuazua 738 Nte.
Col. Centro
Monterrey, Nvo. León. CP. 64000
Tels (81) 8 372 49 89, 83755440
Tel/Fax (81) 83755884
Valentín Gómez Farias No.11
Col. Centro
San Juan del Río, Qro. C.P.76800
Tel. (427) 272 3662
Teleservicio Murillo
Pino Suarez # 501 Sur.
Col. Rancho Blanco
Tlaquepaque, Jalisco. C.P. 44890
Tel (33) 36354404
Tel/Fax (33) 36351875
Col. Centro
Cd. Linares, Nvo León. C.P. 67700
Tel/Fax (821) 2126650
MICHOACAN
Col. Centro
Tepic, Nay. C.P. 63000
Tel/Fax (311) 2145800
Electrónica Cascia
QUINTANA ROO
Electrónica Beta
Av. Sun Yax Chen No. 43 Loc. 4
NAYARIT
Electrónica Show
San Luis No. 118 sur
Multiservicios Profesionales de Zamora
Lago de Patzcuaro # 500-A
Justo Mendoza No. 12
Col. Centro
Uruapan, Mich. C.P. 60000
Tel (452) 5243778, 5240838
Tel/Fax (452) 5245909
Av. 13 No. 400 Esq. Calle 4
Col. Bella Vista
Córdoba, Ver. C.P. 94500
Tel/Fax (993) 3540033
Prol. Reforma No. 6908A
Col. La Libertad
Puebla, Pue. C.P. 72130
Tel (222) 2497819
Serv Técnicos Prof.
Querétaro, Qro. C.P. 76020
Setesa
Centro Electrónico
Sigma de Tabasco
Av. Gregorio Méndez No. 2819
Col. Atasta
Villahermosa, Tab. C.P. 86100
Tel (993) 3545410
NUEVO LEÓN
5 de Febrero No. 2786
Col. Ventura Puente
Morelia, Michoacán.
Tel/Fax (443) 312 03 17
VERACRUZ
Estéreo Car Elec.
Negrete No. 612
Col. Centro
Cd. Valles, SLP. C.P. 79000
Tel/Fax (481) 3820651
J.Jose Ríos No. 178 ote.
Col. Miguel Alemán.
Culiacán Sinaloa. C.P. 80200
JALISCO
Ignacio Ramírez No. 567
S.H. Sta. Teresita
Guadalajara, Jal. C.P. 44200
Tel/Fax (33) 38253229 Tel (33) 38270721
TABASCO
PUEBLA
Serv. Express Electrónico
OAXACA
E-Prom Lab.Electrónico
Col. Centro
Cancun, Q. Roo. C.P. 77508
Tel (998) 8845412
Tel/Fax (998) 8873813
HZ Centro de Servicio.
Av. Javier Rojo Gómez # 480
Col. Payo Obispo III
Chetumal, Q. Roo. C.P. 77508
Tel (983) 8 37 41 96
Modesto Díaz No.403
Col.Ricardo Flores Magon, por volcanes
Oaxaca, Oax. C.P.68020
Tel/Fax.: (951) 5201189
Telestar
Av.Libertad No. 1557
Col. La Piragüa
Tuxtepec , Oaxaca
Tel/Fax (287) 8752544
Morelos No. 201 ote
Col. Centro.
Los Mochis, Sinaloa. C.P. 81200
Tel/Fax (668) 8120588
SONORA
Airil Corporation
Esp. Electrónicas
Matamoros Poniente 225
Col. Centro
FM 67 ELECTRONICA
Cd. Victoria, Tamps. C.P. 87000
Tel (834) 3125193
Fax (834) 3125193
Quinta Tranquila Local 5-C
Col. Las Quintas
Hermosillo, Son. C.P. 83240
Tel (662) 2 60 48 71
Calle 10 No. 607.
Dasetronik.
Guerrero No. 308-A este.
Col. Centro.
Navojoa, Sonora. C.P. 85800
Tel (642) 4224064
Fax (642) 4213664
Grupo Digital
Ignacio Zaragoza # 212
Col. Centro
Coatzacoalcos, Ver.
Tel/Fax: (921) 2120229, 2025812
Micronics
Centro de Servicio de Xalapa.
Col. Jardín 20 de Noviembre
Madero, Tamps. C.P. 89440
Tel (833) 2159689
Av. Villahermosa # 309 B.
Col.Progreso.
Xalapa, Veracruz. C.P. 91130
Fax (833) 2103882
TEL/FAX: (228) 843 58 14
YUCATAN
Electrónica Emmanuel
Obregón No. 206 Pte.
Centro de Servicio OHMEGA
Zona Centro
Calle 15 y 16 Av.Abelardo L. Rodriguez # 51-1 Cd. Mante, Tamaulipas. C.P. 89800
Col. Centro.
Tel/Fax (831) 2329081
Guaymas, Sonora.
SAN LUIS POTOSI
Tel.01 622 224 19 65
Electrónica Especializada
Audio video Electrónica
Airil Electronics de Laredo
Dr.Salvador Nava Mtz. # 2613
Col. Himno Nal. 2a. Secc.
San Luis Potosí, SLP. C.P. 78369
Tel (444) 8393010
Tel/Fax (444) 8393010
Av. Zaragoza No. 516 pte.
Col. Centro.
Cd. Obregón, Sonora. C.P. 85000
Tel (644) 4143828
Fax (644) 4147575
Gutierrez # 3640
Col. Centro
Nvo. Laredo, Tamaulipas.C.P.88000
Tel.01 867 712 85 85
- 33 -
SUR 15 # 210 ENTRE ORIENTE 4 Y 6
Col. Centro
Orizaba, Ver. C.P.94300
Tel/Fax (272) 7247676
Servicentro
Calle 70 No. 443 x calle 49 dept.5
Col. Centro
Mérida, Yuc. C.P. 97000
Tel (999) 9285428 y 9233997
Tel/Fax (999) 9285905
ZACATECAS
Electrónica Mario.
Morelos Poniente No. 1214
Col. Centro
Zacatecas, Zac. C.P. 98000
Tel/Fax (492) 9227561
SERVICIOS TÉCNICOS AUTORIZADOS CHILE
CIUDAD
NOMBRE DE FANTASIA
ARICA
IQUIQUE
CALAMA
ANTOFAGASTA
COPIAPO
LA SERENA
COQUIMBO
OVALLE
LOS ANDES
SAN FELIPE
VALPARAISO
QUILPUE
VIÑA DEL MAR
SAN ANTONIO
MELIPILLA
QUILICURA
SANTIAGO
SANTIAGO
SANTIAGO
SANTIAGO
SANTIAGO
SANTIAGO
SANTIAGO
SANTIAGO
SANTIAGO
SAN BERNARDO
PUENTE ALTO
RANCAGUA
SAN FERNANDO
CURICO
TALCA
LINARES
CHILLAN
CHILLAN
CONCEPCION
CONCEPCION
TALCAHUANO
LOS ANGELES
ANGOL
VICTORIA
TEMUCO
VALDIVIA
VALDIVIA
PAILLACO
OSORNO
PUERTO
COYHAIQUE
COYHAIQUE
PUNTA ARENAS
SERV. ELEC. PROFESIONAL
AVDA. STA. MARIA 1361
MULTI SISTEM
SARGENTO ALDEA 2039
INTEGRALES DE SERVICIO
TECNICO LATORRE 1464
CASA DELTA SERVICIOS TECNICOS
ARTURO PRAT 789
ELECTRONICA ANTAR
INFANTE 492
ELECTRONICA NOVA
COLO COLO 754
ELECTRONICA MARCONI
MELGAREJO 1372
CENTRAL DE SERVICIOS
INDEPENDENCIA 198
GALAXIA 6
MAIPU 598
ELECTRONICA VIDEOSONIC
CARLOS CONDELL 142
SERGIO MUÑOZ
HUITO Nº 576
SERGIO MUÑOZ
ANDRES BELLO 691
SERGIO MUÑOZ
QUINTA 209
TRU-COLOR TV SERVICE
21 DE MAYO 260
ELECTRONICA OSORIO HNOS.
ORTUZAR 164
ELECTRONICA AUDIO VISION
LAS PARCELAS 1242
SOC. COMERCIAL APOQUINDO
PEDRO DE VALDIVIA 2765
A & G ELECTRONIC'S
SANTA BEATRIZ 205
ELECTRONICA MANZUR
GENERAL DEL CANTO 557
ELECTÓNICA MANZUR
AV.VITACURA 6727 MODULO A LOC 03
ELECTRONICA MANZUR
AV. LA FLORIDA 9326
CENTRO TECNICO ELECTRONICO
AV.AMERICO VESPUCIO SUR 899
SERVICIO TECNICO VIDEO CAMARA
SANTA ROSA 905
SERVICIO TECNICO VIDEO CAMARA
SAN DIEGO 965 LOC. 32
PC ELECTÓNICA
CHACABUCO 271
SUNFICH ELECTRONICA
URMENETA 616
ELECTRONICA PUENTE ALTO
JOSE M. BALMACEDA 499
PANAVISION
ABAND. JOSE IGNACIO IBIETA 223
ELECTRONICA COLCHAGUA
ESPAÑA 711
AUDIO VIDEO SISTEMAS
CARMEN 860
TELE SONIDO
11 ORIENTE 1193
ELECTRONICA ROBINSON
BRASIL 139
CASA ANTELE
SARGENTO ALDEA 801 B
TELESTEREO
5 DE ABRIL
AVS ELECTRONICA
FREIRE 942
TOLEDO SERVICIOS ELECTRONICOS LTDA. OROMPELLO 631
SUC.HERMINIO MOLINA P
ANIBAL PINTO 151
ELECTRONICA NUÑEZ
COLO COLO 142
LUIS PERELLI HENRIQUEZ
TUCAPEL 351
SONITEL
CHORRILLOS 1345
ESINA
MANUEL MONTT 198
ELECTRONICA SUR
CHACABUCO 484
ESINA VALDIVIA
ARAUCO 842
ELECTRONICA JAPON
LOS CARRERA 337
VISION - SONIC
BILBAO 1593
MONTT ELECTRONICA VISION
SERRANO 345
SERVITELCO
GENERAL PARRA 201
ELECTRONICA DEL SUR
ALMTE. SIMPSON Nº 198
SERVICOM
ROMULO CORREA 215
DIRECCION
Fono: 800-374374
- 34 -
COD TELEF. FAX
58
57
55
55
52
51
51
53
34
34
32
33
32
35
2
2
2
2
2
2
2
2
2
2
2
2
2
72
72
75
71
73
42
42
41
41
41
43
45
45
45
63
63
63
64
65
67
67
61
253361
320015
318567
261788 / 770610
213815
215162
311730
621099 / 623628
406331
535433 / 505064
253925
405476
882691
212283
8323153
6072088
2695190 / 2695190
2363830 / 2363831
2360795/2350296
2181990
2878807/ 2878566
2774856 / 2776826
6354517
6956400
5315320 / 5340927
8597730
8507648 / 8513705
224001 / 238534
713584
311561 / 313047
220768
213663 / 215470
243160 / 851385
224155
235045 / 910498
790888 / 798279
920517
311263
711554 / 711404
843755
261885
212704
343955
422270
233958
259828
231149
239184
233198
PÓLIZA DE GARANTÍA
?
Este producto ha sido fabricado con componentes de óptima calidad y ha sido revisado por personal técnico especializado del
fabricante, para asegurarle un correcto funcionamiento, en condiciones normales de operación, según se describe en el Manual de
Usuario que se adjunta. Por lo tanto Thomson S.A. le garantiza el buen funcionamiento de este producto, haciéndose cargo de la
reparación de deficiencias producidas exclusivamente por defectos de material y/o manufactura, sin cargo para usted.
?
Esta garantía se otorga por un plazo de 06 meses (equipos de audio) – 12 meses (equipos de video y DVD) – 06 meses (sistemas
teatro en casa) - 06 meses (teléfonos) contados desde la fecha de factora y/o boleta de venta de producto, según corresponda de
acuerdo al Registro de Garantía.
?
La garantía mencionada será válida excepto en las siguientes situaciones:
1) Enmienda en la póliza de garantía
2) Mal uso del aparato a otros equipos distintos a los indicados en el manual de Usuario
3) Daños causados por golpe o bodegaje y/o transporte incorrecto
4) Daños causados por terremoto, inundación, incendio, relámpago, o voltaje excesivo proveniente de la fuente de
alimentación eléctrica.
5) Daño causado por existencia de arena, liquido de pilas, agua o cualquier elemento extraño en el
interior del producto.
6) Reemplazo de cabezales de Audio y de Video quebrados y/o gastados por uso profesional,
comercial o desgaste natural o uso de cintas inadecuadas.
7) Quedan excluidas de la garantía pilas o baterías.
8) Se pierde todo derecho a garantía por alteraciones de o ausencia del número de serie de fábrica del
producto.
9) Limpieza general de artículos, especialmente limpieza de cabezales de Audio y de Video.
10) Señor cliente, en conformidad al Artículo 21 inciso 5° de la Ley 19.496, usted antes de concurrir al
lugar de la compra deberá agotar las alternativas otorgadas por la garantía Thomson S.A., y dirigirse a los Servicios
Técnicos Autorizados que se encuentran al reverso de la Póliza de Garantía.
?
Para hacer efectiva esta garantía usted deberá presentar, en cualquier de los Servicios Técnicos Autorizados por Thomson S.A.,
que se indican al reverso de esta póliza, el original de la factura y/o boleta de compra, conjuntamente con el original de la presente Póliza
de Garantía.
Nota:
En caso que alguno de los Servicios Técnicos Autorizados indicados al reverso de esta póliza dejara o cambiare de domicilio, usted
podrá a su elección dirigirse a alguno de los otros Servicios indicados en el listado o Consultar directamente a Thomson S.A.
THOMSON S.A. 800-374374
REGISTRO DE GARANTIA
NOMBRE:
CIUDAD:
DIRECCION:
COMUNA:
TELEFONO:
CASILLA:
EQUIPO DE AUDIO
06 MESES
DVD
12 MESES
TEATRO EN CASA
06 MESES
MODELO:
Nº DE SERIE:
DISTRIBUIDOR:
FAC./BOL.NO:
- 35 -
TELEFONO
06 MESES
FECHA:
GARANTÍA LIMITADA PARA PUERTO RICO
Producto
DVD
Home Theater Audio
Audio Sistemas
Audio Portatil
Audio Personal
Reproductor MP3 Portátil*
•
Partes y Mano de Obra
1 año, llevar al Centro de Servicio Autorizado
1 año, llevar al Centro de Servicio Autorizado
1 año, llevar al Centro de Servicio Autorizado
1 año, llevar al Centro de Servicio Autorizado
1 año, llevar al Centro de Servicio Autorizado
1 año, llevar al Centro de Servicio Autorizado
Su garantía cubre los defectos de materiales o de fabricación por un año a partir de
la fecha de compra. Thomson Inc. se compromete a pagar a cualquier Centro de
Servicio Autorizado los costos de mano de obra y partes para la reparación de los
productos defectuosos Thomson. Sírvase contactar al Centro de Servicio Autorizado
más cercano indicados en la lista de anexa. Es obligatorio presentar la factura de
compra original.
Reproductor MP3 Portátil
•
Para asistencia técnica personalizada para el Reproductor Mp3 Portátil, llame a
General Electronics Service, al número telefónico (787) 878-5684.
Su garantía no cubre:
•
Instrucción sobre funcionamiento del producto, instalación y/o ajustes, problemas de
recepción no causados por nuestro producto.
•
Daños causados por mal uso o negligencia.
•
Limpieza de cabezales de video y audio.
•
Baterías.
•
Productos modificados o intervenidos por personas no autorizadas.
•
Productos usados para fines comerciales o institucionales.
•
Daños causados por la naturaleza tales como, pero no limitado a, descargas
eléctricas.
- 36 -
THOMSON CENTROS DE SERVICIO AUTORIZADOS, PUERTO RICO
Centros de Servicio Autorizados RCA & GE Puerto Rico
NOMBRE
BETANCES ELECTRONICS
GENERAL ELECTRONICS
RAMOS ELECTRONICS
CONTACTO
FERNANDO PEREZ
LUIS VELEZ
CARLOS RAMOS
DIRECCION
TEL #
ASC
AV. BETANCES D-13, HNAS. DAVILA
787-798-4615
112728
BAYAMON, PR 00960
787-778-4108
MANUEL PEREZ FREITES #253
787-878-5684
ARECIBO, PR 00612
fax 787-815-
P.O. BOX 244
787-868-5290
126706
787-752-2075
126222
787-731-7760
115852
787-850-2260
121994
115851
AGUADA, PR 00602
J C TV
JOSE COLLAZO
P.O. BOX 1859
RIO GRANDE, PR 00745
Ave. Iturregui MM-2
Country Club, Carolina
Puerto Rico 00928
JUNIOR'S ELECTRONICS
EFRAIN ARANA
AVE. E POL #497, BZ133 LAS
SAN JUAN, PR 00926
HUMACAO VIDEO
Lisette
AVE. FONT. MARTELLO #162
HUMACAO, PR 00791
- 37 -
TO PREVENT FIRE OR SHOCK HAZARD, DO NOT USE THIS PLUG WITH AN EXTENSION
CORD, RECEPTACLE OR OTHER OUTLET UNLESS THE BLADES CAN BE FULLY
INSERTED TO PREVENT BLADE EXPOSURE. TO PREVENT FIRE OR SHOCK HAZARD,
DO NOT EXPOSE THIS APPLIANCE TO RAIN OR MOISTURE.
PRECAUCIÓN
RIESGO DE CHOQUE ELÉCTRICO
NO ABRIR
El símbolo de rayo con una flecha,
dentro de un triángulo equilátero,
tiene la intención de alertar al
usuario sobre la presencia de
‘voltaje peligroso’ no aislado
dentro del alojamiento del
producto que pudiera ser de una
magnitud suficiente para constituir
un riesgo de choque eléctrico.
ADVERTENCIA: PARA REDUCIR
EL RIESGO DE UN CHOQUE
ELÉCTRICO, NO RETIRE LA TAPA
(NI LA PARTE POSTERIOR). NO
HAY PARTES INTERNAS A LAS
CUALES EL USUARIO PUEDA DAR
SERVICIO. SÓLO EL PERSONAL
CALIFICADO DE SERVICIO DEBERÁ
REPARAR ESTA UNIDAD.
El signo de admiración dentro
de un triángulo equilátero
tiene la intención de alertar
al usuario sobre la presencia
de importantes instrucciones
de operación y mantenimiento
(servicio) incluidas en el folleto
que acompaña a la unidad.
Important Safety Instructions
1. Read these instructions.
2. Keep these instructions.
3. Heed all warnings.
4. Follow all instructions.
5. Do not use this apparatus near water.
6. Clean only with dry cloth.
7. Do not block any ventilation openings. Install in accordance with the manufacturer’s
instructions.
8. Do not install near any heat sources such as radiators, heat registers, stoves, or other
apparatus (including ampli ers) that produce heat.
9. Do not defeat the safety purpose of the polarized or grounding-type plug. A polarized plug has
two blades with one wider than the other. A grounding type plug has two blades and a third
grounding prong. The wide blade or the third prong is provided for your safety. If the provided
plug does not t into your outlet, consult an electrician for replacement of the obsolete outlet.
10. Protect the power cord from being walked on or pinched particularly at plugs, convenience
receptacles, and the point where they exit from the apparatus.
11. Only use attachments / accessories speci ed by the manufacturer.
12. Unplug this apparatus during lightning storms or when unused for long periods of time.
- 38 -
13. Refer all servicing to quali ed service personnel. Servicing is required when the apparatus
has been damaged in any way, such as power-supply cord or plug is damaged, liquid has been
spilled or objects have fallen into the apparatus, the apparatus has been exposed to rain or
moisture, does not operate normally, or has been dropped.
14. This appliance shall not be exposed to dripping or splashing water and no object lled with
liquids such as vases shall be placed on the apparatus.
15. Do not overload wall outlet. Use only power source as indicated.
16. Use replacement parts as speci ed by the manufacturer.
17. The product may be mounted to a wall only if recommended by the manufacturer.
18. Upon completion of any service or repairs to this product, ask the service technician to
perform safety checks.
19. The unit must be placed near a power outlet that is easily accessible.
THIS UNIT SHOULD NOT BE ADJUSTED OR REPAIRED BY ANYONE
EXCEPT PROPERLY QUALIFIED SERVICE PERSONNEL.
- 39 -
CLASS 1 LASER PRODUCT
PRODUCTO LASER DE CLASE 1
PRODUTO LASER CLASSE 1
PRECAUCIÓN
RADIACIÓN DE LÁSER INVISIBLE
AL ABRIRSE Y BLOQUEOS
ANULADOS.
EVITE LA EXPOSICIÓN AL RAYO.
Este producto contiene un Dispositivo Láser de baja potencia.
Important Notes
?
Before turning ‘On’ the power, make certain that power cord is properly installed.
?
Before turning ‘On’ the power, make certain that power cord is properly installed.
?
Store your CDs in a cool area to avoid damage from heat.
?
When moving the set, be sure to first disconnect the power cord.
?
Avoid installing this unit in places exposed to direct sunlight or close to heat radiating
appliances such as electric heaters, on top of other stereo equipment that radiates too much
heat, places lacking ventilation or dusty areas, places subject to constant vibration and/or
humid or moist areas.
?
Do not attempt to clean this unit with chemical solvents as this might damage the finish. Use a
clean dry cloth.
FCC Information
This equipment has been tested and found to comply with the limits for a Class B digital device,
pursuant to Part 15 of the FCC Rules. These limits are designed to provide reasonable
protection against harmful interference in a residential installation. This equipment generates,
uses, and can radiate radio frequency energy and, if not installed and used in accordance with
the instructions, may cause harmful interference to radio communications. However, there is no
guarantee that interference will not occur in a particular installation. If this equipment does
cause harmful interference to radio or television reception, which can be determined by turning
the equipment off and on, the user is encouraged to try to correct the interference by one or
more of the following measures:
?
Reorient or relocate the receiving antenna.
?
Increase the separation between the equipment and receiver.
?
Connect the equipment into an outlet on a circuit different from that to which the receiver is
- 40 -
connected.
?
Consult the dealer or an experienced radio/TV technician for help.
This device complies with Part 15 of the FCC Rules. Operation is subject to the following two
conditions:
?
This device may not cause harmful interference, and
?
this device must accept any interference received, including interference that may cause
undesired operation.
- 41 -
FEATURES
Thank you for purchasing our product. Please go through this manual carefully
before connection and operation. Please keep this manual for future reference.
DVD player is a new generation home player which can produce high quality video
and audio. Its performance is much better than that of any previous home video
playing equipment. As the best signal source of home theatre system, it will give
you the uppermost enjoyment!.
Built in Dolby Digital, LPCM, MPEG etc. digital audio output.
?
Hi-fi, 96kHz/24bi t or 48kHz/24bit audio digital processor.
?
Software intelligent upgrade * High-resolution picture, support the future video
?
equipment.
Coaxial digital audio output.
?
Super compatible with DVD/VCD/CD/MP3/MPEG 4/PICTURE CD.
?
Latest the fourth generation servo, decoding single-wafer technology, reliable stability and
?
super error correction.
Full function remote control.
?
AM/FM stereo radio tuner.
?
Built-in high sensitivity amplifier.
?
- 42 -
IMPORTANT SAFETY INSTRUCTIONS
SAFETY INSTRUCTION
1. Read these instructions.
2. Keep these instructions.
3. Heed all warnings.
4. Follow all instructions.
5. Do not use this apparatus near water.
6. Clean only with dry cloth.
7. Do not block any ventilation openings. Install in accordance with the manufacturer-s
instructions.
8. Do not install near any heat sources such as radiators, heat registers, stoves, or other
apparatus (including amplifiers) that produce heat.
9. Do not defeat the safety purpose of the polarized or grounding-type plug. A polarized plug
has two blades with one wider than the other. A grounding type plug has two blades and a third
grounding prong. The wide blade or the third prong are provided for your safety, if the provided
plug does not fit into our outlet, consult an electrician for replacement of the obsolete outlet.
10. Protect the power cord from being walked on or pinched particularly at Plugs, convenience
receptacles, and the point where they exit from the apparatus.
11. Only use attachments /accessories specified by the manufacturer´s.
12. Use only with the cart, stand, tripod, bracket, or table specified by the manufacturer, or sold
- 43 -
IMPORTANT SAFETY INSTRUCTIONS
with the apparatus. When a cart is used caution when moving the cart/apparatus
combination to avoid injury tipover.
13. Unplug this apparatus during lightning storms or when unused for long
periods of time.
14. Refer all servicing to qualified service personnel. Servicing is required when the
apparatus has been damaged in any way, such as power-supply cord or plug is damaged,
liquid has been spilled or objects have fallen into the apparatus. The apparatus has been
exposed to rain or moisture, does not operate normally, or has been dropped.
15. Plug, as the disconnected device entirely with power source ,should keep in easy-tooperation in daily life.
16. The apparatus shall not be exposed to dripping or splashing and that no object filled
with liquids, such as vases, shall be placed on the apparatus.
- 44 -
IMPORTANT SAFETY INSTRUCTIONS
SAFETY PRECAUTION
RISK OF ELECTRIC SHOCK
DO NOT OPEN
WARNING
To reduce risk of fire or electric shock, do not
expose this apparatus to rain or moisture.
Note: This product is for indoor use only.
This lightning flash with arrowhead symbol within an equilateral triangle, is
intended to alert the user to the presence of uninsulated “dangerous voltage”
±
within the products enclosure that may be of sufficient magnitude to
constitute a risk of electrical shock to persons.
The exclamation point within an equilateral triangle is intended to alert the
user to the presence of important operating and maintenance (servicing)
instructions in the literature accompanying the product.
- 45 -
ACCESSORIES
Accessories
User Manual
Remote control
AM Antenna
A/V Cable
FM Antenna
Speaker Connect Cable
Use r man ual
ѡʱ
¿ì½ø
Çú Çú
È·ÈÏ
É ùµ À
Remote Control Operation
?
Insert the batteries into the cell box. The remote control would work within 8 meters if facing
the obverse face of the unit /within 6 meters if facing the side of the unit and within 30
degrees at left or right side.
?
Take the battery out of the control if it is not used for a long time.
This unit can play the following types of discs
Disc types
Symbol
Contents
DVD
Audio + Video
MP3
Video-CD
VCD
Audio
COMPACT
DIGITAL VIDEO
VIDEO CD
CD-DA
Audio
Electronic Photo
Picture CD
MPEG-4
Audio + Video
V I
Audio + Video
D E O
- 46 -
PANEL
Front panel
1 Standby Button
2 USB Port
VOL
3 Disc Door
4 DVD/RADIO Switch Button
5 Prev Button
STANDBY
USB
6 Next Button
DVD/RADIO
7 Play/Pause Button
8 Open/Close Button
9 Headphone
10 Volume knob
1
2
3 4
6
5
7
9
8
10
Rear panel
R
1 Speaker Output
L
2 Video Output
FM 75 ohm
SPEAKER OUT
ANTENNA
3 S-video Output
AM LOOP
4 Audio Output
6~16
POWER
VIDEO
ON
5 Coaxial Digital Output
Cr/P r
Cb/Pb
Y
OFF
S-VIDEO
L
R
COAXIAL
6 Component Y,Cb/Pb,Cr/Pr
~
7 FM Antenna
8 Power ON/OFF
9 AM Antenna
1 2
3
4
5
6 7 8
9
- 47 -
CONNECTION
Video system connection
The following video output available for this
S-VIDEO
VIDEO
Component input
Y
unit .
Cb/Pb Cr/Pr
Composite Video
Use the AV cable (yellow terminal) to connect
composite video output of this unit to the
TV/monitorvideo input.
S-video
Use the S-video cable to connect the s-video
output of this unit to the TV/monitor S-video
input.
Y
Component Video (YUV)
VIDEO
Use 3 -core AV cable to connect the
component output terminals of this unit to the
Cb/Pb
S-VIDEO
Video and
S-Video
Cr/Pr
corresponding TV/monitor input.
Component video
output
Note:
?
?
Which connection depends on the TV/monitor input terminal.
?
Don't use the all connections at one time, otherwise the picture will be affected.
?
Only the physical connection conforms to the video setting can produce the normal
picture (reference to the Video Setup in System Setup).
- 48 -
CONNECTION
CONEXIÓN
Audio system connectio
TV/Monitor Input
The player has both analogue and digital
audio output. The analogue audio is two
Digital Audio Input
2CH Audio Input
channel. The digital audio is outputted from
the coaxial, and sound quality is much
R
L
Speaker
COAXIAL
better than the analogue audio.
2ch output
White
Use a pair of audio cable (red for right/white
Black
White
Black
for left) to connect the audio input of the TV
or AV amplifier to the audio output of this
R
L
unit.
R
L
CO AX IA L
DIGITAL AUDIO
Coaxial Digital Audio
2CH Audio Output
Coaxial Output
Speaker output
Use the specified coaxial cable to connect
the coaxial output of this unit to the coaxial
DVD Output
input of power Amplifier.
Speaker output
Use the specified cable(white+,black-) in
the accessories to connect this unit to the
input of sound boxes.
Note:
The physical connection should come with audio output setup of this unit. Please refer to Audio
Setup in system setup.
- 49 -
SYSTEM SETUP
Menu operation
P ress [SETUP] button in the remote controller, the SETUP MENU (main) will be displayed.
1. After accessing the [SETUP] Menu, press
and
buttons to select a desired item, then
press [ENTER] button to enter the sub-menu. In the submenu, press
and
buttons to
select the desired one, then press the [ENTER] button to confirm. Now, setup of this current
function is completed.
2. To end the setup, press the [SETUP] button again. In the SETUP MENU, you may choose
any of the following options as you like.
General setup page
This option is used to set up TV screen format, video function and DVD function, with options of
“TV DISPLAY”, , “ANGLE MARK”, “OSD LANG”, “CLOSED CAPTIONS”, “SCREEN SAVER”
and “LAST MEMORY”.
TV Display
4:3 PAN SCAN: When the unit connects to the normal TV set, the wide-screen image shows on
the full screen ,but some part is cut off.
4:3 LETTERBOX: When the unit connects to the normal TV set, the wide-screen image shows
and black bars appear on the top and bottom of screen.
16:9: Use this item when the unit is connected to the wide screen TV set.
Wide Squeeze: Use this item when the unit is connected to the wide screen TV set.
ANGLE MARK:
When a DVD with multiple angles is used, you can select a particular shooting angle.
OSD LANGUAGE:
You may use this item to set the language of the setup menu and screen display language.
- 50 -
SYSTEM SETUP
CLOSED CAPTIONS:
This function doesn’t work if the DVD hasn’t the closed caption. If the captions is OFF, press
[SUBTITLE ]key on the remote control to make caption on.
SCREEN SAVER:
If the SCREEN SAVER is set ON and the unit is switched on without a disc playing for several
minutes, a moving picture appears on the screen, and the unit will go to standby mode after 20
minutes. You can press [STANDBY] key on the remote control to wake it up.
LAST MEMORY
When this function is on, the unit can memorize the time elapsed from the last time you played
the disc. When playing next time, it will resume playing from the memorized time.
Audio setup page
ANALOG AUDIO SETUP:
DOWNMIX:
Use
arrow button to move the scroll to choose one.
LT/RT: The audio out is Left and Right channel format even if the original sound is 5.1CH format.
STEREO: The audio out format is stereo even if the original sound is 5.1CH format.
DIGITAL AUDIO SETUP PAGE :
DIGITAL OUTPUT:
SPDIF OFF: No digital output( coaxial off), only analog audio output .
ALL: If this item is selected, you can set up the RAW.
PCM ONLY: In SPDIF/PCM mode, setup PCM channel according to your preference.
LPCM OUT :
Select PCM frequency at 48kHz or 96kHz.
Note: Some amplifiers don't support 96kHz sampling which will effect the coaxial output.
- 51 -
SYSTEM SETUP
DOLBY DIGITAL SETUP:
Dual Mono:
Stereo: Set audio output to the stereo output.
L-mono: Set audio output to the mono-left channel.
R-mono: Set audio output to the mono-right channel.
Mix-mono: Set audio output to the Mix mono channel.
DYNAMIC:
Select this to reduce the overall volume and still keep defined audio sound.
Video setup page
VIDEO OUTPUT:
OFF: Set video output to the composite.
YUV: Set video output in analog component video format when connecting to Y/U/V terminals.
P-YUV: Set progressive YUV signals. Connection same as YUV.
Note: If the video setting differs from the physical connection, the TV set may be without
picture. In case of this, you can RESET the machine, then keep pressing key [V_MODE] until
the picture is OK again.
COLOR SETTING:
COLOR SETTING includes: SHARPNESS, BRIGHTNESS, CONTRAST, GAMMA, HUE,
SATURATION and LUMA DELAY.
Adjust each item in the Color Setting to get the suitable color output of the TV screen.
SHARPNESS: There are three optional output modes: HIGH\MEDIUM\LOW, can press
[enter] and
and
direction key to choose one.
BRIGHTNESS: Use the
CONTRAST: Use the
or
or
arrow button to move the scroll and adjust the brightness.
arrow button to move the scroll and adjust the contrast.
- 52 -
SYSTEM SETUP
GAMMA: There are four optional output modes: HIGH\MEDIUM\LOW\NONE,can press
[enter] and [ ]and [ ] direction key to choose one.
HUE: Use the [
] or [
] arrow button to move the scroll and adjust the hue.
SATURATION: Use the [ ] or [ ] arrow button to move the scroll and adjust the saturation.
LUMA DELAY: Use the [
] or [ ] arrow button to move the scroll to select one choice: 0T or 1T.
Preference setup
TV TYPE:
This product supports various system, including NTSC and PAL-M.
If TV set has only NTSC or PAL-M system, screen will blink and become colorless when a wrong
system is selected.
For more information of output format, please refer to the instruction of your TV set.
MULTI: The unit switches automatically according to the disc system.
NTSC: This system is used in USA, TAIWAN, JAPAN etc.
PAL-M: This system is used in CHINA, EUROPE, HONGKONG etc.
Note :
If the TV TYPE is different from this setting, its imagine will have black and white state for
jumping.
PBC: In the item, you can set it ON or OFF.
AUDIO, SUBTITLE and DISC MENU LANGUAGE SETUP:
These are the initial setting by your preference. If a setting is supported by disc content, it will
work. Otherwise disc default value works. And these setting can be changed respectively by
pressing key [AUDIO] and [SUBTITLE] when playing.
- 53 -
SYSTEM SETUP
PARENTAL FUNCTION :
This item is set for parents to control the playing content and protect your children from violence
and erotism. If the level of the disc is higher than the set level, it can not be played.
DEFAULT SETUP:
Resume to the initial factory setup.
PASSWORD SETUP:
You can change the password. The in ial factory password is 136900. You can set your own
password according to indication box in the screen . If you forget your own password, you can
use 136900 as general password.
- 54 -
REMOTE CONTROL
STANDBY
REPEAT
SETUP
VOL+/-
NUMBER keys
GO TO
FAST FORWARD
NEXT
FAST BACKWARD
PREV
STOP
MUTE
TITLE (AM/FM)
PLAY/PAUSE
UP/DOWN/LEFT/RIGHT
SUBTITLE (AUTO)
AUDIO (MEMORY)
ENTER
ANGLE
MENU (MO / ST)
PBC
V-MODE
PROG
SOURCE
OSD
USB
S-EFFECT
STEP
CH-LEVEL
ZOOM
OPEN/CLOSE
TONE
AB-REPEAT
- 55 -
PLAY
The following is the basic operation for this unit with the attached remote controller.
Please note some function just is available for some disc.
STANDBY
Stand by/working mode switch.
SOURCE
A/V Source switch among DVD/TUNER(AM/FM).
OPEN/CLOSE
CH-LEVEL
Eject or load the disc tray.
Press this key to select a channel then press VOLUME+/- to adjust its level.
TITLE
Return to the top menu when playing DVD disc.
MENU
Return to the previous menu when playing DVD disc.
PBC
V-MODE
Switch on or off PBC function.
Video output mode switch (if losing pictures or picture is abnormal, keep
switching until you reach a clear picture).
STEP
When playing DVD or VCD disc, press [STEP] once, the picture will be played
to next frame.Press the [PLAY] button to resume normal play.
TONE
SUBTITLE
Press [TONE], then press VOLUME+/- to control bass, mediant and treble.
When playing the disc with multi-subtitle, press SUBTITLE continually, select
the desired subtitle .
ANGLE
When playing the disc with multi-angle, it's convenient to change the view
angle.
- 56 -
PLAY
1
2
3
4
5
6
7
8
When playing VCD1.1, CD disc, after loading the disc, use the digit key to
select the desired track or chapter directly. Press 10+ key and then another
10+ 0/10
digit key to select the track which number is 10 or more.
You can press digit keys at PROGRAM and MENU selection.
STOP
When playing DVD, VCD, CD disc, press STOP once, the unit will memorize
the previous ending point. Press PLAY/PAUSE button to go on the play. Press
STOP for the second time to stop the play and end memory.
When playing the disc, press PLAY/PAUSE once to pause, press
PLAY/PAUSE again to return to normal play.
USB
Insert U disc, and press USB button to switch to the USB play state. Press
arrow button to select the desired folder or file, and press USB again to return
to DVD play state.
AUDIO
When playing DVD with more than one audio stream, press [AUDIO] to select
you desired.
Press this button for quick forward search.
Press this button for quick rewind search.
W hen playing DVD disc, press PREV to the previous chapter.
When playing VCD or CD disc, press PREV to the previous track.
Some MP3 discs require you to use the arrow keys to skip tracks.
When playing DVD disc, press NEXT to the next chapter.
When playing VCD or CD disc, press NEXT to the next track.
Some MP3 discs require you to use the arrow keys to skip tracks.
- 57 -
PLAY
PROG
If the disc is with 2 or more tracks, chapters or titles, set up the playing order as
your preference. Press this button to enter program menu.
Press digit key to input the number of the track, title or chapter. If the
programmed tracks are over ten, press NEXT to go on programming.
(Maximum 20 programable items) use the up/down/left/right key to move the
cursor to the START. Press ENTER to start PROGRAM play.
REPEAT
Press REPEAT button to repeat a title, chapter, track or the whole disc.
When playing DVD disc, press REPEAT button continually, the turn is chapter
repeat, title repeat, all repeat, repeat cancel in turn.
When playing VCD or CD disc, the turn is track repeat, all repeat, repeat cancel.
When playing MP3 disc, the turn is single repeat, repeat one, repeat folder and folder.
A-B
When playing DVD, VCD or CD disc, press A-B button to repeat a certain contents.
Press A-B key on the start point (A) and the ending point (B) to select the repeat part.
Press A-B the third time, cancel A-B repeat and return to normal play.
GOTO
Press GOTO to select title time, chapter time, track time to play. You can use
digit keys input the goto time.
ZOOM
When playing DVD, VCD disc, press ZOOM to zoom in or zoom out the picture.
In zoom in mode, press up/down/left/right to move the picture for viewing. The
picture can not be moved in zoom out mode.
S.EFFECT
Press S.EFFECT button to obtain different sound effects. CD’s provide better
sound effect .
VOLUME
Press VOLUME+ to adjust volume up.
Press VOLUME- to adjust volume down.
- 58 -
PLAY
Mute
Press MUTE button, to turn off the sound and the mute symbol will display on
the TV screen.
Press MUTE again, MUTE OFF will display and the sound will resume.
OSD
Press the [OSD] button, the relative information of the disc will display on the
TV screen.
Note:
A few buttons is not necessary for some types of machine. The normal
operation will not be affected without them!.
- 59 -
PLAY
Play picture cd disc
?
Press [ ] key,12 small pictures will show on the TV screen.
?
Press [ ] [ ][ ] [ ] to select the desired picture, then press [ENTER] to start random play.
?
Press [ ] to pausing playing picture CD. Press [
] again to return to normal play.
NOTE:
This function is used for picture disc , not for JPEG.
Play MP3 disc
?
When playing a MP3 disc, there is a menu screen on TV, press the [ ]or[ ] button to shift
the cursor to select the track or folder, and press the [ENTER] button to play the selected
track or folder (it needs to enter the sub-folder to select the track and press the [ENTER]
button to play for some MP3 discs).
?
Also use the digit buttons in the remote controller to select the track (For example: press [1]
button and then ,press [ENTER] button to play the first track. It needs to enter the folder and
select the current folder s track to play MP3 ).
?
There are two play modes for MP3 disc: folder and file play, the default mode is the folder
play; press [PROG] button to select the mode. In the files play mode, the screen displays the
total track number and the current playing track, and use the digit button to select the track,
or use the [ ] [ ] button to shift to the track and press the [ENTER] button to play the track.
Play USB
?
when the unit is playing other disc, insert the U disc, and press [USB] key to switch to play the
corresponding content.
- 60 -
PLAY
When the unit is in no disc state, insert the U disc, and press [USB] key to play the corresponding content.
?
Please take out the USB after power off.
?
Headphone
Adjust the volume to minimum level and insert the headphone into the headphone jack, sound
output is only though the headphone.
If take it out , the sound output will resume.
Tuner Operation
AM/FM
FM/AM switch.
MO/ST
Mono/Stereo switch in FM mode.
MEMORY
After having selected a station and tuned a new frequency, press MEMORY to
start saving the frequency, and press MEMORY again to confirm the store
action.
AUTO
Automatic searching and presetting in FM/AM tuner mode.
1
2
3
4
5
6
7
8
9
10+ 0/10
Press the digit buttons to choose a preset station, you can input a digit keys to
select a station. If the station number is more than 10, you must press the 10+
key and the digit key, if the station number is more than 20, you must press the
10+ key twice.
if you select 15 station, you must press 10+ and 5.
SEARCH+
Searching frequency up.
- 61 -
PLAY
SEARCH-
Searching frequency down.
RADIO+
Skip forward a station.
RADIO-
Skip backward a station.
NOTE:
Under Tuner mode, [VOLUME+/-], [CH_LEVEL], [MUTE], [TONE] and [S.EFFECT] buttons
are available, please refer to the PLAY chapter for details.
- 62 -
TROUBLESHOOTING
Before resorting to maintenance service, please kindly check by yourself with the following chart.
Symptom
No power
Cause(s)
Solution
The power cord isn't connected
Connect the power cord properly
Fuse melting
Replace a same specification
fuse!
TV video setup isn't correct
Select the suitable setup
Player video setup isn't correct
Select the suitable setup
Video cable isn't connected well.
Connect the cable properly
Audio cable isn't connected well
Connect the cable properly
Source select incorrect
Switch to the proper source
Audio setup isn't correct
Select the suitable audio setup
Dirty disc
Clean the disc
In fast forward or fast rewind
mode
Sometimes, the tiny distortion
appears. It's normal
Luminance unsteady
or picture with noise
Anti-copy circuit influence
Connect the DVD unit to TV
directly
Unable to play
Without disc
Load the disc
Disc is bad
Clean or replace the disc
Disc is put upside down
Load the disc properly
Dirty disc
Clean the disc
There are menu on TV screen
Use SETUP to turn off menu
Parental control is working
Set up parental off or change the
setup
No picture
No sound
Distorted picture
- 63 -
TROUBLESHOOTING
Key malfunction
Power wave or other static
interference.
Turn on/off the power and try
again.
Remote control
Doesn't work
Doesn't work
Point the remote control at the
sensor
Remote control is too far from
DVD unit
Operate the remote control
within 8m
Batteries are exhausted.
Replace the batteries
Antenna is not connected
Connect antenna
Source mode is not in tuner
mode
Switch to tuner mode
Can't locate any channels
in tuner mode
- 64 -
SPECIFICATION
DVD Mini Combination System
Power supply
AC ~100-240 V ca 60/50Hz
Power consumption
75W
Working
environment
Disc output
Radio
Temperature
-10 ~ +40Cº
Relative humidity
5% ~ 90%
TV System
MULTI / PAL-M / NTSC
Output level
1V (P-P 75
Output level
1.0~2.2V (rms 1KHz/0dB)
Frequency Response
20Hz ~ 20KHz
S/N A weight
>80dB (1KHz)
NEGATIVE SYNCHRONISM)
Frequency Range
70dB (1KHz)
THD+NOISE
-60dB (1KHz)
WOW FLUTTER
Debajo del límite de la medida del equipo
AM frequency Range
522KHz ~ 1620KHz (step = 9kHz)
S/N(A weight)
46dB
FM band Range
87.5MHz ~ 108MHz
S/N(STEREO)
40dB
Frequency response
±1.5dB (20Hz ~ 20KHz)
- 65 -
PUERTO RICO LIMITED WARRANTY
Product
DVD
Home Theater Audio
Audio Systems
Portable Audio
Personal Audio
Portable MP3 Player*
•
Parts & Labor
One year, Carry-In Service
One year, Carry-In Service
One year, Carry-In Service
One year, Carry-In Service
One year, Carry-In Service
One year, Carry-In Service
Your warranty covers any defect in materials or workmanship for a period of one
year from the date of purchase. Thomson Inc. will pay any Thomson Authorized
Service Center the labor and parts charges to repair your product. Contact an
Authorized Service Center from the list below, or call your retailer for the nearest
Thomson Authorized Service Center. You must present proof of purchase to verify
warranty.
Portable MP3 Player
•
You can receive technical assistance for your Portable MP3 Player by calling General
Electronics (787) 878-5684 during normal business hours.
What your warranty does not cover:
•
Customer instruction, installation and/or adjustments, reception problems not
caused by our product.
•
Damage due to misuse or neglect.
•
Cleaning of video or audio heads.
•
Batteries.
•
Products that have been modified or serviced by non-authorized personnel.
•
Products used for commercial or institutional use.
•
Acts of nature, such as but not limited to lightning damage.
- 66 -
THOMSON AUTHORIZED SERVICE CENTERS PUERTO RICO
Centros de Servicio Autorizados RCA & GE Puerto Rico
NAME
BETANCES ELECTRONICS
GENERAL ELECTRONICS
RAMOS ELECTRONICS
CONTACT
FERNANDO PEREZ
LUIS VELEZ
CARLOS RAMOS
ADDRESS
TEL #
ASC#
AV. BETANCES D-13, HNAS. DAVILA
787-798-4615
112728
BAYAMON, PR 00960
787-778-4108
MANUEL PEREZ FREITES #253
787-878-5684
ARECIBO, PR 00612
fax 787-815-
P.O. BOX 244
787-868-5290
126706
787-752-2075
126222
787-731-7760
115852
787-850-2260
121994
115851
AGUADA, PR 00602
J C TV
JOSE COLLAZO
P.O. BOX 1859
RIO GRANDE, PR 00745
Ave. Iturregui MM-2
Country Club, Carolina
Puerto Rico 00928
JUNIOR'S ELECTRONICS
EFRAIN ARANA
AVE. E POL #497, BZ133 LAS
SAN JUAN, PR 00926
HUMACAO VIDEO
Lisette
AVE. FONT. MARTELLO #162
HUMACAO, PR 00791
- 67 -
- 68 -