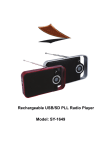
1
Manual de usuario
www.primux.es
Español/English
Contenido
Contenido......................................................... P1
Características del producto................................ P2
A simple vista ................................................... P3
Comenzar........................................................... P4-P5
Sobre las aplicaciones........................................ P5-P6
Aplicaciones preinstaladas.................................. P6
Conectarse a una red W i-Fi................................. P7-P8
Conexiones opcionales....................................... P9
Especificaciones................................................ P10
1
Características del producto
Navegue a través del navegador web:
Visite sus páginas favoritas.
Portable:
Reproduzca en cualquier sitio música,
ví deos e imágenes.
Compruebe su correo electrónico:
Comuní quese con sus amigos y familia.
Lector de tarjetas microSD.
Visualice ví deos de YouTube:
Navegue por la comunidad social de
ví deos más importantes del mundo.
Posibilidad de incrementar la capacidad de
almacenamiento del dispositivo (soporta
más de 32GB).
Lea sus libros favoritos:
Descargue miles de libros con el lector
de libros electrónicos incluido.
Cámara incorporada (Cámara frontal).
Descubra miles de aplicaciones Android:
Juegos, aplicaciones, y mucho más en
Google Play (ha de instalarlo
previamente).
Conéctese a internet sin cables:
Wi-Fi de alta velocidad 802.11 b/g/n.
Disfrute su librerí a multimedia en
cualquier parte.
2
Detección de orientación automática:
Lea de la forma que desee; ¡la pantalla se
ajusta automáticamente!
Para leer libros, es necesario usar la
aplicación de E-book incorporada.
A simple vista
4.DC 5V
Cargue el dispositivo con el adaptador de corriente
incluido.
1
2
3
4
6
5
5. TARJETA TF
Para tarjetas de memoria microSD externas.
6.VOL+/VOLPresione VOL+ para incrementar el
volumen.
Presione VOL- para reducir el volumen.
1.BOTÓN DE ENCENDIDO
Mantenga pulsado para encender el dispositivo, o encienda/apague la pantalla.
Presione y mantenga para acceder al menú de apagado del dispositivo.
2. AURICULARES
Ranura de conexión de audio para auriculares.
3.USB
Conéctese a un dispositivo USB o a un ordenador para transferir datos (música, vídeos, fotos, archivos).
3
Comenzar
Encender/apagar el dispositivo
Para encender el dispositivo:
presione y mantenga pulsado el botón
de encendido hasta que la pantalla LCD
se encienda. Espere hasta que aparezca
la pantalla de inicio; el dispositivo estará
listo para usarse.
Para apagar el dispositivo:
1.presione y mantenga pulsado el
botón
de
encendido
hasta
que
aparezca el menú de opciones.
2. Pulse OK en la pantalla para apagar
el dispositivo.
4
Encender/apagar la pantalla (Modo
reposo)
Cuando el dispositivo esté encendido, puede
apagar la pantalla para reducir el consumo
de baterí a. Presione el botón de encendido
una vez para apagar la pantalla. Pulse de
nuevo para encenderla.
Para ahorrar energí a de la baterí a,
puede configurar el apagado de la
pantalla automáticamente cuando
no esté usando el dispositivo (entre
1 y 30 minutos). Encontrará esta
opción en el menú de Ajustes.
Comenzar
Sobre las aplicaciones
Desbloquear la pantalla
Para abrir una aplicación, pulse en el icono de
la aplicación que desee abrir en la pantalla de
inicio.
Si la pantalla está apagada, tendrá que
desbloquearla en el momento en que quiera
utilizar el dispositivo de nuevo.
Pantalla de inicio:
Para desbloquear la pantalla, deslice el
icono de bloqueo a través de la pantalla
hasta el icono de desbloqueo.
La pantalla que se muestra en la parte
superior de la página solo es ilustrativa. La
empresa se reserva el derecho de modificar
e incrementar la lista final de aplicaciones
disponibles en el dispositivo..
5
Sobre las aplicaciones
Aplicaciones preinstaladas
Aplicaciones preinstaladas
InstalandoAplicaciones
Algunas aplicaciones del dispositivo vienen
instaladas por defecto. Estas incluyen:
Navegador web
Calculadora
Cámara frontal (ví deo y Fotos).
Correo electrónico.
Reproductor de música.
Ajustes
6
También
puede
descargar
e
instalar
aplicaciones adicionales desde Google Play,
desde el navegador web u otras fuentes.
El dispositivo debe configurarse para permitir
la instalación de aplicaciones que provengan
de otra fuente diferente a Google Play. Puede
modificarlo en los ajustes del
menú.
Conectarse a una red Wi-Fi
La barra de notificaciones muestra los iconos
que indican el estado de la cobertura de red
Wi-Fi del dispositivo.
WI FI0 00 1
WI FI0 00 2
Notificación de que está disponible una
red W i-Fi abierta.
Conectado a una red W i-Fi (las
ondas indican la cobertura de red).
Si el icono no aparece, indica que no hay
redes W i-Fi disponibles en el rango en el
que se encuentra o que ha desactivado la
opción de W i-Fi del dispositivo.
1.Conecte la opción de Wi-Fi:
a.Vaya a la pantalla de inicio.
Presione el icono de Inicio.
b.Abra el menú de Ajustes: pulse en el
icono situado en la parte superior
derecha de la pantalla de inicio y
después en el icono de Ajustes.
c.Abra
el
menú
de
Conexiones
inalámbricas y redes: deslice el icono
a ON.
Cuando la cobertura de red W i-Fi esté
conectada, el dispositivo buscará y mostrará
una lista de redes W i-Fi disponibles.
Si el dispositivo encuentra una red a
la que se haya conectado anteriormente, el
dispositivo
se
conectará
a
ella
automáticamente. Si no visualiza la red en
la lista, puede re-escanear las redes
disponibles.
7
Conectarse a una red Wi-Fi
2. Seleccionar una red Wi-Fi disponible para
conectarse
En el menú de Ajustes, seleccione una red de
la lista.
Si la red está abierta, el dispositivo le avisará para
que confirme la conexión. Pulse Conectar para
confirmar.
Si la red está protegida por clave, el dispositivo le
pedirá que introduzca una contraseña u otras
credenciales.
WI FI0 00 2
8
Cuando se haya conectado a una red, la barra
de notificaciones mostrará el indicador de
señal.
Para saber más sobre cómo añadir una
red Wi-Fi cuando no aparece en la lista o
cuando el router está configurado con
nombre oculto (SSID), o para configurar
opciones avanzadas de Wi-Fi, por favor,
consulte el manual.
Conexiones opcionales
Conectarse a un ordenador
Conecte el dispositivo a un ordenador para
transferir archivos.
1.Conecte su dispositivo a un ordenador.
Con el cable USB incluido: conecte uno de los
extremo más pequeño del cable al dispositivo, y
el más grande al ordenador.
2.Cuando haya conectado el dispositivo,
deslice el icono de USB y pulse en el icono
de USB conectado.
3Almacenamiento.
Pulse en el botón de Conectar almacenamiento
USB para intercambiar archivos.
9
Especificaciones
Procesador
RAM
Almacenamiento
Pantalla
512MB DDR3
4GB; ranura de tarjeta micro SD (máximo
32GB)
7”TFTLCD(800x480), Pantalla táctil capacitiva
Conexiones
inalámbricas
Salida audio
IEEE 802.11 b/g/n
Interfaz PC
USB 2.0 de alta velocidad
Herramientas
adicionales
Micrófono incorporado. Cámara frontal
(0.3MP). Altavoz 1X1W
Sistema operativo
Batería
Tiempo de
reproducción
(horas)
10
BOXCHIPA13 1GHz(CortexA8)
Auricular 3.5 mm
Androi d™ 4.0
Batería recargable
Adaptador (DC 5V, 2A)
Más de 6 horas de música
3 horas de vídeo,
3 horas de navegación por web
La música ha sido probada con archivos MP3
de 128kbps; el ví deo ha sido probado con
archivos
MPEG-4/AVC
1920x1080;
el
navegador ha sido probado con el brillo de
pantalla
configurado
por
defecto.
La
reproducción real puede variar ligeramente.
USER'S MANUAL
ENGLISH
ZONDA 2
Table of Contents
Table of Contents......................................P1
Features..................................................P2
Unit at a Glance .......................................P3
Getting Started....................................P4-P5
AboutApplications...............................P5-P6
PreinstalledApplications...........................P6
Connect to a W i-Fi network....................P7-P8
Optional Connections................................P9
Specifications.........................................P10
12
Features
Browse the Web.
Visit your favorite websites
Check your e-mail
Keep in touch with friends and family
WatchYouTube™ videos
Browse the world’s most popular videosharing community
Read your favorite books
Download thousands of books with the
included E-book reader *
Discover thousands of apps forAndroid™
Games, applications, and more with
marketplace(need for customer installed)
Connect to the Internet wirelessly
High-speed W i-Fi 802.11 b/g/n networking
Enjoy your media library anywhere
13
Portable powerhouse plays popular music,
video,andphoto formats
microSDmemory card reader
Increase your storage capacity (up to 32 GB
supported)
Built-in camera
Convenient front-facing camera
Automatic orientation detection
Read any wa y you want; the display adjusts
automatically!
Reading books in the ePubformat requires
the included E-book reader application.
Unit at a Glance
4.DC IN 5V
Change and power the tablet with the included
power adapter.
1
2
3
4
6
5
5. TF CARD
Load external microSD memory cards here.
6.VOL+/VOLPress VOL+ to increase the volume level.
Press VOL- to decrease the volume level.
1.POWER
Press to turn the unit on, or to turn the screen on
or off.
Press and hold to access the Power Off menu.
2. Headphone
Audio output connection for headphones.
3.USB OTG / HOST
Connect to a USB device or a computer to transfer
data (e.g. music, videos,photos, files).
14
Getting Started
Turning the Tableton or off
To turn the tableton:
Press and hold the Power key until the LCD
screen turns on. Wait until the Hom e screen
appears; the tablet is now ready for use.
To turn the tablet off:
1.Pressand hold the Power key until the
Device Options menu appears.
Turning the Screen On or off
(Standby)
W hen the tablet is on, you can turn off the
screen to conserve battery power. Simply press
the Power key once to turn the screen
off. Press the Power key again to turn the
screen back on.
To conserve battery power, the screen
can be set to turn off automatically when
the tablet is not in use (between
1 minute and 30 minutes).
This Screen timeout option can be found
in the Display menu.
2.Touch okthe screen to turn off the tablet.
15
Getting Started
AboutApplications
Unlocking the Screen
To open an application, touch the application
icon on the home screen or in the Launcher
where you can tap the icon right up on the
home screen to get in..
W hen the screen turns off, you will have to
unlock the screen
whenyou turn it back on.
To unlock the screen, drag the lock icon across
the screen towards the lock icon.
Launcher screen:
.
The screen shown above is for illustrative
purposes only. Reserves the right to modify
and improve the final list of applications
available on the tablet.
16
AboutApplications
PreinstalledApplications
PreinstalledApplications
InstallingApplications
Someapplicationshavebeeninstalledonyour
tabletforyourconvenience.
Theseapplicationsinclude:
Browse the web.
Perform simple mathematical operations.
Take pictures or videos with the
frontfacingcamera.
Check your e-mail.
Play music.
Access the Settings menu to adjust the
tablet’s options.
17
You can also download aninstall additional
applicationsfrom the device’s applications
marketplace, the web browser, or other
sources.
The tablet must be set to allow installation of
applications from non-Market sources.T he
Unknown sources option can be set in the
Application settings menu.
ConnecttoaWi-Finetwork
The Notification bar displays icons that indicate
your tablet’s W i-Fi status.
Notification that an open W i-Fi network is
in range.
WI FI0 00 1
WI FI0 00 2
Connected to a W i-Fi network (waves
indicate connection strength).
[noicon]There are no W i-Fi networks in
range, or the W i-Fi radio is off.
1.Turn on the W i-Fi radio if it is not already
on.To turn on W i-Fi:
a.Goto the Hom e screen: Press the Hom e
key.
b.Openthe Settings menu: tap the icon right
up on the home screen to get into the
launcher, then touch Settings icon.
c.Openthe W ireless &networks menu: Slide
the icon to ON status.
W hen W i-Fi is on, the tablet will look for and
display a list of available W i-Fi networks.
If a network that yo u have connected to
previously is found, the tablet will
connect to it.Ifyou don’t see your
network in the list, you can force the
tablet to re-scan.To scan for networks,
tap the Menu key, and then touch Scan.
18
ConnecttoaWi-Finetwork
2. Select an available Wi-Fi network to connect
to:
In the same Wi-Fi settings menu above,touch a
network in the list.
If the network is open,the tablet will prompt you to
confirm connection to the network.Touch Connect
to confirm.
If the network is secured (as indicated by a Lock
icon),the tablet will prompt you to enter a
password or other credentials.Touch the Wireless
password box to show the on-screen keyboard
and then use it to enter the password.Touch
Connect to confirm.
WI FI0 00 2
19
When you have successfully connected to a
Wi-Fi network, the Notifications bar at the the low
of the screen will show a Wi-Fi signal indicator.
To learn about how to add a Wi-Fi network
when it is not in range or when the router
is set to obscure the network name (SSID);
or to configure advanced Wi-Fi options,
please refer to the manual.
OptionalConnections
ConnectingtoaComputer
Connect the tablet to a computer to transfer files.
1.Connect your tablet to the computer.
With the included USB cable: Plug the small end
of the cable into the USB 2.0 high speed
connector of the tablet. Plug the large end of the
cable into an available USB 2.0 high speed port
on the computer.
2.When your tablet is connected,slide up the
USB icon right down on the screen and then
touch icon USB connected.
3.Mountthestorage.
TouchbuttonTurnonUSBstoragetomountthe
tablet’sbuilt-instorage.W henitismounted,you
cancopyfilestoorfromyourtablet.
20
Specifications
Processor
RAM
BOXCHIPA13 1GHz(CortexA8
512MB DDR3
Storage
4GB(option) flash built-in; micro
SD card slot (max.32GB supported)
Display
7”TFTLCD(800x480), Capcitive touchscreen
Wi-Fi Networking
IEEE 802.11 b/g/n
Audio Output
3.5mm headphone
PC Interface
USB 2.0 high speed
Additional Features Built-in microphone
Front facing camera(0.3MP)
1X1W speaker
Operating System
Power
PlaybackTime
(hours)
21
Androi d™ 4.0
Rechargeable Li-poly battery power
Adapter(DC 5V,2A)
Up to 6 hours music,
3 hours video,
3 hours web browsing
Music was tested with a 128 kbps MP3 file; video
was tested with a 1920x1080 MPEG-4/AVC file;
browsing was tested with the screen brightness
set to default.Actual playback results may var y.