1
Remote Cradle
The remote cradle holds the remote, and can either be mounted
on a surface such as the dashboard or connected to a belt clip.
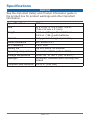
Tools Required
• Phillips screwdriver
• Drill and 1/8 in. (3.2 mm) drill bit
Mounting the Cradle
Note: Mount the cradle at least 9.875 in. (250 mm) from a
magnetic compass to avoid interference.
1 Use the cradle mounting screw holes ➊ as a template to
mark pilot hole locations on the surface on which you will be
mounting the cradle.
Note: If you are mounting the cradle
in fiberglass, use a countersink bit to drill ➊
a clearance counterbore through only
the top gel-coat layer. This help to avoid
cracking in the gel-coat layer when the
screws are tightened.
3 Drill 1/8 in. (3.2 mm) pilot holes.
4 Use the two included mounting screws to attach the cradle
to the mounting surface.
Inserting the Remote into the Cradle
1 Slide the remote into the top of the cradle.
2 Push the remote into the cradle until you
feel it lock in place.
Removing the Remote from the Cradle
1 Push up on the bottom of the remote to
release it from the cradle.
2 Pull the remote out of the cradle.
Attaching the Belt-Clip Key and Belt Clip
1 Screw the belt-clip key into the back of the cradle.
EN–3