1
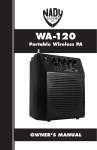
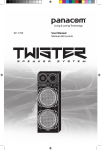
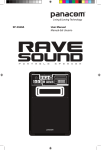
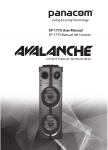
SP-5215
User Manual
Manual del Usuario
CAUTION
Read this before operating your unit.
1. To assure the finest performance, please read this manual carefully. Keep it in a safe place for
future reference.
2. Install this sound system in a well ventilated, cool, dry, clean place - away from direct sunlight,
heat sources, vibration, dust, moisture, and/or cold. For proper ventilation, allow the following minimum clearances around this unit. Top: 10 cm (4 in) Rear: 10 cm (4 in) Sides: 10 cm (4 in)
3. Locate this unit away from other electrical appliances, motors, or transformers to avoid humming
sounds.
4. Do not expose this unit to sudden temperature changes from cold to hot, and do not locate this
unit in an environment with high humidity (i.e. a room with a humidifier) to prevent condensation inside this unit, which may cause an electrical shock, fire, damage to this unit, and/or personal injury.
5. Avoid installing this unit where foreign object may fall onto this unit and/or this unit may be exposed to liquid dripping or splashing. On the top of this unit, do not place:
Other components, as they may cause damage and/or discoloration on the surface of this unit.
Burning objects (i.e. candles), as they may cause fire, damage to this unit, and/or personal injury.
Containers with liquid in them, as they may fall and liquid may cause electrical shock to the user
and/or damage to this unit.
6. Do not cover this unit with a newspaper, tablecloth, curtain, etc. in order not to obstruct heat
radiation. If the temperature inside this unit rises, it may cause fire,
damage to this unit, and/or personal injury.
7. Do not plug in this unit to a wall outlet until all connections are complete.
8. Do not operate this unit upside-down. It may overheat, possibly causing damage.
9 .Do not use force on switches, knobs and/or cords.
10. When disconnecting the power cable from the wall outlet, grasp the plug; do not pull the cable.
11. Do not clean this unit with chemical solvents; this might damage the finish. Use a clean,
dry cloth.
12. Only voltage specified on this unit must be used. Using this unit with a higher voltage than
specified is dangerous and may cause fire, damage to this unit, and/or personal injury. We will not be
held responsible for any damage resulting from use of this unit with a voltage other than specified.
13. To prevent damage by lightning, keep the power cable and outdoor antennas disconnected from
a wall outlet or this unit during a lightning storm.
14. Do not attempt to modify or fix this unit. Contact Qualified service personnel when any service
is needed. The cabinet should never be opened for any reasons.
15. When not planning to use this unit for long periods of time (i.e. vacation), disconnect the AC
power plug from the wall outlet.
16. Be sure to read the TROUBLESHOOTING section on common operating errors before concluding that this unit is faulty.
17. Before moving this unit,disconnect the AC power plug from the wall outlet.
18. Condensation will form when the surrounding temperature changes suddenly. Disconnect the
power cable from the outlet, then leave this unit alone.
19. When using this unit for a long time, this unit may become warm. Turn the power off, then leave
this unit alone for cooling.
20. Install this unit near the AC outlet and where the AC power plug can be reached easily.
21. The batteries shall not be exposed to excessive heat such as sunshine, fire or the like. When you
dispose of batteries, follow your regional regulations.
22. Excessive sound pressure from earphones and headphones can cause hearing loss.
Pg. 3
CYCLONE Speaker.
User’s Guide
Thank you for purchasing Panacom’s Cyclone Speaker.
Please read the manual carefully before operating.
CONNECTIONS
Connection diagram:
Note:
• Always unplug the unit when making connections.
• Check all connections are firmly fitted.
• Check all speakers are connected to their correct designated position.
Pg. 4
CONTROLS ON PANEL
1.
(NEXT)
9.lNPUT
Press this key to choose next song.
Press this key to choose the input mode.
2.STANDBY
3.DJ.EFFECT
10.VOLUME
Press this key to choose diffect music effect.
11.MUTE
4.DJ
Adjust the knob to design and change the music effect.
5.
(PLAY/PAUSE)
Press this key to play or pause.
6.USB A
USB A terminal.
Adjust the unit volume level.
Press this switch to mute,press
again recover.
12.REC-USB
REC-USB terminal.
13.PHONES
phones terminal.
14.MlCROPHONE 1&2
7.LED DISPLAY
8.MENU
Microphone 1&2 terminal.
This switch selects the menu.
Press this key to choose previous song.
15.
(PREV)
Pg. 5
TERMINALS ON REAR
1.LlNE IN AUDIO INPUT JACK
Connect to LINE IN signal output jack.
2.AUX AUDIO INPUT JACK
Connect to AUX signal output jack.
3.Power Switch
Press this switch to turn the unit on or off remote sensor.
4.FM ANTENNA
5.AC INPUT
100-240Vca 50/60Hz
Pg. 6
REMOTE CONTROL
1. INPUT SELECT
2. STANDBY
3. DJ.EFFECT
4. LIGHT MODE
5. X DRIVE
6. USBA
7. BLUETOOTH
8. VOLUME9. NEXT
10. B.WARD
11. TREBLE+
12. PREVIOUS
13. TREBLE14. NUMBER BUTTON
15. CHANNEL16. CHANNEL+
17. RECORD
18. PAUSE
19. MUTE
20. MICROPHONE VOLUME21. MICROPHONE VOLUME+
22. ECHO+
23. ECHO24. MICROPHONE BASS+
25. MICROPHONE BASS26. MICROPHONE TREBLE+
27. MICROPHONE TREBLE28. DISCONNECT(BLUETOOTH)/STOP
29. VOLUME+
30. PLAY/PAUSE
31. F.WARD
32. BASS+
33. BASS34. STEREO
35. MONO
36. TUNING+
37. TUNING38. AUTO
39. PLAYBACK
REMOTE CONTROL OPERATION:
lf the remote control conflicts with other devices, the operation will be affected.
Do not simultaneously press buttons on the unit and the remote control.
Avoid using two remote controls at the same time as this will cause a malfunction.
Use only UM-4 “AAA“ size batteries. Do not mix old batteries with new ones.
If the batteries leak, clean thoroughly before replacing with new ones.
Do not short two terminals of the batteries. Dispose of old batteries in a suitable place.
Pg. 7
OPERATING
Normal function
1. Be sure to switch off the power and to connect the outputs to corresponding input jacks.
2. Turn on the power and wait 3-4 seconds untill the speaker functions are connected.
3. Select an audio source by pressing the INPUT key on the front panel or on the remote
control to display AUX,LlNE lN,USB A,Wireless,TUNER,RECU.
4. Adjust the VOLUME knob on the front panel or the VOL+/- key on the remote control to
adjust the setting of the main volume.
5. Press the MENU key on the front panel or on the remote control to display TREBLE, BASS,
XDRlVE, LlGHT MODE, MlC VOLUME/ECHO/BASS/TREBLE then adjust the VOLUME knob
or adjust +/- to change music treble, bass, light mode and MIC effect.
6. Press the DJ EFFECT key on the panel or the DJ kedy on the remote control to display
SCRATCH,REVERB,DEAT BOX,YEAH mode,then adjust the DJ knob to design and change
the music effect with you like.
7. Press the MUTE key to mute, press it again to reset.
Tuner applications
1. Before using the radio functions, you must attach the supplied antenna. Adjust the
antenna to obtain optimum reception. Press the INPUT key on the front panel(amplifier)or on
the remote control,to select “ FM “ function.
2. Press the CH+/CH- key on the remote control to find radio bands that you have previously
saved.
3. Press or hold the TU+/TU- key on the remote control to adjust the radio frequency
manually.
4. Press the AUTO key on the remote control, the machine will scan radio channels from
low-frequency to high-frequency by itself and memorize the channels one by one.
5. Press the MEMO key on the remote control and it will memorize the current radio frequency
on the band. Press the number buttons to set desired programed number. The machine can
memorize at most 40 FM radio bands.
6. In FM mode, press the ST.MO key on the remote control to select STEREO or MONO.
KARAOKE function
1. The machine can auto detect whether MlC1,MlC2 is inserted.
Please turn off the microphone volume and adjust the volume gradually after inserting the
microphone.
2. Press MENU on the front panel to display MVOL,then adjust the VOLUME knob to change
the microphone VOLUME.
3. Press MENU on the front panel to display ECHO,then adjust the VOLUME knob to change
themicrophone ECHO.
Note: Do not touch the top of the microphone when singing in oder to avoid howling effect.
Adjust the microphone volume gradually to avoid howling effect.
Wireless pair and connect
• Turn offany Wireless devices previously paired (linked) with this unit.
• Turn on the Wireless features on your phone or music player.
• Turn on and set this unit to Wireless mode. The flashing blue light on LED display
indicates it is in pairing mode.
• Set your phone or music player to search for Wireless devices.
• Select SP-5215 from search results on your phone or music player.
• Select OK or YES to pair this unit with your phone or music player.
• If protected, enter 0000 for passkey steady blue light indicates successful
connection.
• Press the DISCONNECT key on the remote to disconnect the Wireless.
Pg. 8
Function of USB reader
USB A interface
This unit has two USBjacks. Press the INPUT key to select USBA,then you can insert a USB
to play Mp3 music.
Important: The USB port is intended only for data transfer only, other devices cannot be used
with this USB connection. The use of USB extension cords is not recommended.
REC-USB function
The button of RECORD,PAUSE,PLAYBACK are all for recording use only. REC_USB is
recording jack.
Recording function only works in the mode of AUX,LINE IN,WIRELESS,FM.
1.Recording button: Please insert your usb device and press record button,it will show
WAITING for few seconds and then RECORDING for a moment before starting button.
2.RECORD button: Press this button when in record mode,itwill show WAITING on display
for a seconds. Then start to play the files recorded.
3.PAUSE button: Press PAUSE button to pause recording,press this button again to contuine
recording.
Function of NFC
For the smartphone with NFC (Near Field Communication) function, you can easily perform
the pairing operation just by touching the NFC mark on this unit with your smartphone (you
need to turn on the power of this unit and turn on the NFC function of the connecting device
beforehand).
1. Press the (Power) button to turn on the power of this unit.
2. Perform the pairing operation on the connecting device (for details, referto the owner’s
manual of the connecting device).
lf the connection fails, move the smartphone slowly on the NFC mark. lf the smartphone is
equipped with a case, remove the case.
What is NFC?
Near Field Communication (NFC) is a standards-based connectivity technology that makes it
more convenient to make transactions, exchange digital content and connect devices.
Using NFC you can transfer information between your phone and other NFC devices, such
as phones and other mobile devices, payment devices and home audio and video devices.
For example, you can share web addresses, contacts, phone numbers, music tracks, videos
or photos. NFC is activated by bringing two NFC devices together. The maximum reading
distance is about one centimeter, which helps prevent unauthorized communications.
HEADPHONE JACK
For private Iistening,insert a 6.3mm headphone into the PHONE JACK. The SPEAKER output
is automatically cutoff.
CAUTION: LISTENING AT HIGH POWER FORA LONG MOMENT COULD DAMAGE USER’S
EARS.
SPECIFICATION
Power Consumption.......................................................................................................120W
Frequency Response..........................................................................................38Hz~20KHz
Max. Input CapabiIity....................................................................................................300mV
Distortion.........................................................................................................................<1%
S/N..................................................................................................................................75dB
Pg. 9
GENERAL REQUIREMENT
Power source.........................................................................................................240~,50Hz
Accessory
Operation manual 1PC
Remote Control 1PC
FM Antenna 1 PC
-The specification presents only as a reference. Weight and size values are approximate.
-Our product specifications are subject to change without prior notice.
Pg. 10
PRECAUCIÓN
Lea esto antes de operar su unidad.
1. Para asegurar el mejor rendimiento, por favor, lea atentamente este manual. Guárdelo en un lugar
seguro para futuras consultas.
2. Instale el sistema de sonido en un lugar bien ventilado, fresco, seco y limpio lugar - lejos de la luz
solar directa, fuentes de calor, vibración, polvo, humedad y / o frío. Para una ventilación adecuada, deje
las siguientes distancias mínimas alrededor de esta unidad. Inicio: 10 cm (4 pulgadas) traseras: 10 cm (4
pulgadas) Laterales: 10 cm (4 pulgadas)
3. Coloque este aparato lejos de otros aparatos eléctricos, motores o transformadores, para evitar los
ruidos de zumbido.
4. No exponga esta unidad a cambios bruscos de temperatura de frío a caliente, y no se localice esta
unidad en un ambiente con alta humedad (es decir, una habitación con un humidificador) para evitar la
condensación en el interior de esta unidad, que puede causar una descarga eléctrica, incendio, daños
en el aparato y/o lesiones personales.
5. Evite instalar esta unidad donde un objeto extraño pueda caerle y/o pueda estar expuesto a cualquier
líquido. En la parte superior de esta unidad, no coloque:
Otros componentes, ya que pueden causar daños y/o decoloraciones.
Quemar objetos (velas por ej.), ya que pueden causar incendios, daños en la unidad, y/o lesiones personales.
Los recipientes con líquido en ellos, ya que pueden caer y líquidos pueden causar descargas eléctricas
al usuario y/o daños en la unidad.
6. No cubra el aparato con un periódico, mantel, cortina, etc. para no impedir el escape del calor. Si la
temperatura en el interior del aparato aumenta, podría provocar un incendio,
daños en la unidad, y/o lesiones personales.
7. No enchufe la unidad a una toma de corriente hasta que todas las conexiones esten completas.
8. No opere esta unidad boca abajo. Puede sobrecalentarse y causar daños.
9. No fuerce interruptores y/o perillas.
10. Al desconectar el cable de alimentación de la toma de corriente, tire del enchufe; no tire del cable.
11. No limpie la unidad con solventes químicos; esto podría dañar el acabado. Use un paño limpio y seco.
12. Utilice sólo el voltaje especificado para esta unidad. El uso de este aparato con una tensión más alta
de la especificada es peligroso y puede causar incendio, daños en el aparato y/o lesiones personales.
Nosotros no seremos responsables de ningún daño resultante del uso de esta unidad con un voltaje
distinto al especificado.
13. Para evitar daños debidos a relámpagos, desconecte el cable de alimentación y antenas exteriores
de la toma de pared durante la tormenta eléctrica.
14. No intente modificar o reparar esta unidad. Póngase en contacto con personal de servicio cualificado
cuando necesite realizar alguna reparación. El gabinete nunca debe ser abierto por cualquier motivo.
15. Cuando no vaya a utilizar la unidad durante largos períodos de tiempo (por ejemplo, vacaciones),
desconecte el cable de alimentación de la toma de corriente.
16. Asegúrese de leer la sección PROBLEMAS en errores comunes de funcionamiento antes de concluir
que esta unidad es defectuosa.
17. Antes de mover la unidad, desconecte el cable de alimentación de la toma de corriente.
18. La condensación se forma cuando la temperatura ambiente cambia repentinamente. Desconecte el
cable de alimentación de la toma.
19. Al utilizar esta unidad durante mucho tiempo, esta unidad puede llegar a calentarse. Desconecte la
alimentación y a continuación, no utilice el aparato para la refrigeración.
20. Instale esta unidad cerca de una toma donde el cable de alimentación pueda llegar fácilmente.
21. Las baterías no deben exponerse a un calor excesivo como el del sol, fuego o similares. Cuando se
deshaga de las pilas, respete la normativa regional.
22. El uso excesiva de los auriculares puede causar pérdida de la audición.
ADVERTENCIA
cuidado
RIESGO DE DESCARGA ELECTRICA
NO ABRIR
ADVERTENCIA: PARA REDUCIR EL PELIGRO DE UNA DESCARGA
ELECTRICA NO ABRA LA TAPA. NO HAY PIEZAS EN EL INTERIOR.
DIRIGIRSE A PERSONAL CUALIFICADO DE SEVICIO TECNICO
Pg. 11
parlante CYCLONE.
Guía del usuario
Gracias por adquirir Parlante Cyclone de Panacom.
Por favor, lea atentamente el manual antes de operar.
CONEXIONES
Diagrama de conexión:
Nota:
• Desenchufe siempre la unidad cuando realice las conexiones.
• Compruebe que todas las conexiones esten firmemente realizadas.
• Compruebe que todos los altavoces estén conectados a su posición correcta.
Pg. 12
PANEL DE CONTROL
1.
(NEXT)
8.MENU
Pulse esta tecla para elegir la siguiente
canción.
Este interruptor selecciona el menú.
2.STANDBY
3.DJ.EFFECT
Pulse esta tecla para seleccionar el modo
de entrada.
Ajuste el mando para diseñar y cambiar el
efecto de la música.
9.lNPUT
10.VOLUME
Ajuste el nivel de volumen de la unidad.
4.DJ
11.MUTE
Ajuste el mando para diseñar y cambiar el
efecto de la música.
Pulse este interruptor para silenciar, pulse
para recobrar el sonido de nuevo.
5.
12.REC-USB
(PLAY/PAUSE)
Pulse esta tecla para reproducir o pausar.
Terminal REC-USB.
6.USB A
13.PHONES
USB A terminal.
Terminal de móviles.
7.LED DISPLAY
14.MlCROPHONE 1&2
Terminales micrófono 1 y 2.
15.
(PREV)
Pulse esta tecla para seleccionar
la canción anterior.
Pg. 13
TERMINALES TRASERAS
1.LlNEA DE ENTRADA AUDIO JACK
Connect a LINE IN para salida de la señal.
2. LlNEA DE ENTRADA AUX AUDIO JACK
Connect a AUX para salida de la señal.
3.Power Switch
Pulse este interruptor para encender la unidad
o desactivar el sensor remoto.
4.ANTENA FM
5. AC DE ENTRADA
100-240Vca 50/60Hz
Pg. 14
REMOTE CONTROL
1. INPUT SELECT
2. ESPERA
3. DJ.EFFECT
4. MODO DE LUZ
5. X UNIDAD
6. USBA
7. BLUETOOTH
8. VOLUMEN9. SIGUIENTE
10. B.WARD
11. AGUDOS +
12. ANTERIOR
13. AGUDOS14. BOTON NÚMERO
15. CANALL16. CANAL +
17. GRABAR
18. PAUSA
19. SILENCIO
20. MICROFONO VOLUME21. MICROFONO VOLUME+
22. ECHO+
23. ECHO24. MICROFONO BAJOS+
25. MICROFONO BAJOS26. MICROFONO AGUDOS+
27. MICROFONO AGUDOS28. DESCONECAR (BLUETOOTH)/STOP
29. VOLUMEN+
30. PLAY/PAUSE
31. F.WARD
32. BAJOS+
33. BAJOS34. STEREO
35. MONO
36. TUNING+
37. TUNING38. AUTO
39. REPRODUCCIÓN
receptor infrarojo del
control remoto:
unidad de control
remoto
por infrarojo
Funcionamiento del control remoto:
Si tiene conflictos con otros dispositivos de mando a distancia, la operación
se verá afectada.
No presione simultáneamente los botones de la unidad y el mando a distancia.
Evite el uso de dos mandos a distancia al mismo tiempo ya que esto causará
un mal funcionamiento.
Utilice sólo pilas de tamaño UM-4 “AAA”. No mezcle pilas viejas
con pilas nuevas.
Si las pilas se derraman, limpie a fondo antes de sustituir por otras nuevas.
No corte dos terminales de las baterías. Deseche las pilas usadas en un lugar
adecuado.
Pg. 15
FUNCIONAMIENTO
La función normal
1. Asegúrese de desconectar la alimentación y conectar las salidas a las entradas correspondientes.
2. Encienda la alimentación y espere 3-4 segundos hasta las funciones de los altavoces estén
conectados.
3. Seleccione una fuente de audio pulsando la tecla INPUT del panel frontal o del mando a
distancia para mostrar AUX, LlNE LN, USB, Wireless, TUNER, RECU.
4. Ajuste el mando de volumen del panel frontal con la tecla VOLUMEN +/- del mando a distancia para ajustar la configuración del volumen principal.
5. Pulse la tecla MENU en el panel frontal o en el mando a distancia para mostrar agudos,
graves, XDRlVE, LUZ MODO, MLC VOLUMEN / ECHO / graves / agudos luego ajuste la
perilla de VOLUMEN o ajuste +/- para cambiar los agudos música, bajos, el modo de la luz
y el efecto MIC.
6. Pulse el botón DJ EFECTO en el panel o DJ en el mando a distancia para mostrar SCRATCH,
REVERB, DEAT BOX, YEAH mode. A continuación, ajuste la perilla de DJ para diseñar y cambiar el efecto de la música que desee.
7. Pulse la tecla MUTE para silenciar, pulse de nuevo para reiniciar.
Aplicaciones para la Radio
1. Antes de utilizar las funciones de radio, debe conectar la antena incluída. Ajuste la antena
para obtener una recepción óptima. Pulse la tecla INPUT del panel frontal (amplificador) o en el
control remoto, para seleccionar la función “FM”.
2. Pulse el botón CH+/CH- del control remoto para encontrar bandas de radio que haya guardado previamente.
3. Pulse o mantenga pulsada la tecla TU+/TU- en el mando a distancia para ajustar la frecuencia de radio de forma manual.
4. Pulse la tecla AUTO del control remoto, el equipo escaneará los canales de radio de baja
frecuencia a alta frecuencia por sí mismo y memorizará los canales uno por uno.
5. Pulse la tecla MEMO en el mando a distancia y memorizará la frecuencia de radio actual en
la banda. Pulse los botones numéricos para establecer el número programado deseado. La
máquina puede memorizar más de 40 bandas de radio FM.
6. En el modo FM, pulse la tecla ST.MO en el control remoto para seleccionar STEREO o MONO.
Función KARAOKE
1. La máquina puede detectar automáticamente si MIC1, MIC2 está insertado.
Por favor, apague el volumen del micrófono y ajustar el volumen de forma gradual después de
insertar el micrófono.
2. Pulse MENU en el panel frontal para visualizar MVOL, a continuación, ajuste la perilla VOLUME para cambiar el volumen del micrófono.
3. Pulse MENU en el panel frontal para visualizar ECHO, a continuación, ajuste la perilla VOLUME para cambiar themicrophone ECHO.
Nota: No toque la parte superior del micrófono al cantar en oder para evitar efecto de zumbido.
Ajuste el volumen del micrófono gradualmente para evitar efectos aullando.
Empareje Wireless y conecte
• Apague dispositivos Wireless vinculados anteriormente con esta unidad.
• Encienda las funciones de Wireless en su teléfono o reproductor de música.
• Active y configure esta unidad en modo Wireless. La luz azul parpadea en el visualizador LED
e indica que está en modo de emparejamiento.
• Configure su teléfono o reproductor de música para buscar dispositivos Wireless.
• Seleccione SP-5215 en su teléfono o reproductor de música.
• Seleccione Aceptar o Sí para asociar esta unidad con el teléfono o reproductor de música.
• Si está protegida, introduzca la clave clave 0000 y la luz azul fija indicará éxito en la conexión.
• Pulse la tecla DESCONECTAR en el control remoto para desactivar el Wireless.
Pg. 16
Función de lector USB
USB A interface
Esta unidad cuenta con dos conectores USBjacks. Pulse la tecla INPUT para seleccionar USB
A, entonces podrá insertar un USB para reproducir música MP3.
Importante: El puerto USB es sólo para la transferencia de datos solamente, otros dispositivos no se
pueden utilizar con esta conexión USB. No se recomienda el uso de cables de extensión USB.
Función REC-USB
El botón de grabar, pausar, REPRODUCCIÓN son totalidad son de uso exclusivo de grabación. REC_USB está grabando jack.
Función de grabación sólo funciona en el modo AUX, LINE IN, WIRELESS, FM.
1. Botón Grabando: Inserte el dispositivo USB y pulse el botón de grabación, espere unos
segundos y luego grabe.
2. Botón Grabar: Pulse este botón cuando esté en modo de grabación. Verá espere en pantalla
por un segundo. A continuación, comience a reproducir los archivos grabados.
3. Botón PAUSE: Pulse el botón de pausa para detener la grabación, pulse este botón de nuevo
para continuar la grabación.
Función de NFC
Para smartphone NFC (Near Field Communication), se puede realizar fácilmente la operación
de emparejamiento con sólo tocar la marca de la NFC en esta unidad con el teléfono (active de
antemano la función NFC en el dispositivo).
1. Pulse el botón (Encendido) para encender la unidad.
2. Realice la operación de emparejamiento en el dispositivo de conexión (para más detalles, ver
manual del usuario del dispositivo de conexión).
Si la conexión falla, mueva el teléfono inteligente lentamente en la marca de la NFC. Si el teléfono
está equipado con un caja, quitar la caja.
¿Qué es NFC?
Near Field Communication (NFC) es una tecnología de conectividad basada en estándares que
hace que sea más conveniente para realizar transacciones, contenido digital intercambio y conexión de dispositivos.
El uso de NFC puede transferir información entre el teléfono y otros dispositivos NFC, como
teléfonos y otros dispositivos móviles, dispositivos de pago y audio para el hogar y dispositivos
de video. Por ejemplo, usted puede compartir direcciones web, contactos, números de teléfono,
pistas de música, vídeos o fotos. NFC es activado por la unión de dos dispositivos NFC juntos.
La distancia máxima de lectura es alrededor de un centímetro, que ayuda a prevenir las comunicaciones no autorizadas.
AURICULARES
Inserte un auricular de 6.3mm en la toma telefónica. La salida del altavoz automáticamente se
corta.
PRECAUCIÓN: escuchar en ALTA POTENCIA por mucho tiempo PUEDE CAUSAR DAÑOS EN LOS OÍDOS DEL USUARIO.
ESPECIFICACIONES
Consumo de energía...............................................................................................................120W
Frecuencia...................................................................................................................38Hz~20KHz
Capacidad Max. de Entrada.................................................................................................300mV
Distorsión...................................................................................................................................<1%
S/N............................................................................................................................................75dB
Pg. 17
REQUISITO GENERAL
Fuente de energía...................................................................................................240~,50Hz
Accesorio
Operación manual 1PC
Control Remoto 1PC
Antena FM 1 PC
-La especificación es sólo como referencia. Los valores de peso y tamaño son aproximados.
-Nuestras especificaciones del producto están sujetas a cambios sin previo aviso.
Pg. 18
TECHNICAL SERVICES / SERVICIO TECNICO
Razón SocialLocalidadDomicilio
Teléfono
Company
LocalityAddressPhone
Ciudad de Buenos Aires
SERVICE HOME
C.A.B.A
Provincia de Buenos Aires
TAURO ELECTRÓNICA
Santa Teresita
TOSHIMAR
Mar del Plata
SERVICE DE LA COSTA
San Nicolás
SPEED SERVICE
La Plata
TAURO ELECTRÓNICA
Mar de Ajo
TAURO ELECTRÓNICA
Dolores
TECNISERVICE
Bahía Blanca
CITTA SERVICE
Bahía Blanca
Provincia de Córdoba
RAUL GARCÍA
Córdoba Bº Gral Paz
JUAN MARTÍN VALSECCHI Río Cuarto
STONE BICYCLE
Córdoba
ALCARAZ JUAN
San Francisco
Provincia de Corrientes
SERVITEC ELECTRONICA Corrientes
Provincia de Chaco
ELECTRONICA DANY
Roque Sanz Peña
Provincia de Entre Rios
VALENTE HNOS
Paraná
ELECTRO SERVICE
Concordia
ELECTRO DAN
Gualeguaychu
Provincia de Formosa
ELECTR.THOMPSON S.R.L Formosa
Provincia de Jujuy
TECNOTRONIC
S.S. de Jujuy
Provincia de La Rioja
EGA ELECTRONICA
La Rioja
Carlos Calvo 3621 011-4957-3030
Av 41 Nº 688
Bolivar 3056
Brown 113
Calle 66 Nº 1165 ½ entre 18 y 19 Catamarca 14
Cramer 199
Angel Brunel 877
H. Irigoyen 176
02246-52-0932
0223-494-0723
03461-42-3916
0221-457-5873 / 356-4572
02257-42-1750
02245-44-4300
0291-454-5460
0291-4520881/4515010
Eufrasio Loza 411
Dinkeldein 598
Av Pueyrredón 1616
Liniers 851/53
0351-452-1807
0358-464-7731
0351-156-568959
03564-437-114
Cabo de Hornos 3745 0379-4414026
B° 3 de Abril
Padre Mustacchio 276 03644-423751
Av.de las Americas 2580 0343-4350390
Urnilarrain 340/42
0345-421-4473/4230659
San josé 492
03446-15-311-715
esq GuidoSpano
Territorios Nac. 1064 03704-430805
Cerro Aguilar 629 Bº Lujan 0388-4256125
Malvinas Argentinas y Pje 103822-155-38901
Pg. 19
Razón SocialLocalidadDomicilio
Teléfono
Company
LocalityAddressPhone
Provincia de Mendoza PLAY SERVICE
Mendoza
San Juan 1630
OMEGA.COM
San Rafael
Gutierrez 489
Provincia de Misiones TOTAL SERVICE
Posadas
Chacra 32-33 edif 18
escalera 38 dto A PB
Provincia de Neuquén ELECTRONICA INTEGRAL Neuquén
Comb. de S. Lorenzo 445
SOSA PAGANO SERVICIO Zapala
Ejercito Argentino 229
ZENER ELECTRONICA
San M. de los Andes Elordi 614
NORTE SERV ELECTRO.
Chos Malal
Catamarca 56
Provincia de Rio Negro
ELECTRO POWER
Cipolletti
J Kennedy 70
Provincia de Salta
ELECTRONICA SALTA
Salta
Alberdi 510
CASA EL GATO
Tartagal
Alberdi 11
Provincia de San Juan CAMPORA ERNESTO
San Juan
Laprida oeste 533
Provincia de Santa Fe ELECTROAUDITEL
Rafaela
Pellegrini 86
METAL CARCARAÑA
Carcarañá
Río Colorado 940
STA. FE ELECTRONICA
Santa Fe
Blas Parera 9282
SET INGENIERIA
Rosario
España 470
Provincia de Santiago del Estero
ING.RAUL BARCHINI
Sgo.del Estero
Rivadavia 833
Provincia de Tucumán CASA SILVESTRO
San Juan 610
Tucumán
SERVICE ELECTR. CENTRAL Tucumán
Salta 190
Pg. 20
0261-489-9691
02627-429-206
03764-47-1360
0299-155-717212
02942-421980
02972-425155
02942-155-77671
0299-478-2300
0387-422-3498
03875-422-849
0264- 4084125
03492-570068
0341-4624782
0342-4891088
0341-425-8180
0385-423872/4223755
0381-421-5763
0381-421-9230/
155-308894
INTERNATIONAL WARRANTY
Terms and Conditions
1. PANACOM warrants the operation of this product to be free from any manufacturing and/or material
defect for a period of 6 months from the date of purchase by the user.
2. This warranty is limited to the repair and/or replacement of this product, according to our own criterion,
free of charge within the stipulated term and it does not extend to consequential or incidental damages
to other products that may be used with this unit.
3. The warranty shall be voided in the following cases: a) repair or attempt to repair by third parties not
authorized by the company. b) in case of performing any type of cut in connection cables, plugs, connectors, or other adapters different from the original ones provided by the company.
4. To make this warranty effective, you shall contact the Authorized Service Center of your country and
they shall carry out the pertinent procedure; said information is available at www.panacom.com. In order
to start the necessary procedure to get said warranty, you shall hand in the Original Purchase Invoice
where the purchase date, dealer name and product identification shall be stated clearly.
5. Transportation, freight, stay and/or insurance expenses, if any, are not covered by this warranty.
To ask for technical support of this product in Argentina see list.
GARANTIA INTERNACIONAL
Términos y Condiciones
1. PANACOM garantiza el funcionamiento de este producto ante cualquier defecto de fabricación y/o
vicio de material por el término de 6 meses contado a partir de la fecha de compra por parte del usuario.
2. Esta garantía se limita a la reparación y/o reemplazo de este producto, a nuestro criterio, sin cargo
alguno dentro del plazo de vigencia y no se extiende a daños consecuentes o incidentales hacia otros
productos que fueran utilizados con esta unidad.
3. La garantía queda anulada ante: a) reparación o intento de reparación por terceros no autorizados por
la compañía. b) en el caso de realizar cualquier tipo de corte de los cables de conexión, fichas, conectores, u otros adaptadores distintos de los originales de fábrica.
4. Para hacer valer esta garantía se deberá remitir al centro de servicios autorizado de su país quienes
gestionarán la misma, dicha información se encuentra www.panacom.com. Para gestionar dicha garantía
deberá presentar la Factura Original de compra en la cual deberá constar claramente la fecha de compra,
nombre del comercio e identificación del producto.
5. No quedan cubiertos por esta garantía gastos de traslado, flete, estadía, y/o seguro si los hubiera.
Para consultar por nuestra red de servicio técnico en Argentina ver lista.
Pg. 21