1
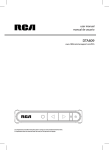
User Manual
Manual de usuario
RT2781BE
EN
ES
Scan for more user manual details or visit
Consulte para obtener más detalles del manual del usuario o visite
www.RCAav.com
It’s important to read this instruction prior to using your new product for the first time.
Es importante leer este manual antes de usar por vez primera su euipo.
AV62781BE_IB_811-A27891W022.indd 12
2014/6/10 15:10:04
FCC Information
FCC Information
For Your Safety
CAUTION: TO REDUCE THE RISK OF ELECTRIC SHOCK, DO NOT REMOVE
COVER (OR BACK). NO USER SERVICEABLE PARTS INSIDE. REFER
SERVICING TO QUALIFIED SERVICE PERSONNEL.
THE LIGHTNING FLASH AND ARROWHEAD WITHIN
THE TRIANGLE IS A WARNING SIGN ALERTING YOU OF
“DANGEROUS VOLTAGE” INSIDE THE PRODUCT.
THE EXCLAMATION POINT WITHIN THE TRIANGLE IS A
WARNING SIGN ALERTING YOU OF IMPORTANT INSTRUCTIONS
ACCOMPANYING THE PRODUCT.
FCC INFORMATION
This equipment has been tested and found to comply with the limits
for a Class B digital device, pursuant to part 15 of the FCC Rules. These
limits are designed to provide reasonable protection against harmful
interference in a residential installation. This equipment generates,
uses and can radiate radio frequency energy and, if not installed
and used in accordance with the instructions, may cause harmful
interference to radio communications.
However, there is no guarantee that interference will not occur
in a particular installation. If this equipment does cause harmful
interference to radio or television reception, which can be determined
by turning the equipment off and on, the user is encouraged to try to
correct the interference by one or more of the following measures:
• Reorient or relocate the receiving antenna.
• Increase the separation between the equipment and receiver.
• Connect the equipment into an outlet on a circuit different from
that to which the receiver is connected.
• Consult the dealer or an experienced radio / TV technician for help.
WARNING: Changes or modifications to this unit not expressly
approved by the party responsible for compliance could void the user's
authority to operate the equipment.
This class B digital apparatus meets all requirements of the Canadian
Interference - Causing Equipment Regulations.
The Shock Hazard Marking and Associated Graphical Symbol is
provided on the bottom panel of unit.
Refer to the identification / rating label located on the back panel of
your product for its proper operating voltage.
The AC power plug is polarized (one blade is wider than the other) and
only fits into AC power outlets one way. If the plug
won’t go into the outlet completely, turn the plug
over and try to insert it the other way.
If it still won’t fit, contact a qualified electrician to
change the outlet, or use a different one. Do not
attempt to bypass this safety feature.
CAUTION:
• To prevent electric shock, match wide blade of plug to wide slot, fully
insert.
• The apparatus shall not be exposed to dripping or splashing and
that no objects filled with liquids, such as vases, shall be placed on
apparatus.
• The mains plug is used as disconnect device. The mains plug of
apparatus should not be obstructed OR should be easily accessed
during intended use. To be completely disconnect the power input,
the mains plug of apparatus shall be disconnected from the mains.
EN
Service Information
This product should be serviced only by those specially trained in
appropriate servicing techniques. For instructions on how to obtain
service, refer to the warranty included in this user manual.
Connecting for Power
Make sure you connect all your other electronic components and the
speakers before plugging your unit into the outlet. Plug the power cord
in the wall outlet, matching the wide blade of the plug with the wide
slot in the outlet. Be sure to insert the plug completely.
Technical Specification
Product: Home Theater System with Bluetooth® Wireless Technology
Brand: RCA
Electrical Consumption
Power Supply: 120V ~ 60Hz
Headset Safety
• Do not play your headset at a high volume. Hearing experts warn
against extended high-volume play.
• If you experience a ringing in your ears, reduce volume or
discontinue use.
• You should use extreme caution or temporarily discontinue use in
potentially hazardous situations.
• Even if your headset is an open-air type designed to let you hear
outside sounds, don't turn up the volume so high that you are
unable to hear what is around you.
• Excessive sound pressure from earphones and headphone can
cause hearing loss.
IMPORTANT: The power cord can be unplugged to turn off the main
power to the unit. It should also be easily accessible in an emergency.
• Leave sufficient space around the appliance to allow adequate
ventilation: 10cm on either side and at the back, as well as 7cm
above it are ideal.
WARNING: To reduce the risk of fire or electric shock, do not expose
this apparatus to rain or moisture. The apparatus shall not be
exposed to dripping or splashing and that no objects filled with
liquids, such as vases, should be placed on the apparatus.
CAN ICES-003(B)/NMB-3 (B)
-1-
AV62781BE_IB_811-A27891W022.indd 1
2014/6/10 15:03:51
Important Safety
Instructions
EN
Connections and Setup
• One main unit
• One remote control with batteries
• One pair of front speakers, one pair of rear speakers, one center speaker
and one subwoofer
• One pig-tail antenna wire
• One AM loop antenna
• One pair of audio cable for analog connections
• One English & Spanish user manuals
Please read and save for future reference.
Some of the following information may not apply to your particular
product; however, as with any electronic product, precautions should
be observed during handling and use.
• Read these instructions.
• Keep these instructions.
Main Unit
• Heed all warnings.
• Follow all instructions.
• Do not use this apparatus near water.
Use Manual
• Clean only with a dry cloth.
• Do not block any ventilation openings. Install in accordance with
the manufacturer’s instructions.
• Do not install near any heat sources such as radiators, heat registers,
stoves, or other apparatus (Including amplifiers) that produce heat.
• Do not defeat the safety purpose of the polarized or groundingtype plug. A polarized plug has two blades with one wider than the
other. A grounding type plug has two blades and a third grounding
prong. The wide blade or the third prong is provided for your safety.
If the provided plug does not fit into your wall outlet, consult an
Left and right
Left and right
Center speaker
electrician for replacement of the obsolete outlet.
rear speakers
front speakers
• Protect the power cord from being walked on or pinched
particularly at plugs, convenience receptacles, and the point where
they exit from the apparatus.
• Only use attachments / accessories specified by the manufacturer.
• Use only with a cart, stand, tripod, bracket or table specified by the
manufacturer, or sold with the apparatus. When
a cart is used, use caution when moving the cart /
]
apparatus combination to avoid injury from tip-over.
AM loop antenna
• Unplug this apparatus during lightning storms or
when unused for long periods of time.
• Refer all servicing to qualified service personnel. Portable Cart
Remote
Servicing is required when the apparatus has been
control with
Warning
Pig-tail
Audio cable for
damaged in any way, such as the power cord or plug
batteries
antenna wire
analog connections
is damaged, liquid has been spilled or objects have fallen into the
apparatus, the apparatus has been exposed to rain or moisture,
Setup and Maintenance of the Unit
does not operate normally, or has been dropped.
Provides spaces for sufficient ventilation as indicated:
Additional safety information
• Apparatus shall not be exposed to dripping or splashing and no objects
filled with liquids, such as vases, shall be placed on the apparatus.
• Always leave sufficient space around the product for ventilation. Do
Front View
not place product in or on a bed, rug, in a bookcase or cabinet that
may prevent air flow through vent openings.
• Do not place lighted candles, cigarettes, cigars, etc. on the product.
• Connect power cord only to AC power source as marked on the product.
• Care should be taken so that objects do not fall into the product.
• Do not attempt to disassemble the cabinet. This product does not
contain customer serviceable components.
Side View
If your product operates on batteries, adhere to the following
precautions:
A. Any battery may leak electrolyte if mixed with a different battery type,
inserted incorrectly, or if all batteries are not replaced at the same time. • Do not connect to the AC power cords until all connections are
B. Any battery may leak electrolyte or explode if disposed of in fire or an
completed.
attempt is made to charge a battery not intended to be recharged.
• Do not use your set immediately after transferring it from a cold place
C. Discard leaky batteries immediately. Leaking batteries can cause skin
to a warm place: there is risk of condensation.
burns or other personal injury. When discarding batteries, be sure to
dispose of them in a proper manner, according to your state / provincial • Do not expose your set to water and excessively high temperatures.
• After having disconnected your set, clean the case with a soft cloth,
and local regulations.
or with a slightly damp leather chamois. Never using strong solvents.
D.Battery shall not be exposed to excessive heat such as sunshine, fire
• Place an amplifier near the top shelf of the stand so heated air rising
or the like.
from it will not affect other components. If you have a satellite receiver,
Important battery information
• Do not mix different types of batteries or new and old batteries. Do
you should place it on the top shelf.
not mix alkaline, standard (carbonzinc), or rechargeable (ni-cad, ni- Protect your Components from Overheating
mh, etc) batteries.
• In order to avoid any risk of explosion, observethe polarities • Do not block ventilation holes in any component. Arrange the
components so that air can circulate freely.
indicated inside the battery compartment. Replace only with the
type of batteries specified. Do not dispose of them in a fire or • Do not stack components directly on top of each other.
recharge them.
• Do not place the unit near other components that generate heat such
• If you are not using the remote control for a long period of time,
as heating vents.
remove the batteries.
• Allow adequate ventilation when placing your components in a stand.
• Do not dispose of batteries in a fire. Batteries may explode or leak.
• Place an amplifier near the top shelf of the stand so heated air rising
• When discarding batteries, environmental problems must be
from it will not affect other components. If you have a satellite receiver,
considered and local rules or laws governing the disposal of these
you should place it on the top shelf.
batteries must be strictly followed.
-2-
AV62781BE_IB_811-A27891W022.indd 2
2014/6/10 15:03:51
Connections and Setup
Connecting to Audio Components
Digital Audio in Connection
Digital Input
Connect components, such as DVD players, Satellite receiver/Cable boxes, BD
(Blu-ray DiscTM) players or TVs, capable of outputting Dolby Digital (Surround
Sound) or standard PCM (Stereo) format digital signals.
Note: “Blu-ray Disc” is a trademark of Blu-ray Disc Association.
Analog Audio Signals
Analog Audio Signals
EN
O
OR
Digital Connection
The digital audio jacks can accept Dolby Digital (Surround Sound) or PCM
(Stereo) signals when compatible components are connected.
• This unit provides two optical and one coaxial digital input jacks for the
connection of your components that have digital audio outputs.
• To connect DVD player, Satellite receiver, Cable box, Blu-ray player or TV that
has a digital audio output, use a coaxial digital (not included) or an optical
digital cable (not included) to carry the audio signal and enjoy Dolby Digital
sound quality.
• A separate optical or coaxial cable is needed for each digital connection.
Notes:
• If your TV has digital audio output, you can
connect it to the corresponding digital audio
input of the system instead of using analog
connection.
• Optical and coaxial cables carry only the audio
portion of the signal.
Blu-ray player
BD/DVD/SAT-CABLE/TV/LINE-IN
Satellite receiver
Optical Digital In (Audio)
Connect to optical digital output of Cable box, Satellite receiver,
DVD, Blu-ray player, TV or other compatible devices using the
Optical Fiber Cable (not included).
BD/DVD/SAT-CABLE/TV/LINE-IN
DVD player
Coaxial Digital In (Audio)
Connect to coaxial digital output of DVD, Cable box, Satellite
receiver, TV or other compatible devices using the Coaxial Digital
Cable (not included).
BD/DVD/SAT-CABLE/TV/LINE-IN
Connecting the Antennas
Connect the AM and FM antennas to the AM and FM terminals on the system’s back panel.
They must be hooked up in order to receive clear reception. For FM reception, extend antenna to its full length. For AM reception, rotate the
antenna horizontally to get better reception.
-3-
AV62781BE_IB_811-A27891W022.indd 3
2014/6/10 15:03:52
Connections and Setup
AM Loop Antenna and FM Indoor Antenna
1. Uncoil the antenna wire and locate the base end of the AM antenna.
2. Press down on the antennas tab to open the terminal.
3. Insert the antenna wires into the terminal and release the tabs to secure the wires in place.
4. Make sure the white wire on the AM loop antenna is inserted into the AM loop terminal and the other wire is inserted into the ground loop
terminal.
Connecting the speakers
EN
Front Speakers
(Surround Sound)
Center
Speaker
Subwoofer
Right
If the cords are reversed, the sound will be distorted. Do not let the
speaker wires touch each other, it will damage the Home Theater’s
amplifier.
Purple and Black
Left
White and
Black
When connecting the speakers, make sure the polarities (“+“ speaker
wire to “+“ on the unit. For example, red wire to red terminal on the
unit) of speaker wires and terminals match.
Red and
Black
Green and Black
Speaker wires are color-coded to match the terminals. Connect the
speaker wire from the back of each speaker to the corresponding color
terminal at the back of the unit. Press down the tab to open the terminal
and insert the wire. Release the tab to lock wire in the terminal.
Positioning Speakers
3
Blue and Black
Grey and Black
1
Right
Left
2
Rear Speakers
(Surround Sound)
1
3
4
Front Speaker Placement
For best results, follow the speaker
placement below.
Courtesy Dolby Laboratories
1. Left, Right (Front Speakers)
Front speakers carry primarily music and sound effects.
2. Center
In surround mode, the center speaker carries most of the dialog as well
as music and effects.
It should be set between the left and right speakers.
3. Surround (Rear Speakers)
The surround speakers’ overall sound balance should be as close as
possible to the front speakers. Proper placement is vital to establish an
evenly distributed sound field.
4. Subwoofer
A subwoofer is designed to reproduce powerful low bass effects
(explosions, the rumble of spaceships, etc.).
Magnetic Shielding
Speakers placed less than two feet from the TV set must be magnetically
shielded in order to prevent picture distortion. Center speaker provided
with this unit is magnetically shielded to protect your TV set.
Alignment
Align the center speaker evenly with (A)
or slightly behind (B) (the left and right
speakers), but not ahead of them.
Courtesy Dolby Laboratories
Angle
Place the left and right speakers
to form a 45-degree angle with
your favorite viewing position to
duplicate the soundtrack mixer’s
perspective.
Height
The three front speakers should
be as close as possible to the same
height. This often requires placing
the center speaker directly on top
(A) or beneath (B) the TV set.
A
B
Courtesy Dolby Laboratories
-4-
AV62781BE_IB_811-A27891W022.indd 4
2014/6/10 15:03:53
Connections and Setup
Playback via Bluetooth® enabled
devices
Better Surround Placement
Location
If possible, place surround speakers to either side of the listening area,
not behind it.
Height
If space permits, install surround speakers 2-3 feet above viewers. This
helps to minimize localization effects.
Aiming
Aim surround speakers straight across the room, not down at viewers, to
help create a more open, spacious surround sound field.
Courtesy Dolby Laboratories
Alternative Surround Placement
Rear wall
If rear wall mounting is the only choice, aim the speakers at each other
(A), towards the front (B) or towards the sidewalls (C, D).
Experiment with placement until sounds seem to surround you, rather
than come from behind you.
Courtesy Dolby Laboratories
No adjacent walls
Surround speakers can go on stands facing each other to approximate
sidewall mounting (A), or to the sides or rear of the viewing area, aimed
upwards; they can go right on the floor, or preferably, a few feet off the
floor such as on end tables (B).
Manufactured under license from Dolby
Laboratories.
Dolby, Pro Logic, and the double-D
symbol are registered trademarks of Dolby
Laboratories.
The unit can be paired and connected to the Bluetooth® enabled
devices such as a smart phone.
INITIAL DEVICE PAIRING AND CONNECTION
In order to pair and connect your Bluetooth® device for the first time:
1. Press the button to turn on the unit.
2.Press SOURCE button or
button on the remote control to select
the BT mode. Turn on the Bluetooth® device you wish to pair and
connect.
3. On your Bluetooth® enabled device, search for the “RT2781BE” in the
list of discovered devices and select it.
It may take the unit and Bluetooth® enabled device a few seconds to
pair.
4.If it is successful, the front display of the main unit will show
“CONNECTED”.
5. You can now enjoy audio from the unit.
Notes:
• If your Bluetooth device (e.g. Smart phone etc.) need the PIN code
while pairing, please enter 4-digit number: 0000.
• The unit can only be connected to one Bluetooth® device at a time.
EN
RECONNECTING A BLUETOOTH® ENABLED DEVICE
Bluetooth® enabled devices must be reconnected when the device has
been turned off or the unit has been turned off.
1. Press the button to turn on the unit.
2.Press SOURCE button or
button on the remote control to select
the BT mode. Turn on the Bluetooth® device that has already been
paired with the unit.
3. Depending on your Bluetooth device, your device may automatically
connect to the unit.
If the device does not automatically connect to the unit, then search
for the “RT2781BE” in its list of your Bluetooth® devices and select it.
4.If it is successful, the front display of the main unit will show
“CONNECTED”.
5. You can now enjoy audio from the unit.
PAIR AND CONNECT WITH ANOTHER NEW DEVICE
In order to pair the unit to a new device, you must first disconnect the
currently paired and connected Bluetooth® device from the unit.
1. On the currently paired and connected Bluetooth® device, select the
“RT2781BE” from the list of currently paired and connected devices,
and disconnect it. Please refer to your Bluetooth® enabled device
User’s Guide for direction on how to disconnect a device. Or turn off
the Bluetooth® device.
2. Follow the Initial device pairing and connection instructions above.
The Bluetooth® word mark and logos are
registered trademarks owned by Bluetooth
SIG, Inc.
Dolby Digital
The Dolby Digital mode lets you enjoy full digital surround from
software processed in the Dolby Digital format. Dolby Digital provides
better sound quality and a more powerful presence than conventional
Dolby Surround. This unit is equipped with Dolby Digital 5.1-channel
so that you can enjoy enhanced full digital surround sound. The new
system provides stereo separation of the rear speakers (Rear-Right,
Rear-Left). Adding the subwoofer channel to the 5 channels for bass
sounds (counted as 0.1 channel) results in 5.1 channels (or 6 Channels)
that bring you the most sophisticated Dolby Digital sound enjoyment.
-5-
AV62781BE_IB_811-A27891W022.indd 5
2014/6/10 15:03:53
Unit Controls
Main Unit
1
7
2
3
EN
4 5 6
1.
(SOURCE button)
Selects the sources.
2. ON/STANDBY button
Turns on / off the unit. When the unit is turned on, the unit will go to
the mode it was in before powered off.
3. / (SURROUND buttons)
Selects among digital surround sound effects. (HALL/CHURCH/
CONCERT/LIVING ROOM/CAVE/ARENA/STEREO/DOLBY PL II MUSIC/
DOLBY PL II MOVIE/DOLBY PL EMULATION) depending on input
signal.
Adjusts value in SETUP MENU.
/ (TUNING buttons)
Tunes in to desired stations in AM/FM mode.
/
(PRESET buttons)
Selects preset stations in AM/FM mode;
Selects item to be set in SETUP MENU.
4. AUX 3 jacks
Connects game consoles or other AV products that have AUX audio
outputs.
5. LINE-IN jack
Connects portable audio devices or other AV products that have a
LINE-OUT jack.
6. PHONES jack
7. MASTER VOLUME
Adjusts the volume.
Remote Control
Install two “AAA” batteries in the remote
control prior to use.
NOTES:
• Batteries shall not be exposed to
excessive heat such as sunshine, fire
or the like.
• Do not mix old and new batteries.
• Do not mix alkaline, standard (carbonzinc), or rechargeable (Ni-Cad, Ni-MH,
etc.) batteries.
1
2
13
3
4
14
15
5
16
6
7
17
8
9
18
10
19
20
11
12
1.
ON•OFF
Turns on/off the unit.
2.SLEEP
Selects sleep time.
21
8.LEVEL
Speaker level setting. Refer to “Advanced Sound Control” for details.
9.SUBWOOFER
Selects among subwoofer sound levels. [BALANCE (SWF:BAL),
STRONG (SWF:STRG), POWERFUL (SWF:PWRF) or SOFT] by pressing
SUBWOOFER. The setting is also available in SETUP MENU.
10.MEM + / MEM Selects programmed stations in AM/FM mode.
11.TUNER +
Tap to increase the radio frequency in AM/FM mode.
Press and hold to search next available station in ascending
frequencies.
12.EQ buttons
Selects among preset equalizer mode (POP, FLAT, JAZZ, CLASSIC,
ROCK, BASS and TREBLE). Press the corresponding button to select
the desired sound mode. This function is only available in Stereo
mode.
13.Number buttons
Directly accesses a preset station in AM/FM mode.
14.MEMORY
Stores stations as preset stations in AM/FM mode.
15.MONO/ST
Selects between Stereo and Mono sound in FM mode.
16.SETUP
Enters Setup mode. Use / to select among setup options.
17.MUTE
Mutes all sound.
18.VOL + / VOL Adjusts the volume.
19.EXIT
Exits the current setting.
20.TUNER Tap to decrease the radio frequency in AM/FM mode.
Press and hold to search next available station in descending
frequencies.
21.Source buttons
Selects audio sources.
3.NIGHT
Selects among night mode options (MODE RATE / QUIET / OFF)
which compresses the volume difference between normal voices
and sounds such as explosions. (Available only during Dolby digital
signal playback).
4. TEST TONE
Speaker test tone setting. Refer to “Advanced Sound Control” for
details.
5.SURROUND
Selects among digital surround sound effects. (HALL/CHURCH/
CONCERT/LIVING ROOM/CAVE/ARENA/STEREO/DOLBY PL II MUSIC/
DOLBY PL II MOVIE/DOLBY PL EMULATION) depending on input
signal.
6.DISTANCE
Adjusts the speakers’ listening distance.
7.
/ / / / OK
• Press / to select among setting items in Setup mode.
• Press
/
to adjust the values when the display shows the
setup you want to change.
• Press OK to confirm your selection.
-6-
AV62781BE_IB_811-A27891W022.indd 6
2014/6/10 15:03:54
Operating Your Unit
Selecting Source
When one of the SOURCE buttons on the front panel or on the remote
control is pressed, the corresponding input will be activated.
The unit acts as a switching device between all the sources that are
plugged into it.
Example 1:
If you have connected a DVD player to COAXIAL jack on the unit, press
SOURCE on the front panel or on the remote control to receive the
sounds transmitted by the DVD.
Example 2:
If a VCR is connected to the AUX 3 jack of the front unit, press SOURCE
on the front panel or on the remote control, the sound from the VCR
will be selected.
You can connect up to 6 audio sources to this amplifier:
Source
SAT-CABLE
BD
DVD
TV
TUNER
VCR
LINE-IN
Default input
OPTICAL 1
OPTICAL 2
COAXIAL
Rear Analog (AUX 1)
Built-in tuner
Front Analog (AUX 3)
Front Analog (LINE-IN)
3. Repeat step 2 to tune to another radio station.
4. To prematurely stop the searching function, press TUNER+ or
TUNER- button on the remote control.
5. Adjust the volume by pressing VOL +/ VOL - button.
Manual Tuning
Press TUNER+ or TUNER- button on the remote control or
or
button on the front panel of the unit repeatedly to tune a desired
frequency.
Automatic Preset Programming
The unit can preset 30 FM stations and 30 AM stations. Before tuning,
make sure to turn down the volume.
1. Press TUNER button to enter the AM/FM mode.
2. Press and hold TUNER button for two seconds to start automatic
preset programming.
3.Radio frequencies will be browsed and radio stations stored
automatically. When all the available radio stations are stored or all
60 preset stations (30 for AM and 30 for FM) memory locations are
full, the auto preset programming function will stop.
EN
Manual Preset
1. Press TUNER button to select the desired radio mode.
2. Press and hold TUNER+/TUNER- button on the remote control or
/
button on the front panel of the unit until the system tunes in a
station.
3. Press MEMORY button. While the Program Preset number is still
flashing, input your desired preset number using the numeric
buttons, then press MEMORY button to store it.
The source name you selected will be shown on the display.
Notes:
• Your unit has a built-in tuner. Just connect the appropriate antenna
to the back of the unit and you will be able to listen to radio
stations. (For details, please refer to Radio section)
• Connections at the back panel can be interchanged depending on
whether sources have the same audio input.
Select Preset Stations
1. Press TUNER button to enter the Tuner mode with selecting AM or
FM band.
2. Press
/
on the main unit repeatedly or directly press MEM
+ / MEM - button on the remote control to search for the preset
stations. Each time you press the button, the system tunes in one
preset station.
Example: Connecting a Blu-ray Player
1. Connect the optical digital audio output of Blu-ray player to
OPTICAL 1 jack on the rear panel of the unit.
2. Press ON/STANDBY button on the front panel of the unit or press
ON•OFF button on the remote control to switch on the unit.
3. Press SOURCE button on the main unit to select BD source.
4. Switch ON the Blu-ray player and start playback.
5. Set the SURROUND mode if needed (see “Advanced Sound Control”
for details).
Tips:
• When you tune at a weak FM station manually, press MONO/ST
on remote control to switch from Stereo to Mono mode. This will
reduce the background noise.
• If there is any interference, change the antenna’s position until
ideal sound reception is obtained. TV and other electronic devices
could be the cause of interference, so try to position the antenna
away from them.
Example: Connecting a TV to a digital input
1. If TV has an analog audio output, connect it to the ANALOG AUDIO
IN jack on the rear panel of the unit.
2. Press ON•OFF button on the remote control to switch on the unit.
3. Press SOURCE button to select TV mode.
4. Press the SETUP button to show setup options.
5.Press / buttons unit DIMMER 0/DIMMER 1, CTR YES/CTR NO, SUR
YES/SUR NO or SWF SOFT/PWRF/STRG/BAL are displayed.
6.Press SOURCE button to select among OPTICAL 1 / OPTICAL 2
/ COAXIAL / AUX 1 / AUX 3 / LINE IN to match your connection
(ANALOG). Your selection will be stored for future use automatically.
7. Switch on the TV.
RADIO
The unit has a built-in tuner that allows for AM/FM radio function.
Connect the FM antenna and the AM loop antenna at the back of the
unit. Rotate the AM loop for better reception.
Automatic Tuning
1. Press TUNER button.
2. Press and hold TUNER+ or TUNER- button on the remote control or
or button on the front panel of the unit until the auto searching
starts. Searching stops when the system tunes in a station. (Once
the FM station that broadcasts Stereo sound is found, STEREO is
displayed.)
LINE-IN
1. Connects one end of the 3.5mm stereo cable (not included) to the
LINE-IN connector on the front panel of the unit and the other to the
line out or headphone jack on an external source.
2. Press SOURCE button on the front panel to select LINE-IN mode.
SETTING THE SLEEP TIMER
You can set the system to turn off at a preset time, so you can fall asleep
listening to music. You can preset the time in 30-minutes increments.
1. Press SLEEP button on the remote control.
2. Each time you press SLEEP button, the minutes display (the
remaining time) changes by 30 minutes.
3. When you set the sleep timer, "SLEEP" icon will be shown on the
front panel display.
• To change the remaining time, press SLEEP button repeatedly to
select the desired time.
• To clear the preset sleep time, press the SLEEP button until SLP OFF
appears.
-7-
AV62781BE_IB_811-A27891W022.indd 7
2014/6/10 15:03:55
Advanced Sound Control
Sound Enhancement Systems
EN
This receiver is equipped with several built-in sound enhancement
systems.
Dolby Digital
The Dolby Digital mode lets you enjoy full digital surround from
software processed in the Dolby Digital format. Dolby Digital provides
better sound quality and a more powerful presence than conventional
Dolby Surround. This unit is equipped with Dolby Digital 5.1-channel
so that you can enjoy enhanced full digital surround sound. Different
from Dolby Pro Logic in that only four channels (Front Left, Front Right,
Center and Rear) are used, the new system provides stereo separation of
the rear speakers (Rear-Right, Rear-Left). Adding the subwoofer channel
to the 5 channels for bass sounds (counted as 0.1 channel) results in 5.1
channels (or 6 Channels) input Dolby Digital for that bring you the most
sophisticated sound enjoyment.
Dolby Pro Logic II
The Pro Logic II mode uses the built-in circuit to steer the Left, Center,
Right and Surround left and right channel audio signals and uses all five
speakers to play both stereo and Dolby Pro Logic program source, such
as TV and VCR.
Dolby Pro Logic II
includes Dolby Pro
Center Speaker
Logic II Movie, Dolby
Pro Logic II Music
and Dolby Pro Logic
Emulation.
You can use this
mode with any
stereo
program
source (such as VCR/
TV) to enjoy multichannel
sound
experience.
Manufactured under license from Dolby
Laboratories. Dolby, Pro Logic, and the double-D
symbol are trademarks of Dolby Laboratories.
Stereo
The default surround modes for different components are listed in the
table below. The unit will keep the last selection in memory.
Source Input If digital input
(optical or coaxial)
is selected
DVD
Dolby Digital
SAT-CABLE
Dolby Digital
BD
Dolby Digital
Dolby Digital
TV
AM/FM
N/A
VCR
N/A
N/A
LINE IN
If analog input is
selected
Pro Logic II Movie
Pro Logic II Movie
Pro Logic II Movie
Pro Logic II Movie
Stereo
Pro Logic II Movie
Pro Logic II Movie
Digital Inputs
The Home Theater has three digital audio inputs and two analog audio
inputs for BD, SAT-CABLE, DVD,TV or LINE-IN sources.
The default input is optical 1 for SAT-CABLE, optical 2 for BD, and coaxial
for DVD. However, if you need to assign a source to a different input:
1. Select the source (DVD, SAT-CABLE, BD, TV or LINE-IN).
2. Press the SETUP button to show setup options.
3.Press SOURCE button until OPTICAL 1/ OPTICAL 2/COAXIAL/AUX 1/
AUX 3/LINE IN is displayed.
4.Press SOURCE button to select among OPTICAL 1/ OPTICAL 2/
COAXIAL/AUX 1/AUX 3/LINE IN (different source will have different
available inputs for selection) to match your connection. Your
selection will be stored for future use automatically.
You have the capability to change audio inputs for the SAT-CABLE, BD,
TV or LINE-IN sources.
Source
SAT-CABLE
BD
DVD
TV
TUNER
VCR
LINE-IN
Default input
OPTICAL 1
OPTICAL 2
COAXIAL
Rear Analog (AUX 1)
Built-in tuner
Front Analog (AUX 3)
Front Analog (LINE-IN)
Analog Inputs
The Home Theater has three analog audio inputs: Analog AUX 1, Analog AUX
3 (front) and LINE-IN.
Note:
To play Dolby Prologic II Movie sound when listening to an analog audio
source, press the SURROUND button until “Dolby PL II MOVIE” appears
on the Display.
To play Dolby Digital sound, the source must be connected to the unit
via Optical or Coaxial terminals.
Fine Setting of the Speakers
The Stereo mode uses the two main channel outputs from the front
speakers and subwoofer speaker. Use this mode if you have connected
the front speakers only.
DSP (Digital Sound Processor)
These digital sound effects resemble sounds in a real environment such
as (HALL, CHURCH, STEREO, DOLBY PL EMULATION, DOLBY PL II MUSIC,
DOLBY PL II MOVIE). DSP automatically converts analog audio signals to
digital ones which enables you to adjust the sound without degrading
the sound quality. Different modes will give you different feels of size
and types of listening environment.
Press SUBWOOFER button to select the subwoofer effects level
according to you needs. Four settings are available: BALANCE, STRONG,
POWERFUL and SOFT.
Fine Setting of the Components
All the basic settings have already been preset for the speakers included
in the box.
Also, to make the surround sound more effective and suit the acoustic
conditions in your listening room, you may need to delay the signal
coming from some of the speakers. Channel delay compensates for
center or surround speakers that are closer to the listening position
than the front speakers.
Testing and Adjusting Speaker Loudness
The TEST TONE button on the remote control allows you to adjust
each speaker volume level individually to suit your particular listening
environment.
1. Press the TEST TONE button.
2. A tone will be heard at each speaker, one speaker at a time.
3. Press the / button on the remote control to adjust the level of
the speaker that is playing the tone at the particular moment. The
Home Theater’s display will also indicate which speaker is playing
the tone at any particular moment.
4.Press EXIT button to exit this mode.
Adjusting Speaker Loudness Without Using Test Tones
1. To adjust individual speaker volume level, press LEVEL button on the
remote control.
2. Continue to press LEVEL button on the remote control to select the
speaker to be adjusted, then press the / buttons to adjust the
level.
3.Press EXIT button to exit this mode.
You can select the surround mode by pressing SURROUND button
/
button to select among different options. (HALL/
follow by
CHURCH/CONCERT/LIVING ROOM/CAVE/ARENA/STEREO/DOLBY PL II
MUSIC/DOLBY PL II MOVIE/DOLBY PL EMULATION )
-8-
AV62781BE_IB_811-A27891W022.indd 8
2014/6/10 15:03:55
Troubleshooting Tips
Advanced Sound Control
Speaker Configurations
AM / FM Operation
You can also change the setup of the speakers. Use a subwoofer to
enjoy optimum sound.
For optimum surround experience measure the distance between the
speaker and your favorite listening position. Press DISTANCE button to
adjust the speakers’ distance values.
1. Press the DISTANCE button to show setup options.
2. Continue to press the DISTANCE button until the speaker you want
to adjust is displayed.
3.Press / buttons to change the speaker settings. Your selection
will be stored automatically.
4. Repeat step 2 and 3 to set up the next speaker. You may adjust the
distance within the following ranges:
• Front Speaker distance (FRNT):0-30ft
• Center Speaker distance (CNTR): 0-30ft
• Rear Speaker distance (SURR): 0-30ft
5. When set up is done, wait for five seconds to automatically save your
settings or press any buttons to save your selection and set up mode.
Factory Default Speaker Distance Settings
• Front Speakers (FRNT): 15ft
Front
• Center Speaker (CNTR): 10ft
Left
• Rear Speakers (SURR): 10ft
Center
Front
Right
Rch
L/S
R/S
Rear
Left
Rear
Right
Center / Surround Speaker Setup
1. Press the SETUP button on the remote control or front panel to
show setup options.
2. Press / button until CTR YES or SUR YES is displayed.
3.Press / button to select between YES and No.
Notes:
• CNTR stands for “Center Speaker” selection while SURR
stands for “Surround Speaker” selection.
• By default, the Center and Surround Speakers are set to YES. If you
decide not to use them, set the ones you do not intend to use to
NO so that the sound performance is not affected.
Home Theater’s Display Dimmer Control
1. Press the SETUP button to show setup options.
2. Press / button until DIMMER 0 is displayed.
3.Press / button to select between 0 and 1.
EN
The remote control does not operate the unit.
• No batteries installed (included with your system). Install the
batteries before attempting to operate the remote. Be sure to match
the + and - ends of each battery to the symbols shown in the remote
battery compartment.
• The batteries are weak. Replace all batteries.
• The remote is not pointed at the remote control sensor on the main
unit or there is an obstacle between the remote and the main unit.
• The remote control is too far from the main unit, move closer.
No audio.
• Make sure the speakers are connected.
• Check the input connections.
• Check the power cord connections.
• Make sure MUTE is off.
• Make sure the digital setting (optical, coaxial or analog) is correct.
• Check that the headphone is not inserted.
No audio from one channel.
• Check the speaker level setting.
• Check the speaker wire or external source cable connections.
Noise occurs when the TV is turned on.
• The TV is too close to the audio system.
Not getting audio from all speakers.
• Check your Surround Mode setting (under Advanced Sound Control
section of this book). Your Home Theater has a number of different
SURROUND MODE settings, it defaults to modes most suited to the
type of audio content being played – however you can change these
settings. Some of these modes, (such as DOLBY DIGITAL, and Dolby
PROLOGIC II), will cause all speakers to be active, while other modes,
(such as STEREO and 3-STEREO), will cause your rear speakers to be
inactive. You can always test your Home Theater amplifier - and each
speaker, by using the built-in TEST TONE generator (press TEST TONE
button on remote control).
Care and Maintenance
NIGHT Mode Selection
"Night Mode" will limit the volume on loud passages of movies (such as
action sequences) while still allowing you to hear quiet passages (such
as dialog).
1. Press the NIGHT button to show setup options.
2. Continue to press the NIGHT button to select among different
options “MODE RATE /QUIET/OFF” .
3. It is available only during Dolby Digital signal playback.
SUBWOOFER Mode Selection
Remote Control Operation
General
Cch
Lch
STEREO indicator is off in FM mode.
• Adjust the antenna.
• Press MONO / ST button to insure you are not outputting in mono.
The signal is Mono. Severe hum or noise.
• The signal is too weak. Connect an external antenna.
• Adjust antenna.
• Reposition antenna away from any electronics.
There is interference to FM reception.
• Turn off other electrical unit (e.g. DVD, BD, CD player) near the unit.
Disconnect the audio system from the power source before performing
any maintenance.
Cleaning the exterior
Disconnect the system from AC power before cleaning the exterior of the
system with a soft dust cloth, or with a slightly damp leather chamois.
Never use strong solvents.
Important Battery Information
• Remove the batteries to avoid leakage if you do not use your remote
control for more than one month.
• Discard leaky batteries immediately as leaking batteries may cause
skin burns or other personal injuries.
• Dispose of batteries in the proper manner, according to provincial
and local regulations.
• Any battery may leak electrolyte if mixed with a different battery
type, if inserted incorrectly, if all batteries are not replaced at the
same time, if disposed of in fire, or if an attempt is made to charge a
battery not intended to be recharged.
-9-
1. Press the SETUP button to show setup options.
2.Press / button until current SUBWOOFER mode is displayed.
3.Press SUBWOOFER button to select among "BALANCE", "STRONG",
"POWERFUL" or "SOFT " is scrolled once.
AV62781BE_IB_811-A27891W022.indd 9
2014/6/10 15:03:55
Care and Maintenance
Limited Warranty
Safety Precautions
EN
Out of Warranty
• Never open the cabinet under any circumstances. Any repairs or
internal adjustments should be made only by a trained technician.
• Never operate this product with the cabinet removed.
• Do not touch the player with wet hands. If any liquid enters the
player cabinet, take the player to a trained technician for inspection.
• The apparatus shall not be exposed to dripping and splashing.
• No object filled with liquids, such as vases, shall be placed on the
apparatus.
• No naked flame sources such as lighted candles, shall be placed on
the apparatus.
In the event your product requires repair after the limited warranty
period has expired, please contact our Customer Support Center at
1-800-506-5746, 1-877-252-6873 or www.RCAav.com
Specifications and external appearance are subject to change
without notice.
All warranties implied by state law, including the implied warranties
of merchantability and fitness for a particular purpose, are expressly
limited to the duration of the limited warranties set forth above. With
the exception of any warranties implied by state law as hereby limited,
the foregoing warranty is exclusive and in lieu of all other warranties,
guarantees, agreements and similar obligations of manufacturer or
seller with respect to the repair or replacement of any parts. In no event
shall AVC be liable for consequential or incidental damages.
Need More Help?
Please visit online help at
http://www.RCAav.com
Limited Warranty
AVC MULTIMEDIA (“AVC”) makes the following limited warranty. This
limited warranty extends to the original consumer purchaser and is
limited to non-commercial use of the product.
One Year Parts & Labor Warranty
AVC products purchased in the United States are warranted to be free
from defects in materials or workmanship for a period of one year from
the date of their original retail purchase. If the unit fails to conform to
this warranty, we will service the product using new or refurbished
parts and products, at AVC’s sole discretion.
During a period of one year from the effective warranty date, AVC will
provide, when needed, service labor to repair a manufacturing defect at
its designated Service Center. To obtain warranty service in the United
States, you must first call our Customer Support Center at 1-800-5065746 or 1-877-252-6873, during the hours listed in the box below.
The determination of service will be made by AVC Customer Support.
PLEASE DO NOT RETURN YOUR UNIT TO AVC WITHOUT PRIOR
AUTHORIZATION. New or remanufactured replacements for defective
parts or products will be used for repairs by AVC at its designated
Service Center for one year from the effective warranty date. Such
replacement parts or products are warranted for an additional one year
from the date of repair or replacement. The Customer will be required
to ship the unit to the Service Center indicated at the time Customer
Support is contacted to make the necessary repairs. The customer is
responsible for all transportation charges to the service facility.
Packaging and Shipping Instruction
When you send the product to the AVC service facility you must use the
original carton box and packing material or an equivalent as designated
by AVC.
Hours:
Monday–Thursday: 9am–7pm, Friday: 9am–5pm,
Saturday: 9am–NOON Eastern time.
Important: You are responsible for any transportation, shipping or
insurance relative to the return of product to our Product Returns
Center.
No person, agent, distributor, dealer or company is authorized to
change, modify or extend the terms of these warranties in any manner
whatsoever. The time within action must be commenced to enforce any
obligation of AVC arising under the warranty or under any statute, or
law of the United States or any state thereof, is hereby limited to one
year from the date of purchase. This limitation does not apply to implied
warranties arising under state law.
This warranty gives you specific legal rights and you may also have other
rights, which may vary, from state to state. Some states do not allow
limitation on how long an implied warranty lasts, when an action may
be brought, or the exclusion or limitation of incidental or consequential
damages, so the above provisions may not apply to you.
For more information on other products and services, please visit our
web site at
www.RCAav.com
Important: Also keep your “Bill of Sale” as proof of purchase.
Model no..........................................................................................................................
Product name.................................................................................................................
Type of set........................................................................................................................
Serial no............................................................................................................................
Invoice no.........................................................................................................................
Date purchased..............................................................................................................
Dealer name....................................................................................................................
FOR SERVICE AND REPAIR, PLEASE VISIT www.RCAav.com
LIMITED WARRANTY
Your Responsibility
(1) You must retain the original sale receipt to provide proof of purchase.
(2) These warranties are effective only if the product is purchased and
operated in the U.S.A. or Canada.
(3) Warranties extend only to defects in material or workmanship, and do
not extend to any product or parts which have been lost or discarded,
or damage to product or parts caused by misuse, accident, improper
operation or maintenance, or use in violation of instructions provided
with the product, or to product which has been altered or modified
without authorization of AVC, or to products or parts thereof which
have had the serial number removed or changed.
- 10 -
AV62781BE_IB_811-A27891W022.indd 10
2014/6/10 15:03:56
Información FCC
Información FCC
Por su Seguridad
La clavija de corriente CA está polarizada (una cuchilla es más ancha
que la otra) y solamente entra en la toma de
corriente CA de una forma. Si la clavija no se adapta
completamente a la toma de corriente, voltee la
clavija y trate de insertarla de la otra forma. Si aún
no entra, contacte a un electricista calificado para
cambiar la toma de corriente, o use una diferente.
No intente saltar esta característica de seguridad.
Para reducir el riesgo de choque eléctrico, no retire la cubierta o la tapa
posterior (no hay adentro partes que requieran servicio). Refiera el
servicio a personal calificado.
Este símbolo indica “voltaje peligroso” dentro del producto y
representa un riesgo de choque eléctrico o lesión personal.
Este símbolo indica instrucciones
acompañan el producto.
importantes
que
Información FCC
NOTA: Este aparato ha sido puesto a prueba y se ha verificado que
cumple con las restricciones de los equipos digitales clase B, en
conformidad con el Capítulo 15 del Reglamento de la FCC. Dichas
restricciones están diseñadas para proporcionar la debida protección
contra interferencia dañina en las instalaciones residenciales. Este
equipo genera, usa y puede irradiar energía de frecuencias radiales
y, de no instalarse y usarse según las instrucciones, puede causar
interferencia dañina para las comunicaciones de radio. No obstante,
no hay garantía de que en una instalación específica no se produzca
interferencia. Si este equipo causara interferencia en la recepción
de la radio o la televisión (lo quer se puede determinar encediendo
y apagando el equipo), le sugerimos al usuario que intente corregir
dicha interferencia, adoptando una o más de las siguientes medidas:.
• Reoriente o ubique en otro lugar la antena de recepción.
• Aumente la distancia que separa al equipo del receptor.
• Conecte el equipo a un enchufe de pared que se encuentre en un
circuito diferente a donde tenga conectado el receptor.
• Pida ayuda al vendedor o a un técnico de radios y televisores con
experiencia.
ADVERTENCIA: los cambios o modificaciones que se hagan a
esta unidad, que no estén expresamente aprobados por la parte
responsable de hacer cumplir las reglas de funcionamiento de este
aparato, pueden anular la autoridad del usuario para operar este
equipo.
Este aparato digital clase B cumple con todos los requerimientos de las
Regulaciones del Canadá para Equipo Causante de Interferencia.
Las Marcas de Peligro de Choque y los Símbolos Gráficos Asociados
son suministrados en el panel inferior de la unidad.
Para su voltaje de operación apropiado verifique la etiqueta de
clasificación/identificación ubicada en el panel posterior de su
producto.
PRECAUCIÓN:
• Para evitar choque eléctrico, haga coincidir la cuchilla ancha en la
clavija con la ranura ancha, completamente insertada.
• El aparato no debe ser expuesto a salpicaduras o goteos, y ningún
objeto relleno de líquido, tal como una vasija, debe ser colocado
sobre el aparato.
• La clavija de corriente es usada como el dispositivo de desconexión,
deberá permanecer operativa sin obstrucciones durante el uso para
el cual está diseñada. Para desconectar completamente el aparato
de la corriente elèctrica, la clavija de corriente del aparato deberá
ser desconectada completamente de la toma de corriente de pared.
ES
Información de servicio
Este producto deberá recibir servicio solamente por parte de aquellos
especialmente capacitados en tècnicas apropiadas de servicio. Para
instrucciones sobre cómo obtener servicio, refiérase a la garantía
incluida en este manual del usuario.
Conexión de Energía
Asegúrese de conectar todos sus otros componentes electrónicos y
las bocinas antes de conectar su unidad a la toma de corriente en la
pared. Conecte el cable de corriente en la toma de la pared, haciendo
coincidir la cuchilla ancha de la clavija con la ranura ancha en la toma de
corriente. Asegúrese de insertar completamente la clavija.
Especificaciones Técnicas:
Producto: Marca: Sistema de Teatro en Casa à technologie Bluetooth®
RCA
Consumo Eléctrico
Fuente de poder: 120 V ~ 60 Hz
Seguridad del Auricular
• No opere su auricular a un alto volumen. Los expertos en audición
advierten contra la reproducción prolongada a un alto volumen.
• Si usted experimenta un zumbido en sus oídos, reduzca el volumen
o deje de usarlos.
• Usted deberá tener precaución extrema o dejar temporalmente de
usarlos en situaciones potencialmentre peligrosos.
• Aún si su auricular es del tipo para uso al aire libre diseñado para
permitirle escuchar sonidos exteriores, no suba el volumen tan alto
que sea imposible escuchar lo que está a su alrededor.
• Presión Una excesiva del sonido de los auriculares y audífonos
puede provocar sordera.
IMPORTANTE: El cable de corriente puede ser desconectado para
apagar el suministro de energía a la unidad. Deberá ser fácilmente
accesible en una emergencia.
• Deje suficiente espacio alrededor del aparato para permitir una
ventilación adecuada: 10cm. alos lados y en la parte posterior, así
como 7cm. en la parte superior es lo ideal.
ADVERTENCIA: Para reducir el riesgo de fuego o choque eléctrico,
no exponga este aparato a la lluvia o a la humedad. No exponga este
equipo a la caída de gotas o salpicaduras y no coloque ningún objeto
con líquido, como un jarrón, sobre el aparato.
CAN ICES-003(B)/NMB-3 (B)
-1-
AV62781BE_IB_811-A27891W022.indd 1
2014/6/10 15:03:56
Importante Instrucciones
de Seguridad
ES
Conexiones y Configuración
• Una unidad principal
• Un control remoto con baterías
• Un par de bocinas frontales, un par de bocinas traseras, una bocina
central y un subwoofer
• Un cable de antena en espiral
• Una antena de bucle AM
• Un par de cable audio para las conexiones análogas
• Un & inglés; manuale españoles de un usuario
Unidad Principal
Alguna de la siguiente información quizá no se aplique a su producto
en particular. Sin embargo, como con cualquier producto electrónico,
se deben tomar precauciones durante su manejo y uso.
• Lea estas instrucciones.
• Conserve estas instrucciones.
• Tome en cuenta todas las advertencias.
• Siga todas las instrucciones.
• No uso este aparato cerca del agua.
Manual del
• Limpie solamente con un paño seco.
Usuario
• No bloquee ninguna de las aperturas de ventilación. Instale de
acuerdo con las instrucciones del fabricante.
• No instale cerca de fuentes de calor tales como radiadores, registros
de calor, estufas, u otros aparatos (incluyendo amplificadores) que
produzcan calor.
• No elimine el propósito de seguridad de la clavija polarizada o del
tipo o tierra. Una clavija polarizada tiene dos cuchillas, una más
ancha que la otra. Una clavija del tipo a tierra tiene dos cuchillas
y una tercera punta para conexión a tierra. La cuchilla ancha o la
tercera punta son suministradas para su seguridad. Si la clavija
suministrada no se adapta dentro de su toma de corriente, consulte
a un electricista para que reemplace la toma de corriente obsoleta.
bocinas traseras
bocinas frontales
bocina central
• Proteja el cable de corriente de pisotones o machucones
izquierda y derecha
izquierda y derecha
particularmente en las clavijas, receptáculos de
conveniencia, y en punto donde salen del aparato.
]
• Uso solamente accesorios/aditamentos especificados
por el fabricante.
Uso
solamente
con
el
carro,
soporte,
trípode,
•
consola, o mesa especificados por el fabricante, o
vendidos con el aparato. Cuando se utiliza un carro, Advertencia
tenga precaución al mover la combinación de carro/ sobre el Carro
aparato para evitar lesión ocasionada por volcadura.
Portátil
Antenne cadre AM
• Desconecte este aparato durante tormentas
eléctricas o cuando no sea utilizado por largos períodos de tiempo.
• Refiera todo el servicio a personal de servicio calificado. El servicio
es requerido cuando el aparato ha sido dañado de alguna forma,
control
tal como daño a la clavija o al cable de corrinte, cuando se ha
remoto con cable de antena Cable audio para las
derramado líquido o han caído objetos dentro del aparato,
Subwoofer
el aparato ha sido expuesto a lluvia o humedad, no funciona
en espiral
conexiones analogicas
baterías
normalmente, o ha sido tirado.
Configuración
y
Mantenimiento
de
la
Unidad
Informacion adicional de seguridad
• El aparato no debe quedar expuesto a goteos o salpicaduras de Suministre espacios para
líquidos, y, por lo tanto, no se deben colocar sobre el aparato objetos suficiente ventilación como
que contengan líquidos, como por ejemplo vasos.
Vista Frontal
• Siempre deje suficiente espacio para ventilación alreadedor del se indica:
producto. No ponga el producto en la cama, alfombra, librero o
gabinete que pueda obstruir la corriente de aire a través de apeturas
de ventilación.
• No pongan velas, cigarillos o cigarros encendidos encima de producto.
• Conecte sólo en receptáculos de corriente alterna como esta indicado
en el producto.
Vista Lateral
• Tome precauciones para evitar que caigan objetos dentro del producto.
• Carros y Estantes-El artefacto deberá ser usado sólo con carros y
estantes que hayan sido recomendados por el fabricante.
Si su producto funciona con pilas, haga, caso a las precauciones • No desconecte los cables de corriente CA hasta que todas las
conexiones estén terminadas.
siguientes:
A. Electrólito puede gotear de cualquier pila si está si está mezclada con • No uso su equipo inmediatamente después de transferirlo de un lugar
frío a un lugar caliente: hay riesgos de condensación.
una pila de un tipo diferente, si ha sido insertada incorrectamente, o
si no se reemplazan todas las pilas al mismo tiempo.
• No exponga su aparato al agua y a temperaturas excesivamente altas.
B. Cualquier pila puede explotar o gotear electrólito si se echa en un • Después de haber desconectado su aparato, limpie el gabinete con
fuego o si trata de cargar una pila no recargable.
un paño suave, o con una gamuza ligeramente húmeda. Nunca usos
C.Deseche inmediatemente pilas con fuga. Estas pueden causar
solventes fuertes.
quemaduras a la piel otra herida personal. Cuando deseche las baterías
asegúrese de deshacerse de ellas en una manera apropiada, de acuerdo • Coloque un amplificador cerca del estante superior de la base, de forma
que que el aire que se eleve de él no afecte otros componentes. Si
con las regulaciones locales o del estado.
D. La baterías no debe exponerse al calor excesivo como es el caso de
Ud. tiene un receptor de satélite, Ud. debería colocarlo en el estante
la luz del sol, fuego o similares.
superior.
Información importante sobre la batería
• No mezcle tipos diferentes de baterías o baterías nuevas y viejas. No Proteja sus Componentes del Sobrecalentamiento
mezcle pilas alkaline, estándar (carbon-zinc) o recargables (ni-cad, • No bloquee los orificios de ventilación en los componentes. Disponga
ni-mh, etc).
los componentes de manera que el aire pueda circular libremente.
• Con objeto de evitar algún riesgo de explosión, observe las polaridades • No apile componentes directamente uno sobre otro.
indicadas dentro del compartimiento de la batería. Reemplace • No coloque la unidad cerca de otros componentes que generen calor
solamente con el tipo de baterías indicado. No elimine las baterías
tales como ventilas de calefacción.
en el fuego o las recargue.
• Si usted no está usando el control remoto por un largo periodo de • Permita ventilación adecuada al colocar sus componentes en un
soporte.
tiempo, retire las baterías.
• No arroje las pilas al fuego, ya que pueden explotar o se puede derramar • Coloque un amplificador cerca del anaquel superior del soporte de
el líquido que hay en su interior.
manera que el aire caliente que se eleva desde este no afecte otros
• Al desechar las pilas, se debe considerar los problemas ambientales,
componentes. Si usted tiene un receptor satelital, debería colocarlo
y se debe obedecer estrictamente las reglas y leyes locales referentes
sobre el anaquel superior.
a la eliminación de estas pilas.
-2-
AV62781BE_IB_811-A27891W022.indd 2
2014/6/10 15:03:56
Conexiones y Configuración
Conexión a Componentes de Audio
Conexión para entrada de audio digital
Entrada Digital
Conecte los componentes, como son los reproductores de DVD,
receptores satelitales/cajas de cable, reproductores de BD (Blu-ray DiscTM)
o televisores, capaces de dar salida a señales digitales con formato Dolby
Digital (Sonido envolvente) o formato PCM estándar (estéreo).
Nota: “Blu-ray Disc” es marca registrada de la Asociación Blu-ray Disc.
Señales de
audio analógico
Señales de
audio analógico
OR
O
ES
Conexiones Digitales
Los receptáculos de audio digital pueden aceptar señales Dolby Digital
(Anillo - sonido) o PCM (Estéreo) cuando los componentes compatibles
están conectados.
• Esta unidad cuenta con dos enchufes para entrada digital óptica y un
enchufe para entrada digital coaxial, para que usted pueda conectar
sus componentes que tienen salida para audio digital.
• Para conectar un reproductor de DVD, un receptor satelital, una caja
para cable, un reproductor para BD (disco Blu-ray) o un televisor TV
con salida para audio digital, utilice un cable digital coaxial (no viene
incluido) o un cable digital óptico (no viene incluido) para transmitir
la señal de audio y disfrutar de la calidad del sonido Dolby Digital.
• Un cable óptico o coaxial separado es necesario para cada conexión
digital.
Nota:
• Si su televisor cuenta con salida para audio
digital, usted puede conectarlo a una de las
entradas para audio digital de la unidad, en
vez de usar la conexión analógica.
• Los cables coaxial y óptico transportan
solamente la parte de audio de la señal.
Blu-ray player
BD/DVD/SAT-CABLE/TV/LINE-IN
Satellite receiver
Entrada Optica Digital (Audio)
Conecte a la salida digital óptica del DVD, SAT-CABLE, BD, TV o algunos otros
dispositivos compatibles usando el cable de fibre óptica (no incluido).
BD/DVD/SAT-CABLE/TV/LINE-IN
DVD player
Entrada Coaxial Digital (Audio)
Conecte a la salida coaxial digital del DVD, SAT-CABLE, BD, TV o
algunos otros dispositivos compatibles usando el cable coaxial
digital (no incluido).
BD/DVD/SAT-CABLE/TV/LINE-IN
Conexión de las Antenas
Conecte las antenas AM y FM a las terminales AM y FM en el panel trasero del sistema.
Deben estar conectadas para recibir una buena recepción. Para recepción FM, extienda la antena en toda su longitud. Para recepción AM, gire la
antena horizontalmente para obtener mejor recepción.
-3-
AV62781BE_IB_811-A27891W022.indd 3
2014/6/10 15:03:56
Conexiones y Configuración
Antena AM de Bude y Antena FM para Interiores
1. Desenrede el cable de la antena y localice el extremo de la base de la antena AM.
2. Presione hacia abajo en la lengüeta de la antena para abrir la terminal.
3. Inserte los cables de la antena en la terminal y libere las lengüetas para asegurar los cables en su lugar.
4. Asegúrese de que el cable blanco en la antena de bucle AM esté insertado en la terminal AM LOOP y que el otro cable esté insertado en la
terminal de bucle a tierra.
Bocinas Frontales
(Sonido
Surround)
Front Speakers
Conexión de las Bocinas
bocina
Center
central
Speaker
Subwoofer
derecha
Black
azul y negro
Blue and Black
Grey and Black
Posición de las Bocinas
Left
blanco
y negro
White
and
gris y negro
Black
morado
negro
Purple yand
Black
Si los cables están al revés, el sonido será distorsionado. No permita que
los cables de las bocinas se toquen uno al otro, ya que esto dañará el
amplificador del teatro casero.
Right
rojo
y negro
Red
and
verde
y negro
Green
and Black
ES
(Surround izquierda
Sound)
derecha
Los cables de las bocinas tienen código en color para coincidir con las
terminales. Conecte el cable de la bocina de la parte posterior de cada
bocina a la terminal de color correspondiente en la parte posterior de la
unidad. Presione hacia abajo la lengüeta para abrir la terminal e insertar
el cable. Suelte la lengüeta para asegurar el cable en la terminal.
Al conectar las bocinas, asegúrese de que las polaridades (“+” cable de
la bocina a “+” en la unidad. Por ejemplo, el cable rojo a la terminal roja
en la unidad) de los cables de las bocinas y las terminales coincidan.
Right
izquierda
Left
3
1
Rear Speakers
Bocinas
Traseras
(Sonido Surround)
(Surround
Sound)
2
Posición de la bocina frontal
Siga las sugerencias a continuación
para colocar la bocina para obtener los
mejores resultados.
1
3
4
Cortesía de Dolby Laboratories
Courtesy Dolby Laboratories
1. Izquierda, Derecha (Bocinas Frontales)
Las bocinas centrales transportan principalmente musical y efectos de
sonido.
Alineación
Alinee la bocina central uniformemente
(A) o ligeramente detrás (B) (las bocinas
izquierda y derecha), pero no delante de
ellas.
2. Central
En modo surround, la bocina central transporta la mayoría del diálogo
así como música y efectos. Deberá estar colocada entre las bocinas
izquierda y derecha.
3. Surround (Bocinas Traseras)
El balance de sonido general de las bocinas traseras deberá estar
tan cerca como sea posible de las bocinas frontales. La colocación
adecuada es vital para establecer un campo de sonido uniformemente
distribuido.
4. Subwoofer
Un subwoofer está diseñado para reproducir poderosos efectos de
bajos (explosiones, el estruendo de naves espaciales, etc.) los cuales
amplifican dramáticamente la acción en la pantalla.
Blindaje Magnético
Los parlantes que estén ubicados a menos de dos pies del televisor,
deben tener blindaje magnético para evitar la distorsión de la
imagen. Los parlantes centrales que se incluyen con esta unidad están
magnéticamente blindados para proteger su televisor.
Cortesía de Dolby Laboratories
Ángulo
Coloque las bocinas izquierda y
derecha para formar una posición
de 45 grados para duplicar la
perspectiva del mezclador de la
pista de sonido.
Altura
Los impulsores de frecuencia
media y alta de las tres bocinas
frontales deberán estar a la
misma altura tanto como sea
posible. Esto con frecuencia
requiere colocar la bocina central
directamente encima (A) o debajo
(B) del aparato del TV.
A
B
Cortesía de Dolby Laboratories
-4-
AV62781BE_IB_811-A27891W022.indd 4
2014/6/10 15:03:57
Conexiones y Configuración
Reproducción por medio de aparatos
habilitados para funcionar con Bluetooth®
Mejor Posición del Surround
Ubicación
Si es posible, coloque las bocinas surround a cualquier lado del área de
escucha no detrá de esta.
Altura
Si el espacio lo permite, instale bocinas surround a 2-3 pies por encima
de los espectadores. Esto ayuda a minimizar los efectos de localización.
Dirección
Apunte las bocinas surround directamente a través de la habitación, no
hacia abajo a los espectadores, para ayudar a crear un campo de sonido
surround espacioso, más abierto.
Cortesía de Dolby Laboratories
Posición Alternativa del Surround
Pared posterior
Si el montaje en la pared posterior es la única opción, apunte las bocinas
una hacia la otra (A), hacia el frente (B) o hacia las paredes laterales (C, D).
Experimente con la ubicación hasta que el sonido parezca rodearlo más
bien que venir de detrás usted.
Cortesía de Dolby Laboratories
Sin Paredes Adyacentes
Las bocinas Surround pueden ir sobre soportes una frente a otra para
aproximarse al montaje en pared lateral (A), a los lados o detrás del área
de visión, apuntando hacia arriba; o pueden estar justo en el piso, o
preferentemente, unos cuantos pies por arriba del nivel del piso sobre
mesas en los extremos (B).
Esta unidad se puede usar en conjunto y conectarse a aparatos
habilitados para funcionar con Bluetooth®, tales como son los
teléfonos inteligentes.
CONEXIÓN Y USO CONJUNTO INICIAL DEL APARATO
Para usar en conjunto y conectar su aparato de Bluetooth® por primera
vez:
1. Oprima el botón STANDBY para encender la unidad.
2. Pulse el botón SOURCE o botón de
en el control remoto para
seleccionar el modo BT. Encienda el aparato con Bluetooth® que
desea conectar y usar en conjunto con el otro dispositivo.
3. En el aparato habilitado para funcionar con Bluetooth®, busque
dentro de la lista de aparatos detectados “RT2781BE” y seleccione
esta opción.
Es posible que la unidad y el aparato habilitado para funcionar con
Bluetooth® tarden unos segundos en asociarse.
4. Si se trata correctamente, la pantalla mostrará "Conectado".
5. Ahora usted puede disfrutar del sonido a través de la unidad.
Notas:
• Si su aparato de Bluetooth (como un teléfono inteligente, etc.)
precisa de un código PIN al asociarse, por favor ingrese el número
de 4 dígitos: 0000.
• La unidad sólo puede conectarse a un aparato con Bluetooth® a la
vez.
ES
PARA RECONECTAR UN APARATO HABILITADO PARA FUNCIONAR
CON BLUETOOTH®
Los aparatos habilitados para funcionar con Bluetooth® deben volver a
conectarse cuando el aparato o la unidad se hayan apagado.
1. Oprima el botón STANDBY para encender la unidad.
2. Pulse el botón SOURCE o botón de
en el control remoto para
seleccionar el modo BT. Encienda el aparato con Bluetooth® que ya
se ha asociado con la unidad.
3. Dependiendo de su aparato de Bluetooth, puede que su aparato se
conecte automáticamente a la unidad.
Si el aparato no se conecta automáticamente a la unidad, luego
busque el ítem “RT2781BE” en la lista de aparatos de Bluetooth® y
selecciónelo.
4. Si se trata correctamente, la pantalla mostrará "Conectado".
5. Ahora usted puede disfrutar del sonido a través de la unidad.
PARA USAR EN CONJUNTO Y CONECTAR A UN NUEVO APARATO
1. En el aparato de Bluetooth® que tenga actualmente asociado y
conectado, seleccione “RT2781BE” de la lista de aparatos actualmente
asociados y conectados, y desconéctelo. Sírvae consultar la Guía para
el usuario adjunta al aparato habilitado para funcionar con Bluetooth®
para más instrucciones sobre cómo desconectar un aparato. O bien,
apague el aparato con Bluetooth®.
2. Siga las instrucciones de conexión y uso conjunto inicial del aparato
que aparecen más arriba.
Fabricado bajo licencia de Dolby
Laboratories.
Dolby, Pro Logic y el símbolo de la
doble-D son marcas registradas de Dolby
Laboratories.
Bluetooth es una marca comercial
registrada de Bluetooth SIG Inc. La
tecnología Bluetooth ha sido incorporada
bajo la licencia de Bluetooth SIG Inc.
Dolby Digital
El modo Dolby Digital le permite disfrutar surround digital total
del software procesado en el formato Dolby Digital. Dolby Digital
suministra mejor calidad de sonido y tiene una presencia más poderosa
que el Dolby Surround convencional. Esta unidad está equipada
con el canal Dolby Digital 5.1- de manera que usted pueda disfrutar
sonido surround digital total realzado. el nuevo sistema proporciona
separación estéreo de las bocinas traseras (trasera derecha, trasera
izquierda). El agregar a los 5 canales el canal subwoofer para sonidos
bajos (contado como canal 0.1) resulta en 5.1 canales que le aportan el
disfrute de sonido Dolby Digital más sofi sticado.
-5-
AV62781BE_IB_811-A27891W022.indd 5
2014/6/10 15:03:57
Controles de la unidad
Unidad Principal
1
7
2
3
4 5 6
ES
1. Botones
SOURCE
Selecciona la fuente del sonido.
2.
ON/STANDBY (Encendido/En espera)
Enciende/apaga la unidad. Cuando la unidad sea encendida, la
unidad pasará al modo en que estaba antes de ser apagada.
3.
/ (Botones TUNING)
Sintoniza las estaciones deseadas.
4.
5.
6.
7.
/
(Botones PRESET)
Sintoniza las estaciones deseadas en la modalidad AM y FM.
Selecciona un ítem para configurar en el menú SETUP MENU.
/ (Botones SURROUND)
Selecciona entre las opciones de efectos de sonido envolvente
digital. (HALL, IGLESIA, ESTEREO, EMULACIÓN DOLBY PL, MÚSICA
DOLBY PL II, PELÍCULA DOLBY PL II) Dependiendo de la señal de
entrada.
Ajusta los niveles en el menú de configuración SETUP MENU.
Enchufes AUX 3
Conecte las consolas de juegos u otros productos para audio y
video que tengan salida para audio AUX.
Enchufe LINE-IN
Conecte aparatos de audio portátiles u otros productos para audio
y video que tengan un enchufe LINE-OUT.
Receptáculo de audífonos
MASTER VOLUME
Ajusta el volumen.
Control Remoto
Instale dos baterías tipo “AAA” en el
control remoto antes de usarlo.
Nota:
• Las baterías no deben ser expuestas a
calor excesivo, tal como luz solar directa,
fuego osimilares.
• No mezcle les baterías viejas y nuevas.
• No mezcle (Ni-Cad, Ni-MH, etc.) las baterías alcalinas, estándares (carbón-cinc),
o recargables.
1
2
13
3
4
14
15
5
16
6
7
17
8
9
18
10
19
20
11
12
21
1.
ON•OFF
Enciende/apaga la unidad.
2.SLEEP
Selecciona el tiempo en el temporizador para dormir.
3.NIGHT
Selecciona entre opciones de modo nocturno (MODE RATE / QUIET
/ OFF) el cual comprime la diferencia de volumen entre voces
normales y sonidos tales como explosiones. (Disponible solamente
durante la reproducción de señal Dolby digital).
4. TEST TONE
El parlante prueba la conguración de tono. Lea la sección “Control
de sonido avanzado” para más detalles.
5.SURROUND
Selecciona entre las opciones de efectos de sonido envolvente
digital. (HALL, IGLESIA, ESTEREO, EMULACIÓN DOLBY PL, MÚSICA
DOLBY PL II, PELÍCULA DOLBY PL II) dependiendo de la señal de
entrada.
6.DISTANCE
Ajusta la distancia de escucha de los parlantes.
7.
/ / /
• Presione / para seleccionar entre elementos de configuración
en el modo Configuración.
• Presione
/
para ajustar los valores cuando la pantalla
muestra la configuración que usted quiere cambiar.
• Oprima OK para conrmar su selección.
8.LEVEL
Conguración del nivel de los parlantes. Lea la sección “ Control de
sonido avanzado” para más detalles.
9.SUBWOOFER
Selecciona entre niveles de salida de subwoofer. [BALANCE
(SWF:BAL), FUERTE (SWF:STRG), POTENTE (SWF:PWRF), SUAVE]
apretando el botón SUBWOOFER. La configuración también está
disponible en el menú de configuración SETUP MENU.
10.MEM + / MEM Selecciona las estaciones programadas en modo AM y FM.
11.TUNER +
Oprima para subir la frecuencia radial en la banda AM y FM.
Oprima y mantenga apretado para buscar la siguiente estación
disponible en las frecuencias descendientes.
12.Botones EQ
Selecciona entre el modo de ecualizador preestablecido (POP,
FLAT, JAZZ, CLASSIC, ROCK, BASS y TREBLE). Oprima el botón
correspondiente para seleccionar la modalidad deseada de sonido.
Esta función está disponible solamente en modo Estéreo.
13.Botones numéricos
Accesa directamente un estación de preselección en modo AM/FM.
14.MEMORY
Almacena estaciones como estaciones programadas en la
modalidad AM y FM.
15.MONO/ST
Selecciona entre sonido Estéreo y Mono en el modo FM.
16.SETUP
Ingrese al modo Configuración. Uso / para selecccionar entre
opciones de configuración.
17.MUTE
Silencia todo el sonido.
18.VOL + / VOL Ajusta el volumen.
19.EXIT
Sale de la programación en curso.
20.TUNER Oprima para bajar la frecuencia radial en la banda AM y FM.
Oprima y mantenga apretado para buscar la siguiente estación
disponible en las frecuencias descendientes.
21.SOURCE
Selecciona las fuentes de audio.
-6-
AV62781BE_IB_811-A27891W022.indd 6
2014/6/10 15:03:57
Operación de su Unidad
Selección de la Fuente
Cuando uno de los botones SOURCE en el panel frontal o en el control
remoto es presionado, la entrada correspondiente al nombre será activada.
La unidad actúa como un dispositivo de conmutación entre todas las
fuentes que están conectadas a ella.
Ejemplo 1:
Si usted ha conectado un reproductor DVD en la entrada COAXIAL
(DVD) en la unidad, presione SOURCE en el panel frontal o en el control
remoto para recibir los sonidos transmitidos por el DVD.
Ejemplo 2:
Si hay una videograbadora conectada al enchufe de la videograbadora
VCR de la unidad, oprima SOURCE en el panel frontal o en el control
remoto, y se seleccionará el sonido proveniente de la videograbadora.
Usted puede conectar hasta 6 fuentes de audio a este amplificador:
SOURCE
button on
front panel
SAT-CABLE
BD
D D
T
TUNER
LINE-IN
SOURCE button
on re ot e
control
SAT-CABLE
BD
D D
T
TUNER
LINE-IN
Corre pon n
connector at the
rear panel
OPTICAL IN 1
OPTICAL IN 2
COAXIAL IN
T
bu lt- n
LINE-IN jack
on the front panel
El nombre de la fuente que haya seleccionado aparecerá en el
visualizador.
Notas:
• Su unidad tiene un sintonizador incorporado. Sólo conecte la
antena apropiada en la parte posterior de la unidad y usted podrá
escuchar estaciones de radio. (Vea los detalles en la sección Radio)
• Las conexiones en el panel posterior pueden ser intercambiadas si
las fuentes tienen la misma entrada de audio. Ejemplo, usted puede
conectar una TV a entradas VCR y conectar una VCR a la entrada de
TV.
Operación de su Unidad
3. Repita el paso 2 para sintonizar otra estación de radio.
4. Para detener la función de búsqueda antes de que termine de llevarse
a cabo, oprima el botón TUNER+ o TUNER- del control remoto.
5. Ajuste el volumen, oprimiendo botón VOL +/ VOL -.
Sintonización manual
Oprima reiteradamente el botón TUNER+ o TUNER- del control remoto
o el botón
o
del panel frontal de la unidad para sintonizar una
frecuencia deseada.
Programación de Prese ección Automática
La unidad puede programar 30 estaciones FM y 30 estaciones AM.
Antes de sintonizar una radio, asegúrese de bajar el volumen.
1. Presione botón TUNER para ingresar al modo AM/FM.
2. Presione y sostenga botón TUNER por dos segundos para iniciar la
programación de preselección automática.
3.Se navegará a través de las frecuencias de radio almacenadas
automáticamente. Cuando todas las estaciones de radio disponibles
estén almacenadas o se llegue a todas las 60 y las ubicaciones en
memorias estén llenas, la función de programación de preselección
automática se detendrán.
Preselección Manual
1. Oprima botón TUNER para seleccionar la modalidad de radio
deseada.
2. Oprima y mantenga oprimidos los botones TUNER+/TUNER- del
control remoto o los botones / del panel frontal de la unidad,
hasta que el equipo sintonice una estación.
3.Oprima botón MEMORY. Mientras el número de programación
del programa esté aún parpadeando, ingrese el número de
programación que desee utilizando los botones numéricos, y luego
oprima botón MEMORY para dejarlo almacenado en la memoria.
Selección de estaciones programadas
1.Oprima botón TUNER para ingresar a la modalidad de radio,
seleccionando la banda AM o FM.
2. Oprima reiteradamente
/
en la unidad principal u oprima
directamente el botón MEM+/MEM- del control remoto para buscar
las estaciones programadas. Cada vez que presiona el botón, el
equipo sintoniza una estación programada.
ES
Ejemplo: Conexión de un reproductorde Blu-ray
1. Conecte la salida HDMI del reproductor de Blu-ray al enchufe HDMI
IN 1 ubicado en el panel posterior de la unidad.
2.Oprima botón ON/STANDBY en el panel frontal de la unidad u
oprima botón ON•OFF en el control remoto para encender la
unidad.
3.Oprima botón SOURCE en la unidad principal para seleccionar la
fuente de BD.
4. Encienda el reproductor para Blu-ray y dé inicio a la reproducción.
5. Congure el modo de surround de ser necesario (Lea la sección
“Control de sonido avanzado” para más detalles).
Consejo :
• Cuando usted sintonice manualmente una estación FM débil,
presione MONO/ST en el control remoto para alternar del modo
Estéreo al Mono. Esto reducirá el ruido de fondo.
• Si hay alguna interferencia, cambie la posición de la antena hasta
que la recepción de sonido ideal se logre. La TV y otros dispositivos
electrónicos pueden ser la causa de interferencia, por lo tanto
intente colocar la antena lejos de ellos.
Ejemplo: Conexión de un televisor a una entrada digital Modo Entrada de Línea
1. Si el televisor cuenta con una salida para audio digital óptico, conéctelo
al enchufe OPTICAL ubicado en el panel posterior de la unidad.
2.Oprima botón ON•OFF en el control remoto para encender la
unidad.
3. Oprima el botón SOURCE para seleccionar la modalidad de TV.
4. Presione el botón SETUP para mostrar las opciones de configuración.
5. Oprima botón / hasta que DIMMER 0/DIMMER 1, CTR YES/CTR
NO, SUR YES/SUR NO o SWF SOFT/PWRF/STRG/BAL aparezca en el
visualizador.
6. Presione botón SOURCE para seleccionar entre OPTICAL 1/OPTICAL
2/COAXIAL/AUX 1/AUX 3/ LINE IN para coincidir con su conexión.
Su selección se almacenará para su futuro uso automáticamente.
7. Encienda el televisor.
RADIO
1. Conecte un extremo del cable estéreo de 3.5mm en el conector de
entrada de línea en el panel frontal de la unidad y el otro extremo a
la salida de línea o al receptáculo de audífono en una fuente externa.
2. Presione botón SOURCE en el panel frontal o en el control remoto
para seleccionar el modo entrada de línea.
Programación del temporizador para dormir SLEEP
Usted puede programar el equipo para que se apague a una hora
predeterminada, de manera que usted se pueda quedar dormido
escuchando música. Usted puede programar esta cantidad de tiempo
en incrementos de 30 minutos.
1. Oprima el botón SLEEP del control remoto.
2. Cada vez que oprime botón SLEEP, el visualizador de los minutos (el
tiempo restante) cambia en 30 minutos.
3.Cuando usted programa el temporizador para dormir, el ícono
“SLEEP” aparecerá en el visualizador del panel frontal.
• Para cambiar el tiempo restante, oprima reiteradamente SLEEP para
seleccionar el tiempo deseado.
• Para borrar el tiempo de programación para dormir, oprima el botón
SLEEP hasta que SLP OFF aparezca en el visualizador.
La unidad tiene un sintonizador integrado que permite la función de
radio AM/FM.
Conecte la antena FM y la antena de bucle AM en la parte posterior de
la unidad. Gire la antena del bucle AM para mejor recepción.
Sintonización automática
1. Presione botón TUNER.
2. Oprima y mantenga oprimido el botón TUNER+ o TUNER- del
control remoto o el botón o del panel frontal de la unidad
hasta que comience la búsqueda automática. La búsqueda se
detiene cuando el equipo sintoniza una estación.
-7-
AV62781BE_IB_811-A27891W022.indd 7
2014/6/10 15:03:58
Control de Sonido Avanzado
Sistemas de Realce de Sonido
Esta unidad está equipada con varios sistemas de realce de sonido
incorporados.
ES
Dolby Digital
El modo Dolby Digital le permite disfrutar surround completamente
digital del software procesado en el formato Dolby Digital. Dolby Digital
suministra mejor calidad de sonido y una presencia más poderosa que
el Dolby Surround convencional. Esta unidad está equipada con Dolby
Digital 5.1 canales de manera que usted pueda disfrutar sonido surround
completamente digital. Se diferencia del Dolby Pro Logic en que sólo
cuatro canales (Frontal Izquierdo, Frontal Derecho, Central y Trasero) son
usados, el nuevo sistema suministra separación estéreo de las bocinas
traseras (Trasera Derecha, Trasera Izquierda). Estos cinco canales, junto
con el canal subwoofer para sonidos bajos (contado como 0.1 canal),
se constituyen como entrada de 5.1- Canales (o 6 Canales) para Dolby
Digital el cual le aporta el más sofisticado disfrute de sonido.
Dolby Pro Logic II
El modo Pro Logic II usa el circuito incorporado para dirigir las señales de
audio de canal izquierdo, central, derecho, así como surround izquierdo
y derecho y utiliza cinco bocinas para reproducir fuentes de programa
estéreo y Dolby Pro Logic, tales como TV y VCR.
Dolby Pro Logic II incluye Dolby Pro Logic II Película, Dolby Pro Logic II
Música y Dolby Pro Logic Emulación.
Usted puede usar este modo con cualquier fuente de programa esteréo
(tal como VCR/TV) para disfrutar una experiencia de sonido multicanal.
Fabricado bajo licencia de Dolby Laboratories.
Dolby, Pro Logic y el símbolo de la doble D son
marcas registradas de Dolby Laboratories.
Estéreo
Control de Sonido Avanzado
Ajuste Fino de los Componentes
Usted puede seleccionar el modo surround presionando SURROUND
/
repetidamente para elegir entre diferentes
junto con la tecla
opciones. (HALL, IGLESIA, ESTEREO, EMULACIÓN DOLBY PL, MÚSICA
DOLBY PL II, PELÍCULA DOLBY PL II).
Los modos surround predeterminados para diferentes componentes
son listados en la siguiente tabla. La unidad mantendrá la última
selección en memoria.
Source Input If digital input
(optical or coaxial)
is selected
DVD
Dolby Digital
SAT-CABLE
Dolby Digital
BD
Dolby Digital
Dolby Digital
TV
AM/FM
N/A
VCR
N/A
N/A
LINE IN
If analog input is
selected
Pro Logic II Movie
Pro Logic II Movie
Pro Logic II Movie
Pro Logic II Movie
Stereo
Pro Logic II Movie
Pro Logic II Movie
Entrada Digital
El equipo Home Theater cuenta con dos entradas para audio digital para
fuentes externas de BD, SAT-CABLE, DVD, TV o LINE-IN.
La programación por defecto de las entradas es: optical 1 para BD,
optical 2 para SAT-CABLE y coaxial para DVD. No obstante, si usted
precisa asignar una fuente a una entrada diferente:
1. Seleccione la fuente (DVD, SAT-CABLE, BD, TV o LINE-IN).
2. Presione el botón SETUP para mostrar las opciones de configuración.
3. Oprima botón SOURCE hasta que OPTICAL 1/OPTICAL 2/COAXIAL/
AUX 1/AUX 3 o LINE-IN aparezca en el visualizador.
4. Presione botón SOURCE para seleccionar entre OPTICAL 1/OPTICAL
2/COAXIAL/AUX 1/AUX 3 o LINE-IN (las distintas fuentes tendrán
disponible entradas distintas que seleccionar) para coincidir
con su conexión su selección se almacenará para su futuro uso
automáticamente.
Usted tiene la capacidad de cambiar las entradas de audio a las fuentes
de audio SAT-CABLE, BD, TV o LINE-IN.
Source
SAT-CABLE
BD
DVD
TV
TUNER
VCR
LINE-IN
Default input
OPTICAL 1
OPTICAL 2
COAXIAL
Rear Analog (AUX 1)
Built-in tuner
Front Analog (AUX 3)
Front Analog (LINE-IN)
Entrada Análoga
El equipo Home Theater cuenta con cuatro entradas para audio
analógico y LINE-IN.
Notas:
Para reproducir sonido Dolby Prologic II Movie al escuchar una fuente
de audio analógica, pressione los botones SURROUND hasta que
“Dolby PL II MOVIE” aparezca en la pantalla.
Para reproducir sonido Dolby Digital, la fuente debe estar conectada a
la unidad vía la terminal óptica o coaxial.
Ajuste Fino de las Bocinas
La modalidad estéreo usa las dos salidas de canal principales de los Todas las configuraciones básicas han sido ya preestablecidas para las
parlantes frontales y del subwoofer. Uso esta modalidad sólo cuando bocinas incluidas en la caja.
haya conectado los parlantes frontales.
Además, para hacer más efectivo el sonido surround y adaptarlo a las
condiciones acústicas de su habitación, puede ser que usted necesite
DSP (Procesador de Sonido Digital)
Estos efectos de sonido digital semejan sonidos en un ambiente real demorar la señal que viene de algunas de las bocinas. La demora de
tales como (HALL, IGLESIA, ESTEREO, EMULACIÓN DOLBY PL, MÚSICA canal compensa para las bocinas central o surround que están más
DOLBY PL II, PELÍCULA DOLBY PL II). DSP convierte automáticamente cerca de la posición de escucha que las bocinas frontales.
señales de audio análogo a digitales lo cual le permite ajustar el sonido Prueba y ajustando de la Intensidad de Bocinas
sin degradar la calidad del mismo. Diferentes modos le darán diferentes El botón de TEST TONE en el teledirigido permite que usted ajuste
cada nivel del volumen del altavoz individualmente para adaptarse a su
sensaciones de dimensión y tipos de ambiente para escuchar.
ambiente que escucha determinado.
Oprima SUBWOOFER junto para seleccionar el nivel de efectos del
1. Presione botón TEST TONE en el control remoto.
parlante de graves, según lo necesite. Cuatro configuraciones están 2. Un tono será oído en cada locutor, un locutor al mismo tiempo.
disponibles: BALANCE, FUERTE, PODEROSO, y SUAVE.
-8-
AV62781BE_IB_811-A27891W022.indd 8
2014/6/10 15:03:58
Control de Sonido Avanzado
Control de Sonido Avanzado
3. Presione le botón / en el teledirigido para ajustar el nivel del
altavoz que está jugando el tono en ese momento determinado.
La visualización del teatro casero también indicará qué altavoz está
jugando el tono en cualquier momento determinado.
4. Oprima el botón EXIT para salir de esta modalidad.
Ajuste la intensidad del altavoz sin usar tonos de la prueba
1. Para ajustar el nivel del volumen de una bocina individual, presione
botón LEVEL en el control remoto.
2.Continúe presionando botón LEVEL en el control remoto para
seleccionar el canal a ser ajustado, luego presione le botón /
para ajustar el nivel.
3. Oprima el botón EXIT para salir de esta modalidad.
Configuraciones de Bocinas
Usted puede también cambiar la configuración de las bocina. Uso un
subwoofer para disfrutar sonido óptimo.
Para una experiencia surround óptima mida la distancia entre la bocina
y su posición de escucha favorita. Presione el botón DISTANCE para
ajustar la distancia de las bocinas.
1. Oprima el botón DISTANCE para mostrar las opciones de
configuración.
2. Siga oprimiendo el botón DISTANCE hasta que el parlante que
desea ajustar aparezca en la pantalla.
3.Presione botón / para cambiar las configuraciones de bocina.
Su selección será almacenada automáticamente.
4. Repita el paso 2 y 3 para configurar la siguiente bocina. Usted puede
ajustar la distancia dentro de los rangos siguientes:
• Distancia de la bocina frontal (FRNT): 0-30 pies
• Distancia de la bocina central (CNTR): 0-30 pies
• Distancia de la bocina trasera (SURR): 0-30 pies
5. Cuando la configuración esté terminada, espere cinco segundos
para guardar automáticamente sus elecciones o presione cualquier
botón para guardar su selección y el modo de configuración.
Configuraciones de la distancia del altavoz del valor
por defecto de la fábrica
1.Presione el botón SETUP para visualizar las opciones de
configuración.
2. Presione el botón / hasta que DIMMER 0 se visualice.
3. Presione el botón / para seleccionar entre 0 y 1.
Selección del Modo NOCHE
La modalidad de noche "Night Mode" restringirá el volumen de las
partes de las películas con volumen fuerte (como las secuencias de
acción) a la vez que le seguirá permitiendo escuchar las partes con
volumen más bajo (como los diálogos).
1. Oprima el botón NIGHT para mostrar las opciones de configuración.
2. Continuar oprima el botón NIGHT para seleccionar entre “MODE
RATE/QUIET/OFF”.
3. Sólo está disponible durante la reproducción de la señal Dolby
Digital.
ES
Selección del modo PARLANTE DE GRAVES
1. Oprima el botón SETUP para mostrar las opciones de configuración.
2. Oprima el botón / hasta que la modalidad de SUBWOOFER que
esté programada aparezca en pantalla.
3. Oprima el botón SUBWOOFER para seleccionar entre "BALANCE",
"FUERTE'", "POTENTE" o "SUAVE".
Configuraciones de la distancia del altavoz del valor por defecto
de la fábrica:
• Bocinas frontales (FRNT): 15 pies
• Bocina central (CNTR ): 10 pies
• Bocinas traseras (SURR): 10 pies
frontal
izquierda
Central
frontal
derecha
Cch
Lch
Rch
L/S
R/S
trasera
izquierda
trasera
derecha
Configuración de Bocina Central/Surround
1. Oprima el botón SETUP del control remoto o del panel frontal para
mostrar en el visualizador las opciones de configuración.
2. Presione el botón / hasta que CTR YES o SUR YES se visualice.
3. Presione el botón / para seleccionar entre YES y No.
Notas:
• CNTR significa selección de Bocina Central en tanto que SURR
significa selección de Bocina Surround.
• De forma predeterminada, la bocina Central y Surround están
establecidas en SI. Si usted decide no usarlas, configure las que no
pretende utilizar en NO de manera que el desempeño del sonido
no sea afectado.
-9-
AV62781BE_IB_811-A27891W022.indd 9
2014/6/10 15:03:58
Tips para Solución de Problemas
Cuidado y Mantenimiento
Operación de AM/FM
El indicador ESTEREO está apagado en la modalidad FM.
• Ajuste la antena.
• Presione el botón MONO/ST para asegurar que usted no está dando
salida en mono.
La señal es Mono. Zumbido o ruido severos.
• La señal es demasiado débil. Conecte una antena externa.
• Ajuste la antena.
• Vuelva a colocar la antena más lejos de cualquier equipo electrónico.
Hay interferencia a la recepción FM.
• Apague cualquier otro equipo eléctrico (por ejemplo, reproductor
DVD, BD, CD) que esté cerca de la unidad.
ES Operación de Control Remoto
El control remoto no hacer funcionar la unidad.
• No hay baterías instaladas (incluidas con su sistema). Instale las
baterías antes de intentar operar el control remoto. Asegúrese de
que los extremos + y - de cada batería coincidan con los símbolos
mostrados en el compartimiento de baterías del control remoto.
• Las baterías están débiles. Reemplace todas las baterías.
• El control remoto no apunta al sensor del control remoto en la
unidad principal o hay un obstáculo entre el control remoto y la
unidad principal.
• El control remoto está demasiado lejos de la unidad principal,
acérquelo.
Generales
No hay audio.
• Asegúrese de que las bocinas estén conectadas.
• Verifique las conexiones de entrada.
• Verifique las conexiones del cable de corriente eléctrica.
• Asegúrese de que MUTE esté en off.
• Asegúrese de que la configuración digital (óptica, coaxial o análoga)
sea correcta.
• Verifique que el audífono no esté insertado.
No hay audio de un canal.
• Verifique la configuración del nivel de la bocina.
• Verifique el cable de la bocina o las conexiones del cable de la fuente
externa.
Hay ruido cuando la TV está encendida.
• La TV está demasiado cerca del sistema de audio.
No se escucha el sonido de todos los parlantes.
• Revise su congur ación de la modalidad de sonido envolvente
Surround Mode (especicado en la sección “Control de sonido
avanzado” de este manual). Su equipo Home Theater cuenta con una
variedad de congur aciones distintas para la modalidad de sonido
envolvente SURROUND MODE, y por defecto elije las modalidades
que meas se adaptan al tipo de contenido de audio que se esté
reproduciendo - no obstante, usted puede cambiar estas congur
aciones. Algunas de estas modalidades, (como son DOLBY DIGITAL,
y Dolby PROLOGIC II), activarán todos los parlantes, mientras que
otras modalidades, (como son la modalidad STEREO y 3-STEREO),
desactivarán los parlantes posteriores. Usted siempre cuenta con la
opción de probar el amplicador de su equipo Home Theater - y cada
parlante, usando el generador incorporado de prueba de tono TEST
TONE (oprima el botón TEST TONE del control remoto).
Desconecte el sistema de audio de la corriente de energía antes de
realizar algún mantenimiento.
Limpieza del Exterior
Desconecte el sistema de la corriente eléctrica antes de limpiar el exterior del sistema con un paño suave, o con una gamuza ligeramente
húmeda. Nunca use solventes fuertes.
Información Importante Sobre la batería
• Retire las baterías para evitar derrame si usted no usa su control
remoto durante más de un mes.
• Elimine las baterías con fugas inmediatamente ya que las baterías con
fugas pueden causar quemaduras de piel u otras lesiones personales.
• Elimine los baterías de una manera apropiada, conforme a las
regulaciones estatales y locales.
• Cualquier batería puede derramar electrolito si es mezclada con un
tipo de batería diferente, si es insertada incorrectamente, si todas
las baterías no son remplazadas al mismo tiempo, si es arrojada al
fuego, o si se intenta cargar una batería que no está diseñada para ser
recargada.
Precauciones de Seguridad
• Bajo cualesquier circunstancias nunca abra el gabinete. Cualesquier
reparaciones o ajustes internos deberán ser efectuados solamente
por un técnico capacitado.
• Nunca opere este producto con el gabinete removido.
• No toque el reproductor con las manos húmedas. Si algún líquido
entra al gabinete del reproductor, lleve el reproductor a un técnico
calificado para inspección.
• El aparato no deberá ser expuesto a goteo y salpicaduras.
• Ningún objeto conteniendo líquidos, tal como un florero, deberá ser
colocado sobre el aparato.
• Ninguna flama abierta tal como velas encendidas deberá ser
colocada sobre el aparato.
Estas especificaciones y la apariencia externa de este aparato están
sujetas a cambio sin previo aviso.
¿Necesita más ayuda?
Por favor, o visite nuestra página de ayuda
en internett http://www.RCAav.com
- 10 -
AV62781BE_IB_811-A27891W022.indd 10
2014/6/10 15:03:58
Garantía Limitada
Garantía Limitada
AVC MULTIMEDIA (“AVC”) ofrece la siguiente garantía limitada, la cual
se extiende al comprador-consumidor original y está limitada al uso no
comercial del producto.
Garantía de repuestos y reparaciones por Uno Año
Los productos AVC que se hayan comprado en los Estados Unidos tienen
una garantía de uno año a partir de la fecha original de compra en caso
de presentar defectos en los materiales o en su fabricación. Si la unidad
no se encuentra en conformidad a esta garantía, nosotros repararemos
el producto usando piezas y productos nuevos y reparados, según lo
estime AVC únicamente.
Durante un período de uno año a partir de la fecha efectiva de la
garantía, AVC proporcionará, cuando sea necesario, mano de obra
de reparación para reparar defectos de fabricación en su centro de
reparaciones designado. Para obtener los servicios de la garantía en
los Estados Unidos, usted deberá llamar primero a nuestro Centro
de Servicio para el Cliente al 1-800-506-5746 o 1-877-252-6873
durante las horas que se indican en el recuadro más abajo. La
decisión de si bien usted está facultado para recibir estos servicios
la tomará la oficina de Respaldo al Cliente de AVC. POR FAVOR NO
DEVUELVA ESTA UNIDAD A AVC SIN CONTAR CON AUTORIZACIÓN
PREVIA. En los centros designados para reparaciones y por un período
de uno año a contar de la fecha de efectividad de la garantía, AVC
utilizará piezas o productos de recambio nuevos o refabricados al
efectuar reparaciones de productos o piezas defectuosas. Dichos
productos o piezas de recambio cuentan con una garantía adicional de
uno año a contar de la fecha del cambio o de la reparación. Para poder
hacer las reparaciones que sean necesarias, el cliente deberá enviar la
unidad al centro de reparaciones que se le indique al contactarse con
la oficina de respaldo al cliente. El cliente es responsable por todos los
gastos de envío al centro de reparaciones.
Instrucciones para envolver la unidad y para su envío
Cuando usted envíe el producto al centro de reparaciones de AVC,
usted debe utilizar la caja de cartón y el material de embalaje original o
un tipo de embalaje equivalente, según lo establezca AVC.
GARANTÍA LIMITADA
Su responsabilidad
(1) Usted debe guardar la boleta de venta original como prueba de su
compra.
(2)Estas garantías sólo son efectivas si el producto ha sido comprado y
puesto a funcionar en Estados Unidos o Canadá.
(3)Las garantías sólo se extienden en caso de materiales o de
fabricación defectuosa y no se extiende a productos o piezas que se
hayan perdido o tirado a la basura, ni a productos o piezas dañadas
a causa del mal uso de la unidad, de accidentes, del funcionamiento
o mantenimiento inapropiados del equipo, así como tampoco en
caso de no haber seguido las instrucciones que acompañan este
producto, o de haber modificado o alterado el producto sin la
autorización de AVC, o de haber quitado o cambiado el número de
serie de las piezas o del producto.
cualesquiera garantías implícitas según la ley de un estado, que por
la presente quedan limitadas, la garantía precedente tiene carácter de
exclusiva y predomina sobre las demás garantías, cauciones, acuerdos
y obligaciones similares del vendedor o del fabricante con respecto a
la reparación o al reemplazo de cualesquier partes del aparato. AVC
en ningún caso se hará responsable de daños fortuitos ni de daños
resultantes de cualquier otra situación que no sea la indicada en la
garantía limitada de este aparato.
Ninguna persona, agente, distribuidor, comerciante ni empresa está
autorizada para cambiar, modificar o extender los términos de estas
garantías en ninguna manera, cualquiera que ésta fuese. El tiempo
dentro del cual se debe iniciar una acción para hacer cumplir cualquier
obligación de AVC que surja en virtud de la garantía o de cualquier
estatuto o ley de Estados Unidos o de cualesquier de sus estados,
queda aquí limitado a uno año a contar de la fecha de adquisición
del producto. Esta restricción no se aplica a las garantías implícitas
planteadas en virtud de la ley de un estado.
Esta garantía le brinda derechos legales específicos y puede que usted
también tenga otros derechos que pueden variar, dependiendo del
estado. Algunos estados no ponen límite en cuanto a la duración de
una garantía implícita, a cuándo se puede tomar acción, o a la exclusión
o limitación de los daños fortuitos o consiguientes, de modo que es
posible que las disposiciones anteriores no sean aplicables en su caso.
ES
Para mayor información acerca de otros productos y servicios, sírvase
contactar nuestra página de internet en la siguiente dirección:
www.RCAav.com
Importante: Guarde su “Boleta de venta” como prueba de su compra.
N° de modelo...................................................................................................................
Nombre del producto...................................................................................................
Tipo de aparato...............................................................................................................
N° de serie.........................................................................................................................
N° de recibo......................................................................................................................
Fecha de compra............................................................................................................
Nombre del comerciante.............................................................................................
PARA SERVICIO Y REPARACIÓN, POR FAVOR VISTITA
www.RCAav.com
Fuera de la Garantía
En caso que su producto necesite ser reparado y que el período
de garantía ya haya expirado, sírvase contactarse con el Centro de
Ayuda al Cliente en el fono 1-800-506-5746, 1-877-252-6873 o
www.RCAav.com
Hora: Lunes–Jueves: 9am–7pm, Viernes: 9am–5pm, Sábado:
9am–NOON Eastern time.
Importante: Usted se hace responsable de cualesquier gastos
por razones de transporte, envío o seguro relacionados con la
devolución del producto al Centro de Devoluciones de Productos.
Todas las garantías implícitas según la ley de un estado, incluidas
las garantías implícitas de comercialización y de aptitud para un
propósito específico, están limitadas expresamente a la duración
de la garantía limitada expuesta más arriba. Con la excepción de
- 11 -
AV62781BE_IB_811-A27891W022.indd 11
2014/6/10 15:03:58
AVC Multimedia,
Markham, Ontario L3R 1E3
http://www.RCAav.com
© 2014 AVC MULTIMEDIA
Printed in China
Impreso en China
AV62781BE_IB_811-A27891W022.indd 13
811-A27891W022
2014/6/10 15:03:59