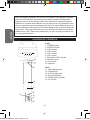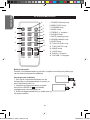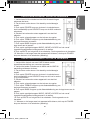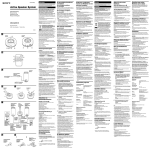
1
Bluetooth® Sound Tower
BT1000seriesIM1274_18Jun_V25.indd 1
BT1000series
19/06/2014 2:55 PM
FRANÇAIS
MESURES DE SECURITE
MISE EN GARDE
RISQUE D’ÉLECTROCUTION
NE PAS OUVRIR
MISE EN GARDE : AFIN DE RÉDUIRE LES RISQUES D’ÉLECTROCUTION,
NE PAS ENLEVER LE COUVERCLE (NI L’ARRIÈRE). NE CONTIENT AUCUNE
PIÈCE POUVANT ÊTRE RÉPARÉE NI REMPLACÉE PAR L’UTILISATEUR.
CONFIER TOUTE RÉPARATION À UN TECHNICIEN QUALIFIÉ.
TENSION DANGEREUSE : Les symboles de l’éclair
et de la pointe de flèche dans un triangle permettent
d’alerter l’utilisateur de la présence de ‘tension
dangereuse’ non isolée à l’intérieur de l’appareil, ce
qui constitue un risque d’électrocution.
BENZENE
Solution
ttoyante
ATTENTION : Le pointned’exclamation
à l’intérieur du
triangle permet d’alerter l’utilisateur de la présence
d’instructions d’opération et d’entretien importantes
accompagnant le produit.
AVERTISSEMENT:
• Afin de réduire tout risque d’incendie ou de choc électrique, n’exposez
pas cet appareil à la pluie ou à l’humidité.
• N’exposez pas le produit à des gouttes d’eau ou à des éclaboussures et
ne placez aucun objet rempli de liquide, tel un vase, sur l’appareil.
• La prise d’alimentation est utilisée comme système de déconnexion et
doit toujours être facilement accessible.
• Afin de déconnecter complètement l’appareil de l’électricité, la prise
d’alimentation doit être déconnectée de la prise électrique.
BENZENE
Solution
nettoyante
PARASURTENSEUR
olutconnexion
ion
Il est recommandé d’utiliser
un parasurtenseur
CA. Les dégâts
Solution
BENZENE pour Sla
BENZENE
nettoyante
nettoyante
causés par la foudre et les surtensions
ne SONT PAS couverts par la garantie de
ce produit.
BT1000seriesIM1274_18Jun_V25.indd 2
2
19/06/2014 2:55 PM
FRANÇAIS
INSTRUCTIONS RELATIVES A LA SECURITE
LIRE LES INSTRUCTIONS SUIVANTES AVANT TOUTE UTILISATION DE
L’APPAREIL.
Lisez attentivement et suivez ces instructions afin d’utiliser au mieux toutes
les fonctions qu’offre cet appareil. Merci de noter qu’il s’agit de précautions
générales qui peuvent ne pas s’appliquer à votre unité.
1. Lisez ces instructions.
2. Conservez ces instructions.
3. Suivez toutes les instructions.
4. Prenez en compte les avertissements.
5. N’utilisez pas cet appareil près de l’eau.
6. Nettoyez-le seulement avec un chiffon doux.
7. Ne bloquez aucune ouverture de ventilation. Procédez à l’installation selon
les instructions.
8. Gardez une distance minimale de 10 cm autour de l’appareil pour assurer
une ventilation adéquate.
9. N’installez pas cet appareil près de sources de chaleur telles que plinthes
électriques, cuisinières, ou autres (même les amplificateurs).
10. Ne tentez pas d’outrepasser la mesure de sécurité de la fiche polarisée ou
de la prise de terre. Une fiche polarisée possède deux broches, dont l’une
est plus large que l’autre. Une fiche avec une prise de terre possède deux
broches plates et une troisième broche ronde pour la prise de terre. La
broche plus large et la troisième broche constituent des mesures de sécurité
importantes visant à vous protéger. Si vous ne parvenez pas à insérer
complètement la prise dans la prise électrique murale, contactez votre
électricien pour remplacer la prise murale obsolète.
11. Le câble d’alimentation doit être mis en place de sorte qu’on ne marche pas
dessus ou qu’il soit écrasé particulièrement à l’endroit de la prise, à l’endroit
où il est branché et à l’endroit d’où il sort de l’appareil.
12. Utilisez uniquement les pièces détachées/accessoires spécifiés par le
fabricant.
13. Débranchez cet appareil durant les orages ou lorsqu’il n’est pas utilisé durant
une longue période.
14. Référez-vous à un personnel qualifié pour toute réparation. Une réparation
sera nécessaire si l’appareil était endommagé d’une manière ou d’une autre,
si le câble d’alimentation ou la prise était endommagé(e), si un liquide s’est
déversé ou si des objets sont tombés dans l’appareil, si l’appareil a été
exposé à la pluie ou à l’humidité, ou s’il a subi une chute.
15. Cet appareil ne doit pas être exposé à des gouttes d’eau ou à des
éclaboussures et aucun objet rempli de liquide, tel un vase, ne doit être placé
sur l’appareil.
BT1000seriesIM1274_18Jun_V25.indd 3
3
19/06/2014 2:55 PM
FRANÇAIS
16. Ne surchargez pas la prise électrique. Utilisez uniquement la source
d’alimentation comme indiqué.
17. Utilisez les pièces de rechange spécifiées par le fabricant.
18. Vous ne pouvez installer le produit au mur que si cela est recommandé par le
fabricant. Suivez les méthodes indiquées dans le guide d’utilisation.
19. Les piles ne doivent jamais être exposées à une source de chaleur
excessive, par exemple la lumière du soleil ou un feu.
20. Pour protéger l’environnement, jetez les piles, accumulateurs et appareils
électriques usés de manière appropriée.
21. Utilisez l’appareil uniquement lorsque les températures ambiantes sont
modérées. (Températures de fonctionnement -20˚C ~ +35˚C)
22. La prise secteur doit être installée près de l’appareil et rester facilement
accessible.
23. L’accès à l’adaptateur secteur ne doit pas être gêné OU l’adaptateur secteur
doit rester facile d’accès pendant toute la durée de l’utilisation prévue.
24. Pour débrancher complètement l’appareil de l’alimentation électrique, l’adaptateur secteur doit être sorti de la prise secteur, car l’adaptateur secteur sert de dispositif de déconnexion.
25. L’appareil et l’adaptateur secteur ne doivent pas être exposés à des gouttes ni à des éclaboussures, et aucun objet rempli de liquide, par exemple un vase, ne doit être placé près d’eux.
26. Une puissance sonore excessive lors de l’utilisation des écouteurs peut
sérieusement endommager votre audition.
27. «Tension de sortie maximale : ≤ 150 mV. »
28. Écouter de la musique pendant longtemps à un volume élevé peut détériorer
l’acuité auditive de l’utilisateur.
DEBALLAGE DE L’APPAREIL
Lors du déballage, assurez-vous que les pièces suivantes soient incluses :
1 x Tour de son Bluetooth®
1 x Télécommande (pile au lithium CR2025 incluse)
1 x Adaptateur secteur
1 x Mode d’emploi
1 x Câble Line In 3,5mm
1 x Câble avec fiche RCD x 2 mâles
1 x Support pour tablette ou smartphone
AVERTISSEMENT: Tous les matériaux d’emballage, comme le scotch, les
feuilles en plastique, les ficelles et les étiquettes ne font pas partie du produit et
doivent être jetés.
BT1000seriesIM1274_18Jun_V25.indd 4
4
19/06/2014 2:55 PM
FRANÇAIS
ALIMENTATION
La tour de son Bluetooth® fonctionne avec une source électrique CA~100-240V,
50 / 60Hz.
Connexion à l’alimentation
1. Assurez-vous que l’appareil soit éteint.
2. Insérez une extrémité du câble CA à la prise d’entrée CA située à l’arrière de
l’appareil.
3. Branchez l’autre extrémité du câble CA à une prise électrique murale
CA~100-240V, 50 / 60Hz.
Prise CA
Adaptateur secteur
Note :
• Utilisez l’adaptateur secteur fourni avec le produit. Ne pas utiliser d’autre
adaptateur.
• La prise électrique à laquelle l’appareil est branché doit être installée près de
l’équipement et doit toujours être facilement accessible.
ATTENTION : D’importantes interférences électromagnétiques ou des décharges
électrostatiques peuvent provoquer un dysfonctionnement ou une perte de
données. Si l’appareil ne fonctionne pas correctement, débranchez le câble CA
de la prise de courant puis rebranchez-le.
BT1000seriesIM1274_18Jun_V25.indd 5
5
19/06/2014 2:55 PM
FRANÇAIS
TÉLÉCOMMANDE
6
7
1
2
8
9
10
3
11
12
4
13
14
5
15
1. Bouton POWER (Marche / Arrêt)
2. Bouton MEM/CLOCK
3. Bouton TUN/MEM
4. Bouton MUSIC
5. Boutons TREBLE + / 6. Bouton SOURCE
7. Bouton MUTE (Sourdine)
8. Bouton ALARM
9. Bouton SLEEP (Veille)
10. Bouton TUN+/CLOCK+
11. Bouton TUN-/CLOCK12. Bouton MOVIE (Film)
13. Bouton VOICE (Voix)
14. Boutons BASS + / 15. Boutons VOLUME + / -
Information concernant la pile
La première fois que vous utilisez la télécommande, retirez la languette
protégeant la pile située à l’arrière de la
télécommande.
Changer la pile
1. Poussez le loquet de verrouillage vers la
droite, puis faites glisser le support de la pile
pour l’ouvrir.
2. Retirez la pile usagée et insérez une pile au
lithium CR2025 3V
(fournie), comme
montré.
3. Faites glisser le support de la pile dans son réceptacle jusqu’à ce qu’il se
verrouille en place avec un déclic.
BT1000seriesIM1274_18Jun_V25.indd 6
6
19/06/2014 2:55 PM
FRANÇAIS
Ne pas recharger les piles non rechargeables. Retirer les accumulateurs de
l’appareil avant de les recharger. Ne charger les accumulateurs que sous
la surveillance d’un adulte. Ne pas mélanger différents types de piles ou
accumulateurs, ou des piles et accumulateurs neufs et usagés. Les piles et
accumulateurs doivent être mis en place en respectant la polarité. Les piles
et accumulateurs usagés doivent être enlevés de l’appareil. Les bornes d’une
pile ou d’un accumulateur ne doivent pas être mises en court-circuit. Ne pas
jeter les piles au feu. Retirer les piles en cas de non utilisation prolongée. Cet
appareil doit être alimenté avec les piles spécifiées seulement.
EMPLACEMENT DES TOUCHES
1
2 3 45
Avant
1. Bouton POWER (Marche / Arrêt)
2. Bouton SOURCE
3. Bouton TUN+
4. Bouton TUN5. Bouton VOL+
6. Bouton VOL7. Indicateur DEL Bluetooth®
8. Capteur de la télécommande
9. Affichage
10. Enceinte
6
7
8
9
Arrière
11. Port de chargement USB
12. Antenne FM
13. Prise AUX IN (droite)
14. Prise AUX IN (gauche)
15. Prise LINE IN (3,5mm)
16. Prise d’alimentation DC IN
10
11
12
14
BT1000seriesIM1274_18Jun_V25.indd 7
13
15
16
7
19/06/2014 2:55 PM
FRANÇAIS
CHARGER UN APPAREIL PERSONNEL PAR PORT USB INTÉGRÉ
1. Fixez le porte-tablette dans les deux trous situés sur le dessus de la tour
Bluetooth®.
2. Placez votre appareil au dessus de la fente.
3. Branchez une extrémité d’un câble (non inclus) à votre appareil puis le côté
USB du câble au port de chargement USB DC 5V
au dos de la tour.
Notes : l’appareil personnel se charge automatiquement lorsqu’il est branché à la
tour Bluetooth®. Assurez-vous que la tour soit alimentée.
RÉGLAGES BLUETOOTH®
La marque et les logos Bluetooth® sont des marques déposées appartenant à
Bluetooth SIG, Inc. et Lexibook® les utilise sous licence. Les autres marques
de commerce et noms commerciaux appartiennent aux sociétés qui en sont
respectivement détentrices.
© 2014 Bluetooth SIG, Inc.
Association initiale
1. Allumez la tour Bluetooth®, puis appuyez sur le bouton SOURCE jusqu’à
obtenir le mode Bluetooth® (bt). La DEL Bluetooth® clignote pendant la
recherche d’appareils.
2. Activez la fonction Bluetooth® sur votre appareil personnel. Pour en savoir plus
sur comment activer cette fonction, veuillez consulter le manuel d’instructions de
votre appareil.
3. Sélectionnez le nom de la tour Bluetooth®, puis associez votre appareil à la
tour de son.
4. Une fois que l’appareil et la tour sont connectés, mettez un fichier audio
ou vidéo sur lecture. Réglez le volume en vous servant des touches de votre
appareil personnel ou des boutons volume de la tour ou de la télécommande.
BT1000seriesIM1274_18Jun_V25.indd 8
8
19/06/2014 2:55 PM
FRANÇAIS
Ré-association
Lorsque la tour ou le mode Bluetooth® est éteint :
1. Allumez la tour Bluetooth®, puis appuyez sur le bouton SOURCE jusqu’à
obtenir le mode Bluetooth® (bt).
2. La DEL Bluetooth® clignote pendant 3 secondes. La tour retrouve ensuite
automatiquement le dernier appareil avec lequel il s’est associé.
3. Lorsqu’aucun appareil n’a été trouvé, la DEL Bluetooth® continue à clignoter.
Appuyez sur SOURCE pour sélectionner d’autres modes : FM, AUX ou L IN.
Notes :
1. La tour Bluetooth® se connecte seulement à un appareil à la fois.
2. La distance maximum de transmission entre le haut-parleur Bluetooth® et
l’appareil est de 10 mètres, soit 32 pieds.
3. Des interférences peuvent avoir lieu pendant la lecture lorsque la fonction
Bluetooth® est utilisée à proximité d’autres appareils sans-fil. Si la lecture par
Bluetooth® pose un problème, déplacez le haut-paleur Bluetooth® et le lecteur
dans un autre endroit, ou utilisez la prise LINE IN de 3,5mm au lieu de la fonction
Bluetooth®.
FONCTIONS HORAIRES
Réglages de l’horloge
1. Appuyez sur le bouton POWER pour éteindre la tour (mode veille).
2. Appuyez sur le bouton MEM/CLOCK de la télécommande.
3. Les chiffres à gauche clignotent. Appuyez sur le TUN+/CLOCK+ ou TUN-/
CLOCK- de la télécommande pour régler l’heure.
4. Appuyez sur MEM/CLOCK à nouveau pour confirmer l’heure. Les minutes
clignotent automatiquement.
5. Appuyez sur le bouton TUN+/CLOCK+ ou TUN-/CLOCK- pour régler les
minutes.
6. Appuyez sur MEM/CLOCK à nouveau pour confirmer les minutes.
Réglages du réveil (avec une station de radio préréglée)
1. Appuyez sur le bouton POWER pour allumer la tour.
2. Appuyez sur le bouton SOURCE jusqu’à obtenir le mode FM.
3. Sélectionnez une fréquence radio de votre choix en appuyant sur TUN+/
CLOCK+ ou sur TUN-/CLOCK-.
4. Appuyez sur le bouton POWER pour éteindre la tour.
5. Appuyez sur le bouton ALARM de la télécommande. L’heure sur l’affichage
clignote.
6. Les chiffres à gauche clignotent. Appuyez sur TUN+/CLOCK+ ou sur TUN-/
CLOCK- de la télécommande pour régler l’heure.
7. Appuyez sur ALARM à nouveau pour confirmer l’heure. Les minutes clignotent
automatiquement.
BT1000seriesIM1274_18Jun_V25.indd 9
9
19/06/2014 2:55 PM
FRANÇAIS
8. Appuyez sur TUN+/CLOCK+ ou sur TUN-/CLOCK- pour régler les minutes.
9. Appuyez sur ALARM à nouveau pour confirmer les minutes.
10. Le réveil se déclenche à l’heure réglée avec la fréquence radio préréglée.
11. Pour désactiver le réveil, appuyez sur le bouton ALARM de la télécommande
pendant 3 secondes. La cloche qui était sur l’écran de la tour disparaîtra et le
réveil sera dès lors désactivé.
Réglages de la minuterie
1. Appuyez sur le bouton POWER pour allumer la tour.
2. Appuyez sur le bouton SLEEP plusieurs fois pour sélectionner la minuterie
préréglée : 5, 10, 15, 30, 60 ou 90 minutes.
3. L’affichage LCD se met automatiquement en mode veille lorsque le délai de la
minuterie est écoulé.
RÉGLAGES RADIO
Note : ajustez l’antenne FM (incluse) pour recevoir un signal de réception
optimal.
Réglages de la radio FM
1. Appuyez sur le bouton POWER pour allumer la tour.
2. Appuyez sur le bouton SOURCE jusqu’à obtenir le mode FM.
3. Appuyez sur TUN+/CLOCK+ ou sur TUN-/CLOCK- pour régler la fréquence de
votre choix.
4. Appuyez sur TUN+/CLOCK+ ou sur TUN-/CLOCK- et maintenez le bouton
enfoncé pour effectuer une recherche de station automatique.
Enregistrement d’une station de radio
1. Réglez la radio FM.
2. Sélectionnez une fréquence, puis appuyez sur le bouton MEM/CLOCK pour
enregister la station de radio actuelle. La tour Bluetooth® peut mémoriser jusqu’à
30 stations.
Écoute d’une station radio enregistrée
1. Appuyez sur le bouton POWER pour allumer la tour.
2. Appuyez sur le bouton SOURCE afin de sélectionner le mode FM.
3. Appuyez sur le bouton TUN/MEM pour parcourir les stations de radios
enregistrées.
BT1000seriesIM1274_18Jun_V25.indd 10
10
19/06/2014 2:55 PM
1. Branchez un câble AUX à la prise AUX IN qui se trouve
au dos de la tour.
2. Branchez la tour à une prise de courant. L’indicateur de
veille s’allume.
3. Allumez la tour, puis appuyez sur le bouton SOURCE
jusqu’à obtenir le mode AUX.
4. Mettez le lecteur en marche et commencez la lecture d’un
fichier.
5. Appuyez sur les boutons volume pour régler le volume.
6. Appuyez sur les boutons TREBLE de la télécommande
pour régler les régulateurs treble.
7. Appuyez sur les boutons BASS de la télécommande pour
régler les régulateurs bass.
8. Appuyez sur les boutons MUSIC, MOVIE ou VOICE pour
régler les effets d’égalisation.
9. Appuyez sur le bouton MUTE pour éteindre le son, puis appuyez à nouveau
pour remettre le son.
10. Lorsque vous avez fini d’écouter, appuyez sur le bouton POWER pour
éteindre la tour (mode veille).
FRANÇAIS
BRANCHER UN APPAREIL PAR AUX IN
BRANCHER UN APPAREIL PAR LINE IN
1. Branchez une extrémité du câble LINE IN à la prise
écouteurs de votre appareil externe.
2. Branchez l’autre extrémité du câble à la prise LINE IN
située à l’arrière de la tour.
3. Alimentez la tour. L’indicateur de veille s’allume.
4. Allumez la tour, puis appuyez sur le bouton SOURCE
jusqu’à obtenir le mode Line In (L In).
5. Mettez l’appareil externe en marche et commencez la
lecture d’un fichier.
6. Appuyez sur les boutons volume pour régler le volume.
7. Appuyez sur les boutons TREBLE de la télécommande
pour régler les régulateurs treble.
8. Appuyez sur les boutons BASS de la télécommande pour
régler les régulateurs bass.
9. Appuyez sur les boutons MUSIC, MOVIE ou VOICE pour régler les effets
d’égalisation.
10. Appuyez sur le bouton MUTE pour éteindre le son, puis appuyez à nouveau
pour remettre le son.
11. Lorsque vous avez fini d’écouter, appuyez sur le bouton POWER pour
éteindre la tour (mode veille).
BT1000seriesIM1274_18Jun_V25.indd 11
11
19/06/2014 2:55 PM
FRANÇAIS
GUIDE DE DEPANNAGE
PROBLEMES
SOLUTION
Pas de courant.
Vérifiez la connexion de l’adaptateur CA / CC entre la
tour et la prise de courant.
Pas de son.
Vérifiez que le contrôle du volume N’EST PAS réglé
au minimum.
Vérifiez que la sourdine N’EST PAS activée.
La télécommande ne
fonctionne pas.
Inspectez ou remplacez la batterie.
Aucun son à partir du
mode Bluetooth®.
Vérifiez l’association des appareils.
Assurez-vous qu’aucun obstacle ne cache l’avant de
la tour.
SPECIFICATIONS
GENERAL
Adaptateur secteur
Consommation électrique
Puissance audio Couverture radio
Impédance des enceintes Dimensions
Poids
BT1000seriesIM1274_18Jun_V25.indd 12
Entrée CA 100-240V, 50/60 Hz; Sortie 18V
>50W
Baffle : 30W
Canal gauche : 10W
Canal droit : 10W
FM 87.5-108.0 MHz
Woofer : 8 Ohm, 25W x 2
Canal gauche : 4 Ohm, 15W
Canal droit : 4 Ohm, 15W
100 x 23 x 18.5 cm
4,5 kg
1,6A
12
19/06/2014 2:55 PM
FRANÇAIS
DECLARATION DE CONFORMITE
Nous, Lexibook® S.A.
2, avenue de Scandinavie
91953 Courtaboeuf Cedex – France
déclarons sous notre seule responsabilité que le produit :
Désignation : Tour de son Bluetooth®
Référence / type : BT1000series
Est conforme aux standards et/ou normes suivantes :
EN60065:2002+A1:2006+A11:2008+A2:2010+A12:2011
EN55013:2013
EN55020:2007+A11:2011
EN61000-3-2:2006+A1:2009+A2:2009
EN61000-3-3:2013
ETSI EN 300 328 V1.7.1
ETSI EN 301 489-1 V 1.9.2
ETSI EN 301 489-17 V 2.2.1
EN 62479:2010
Par la présente, nous déclarons que le produit désigné ci-dessus est en
conformité avec les directives de l’Union européenne, notamment à la directive
CEM 2004/108/CE et aux directives Basse tension 2006/95/CE et RTTE 1999/5/
CE.
0700
Yiu Wai Man
Directeur du développement du produit
Hong Kong, le 27/05/2014
ENTRETIEN
Pour éviter tout incendie ou électrocution, débranchez l’appareil de l’alimentation
en courant CA quand vous le nettoyez. Nettoyez l’appareil en l’essuyant avec un
chiffon à poussière comme pour un meuble. Nettoyez et essuyez les parties en
plastique avec précaution. Il est conseillé d’utiliser un savon doux et un chiffon
humide pour nettoyer la partie frontale.
BT1000seriesIM1274_18Jun_V25.indd 13
13
19/06/2014 2:55 PM
FRANÇAIS
GARANTIE
Ce produit est couvert par notre garantie de deux ans. Pour toute mise en
œuvre de la garantie ou du service après-vente, vous devez vous adresser à
votre revendeur muni de votre preuve d’achat. Notre garantie couvre les vices
de matériel ou de montage imputables au constructeur à l’exclusion de toute
détérioration provenant du non-respect de la notice d’utilisation ou de toute
intervention intempestive sur l’article (telle que démontage, exposition à la
chaleur ou à l’humidité…).
Note : Veuillez garder ce mode d’emploi, il contient d’importantes informations.
Le contenu de ce mode d’emploi peut changer sans préavis. Aucune partie de ce
mode d’emploi ne doit être reproduite sans le consentement écrit du fabricant.
Référence : BT1000series
Conçu et développé en Europe – Fabriqué en Chine
© 2014 LEXIBOOK®
LEXIBOOK S.A,
2, avenue de Scandinavie,
91953 Courtaboeuf Cedex,
France
Pour vos demandes concernant un problème SAV ou une réclamation, composez
le 01 84 88 58 58.
Pour toutes vos autres demandes (conseil d’achat, choix d’un produit,
renseignement avant-vente sur l’utilisation d’un produit …), composez le 08 92 23
27 26 (0,34€ TTC / minute).
http://www.lexibook.com
Ce produit n’est pas un jouet.
Informations sur la protection de l’environnement
Tout appareil électrique usé est une matière recyclable et ne devrait pas faire partie des
ordures ménagères ! Nous vous demandons de bien vouloir nous soutenir en contribuant
activement au ménagement des ressources et à la protection de l’environnement en
déposant cet appareil dans des sites de collecte (si existants).
BT1000seriesIM1274_18Jun_V25.indd 14
14
19/06/2014 2:55 PM
SAFETY PRECAUTIONS
CAUTION
ENGLISH
RISK OF ELECTRIC SHOCK
DO NOT OPEN
CAUTION: TO REDUCE THE RISK OF ELECTRIC SHOCK, DO NOT
REMOVE COVER (OR BACK). NO USER-SERVICEABLE PARTS INSIDE.
REFER SERVICING TO QUALIFIED SERVICE PERSONNEL.
DANGEROUS VOLTAGE:
The lightning flash with arrowhead symbol within an
equilateral triangle is intended to alert the user to the
presence of uninsulated dangerous voltage within the
product’s enclosure that may be of sufficient
magnitude to constitute a risk of electric shock to
persons.
ATTENTION :
Solution
BENZENE
ettoyante an equilateral triangle is
The exclamation
point nwithin
intended to alert the user to the presence of important
operating and maintenance (servicing) instructions in
the literature accompanying the appliance.
WARNING:
• To reduce the risk of fire or electric shock, do not expose this appliance to
rain or moisture.
• The apparatus shall not be exposed to dripping or splashing and that
no objects filled with liquids, such as vases, shall be placed on the
apparatus.
• The mains plug is used as the disconnect device, the disconnect device
shall remain readily operable.
• In order to disconnect the apparatus from the mains completely, the
mains plug should be disconnected from the mains socket outlet
completely.
Solution
BE
E
BENZENE
Solution
nettoyante
Solution
NZEN
BENZENE
nettoyante
nettoyante
SURGE PROTECTORS:
It is recommended to use a surge protector for AC connection. Lightning and
power surges ARE NOT covered under warranty for this product.
BT1000seriesIM1274_18Jun_V25.indd 15
15
19/06/2014 2:55 PM
SAFETY INSTRUCTIONS
PLEASE READ BEFORE OPERATING THIS EQUIPMENT.
Before using the unit, be sure to read all operating instructions carefully. Please
note that these are general precautions and may not pertain to your unit.
ENGLISH
1. 2. 3. 4. 5. Read these instructions.
Keep these instructions.
Heed all warnings.
Follow all instructions.
Do not use this product near water and moisture, for example: near a
bathtub, washbowl, kitchen sink or laundry tub; in a wet basement; or near a
swimming pool. No objects such as vases should be placed on the unit.
6. Unplug this product from the wall outlet before cleaning. Do not use liquid
cleaners or aerosol cleaners. It may damage the screen. Use a dry cloth for
cleaning only.
7. Slots and openings in the cabinet and in the back or bottom are provided for
ventilation, to ensure reliable operation of the product and to protect it from
overheating. These openings must not be blocked or covered. The openings
should never be blocked by placing the product on a bed, sofa, rug or other
similar surface. This product should never be placed near or over a radiator
or heat source. This product should not be placed in a built-in installation
such as a bookcase or rack unless proper ventilation is provided or the
manufacturer’s instructions have been adhered to.
8. Minimum distances 10 cm around the apparatus for sufficient ventilations.
9. Do not install near any heat sources such as radiators, heat registers, stoves,
or other apparatus (including amplifiers) that produce heat.
10. Do not defeat the safety purpose of the polarized or grounding type plug.
A polarized plug has two blades with one wider than the other. A grounding
type plug has two blades and a third grounding prong. The wide blade or the
third prong is provided for your safety. If the provided plug does not fit into
your outlet, consult an electrician for replacement of the obsolete outlet.
11. Protect the power cord from being walked on or pinched particularly at plugs,
convenience receptacles, and the point where they exit from the apparatus.
12. Only use attachments/accessories specified by the manufacturer.
13. Unplug this apparatus during lightning storms or when unused for long
periods of time.
14. Refer all servicing to qualified service personnel. Servicing is required when
the apparatus has been damaged in any way, such as power-supply cord
or plug is damaged, liquid has been spilled or objects have fallen into the
apparatus; and/or the apparatus has been exposed to rain or moisture and
does not operate normally, or has been dropped.
15. This product should be operated only from the type of power source
indicated on the marking label. If you are not sure of the type of power supply
to your home, consult your appliance dealer or local power company. For
products intended to operate from battery power, or other sources, refer to
the operating instructions.
BT1000seriesIM1274_18Jun_V25.indd 16
16
19/06/2014 2:55 PM
BT1000seriesIM1274_18Jun_V25.indd 17
ENGLISH
16. Do not overload wall outlets and extension cords as this can result in a risk of
fire or electric shock. Use only power source as indicated.
17. Never push objects of any kind into this product through openings as they
may touch dangerous voltage points or short out parts that could result in fire
or electric shock. Never spill or spray any type of liquid on the product.
18. Do not attempt to service this product yourself as opening or removing
covers may expose you to dangerous voltage or other hazards. Refer all
servicing to qualified service personnel.
19. Upon completion of any service or repairs to this product, ask the service
technician to perform safety checks to determine that the product is in proper
operating condition.
20. Batteries shall not be exposed to excessive heat such as sunshine, fire or the
like.
21. Attention should be drawn to the environmental aspects of battery disposal.
22. Use the apparatus in moderate climates. (Work temperature -20˚C~ +35˚C)
23. The socket-outlet shall be installed near the equipment and must be easily accessible.
24. The AC/DC adaptor should not be obstructed OR should be easily accessed during intended use.
25. To completely disconnect the power input, the AC/DC adaptor shall be
disconnected from the mains, as the disconnecting part is the AC/DC
adaptor.
26. The apparatus and AC/DC adaptor shall not be exposed to dripping or
splashing and no objects filled with liquids , such as vases, shall be placed
near them.
27. Excessive sound pressure from earphones and headphones can cause
hearing loss.
28. “Maximum output voltage: ≤ 150 mV”.
29. At full power, listening to a music player for prolonged periods can damage
the user’s hearing.
17
19/06/2014 2:55 PM
UNPACKING THE DEVICE
ENGLISH
When unpacking, ensure that the following elements are included:
1 x Bluetooth® Sound Tower
1 x Remote control (CR2025 lithium type battery already inside)
1 x AC/DC adaptor
1 x Instruction manual
1 x 3.5mm Line In cable
1 x Twin male RCA cable
1 x Docking station for tablet or smartphone
WARNING: All packaging materials, such as tape, plastic sheets, wire ties and
tags are not part of this product and should be discarded.
POWER SOURCES
The Bluetooth® Sound Tower operates on AC~100-240V, 50/60Hz.
AC operation
1. Check that the unit is switched off.
2. Insert the small end of the AC adapter into the DC IN socket at the back of
the unit.
3. Plug the other end of the AC adapter into any convenient AC~100-240V,
50/60Hz power outlet.
AC Outlet
AC/DC adapter
NOTE:
• Only use the adapter supplied with the product. Do not use other adapter.
• The socket-outlet shall be installed near the equipment and shall be easily
accessible.
WARNING: Malfunction or loss of memory may be caused by strong frequency
interference or electrostatic discharge. Should any abnormal function occur,
unplug the AC adapter from the mains socket and plug it back in.
BT1000seriesIM1274_18Jun_V25.indd 18
18
19/06/2014 2:55 PM
6
7
1
2
8
9
10
3
11
12
4
13
14
5
15
1. POWER button
2. MEM/CLOCK button
3. TUN/MEM button
4. MUSIC button
5. TREBLE +/- buttons
6. SOURCE button
7. MUTE button
8. ALARM button
9. SLEEP button
10. TUN+/CLOCK+ button
11. TUN-/CLOCK- button
12. MOVIE button
13. VOICE button
14. BASS +/- buttons
15. VOLUME +/- buttons
ENGLISH
REMOTE CONTROL
Battery information
The first time you use the remote control, remove the battery tab located at the
rear of the unit.
Battery replacement
1. Open the battery compartment cover by
pressing the unlock switch to the right and then
sliding the battery holder out.
2. Remove the used battery and insert one
lithium CR2025 3V
type battery (included) as
illustrated.
3. Slide the battery cover in until it clicks firmly into place.
BT1000seriesIM1274_18Jun_V25.indd 19
19
19/06/2014 2:55 PM
ENGLISH
Non-rechargeable batteries are not to be recharged. Rechargeable batteries
are to be removed from the product before being charged. Rechargeable
batteries are only to be charged under adult supervision. Different types of
batteries or new and used batteries are not to be mixed. Only batteries of the
same or equivalent type as recommended are to be used. Batteries are to be
inserted with the correct polarity. Exhausted batteries are to be removed from
the product. The supply terminals are not to be short circuited. Do not throw
batteries into a fire. Remove the batteries if you are not going to use the unit
for a long period of time.
LOCATION OF CONTROLS
1
2 3 45
6
7
8
9
10
Front
1. POWER button
2. SOURCE button
3. TUN+ button
4. TUN- button
5. VOL+ button
6. VOL- button
7. Bluetooth® LED indicator
8. Remote sensor
9. LCD screen
10. Speaker
Back
11. USB charging port
12. FM antenna
13. AUX IN (right) jack
14. AUX IN (left) jack
15. LINE IN jack (3.5mm)
16. DC IN jack
11
12
14
BT1000seriesIM1274_18Jun_V25.indd 20
13
15
16
20
19/06/2014 2:55 PM
CHARGING A PERSONAL DEVICE USING THE BUILT-IN USB PORT
Notes: the personal device automatically charges when it is connected to the
Bluetooth® tower. Make sure the tower is supplied with power.
ENGLISH
1. Fix the device holder in the two holes on top of the Bluetooth® tower.
2. Place your device over the slot.
3. Connect one end of a cable (not included) to your device and the USB end to
the USB DC 5V
charging port at the rear of the tower.
BLUETOOTH® SET UP
The Bluetooth® word mark and logos are registered trademarks owned by
Bluetooth SIG, Inc. and any use of such marks by Lexibook® is under license.
Other trademarks and trade names are those of their respective owners.
© 2014 Bluetooth SIG, Inc.
Initial Pairing
1. Switch on the Bluetooth® tower and press the SOURCE button to select
Bluetooth® mode (bt). The Bluetooth® LED blinks while searching for a device.
2. Activate the Bluetooth® function on your personal device. Please refer to the
instruction manual of your device on how to active this function.
3. Select the Bluetooth® tower name and start pairing your personal device with
the tower.
4. Once both device and tower are connected, play an audio or a video file.
Adjust the sound volume level using the keys on your personal device or the
volume buttons of the tower or remote control.
Re-pairing
When the tower or Bluetooth® mode has been switched off:
1. Switch on the Bluetooth® tower and press the SOURCE button to select
Bluetooth® mode (bt).
2. The Bluetooth® LED blinks for 3 seconds and automatically finds the last
device it was paired with.
3. If no device is found, the Bluetooth® LED continues to blink. Press SOURCE
to select other modes: FM, AUX or L IN.
BT1000seriesIM1274_18Jun_V25.indd 21
21
19/06/2014 2:55 PM
ENGLISH
Notes:
1. The Bluetooth® tower only connects to one device at a time.
2. The maximum transmission between the Bluetooth® speaker and a device is
10 meters or 32 feet.
3. Interference may occur during playback when using the Bluetooth®
function near other wireless devices. If playback through Bluetooth® is
problematic, move the Bluetooth® speaker and the playback device to a
different location, or use the 3.5mm LINE IN jack instead of the
Bluetooth® function.
CLOCK FUNCTIONS
Setting the Clock
1. Press the POWER button to turn off (standby mode) the tower.
2. Press the MEM/CLOCK button on the remote control.
3. The left digits blink. Press the TUN+/CLOCK+ or TUN-/CLOCK- button on the
remote control to set the hour.
4. Press MEM/CLOCK again to confirm the hour setting. The minutes
automatically blink.
5. Press the TUN+/CLOCK+ or TUN-/CLOCK- button to set the minutes.
6. Press MEM/CLOCK again to confirm the minute setting.
Setting the Alarm (with a preset radio station)
1. Press the POWER button to switch on the unit.
2. Press the SOURCE button repeatedly to select the FM mode.
3. Select a desired radio frequency by pressing the TUN+/CLOCK+ or TUN-/
CLOCK- button.
4. Press the POWER button to turn off (standby mode) the tower.
5. Press the ALARM button on the remote. The time on the LCD screen blinks.
6. The left digits blink. Press the TUN+/CLOCK+ or TUN-/CLOCK- button on the
remote control to set the hour.
7. Press ALARM to confirm the hour setting. The minutes automatically blink.
8. Press the TUN+/CLOCK+ or TUN-/CLOCK- button to set the minutes.
9. Press ALARM again to confirm the minute setting.
10. The alarm goes off with the preset radio frequency at the set time.
11. To deactivate the alarm, press the alarm button on the remote for 3 seconds.
The bell symbol disappears.
Setting the Timer
1. Press the POWER button to switch on the unit.
2. Press the SLEEP button repeatedly to select a preset timer: 5, 10, 15, 30, 60
or 90 minutes.
3. The LCD automatically enters sleep mode when the timer has been reached.
BT1000seriesIM1274_18Jun_V25.indd 22
22
19/06/2014 2:55 PM
RADIO FUNCTIONS
Tuning the FM Radio
1. Press the POWER button to turn the unit on.
2. Press the SOURCE button to select FM radio mode.
3. Press the TUN+/CLOCK+ or TUN-/CLOCK- button to set a desired frequency.
4. Press and hold the TUN+/CLOCK+ or TUN-/CLOCK- button for an automatic
tuning.
Saving a Radio Station
1. Tune the FM radio.
2. Select a desired frequency and press the MEM/CLOCK button to save the
current radio station. Up to 30 stations can be saved to the Bluetooth® tower’s
memory.
ENGLISH
Note: for a good reception signal, adjust the FM wire antenna (included).
Listening to a Saved Radio Station
1. Press the POWER button to turn the unit on.
2. Press the SOURCE button to select FM radio mode.
3. Press the TUN/MEM button to cycle through saved radio stations.
BT1000seriesIM1274_18Jun_V25.indd 23
23
19/06/2014 2:55 PM
CONNECTING AN EXTERNAL DEVICE USING AUX IN
ENGLISH
1. Connect an AUX out cable to the AUX IN jacks at the back
of the tower.
2. Supply the tower with power. The standby indicator turns
on.
3. Press the POWER button to turn the tower on and press
the SOURCE button repeatedly to select AUX mode.
4. Turn on the connected external player and start playback.
5. Press the volume buttons to adjust the volume level.
6. Press the TREBLE buttons on the remote control to adjust
treble levels as desired.
7. Press the BASS buttons on the remote control to adjust
bass levels as desired.
8. Press the equalisation pre-set mode buttons MUSIC,
MOVIE or VOICE to turn on the pre-set equalisation effect
as desired.
9. Press the MUTE button to turn off the sound. Press again to resume.
10. When you are done listening, press the POWER button to turn off (standby
mode) the tower.
CONNECTING AN EXTERNAL DEVICE USING LINE IN
1. Connect one end of the LINE IN cable to the headphone
jack of your external device.
2. Connect the other end of the cable to the LINE IN jack at
the back of the tower.
3. Connect the tower to the power source. The standby
indicator turns on.
4. Press the POWER button to turn the tower on and press
the SOURCE button repeatedly to select LINE IN mode (L
In).
5. Turn on the connected external player and start playback.
6. Press the volume buttons to adjust the volume level.
7. Press the TREBLE buttons on the remote control to adjust
treble levels as desired.
8. Press the BASS buttons on the remote control to adjust bass levels as
desired.
9. Press the equalisation preset mode buttons MUSIC, MOVIE or VOICE to turn
on the preset equalisation effect as desired.
10. Press the MUTE button to turn off the sound, press again to resume.
11. When you are done listening, press the POWER button to turn off (standby
mode) the tower.
BT1000seriesIM1274_18Jun_V25.indd 24
24
19/06/2014 2:55 PM
SYMPTOM
SOLUTION
No power.
Check the connection of the AC/DC adapter between
the tower speaker and wall outlet.
No sound.
Check that the volume control is NOT at minimum.
Check that it is NOT set to mute.
The remote control
won’t work.
Inspect or replace the battery.
No sound from the
Bluetooth® mode.
Check if you have pairing or not.
ENGLISH
TROUBLESHOOTING GUIDE
Make sure there are no obstacles obscuring the front
of the tower speaker.
SPECIFICATIONS
General
AC/DC Adaptor
Power Consumption
Audio Power
Radio Coverage
Impedance of Speakers
Dimensions
Weight
BT1000seriesIM1274_18Jun_V25.indd 25
Input AC 100-240V, 50/60 Hz;
Output 18V
1.6A
>50W
Woofer: 30W
Left Channel: 10W
Right Channel: 10W
FM 87.5-108.0 MHz
Woofer: 8 Ohm, 25W x 2
Left Channel: 4 Ohm, 15W
Right Channel: 4 Ohm, 15W
100 x 23 x 18.5 cm
4.5 kg
25
19/06/2014 2:55 PM
CONFORMITY DECLARATION
We, Lexibook® S.A.
2, avenue de Scandinavie
91953 Courtaboeuf Cedex – France
Declare under our sole responsibility that the following product:
ENGLISH
Kind of product: Bluetooth® Tower
Type designation: BT1000series
Is in compliance with the following standards:
EN60065:2002+A1:2006+A11:2008+A2:2010+A12:2011
EN55013:2013
EN55020:2007+A11:2011
EN61000-3-2:2006+A1:2009+A2:2009
EN61000-3-3:2013
ETSI EN 300 328 V1.7.1
ETSI EN 301 489-1 V 1.9.2
ETSI EN 301 489-17 V 2.2.1
EN 62479:2010
We hereby declare that the above mentioned product is in compliance with the EMC
Directive (2004/108/EC), with the Low Voltage Directive (2006/95/EC) and with the
R&TTE Directive (1999/5/EC) of the European Commission.
0700
Yiu Wai Man
Product Development Manager
27/05/2014 (Hong Kong)
BT1000seriesIM1274_18Jun_V25.indd 26
26
19/06/2014 2:55 PM
MAINTENANCE
WARRANTY
This product is covered by our 2-years warranty.
For any claim under the warranty or after sale service, please contact your
distributor and present a valid proof of purchase. Our warranty covers any
manufacturing material and workmanship defect, with the exception of any
deterioration arising from the non-observance of the instruction manual or from
any careless action implemented on this item (such as dismantling, exposition to
heat and humidity, etc.). It is recommended to keep the packaging for any further
reference.
In a bid to keep improving our services, we could implement modification on the
colours and the details of the product shown on the packaging.
NOTE: Please keep this instruction manual, it contains important information.
ENGLISH
To prevent fire or shock hazard, disconnect your unit from the power source when
cleaning. The finish on your unit may be cleaned with a dust cloth and cared for
as other furniture. Use a soft, clean cloth moistened with plain, lukewarm water
to clean the exterior of the unit. Use caution when cleaning and wiping the plastic
parts. Mild soap and a damp cloth may be used on the front panel.
Reference: BT1000series
Designed and developed in Europe – Made in China
© 2014 LEXIBOOK®
United Kingdom & Ireland
For any further information, please call Helpline: 0808 1003015
www.lexibook.com
This product is not a toy.
Environmental Protection
Unwanted electrical appliances can be recycled and should not be discarded along with
regular household waste! Please actively support the conservation of resources and help
protect the environment by returning this appliance to a collection centre (if available).
BT1000seriesIM1274_18Jun_V25.indd 27
27
19/06/2014 2:55 PM
PRECAUCIONES DE SEGURIDAD
PRECAUCIÓN
RIESGO DE DESCARGA
ELÉCTRICA NO ABRIR
ESPAÑOL
PRECAUCIÓN: PARA REDUCIR EL RIESGO DE DESCARGA ELÉCTRICA,
NO RETIRE LA CUBIERTA (O PARTE TRASERA). NO HAY PIEZAS EN EL
INTERIOR SUSCEPTIBLES DE SER MANIPULADAS POR EL USUARIO.
EN CASO DE AVERÍA, SOLICITE ASISTENCIA TÉCNICA DE PERSONAL
CUALIFICADO.
El símbolo del rayo dentro de un triángulo equilátero,
advierte al usuario de la presencia de “tensiones
peligrosas”, sin aislamiento, en el interior del equipo,
que pueden ser de magnitud suficiente como para
constituir un riesgo de descarga eléctrica para las
personas.
El signo de Bexclamación
de un triángulo
Soludentro
tion
ENZENE
nettoyante
equilátero advierte al usuario
de la existencia de
instrucciones importantes de mantenimiento (revisión)
y funcionamiento en la literatura que acompaña al
equipo.
ADVERTENCIA:
• Para reducir riesgos de descarga eléctrica o de incendio, no exponga
este equipo a la lluvia o a la humedad.
• No exponga el equipo a goteras o salpicaduras, y no coloque sobre él
objetos con líquidos, como por ejemplo jarrones.
• El enchufe de red se utiliza como dispositivo de desconexión; debe
mantenerse accesible de manera que sea fácil desconectarlo en
cualquier momento.
• Para desconectar completamente el aparato de la red eléctrica, debe
desconectarse de la pared el enchufe de red.
BENZENE
Solution
nettoyante
PROTECTORES DE SOBRETENSIÓN
Solution
Solution
BENZENE
BENZENE
nettoyantela conexión a la red
Se recomienda utilizar
un protector
nettoyande
te sobretensión para
CA. Las tormentas y sobretensiones no están cubiertas por la garantía de este
producto.
BT1000seriesIM1274_18Jun_V25.indd 28
28
19/06/2014 2:55 PM
INSTRUCCIONES DE SEGURIDAD
LEA ESTA SECCIÓN ANTES DE UTILIZAR ESTE EQUIPO.
Antes de utilizar el equipo, asegúrese de leer con cuidado todas las instrucciones
de funcionamiento. Tenga en cuenta que estas son precauciones generales y puede
que no tengan aplicación a su equipo.
Lea estas instrucciones.
Guarde estas instrucciones.
Respete todas las advertencias.
Siga todas las instrucciones.
No utilice este producto cerca del agua o en un ambiente húmedo, por ejemplo
junto a una bañera, palangana de fregar, fregadero o cuba de lavado, ni sobre
una superficie húmeda, o cerca de una piscina.
6. Desenchufe el equipo de la red eléctrica antes de proceder a su limpieza. No
utilice detergentes líquidos ni de aerosol. Pueden dañar la pantalla. Utilice solo
un paño suave seco para limpiarlo.
7. En la carcasa y en la parte trasera o en la parte inferior se han dispuesto
rendijas y aberturas para proporcionar ventilación al equipo y asegurar así un
funcionamiento fiable y evitar el recalentamiento. Estas aberturas nunca deben
estar bloqueadas o cubiertas. Nunca obstruya las aberturas colocando el equipo
en una cama, sofá, alfombrilla o superficies similares. Este producto no debe
colocarse nunca cerca o sobre un radiador o cualquier otra fuente de calor.
Este producto no debe colocarse nunca en un habitáculo, como una librería o
un rack, a menos que se proporcione una ventilación adecuada o que se hayan
seguido las instrucciones del fabricante.
8. Mantenga una distancia mínima de 10 cm alrededor del aparato para asegurar
una ventilación suficiente.
9. El producto debe colocarse apartado de fuentes de calor, como radiadores,
calentadores, estufas u otros productos (incluyendo amplificadores) que
generen calor.
10. No anule la función de seguridad del enchufe polarizado o con toma de tierra.
Un enchufe polarizado tiene dos conectores planos, uno más ancho que el otro.
Un enchufe con toma de tierra tiene dos conectores más una tercera borna para
tierra. El conector plano más ancho o la tercera borna se proporcionan para su
seguridad. Si el enchufe suministrado no encaja en su enchufe de red, consulte
con un electricista para que sustituya el enchufe de tipo obsoleto.
11. Proteja el cable de alimentación para evitar que se pise o se pille,
particularmente en las zonas de los enchufes, enchufes auxiliares y en el lugar
por el que sale el cable del equipo.
12. Utilice únicamente los complementos o accesorios especificados por el
fabricante.
13. Desenchufe este equipo durante las tormentas eléctricas o cuando no se vaya a
utilizar durante un periodo largo de tiempo.
14. Confíe todas las reparaciones a personal de reparación cualificado. Es
necesaria la reparación cuando el equipo sufra cualquier tipo de daño, como
deterioro del cable de alimentación o del enchufe, caída de líquido sobre el
mismo, introducción de objetos dentro del equipo, o cuando el equipo haya
estado expuesto a la lluvia o a la humedad, o no funcione normalmente o se
haya dejado caer.
BT1000seriesIM1274_18Jun_V25.indd 29
ESPAÑOL
1. 2. 3. 4. 5. 29
19/06/2014 2:55 PM
ESPAÑOL
15. Este producto debe alimentarse únicamente con el tipo de alimentación eléctrica
indicada en la etiqueta. Si no está seguro del tipo de alimentación eléctrica
disponible en su hogar, consulte a su instalador o a la compañía de electricidad
local. Para productos que funcionan con pilas o con otro tipo de alimentación,
consulte las instrucciones de funcionamiento.
16. No sobrecargue los enchufes de la pared ni los cables de extensión, ya que
esto puede ser causa de incendios y de descargas eléctricas.
17. Nunca empuje ningún objeto a través de las aberturas del equipo, ya que puede
entrar en contacto con puntos de tensión peligrosa o producir cortocircuitos con
el consiguiente riesgo de incendio y de descarga eléctrica. Nunca emplee sobre
el equipo pulverizadores de ningún tipo y evite cualquier salpicadura.
18. No intente reparar este producto usted mismo; abrir o retirar las cubiertas le
expone a tensiones peligrosas y otros riesgos. Confíe todas las reparaciones a
personal de reparación cualificado.
19. Después de realizada cualquier revisión o reparación en este producto, solicite
al técnico que realice las comprobaciones de seguridad necesarias para
asegurar que el producto funciona en condiciones correctas.
20. Deberá evitarse exponer las pilas a temperaturas excesivamente elevadas tales
como las generadas por la acción de los rayos del sol o de las llamas.
21. Deberá prestarse atención al método de desecho de pilas y acumuladores para
así proteger el medioambiente.
22. Utilice únicamente el aparato cuando las temperaturas ambiente sean
moderadas. (Margen óptimo de temperatura ambiente de funcionamiento
-20˚C~ + 35˚C)
23. La toma de corriente debe estar instalada cerca del aparato y debe ser
fácilmente accesible.
24. El adaptador AC/DC no debe quedar estar obstruida O debe ser fácilmente
accesible durante el uso del aparato.
25. Para desconectar completamente la alimentación, el adaptador AC/DC debe
desconectarse de la toma de corriente, que se utiliza como dispositivo de
desconexión.
26. El aparato y el adaptador AC/DC no deben quedar expuestos a goteos ni
salpicaduras. Asimismo, no se debe colocar ningún objeto lleno de líquido,
como un jarrón, cerca de ellos.
27. Una potencia de sonido excesiva durante la utilización de audífonos y
auriculares puede dañar seriamente su capacidad auditiva.
28. “Tensión máxima de salida: ≤ 150 mV”.
29. La escucha a plena potencia de un reproductor de música por periodos
prolongados puede perjudicar la capacidad auditiva del usuario.
BT1000seriesIM1274_18Jun_V25.indd 30
30
19/06/2014 2:55 PM
DESEMBALAJE DEL PRODUCTO
Cuando desembale el equipo, asegúrese de que están incluidos los siguientes
elementos:
1 x Torre de Sonido Bluetooth®
1 x Mando a distancia (con una pila de litio de tipo CR2025 instalada en su
interior)
1 x Adaptador de corriente
1 x Manual de instrucciones
1 x Cable LINE IN de 3,5mm
1 x Cable RCA de doble macho
1 x Estación de acoplamiento para tableta o smartphone
¡ADVERTENCIA! Todos los elementos utilizados para el embalaje, como por
ejemplo cintas, recubrimientos plásticos, ataduras metálicas y etiquetas no
forman parte del aparato y deberán desecharse.
ESPAÑOL
ALIMENTACIÓN ELÉCTRICA
El torre de sonido Bluetooth® funciona con la red eléctrica CA~100-240V,
50/60Hz.
Funcionamiento CA
1. Compruebe que el equipo esté apagado.
2. Introduzca el extremo pequeño del cable CA en el conector de entrada de
CA en la parte trasera de la unidad.
3. Enchufe el otro extremo del cable CA en una toma de red adecuada de
CA~100-240V, 50/60Hz.
Toma de red
Adaptador CA/CC
Nota:
• Utilice únicamente el adaptador de corriente suministrado con el producto. No
utilice ningún otro adaptador.
• La toma de corriente deberá estar instalada cerca del aparato y estar fácilmente
accesible durante su utilización.
¡ADVERTENCIA! Las descargas electrostáticas o interferencias de una
frecuencia fuerte podrán causar el funcionamiento anormal del aparato o la
pérdida de los datos almacenados en la memoria. En caso de observarse algún
funcionamiento anormal, desenchufe el cable de alimentación eléctrica de la
toma de corriente y vuelva a enchufarlo.
BT1000seriesIM1274_18Jun_V25.indd 31
31
19/06/2014 2:55 PM
MANDO A DISTANCIA
6
7
1
2
8
9
10
3
11
12
ESPAÑOL
4
13
14
5
15
1. Botón POWER (Encendido)
2. Botón MEM/CLOCK
3. Botón TUN/MEM
4. Botón MUSIC
5. Botones TREBLE +/6. Botón SOURCE (Fuente)
7. Botón MUTE (Desactivación del
sonido)
8. Botón ALARM (Alarma)
9. Botón SLEEP
10. Botón TUN+/CLOCK+
11. Botón TUN-/CLOCK12. Botón MOVIE
13. Botón VOICE
14. Botones BASS +/15. Botones VOLUME +/-
Información relacionada con las pilas
La primera vez que vaya a utilizar el mando a distancia, retire la lengüeta de
protección de la pila situada en la parte trasera
del mando.
Sustitución de las pila
1. Abra la tapa del compartimento de la pila
desplazando hacia la derecha el interruptor de
desbloqueo y, a continuación, deslice el soporte de
la pila para extraerlo del mando.
2. De estar instalada, retire del aparato la pila
agotada e instale una pila nueva de litio de 3 V
de tipo botón, referencia
CR2025 (incluida) de la manera indicada en la ilustración.
3. A continuación, deslice hacia dentro la tapa de la pila hasta encajarla
firmemente en su sitio. Sonará un chasquido para indicar que la tapa ha encajado
correctamente.
BT1000seriesIM1274_18Jun_V25.indd 32
32
19/06/2014 2:55 PM
No intentes nunca recargar baterías no recargables. Para cargar las
pilas recargables, retíralas antes del equipo. Las pilas recargables deben
recargarse siempre bajo la supervisión de un adulto. No mezcles pilas de
distinto tipo, o pilas nuevas con pilas usadas. Utiliza únicamente baterías del
tipo recomendado o equivalente. Cuida siempre de colocar las baterías en la
posición correcta, de acuerdo con la polaridad indicada en el compartimento.
Retira de la unidad las pilas gastadas. No permitas que entren en contacto
eléctrico los terminales de la pilas. No tires las pilas al fuego. Antes de
almacenar la unidad por un periodo largo de tiempo, retira la pila.
1
2 3 45
6
7
8
9
10
Frontal
1. Botón POWER (Encendido)
2. Botón SOURCE (Fuente)
3. Botón TUN+
4. Botón TUN5. Botón VOL+
6. Botón VOL7. Testigo LED Bluetooth®
8. Sensor de la señal de mando a distancia
9. Pantalla
10. Altavoces
ESPAÑOL
SITUACIÓN DE LOS CONTROLES
Trasera
11. Puerto de carga USB
12. Antena FM
13. Conector de entrada AUX IN (derecho)
14. Conector de entrada AUX IN (izquierdo)
15. Conector de entrada LINE IN (3,5mm)
16. Toma de alimentación DC
11
12
14
BT1000seriesIM1274_18Jun_V25.indd 33
13
15
16
33
19/06/2014 2:55 PM
RECARGA DE UN DISPOSITIVO A TRAVÉS DEL PUERTO USB
1. Fije el soporte del dispositivo en los dos agujeros de la parte superior de la
torre Bluetooth®.
2. Coloque el dispositivo en la ranura.
3. Conecte un extremo del cable (no incluido) a su dispositivo y el extremo USB
en el puerto de carga USB de DC 5V
situado en la parte trasera de la torre.
Notas: el dispositivo se cargará automáticamente al conectarlo a la torre
Bluetooth®. Compruebe que la torre esté conectada al suministro de corriente.
ESPAÑOL
INSTALACIÓN DEL BLUETOOH®
La marca y logotipos de la palabra Bluetooth® son marcas comerciales
registradas propiedad de Bluetooth SIG, Inc. y cualquier uso de tales marcas por
parte de Lexibook® se hace bajo licencia. Otras marcas y nombres comerciales
son de sus respectivos propietarios.
© 2014 Bluetooth SIG, Inc.
Emparejamiento inicial
1. Encienda la torre Bluetooth® y pulse el botón SOURCE para seleccionar el
modo Bluetooth® (bt). El testigo LED de Bluetooth® centellea mientras busca un
dispositivo.
2. Active la función de Bluetooth® en su dispositivo personal. Consulte el manual
de instrucciones de su dispositivo para obtener información acerca de cómo
activar esta función.
3. Seleccione el nombre del torre Bluetooth®. Inicie el emparejamiento de su
dispositivo con la torre.
4. Una vez conectado el dispositivo a la torre, inicie la reproducción de un archivo
de audio o vídeo. Ajuste el nivel del volumen con los controles de su dispositivo o
con los botones del volumen en la torre o el mando a distancia.
BT1000seriesIM1274_18Jun_V25.indd 34
34
19/06/2014 2:55 PM
ESPAÑOL
Reemparejamiento
Cuando se apague la torre o se desactive el modo Bluetooth®:
1. Encienda la torre Bluetooth® y pulse el botón SOURCE para seleccionar el
modo Bluetooth® (bt).
2. El testigo LED del Bluetooth® centelleará durante 3 segundos y encontrará
automáticamente el último dispositivo con el que estuvo emparejado.
3. Si no encuentra ningún dispositivo, el testigo LED del Bluetooth® continuará
centelleando. Pulse SOURCE para seleccionar otros modos: FM, AUX o L IN.
Notas:
1. La torre Bluetooth® solo se puede conectar a un dispositivo a la vez.
2. El alcance máximo de transmisión entre el altavoz Bluetooth® y el dispositivo
es de 10 metros (32 pies).
3. Pueden producirse interferencias durante la reproducción cuando utiliza
la función Bluetooth® cerca de otros dispositivos. Si la reproducción a través
de la señal Bluetooth® muestra problemas, mueva el altavoz Bluetooth® y el
dispositivo de reproducción a otro lugar, o utilice una conexión LINE IN de 3,5
mm en lugar de la función Bluetooth®.
FUNCIONES DEL RELOJ
Ajuste del reloj
1. Pulse POWER para apagar la torre (modo de espera).
2. Pulse MEM/CLOCK en el mando a distancia.
3. Los dígitos de la izquierda centellearán. Pulse TUN+/CLOCK+ o TUN-/
CLOCK- en el mando a distancia para ajustar la hora.
4. Pulse MEM/CLOCK otra vez para confirmar la hora seleccionada. Los minutos
centellearán automáticamente.
5. Pulse TUN+/CLOCK+ o TUN-/CLOCK- en el mando a distancia para ajustar
los minutos.
6. Pulse MEM/CLOCK otra vez para confirmar los minutos.
Ajuste de la alarma (con una emisora presintonizada)
1. Pulse POWER para encender la unidad.
2. Pulse SOURCE reiteradamente hasta seleccionar el modo FM.
3. Pulse TUN+/CLOCK+ o TUN-/CLOCK- para seleccionar una frecuencia de
radio.
4. Pulse POWER para apagar la torre (modo de espera).
5. Pulse ALARM en el mando a distancia. La hora de la pantalla LCD centelleará.
6. Los dígitos de la izquierda centellearán. Pulse TUN+/CLOCK+ o TUN-/
CLOCK- en el mando a distancia para ajustar la hora.
7. Pulse ALARM para confirmar la hora ajustada. Los minutos centellearán
automáticamente.
BT1000seriesIM1274_18Jun_V25.indd 35
35
19/06/2014 2:55 PM
8. Pulse TUN+/CLOCK+ o TUN-/CLOCK- en el mando a distancia para ajustar
los minutos.
9. Pulse ALARM otra vez para confirmar los minutos ajustados.
10. La alarma se activará con la emisora presintonizada a la hora establecida.
11. Para desactivar la alarma, pulsa el botón de la alarma en el mando a
distancia durante 3 segundos (el símbolo de la campana desaparece).
Ajuste del temporizador
1. Pulse POWER para encender la unidad.
2. Pulse SLEEP reiteradamente hasta que seleccionar el tiempo preestablecido
del temporizador: 5, 10, 15, 30, 60 o 90 minutos.
3. La pantalla se apagará automáticamente cuando transcurra el tiempo
seleccionado del temporizador.
FUNCIONES DE RADIO
ESPAÑOL
Nota: ajuste la antena FM (incluida) para mejorar la recepción de la señal.
Sintonización de la radio FM
1. Pulse POWER para encender la unidad.
2. Pulse SOURCE hasta seleccionar el modo de radio FM.
3. Pulse TUN+/CLOCK+ o TUN-/CLOCK- para seleccionar una frecuencia.
4. Mantenga pulsado TUN+/CLOCK+ o TUN-/CLOCK- para sintonizar con una
emisora automáticamente.
Guardar una emisora de radio
1. Seleccione el modo de radio FM.
2. Seleccione una frecuencia de radio y pulse MEM/CLOCK para guardar la
emisora de radio. Se pueden guardar hasta 30 emisoras en la memoria de la
torre Bluetooth®.
Escuchar una emisora de radio sintonizada
1. Pulse POWER para encender la unidad.
2. Pulse SOURCE hasta seleccionar el modo de radio FM.
3. Pulse TUN/MEM para saltar de una emisora de presintonizada a otra.
BT1000seriesIM1274_18Jun_V25.indd 36
36
19/06/2014 2:55 PM
1. Conecte un cable de audio a la toma AUX IN de la parte trasera de la torre.
2. Encienda la torre. El testigo de encendido se encenderá.
3. Pulse POWER para encender la torre y pulse SOURCE
reiteradamente hasta seleccionar el modo AUX.
4. Encienda el reproductor externo y inicie la reproducción.
5. Pulse los botones del volumen para ajustar el nivel del
volumen.
6. Pulse los botones de TREBLE en el mando a distancia
para ajustar el nivel de agudos.
7. Pulse los botones de BASS en el mando a distancia para
ajustar el nivel de graves.
8. Pulse los botones de preecualizaciones MUSIC,
MOVIE o VOICE para activar el efecto de ecualización
correspondiente.
9. Pulse MUTE para desactivar el sonido. Púlselo otra vez
para volver a activarlo.
10. Cuando termina de escuchar música, pulse POWER
para apagar la torre modo de espera).
ESPAÑOL
CONEXIÓN DE UN DISPOSITIVO EXTERNO MEDIANTE AUX IN
CONEXIÓN DE UN DISPOSITIVO EXTERNO MEDIANTE LINE IN
1. Conecte un extremo del cable LINE IN a la toma de
auriculares de su dispositivo externo.
2. Conecte el otro extremo a la toma LINE IN de la parte
trasera de la torre.
3. Encienda la torre. El testigo de encendido se encenderá.
4. Pulse POWER para encender la torre y pulse SOURCE
reiteradamente hasta seleccionar el modo LINE IN (L ln).
5. Encienda el reproductor externo y inicie la reproducción.
6. Pulse los botones del volumen para ajustar el nivel del
volumen.
7. Pulse los botones de TREBLE en el mando a distancia
para ajustar el nivel de agudos.
8. Pulse los botones de BASS en el mando a distancia para
ajustar el nivel de graves.
9. Pulse los botones de preecualizaciones MUSIC, MOVIE o VOICE para activar
el efecto de ecualización correspondiente.
10. Pulse MUTE para desactivar el sonido. Púlselo otra vez para volver a
activarlo.
11. Cuando termina de escuchar música, pulse POWER para apagar la torre
(modo de espera).
BT1000seriesIM1274_18Jun_V25.indd 37
37
19/06/2014 2:55 PM
RESOLUCIÓN DE PROBLEMAS
SÍNTOMA
SOLUCIÓN
No hay alimentación.
Compruebe la conexión del adaptador de
alimentación entre el altavoz de torre y la toma de
corriente.
No hay sonido.
Compruebe que el volumen NO esté ajustado al
mínimo.
Compruebe que no el sonido NO esté desactivado.
ESPAÑOL
El mando a distancia
no funciona.
Inspeccione el estado de las pilas o reemplácelas.
Asegúrese de que no haya obstáculos entre la parte
frontal del altavoz y el mando a distancia.
No se escucha
nada en el modo
Bluetooth®.
Compruebe si los dispositivos están emparejados.
ESPECIFICACIONES
General
Adaptador CA
Consumo eléctrico
Potencia acústica Banda de radiofrecuencia Impedancia de los altavoces
Dimensiones
Peso
BT1000seriesIM1274_18Jun_V25.indd 38
Entrada CA 100-240V, 50/60 Hz; Salida DC 18V
>50W
Woofer: 30W
Canal izquierdo: 10W
Canal derecho: 10W
FM 87.5-108.0 MHz
Woofer: 8 Ohm, 25W x 2
Canal izquierdo: 4 Ohm, 15W
Canal derecho: 4 Ohm, 15W
100 x 23 x 18.5 cm
4,5 kg
1,6A
38
19/06/2014 2:55 PM
DECLARACIÓN DE CONFORMIDAD
Lexibook® S.A.
2, avenue de Scandinavie
91953 Courtaboeuf Cedex, Francia
Declara bajo su total responsabilidad que el siguiente producto:
Tipo de producto: Torre de Sonido Bluetooth®
Designación de tipo: BT1000series
Está en conformidad con las siguientes normas:
ESPAÑOL
EN60065:2002+A1:2006+A11:2008+A2:2010+A12:2011
EN55013:2013
EN55020:2007+A11:2011
EN61000-3-2:2006+A1:2009+A2:2009
EN61000-3-3:2013
ETSI EN 300 328 V1.7.1
ETSI EN 301 489-1 V 1.9.2
ETSI EN 301 489-17 V 2.2.1
EN 62479:2010
Por la presente declaramos que el producto mencionado anteriormente está
en conformidad con la directiva sobre compatibilidad electromagnética (EMC)
(2004/108/CE), con la directiva sobre baja tensión (2006/95/CE) y con la
directiva sobre equipos de radio y terminales de telecomunicaciones (R&TTE)
(1999/5/CE) de la Comisión Europea.
Yiu Wai Man
Gerente de desarrollo de productos
27/05/2014 (Hong Kong)
0700
MANTENIMIENTO
Para evitar fuego o peligro de descarga eléctrica, desconecta la unidad de la red
eléctrica de CA antes de proceder a su limpieza. El acabado de la unidad puede
limpiarse con un paño de polvo y requiere los mismos cuidados que cualquier
otro aparato. Utiliza un paño blando, limpio, humedecido con agua natural tibia
para limpiar el exterior de la unidad. Ten cuidado cuando limpies y frotes las
partes de plástico. Para el panel frontal puedes utilizar un paño húmedo y jabón
suave.
BT1000seriesIM1274_18Jun_V25.indd 39
39
19/06/2014 2:55 PM
GARANTÍA
Este producto tiene una garantía de 2 años.
Para cualquier reclamación sobre la garantía o servicio posventa, contacte con
su distribuidor y presente una prueba válida de compra. Nuestra garantía cubre
cualquier defecto de fabricación por material o por mano de obra, con excepción
de cualquier deterioro que resulte de la inobservancia de las instrucciones de
este manual, o de alguna acción imprudente realizada sobre la unidad (como
desmontarla, exposición al calor o a la humedad, etc.). Se recomienda conservar
el embalaje para consultas en el futuro.
En nuestro compromiso por mejorar nuestros servicios, podrían haberse
realizado modificaciones en los colores y detalles del producto mostrado en el
embalaje.
NOTA: Conserve este manual de instrucciones ya que contiene información
importante.
ESPAÑOL
Referencia: BT1000series
Diseñado y desarrollado en Europa – Fabricado en China
© 2014 LEXIBOOK®
España
Servicio atención al cliente: 902 760 049
www.lexibook.com
Este producto no es un juguete.
Protección medioambiental
¡Los aparatos eléctricos pueden ser reciclados y no deben ser desechados junto con la
basura doméstica habitual! Apoye activamente el aprovechamiento racional de los recursos
y ayude a proteger el medio ambiente enviando este producto a un centro de recolección
para reciclaje (en caso de estar disponible).
BT1000seriesIM1274_18Jun_V25.indd 40
40
19/06/2014 2:55 PM
PRECAUÇÕES DE SEGURANÇA
CUIDADO
RISCO DE CHOQUE
ELÉCTRICO NÃO ABRIR
CUIDADO: PARA REDUZIR O RISCO DE CHOQUE ELÉCTRICO, NÃO
RETIRE A COBERTURA DIANTEIRA OU TRASEIRA. NÃO EXISTEM PEÇAS
QUE POSSAM SER REPARADAS PELO UTILIZADOR NO INTERIOR. A
REPARAÇÃO DEVERÁ SER FEITA POR PESSOAL QUALIFICADO.
O ponto de exclamação dentro de um triângulo
Solution
BENZENE
nettoyante o utilizador da presença
equilátero serve
para alertar
de instruções de funcionamento e manutenção
importantes (reparação) nos manuais que
acompanham o aparelho.
AVISO:
• Para reduzir o risco de fogo ou de choque eléctrico, não exponha este
aparelho à chuva ou humidade.
• O aparelho não deverá ser exposto a pingos ou borrifos e não deve
colocar objectos com líquidos, como vasos, em cima do aparelho.
• A ficha é usada como sistema para desligar o aparelho e esta deverá
estar sempre em boas condições de funcionamento.
• Para desligar completamente o aparelho da alimentação, deverá retirar
por completo a ficha da tomada.
PORTUGUÊS
O trovão com uma seta dentro de um triângulo
equilátero serve para avisar o utilizador da presença
de “voltagem perigosa” sem isolamento dentro da
estrutura do produto, que pode ser suficiente para
constituir risco de choque eléctrico.
BENZENE
Solution
nettoyante
PROTECÇÃO CONTRA ONDULAÇÃO DE CORRENTE
Recomendamos que use uma protecção contra ondulação de corrente. As
Solution
Solution NÃO
BESÃO
NZENE abrangidas
BENZEN
trovoadas e ondulações
de
pela nossa garantia
E corrente
nettoyante
nettoyante
do produto.
BT1000seriesIM1274_18Jun_V25.indd 41
41
19/06/2014 2:55 PM
INSTRUÇÕES DE SEGURANÇA
POR FAVOR, LEIA ANTES DE UTILIZAR ESTE EQUIPAMENTO.
Antes de usar a unidade, certifique-se de que lê com atenção todas as
instruções de funcionamento. Tenha em conta que estas são precauções gerais
e podem não abranger a sua unidade.
1. 2. 3. 4. 5. PORTUGUÊS
Leia estas instruções.
Guarde estas instruções.
Preste atenção a todos os avisos.
Siga todas as instruções.
Não use este produto perto de água ou humidade, por exemplo, perto de
uma banheira, lavatório, lava-loiça ou tina, numa cave húmida ou perto de
uma piscina.
6. Desligue a ficha deste produto da tomada antes de proceder à limpeza. Não
use produtos de limpeza líquidos nem aerossóis. Estes podem danificar o
ecrã. Use apenas um pano seco para proceder à limpeza.
7. As ranhuras e entradas na estrutura e na parte traseira ou inferior existem
para a ventilação, para assegurar um funcionamento correcto do produto
e para o proteger do sobreaquecimento. Estas aberturas não podem ser
bloqueadas nem cobertas. As aberturas nunca devem ser bloqueadas,
colocando o produto numa cama, sofá, tapete ou outra superfície
semelhante. Este produto nunca deve ser colocado perto ou por cima de
um radiador ou outra fonte de calor. Este produto não deve ser colocado
em locais como estantes ou grelhas, a não ser que exista uma ventilação
adequada, ou se as instruções do fabricante forem seguidas.
8. Deixe uma distância mínima de 10 cm em redor do aparelho para uma
ventilação adequada.
9. Não coloque o aparelho perto de fontes de calor, como radiadores,
registadores de calor, fornos ou outros aparelhos (incluindo amplificadores)
que produzam calor.
10. Não danifique a segurança da ficha polarizada ou com ligação à terra. Uma
ficha polarizada tem dois dentes, um maior do que o outro. Uma ficha com
ligação à terra tem dois dentes e um terceiro dente da ligação à terra. O
dente mais largo ou o terceiro dente existem para sua segurança. Se a ficha
fornecida não couber na sua tomada, consulte um electricista especializado
para proceder à substituição da tomada obsoleta.
11. Não deixe que passem por cima do fio da alimentação e proteja-o de dobras,
especialmente perto da ficha, receptáculos de conveniência e no local onde
o fio sai do aparelho.
12. Use apenas acessórios especificados pelo fabricante.
13. Retire a ficha deste aparelho da tomada durante tempestades ou quando
não for usado durante um longo período de tempo.
BT1000seriesIM1274_18Jun_V25.indd 42
42
19/06/2014 2:55 PM
BT1000seriesIM1274_18Jun_V25.indd 43
PORTUGUÊS
14. Consulte pessoal qualificado para proceder a todo o tipo de reparações. O
aparelho tem de ser reparado quando for danificado de algum modo, como
danos no fio ou na ficha, derrames de líquidos no aparelho, exposição do
aparelho à chuva ou humidade, ou se deixar cair o aparelho.
15. Este produto deverá ser utilizado apenas com o tipo de alimentação
indicado na etiqueta das especificações. Se não tiver a certeza do tipo
de alimentação existente em sua casa, consulte o seu revendedor ou
a companhia local de electricidade. Quanto a produtos criados para
funcionarem a pilhas, ou a outras fontes de energia, consulte as instruções
de funcionamento.
16. Não sobrecarregue tomadas de parede e extensões, pois isso pode dar
origem ao risco de fogo ou choque eléctrico.
17. Nunca prima qualquer tipo de objectos contra as entradas deste produto,
pois estes podem tocar em pontos de voltagem perigosa ou colocar alguma
peça em curto-circuito, podendo dar origem a fogo ou choques eléctricos.
Nunca derrame nem borrife qualquer tipo de líquido no produto.
18. Não tente reparar este produto sozinho, pois a abertura ou remoção das
coberturas pode expô-lo a voltagem perigosa ou outros perigos. Consulte
pessoal qualificado para proceder a qualquer tipo de reparação.
19. As pilhas não deverão ser expostas a calor em excesso, como luz directa do sol, fogo ou algo parecido.
20. Preste atenção aos aspectos ambientais da eliminação das pilhas.
21. Utilize o aparelho em climas moderados. (Temperatura de funcionamento
-20˚C~ + 35˚C)
22. A tomada deve ser instalada perto do equipamento e ser de fácil acesso.
23. O adaptador AC/DC não deve ficar obstruído E deve ser de fácil acesso durante a utilização.
24. Para desligar completamente a energia eléctrica o adaptador AC/DC deve ser desligado da tomada da parede já que o interruptor para desligar é o próprio adaptador AC/DC.
25. O aparelho e o adaptador AC/DC não devem ser expostos a pingos ou salpicos nem se devem colocar objecto com líquidos, como jarras, junto deles.
26. A pressão excessiva do som dos auscultadores e headphones pode dar origem a lesões auditivas.
27. “Voltagem máxima de saída: ≤ 150mV”.
28. Ouvir música no volume máximo durante períodos prolongados pode causar lesões auditivas no utilizador.
43
19/06/2014 2:55 PM
RETIRAR O APARELHO DA CAIXA
Quando retirar o aparelho da caixa, certifique-se de que os seguintes elementos
se encontram incluídos:
1 x Torre de Som com Bluetooth®
1 x Telecomando (pilha de lítio CR2025 no interior)
1 x Adaptador AC/DC
1 x Manual de instruções
1 x Cabo Line-in de 3,5mm
1 x Duplo cabo RCA macho
1 x Estação de acoplamento para tablet ou Smartphone
AVISO: Todos os materiais de empacotamento, como fita, películas de plástico,
arames e etiquetas não fazem parte da unidade e devem ser eliminados.
ALIMENTAÇÃO
O torre de som com Bluetooth® funciona a alimentação AC~100-240V, 50/60Hz.
PORTUGUÊS
Funcionamento AC
1. Certifique-se de que a unidade está desligada.
2. Insira a extremidade pequena do adaptador AC na entrada DC IN na parte
traseira da unidade.
3. Ligue a outra extremidade do adaptador AC em qualquer tomada adequada
AC~100-240V, 50/60Hz.
Tomada AC
Adaptador AC/DC
Nota:
• Use apenas o adaptador fornecido com o produto. Não use outro adaptador.
• A tomada de parede deverá estar perto do equipamento e ser facilmente
acessível.
AVISO: Pode haver um mau funcionamento ou perda de memória devido
a interferências fortes ou descargas electrostáticas. Caso ocorra algum
funcionamento anormal, retire a ficha da tomada e volte a ligá-la.
BT1000seriesIM1274_18Jun_V25.indd 44
44
19/06/2014 2:55 PM
6
7
1
2
8
9
10
3
11
12
4
13
14
5
15
1. Botão POWER (energia)
2. Botão MEM/CLOCK (mem/relógio)
3. Botão TUN/MEM (sintonizar/memória)
4. Botão MUSIC (música)
5. Botões TREBLE +/- (agudos +/-)
6. Botão SOURCE (fonte)
7. Botão MUTE (desligar o som)
8. Botão ALARM (despertador)
9. Botão SLEEP (adormecer)
10. Botão TUN+/CLOCK+ (sintonizar+/
relógio)
11. Botão TUN-/CLOCK- (sintonizar-/
relógio-)
12. Botão MOVIE (filme)
13. Botão VOICE (voz)
14. Botões BASS +/- (baixos +/-)
15. Botões VOLUME +/-
PORTUGUÊS
TELECOMANDO
Informação acerca das pilhas
A primeira vez que usar o telecomando, retire a aba das pilhas, que se encontra
na parte traseira da unidade.
Substituição das pilhas
1. Abra a tampa do compartimento das pilhas,
premindo o interruptor de desbloquear para a
direita e depois fazendo deslizar o suporte da
pilha para fora.
2. Retire a pilha gasta e insira uma pilha de lítio
CR2025 3V
(incluída), conforme ilustrado.
3. Faça deslizar a tampa do compartimento das pilhas até que volte a ficar
firmemente inserida no devido lugar.
BT1000seriesIM1274_18Jun_V25.indd 45
45
19/06/2014 2:55 PM
As pilhas não recarregáveis não podem ser recarregadas. As pilhas
recarregáveis têm de ser retiradas do produto antes de serem recarregadas.
As pilhas recarregáveis só podem ser recarregadas sob a supervisão de
um adulto. Não misture diferentes tipos de pilhas ou pilhas novas com
pilhas usadas. Utilize apenas pilhas do mesmo tipo ou equivalentes às
recomendadas. Coloque as pilhas com a polaridade correcta. As pilhas
gastas têm de ser retiradas do produto. Não coloque os terminais em curtocircuito. Não atire as pilhas para o fogo. Retire as pilhas se não utilizar o
produto durante um longo período de tempo.
LOCALIZAÇÃO DOS CONTROLOS
1
2 3 45
Parte dianteira
1. Botão POWER (energia)
2. Botão SOURCE (fonte)
3. Botão TUN+ (sintonizar+)
4. Botão TUN- (sintonizar-)
5. Botão VOL+
6. Botão VOL7. Indicador LED Bluetooth®
8. Sensor remoto
9. Ecrã
10. Altifalantes
6
PORTUGUÊS
7
8
9
Parte traseira
11. Porta de carregamento USB
12. Antena FM
13. Entrada AUX IN (direita)
14. Entrada AUX IN (esquerda)
15. Entrada LINE IN (3,5mm)
16. Entrada DC IN
10
11
12
14
BT1000seriesIM1274_18Jun_V25.indd 46
13
15
16
46
19/06/2014 2:55 PM
CARREGAR UM DISPOSITIVO PESSOAL USANDO A PORTA USB INCORPORADA
1. Fixe o suporte do dispositivo nos dois orifícios no topo da torre Bluetooth®.
2. Coloque o seu dispositivo na ranhura.
3. Ligue uma extremidade de um cabo (não incluído) ao seu dispositivo e a
extremidade USB à porta de carregamento USB DC 5V
na parte traseira
da torre.
Notas: O dispositivo pessoal carrega automaticamente quando está ligado à
torre Bluetooth®. Certifique-se de que a torre está ligada à alimentação.
CONFIGURAÇÃO DO BLUETOOTH®
PORTUGUÊS
A palavra Bluetooth® e logótipos são marcas registadas da Bluetooth SIG,
Inc. e qualquer uso de tais marcas por parte da Lexibook® é efectuado sob
licença. Outras marcas comerciais e nomes são propriedade dos respectivos
proprietários.
© 2014 Bluetooth SIG, Inc.
Emparelhamento inicial
1. Ligue a torre Bluetooth® e prima o botão SOURCE (fonte) para seleccionar
o modo Bluetooth® (bt). O LED do Bluetooth® pisca enquanto procura um
dispositivo.
2. Active a função Bluetooth® no seu aparelho pessoal. Consulte o manual de
instruções do seu aparelho para saber como activar esta função.
3. Seleccione o nome torre do Bluetooth®. Inicie o emparelhamento do seu
dispositivo pessoal à torre.
4. Quando o dispositivo e a torre estiverem conectados, inicie a reprodução de
um ficheiro de áudio ou vídeo. Ajuste o volume com os botões do seu dispositivo
pessoal ou os botões do volume na torre ou no telecomando.
Voltar a emparelhar
Quando o modo da torre ou do Bluetooth® for desligado:
1. Ligue a torre Bluetooth® e prima o botão SOURCE (fonte) para seleccionar o
modo Bluetooth® (bt).
BT1000seriesIM1274_18Jun_V25.indd 47
47
19/06/2014 2:55 PM
2. O LED Bluetooth® pisca durante 3 segundos e encontra automaticamente o
último dispositivo com que esteve emparelhado.
3. Se não encontrar qualquer dispositivo, o LED Bluetooth® continua a piscar.
Prima SOURCE (fonte) para seleccionar outros modos: FM, AUX ou L IN.
Notas:
1. A torre Bluetooth® só se conecta a um dispositivo de cada vez.
2. A transmissão máxima entre o altifalante Bluetooth® e um dispositivo é de 10
metros.
3. Podem ocorrer interferências durante a reprodução quando usar a função
Bluetooth® perto de outros aparelhos sem fios. Se tiver problemas de
reprodução através do Bluetooth®, mova o altifalante Bluetooth® e o dispositivo
de reprodução para um local diferente, ou use a entrada LINE IN de 3,5 mm em
vez da função Bluetooth®.
FUNÇÕES DO RELÓGIO
PORTUGUÊS
Acertar o relógio
1. Prima o botão POWER (energia) para desligar (modo de espera) a torre.
2. Prima o botão MEM/CLOCK (mem/relógio) no telecomando.
3. Os dígitos à esquerda começam a piscar. Prima o botão TUN+/CLOCK+
(sintonizar+/relógio+) ou TUN-/CLOCK- (sintonizar-/relógio-) no telecomando
para acertar as horas.
4. Prima de novo MEM/CLOCK (mem/relógio) para confirmar o acerto das horas.
Os minutos começam a piscar automaticamente.
5. Prima o botão TUN+/CLOCK+ (sintonizar+/relógio+) ou TUN-/CLOCK(sintonizar-/relógio-) no telecomando para acertar os minutos.
6. Prima de novo MEM/CLOCK (mem/relógio) para confirmar o acerto dos
minutos.
Acertar o despertador (com uma estação de rádio predefinida)
1. Prima o botão POWER (energia) para ligar a unidade.
2. Prima repetidamente o botão SOURCE (fonte) para seleccionar o modo FM.
3. Seleccione uma frequência de rádio desejada, premindo o botão TUN+/
CLOCK+ (sintonizar+/relógio+) ou TUN-/CLOCK- (sintonizar-/relógio-).
4. Prima o botão POWER (energia) para desligar (modo de espera) a torre.
5. Prima o botão ALARM (despertador) no telecomando. As horas no ecrã LCD
começam a piscar.
6. Os dígitos à esquerda começam a piscar. Prima o botão TUN+/CLOCK+
(sintonizar+/relógio+) ou TUN-/CLOCK- (sintonizar-/relógio-) no telecomando
para acertar as horas.
7. Prima ALARM (despertador) para confirmar o acerto das horas. Os minutos
começam a piscar automaticamente.
BT1000seriesIM1274_18Jun_V25.indd 48
48
19/06/2014 2:55 PM
8. Prima o botão TUN+/CLOCK+ (sintonizar+/relógio+) ou TUN-/CLOCK(sintonizar-/relógio-) no telecomando para acertar os minutos.
9. Prima de novo ALARM (despertador) para confirmar o acerto dos minutos.
10. O despertador desliga-se em simultâneo com a frequência de rádio
predefinida.
11. Para desactivar o despertador, prima o botão do despertador no telecomando
durante 3 segundos. O símbolo do sino desaparece.
Acertar o temporizador
1. Prima o botão POWER (energia) para ligar a unidade.
2. Prima repetidamente o botão SLEEP (adormecer) para seleccionar um
temporizador predefinido. 5, 10, 15, 30, 60 ou 90 minutos.
3. O LCD entra automaticamente no modo de espera quando o tempo do
temporizador terminar.
FUNÇÕES DO RÁDIO
Sintonizar o rádio FM
1. Prima o botão POWER (energia) para ligar a unidade.
2. Prima o botão SOURCE (fonte) para seleccionar o modo de rádio FM.
3. Prima o botão TUN+/CLOCK+ (sintonizar+/relógio+) ou TUN-/CLOCK(sintonizar-/relógio-) para escolher uma frequência desejada.
4. Prima e mantenha premido o botão TUN+/CLOCK+ (sintonizar+/relógio+) ou
TUN-/CLOCK- (sintonizar-/relógio-) para uma sintonização automática.
Guardar uma estação de rádio
1. Sintonize o rádio FM.
2. Seleccione uma frequência desejada e prima o botão MEM/CLOCK (mem/
relógio) para guardar a estação de rádio actual. Pode guardar até 30 estações
na memória da torre Bluetooth®.
PORTUGUÊS
Nota: Para uma boa recepção do sinal, ajuste o fio da antena FM (incluído).
Escutar uma estação de rádio guardada
1. Prima o botão POWER (energia) para ligar a unidade.
2. Prima o botão SOURCE (fonte) para seleccionar o modo de rádio FM.
3. Prima TUN/MEM (sintonizar/memória) para correr as estações de rádio
guardadas.
BT1000seriesIM1274_18Jun_V25.indd 49
49
19/06/2014 2:55 PM
LIGAR A UM DISPOSITIVO EXTERNO POR AUX IN
1. Ligue o cabo AUX OUT nas entradas AUX IN na parte traseira
da torre.
2. Ligue a torre à alimentação. O indicador de espera acende-se.
3. Prima o botão POWER (energia) para ligar a torre e prima
repetidamente o botão SOURCE (fonte) para seleccionar o
modo AUX.
4. Ligue o leitor externo conectado e inicie a reprodução.
5. Prima os botões do volume para ajustar o nível do volume.
6. Prima os botões TREBLE (agudos) no telecomando para
ajustar os agudos conforme desejado.
7. Prima os botões BASS (baixos) no telecomando para ajustar
os baixos conforme desejado.
8. Prima os botões do modo predefinido de equalização MUSIC
(música), MOVIE (filme) ou VOICE (voz) para ligar o efeito de
equalização predefinido, conforme desejado.
9. Prima o botão MUTE para desligar o som. Prima de novo para voltar a ligar o
som.
10. Quando terminar de utilizar o aparelho, prima o botão POWER (energia) para
desligar a torre.
PORTUGUÊS
LIGAR A UM DISPOSITIVO EXTERNO POR LINE IN
1. Ligue uma extremidade do cabo LINE IN à entrada dos
auscultadores do seu dispositivo externo.
2. Ligue a outra extremidade do cabo na entrada LINE IN na
parte traseira da torre.
3. Ligue a torre à alimentação. O indicador de espera
acende-se.
4. Prima o botão POWER (energia) para ligar a torre e prima
repetidamente o botão SOURCE (fonte) para seleccionar o
modo LINE IN (L In).
5. Ligue o leitor externo conectado e inicie a reprodução.
6. Prima os botões do volume para ajustar o nível do volume.
7. Prima os botões TREBLE (agudos) no telecomando para
ajustar os agudos conforme desejado.
8. Prima os botões BASS (baixos) no telecomando para ajustar os baixos
conforme desejado.
9. Prima os botões do modo predefinido de equalização MUSIC (música),
MOVIE (filme) ou VOICE (voz) para ligar o efeito de equalização predefinido,
conforme desejado.
10. Prima o botão MUTE para desligar o som. Prima de novo para voltar a ligar
o som.
11. Quando terminar de utilizar o aparelho, prima o botão POWER (energia) para
desligar a torre.
BT1000seriesIM1274_18Jun_V25.indd 50
50
19/06/2014 2:55 PM
RESOLUÇÃO DE PROBLEMAS
PROBLEMA
SOLUÇÃO
Não há energia.
Verifique a ligação do adaptador AC/DC entre a torre
e a tomada.
Não há som.
Certifique-se de que o controlo do volume NÃO está
no mínimo.
Certifique-se de que NÃO está na posição MUTE.
O telecomando não
funciona.
Verifique ou substitua as pilhas.
Não há som no modo
Bluetooth®.
Certifique-se de que efectuou o emparelhamento.
ESPECIFICAÇÕES
Gerais
Adaptador AC/DC
Consumo de energia
Potência de áudio Abrangência de rádio
Impedância dos altifalantes
Dimensões
Peso
BT1000seriesIM1274_18Jun_V25.indd 51
Entrada AC 100-240V, 50/60 Hz;
Saída DC 18V
1,6A
>50W
Woofer: 30W
Canal esquerdo: 10W
Canal direito: 10W
FM 87.5-108.0 MHz
Woofer: 8 Ohm, 25W x 2
Canal esquerdo: 4 Ohm, 15W
Canal direito: 4 Ohm, 15W
100 x 23 x 18.5 cm
4,5 kg
PORTUGUÊS
Certifique-se de que não existem obstáculos a tapar
a frente da torre.
51
19/06/2014 2:55 PM
DECLARAÇÃO DE CONFORMIDADE
Nós, Lexibook® S.A.
2, avenue de Scandinavie
91953 Courtaboeuf Cedex – França
Declaramos ao abrigo da nossa inteira responsabilidade que o seguinte produto:
Tipo de produto: Torre de Som com Bluetooth®
Designação do tipo: BT1000series
Está em conformidade com os seguintes padrões:
PORTUGUÊS
EN60065:2002+A1:2006+A11:2008+A2:2010+A12:2011
EN55013:2013
EN55020:2007+A11:2011
EN61000-3-2:2006+A1:2009+A2:2009
EN61000-3-3:2013
ETSI EN 300 328 V1.7.1
ETSI EN 301 489-1 V 1.9.2
ETSI EN 301 489-17 V 2.2.1
EN 62479:2010
Declaramos desta forma que o produto supra mencionado está em conformidade
com a Diretiva CEM (2004/108/CE), com a Diretiva “Baixa Tensão” (2006/95/CE) e
com a Diretiva ETRT (1995/5/CE) da Comissão Europeia.
Yiu Wai Man
Gerente de Desenvolvimento de Produto
27/05/2014 (Hongkong)
0700
MANUTENÇÃO
Para prevenir fogo ou perigo de choque, desligue a sua unidade da alimentação
quando proceder à limpeza. O acabamento na sua unidade pode ser limpo
com um pano do pó e pode tratá-lo tal como a qualquer peça de mobília. Use
um pano suave e limpo, ligeiramente embebido em água morna para limpar o
exterior da unidade. Tenha cuidado quando limpar e secar as peças de plástico.
Pode usar um pano ligeiramente embebido em água e detergente neutro para
limpar o painel dianteiro.
BT1000seriesIM1274_18Jun_V25.indd 52
52
19/06/2014 2:55 PM
GARANTIA
Este produto é abrangido pela nossa garantia de 2 anos.
Para utilizar a sua garantia ou o serviço pós-venda, por favor, contacte o seu
distribuidor e apresente uma prova de compra válida. A nossa garantia abrange
qualquer defeito de material ou de mão-de-obra, com a excepção de qualquer
deterioração devido à não observância do manual de instruções, ou de quaisquer
acções sem cuidado implementadas neste aparelho (como desmontar, expor
ao calor e à humidade, etc.). Recomendamos que guarde a caixa para futuras
referências.
Num esforço constante para melhorar os nossos serviços, podemos implementar
modificações nas cores e pormenores do produto apresentado na caixa.
NOTA: Por favor, guarde este manual de instruções, pois contém informações
importantes.
Referência: BT1000series
Criado e desenvolvido na Europa – Fabricado na China
© 2014 LEXIBOOK®
PORTUGUÊS
www.lexibook.com
Este produto não é um brinquedo.
Protecção Ambiental
Os aparelhos eléctricos indesejados podem ser reciclados e não deverão ser eliminados
juntamente com o lixo doméstico comum! Por favor, suporte activamente a conservação de
recursos e ajude a proteger o ambiente, devolvendo este aparelho num centro de recolha
(se disponível).
BT1000seriesIM1274_18Jun_V25.indd 53
53
19/06/2014 2:55 PM
PRECAUZIONI DI SICUREZZA
ATTENZION
PERICOLO DI SCOSSA
ELETTRICA NON APRIRE
ATTENZIONE: PER RIDURRE IL RISCHIO DI SCOSSA ELETTRICA: NON
RIMUOVERE IL COPERCHIO (O LA PARTE POSTERIORE). ALL’INTERNO
NON SONO PRESENTI PARTI SOSTITUIBILI DALL’UTENTE. PER
EVENTUALI MANUTENZIONI, RIVOLGERSI A PERSONALE DI ASSISTENZA
QUALIFICATO.
La freccia a forma di lampo all’interno di un triangolo
equilatero ha lo scopo di segnalare all’utente la
presenza di “tensione pericolosa” non isolata
all’interno del prodotto, di grandezza sufficiente da
costituire un rischio di folgorazione per le persone.
So
n
lutio
BENZENE
Il punto esclamativo
all’interno
di un triangolo
nettoyante
equilatero ha lo scopo di segnalare all’utente la
presenza di istruzioni importanti per il funzionamento
e la manutenzione nella documentazione che
accompagna il prodotto.
ITALIANO
AVVERTENZA:
• Per ridurre il rischio di incendio o di folgorazione, non esporre questo
prodotto a pioggia o umidità.
• L’apparecchio non deve essere esposto a gocciolamenti o spruzzi, e non
devono essere posti su di esso oggetti pieni d’acqua, ad es. vasi.
• La spina principale è utilizzata come dispositivo per il distacco, che dovrà
rimanere sempre raggiungibile facilmente.
• Per staccare completamente l’apparecchio dalla rete elettrica. staccare la
spina dalla presa di corrente.
BENZENE
Solution
nettoyante
LIMITATORI DI SOVRATENSIONE
Soluper
tion collegamenti AC.
Si consiglia di utilizzare
limitatore
Solution di sovratensione
BENZENE
BENZEun
nettoyante
NE
nettoyante
Lampi e picchi di corrente NON sono
coperti dalla garanzia del prodotto.
BT1000seriesIM1274_18Jun_V25.indd 54
54
19/06/2014 2:55 PM
ISTRUZIONI DI SICUREZZA
LEGGERE PRIMA DI UTILIZZARE L’APPARECCHIO.
Prima di utilizzare l’unità, leggere attentamente tutte le istruzioni operative. Notare
che si tratta di precauzioni generiche che possono non essere relative alla vostra
unità.
Leggere le istruzioni.
Conservare le istruzioni.
Prestare attenzione a tutte le avvertenze.
Seguire tutte le istruzioni.
Non utilizzare questo prodotto vicino all’acqua e in condizioni di umidità, ad
esempio: vicino ad una vasca da bagno, lavandino, lavello della cucina o
lavatoio; in una cantina umida o vicino ad una piscina.
6. Staccare il prodotto dalla presa di corrente prima di pulirlo. Non utilizzare
detergenti liquidi o vaporizzatori. Potrebbero danneggiare lo schermo.
Utilizzare soltanto un panno asciutto.
7. Le feritoie e le aperture nell’involucro e nella parte posteriore o sul fondo
hanno lo scopo di consentire la ventilazione, per garantire il funzionamento
affidabile del prodotto e per proteggerlo dal surriscaldamento. Tali aperture
non devono essere bloccate o coperte. Le aperture non devono essere mai
bloccate posizionando il prodotto su un letto, divano, tappeto o superficie
analoga. Il prodotto non deve mai essere posizionato vicino o su un radiatore
o altra fonte di calore. Questo prodotto non deve essere posizionato in
un mobile chiuso, come una libreria o un mobile con ante a meno che sia
garantita la ventilazione corretta o che siano rispettate le istruzioni del
costruttore.
8. Distanza minima: 10 cm dall’apparecchio, per una ventilazione sufficiente.
9. Non installare vicino a fonti di calore vicino a fonti di calore quali radiatori,
termoconvettori, stufe o altri apparecchi (compresi gli amplificatori) che
producono calore.
10. Non annullare la sicurezza fornita dalla spina polarizzata o con messa a terra.
La spina polarizzata ha due rebbi, uno dei quali distanziato dall’altro. La spina
con messa a terra ha due rebbi e un terzo per la messa a terra. Il terzo rebbo
è fornito per garantire la sicurezza. Se la spina in dotazione non si adatta alla
presa di corrente, consultate un elettricista per sostituire la presa di corrente
obsoleta.
11. Proteggere il cavo di alimentazione da calpestio o da schiacciamento,
in particolare vicino alla spina, alle prese e nel punto in cui esce
dall’apparecchio.
12. Utilizzare soltanto accessori specificati dal costruttore.
13. Staccare l’apparecchio dalla presa di corrente durante temporali o se non
utilizzato per periodi prolungati.
BT1000seriesIM1274_18Jun_V25.indd 55
ITALIANO
1. 2. 3. 4. 5. 55
19/06/2014 2:55 PM
ITALIANO
14. Per le riparazioni rivolgersi a personale qualificato. La riparazione è
necessaria quando l’apparecchio è stato danneggiato in qualsiasi modo,
ad es. quando il cavo di alimentazione o la spina sono danneggiati, è stato
rovesciato liquido o sono caduti oggetti sull’apparecchio, l’apparecchio è stato
esposto a pioggia o umidità e non funziona normalmente, oppure è caduto.
15. Questo prodotto deve essere collegato soltanto al tipo di alimentazione
indicato sulla targhetta. Se non si è certi del tipo di alimentazione della
propria casa, consultare il venditore di elettrodomestici o il fornitore di energia
elettrica. Per i prodotti funzionanti a batteria o da altre fonti di energia, fare
riferimento alle istruzioni per il funzionamento.
16. Non sovraccaricare prese di corrente e prolunghe in quanto ciò potrebbe
provocare rischio di incendio o folgorazione.
17. Non spingere oggetti di alcun tipo nel prodotto attraverso le aperture in quanto
potrebbero toccare punti di tensione pericolosi o cortocircuitare parte che
potrebbero provocare incendi o folgorazione. Non rovesciare o spruzzare
acqua o altri tipi di liquido sul prodotto.
18. Non tentare di riparare questo prodotto da soli in quanto aprire e togliere
i coperchi può esporvi a tensioni pericolose o altri pericoli. Rivolgersi a
personale qualificato per le riparazioni.
19. Dopo aver completato riparazioni o manutenzioni del prodotto, chiedere al
tecnico di eseguire controlli di sicurezza per verificare che il prodotto sia in
buone condizioni di funzionamento.
20. Non esporre le batterie a un calore eccessivo, ad esempio la luce del sole o
un fuoco.
21. Nel rispetto dell’ambiente, prestare attenzione al corretto smaltimento delle
batterie.
22. Usare l’apparecchio in climi moderati. (Temperatura di funzionamento -20˚C ~
+ 35˚C)
23. La presa elettrica deve trovarsi vicino all’apparecchio e deve essere
facilmente accessibile.
24. L’adattatore AC/DC non deve essere ostruito e deve essere facilmente
accessibile durante l’uso.
25. Per scollegare completamente l’alimentazione è necessario scollegare
l’adattatore AC/DC, poiché l’elemento che collega l’apparecchio alla rete è
l’adattatore AC/DC.
26. L’apparecchio e l’adattatore AC/DC non devono essere esposti a sgoccolii o
schizzi, e non devono essere collocati vicino a oggetti contenenti liquidi, come
vasi.
27. Un’eccessiva pressione sonora dalle cuffi e o dagli auricolari può provocare la
perdita dell’udito.
28. “Massima tensione di uscita: ≤ 150 mV”.
29. L’ascolto a piena potenza per periodi prolungati può danneggiare l’udito
dell’utente.
BT1000seriesIM1274_18Jun_V25.indd 56
56
19/06/2014 2:55 PM
APRIRE LA CONFEZIONE
Quando si apre la confezione, controllare che contenga i seguenti elementi:
1 x Altoparlante a torre Bluetooth®
1 x Telecomando (batteria al litio CR2025 già all’interno)
1 x Adattatore AC/DC
1 x Manuale di istruzioni
1 x Cavo in ingresso 3,5 mm
1 x Cavo maschio doppio RCA
1 x Docking station per tablet o smartphone
AVVERTENZA: tutti i materiali da imballaggio quali nastro adesivo, fogli di
plastica, cavi e linguette non fanno parte dal prodotto e vanno gettati.
ALIMENTAZIONE
Il altoparlante a torre Bluetooth® funziona da rete (AC~100-240V, 50/60Hz).
Funzionamento da rete
1. Controllare che l’unità sia spenta.
2. Inserire l’estremità piccola del adattatore AC nella presa DC IN sulla parte
posteriore dell’unità.
3. Inserire l’altra estremità del adattatore AC in una presa AC~100-240V,
50/60Hz adatta.
ITALIANO
Presa AC
adattatore AC/DC
Nota:
• Usare solo l’adattatore fornito con il prodotto. Non usare altri adattatori.
• La presa di corrente deve essere posizionata vicino all’apparecchiatura e deve
essere facilmente accessibile.
AVVERTENZA: Forti interferenze di frequenza o scariche elettrostatiche possono
causare malfunzionamenti o perdita di memoria. In caso di malfunzionamento,
togliere il cavo di alimentazione AC dalla presa di corrente e inserirlo
nuovamente.
BT1000seriesIM1274_18Jun_V25.indd 57
57
19/06/2014 2:55 PM
TELECOMANDO
6
7
1
2
8
9
10
3
11
12
4
13
14
5
15
1. Pulsante POWER
2. Pulsante MEM/CLOCK
3. Pulsante TUN/MEM
4. Pulsante MUSIC
5. Pulsanti TREBLE +/6. Pulsante SOURCE
7. Pulsante MUTE
8. Pulsante ALARM
9. Pulsante SLEEP
10. Pulsante TUN+/CLOCK+
11. Pulsante TUN-/CLOCK12. Pulsante MOVIE
13. Pulsante VOICE
14. Pulsanti BASS +/15. Pulsanti VOLUME +/-
ITALIANO
Informazioni sulla batteria
La prima volta che si utilizza il telecomando, rimuovere la linguetta della batteria
si trova sul retro dell’unità.
Sostituzione delle batterie
1. Aprire il coperchio del vano batteria premendo
la chiusura a destra e poi far uscire il supporto
della batteria.
2. Rimuovere la batteria utilizzata e inserire una
batteria al litio CR2025 da 3 V
(in dotazione)
come illustrato.
3. Far scorrere il coperchio della batteria fino a
quando non scatta saldamente in posizione.
BT1000seriesIM1274_18Jun_V25.indd 58
58
19/06/2014 2:55 PM
Le batterie non ricaricabili non devono essere ricaricate. Le batterie
ricaricabili devono essere tolte dal prodotto prima di essere ricaricate. Le
batterie ricaricabili devono essere ricaricate soltanto con la supervisione di un
adulto. Non utilizzare insieme batterie di tipo diverso oppure nuove e usate.
Si consiglia di utilizzare soltanto batterie dello stesso tipo o equivalenti.
Inserire le batterie con la polarità corretta. Le batterie esaurite devono essere
tolte dal prodotto. I terminali non devono essere cortocircuitati. Non gettare le
batterie nel fuoco. Togliere le batterie se non si intende utilizzare il prodotto
per un periodo di tempo prolungato.
POSIZIONE DEI COMANDI
2 3 45
6
7
8
9
Parte posteriore
11. Porta USB di ricarica12. Antenna FM
13. Ingresso AUX IN (destra)
14. Ingresso AUX IN (sinistra)
15. Ingresso LINE IN (3,5mm)
16. Ingresso alimentazione DC
10
ITALIANO
1
Parte anteriore
1. Tasto POWER
2. Tasto SOURCE
3. Tasto TUN+
4. Tasto TUN5. Tasto VOL+
6. Tasto VOL7. Spia Bluetooth®
8. Sensore telecomando
9. Display
10. Altoparlanti
11
12
14
BT1000seriesIM1274_18Jun_V25.indd 59
13
15
16
59
19/06/2014 2:55 PM
RICARICA DI UN DISPOSITIVO PORTATILE TRAMITE LA PORTA USB INTEGRATA
1. Installare il supporto per dispositivi nei due fori sulla parte superiore della torre
Bluetooth®.
2. Posizionare il dispositivo nell’alloggio.
3. Collegare un’estremità del cavo USB (non incluso) al dispositivo e l’altra
estremità alla porta USB DC 5V
sul retro della torre.
Note: il dispositivo portatile si ricarica automaticamente quando è collegato alla
torre Bluetooth®. Accertarsi che la torre sia collegata all’alimentazione.
CONFIGURAZIONE BLUETOOTH®
Il marchio e il logo Bluetooth® sono marchi depositati appartenenti a Bluetooth
SIG, Inc., e sono utilizzati da Lexibook® sotto licenza. Gli altri marchi commerciali
e i nomi commerciali appartengono alle rispettive società titolari.
© 2014 Bluetooth SIG, Inc.
ITALIANO
Appaiamento iniziale
1. Accendere la torre Bluetooth® e premere il pulsante SOURCE per selezionare
la modalità Bluetooth® (bt). La spia Bluetooth® lampeggia durante la ricerca dei
dispositivi.
2. Attivare la funzione Bluetooth® sul dispositivo. Per informazioni sull’attivazione
di questa funzione, consultare il manuale del dispositivo.
3. Selezionare il nome della torre Bluetooth®. Appaiare il dispositivo portatile con
la torre.
4. Quando il dispositivo e la torre sono collegati, avviare la riproduzione di un file
audio o video. Regolare il volume usando i pulsanti del dispositivo o i pulsanti del
volume sulla torre o sul telecomando.
Nuovo appaiamento
Se la torre o la modalità Bluetooth® sono stati spenti:
1. Accendere la torre Bluetooth® e premere il pulsante SOURCE per selezionare
la modalità Bluetooth® (bt).
BT1000seriesIM1274_18Jun_V25.indd 60
60
19/06/2014 2:55 PM
2. La spia Bluetooth® lampeggerà per 3 secondi e la torre troverà
automaticamente l’ultimo dispositivo a cui si è collegata.
3. Se non viene trovato alcun dispositivo, la spia Bluetooth® continuerà a
lampeggiare. Premere SOURCE per selezionare altre modalità: FM, AUX o L IN.
Note:
1. La torre Bluetooth® può collegarsi a un solo dispositivo alla volta.
2. Il raggio di trasmissione massimo tra la torre Bluetooth® e il dispositivo è pari
a 10 metri.
3. La vicinanza di altre dispositivi wireless può causare interferenze durante la
riproduzione tramite Bluetooth®. In tal caso, spostare la torre Bluetooth® e il
dispositivo in un’altra posizione o utilizzare il cavo LINE IN 3,5 mm invece della
funzione Bluetooth®.
FUNZIONI OROLOGIO
Impostare la sveglia (con una stazione radio preimpostata)
1. Premere il pulsante POWER per accendere la torre.
2. Premere ripetutamente il pulsante SOURCE per selezionare la modalità FM.
3. Selezionare la frequenza radio desiderata premendo il pulsante TUN+/
CLOCK+ o TUN-/CLOCK-.
4. Premere il pulsante POWER per spegnere la torre (modalità di standby).
5. Premere il pulsante ALARM sul telecomando. L’orario sul display lampeggerà.
6. Le cifre sulla sinistra lampeggeranno. Premere il pulsante TUN+/CLOCK+ o
TUN-/CLOCK- sul telecomando per impostare l’ora.
7. Premere ALARM per confermare l’impostazione dell’ora. I minuti
lampeggeranno automaticamente.
8. Premere il pulsante TUN+/CLOCK+ o TUN-/CLOCK- sul telecomando per
impostare i minuti.
9. Premere nuovamente ALARM per confermare l’impostazione dei minuti.
10. La sveglia accenderà la radio sulla frequenza preimpostata all’orario inserito.
11. Per disattivare la sveglia, premere il pulsante della sveglia sul telecomando
per 3 secondi. L’icona della sveglia scompare dallo schermo.
BT1000seriesIM1274_18Jun_V25.indd 61
ITALIANO
Impostare l’orologio
1. Premere il pulsante POWER per spegnere la torre (modalità di standby).
2. Premere il pulsante MEM/CLOCK sul telecomando.
3. Le cifre sulla sinistra lampeggeranno. Premere il pulsante TUN+/CLOCK+ o
TUN-/CLOCK- sul telecomando per impostare l’ora.
4. Premere nuovamente MEM/CLOCK per confermare l’impostazione dell’ora. I
minuti lampeggeranno automaticamente.
5. Premere il pulsante TUN+/CLOCK+ o TUN-/CLOCK- sul telecomando per
impostare i minuti.
6. Premere nuovamente MEM/CLOCK per confermare l’impostazione dei minuti.
61
19/06/2014 2:55 PM
Impostare il timer
1. Premere il pulsante POWER per accendere la torre.
2. Premere ripetutamente il pulsante SLEEP per selezionare un timer
preimpostato: 5, 10, 15, 30, 60 o 90 minuti.
3. Il display entrerà automaticamente in modalità di standby al termine del conto
alla rovescia.
FUNZIONI RADIO
Nota: per una ricezione del segnale ottimale, regolare l’antenna a filo FM
(inclusa).
Sintonizzare la radio FM
1. Premere il pulsante POWER per accendere la torre.
2. Premere il pulsante SOURCE per selezionare la modalità radio FM.
3. Premere il pulsante TUN+/CLOCK+ o TUN-/CLOCK- per impostare la
frequenza desiderata.
4. Tenere premuto il pulsante TUN+/CLOCK+ o TUN-/CLOCK- per la
sintonizzazione automatica.
Memorizzare una stazione radio
1. Sintonizzare la radio FM.
2. Selezionare la frequenza desiderata e premere il pulsante MEM/CLOCK per
memorizzare la stazione radio corrente. Nella memoria della torre Bluetooth® è
possibile salvare fino a 30 stazioni.
Ascoltare una stazione radio memorizzata
1. Premere il pulsante POWER per accendere la torre.
2. Premere il pulsante SOURCE per selezionare la modalità radio FM.
3. Premere TUN/MEM per passare in rassegna le stazioni radio memorizzate.
ITALIANO
BT1000seriesIM1274_18Jun_V25.indd 62
62
19/06/2014 2:55 PM
COLLEGARE UN DISPOSITIVO ESTERNO TRAMITE AUX IN
1. Collegare un cavo AUX alla presa AUX sul retro della torre.
2. Collegare la torre all’alimentazione. La spia di standby si
accenderà.
3. Premere il pulsante POWER per accendere la torre e premere
ripetutamente il pulsante SOURCE per selezionare la modalità
AUX.
4. Accendere il dispositivo esterno e avviare la riproduzione.
5. Premere i pulsanti del volume per regolare il livello del volume.
6. Premere i pulsanti TREBLE sul telecomando per regolare i
livelli degli alti.
7. Premere i pulsanti BASS sul telecomando per regolare i livelli
dei bassi.
8. Premere i pulsanti dei tipi di equalizzazione preimpostati
MUSIC, MOVIE o VOICE per attivare l’effetto di equalizzazione
desiderato.
9. Premere il pulsante MUTE per disattivare il suono. Premere nuovamente il
pulsante per riattivarlo.
10. Al termine dell’ascolto, premere il pulsante POWER per spegnere la torre
(modalità di standby).
BT1000seriesIM1274_18Jun_V25.indd 63
ITALIANO
COLLEGARE UN DISPOSITIVO ESTERNO TRAMITE LINE IN
1. Collegare un’estremità del cavo LINE IN alla presa cuffie del dispositivo
esterno.
2. Collegare l’altra estremità del cavo alla presa LINE IN sul
retro della torre.
3. Collegare la torre all’alimentazione. La spia di standby si
accenderà.
4. Premere il pulsante POWER per accendere la torre e
premere ripetutamente il pulsante SOURCE per selezionare
la modalità Line In (L In).
5. Accendere il dispositivo esterno e avviare la riproduzione.
6. Premere i pulsanti del volume per regolare il livello del
volume.
7. Premere i pulsanti TREBLE sul telecomando per regolare i
livelli degli alti.
8. Premere i pulsanti BASS sul telecomando per regolare i livelli dei bassi.
9. Premere i pulsanti dei tipi di equalizzazione preimpostati MUSIC, MOVIE o
VOICE per attivare l’effetto di equalizzazione desiderato.
10. Premere il pulsante MUTE per disattivare il suono. Premere nuovamente il
pulsante per riattivarlo.
11. Al termine dell’ascolto, premere il pulsante POWER per spegnere la torre
(modalità di standby).
63
19/06/2014 2:55 PM
RICERCA GUASTI
SINTOMO
SOLUZIONE
Alimentazione
assente.
Controllare che l’adattatore AC/DC sia collegato
correttamente alla torre e alla presa di corrente.
Suono assente.
Controllare che il volume NON sia impostato al
minimo.
Controllare che NON sia attiva la funzione MUTE.
Il telecomando non
funziona.
Controllare o sostituire la batteria.
Suono assente in
modalità Bluetooth®.
Controllare se l’appaiamento è attivo.
Verificare che non siano presenti ostacoli davanti
alla torre.
SPECIFICHE
ITALIANO
Generali
Adattatore AC
Consumo di energia
Potenza audio
Copertura radio
Impedenza degli altoparlanti
Dimensioni
Peso
BT1000seriesIM1274_18Jun_V25.indd 64
Ingresso AC 100-240V, 50/60 Hz;
Produzione DC 18V
1,6A
>50W
Altoparlante bassi: 30W
Canale sinistro: 10W
Canale destro: 10W
FM 87.5-108.0 MHz
Altoparlante bassi: 8 Ohm, 25W x 2
Canale sinistro: 4 Ohm, 15W
Canale destro: 4 Ohm, 15W
100 x 23 x 18.5 cm
4,5 kg
64
19/06/2014 2:55 PM
DICHIARAZIONE DI CONFORMITÀ
Noi, Lexibook® S.A.
2, avenue de Scandinavie
91953 Courtaboeuf Cedex – Francia
Dichiariamo sotto la nostra personale responsabilità che il seguente prodotto:
Tipo di prodotto: Altoparlante a torre Bluetooth®
Modello: BT1000series
E’ stato realizzato in conformità ai seguenti standard:
EN60065:2002+A1:2006+A11:2008+A2:2010+A12:2011
EN55013:2013
EN55020:2007+A11:2011
EN61000-3-2:2006+A1:2009+A2:2009
EN61000-3-3:2013
ETSI EN 300 328 V1.7.1
ETSI EN 301 489-1 V 1.9.2
ETSI EN 301 489-17 V 2.2.1
EN 62479:2010
Yiu Wai Man
Manager Sviluppo prodotto
27/05/2014 (Hong Kong)
0700
ITALIANO
Con la presente dichiariamo che il prodotto qui descritto è conforme alla direttive
europee EMC (2004/108/EC), Basso voltaggio (2006/95/EC) e R&TTE (1999/5/
EC).
MANUTENZIONE
Per impedire pericolo di incendio o di folgorazione, scollegare l’unità dalla presa
AC durante la pulizia. La finitura dell’unità può essere pulita con un panno per
la polvere e trattata come un normale accessorio. Utilizzare un panno pulito
e morbido inumidito con acqua tiepida per pulire la parte esterna dell’unità.
Prestare attenzione quando si puliscono e si strofinano le parti in plastica. Sul
pannello frontale si possono utilizzare un panno umido e sapone neutro.
BT1000seriesIM1274_18Jun_V25.indd 65
65
19/06/2014 2:55 PM
GARANZIA
Questo prodotto è coperto dalla nostra garanzia di 2 anni.
Per eventuali reclami coperti da garanzia o dal servizio postvendita, contattare il
vostro distributore e presentare uno scontrino valido. La nostra garanzia copre
tutti i difetti costruttivi di componentistica e di manodopera, con l’eccezione di
eventuali deterioramenti che derivano dalla non osservanza del manuale di
istruzioni o dall’uso poco attento del prodotto (ad es. smontaggio, esposizione
a calore e umidità, ecc.). Si consiglia di conservare l’imballo per eventuali
riferimenti futuri.
Allo scopo di continuare a migliorare il nostro servizio, potremmo implementare
modifiche a colori e particolari del prodotto illustrato sull’imballo.
NOTA: Conservare il manuale di istruzioni, contiene informazioni importanti.
Riferimento: BT1000series
Progettato e sviluppato in Europa – Fabbricato in Cina
© 2014 LEXIBOOK®
www.lexibook.com
Questo prodotto non è un giocattolo.
ITALIANO
Protezione Ambientale
Gli elettrodomestici da smaltire possono essere riciclati e non devono essere gettati con i
rifiuti domestiti! Sostenete attivamente la conservazione delle risorse e aiutate a proteggere
l’ambiente riportando questo apparecchio ad un centro di raccolta (se disponibile).
BT1000seriesIM1274_18Jun_V25.indd 66
66
19/06/2014 2:55 PM
SICHERHEITSVORKEHRUNGEN
CAUTION
VORSICHT
ELEKTROSCHLAGGEFAHR
NICHT ÖFFNEN
ACHTUNG: ZUR VERMEIDUNG EINES ELEKTROSCHOCKS NIE DAS
GEHÄUSE ÖFFNEN (ODER SCHLIESSEN). ES GIBT KEINE ZU WARTENDEN
TEILE IM INNEREN. SERVICE- ODER REPARATURARBEITEN NUR VON
QUALIFIZIERTEN PERSONEN DURCHFÜHREN.
Der Blitz mit Pfeilspitze in einem gleichseitigen
Dreieck warnt den Benutzer, dass nicht isolierte
„gefährliche elektrische Spannung” im Inneren des
Produktes vorhanden ist, die stark genug ist, einen
Stromschlag herbeizuführen.
olution
BENZENE
Das Ausrufezeichen
innSeinem
gleichseitigen
ettoyante
Dreieck weist den Benutzer auf wichtige Bedienund Wartungsanleitungen (Instandhaltung) in der
Begleitliteratur des Gerätes hin.
ÜBERSPANNUNGSSCHUTZ So
Solution
BENZENE
lution
BENZENE
toyante
nettoyante
Es wird empfohlen, für
die AC-Netzverbindung
einennetÜberspannungsschutz
zu
verwenden. Blitzschlag und Überspannungen WERDEN NICHT von der Garantie
dieses Produktes abgedeckt.
BT1000seriesIM1274_18Jun_V25.indd 67
Solution
nettoyante
DEUTSCH
BENZENE
WARNUNG:
• Um die Gefahr eines Feuers oder Stromschlags zu reduzieren, sollte
dieses Gerät weder Regen noch Feuchtigkeit ausgesetzt werden.
• Dieses Gerät darf weder Tropfen noch Spritzern ausgesetzt werden und
es sollten keine mit Wasser gefüllten Objekte, wie z.B. Vasen, auf das
Gerät gestellt werden.
• Das Gerät wird mit dem Netzstecker vollständig vom Netzstrom getrennt.
• Der Netzstecker muss deshalb leicht zugänglich sein. Um das Gerät ganz
vom Netzstrom zu trennen, muss der Netzstecker vollständig aus der
Netzsteckdose gezogen werden.
67
19/06/2014 2:55 PM
SICHERHEITSHINWEISE
BITTE VOR DER INBETRIEBNAHME DIESES GERÄTES LESEN.
Bevor Sie dieses Gerät benutzen, lesen Sie bitte alle Bedienungsanleitungen
sorgfältig durch. Dies sind allgemeine Vorsichtsmaßnahmen und betreffen eventuell
nicht Ihr Gerät.
1. 2. 3. 4. 5. DEUTSCH
Lesen Sie diese Anleitungen.
Bewahren Sie diese Anleitungen auf.
Beachten Sie alle Warnungen.
Befolgen Sie alle Anleitungen.
Benutzen Sie dieses Produkt nicht in der Nähe von Wasser und Feuchtigkeit,
zum Beispiel: in der Nähe einer Badewanne, Waschschüssel, Küchenspüle
oder eines Waschbeckens; in einem feuchten Kellerraum oder in der Nähe
eines Schwimmbeckens.
6. Ziehen Sie den Netzstecker aus der Wandsteckdose, bevor Sie das Gerät
reinigen. Benutzen Sie keine Reinigungsflüssigkeiten oder –sprays. Sie
könnten den Bildschirm beschädigen. Verwenden Sie zur Reinigung nur ein
trockenes Tuch.
7. Schlitze und Öffnungen im Gehäuse und in der Rückseite oder im Boden
dienen zur Luftzirkulation, um einen zuverlässigen Betrieb des Produktes zu
gewährleisten und es vor dem Überhitzen zu schützen. Diese Öffnungen dürfen
nicht blockiert oder abgedeckt werden. Das Produkt sollte deshalb nicht auf ein
Bett, Sofa, einen Teppich oder eine ähnliche Oberfläche gestellt werden, da
die Öffnungen blockiert werden könnten. Dieses Produkt sollte niemals in die
Nähe einer Heizung oder auf eine Heizung oder Hitzequelle gestellt werden.
Dieses Produkt sollte nicht in Einbauten, wie Bücherregalen oder Gestellen,
aufgestellt werden; es sei denn, eine einwandfreie Luftzirkulation besteht oder
die Anleitungen des Herstellers wurden befolgt.
8. Mindestabstand 10 cm um das Gerät herum für eine ausreichende
Luftzirkulation.
9. Stellen Sie das Gerät nicht in der Nähe von Hitzequellen, wie z.B. Heizungen,
Wärmespeichern, Öfen oder anderen Apparaten (einschließlich Verstärkern),
die Hitze erzeugen, auf.
10. Zerstören Sie nicht den Sicherheitszweck des polarisierten Netzsteckers oder
Schukosteckers. Ein polarisierter Stecker hat zwei Stifte, wobei einer größer als
der andere ist. Ein Schukostecker hat zwei Stifte und einen dritten Erdungsstift.
Der größere Stift oder der dritte Erdungsstift dient Ihrer Sicherheit. Sollte der
mitgelieferte Stecker nicht in Ihre Steckdose passen, wenden Sie sich bitte an
einen Elektriker, um die technisch überholte Steckdose zu erneuern.
11. Schützen Sie das Netzstromkabel vor dem Darauftreten und davor, dass es
besonders am Netzstecker, an der Netzsteckdose und den Austrittspunkten
aus dem Gerät abgeknickt wird.
12. Benutzen Sie nur vom Hersteller empfohlene Anbauteile und Zubehör.
13. Ziehen Sie den Netzstecker des Gerätes während eines Gewitters oder wenn
Sie es für längere Zeit nicht benutzen.
BT1000seriesIM1274_18Jun_V25.indd 68
68
19/06/2014 2:55 PM
BT1000seriesIM1274_18Jun_V25.indd 69
DEUTSCH
14. Überlassen Sie alle Wartungsarbeiten qualifiziertem Fachpersonal.
Wartungsarbeiten sind erforderlich, wenn das Gerät in irgendeiner Weise
beschädigt wurde, wie z.B. in folgenden Situationen: Das Netzstromkabel
oder der Netzstecker sind beschädigt; Flüssigkeit oder Gegenstände sind in
das Gerät gekommen, und/oder das Gerät wurde Regen oder Feuchtigkeit
ausgesetzt; das Gerät funktioniert nicht ordnungsgemäß, zeigt einen
Leistungsabfall oder wurde fallen gelassen.
15. Dieses Produkt sollte von einer Stromquelle mit einer Netzspannung, die mit
den Angaben auf dem Typenschild übereinstimmt, betrieben werden. Wenn Sie
sich nicht sicher sind, welche Art Netzspannung in Ihrem Haus verfügbar ist,
fragen Sie bei einem Elektrohändler oder bei dem örtlichen Elektrizitätswerk
nach. Bei Produkten, die mit Batteriestrom oder anderen Stromquellen
betrieben werden, lesen Sie bitte in der Bedienungsanleitung nach.
16. Überladen Sie die Wandsteckdosen und Verlängerungskabel nicht, da dies zu
einem Brand oder Stromschlag führen kann.
17. Schieben Sie niemals irgendwelche Gegenstände durch Öffnungen in das
Produkt, da sie gefährliche Stromspannungspunkte berühren oder Teile
kurzschließen könnten, wodurch ein Brand oder Stromschlag erzeugt werden.
Gießen oder sprühen Sie niemals jegliche Art von Flüssigkeiten auf das Gerät.
18. Versuchen Sie niemals, das Produkt selbst zu reparieren, da das Öffnen
oder Entfernen von Abdeckungen Sie gefährlicher Stromspannung oder
anderen Gefahren aussetzen kann. Wenden Sie sich für alle Reparatur- und
Wartungsarbeiten an qualifiziertes Fachpersonal.
19. Die Batterien dürfen keinen übermäßigen Hitzequellen ausgesetzt werden, zum
Beispiel Sonnenschein oder Feuer.
20. Die Bestimmungen für eine umweltfreundliche Entsorgung der Batterien sollten beachtet werden.
21. Das Gerät sollte in einem moderaten Klima benutzt werden.
(Betriebstemperatur -20˚C ~ + 35˚C)
22. Die Netzsteckdose sollte sich in der Nähe des Gerätes befinden und muss gut
zugänglich sein.
23. Der AC/DC-Adapter darf nicht blockiert sein ODER muss gut zugänglich
während des bestimmungsgemäßen Gebrauchs sein.
24. Um die Stromversorgung vollständig zu trennen, muss der AC/DC-Adapter vom Netzstrom getrennt werden, da der AC/DC-Adapter als Trennvorrichtung
fungiert.
25. Das Gerät und der AC/DC-Adapter dürfen keinen tropfenden oder spritzenden
Flüssigkeiten ausgesetzt werden. Es dürfen keine mit Wasser gefüllten
Objekte, wie z. B. Vasen, in der Nähe des Gerätes und AC/DC-Adapters
aufgestellt werden.
26. Übermäßiger Schalldruck von den Ohrhörern und Kopfhörern kann Hörverlust
verursachen.
27. „Maximale Ausgangsspannung: ≤ 150 mV”.
28. Bei voller Lautstärke kann das Musikhören von einem Musikplayer über
längere Zeit das Gehör des Benutzers schädigen.
69
19/06/2014 2:55 PM
AUSPACKEN DES GERÄTES
Wenn Sie das Gerät auspacken, stellen Sie sicher, dass die folgenden Teile
enthalten sind:
1 x Bluetooth® Lautsprecherturm
1 x Fernbedienung (CR2025 Lithium-Batterie schon einliegend)
1 x AC/DC-Adapter
1 x Bedienungsanleitung
1 x 3,5 mm Line-in-Kabel
1 x Doppel-Cinch-Kabel (Stecker)
1 x Dockingstation für Tablet oder Smartphone
WARNUNG: Alle Verpackungsmaterialien wie Klebeband, Plastikfolien,
Drahtbänder und Etiketten sind nicht Teil dieses Produktes und sollten entsorgt
werden.
STROMVERSORGUNG
Der Bluetooth® Lautsprecherturm wird mit AC~100-240V, 50/60Hz.
AC-Betrieb
1. Stellen Sie sicher, dass das Gerät ausgeschaltet ist.
2. Stecken Sie das schmale Ende des AC-Kabels in die DC IN Buchse auf der
Rückseite des Gerätes.
3. Verbinden Sie das andere Ende des AC-Kabels mit einer gut zugänglichen
AC~100-240V, 50/60Hz Netzsteckdose.
AC Netzsteckdose
AC/DC-Adapter
DEUTSCH
Hinweis:
• Benutze nur den mit dem Produkt mitgelieferten Adapter. Verwende keinen
anderen Adapter.
• Die Netzsteckdose sollte in der Nähe der Anlage installiert und leicht zugänglich
sein.
WARNUNG: Fehlfunktionen oder Speicherverlust können durch starke Störungen
oder elektrostatische Entladungen verursacht werden. Sollte das Gerät nicht
ordnungsgemäß funktionieren, legen Sie diese wieder ein. Oder ziehen Sie das
AC-Kabel aus der Steckdose und stecken Sie es dann wieder ein.
BT1000seriesIM1274_18Jun_V25.indd 70
70
19/06/2014 2:55 PM
FERNBEDIENUNG
6
7
1
2
8
9
10
3
11
12
4
13
14
5
15
1. POWER-Taste
2. MEM/CLOCK-Taste
3. TUN/MEM-Taste
4. MUSIC-Taste
5. TREBLE +/- Tasten
6. SOURCE-Taste (Quelle)
7. MUTE-Taste (Stummschalten)
8. ALARM-Taste (Weckalarms)
9. SLEEP-Taste
10. TUN+/CLOCK+ Tasten
11. TUN-/CLOCK- Tasten
12. MOVIE-Taste
13. VOICE-Taste
14. BASS +/- Tasten
15. VOLUME +/- Tasten
Austauschen der Batterie
1. Öffnen Sie den Batteriefachdeckel indem Sie
auf den rechten Schalter zum Öffnen drücken
und dann den Deckel herausschieben.
2. Entfernen Sie die benutzte Batterie und legen
eine Lithium-Batterie CR2025 3V
(enthalten)
wie angezeigt ein.
3. Schieben Sie den Batteriefachdeckel wieder zu
bis er einrastet.
BT1000seriesIM1274_18Jun_V25.indd 71
DEUTSCH
Batterieinformation
Bei erstmaliger Benutzung der Fernbedienung nehmen Sie die
Batterieverriegelung auf der Rückseite der Fernbedienung ab.
71
19/06/2014 2:55 PM
Nichtaufladbare Batterien dürfen nicht wiederaufgeladen werden.
Wiederaufladbare Batterien müssen vor dem Aufladen entfernt werden.
Wiederaufladbare Batterien dürfen nur unter Aufsicht von Erwachsenen
entfernt werden. Keine unterschiedlichen Batterietypen oder neue und
gebrauchte Batterien gleichzeitig verwenden. Nur Batterien desselben oder
equivalenten empfohlenen Typs verwenden. Batterien nur mit richtiger
Polarität einsetzen. Leere Batterien aus dem Gerät entfernen.
Anschlussklemmen nicht kurzschliessen. Keine Batterien in eine offene
Flamme werfen. Entfernen Sie die Batterien, wenn Sie das Gerät für längere
Zeit nicht verwenden.
POSITIONEN DER BEDIENELEMENTE
1
2 3 45
6
7
8
9
10
Vorderseite
1. POWER-Taste
2. SOURCE-Taste
3. TUN+ Taste
4. TUN- Taste
5. VOL+ Taste
6. VOL- Taste
7. Bluetooth® LED-Anzeige
8. Fernsensor
9. Bildschirm
10. Lautsprecher
Rückseite
11. USB-Ladeport
12. FM-Antenne
13. AUX IN-Buchse (rechts)
14. AUX IN-Buchse (links)
15. LINE IN-Buchse (3,5mm)
16. DC-IN-Buchse
DEUTSCH
11
12
14
BT1000seriesIM1274_18Jun_V25.indd 72
13
15
16
72
19/06/2014 2:55 PM
AUFLADEN EINES PERSÖNLICHEN GERÄTES ÜBER DEN EINGEBAUTEN USB-PORT
1. Befestigen Sie den Gerätehalter in den zwei Öffnungen an der Oberseite des
Bluetooth® Turms.
2. Platzieren Sie Ihr Gerät über dem Schlitz.
3. Verbinden Sie ein Ende eines Kabels (nicht inbegriffen) mit Ihrem Gerät und
das USB-Ende mit dem USB-DC-5V
Ladeanschluss an der Rückseite des
Turms.
Hinweise: Ihr persönliches Gerät lädt automatisch, wenn es mit dem Bluetooth®
Turm verbunden ist. Stellen Sie sicher, dass der Turm mit Strom versorgt wird.
BLUETOOTH® EINRICHTEN
Die Bluetooth® Wortmarke und Logos sind eingetragene Warenzeichen im
Besitz der Bluetooth SIG, Inc. und Lexibook® benutzt diese Marken unter
Lizenz. Andere Warenzeichen und Handelsnamen gehören ihren jeweiligen
Eigentümern.
Erstmaliger Verbindungsaufbau
1. Schalten Sie den Bluetooth® Turm ein und drücken Sie die SOURCE-Taste,
um den Bluetooth® Modus auszuwählen (bt). Die Bluetooth® LED blinkt, während
nach einem Gerät gesucht wird.
2. Aktivieren Sie die Bluetooth®-Funktion an Ihrem persönlichen Gerät. Bitte
lesen Sie in der Bedienungsanleitung Ihres Gerätes nach, wie Sie diese Funktion
aktivieren.
3. Wählen Sie den Namen des Bluetooth® Turm. Beginnen Sie die Verbindung
zwischen Ihrem persönlichen Gerät und dem Turm herzustellen.
4. Sobald die Geräte miteinander verbunden sind, starten Sie die Wiedergabe
einer Audio- oder Videodatei. Regulieren Sie die Lautstärke mithilfe der Tasten
an Ihrem persönlichen Gerät oder den Lautstärketasten am Turm oder auf der
Fernbedienung.
BT1000seriesIM1274_18Jun_V25.indd 73
DEUTSCH
© 2014 Bluetooth SIG, Inc.
73
19/06/2014 2:55 PM
Erneuter Verbindungsaufbau
Wenn der Turm oder der Bluetooth® Modus ausgeschaltet wurde:
1. Schalten Sie den Bluetooth® Turm ein und drücken Sie die SOURCE-Taste,
um den Bluetooth® Modus auszuwählen (bt).
2. Die Bluetooth® LED blinkt für 3 Sekunden und findet automatisch das Gerät,
mit dem der Turm zuletzt verbunden war.
3. Wenn kein Gerät gefunden wurde, blinkt die Bluetooth® LED weiter. Drücken
Sie SOURCE, um andere Modi auszuwählen: FM, AUX oder L IN.
Hinweise:
1. Der Bluetooth® Turm verbindet sich mit jeweils nur einem Gerät.
2. Die maximale Übertragungsreichweite zwischen dem Bluetooth® Lautsprecher
und einem Gerät beträgt 10 Meter oder 32 Fuß.
3. Es kann zu Störungen bei der Wiedergabe kommen, wenn die Bluetooth®
Funktion in der Nähe anderer kabelloser Geräte benutzt wird. Wenn die
Wiedergabe über Bluetooth® Probleme bereitet, stellen Sie den Bluetooth®
Lautsprecher und das Wiedergabegerät an eine andere Stelle, oder benutzen
Sie die 3,5 mm LINE IN-Buchse anstelle der Bluetooth® Funktion.
UHR-FUNKTIONEN
Einstellen der Uhr
1. Drücken Sie die POWER-Taste, um den Turm auszuschalten (Stand-byModus).
2. Drücken Sie die MEM/CLOCK-Taste auf der Fernbedienung.
3. Die Stellen auf der linken Seite blinken. Drücken Sie die TUN+/CLOCK+ bzw.
TUN-/CLOCK- Taste auf der Fernbedienung, um die Stunde einzustellen.
4. Drücken Sie erneut MEM/CLOCK, um die Stundeneinstellung zu bestätigen.
Die Minuten blinken automatisch.
5. Drücken Sie die TUN+/CLOCK+ bzw. TUN-/CLOCK- Taste auf der
Fernbedienung, um die Minuten einzustellen.
6. Drücken Sie erneut MEM/CLOCK, um die Minuteneinstellung zu bestätigen.
DEUTSCH
Einstellen des Weckalarms (mit dem voreingestellten Radiosender)
1. Drücken Sie die POWER-Taste, um das Gerät einzuschalten.
2. Drücken Sie mehrmals die SOURCE-Taste, um den FM-Modus auszuwählen.
3. Wählen Sie die gewünschte Radiofrequenz durch Drücken der TUN+/CLOCK+
bzw. TUN-/CLOCK- Taste aus.
4. Drücken Sie die POWER-Taste, um den Turm auszuschalten (Stand-byModus).
5. Drücken Sie die ALARM-Taste auf der Fernbedienung. Die Uhrzeit auf dem
LC-Display blinkt.
6. Die Stellen auf der linken Seite blinken. Drücken Sie die TUN+/CLOCK+ bzw.
TUN-/CLOCK- Taste auf der Fernbedienung, um die Stunde einzustellen.
BT1000seriesIM1274_18Jun_V25.indd 74
74
19/06/2014 2:55 PM
7. Drücken Sie ALARM, um die Stundeneinstellung zu bestätigen. Die Minuten
blinken automatisch.
8. Drücken Sie die TUN+/CLOCK+ bzw. TUN-/CLOCK- Taste auf der
Fernbedienung, um die Minuten einzustellen.
9. Drücken Sie ALARM erneut, um die Minuteneinstellung zu bestätigen.
10. Der Weckalarm ertönt mit dem voreingestellten Radiosender zur eingestellten
Uhrzeit.
11. Um den Alarm zu deaktivieren, drücke die Alarmtaste auf der Fernbedienung
für drei Sekunden. Das Glockensymbol verschwindet.
Timer einstellen
1. Drücken Sie die POWER-Taste, um das Gerät einzuschalten.
2. Drücken Sie mehrmals die SLEEP-Taste, um einen voreingestellten Timer
auszuwählen: 5, 10, 15, 30, 60 oder 90 Minuten.
3. Das LCD geht automatisch in den Stand-by-Modus, wenn die TimerEinstellung erreicht wird.
RADIOFUNKTIONEN
Hinweis: Um eine gutes Empfangssignal zu erhalten, richten Sie die FMDrahtantenne (inbegriffen) entsprechend aus.
Feineinstellung des FM-Radios
1. Drücken Sie die POWER-Taste, um das Gerät einzuschalten.
2. Drücken Sie die SOURCE-Taste, um den FM-Radiomodus auszuwählen.
3. Drücken Sie die TUN+/CLOCK+ bzw. TUN-/CLOCK- Taste, um die
gewünschte Frequenz einzustellen.
4. Halten Sie die TUN+/CLOCK+ bzw. TUN-/CLOCK- Taste gedrückt, um den
automatischen Sendersuchlauf zu aktivieren.
Hören eines gespeicherten Radiosenders
1. Drücken Sie die POWER-Taste, um das Gerät einzuschalten.
2. Drücken Sie die SOURCE-Taste, um den FM-Radiomodus auszuwählen.
3. Drücken Sie TUN/MEM, um die gespeicherten Radiosender zyklisch zu
durchlaufen.
BT1000seriesIM1274_18Jun_V25.indd 75
DEUTSCH
Speichern eines Radiosenders
1. Stellen Sie das FM-Radio ein.
2. Wählen Sie die gewünschte Frequenz und drücken Sie die MEM/CLOCKTaste, um den aktuellen Radiosender zu speichern. Es können bis zu 30 Sender
im Speicher des Bluetooth® Turms gespeichert werden.
75
19/06/2014 2:55 PM
ANSCHLIESSEN EINES EXTERNEN GERÄTES ÜBER AUX IN
1. Verbinden Sie ein AUX-Ausgangskabel mit der AUX IN-Buchse
auf der Rückseite des Turms.
2. Schließen Sie den Turm an den Netzstrom an. Die Stand-byAnzeigeleuchte schaltet sich ein.
3. Drücken Sie die POWER-Taste, um den Turm einzuschalten,
und drücken Sie mehrmals die SOURCE-Taste, um den AUXModus auszuwählen.
4. Schalten Sie das verbundene externe Gerät ein und starten Sie
die Wiedergabe.
5. Drücken Sie die Lautstärketasten, um die Lautstärke zu
regulieren.
6. Drücken Sie die TREBLE-Tasten auf der Fernbedienung, um die
Höhenpegel wie gewünscht anzupassen.
7. Drücken Sie die BASS-Tasten auf der Fernbedienung, um die
Basspegel wie gewünscht anzupassen.
8. Drücken Sie die Equalizer-Tasten mit den vorprogrammierten Modi MUSIC, MOVIE
oder VOICE, um den gewünschten vorprogrammierten Equalizer-Effekt zu aktivieren.
9. Drücken Sie die MUTE-Taste, um den Ton zu deaktivieren. Drücken Sie die Taste
erneut, um den Ton wieder zu aktivieren.
10. Wenn Sie nicht mehr hören möchten, drücken Sie die POWER-Taste, um den
Turm auszuschalten (Stand-by-Modus).
ANSCHLIESSEN EINES EXTERNEN GERÄTES ÜBER LINE IN
DEUTSCH
1. Verbinden Sie das eine Ende eines LINE IN-Kabels mit der
Kopfhörerbuchse Ihres externen Gerätes.
2. Verbinden Sie das andere Ende des Kabels mit der LINE INBuchse auf der Rückseite des Turms.
3. Schließen Sie den Turm an den Netzstrom an. Die Stand-byAnzeigeleuchte schaltet sich ein.
4. Drücken Sie die POWER-Taste, um den Turm einzuschalten,
und drücken Sie mehrmals die SOURCE-Taste, um den Line INModus (L In) auszuwählen.
5. Schalten Sie das verbundene externe Gerät ein und starten
Sie die Wiedergabe.
6. Drücken Sie die Lautstärketasten, um die Lautstärke zu
regulieren.
7. Drücken Sie die TREBLE-Tasten auf der Fernbedienung, um
die Höhenpegel wie gewünscht anzupassen.
8. Drücken Sie die BASS-Tasten auf der Fernbedienung, um die Basspegel wie
gewünscht anzupassen.
9. Drücken Sie die Equalizer-Tasten mit den vorprogrammierten Modi MUSIC,
MOVIE oder VOICE, um den gewünschten vorprogrammierten Equalizer-Effekt zu
aktivieren.
10. Drücken Sie die MUTE-Taste, um den Ton zu deaktivieren. Drücken Sie die Taste
erneut, um den Ton wieder zu aktivieren.
BT1000seriesIM1274_18Jun_V25.indd 76
76
19/06/2014 2:55 PM
11. Wenn Sie nicht mehr hören möchten, drücken Sie die POWER-Taste, um den
Turm auszuschalten (Stand-by-Modus).
FEHLERBEHEBUNG
SYMPTOM
LÖSUNG
Kein Strom.
Prüfen Sie die Verbindung des AC/DC-Adapters
zwischen dem Turm-Lautsprecher und der
Netzsteckdose.
Kein Ton.
Prüfen Sie, ob der Lautstärkeregler möglicherweise auf
die niedrigste Stufe gestellt ist.
Prüfen Sie, ob das Gerät möglicherweise
stummgeschaltet ist.
Die Fernbedienung
funktioniert nicht.
Prüfen oder wechseln Sie die Batterie aus.
Kein Ton im
Bluetooth®-Modus.
Prüfen Sie, ob die Verbindung hergestellt wurde oder
nicht.
Stellen Sie sicher, dass keine Hindernisse die
Vorderseite des Turm-Lautsprechers blockieren.
Allgemein
AC/DC-Adapter
Stromverbrauch
Audioleistung
Funkreichweite
Impedanz des Lautsprechers
Abmessungen
Gewicht
BT1000seriesIM1274_18Jun_V25.indd 77
Eingabe AC 100-240V, 50/60 Hz;
Ausgang DC 18V
1,6A
>50W
Tieftöner: 30W
Linker Kanal: 10W
Rechter Kanal: 10W
FM 87.5-108.0 MHz
Tieftöner: 8 Ohm, 25W x 2
Linker Kanal: 4 Ohm, 15W
Rechter Kanal: 4 Ohm, 15W
100 x 23 x 18.5 cm
4,5 kg
DEUTSCH
TECHNISCHE DATEN
77
19/06/2014 2:55 PM
KONFORMITÄTSERKLÄRUNG
Wir, Lexibook® S.A.
2, avenue de Scandinavie
91953 Courtaboeuf Cedex – Frankreich
erklären in alleiniger Verantwortung, dass das folgende Produkt:
Produktart: Bluetooth® Lautsprecherturm
Typbezeichnung: BT1000series
die folgenden Normen einhält:
EN60065:2002+A1:2006+A11:2008+A2:2010+A12:2011
EN55013:2013
EN55020:2007+A11:2011
EN61000-3-2:2006+A1:2009+A2:2009
EN61000-3-3:2013
ETSI EN 300 328 V1.7.1
ETSI EN 301 489-1 V 1.9.2
ETSI EN 301 489-17 V 2.2.1
EN 62479:2010
Wir erklären hiermit, dass das oben erwähnte Produkt mit der EMC-Richtlinie
(2004/108/EC), mit der Niederspannungsdirektive (2006/95/EC) und der R&TTERichtlinie (1999/5/EC) der Europäischen Kommission übereinstimmt.
Yiu Wai Man
Produktentwicklungsleiter
27/05/2014 (Hongkong)
0700
DEUTSCH
PFLEGE
Um Brand- oder Stromschlaggefahr zu vermeiden, trennen Sie das Gerät von
der AC-Stromquelle, wenn Sie es reinigen. Die Politur Ihres Gerätes kann
mit einem Staubtuch gereinigt und wie andere Möbelstücke gepflegt werden.
Reinigen Sie das Äußere des Gerätes mit einem weichen, sauberen Tuch, das
mit klarem, lauwarmen Wasser angefeuchtet ist. Seien Sie vorsichtig, wenn Sie
die Plastikteile reinigen und abwischen. Eine milde Seife und ein feuchtes Tuch
können zum Reinigen der Vorderseite benutzt werden.
BT1000seriesIM1274_18Jun_V25.indd 78
78
19/06/2014 2:55 PM
GARANTIE
Dieses Produkt ist mit unserer 2-Jahre-Garantie versehen.
Bei Beanstandungen, die unter diese Garantie fallen oder sollten Sie den
Kundendienst benötigen, wenden Sie sich bitte an Ihren Händler und legen
Sie einen gültigen Kaufbeleg vor. Unsere Garantie deckt alle Material- und
Verarbeitungsmängel ab, mit Ausnahme jeglicher Verschleißerscheinungen, die
aus der Nichtbeachtung der Bedienungsanleitung resultieren oder durch jedwede
fahrlässige Handlung an diesem Produkt verursacht wurden (wie demontieren,
Hitze oder Feuchtigkeit aussetzen, usw.). Es wird empfohlen, die Verpackung für
etwaige zukünftige Bezugnahmen aufzubewahren.
In dem Bemühen unsere Leistungen kontinuierlich zu verbessern, könnte es sein,
dass wir Veränderungen an den Farben oder der Produktausführung, wie auf der
Verpackung abgebildet, vornehmen.
HINWEIS: Bitte bewahren Sie diese Bedienungsanleitung auf, da sie wichtige
Informationen enthält.
Referenznummer: BT1000series
Design und Entwicklung in Europa - Hergestellt in China
© 2014 LEXIBOOK®
Deutschland & Österreich
Service-Hotline: 01805 010931 (0,14 Euro/Minute)
E-Mail: [email protected]
www.lexibook.com
Dieses Produkt ist kein Spielzeug.
BT1000seriesIM1274_18Jun_V25.indd 79
DEUTSCH
Hinweise zum Umweltschutz
Alt-Elektrogeräte sind Wertstoffe, sie gehören daher nicht in den Hausmüll! Wir möchten Sie daher bitten,
uns mit Ihrem aktiven Beitrag bei der Ressourcenschonung und beim Umweltschutz zu unterstützen und
dieses Gerät bei den (falls vorhanden) eingerichteten Rücknahmestellen abzugeben.
79
19/06/2014 2:55 PM
NEDERLANDS
VEILIGHEIDSMAATREGELEN
CAUTION
RISK OF ELECTRIC SHOCK
DO NOT OPEN
LET OP: OM HET RISICO VAN EEN ELEKTRISCHE SCHOK TE
VERMINDEREN, VERWIJDER DE BEHUIZING (ACHTERKANT) NIET. IN
HET APPARAAT ZITTEN GEEN ONDERDELEN DIE DOOR DE GEBRUIKER
GEREPAREERD ZOUDEN KUNNEN WORDEN. LAAT REPARATIES
UITVOEREN DOOR GEKWALIFICEERD PERSONEEL.
Het bliksemsymbool met pijlpunt in een gelijkzijdige
driehoek is voorzien om de gebruiker te wijzen op
de aanwezigheid van gevaarlijke niet-geïsoleerde
spanning in het product die van voldoende omvang
zou kunnen zijn om een elektrische schok teweeg te
brengen.
Het uitroepteken
driehoek
lution
BENZENEin eenSogelijkzijdige
nettoyante
is bestemd om de gebruiker
te wijzen op de
aanwezigheid van belangrijke instructies in de
documentatie die met het apparaat gepaard gaan,
inzake de werking en het onderhoud (herstelling) van
dit apparaat.
WAARSCHUWING: Om het risico op brand of een elektrische schok
te beperken, dient u het apparaat niet bloot te stellen aan regen of
vochtigheid. Het apparaat dient niet blootgesteld te worden aan druppels
of spatten en er dienen geen voorwerpen gevuld met vloeistoffen, zoals
vazen, op het apparaat geplaatst worden. De netstekker wordt gebruikt als
ontkoppelingsmechanisme en dient ten alle tijde toegankelijk te zijn. Om het
apparaat volledig van het net los te koppelen, dient u de netstekker van het
apparaat volledig los te koppelen van het stopcontact.
BENZENE
Solution
nettoyante
OVERSPANNINGSAFLEIDER
Het is aanbevolen een overspanningafleider te gebruiken voor een AC
verbinding. Bliksem en spanningspieken Bzijn
NIET gedekt
Solution door de garantie voor
ENZENE
nettoyante
Solution
BENZENE
dit product.
nettoyante
BT1000seriesIM1274_18Jun_V25.indd 80
80
19/06/2014 2:55 PM
NEDERLANDS
VEILIGHEIDSINSTRUCTIES
GELIEVE TE LEZEN ALVORENS DIT APPARAAT TE GEBRUIKEN.
Alvorens dit apparaat te gebruiken, dient u alle gebruiksinstructies grondig te
lezen. Gelieve op te merken dat dit algemene voorzorgen zijn en misschien geen
betrekking hebben op uw apparaat.
1. 2. 3. 4. 5. Lees deze instructies.
Bewaar deze instructies.
Leef all waarschuwingen na.
Volg alle instructies.
Gebruik dit product niet in de nabijheid van water en vochtigheid,
bijvoorbeeld: in de nabijheid van een bad, wasbak, gootsteen of waskuip; in
een natte kelder; of in de buurt van een zwembad.
6. Trek de stekker van dit product uit het stopcontact alvorens schoon
te maken. Gebruik geen vloeibare schoonmaakmiddelen of aerosol
schoonmaakmiddelen. Dit kan het scherm beschadigen. Maak schoon met
een droge doek.
7. Gleuven en openingen in de kast en in het achter- of onderpaneel zijn
voorzien voor ventilatie om een betrouwbare werking van het product te
verzekeren en het te beschermen tegen oververhitting. Deze openingen
dienen niet geblokkeerd of bedekt te worden. De openingen dienen
nooit geblokkeerd te worden door het product op een bed, sofa, tapijt of
gelijkaardig oppervlak te zetten. Dit product dient nooit nabij of op een
radiator of hittebron geplaatst te worden. Dit product dient niet in een
ingebouwde installatie geplaatst te worden, zoals een boekenkast of een rek,
tenzij er voldoende ventilatie voorzien is of de instructies van de fabrikant
nageleefd zijn.
8. Behoud een minimale afstand van 10 cm rondom het apparaat om
voldoende ventilatie te waarborgen.
9. Niet installeren nabij hittebronnen, zoals radiatoren, registers, kachels of
andere apparaten (inclusief versterkers) die hitte produceren.
10. Vernietig het veiligheidsdoel van de gepolariseerde of geaarde stekker
niet. Een gepolariseerde stekker heeft twee pennen, waarvan de ene iets
breder is dan de andere. Een geaarde stekker heeft twee pennen en een
derde aardklem. De brede pen of de derde aardklem zijn voorzien voor
uw veiligheid. Als de voorziene stekker niet op uw stopcontact past, dient
u een elektricien te raadplegen voor het vervangen van het verouderde
stopcontact.
11. Plaats de voedingskabel en de stekker zo, dat er niet kan worden op getrapt
of dat ze niet gekneld raken en bescherm het punt waar de kabel uit het
apparaat komt.
12. Gebruik enkel toebehoren/accessoires die opgegeven zijn door de fabrikant.
13. Trek de stekker van dit apparaat uit tijdens onweersbuiten of als het apparaat
een lange tijd niet zal gebruikt worden.
BT1000seriesIM1274_18Jun_V25.indd 81
81
19/06/2014 2:55 PM
NEDERLANDS
14. Laat alle onderhoud over aan bevoegd onderhoudspersoneel. Onderhoud
is vereist als het apparaat enigszins beschadigd is, als de stroomkabel of
stekker bijvoorbeeld beschadigd is, als er vloeistof gemorst is of voorwerpen
in het apparaat gevallen zijn, als het apparaat blootgesteld is aan regen of
vochtigheid, niet correct werkt of gevallen is.
15. Dit product dient enkel gebruikt te worden met het type stroombron
aangegeven op het typeplaatje. Als u niet zeker bent van het type
stroomtoevoer bij u thuis, neem dan contact op met uw handelaar of
plaatselijk nutsbedrijf. Voor producten die werken op batterijen op andere
bronnen, dient u de gebruiksinstructies te raadplegen.
16. Het stopcontact en de verlengkabel niet overbelasten, daar dit een risico op
brand of een elektrische schok tot gevolg kan hebben.
17. Duw nooit een voorwerp in de openingen van dit product, daar ze in contact
kunnen komen met gevaarlijke voltagepunten of kortsluitingonderdelen die
vuur of een elektrische schok zouden kunnen veroorzaken. Mors of verstuif
nooit een soort vloeistof in het product.
18. Probeer niet om zelf herstellingen aan dit product uit te voeren of de
covers te openen of te verwijderen, daar dit u zou kunnen blootstellen aan
gevaarlijke spanning of andere gevaren. Laat alle onderhoud over aan
bevoegd personeel.
19. Stel de batterijen nooit bloot aan een warmtebron, zoals zonlicht of vuur.
20. Houd rekening met het milieu bij het weggooien van batterijen.
21. Gebruik het apparaat in een gematigd klimaat. (Bedrijfstemperatuur -20˚C ~
+ 35˚C)
22. Zorg ervoor dat het gebruikte stopcontact zich in de nabijheid van het apparaat bevindt en eenvoudig te bereiken is.
23. De AC/DC-adapter mag tijdens het gebruik niet worden belemmerd OF dient op eenvoudige wijze bereikbaar te zijn.
24. Om het apparaat volledig van de voeding los te koppelen, haal de stekker van de AC/DC-adapter uit het stopcontact.
25. Stel het apparaat en de AC/DC-adapter niet bloot aan gedruppel of gespat en plaats geen voorwerpen met een vloeistof, zoals een vaas, op of in de buurt van het apparaat.
26. Een overdreven hoog volume van de oor- of koptelefoon kan tot gehoorverlies leiden.
27. “Maximum uitgangsspanning: ≤ 150mV”.
28. Langdurig luisteren naar de speler op maximum volume kan het gehoor van de gebruiker beschadigen.
BT1000seriesIM1274_18Jun_V25.indd 82
82
19/06/2014 2:55 PM
NEDERLANDS
HET APPARAAT UITPAKKEN
Bij het uitpakken, dient u na te gaan of de volgende elementen inbegrepen zijn:
1 x Bluetooth® geluidstoren
1 x Afstandsbediening (CR2025 lithium type batterij reeds in het batterijvak)
1 x AC/DC adapter
1 x Handleiding
1 x 3,5mm Line In-kabel
1 x RCA-kabel met 2 x RCA male
1 x Dockingstation voor tablet of smartphone
WAARSCHUWING: Alle verpakkingsmateriaal, zoals plakband, plastic vellen,
draadklemmen en labels die niet deel uitmaken van dit apparaat dienen
weggegooid te worden.
STROOMBRONNEN
De Bluetooth® geluidstoren werkt op AC~100-240V, 50/60Hz.
AC werking
1. Ga na of het apparaat uitgeschakeld is.
2. Steek het smalle uiteinde van de AC kabel in de DC IN aansluiting op de
achterzijde van het apparaat.
3. Steek het andere uiteinde van de AC kabel in een geschikt AC~100-240V,
50/60Hz stopcontact.
Stopcontact
AC/DC-adapter
Opmerking:
• Gebruik alleen de meegeleverde adapter met de product. Gebruik geen andere
adapter.
• Zorg ervoor dat het gebruikte stopcontact zich in de nabijheid van het apparaat
bevindt en eenvoudig te bereiken is.
WAARSCHUWING: Er kan een slechte werking of geheugenverlies optreden
door een sterke frequentiestoring of elektrostatische ontlading. Mocht er zich een
abnormale functie voordoen, trek de AC kabel uit het stopcontact en steek hem
vervolgens terug in.
BT1000seriesIM1274_18Jun_V25.indd 83
83
19/06/2014 2:55 PM
NEDERLANDS
AFSTANDSBEDIENING
6
7
1
2
8
9
10
3
11
12
4
13
14
5
15
1. POWER (Stroom) knop
2. MEM/CLOCK knop
3. TUN/MEM knop
4. MUSIC knop
5. TREBLE +/- knoppen
6. SOURCE knop
7. MUTE (demping) knop
8. ALARM (wekker) knop
9. SLEEP knop
10. TUN+/CLOCK+ knop
11. TUN-/CLOCK- knop
12. MOVIE knop
13. VOICE knop
14. BASS +/- knoppen
15. VOLUME +/- knoppen
Batterij-informatie
Voordat u de afstandsbediening gebruikt, verwijder voorzichtig het plastic lipje
van de batterij achteraan het apparaat.
Vervangen van de batterij
1. Druk op de ontgrendelschakelaar aan de
rechterzijde om het batterijdeksel te openen en
schuif de batterijhouder uit.
2. Verwijder de uitgeputte batterij en plaats
één lithium CR2025 3V
type batterij
(meegeleverd) zoals weergegeven.
3. Schuif het batterijdeksel terug in totdat deze op
zijn plaats vastklikt.
BT1000seriesIM1274_18Jun_V25.indd 84
84
19/06/2014 2:55 PM
NEDERLANDS
Probeer niet-oplaadbare batterijen niet op te laden. Oplaadbare batterijen
moeten uit het apparaat gehaald worden voordat deze opgeladen worden.
Oplaadbare batterijen dienen alleen onder toezicht van een volwassene
opgeladen te worden. Gebruik niet tegelijkertijd batterijen van verschillende
types of oude en nieuwe batterijen. Gebruik alleen batterijen van hetzelfde of
gelijkwaardige types als aanbevolen. Batterijen dienen geplaatst te worden
met de juiste polariteit. Lege batterijen dienen uit het apparaat gehaald te
worden. De polen van de batterijen dienen niet kortgesloten te worden. Gooi
batterijen niet in open vuur. Verwijder batterijen als u het apparaat langere tijd
niet gebruikt.
LOCATIE VAN DE BEDIENINGSKNOPPEN
1
2 3 45
6
7
8
9
Voorzijde
1. POWER (Stroom) knop
2. SOURCE knop
3. TUN+ knop
4. TUN- knop
5. VOL+ knop
6. VOL- knop
7. Bluetooth® LED-controlelampje
8. Afstandssensor
9. Scherm
10. Luidsprekers
Achterzijde
11. USB-laadpoort12. FM-antenne
13. AUX IN (rechts) aansluiting
14. AUX IN (links) aansluiting
15. LINE IN-aansluiting
16. DC IN-aansluiting
10
11
12
14
BT1000seriesIM1274_18Jun_V25.indd 85
13
15
16
85
19/06/2014 2:55 PM
NEDERLANDS
EEN PERSOONLIJK APPARAAT LADEN MET BEHULP VAN DE INGEBOUWDE USB-POORT
1. Maak de apparaathouder in de twee gaten bovenaan de Bluetooth® toren vast.
2. Plaats uw apparaat over de sleuf.
3. Verbind één uiteinde van een kabel (niet meegeleverd) met uw apparaat en
het USB-uiteinde met de USB DC 5V
laadpoort achteraan de toren.
Opmerkingen: het persoonlijk apparaat wordt autonatisch geladen wanneer het
met de Bluetooth® toren is verbonden. Zorg dat de toren onder stroom staat.
BLUETOOTH® INSTELLEN
Het Bluetooth® woordmerk en logo’s zijn geregistreerde handelsmerken die
eigendom zijn van Bluetooth SIG, Inc. en elk gebruik van deze merken door
Lexibook® is onder licentie. Andere handelsmerken en handelsnamen zijn
eigendom van hun respectievelijke eigenaars.
© 2014 Bluetooth SIG, Inc.
Initiële koppeling
1. Schakel de Bluetooth® toren in en druk op de SOURCE knop om de
Bluetooth® modus (bt) te selecteren. De Bluetooth® LED knippert tijdens het
zoeken naar een apparaat.
2. Activeer de Bluetooth®-functie op uw persoonlijk apparaat. Zie de
gebruiksaanwijzing van uw apparaat hoe deze functie te activeren.
3. Selecteer de Bluetooth® toren naam. Start met het koppelen van uw
persoonlijk apparaat aan de toren.
4. Eenmaal het apparaat en de toren met elkaar zijn verbonden, start met het
afspelen van een audio- of videobestand. Regel het volume met behulp van
de toetsen op uw persoonlijk apparaat of de volumeknoppen op de toren of
afstandsbediening.
BT1000seriesIM1274_18Jun_V25.indd 86
86
19/06/2014 2:55 PM
NEDERLANDS
Opnieuw koppelen
Wanneer de toren of Bluetooth® modus is uitgeschakeld:
1. Schakel de Bluetooth® toren in en druk op de SOURCE knop om de
Bluetooth® modus (bt) te selecteren.
2. De Bluetooth® LED knippert gedurende 3 seconden en vindt automatisch het
apparaat waarmee het laatst was gekoppeld.
3. Als er geen apparaat wordt gevonden, blijft de Bluetooth® LED knipperen.
Druk op SOURCE om andere modi te selecteren: FM, AUX of L IN.
Opmerkingen:
1. De Bluetooth® toren kan tegelijkertijd met slechts één apparaat worden
verbonden.
2. Het maximum transmissiebereik tussen de Bluetooth® luidspreker en een
apparaat is 10 meter of 32 voet.
3. Storing kan tijdens het afspelen optreden als de Bluetooth® functie in de buurt
van andere draadloze apparaten wordt gebruikt. Als het afspelen via Bluetooth®
problematisch verloopt, breng de Bluetooth® luidspreker en het afspeelapparaat
naar een andere locatie of gebruik de 3,5mm LINE IN-aansluiting in plaats van
de Bluetooth® functie.
KLOKFUNCTIES
De klok instellen
1. Druk op de POWER knop om de toren uit te schakelen (stand-by).
2. Druk op MEM/CLOCK knop op de afstandsbediening.
3. De cijfers aan de linkerzijde knipperen. Druk op de TUN+/CLOCK+ of TUN-/
CLOCK- knop op de afstandsbediening om het uur in te stellen.
4. Druk nogmaals op MEM/CLOCK om de uurinstelling te bevestigen. De
minuten knipperen automatisch.
5. Druk op de TUN+/CLOCK+ of TUN-/CLOCK- knop op de afstandsbediening
om de minuten in te stellen.
6. Druk nogmaals op MEM/CLOCK om de minuteninstelling te bevestigen.
De wekker (met een voorkeurstation) instellen
1. Druk op de POWER knop om het apparaat in te schakelen.
2. Druk herhaaldelijk op de SOURCE knop om de FM-modus te selecteren.
3. Selecteer een gewenste radiofrequentie door op de TUN+/CLOCK+ of TUN-/
CLOCK- knop te drukken.
4. Druk op de POWER knop om de toren uit te schakelen (stand-by).
5. Druk op de ALARM knop op de afstandsbediening. De tijd op het LCD-scherm
knippert.
6. De cijfers aan de linkerzijde knipperen. Druk op de TUN+/CLOCK+ of TUN-/
CLOCK- knop op de afstandsbediening om het uur in te stellen.
BT1000seriesIM1274_18Jun_V25.indd 87
87
19/06/2014 2:55 PM
NEDERLANDS
7. Druk op ALARM om de uurinstelling te bevestigen. De minuten knipperen
automatisch.
8. Druk op de TUN+/CLOCK+ of TUN-/CLOCK- knop op de afstandsbediening
om de minuten in te stellen.
9. Druk nogmaals op ALARM om de minuteninstelling te bevestigen.
10. De wekker met de vooraf ingestelde radiofrequentie gaat af op de ingestelde
tijd.
11. Om het alarm te deactiveren, druk gedurende 3 seconden op de alarmknop
op de afstandsbediening. Het kloksymbool verdwijnt.
De timer instellen
1. Druk op de POWER knop om het apparaat in te schakelen.
2. Druk herhaaldelijk op de SLEEP knop om een vooraf ingestelde timer te
selecteren: 5, 10, 15, 30, 60 of 90 minuten.
3. De LCD gaat automatisch in stand-by wanneer de timer is bereikt.
RADIOFUNCTIES
Opmerking: voor een goede ontvangstsignaal, pas de FM-draadantenne aan
(meegeleverd).
De FM-radio afstemmen
1. Druk op de POWER knop om het apparaat in te schakelen.
2. Druk op de SOURCE knop om de FM-radiomodus te selecteren.
3. Druk op de TUN+/CLOCK+ of TUN-/CLOCK- knop om een gewenste
frequentie in te stellen.
4. Druk en houd de TUN+/CLOCK+ of TUN-/CLOCK- knop ingedrukt om
automatisch af te stemmen.
Een radiostation opslaan
1. Stem de FM-radio af.
2. Selecteer een gewenste frequentie en druk op de MEM/CLOCK knop om het
huidig radiostation op te slaan. Er kunnen tot 30 radiostations in het geheugen
van de Bluetooth® toren worden opgeslagen.
Naar een opgeslagen radiostation luisteren
1. Druk op de POWER knop om het apparaat in te schakelen.
2. Druk op de SOURCE knop om de FM-radiomodus te selecteren.
3. Druk op TUN/MEM om de opgeslagen radiostations te doorlopen.
BT1000seriesIM1274_18Jun_V25.indd 88
88
19/06/2014 2:55 PM
NEDERLANDS
EEN EXTERN APPARAAT VIA AUX IN VERBINDEN
1. Verbind een AUX out-kabel met de AUX IN-aansluitingen
achteraan de toren.
2. Zet de toren onder stroom. Het stand-by controlelampje
brandt.
3. Druk op de POWER knop om de toren in te schakelen en
druk herhaaldelijk op de SOURCE knop om de AUX modus te
selecteren.
4. Schakel het verbonden extern apparaat in en start het
afspelen.
5. Druk op de volumeknoppen om het volume te regelen.
6. Druk op de TREBLE knoppen op de afstandsbediening om
de hoge tonen aan te passen.
7. Druk op de BASS knoppen op de afstandsbediening om de
lage tonen aan te passen.
8. Druk op de equalizerknoppen MUSIC, MOVIE of VOICE om het vooraf
ingesteld equalizereffect zoals gewenst in te stellen.
9. Druk op MUTE om het geluid uit te schakelen. Druk nogmaals om te hervatten.
10. Wanneer u niet langer naar het apparaat wilt luisteren, druk op de POWER
knop om de toren uit te schakelen (stand-by).
EEN EXTERN APPARAAT VIA LINE IN VERBINDEN
1. Verbind één uiteinde van een LINE IN kabel met de
koptelefoonaansluiting van uw extern apparaat.
2. Verbind het ander uiteinde van de kabel met de LINE INaansluiting achteraan de toren.
3. Zet de toren onder stroom. Het stand-by controlelampje
brandt.
4. Druk op de POWER knop om de toren in te schakelen en
druk herhaaldelijk op de SOURCE knop om de Line In modus
(L In) te selecteren.
5. Schakel het verbonden extern apparaat in en start het
afspelen.
6. Druk op de volumeknoppen om het volume te regelen.
7. Druk op de TREBLE knoppen op de afstandsbediening om
de hoge tonen aan te passen.
8. Druk op de BASS knoppen op de afstandsbediening om de lage tonen aan te
passen.
9. Druk op de equalizerknoppen MUSIC, MOVIE of VOICE om het vooraf
ingesteld equalizereffect zoals gewenst in te stellen.
10. Druk op MUTE om het geluid uit te schakelen. Druk nogmaals om te
hervatten.
11. Wanneer u niet langer naar het apparaat wilt luisteren, druk op de POWER
knop om de toren uit te schakelen (stand-by).
BT1000seriesIM1274_18Jun_V25.indd 89
89
19/06/2014 2:55 PM
NEDERLANDS
FOUTOPSPORING
PROBLEEM
OPLOSSING
Geen stroom.
Controleer de verbinding van de AC/DC-adapter
tussen de toren en het stopcontact.
Geen geluid.
Controleer of het volume NIET op minimum is
ingesteld.
Controleer of het geluid NIET gedempt is.
De afstandsbediening
werkt niet.
Inspecteer of vervang de batterij.
Geen geluid vanaf de
Bluetooth®-modus.
Controleer of de koppeling al dan niet is gemaakt.
Zorg dat er zich geen obstakels tussen de
afstandsbediening en de voorkant van de toren
bevinden.
SPECIFICATIES
ALGEMEEN
AC/DC-adapter
Stroomverbruik
Audiovermogen
Radiodekking
Impedantie van luidspreker
Afmetingen
Gewicht
BT1000seriesIM1274_18Jun_V25.indd 90
Invoer AC 100-240V, 50/60 Hz;
Uitgang DC 18V
1,6A
>50W
Woofer: 30W
Linker kanaal: 10W
Rechter kanaal: 10W
FM 87.5-108.0 Mhz
Woofer: 8 Ohm, 25W x 2
Linker kanaal: 4 Ohm, 15W
Rechter kanaal: 4 Ohm, 15W
100 x 23 x 18.5 cm
4,5 kg
90
19/06/2014 2:55 PM
NEDERLANDS
ONDERHOUD
Wij, Lexibook® S.A.
2, avenue de Scandinavie
91953 Courtaboeuf Cedex – Frankrijk
Verklaren onder onze enige verantwoordelijkheid dat het volgende product:
Soort product: Bluetooth® geluidstoren
Type benaming: BT1000series
In overeenstemming is met de volgende normen:
EN60065:2002+A1:2006+A11:2008+A2:2010+A12:2011
EN55013:2013
EN55020:2007+A11:2011
EN61000-3-2:2006+A1:2009+A2:2009
EN61000-3-3:2013
ETSI EN 300 328 V1.7.1
ETSI EN 301 489-1 V 1.9.2
ETSI EN 301 489-17 V 2.2.1
EN 62479:2010
Wij verklaren bij deze dat de bovenvermelde producten in overeenstemming zijn
met de EMC-richtlijn (2004/108/EG), met de Laagspanningsrichtlijn (2006/95/EG)
en met de R&TTE-richtlijn (1999/5/EG) van de Europese Commissie.
0700
Yiu Wai Man
Manager Productontwikkeling
27/05/2014 (Hong Kong)
ONDERHOUD
Om brand of schokgevaar te voorkomen, dient u uw apparaat van de AC
stroombron los te koppelen alvorens het schoon te maken. De afwerking van uw
apparaat kan schoongemaakt worden met een stofdoek en behandeld worden
zoals andere meubelen. Gebruik een zachte, propere doek bevochtigd met
zuiver, lauw water om de buitenkant van het apparaat schoon te maken. Wees
voorzichtig bij het schoonmaken en afvegen van de plastic onderdelen. Er kan
milde zeep en een vochtige doek gebruikt worden op het voorpaneel.
BT1000seriesIM1274_18Jun_V25.indd 91
91
19/06/2014 2:55 PM
NEDERLANDS
GARANTIE
Dit product wordt gedekt door onze 2 jaar garantie.
Voor een claim onder de garantie of de dient na verkoop, dient u contact op te
nemen met uw verdeler en een geldig bewijs van aankoop voor te leggen. Onze
garantie dekt fabricage- en uitvoeringsfouten, met de uitzondering van enige
beschadiging die voortvloeit uit de niet naleving van de handleiding of uit een
nalatige actie (zoals het uit mekaar halen, blootstelling aan hitte en vochtigheid,
enz.). Het is aanbevolen dat u de verpakking bewaart voor het geval u ze later
nog zou nodig hebben.
In een poging om onze diensten te verbeteren, kan het gebeuren dat er
wijzigingen doorgevoerd worden aan de kleuren en de details van het product
zoals afgebeeld op de verpakking.
OPMERKING: Gelieve deze handleiding te bewaren, daar ze belangrijke
informatie bevat.
Referentie: BT1000series
Bedacht en ontworpen in Europa – Gemaakt in China
© 2014 LEXIBOOK®
www.lexibook.com
Dit product is geen speelgoed.
Milieubescherming
Ongewenste elektrische apparaten dienen gerecycleerd te worden en niet weggegooid
met het algemeen huishoudelijk afval! Gelieve actief bij te dragen tot het behoud van
middelen en het milieu te helpen beschermen door dit apparaat terug te bezorgen aan een
verzamelcentrum (indien beschikbaar).
BT1000seriesIM1274_18Jun_V25.indd 92
IM Code: BT1000seriesIM1274
92
19/06/2014 2:55 PM