1
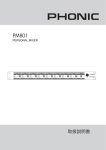
English Deutsch PM801 Español V10 Français Português 日本語 简体中文 User's Manual Benutzerhandbuch Manual del Usuario Mode d'emploi Manual do Usuário ユーザーズマニュアル 使用手册 English PM801 V10 PERSONAL MIXER MEZCLADORA PERSONAL 8声道调音台 Deutsch ENGLISH . . . . . . . . . . . . . . . . . . . . . . . . . . . . . . . . . . . . . . . . . . . . . . . . . . I Español ESPAÑOL ..................................................II 简体中文 . . . . . . . . . . . . . . . . . . . . . . . . . . . . . . . . . . . . . . . . . . . . . . . . .III Français Português 日本語 简体中文 V1.0 08/25/2011 English USER'S MANUAL CONTENTS FEATURES 1 BASIC SETUP 2 MAKING CONNECTIONS 3 CONTROLS AND SETTINGS 4 SPECIFICATIONS 5 Español 1 Deutsch INTRODUCTION APPENDIX 1 DIMENSIONS 2 Français APPLICATIONS Phonic preserves the right to improve or alter any information within this document without prior notice Português 日本語 简体中文 PM801 V10 IMPORTANT SAFETY INSTRUCTIONS English The apparatus shall not be exposed to dripping or splashing and that no objects with liquids, such as vases, shall be placed on the apparatus. The MAINS plug is used as the disconnect device, the disconnect device shall remain readily operable. Warning: the user shall not place this apparatus in the can be easily accessible. area during the operation so that the mains switch 1. Read these instructions before operating this apparatus. Deutsch 2. Keep these instructions for future reference. Español . Clean only with dry cloth. Do not use aerosol or liquid cleaners. Unplug this apparatus before cleaning. CAUTION RISK OF ELECTRIC SHOCK DO NOT OPEN . Heed all warnings to ensure safe operation. 4. Follow all instructions provided in this document. 5. Do not use this apparatus near water or in locations where condensation may occur. . Do not block any of the ventilation openings. Install in accordance with the manufacturer’s instructions. Français 8. Do not install near any heat sources such as radiators, heat registers, stoves, or other apparatus (including . Português 9. Do not defeat the safety purpose of the polarized or grounding-type plug. A polarized plug has two blades with one wider than the other. A grounding type plug has two blades and a third grounding prong. The wide blade or the third prong is provided for your safety. If the provided plug does not into your outlet, consult an electrician for replacement of the obsolete outlet. 10. Protect the power cord from being walked on or pinched particularly at plug, convenience receptacles, and the point where they exit from the apparatus. 11. Only use attachments/accessories manufacturer. CAUTION: TO REDUCE THE RISK OF ELECTRIC SHOCK, DO NOT REMOVE COVER (OR BACK) NO USER SERVICEABLE PARTS INSIDE REFER SERVICING TO QUALIFIED PERSONNEL The lightning flash with arrowhead symbol, within an equilateral triangle, is intended to alert the user to the presence of uninsulated “dangerous voltage” within the product’ magnitude to constitute a risk of electric shock to persons. The exclamation point within an equilateral triangle is intended to alert the user to the presence of important operating and maintenance (servicing) instructions in the literature accompanying the appliance. WARNING: To reduce the risk of or electric shock, do not expose this apparatus to rain or moisture. CAUTION: Use of controls or adjustments or performance of procedures other than those may result in hazardous radiation exposure. by the 日本語 12. Use only with a cart, stand, tripod, bracket, or table by the manufacturer, or sold with the apparatus. When a cart is used, use caution when moving the cart/apparatus combination to avoid injury from tipover. 简体中文 1. Unplug this apparatus during lighting storms or when unused for long periods of time. 14. Refer all servicing to service personnel. Servicing is required when the apparatus has been damaged in any way, such as power-supply cord or plug is damaged, liquid has been spilled or objects have fallen into the apparatus, the apparatus has been exposed to rain or moisture, does not operate normally, or has been dropped. PM801 V10 INTRODUCTION FEATURES Thank you for choosing one of Phonic’s many quality mixers. ϥʳ 1U, compact design 8-ch mixer with EQ engineers that have created a variety of mixers fantastic in style and performance in the past – is an ingenious device, with the ability to be stacked along side your other rack-mountable gear – signal processors and such – this 1 U mixer is the ideal addition to your studio rack or permanent, live setup. With 8 input channels (with 1/4" and 3-pin phoenix / euroblock ϥʳ 8-Channel MIC / LINE input, each with ultra low noise preamp circuitry offering up to 62 dB gain (mic in) ϥʳ Eight sets of balanced XLR mic inputs and 1/4” unbalanced line inputs ϥʳ Pre-fader out and Aux Bus in for connecting additional units to maximize the application flexibility control and muting on each, individual channel, the PM 801 ϥʳ Mute control on each channel will undoubtedly prove itself to have been a valuable investment. ϥʳ Clip indicator on each channel Before you get started, we strongly urge you to take a look ϥʳ Tone control on each input channel through this manual. Inside, you will find many important notes on the set up, use and applications of your brand new mixer many people who flatly refuse to read user manuals, then we ϥʳ Eight DIP switch offering real 48V phantom power for stable, full performance Español (as well as a few warnings). If you do happen to be one of the Deutsch connectors ), a prefader out and auxiliary in, as well as tone English The PM 801 Personal Mixer – designed by the ingenious ϥʳ Built in power supply, no lousy wall-wart plug just urge you to at least glance at the Instant Setup section for some quick tips to get you started. After reading through the manual, it is suggested that you store it in a place that is easy for you to find, because chances are there’s something you missed the first time around. Français Português 日本語 简体中文 PM801 V10 BASIC SETUP English Getting Started Channel Setup 1. 1. Ensure all power is turned off on the PM 801 Personal is selected, every channel should first be muted and all Mixer. To totally ensure this, the AC cable should not be VRs turned all the way to the left (including the main output connected to the unit. 2. All level controls should be set at all the way to the left and all channels muted to ensure no sound is inadvertently control). 2. Deutsch signal that will be sent when in common use. For example, All levels can be changed to acceptable degrees after the if the channel is using a microphone, then you should device is turned on. speak or sing at the same level the performer normally Plug all necessary instruments and equipment into the would during a performance. If a guitar is plugged into that device's various inputs as required. This may include channel, then the guitar should also be used as it normally line level devices, as well as microphones and/or guitars, keyboards, etc. Español 4. Plug any necessary equipment into the PM 801’s output would be. 3. back slightly to ensure the LED does not illuminate. This various devices, such as amplifiers, active speakers or 5. Plug the supplied AC cable into the AC inlet on the back of the device ensuring the local voltage level is identical to Français that required on your device. 6. Plug the supplied AC cable into a power outlet of a suitable voltage. 7. Turn the power switch on. Set the level control of the selected channel to a level that allows the clip LED to illuminate occasionally; then turn it jack and pre-fader output. These outputs can be sent to monitors, signal processors, and/or recording devices. Choose the channel that you wish to set the level of, and ensure that channel has a signal sent to it similar to the sent through the outputs when the device is switched on. 3. To ensure the correct audio levels of each input channel will allow you to make full use of the channel’s signal. 4. This channel is now ready to be used; you can stop making the test audio signal. 5. 6. To activate the channel, release the mute button. You should now select the next channel to set and go back to follow steps 1 through 5. Note: it is possible to connect two PM 801’s together through the Prefader Outputs and AUX Bus Inputs of each, allowing a total of 16 inputs to be used, all controlled through a single fader (or both faders, and sending the same signal Português to 2 separate external devices). 日本語 简体中文 PM801 V10 English Deutsch MAKING CONNECTIONS 5. Prefader Output This RCA output allows external devices to be connected to the PM 801. Such devices may include tape recorders, signal processors and other PM 801s. With low noise preamplifiers, these inputs serve for crystal clear sound replication. Pin identification for grounding, positive and negative pins can be found underneath the input jack. 6. +48V Phantom Power NB. When using an unbalanced microphone, please ensure phantom the XLR connectors, allowing condenser microphones to be These switches allow you to individually elect which channel's microphone input jack to active phantom power on. When activated, these switches provide +48V of phantom power to used on these channels. Before turning Phantom Power on, microphones the phantom power should be activated. ensure level controls are set to a minimum. NB. Phantom Power should be used in conjunction with balanced microphones. When Phantom Power is engaged, single ended (unbalanced) microphones and instruments should not be used various music instruments – such as keyboards, drum on the Mic inputs. Phantom Power will not cause damage to most machines, electric guitars, as well as a variety of other line dynamic microphones, however if unsure, the microphone’s user level instruments. manual should be consulted. This RCA input allows external devices to be connected to the PM 801. Such devices may include tape, CD players and other PM 801s. Português These inputs accept 1/4" TS line inputs for the addition of 3. Aux Bus Input Français power is switched off. However, when using condenser 2. Line In Jacks Español 1. 3-Pin Phoenix/Euroblock Jacks These jacks accept 3-pin phoenix/euroblock inputs for balanced signals. They can be used in conjunction with microphones, such as professional condenser, dynamic or ribbon microphones - with standard XLR male connectors. 7. Power Connector and Fuse Holder This port is for the addition of a power cable and supply, allowing power to be supplied to the mixer. Please use the power cable that is included with this mixer only. The Fuse holder, located above the AC Power connector, is, of course, holder cover, and replace the fuse with a suitable replacement (as indicated on the fuse holder’s cover). 简体中文 PM801 V10 for the PM 801’s fuse. If the fuse happens to blow, open the 日本語 4. Main Output This 3-pin phoenix/euroblock connector will output the final line level signal sent from the main mix. The primary purpose of this jack is to send the main output to external devices such as amplifiers, active speakers, as well as other, mixers, PA systems, and a wide range of other possible signal processors. Pin identification for grounding, positive and negative pins can be found underneath the output jack. English Deutsch CONTROLS AND SETTINGS 8. Tone Controls Español This control allows users to attenuate the high or low frequency signals of the corresponding channel. By turning to the left, the low frequency sounds are reduced somewhat (and are reduced further as the control is turned further), and turning the control to 11. Channel Level Controls This control will alter the signal level that is sent from the corresponding channel to the main mixing bus. 12. Master Level Control Français the right has the same effect on high frequency sounds. This control is the final level control for the Main signal, sent to 9. Clip Indicators 13. Power Switch This small LED indicator will illuminate 6 dB before the signal of the channel is dynamically clipped. If it flashes it is advisable to turn the level control down somewhat to reduce the signal’s level and avoid distortion. the Main output on the rear of the PM 801. This switch is used to turn the mixer on and off. Ensure you turn all level controls down before activating as to avoid any unwanted signals being sent through the output. Português 10. Mute Buttons These buttons affectively mute the corresponding channels, ensuring signals received by the channels are not sent onto the main mixing bus. 日本語 简体中文 PM801 V10 SPECIFICATIONS PM801 Total Channels Mic input / Line input Aux Bus In English Inputs 8 8 x 3-pin phoenix/euroblock & 8 x 1/4" TS RCA Outputs Pre-Fader Out 3-pin phoenix/euroblock Deutsch Main Out RCA THD+N THD (Any output, 1KHz @ +14dBu, 20Hz to 20KHz.) 0.01% Metering Channel Clip indicator Phantom Switches +48V DC Español Phantom Power Supply +6 dBu DIP Frequency Response (Mic input to any output) 20Hz ~ 20KHz + 0/-1 dB 20Hz ~ 60KHz + 0/-3 dB S/N ratio, ref to+4 CMRR (1 KHz @ -60dBu, Gain at maximum ) 106 dB <-129.5 dBm Français Microphone Preamp E.I.N. (150 ohms terminated, max gain) 80 dB Maximum Level Mic Preamp Input +10 dBu All Other Input +22 dBu Main Output +22 dBu Mic Preamp Input 1.4 K ohms Unbalanced Line in 12 K ohms Aux bus in 10 K ohms Main Output 100 ohms Prefader Out 100 ohms Power Requirement (depends on region, built-in) Net Weight 100-120VAC,220-240 VAC, 50/60 Hz 日本語 Dimensions ( WxHxD ) Português Impedance 483 x 44 x 165 mm (19” x 1.73” x 6.49”) 2.3 kg (5.07 lbs) 简体中文 PM801 V10 SERVICE AND REPAIR English For replacement parts, service and repairs please contact the Phonic distributor in your country. Phonic does not release service manuals to consumers, and advice users to not attempt any self repairs, as doing so voids all warranties. You can locate a dealer near you at http://www.phonic.com/where/. Deutsch WARRANTY INFORMATION Español Phonic stands behind every product we make with a no-hassles warranty. Warranty coverage may be extended, depending on your region. Phonic Corporation warrants this product for a minimum of one year from the original date of purchase against defects in material and workmanship under use as instructed by the user’s manual. Phonic, at its option, shall repair or replace the defective unit covered by this warranty. Please retain the dated sales receipt as evidence of the date of purchase. You will need it for any warranty service. No returns or repairs will be accepted without a proper RMA number (return merchandise authorization). In order to keep this warranty in effect, the product must have been handled and used as prescribed in the instructions accompanying this warranty. Any tampering of the product or attempts of self repair voids all warranty. This warranty does not cover any damage due to accident, misuse, abuse, or negligence. This warranty is valid only if the product was purchased new from an authorized Phonic dealer/distributor. For complete warranty policy information, please visit http://www.phonic.com/warranty/. Français CUSTOMER SERVICE AND TECHNICAL SUPPORT Português We encourage you to visit our online help at http://www.phonic.com/support/. There you can find answers to frequently asked questions, tech tips, driver downloads, returns instruction and other helpful information. We make every effort to answer your questions within one business day. 日本語 简体中文 [email protected] http://www.phonic.com PM801 V10 English Manual del Usuario CONTENIDO CARACTERÍSTICAS 1 CONFIGURACIÓN BÁSICA 2 HACIENDO CONEXIONES 3 CONTROLES Y AJUSTES 4 ESPECIFICACIONES 5 Español 1 Deutsch INTRODUCCIÓN Apéndice 1 DIMENSIONES 2 Français APLICACIONES Phonic se reserva el derecho de mejorar o alterar cualquier información provista dentro de este documento sin previo aviso. Português 日本語 简体中文 PM801 V10 English Deutsch Español Français Português 日本語 简体中文 PM801 V10 INTRODUCCIÓN CARACTERÍSTICAS Gracias por escoger una de las muchas mixers de gran ϥʳ 1U, mixer de 8 canales de diseño compacto con EQ y los maravillosos ingenieros que han creado una gran variedad de mixers fantásticas en estilo y desempeño en el pasado - es un dispositivo ingenioso, con la habilidad de poder ser apilado un lado de tus otros equipos de rack - procesadores de señales y otros - esta mixer de una unidad de rack es la opción ideal para el rack de tu estudio o para instalaciones entrada (Con conectores 1/4" and 3-pin phoenix/euroblock), una salida pre fader y entrada auxiliar, así como un control de tono y mute en cada canal individual, la PM801 sin duda ϥʳ 8 Canales de entrada de MIC/LINEA, cada uno con circuitos preamplificadores de ruido ultra bajo que ofrece más de 62dB de ganancia (entrada de micrófono) ϥʳ Ocho sets de entradas de micrófono XLR balanceadas y de entrada de línea desbalanceada 1/4" ϥʳ Salida Pre Fader y Bus Auxiliar para conectar unidades adicionales para maximizar la flexibilidad de aplicaciones ϥʳ Control de Mute en cada canal Antes de que empieces, te sugerimos dar una mirada a este ϥʳ Indicador de Clip en cada canal manual. Dentro, encontraras muchas notas importantes en ϥʳ Control de Tono en cada canal de entrada como unas cuantas advertencias). Si sucede que eres uno de los muchos que se rehusan a leer manuales, entonces te sugerimos a que al menos revises la sección de Configuración Básica para algunos tips rápidos para que puedas comenzar. Español alguna probará por si misma ser una inversión muy valiosa. la configuración, usos y aplicaciones de tu nueva mixer (así Deutsch permanentes y equipos para en vivo. Con ocho canales de salidas directas English calidad de Phonic. La PM 801 Mixer Personal- diseñada por ϥʳ Ocho Dip Switches que ofrecen fuente fantasma real a 48V para desempeño estable y completo ϥʳ Fuente de alimentación integrada, no incrustaciones de pared Después de leer el manual, se sugiere que lo almacenes en Français un lugar que sea de fácil acceso para encontrarlo, pues hay posibilidades de que hayas pasado algo por alto en tu primera lectura. Português 日本語 简体中文 PM801 V10 CONFIGURACIÓN BÁSICA English Iniciando Configuración de Canal 1. 1. Asegúrese de que la mixer personal PM801 esté apagada. entrada de canal, deberán ser cancelados (mute), y todos Para asegurarse de eso, el cable de AC no debe de estar los VRs deberan estar completamente a la izquierda conectado a la unidad. 2. Todos los controles deben de estar completamente a la izquierda y todos los canales cancelados (muted), para (incluyendo el control principal de salida). 2. Deutsch señal que se está ajustando en uso común. Por ejemplo, si cuando se prenda el equipo. Todos los niveles pueden el canal tiene un micrófono conectado a él, entonces hable ser modificados a niveles aceptables después de que se o cante al micrófono al mismo nivel que el cantante usaría encienda el equipo. durante su presentación o grabación; si se conecta una Conecte todos los instumentos necesarios y todo el guitarra en el canal, entonces la guitarra deberá tocarse al equipo en las entradas de la mixer como sea necesario. Esto puede incluir dispositivos de nivel de línea, así como Español también micrófonos y/o guitarras, teclados, etc. 4. mismo nivel en que se tocaría (y así sucesivamente). 3. entonces, regrésate lentamente para asegurarte de que el de la PM 801 y salida de pre-fader. Estas salidas pueden LED no se iluminara. Esto te permitirá hacer uso total de ser enviadas a varios dispositivos como amplificadores, dispositivos de grabación. Français 5. 6. Conecte el cable AC al conector trasero de la mixer y la señal del canal. 4. Este canal está listo para usarse; ya puedes dejar de hacer la prueba de audio. asegúrate de que el nivel de voltaje total es idéntico a lo 5. Para activar el canal, libere el botón de mute. requerido en tu dispositivo. 6. Ahora deberas seleccionar el siguiente canal para Conecte el cable de AC a un contacto de voltaje adecuado para el equipo. 7. Ajuste el control de nivel del canal seleccionado a un nivel que permita al LED de clip iluminarse ocasionalmente; Conecte todo el equipo necesario en los jacks de salida altavoces activos o monitores, procesadores de señal y/o Escoge el canal que quieras ajustar y asegúrate de que cada canal tenga un nivel de señal de envío similar a la asegurar que ningún audio sea enviado a las salidas 3. Para asegurar que se seleccionó el nivel correcto de Encienda el equipo. configurarlo y hacer los pasos del 1 al 5. Nota: Es posible conectar juntas dos mixer PM 801 mediante las salidas Pre-fader y las entradas del Bus Auxiliar de cada una, permitiendo así un total de 16 entradas para ser utilizadas, Português todas controladas mediante un solo fader (o ambos faders y enviando la señal a dos dispositivos externos por separado) 日本語 简体中文 PM801 V10 English Deutsch HACIENDO CONEXIONES 1. 3-Pin Phoenix/Euroblock Jacks Estos jacks aceptan entradas 3-pin phoenix/euroblock para señales balanceadas. Los mismos pueden ser usados en conjunto con micrófonos condensadores profesionales, dinámicos o de ribbon con conectores estándar XLR machos. Identificación de Pin, electropositivo y negativo para conectar pines con tierra pueden ser encontrados debajo de la entrada jack. 5. Salida de Prefader NB. Al usar un micrófono desbalanceado, favor de asegurar que la fantasma. Cuando se activa, estos selectores dan +48V de micrófonos condensadores la fuente de potencia fantasma debe 2. Jacks de Entrada de Línea Estos jacks aceptan entradas de línea 1/4" TS para agregar instrumentos musicales- como teclados, drum machines, guitarras eléctricas, así como también una variedad de instrumentos de nivel de línea. Esta entrada RCA permite a dispositivos externos ser conectados a la PM 801. Dichos dispositivos pueden incluir cintas, reproductores de CD y otras PM 801. qué canal de entrada de micrófono tendrá activada la fuente fuente fantasma a los conectores XLR, permitiendo a los micrófonos de condensador ser utilizados en estos canales. Antes de encender la fuente fantasma, asegúrate de que los niveles de control estén al mínimo. NB. La Fuente Fantasma deberá ser utilizada en conjunto con micrófonos balanceados. Cuando la fuente fantasma está activada, los micrófonos de una sola terminación (desbalanceados) y los instrumentos no deberán de ser utilizados en las entradas de micrófono. La fuente fantasma no causara daños a la mayoría de los micrófonos dinámicos, sin embargo, si no está seguro, deberás de consultar el manual de tus micrófonos. 7. Conector de Energía y Portafusible Este puerto es para colocar un cable de voltaje, permitiendo que el voltaje alimente a la mixer. Por favor utilice únicamente el cable que se incluye con este equipo. El portafusible, localizado por encima del conector de AC es, por supuesto, para el fusible de la PM 801. Si el fusible se quema, abra la tapa de fusible y reemplace el fusible con uno del mismo valor y especificaciones (como se indica en la tapa del fusible). 简体中文 PM801 V10 Estos selectores te permiten seleccionar individualmente 日本語 4. Salida Principal Estos conectores de 3-pin phoenix/euroblock serán la salida final del nivel de línea de señal enviada desde una mezcla central. El propósito principal de este jack es de enviar la salida de principal a dispositivos externos, tales como amplificadores, altavoces activos, sistemas PA y una gran gama de otros posibles procesadores de señal. Identificación de Pin, electropositivo y negativo para conectar pines con tierra pueden ser encontrados debajo de la entrada jack. 6. Fuente Fantasma a +48V Português 3. Entrada de Bus Auxiliar grabadoras de cinta, procesadores de señal y otras PM 801. Français estar activada. conectados a la PM 801. Dichos dispositivos pueden incluir Español fuente de potencia fantasma debe estar desactivada. Y al usar Esta salida RCA permite a dispositivos externos ser English Deutsch CONTROLES Y AJUSTES 8. Controles de Tono Este control control permite a los usuarios atenuar las señales Español de frecuencias altas o bajas del canal correspondiente. Al girar a la izquierda, los sonidos de frecuencias graves serán reducidos de alguna manera (y serán reducidos aún más mientras el control es girado), y moviendo el control a la derecha, tendrá el mismo efecto en las frecuencias de sonidos agudos. 9. Indicadores de Clip Français Este pequeño indicador LED se iluminara 6dB antes de que la señal del canal sea recortada dinámicamente. Si parpadea se aconseja bajar el control de alguna manera para evitar la 11. Controles de Nivel de Canal Este control alterara el nivel de la señal que es enviado del canal correspondiente al bus de mezcla principal. 12. Control de Nivel Principal Este es el control de nivel final de la señal principal, enviado a la salida principal en la parte posterior de la PM 801. 13. Botón de Encendido Este switch es utilizado para encender o apagar la mixer. Asegúrate de bajar todos los niveles antes de encenderla, para evitar que cualquier señal no deseada sea enviada a la salida. distorsión. Português 10. Botones de Mute Estos botones cancelan efectivamente los canales correspondientes, asegurando que las señales recibidas por los canales no serán enviados al bus de mezcla principal. 日本語 简体中文 PM801 V10 ESPECIFICACIONES PM801 English Entradas Canales de Entrada Entrada de Mic / Línea Entrada de Bus Aux 8 8 x 3-pin phoenix/euroblock & 8 x 1/4" TS RCA Salidas Salida Pre-Fader 3-pin phoenix/euroblock Deutsch Salida Principal RCA THD+N THD (Cualquier salida 1KHz @ +14dBu, 20Hz a 20KHz.) 0.01% Medidores Indicador de Clip de Canal +6 dBu +48V DC Selectores de Fuente Fantasma DIP Español Suministro de Fuente Fantasma Repuesta en Frecuencia (Entrada de Mic a cualquier salida) 20Hz ~ 20KHz + 0/-1 dB 20Hz ~ 60KHz + 0/-3 dB Relación S/R, ref a +4 CMRR (1 KHz @ -60dBu, Gananacia al máximo) Français Preamplificador de Mic E.I.N. (150 ohms terminados, ganan máx.) 106 dB <-129.5 dBm 80 dB Nivel Máximo Entrada del Preamplificador de Micrófono +10 dBu Todas las demás Entradas +22 dBu Salida Principal +22 dBu Português Impedancia Entrada de Preamplificador de Micrófono 1.4 K ohms Entrada de Línea Desbalanceada 12 K ohms Entrada de Buas Aux 10 K ohms Salida Principal 100 ohms Salida de Prefader 100 ohms Requisitos de Potencia (depende de la región, integrada) Peso Neto 100-120VAC,220-240 VAC, 50/60 Hz 日本語 Dimensiones ( AnxAlxP ) 483 x 44 x 165 mm (19” x 1.73” x 6.49”) 2.3 kg (5.07 lbs) 简体中文 PM801 V10 SERVICIO Y REPARACIÓN English Para refacciones de reemplazo y reparaciones, por favor póngase en contacto con nuestro distribuidor de Phonic en su país. Phonic no distribuye manuales de servicio directamente a los consumidores y, avisa a los usuarios que no intenten hacer cualquier reparación por si mismo, haciendo ésto invalidará todas las garantías del equipo. Puede encontrar un distribuidor cerca de usted en http://www.phonic.com/where/. Deutsch INFORMACIÓN DE LA GARANTIA Español Phonic respalda cada producto que hacemos con una garantía sin enredo. La cobertura de garantía podría ser ampliada dependiendo de su región. Phonic Corporation garantiza este producto por un mínimo de un año desde la fecha original de su compra, contra defectos en materiales y mano de obra bajo el uso que se instruya en el manual del usuario. Phonic, a su propia opinión, reparará o cambiará la unidad defectuosa que se encuentra dentro de esta garantía. Por favor, guarde los recibos de venta con la fecha de compra como evidencia de la fecha de compra. Va a necesitar este comprobante para cualquier servicio de garantía. No se aceptarán reparaciones o devoluciones sin un número RMA apropiado (return merchandise autorization). En orden de tener esta garantía válida, el producto deberá de haber sido manejado y utilizado como se describe en las instrucciones que acompañan esta garantía. Cualquier atentado hacia el producto o cualquier intento de repararlo por usted mismo, cancelará completamente esta garantía. Esta garantía no cubre daños ocasionados por Français accidentes, mal uso, abuso o negligencia. Esta garantía es válida solamente si el producto fue comprado nuevo de un representante/distribuidor autorizado de Phonic. Para la información completa acerca de la política de garantía, por favor visite http://www.phonic.com/warranty/. Português SERVICIO AL CLIENTE Y SOPORTE TÉCNICO Le invitamos a que visite nuestro sistema de ayuda en línea en www.phonic.com/support/. Ahí podrá encontrar respuestas a las preguntas más frecuentes, consejos técnicos, descarga de drivers, instrucciones de devolución de equipos y más información de mucho interés. Nosotros haremos todo el esfuerzo para contestar sus preguntas lo antes posible. 日本語 简体中文 [email protected] http://www.phonic.com PM801 V10 English 使用说明书 目录 特色 1 基本设置 1 连接操作 1 控制和设置 2 规格 3 Español 1 Deutsch 简介 附录 1 尺寸 2 Français 应用 PHONIC保留不预先通知即可更新本文件的权利。 Português 日本語 简体中文 PM801 V10 重要安全说明 English Deutsch 1. 2. 3. 4. 5. 6. 7. 8. 9. Español 10. 11. 12. 13. 14. Français 请在使用本机前,仔细阅读以下说明。 请保留本使用手册,以便日后参考。 为保障操作安全,请注意所有安全警告。 请遵守本使用手册内所有的操作说明。 请不要在靠近水的地方,或任何空气潮湿的地点操作本机。 本机只能用干燥布料擦拭,请勿使用喷雾式或液体清洁剂。清洁本机前请先将电源插头拔掉。 请勿遮盖任何散热口。确实依照本使用手册来安装本机。 请勿将本机安装在任何热源附近。例如:暖气、电暖气、炉灶或其它发热的装置(包括功率 扩大机)。 请注意极性或接地式电源插头的安全目的。极性电源插头有宽窄两个宽扁金属插脚。接地式 电源插头有两支宽扁金属插脚和第三支接地插脚。较宽的金属插脚(极性电源插头)或第三支 接地插脚(接地式电源插头)是为安全要求而制定的。如果随机所附的插头与您的插座不符, 请在更换不符的插座前,先咨询电工人员。 请不要踩踏或挤压电源线,尤其是插头、便利插座、电源线与机身相接处。 本机只可以使用生产商指定的零件/配件。 本机只可以使用与本机搭售或由生产商指定的机柜、支架、三脚架、拖架 或桌子。在使用机柜时,请小心移动已安装设备的机柜,以避免机柜翻倒 造成身体伤害。 在雷雨天或长期不使用的情况下,请拔掉电源插头。 所有检查与维修都必须交给合格的维修人员。本机的任何损伤都须要检修,例如: 电源线或插 头受损,曾有液体溅入或物体掉入机身内,曾暴露于雨天或潮湿的地方,不正常的运作,或曾 掉落等。 CAUTION RISK OF ELECTRIC SHOCK DO NOT OPEN Português 这个三角形闪电标志是用来警告用户,装置内的非绝缘危险电压足以造成使人触 电的危险性。 日本語 这个三角形惊叹号标志是用来警告用户,随机使用手册中有重要操作与保养维修 说明。 警告: 为减少火灾或触电的危险性,请勿将本机暴露于雨天或潮湿的地方。 注意: 任何未经本使用手册许可的操控,调整或设定步骤都可能产生危险的电磁幅射。 简体中文 PHONIC CORPORATION PM801 V10 ㅔҟ Ўᅝܼ䍋㾕乏⹂ܜ䅸ߛᮁ⏋䷇఼᠔᳝ⱘ⬉⑤ ᇚ䷇䞣ᴚ䷇䞣ࠊ䇗㟇᳔Ԣ݇䯁᠔᳝ໄ䘧ҹ⹂ֱᴎ ఼▔⌏ᯊϡӮথߎᛣⱘా䷇ᓔਃ⏋䷇఼ৢ᠔᳝䷇䞣ৃ 䇗ࠄ⧚ᛇԡ㕂 ᡞ᠔䳔Ф఼䆒ܹϡৠⱘ䕧ܹˈབֵো໘⧚఼ˈ㘇 ᴎˈঢ়ᅗˈ⬉䩶⨈ㄝ 㒣䕧ߎໄ䘧䖲䷇ㆅⲥ఼ֵো໘⧚఼ᔩ䷇䆒া᳝ ䷇ㆅᠡ㛑Ϣࡳ⥛ᬒ఼䕧ߎ䖲བϡℷᔧ䖲⏋䷇఼߭ Ӯᤳണᴎ఼ ᇚ$&㒓ᦦܹᴎ఼㚠䴶ⱘ$&ᄨ⬉ˈݙय़ᑨϢᴎ఼Ⳍヺ $&㒓П㾘Ḑᑨヺড়䗖ᔧⱘ⬉⑤ষ ݇䯁⬉⑤ ⡍㡆 ᏺEQⳈ䕧ߎࡳ㛑8ໄ䘧䍙㭘ᇣൟ⏋䷇఼ 8Ͼᑇ㸵XLR呺ܟ亢䕧ܹ1/4"䴲ᑇ㸵催⬉ᑇ䕧ܹ ᄤࠡ䕧ߎ䕙ࡽᘏ㒓ˈ䖲ऩˈܗࡴ䖤⫼ⱘ♉⌏ ᗻ ↣ໄ䘧ⱘ䴭䷇ࠊ ໄ䘧䆒㕂 ↣ໄ䘧ⱘࠞ⊶ᣛ⼎♃ Ў㦋ᕫ䷇ⱘ⹂ޚ䞣䕧ߎˈ݇䯁᠔ֵ᳝䘧ᑊᡞ䷇䞣ᴚ䆒㟇 Ў0 ↣䕧ܹໄ䘧ⱘ䷇䇗ࠊ 8ϾDIPᓔ݇ᦤկ48Vᑏ䈵⬉⑤ˈᗻ㛑〇ᅮ 䗝ᢽ䖲ⱘֵ䘧ˈ⹂ֱ䕧ߎ䆃োϢℷᐌᎹᯊϔ㟈ˈৃ䗮 䖛䆩呺ܟ亢ᔍ༣Ф఼߸ᮁ䆃োᰃ৺ℷᐌӴ䗕 ݙᓎ⬉⑤կᑨˈ᮴䳔ᦦᑻ ᣝϟPFLᣝ䪂ˈৃⳟࠄЏ⬉ᑇ㸼ⱘ䷇䞣ᰒ⼎ ᇚ⬉ᑇ㸼䇗㟇0dBˈⲞ䆒㕂ेᅠ៤ ֵ䘧Փ⫼ࠡˈ䳔Ёᮁ䷇乥䆃োⱘѻ⫳ Փ⫼ֵ䘧ᯊ݇䯁PFLᣝ䪂 Français Español Deutsch ᙼᓔྟՓ⫼Пࠡ䇋ܜҨ㒚䯙䇏ѻકՓ⫼ˈݠᅗᇍᙼᅝ㺙Ϣ Փ⫼᳝ᐂࡽˈ䇋ᙼࡵᖙ䯙䇏ᖿ䗳ᅝ㺙䚼ߚˈᑊ䇋ཹֱㅵˈ ҹ֓Ѣ᮹ৢ㗏䯙 ޚᎹ English ᙁ୰ᙼ䗝䌁phonic㋏߫ⱘ催ક䋼⏋䷇఼ˈᅗ⬅ϔᡍߎ㡆ⱘ䷇乥 ᎹᏜӀ㊒ᖗ䆒䅵ᠧ䗴ˈᗻ㛑Ϣ䗴ൟϡৠડˊᎻ༎Ꮉⱘ䍙 㭘ൟᴎԧϢ݊ᅗᬃᶊൟ䆒ᑊᬒˈབֵো໘⧚఼ˈ䖬ৃ⧚ᛇഄ ᬒ㕂Ѣᬃᶊˈ䗖⫼ᅮᅝ㺙Ϣ⦄എ㸼ⓨˊPM801䲚8Ͼ䕧ܹໄ䘧 (1/4㣅য়phoneᦦᑻঞ3䩜ᓣphoenix/ euroblockᦦᑻᄤࠡ䕧 ߎ䕙ࡽ䕧ܹˈ↣ໄ䘧ऩ⣀ⱘ䷇䇗ࠊ䴭䷇ࡳ㛑ˈ㒱ᇍᰃᙼϡ ৃᕫⱘ䗝ᢽˊ ᴀ䆒㕂 Português ϸৄPM801⏋䷇఼䖲े䗮䖛↣ৄᴎⱘᄤࠡ䕧ߎ䕙ࡽᘏ㒓 䕧ܹˈ16Ͼ䕧ܹໄ䘧ৃ⬅ϔϾऩϔⱘᴚࠊ˄⬅ϸϾᴚ ࠊˈ䕧ߎৠϔ䆃ো㟇ϸৄϡৠⱘ䆒˅ˊ 日本語 简体中文 PM801 V10 English Deutsch Español Français 䖲᪡ ࠊϢ䆒㕂 1. 3-3䩜ᓣphoenix/ euroblockᦦᑻ 䖭ѯᦦᑻফ3䩜ᓣphoenix/euroblockッᄤⱘᑇ㸵䆃ো䕧ܹ.䗮 ᐌ⫼ᴹϢᷛޚXLR݀ッᦦᑻⱘϧϮ⬉ᆍᓣ呺ܟ亢,ࡼ呺 ܟ亢,ϱᏺ呺ܟ亢ㄝ䖲. Ԣా䆃ⱘࠡ㑻ᬒ఼ᇚ䕧ܹ䆃ো䕀࣪ ៤∈㠀ⱘໄ䷇. 䕧ߎᦦᑻⱘϟᮍৃҹⳟࠄഄッ, ℷᵕッ,䋳 ᵕッⱘ䩜㛮. ䷇䇗ࠊ ⫼ҹ㹄ޣໄ䘧催乥Ԣ乥䆃োˊᮟ䪂ᠧᎺッˈ߭䇗㡖Ԣ乥˗ ᠧেッ䇗㡖催乥ˊ ⊼ᛣ:ᔧՓ⫼䴲ᑇ㸵呺ܟ亢ᯊ, 䇋⹂ֱᑏ䈵⬉⑤Ꮖ݇䯁. Ԛ䖲 ⬉ᆍ呺ܟ亢ᯊ߭䳔ਃࡼ Português 催⬉ᑇ䕧ܹᦦᑻ ℸᦦᑻফФ఼ⱘ1/4"TRS1/4"TSᑇ㸵䕧ܹˈབ䬂Ⲭˈ 哧ໄѻໄ఼ˈ⬉ঢ়ᅗㄝˊ 䕙ࡽᘏ㒓䕧ܹ ℸRCA䕧ܹᅲ⦄䆒ϢPM801⏋䷇఼ⱘ䖲ˈབ⺕ᏺˈ CD᪁ܹᴎ݊ᅗ⏋䷇఼ˊ 日本語 4. Џ㽕䕧ߎ 䖭3䩜ᓣphoenix/euroblockᦦᑻッӮᇚЏ㽕⏋䷇㗠ᴹⱘ㒓ᗻ䆃 ো䕧ߎ.᳔Џ㽕ⱘⳂⱘᰃᇚЏ㽕䕧ߎӴ䗕㟇ڣᰃᠽᴎ,Џࡼᓣ ু,⏋䷇఼,PA㋏㒳,ϧϮ䆃ো໘⧚఼ㄝⱘ䚼㺙㕂. 䕧ߎᦦᑻ ⱘϟᮍৃҹⳟࠄഄッ,ℷᵕッ,䋳ᵕッⱘ䩜㛮 ࠞ⊶ᣛ⼎♃ ໄ䘧䆃োࠄ6dBˈ݊ࡼᗕ㣗ೈݙѻ⫳ࠞ⊶༅ⳳᯊˈᣛ⼎♃ ֓✻҂ˊབᵰᣕ㓁䮾ࡼˈᑨ䇗ᇣ䆃ো⬉ᑇҹ䙓䷇ܡ䋼༅ⳳˊ 䴭䷇䬂 ℸ䬂ৃᇚໄ䘧䆃ো⍜䷇ˈҹ⹂ֱᬊⱘ䆃োϡӮ䗕ߎЏ⏋䷇ ᘏ㒓ˊ ໄ䘧⬉ᑇࠊ ⫼ҹ䇗㡖ҢⳌᑨໄ䗕ܹЏ⏋䷇ᘏ㒓ⱘ䆃োᇣˊ Џ⬉ᑇࠊ ࠊЏ㽕䆃ো䗕㟇PM801㚠ᵓЏ䕧ߎⱘᇣˊ ⬉⑤ᓔ݇ ℸᓔ݇ࠊᴎ఼ⱘᓔϢ݇ˈᓔᴎࠡ䇋ܜᡞ᠔᳝⬉ᑇ䇗㟇᳔ ᇣˈҹ䰆ℶᴖ䷇ⱘѻ⫳ˊ ᄤࠡ䕧ߎ ℸRCA䕧ߎᰃ䖲PM801㟇䚼䆒ˈབ⺕ᏺˈCD᪁ܹᴎ ݊ᅗ⏋䷇఼ˊ 简体中文 +48˲ᑏ䈵⬉⑤ᓔ݇ ᔧᓔ݇ЎONԡ㕂ᯊˈेЎ᠔᳝呺ܟ亢䕧ܹᦤկ+48Vⱘᑏ䈵⬉ ⑤ˈ䖭ḋৃϢ⬉ᆍᓣ呺ܟ亢ϔ䍋Փ⫼ˈᑊԈ᳝ᣛ⼎♃ᰒ⼎ˊᓔ ਃᑏ䈵⬉⑤ࠡˈᡞ⬉ᑇ䇗㟇᳔ᇣҹ䙓ܡѻ⫳䖛ⱘా䷇ˊ ᓔਃᑏ䈵⬉⑤ᯊᑨϢᑇ㸵ᓣ呺ܟ亢Փ⫼ˈℸᯊ呺ܟ亢䕧ܹϡ 䴲ᑇ㸵ᓣ呺ܟ亢ˊ䗮ᐌᑏ䈵⬉⑤ϡӮᇍࡼᓣ呺ܟ亢ѻ⫳ ⸈ണˊ ⬉⑤䖲఼ֱ䰽ϱᑻ ℸッᄤ⬉⑤㒓ˈЎ⏋䷇఼ᦤկ⬉⑤ˈ˄⬉⑤㒓ҙϢ⏋䷇఼ 䖲˅ֱ䰽ϱᑻԡѢѸ⌕⬉䖲఼ϟᮍˈབᵰ㹿⚻ᮁˈᠧᓔ ᇕⲪˈᤶᮄⱘֱ䰽ϱˊ PM801 V10 㾘Ḑ English PM 801 䕧ܹ ໄ䘧᭄ 呺ܟ亢䕧ܹ催⬉ᑇ䕧ܹ 䕙ࡽᘏ㒓䕧ܹ 8 8 x 1/4㣅য়phoneᦦᑻঞ 8 x 3䩜ᓣphoenix/euroblockᦦᑻ RCA Џ㽕䕧ߎ ᄤࠡ䕧ߎ Deutsch 䕧ߎ 3䩜ᓣphoenix/euroblockᦦᑻ RCA THD+N THD 0.01% ໄ䘧ࠞޣᣛ⼎♃ Español ⬉ᑇ㸼 +6 dBu ᑏ䈵⬉⑤կᑨ +48V DC ᑏ䈵⬉⑤ᓔ݇ DIP 乥⥛ડᑨ +0/-1 dB 20Hz-60KHz +0/-3 dB ֵా↨ 呺ܟ亢ࠡ㕂ᬒ఼ CMRR Français 20Hz-20KHz 106 dB <-129.5 dB 80 dB ᳔⬉ᑇ +10 dBu ݊ᅗ䕧ܹ +22 dBu Џ㽕䕧ߎ +22 dBu Português 呺ܟ亢ࠡ㕂ᬒ఼䕧ܹ 䰏ᡫ 1.4 K ohms 䴲ᑇ㸵催⬉ᑇ䕧ܹ 12 K ohms 䕙ࡽᘏ㒓䕧ܹ 10 K ohms Џ㽕䕧ߎ 100 K ohms ᄤࠡ䕧ߎ 100 K ohms ⬉⑤կᑨ 100-120VAC,220-240 VAC,50/60 Hz 483 x 44 x 165 mm (19” x 1.73” x 6.49”) ޜ䞡 2.3 kg (5.07 lbs) 简体中文 ሎᇌ PM801 V10 日本語 呺ܟ亢ࠡ㕂ᬒ఼䕧ܹ 服务与维修 English 如需更换零件,服务和维修,请联系您所在国家的Phonic代理商。Phonic不向 用户提供维修手册,且建议用户不要擅自维修机器,否则将无法获得任何保修 服务。您可登录http://www.phonic.com/where/查找离您最近的代理商。 Deutsch 保修 Phonic承诺对每件产品提供完善的保修服务。根据所在地区的不同,保修时间 或有延长。自原始购买之日起,Phonic即对在严格遵照使用说明书的操作规范 下,因产品材质和做工所产生的问题提供至少1年的保修服务。Phonic可根据保 Español 修条例自行选择维修或更换缺陷产品。请务必妥善保管购买凭证,以此获得保 修服务。对未获得RMA编号(退货授权)的申请,Phonic将不予办理退货或维修 服务。保修服务只适用于正常使用下所产生的问题。用户需严格遵照使用说明 书正确使用产品,任何因肆意损坏,擅自维修,意外事故,错误使用或人为疏 忽所造成的问题,都不在保修受理范围之内。此外,担保维修只适用于在授权 Français 代 理 商 处 的 有 效 购 买 。 如 需 了 解 全 部 的 保 修 信 息 , 请 登 录 Português 敬请访问http://www.phonic.com/support/。从该网站上,您可获得各种常见问 http://www.phonic.com/warranty/。 客户服务和技术支持 题的解答,技术指导,并可下载产品驱动,获得有关退货指导以及其它有用的 信息。我们将竭尽全力在两个工作日内回复您的问题。 日本語 简体中文 [email protected] http://www.phonic.com PM801 V10 Annexe Apêndice 附録 GRABADOR DE DAT DAT ᔩ䷇ᴎ MAQUINA DE TAMBOR ⬉ᄤ哧 MIC VOCAL 䇁䷇呺ܟ亢 GUITARRA ELECTRICA ⬉ঢ়Ҫ PROCESADOR ໘⧚఼ Apéndice TECLADO ⬉ᄤ⨈ Anhang 附录 PM801 V10 MIC VOCAL 䇁䷇呺ܟ亢 Appendix MEZCLADORA 䇗䷇ৄ APPLICATION APLICACIONES APLICACIÓN APPLICATIONS ᑨ⫼ 应用 DIMENSIONS DIMENSIONES 尺寸 Anhang 165 / 6.49 Appendix 44 / 1.73 Apéndice 483 / 19 Annexe measurements are shown in mm/inches Todas las medidas están mostradas en mm/pulgadas. 尺寸是以毫米mm/英寸inch表示。 Apêndice 附録 附录 PM801 V10 NOTES Appendix Anhang Apéndice Annexe Apêndice 附録 附录 PM801 V10