1
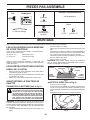
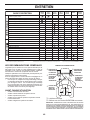
UNASSEMBLED PARTS
Keys
Slope Sheet
Battery
*Installed by Dealer
(2) Hex Bolts
*Brush Guard Kit
(2) Nut Keps
*Pedal
(2) Keys
(1) Oil Drain Tube
(2) Nut U-Channel
(2) Screw
(1) Quick Connect
ASSEMBLY
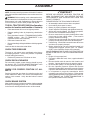
Your new tractor has been assembled at the factory with the exception of those parts left unassembled for shipping purposes.
• Lift seat pan or hood to raised position.
TOOLS REQUIRED FOR ASSEMBLY
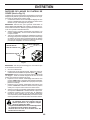
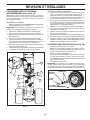
• Remove two terminal caps and discard.
A socket wrench set will make assembly easier. Standard
• First connect RED battery cable to positive (+) terminal
wrench sizes are listed.
with bolt and nut as shown. Tighten securely. Slide
(1) 1/2" wrench
Tire pressure gauge
terminal cover over terminal.
•
Connect BLACK grounding cable to negative (-)
(2) 7/16" wrenches
Utility knife Pliers
terminal with remaining bolt and nut. Tighten securely.
When right or left hand is mentioned in this manual, it means
• Lower seat pan or hood.
when you are in the operating position (seated behind the
NOTE: For battery installation see “REPLACING BATsteering wheel).
TERY” in the Service and Adjustments section in this manual.
TO REMOVE TRACTOR FROM CARTON
TERMINAL
COVER
UNPACK CARTON
•
•
•
Remove all accessible loose parts and parts cartons
from carton.
Remove end panels and lay side panels flat.
Check for any additional loose parts or cartons and
remove.
NUT
TERMINAL
CAP
BOLT
POSITIVE
(RED)
CABLE
NEGATIVE
(BLACK)
CABLE
02605
Fig. 1
BEFORE REMOVING TRACTOR FROM
SKID
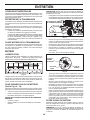
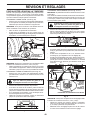
ADJUST SEAT (See Fig. 2)
•
•
CONNECT BATTERY (See Fig. 1)
WARNING: Do not short battery terminals
by allowing a wrench or any other object
to contact both terminals at the same
time. Before connecting battery, remove
metal bracelets, wristwatch bands, rings,
etc. Positive terminal must be connected
first to prevent sparking from accidental
grounding.
NOTE: If this battery is put into service after month and
year indicated on label (label is located between terminals)
charge battery for minimum of one hour at 6-10 amps. (See
“BATTERY” in the Maintenance section of this manual for
charging instructions.)
• Determine battery location. Battery location will be
under the seat or the hood.
LABEL
•
Sit in seat.
Lift up adjustment lever (A) and slide seat until a comfortable position is reached which allows you to press
clutch/brake pedal all the way down.
Release lever to lock seat in position.
A
Fig. 2
5