1
Garantía (cont.)
de inodoro que se colocan dentro del tanque anulará esta garantía.
Sterling, a su criterio, reparará, reemplazará, rectificará o reemplazará una unidad
cuando la inspección de Sterling determine que dicho defecto ocurrió durante uso
normal dentro del periodo de garantía indicado anteriormente. Sterling no se hace
responsable por los costos de desinstalación o instalación en aquéllos casos en que se
reemplace el producto. Todo daño al producto como resultado de errores de manejo,
instalación o mantenimiento inadecuado no serán considerados como defectos de
fabricación y no estarán cubiertos bajo la presente garantía. Esta garantía es válida
únicamente para el comprador original.
Para obtener servicio de garantía, comuníquese con Sterling, bien sea a través de su
contratista de plomería, centro de remodelaciones, comerciante autorizado, o llamando o
escribiendo a Sterling, Consumer Services, 444 Highland Drive, Kohler, Wisconsin 53044,
1-800-783-7546.
En la medida en que la ley lo permita, Kallista no se hace responsable de toda
garantía implícita, incluyendo la comercialización e idoneidad para un uso
determinado. Sterling y el vendedor no se hacen responsables por concepto de daños
particulares, incidentales o indirectos. Algunos estados/provincias no permiten
limitaciones en cuanto a la duración de una garantía implícita o a la exclusión o
limitación de daños particulares, incidentales o indirectos, por lo que estas limitaciones y
exclusiones pueden no aplicar a su caso. Esta garantía le otorga ciertos derechos legales
específicos. Además, usted puede tener otros derechos que pueden variar de estado a
estado y provincia a provincia.
Ésta es la garantía exclusiva por escrito de Sterling.
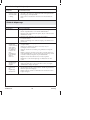
Troubleshooting Guide
Symptoms
1.
Poor flush.
2.
No flush.
3.
The fill valve
turns on/off
by itself
without the
toilet being
flushed, or it
runs, allowing
water to enter
the tank.
4.
Tank takes
excessive time
to fill.
Sterling
Recommended Action
A. Adjust the tank water level to match the waterline.
B. Fully open the water supply shut-off valve.
C. Clear obstructions from the trapway, jet, or bowl rim holes.
D. Clear obstructions from the waste line.
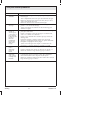
A. Reconnect the flapper chain to the trip lever or flush valve.
B. Adjust the flapper chain assembly to remove excessive slack.
A. Adjust the flapper chain for proper slack so the flapper closes.
B. Clean or replace the flapper if it is worn, dirty, or misaligned
with the opening.
C. Clean the area around the opening to allow the flapper to seal.
D. Remove the tank and tighten the flush valve nut if the flush
valve gasket is leaking. Do not overtighten. If leakage
continues, replace the gasket.
E. Adjust the tank water level if it is too high.
F.
Replace the fill valve if the valve float sinks.
A. Fully open the water supply shut-off valve.
B. Clean the valve inlet, valve head, or supply line. Flush the
lines.
9
1129079-2-A