1
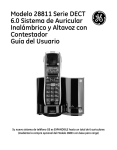
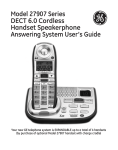
Model 28811 Series
DECT 6.0 Cordless
Handset Speakerphone
Answering System
User’s Guide
Your new GE telephone system is EXPANDABLE up to a total of 6 handsets
(by purchase of optional Model 28801 handset with charge cradle)
Important Information
NOTICE: This product meets the applicable Industry Canada technical
specifications.
Operation is subject to the following two conditions: (1) This device may
not cause interference, and (2) This device must accept any interference,
including interference that may cause undesired operation of the device.
The equipment must be installed using an acceptable method of connection.
The customer should be aware that compliance with the above conditions
may not prevent degradation of service in some situations.
Repairs to certified equipment should be made by an authorized Canadian
maintenance facility designated by the supplier. Any repairs or alterations
made by the user to this equipment, or equipment malfunctions, may give the
telecommunications company cause to request the user to disconnect the
equipment.
Users should ensure for their own protection that the electrical ground
connections of the power utility, telephone lines and internal metallic water
pipe systems, if present, are connected together. This precaution may be
particularly important in rural areas.
CAUTION: Users should not attempt to make such connections themselves,
but should contact the appropriate electric inspection authority, or electrician,
as appropriate.
NOTES: This equipment may not be used on coin service provided by the
telephone company.
Interference Information
This equipment generates and uses radio frequency energy which may
interfere with residential radio and television reception if not properly
installed and used in accordance with instructions contained in this manual.
Reasonable protection against such interference is ensured, although there
is no guarantee this will not occur in a given installation. If interference is
suspected and verified by switching this equipment on and off, the user is
encouraged to try to correct the interference by one or more of the following
measures: Reorient the radio/television receiver’s antenna, relocate the
equipment with respect to the receiver, plug the equipment and receiver into
separate circuit outlets. The user may also wish to consult a qualified radio/
television technician for additional suggestions. This equipment has been fully
tested and complies with all limits for Class B computing devices pursuant to
part 15 FCC Rules and Regulations.
Telephone Network Information
Should your equipment cause trouble on your line which may harm the
telephone network, the telephone company, where practicable, may notify
you that temporary discontinuance of service may be required. Where prior
notice is not practicable and the circumstances warrant such action, the
telephone company may temporarily discontinue service immediately.
The telephone company may make changes in its communications facilities,
equipment, operations or procedures where such action is required in the
operation of its business. If these changes are expected to affect the use or
performance of your telephone equipment, the telephone company will likely
give you adequate notice to allow you to maintain uninterrupted service.
Notice must be given to the telephone company upon termination of your
telephone from your line.
REN Number
On the bottom of this equipment is a label indicating, among other
information, the Ringer Equivalence Number (REN) for the equipment.
The REN is useful in determining the number of devices you may connect
to your telephone line and still have all of these devices ring when your
telephone number is called. In most (but not all) areas, the sum of the RENs
of all devices connected to one line should not exceed 5. To be certain of the
number of devices you may connect to your line as determined by the REN,
you should contact your local telephone company.
REN Number is located on the cabinet bottom.
Hearing Aid Compatibility (HAC)
This telephone system meets FCC standards for Hearing Aid Compatibility.
Licensing
Licensed under US Patent 6,427,009.
FCC RF Radiation Exposure Statement
This equipment complies with FCC RF radiation exposure limits set forth for an
uncontrolled environment. This equipment should be installed and operated
with a minimum distance of 20 centimeters between the radiator and your
body. This transmitter must not be co-located or operated in conjunction with
any other antenna or transmitter.”
For body worn operation, this phone has been tested and meets the FCC RF
exposure guidelines when used with the belt clip supplied with this product.
Use of other accessories may not ensure compliance with FCC RF exposure
guidelines.
Information for DECT Product
This telephone is compliant with the DECT 6.0 standard
which operates in the 1.92GHz to 1.93GHz frequency range.
Installation of this equipment is subject to notification and
coordination with UTAM. Any relocation of this equipment must
be coordinated through and approved by UTAM. UTAM may be
contacted at 1-800-429-8826.
Table of Contents
Important Information. ................... 2
Interference Information. ............... 3
Telephone Network Information..... 3
REN Number................................... 4
Hearing Aid Compatibility (HAC)..... 4
Licensing......................................... 4
FCC RF Radiation Exposure
Statement................................. 4
Information for DECT Product...... 4
Introduction................................... 8
Before You Begin............................ 8
Parts Checklist. .................................8
Telephone Jack Requirements.......... 9
Installation .................................. 10
Digital Security System..................10
Important Installation
Guidelines....................................11
Handset Layout............................. 12
Base Layout. ................................. 13
Installing the Phone. .................... 14
Installing the Handset Battery....14
Base Station.....................................15
GOOG411.......................................16
Programming the Telephone.......... 17
Standby Screen................................17
Programming Functions................17
Phone Book......................................17
Review Records...............................17
Add Records....................................18
Inserting a Pause in the Dialing
Sequence......................................18
Edit Records....................................19
Delete Records................................19
Dialing a Number from Internal
Memory........................................20
Room Monitor.................................20
Set Alarm Clock.............................21
Handset Setup.................................22
Language....................................22
Handset Name...........................23
Ringer Tone...............................23
Ringer Volume...........................24
VIP Melody................................24
Storing VIP Melody.................25
Changing a Stored VIP Melody
Record........................................26
Reviewing And Deleting Stored
VIP Melody Record. ................26
Key Tone.....................................26
Set Day/Time..............................27
Equalizer....................................27
Area Code..................................28
Tone/Pulse. ...............................28
Registration...............................29
Table of Contents
De-Registration........................30
Global De-registration...........31
Default Setting.........................31
Telephone Operation..................... 32
Visual Indicators.............................32
Base.............................................32
Handset......................................32
VMWI / Visual Ringer Indicator
on Handset................................32
Speakerphone Operation...................32
Making a Call..................................33
Answering Calls.............................33
Call Timer.........................................33
Auto Standby...................................33
Ringer Volume.................................34
Flash/Call Waiting....................... 34
Last Number Redial....................... 35
Exit.................................................... 35
Page.................................................. 35
Handset to Handset Paging. ....... 36
Paging All Handsets from a
Handset...................................... 36
Paging from the Base/Group
Page............................................. 36
Mute................................................. 36
Receiver Volume Control............. 37
Do Not Disturb ............................. 37
Intercom Operation.......................38
Making an Intercom Call............. 38
Receiving an Intercom Call.......... 38
Advanced Intercom Features....... 39
Receiving an Incoming Call
During an Intercom Call....... 39
Using Intercom with External
Telephone Calls....................... 39
Two-Way Calling.................... 39
Three-Way Calling ................ 40
Transferring External Calls to
Other Handsets....................... 40
Caller ID (CID).............................41
Call Waiting Caller ID................. 41
Receiving CID Records. ................ 41
Storing CID Records (In CID
Memory)....................................... 42
Reviewing CID Records................ 42
Dialing a CID Number................... 43
Storing CID Records in Internal
Memory....................................... 44
Deleting a CID Record................. 44
Deleting All CID Records........... 45
Table of Contents
Belt Clip and Optional Headset....45
Connecting the Belt Clip.............. 45
Connecting an Optional Headset to
the Handset. .............................. 45
Changing the Battery....................46
Battery Safety Precautions...........46
Display Messages.......................... 47
Handset Sound Signals................ 49
Troubleshooting Guide. ............... 50
Telephone Solutions......................50
Caller ID Solutions......................51
Battery Solutions..........................51
Causes of Poor Reception............ 52
General Product Care................. 52
Warranty. ................................... 53
Accessory Information................. 54
Index............................................ 55
CAUTION:
RISK OF ELECTRIC SHOCK
DO NOT OPEN
WARNING: TO
PREVENT FIRE OR
ELECTRICAL SHOCK
HAZARD, DO NOT
EXPOSE THIS
PRODUCT TO RAIN
OR MOISTURE.
THE LIGHTNING
FLASH AND ARROW
HEAD WITHIN THE
TRIANGLE IS A
WARNING SIGN
ALERTING YOU OF
“DANGEROUS
VOLTAGE” INSIDE
THE PRODUCT.
CAUTION: TO REDUCE THE
RISK OF ELECTRIC SHOCK, DO
NOT REMOVE COVER (OR
BACK). NO USER
SERVICEABLE PARTS INSIDE.
REFER SERVICING TO
QUALIFIED SERVICE
PERSONNEL.
THE EXCLAMATION
POINT WITHIN THE
TRIANGLE IS A
WARNING SIGN
ALERTING YOU OF
IMPORTANT
INSTRUCTIONS
ACCOMPANYING
THE PRODUCT.
SEE MARKING ON BOTTOM / BACK OF PRODUCT
Introduction
CAUTION: When using telephone equipment, there are basic
safety instructions that should always be followed. Refer to the
IMPORTANT SAFETY INSTRUCTIONS provided with this product
and save them for future reference.
IMPORTANT: Because cordless phones operate on electricity, you
should have at least one phone in your home that isn’t cordless, in
case the power in your home goes out.
Before You Begin
Parts Checklist (for model 28811)
Make sure your package includes the items shown here.
Base
Battery
compartment
cover
AC power
adaptor
Belt clip
Handset
battery pack
Wall mount
bracket
Handset
Telephone line
cord
For Model 28811xx2 there will be ONE additional handset, charge cradle, belt clip,
battery pack and cover than shown above.
NOTE: If a speaker box is included in your package, it replaces one
set of a handset, belt clip, battery pack and cover.
For Model 28811xx3 there will be TWO additional handsets, charge cradles, belt clips,
battery packs and covers than shown above.
For Model 28811xx4 there will be THREE additional handsets, charge cradles, belt
clips, battery packs and covers than shown above.
For Model 28811xx5 there will be FOUR additional handsets, charge cradles, belt
clips, battery packs and covers than shown above.
For Model 28811xx6 there will be FIVE additional handsets, charge cradles, belt clips,
battery packs and covers than shown above.
Telephone Jack Requirements
To use this phone, you need an RJ11C type modular
Wall plate
telephone jack, which might look like the one pictured here,
installed in your home. If you don’t have a modular jack,
Modular
call your local phone company to find out how to get one
telephone
installed.
line jack
Installation
Digital Security System
Your cordless phone uses a digital security system to protect against false ringing,
unauthorized access, and charges to your phone line.
INSTALLATION NOTE: Some cordless telephones operate at
frequencies that may cause or receive interference with nearby
TVs, microwave ovens, and VCRs. To minimize or prevent such
interference, the base of the cordless telephone should not be
placed near or on top of a TV, microwave ovens, or VCR. If such
interference continues, move the cordless telephone farther away
from these appliances.
Certain other communications devices may also use the 1.9 GHz
frequency for communication, and, if not properly set, these
devices may interfere with each other and/or your new telephone.
If you are concerned with interference, please refer to the owner’s
manual for these devices on how to properly set channels to avoid
interference. Typical devices that may use the 1.9 GHz frequency
for communication include wireless audio/video senders, wireless
computer networks, multi-handset cordless telephone systems,
and some long-range cordless telephone systems.
10
Important Installation Guidelines
• Avoid sources of noise and heat, such as motors, fluorescent lighting,
microwave ovens, heating appliances and direct sunlight.
• Avoid areas of excessive dust, moisture and low temperature.
• Avoid other cordless telephones or personal computers.
• Never install telephone wiring during a lightning storm.
• Never install telephone jacks in wet locations unless the jack is specifically
designed for wet locations.
• Never touch non-insulated telephone wires or terminals, unless the telephone
line has been disconnected at the network interface.
• Use caution when installing or modifying telephone lines.
11
Handset Layout
Voice Mail Waiting
Indicator (VMWI) /
Visual Ringer
display
TALK
(button)
CALLER ID-VOLUME
6(caller id/volume
down button)
SPEAKER
(button)
END/cancel
(button)
delete/intercom/conf
(delete/intercom/
conference button)
* tone (button)
mute/menu OK
(button)
microphone
12
CALLER ID-VOLUME
5(caller id/volume up
button)
GOOG-411
(Google free one
touch directory
assistance)
#pause (button)
redial/format
(button)
Base Layout
charge/in use
voicemail
(indicator)
find
(button)
do not disturb
(button)
13
Installing the Phone
Installing the Handset Battery
NOTE: You must connect the handset battery before use.
CAUTION: To reduce the risk of fire or personal injury, use only
the Thomson Inc. approved Model 5-2814 Nickel-metal Hydride
battery (Ni-MH), which is compatible with this unit.
1. Locate battery and battery door which are packaged together inside a plastic bag
and are separate from the handset.
2. Locate the battery compartment on the back of the handset.
3. Plug the battery pack cord into the jack inside the compartment.
NOTE: To ensure proper battery installation, the connector is keyed
and can be inserted only one way.
PRESS DOWN
FIRMLY
4. Insert the battery pack.
5. Close the battery compartment by pushing the door up until it snaps into place.
14
Base Station
1. Choose an area near an electrical outlet and a telephone wall jack (RJ11C), and
place your cordless telephone on a level surface, such as a desktop or tabletop, or
you may mount it on the wall.
2. Plug one end of the telephone line cord into the TEL LINE jack on the back of the
base and the other end into a modular jack.
3. Plug the AC power converter into the electrical outlet and the DC connector into
the jack on the back of the base.
4. Place the handset in the base cradle. The charge/in use voicemail indicator turns
on, verifying the battery is charging.
5. Allow the phone to charge for 16 hours prior to first use. If you don’t properly
charge the phone, battery performance is compromised.
CAUTION: To reduce risk of personal injury, fire, or damage
use only the 5-2812 power adaptor listed in the user’s guide.
This power adaptor is intended to be correctly orientated in a
vertical or floor mount position.
15
GOOG411
GOOG-411 is Google’s new 411 service. With GOOG-411, you can find local business
information completely free, directly from your phone. With purchasing the GE phone,
you can access 1-800-GOOG-411 service at anytime by simply pressing the
GOOG-411 button.
1. In standby mode or dialing mode, press the GOOG-411 button, the preset
GOOG-411 service number is dialed out immediately. “GOOG-411: Free 411 by
Google” shows in the display.
2. Speak into the phone and say where you are and what you’re looking for.
GOOG-411 will connect you with the business you choose.
3. When finished, press END/cancel button to hang up.
At any point in the call:
• To go back
say “go back”
• To start over
say “start over” or press *
When asked for a city and state:
• To enter city and state
say the full names
(for example, “Palo Alto California”)
• To enter a zip code
say it or enter with keypad
When asked for business name or category:
• To enter a business name say the full names
or category (for example, “Joe’s Pizzaria” or “Pizza”)
• To spell a business name
press 1 and spell with keypad
(for example, TOYS would be 8697)
When given results:
• To navigate between results
say or press the listing number
• To get more details
say “details”
• To get help
say “help”
16
Programming the Telephone
Standby Screen
The handset displays the handset number and user name.
Programming Functions
The system uses a menu structure to give you access to all of the built-in features.
You may program the following items in main menu: Phonebook, Room Monitor, Set
Alarm Clock and Handset Setup.
Phone Book
Each handset can store up to fifty records in phone book for quick dialing; each
record can contain a maximum of 20-digit numbers and 15-character names.
Review Records
Make sure the phone is OFF (not in TALK mode).
Press the mute/menu OK button to go to the main menu.
Press CALLER ID-VOLUME ( 6 or 5) button to scroll to PHONEBOOK.
Press mute/menu OK button to enter PHONEBOOK menu.
Use the CALLER ID-VOLUME ( 6 or 5) button to scroll to VIEW RECORDS.
Press the mute/menu OK button to confirm, all records are shown in alphabetical
order.
7. Press the CALLER ID-VOLUME ( 6 or 5) button or key in alphabet to view the
records.
1. 2.
3.
4.
5. 6. 17
Add Records
Make sure the phone is OFF (not in TALK mode).
Press the mute/menu OK button to go to the main menu.
Press CALLER ID-VOLUME ( 6 or 5) button to scroll to PHONEBOOK.
Press mute/menu OK button to enter PHONEBOOK menu.
Use the CALLER ID-VOLUME ( 6 or 5) button to scroll to ADD RECORDS.
Press the mute/menu OK button to confirm. ENTER NAME shows on the display.
Use the touch-tone pad to enter a name (up to 15 characters). More than one
letter is stored in each of the number keys. For example, to enter Bill Smith, press
the 2 key twice for the letter B. Press the 4 key 3 times for the letter I. Press the
5 key 3 times for the letter L. Press the 5 key 3 times for the second letter L, and
press the 1 key to insert a space between the first and last name. Press the 7 key
4 times for the letter S; press the 6 key once for the letter M; press the 4 key 3
times for the letter I; press the 8 key for the letter T; press the 4 key twice for the
letter H.
NOTE: If you make a mistake press the delete/intercom/conf button
to backspace and erase the wrong character(s) or number(s).
8. Press the mute/menu OK button again to save your selection. The display shows
ADD TEL NUMBER.
9. Use the touch-tone pad to enter the telephone number (up to 20 digits, including
pauses), and press the mute/menu button to confirm. The records are stored
alphabetically in the phonebook.
1. 2.
3.
4.
5. 6. 7. Inserting a Pause in the Dialing Sequence (of a
Stored Number)
Press the #pause button on the handset’s touch-tone pad to insert a delay in dialing
sequence when a pause is needed to wait for a dial tone (for example, after you dial 9
for an outside line, or to wait for a computer access tone.) Each pause counts as one
digit in the dialing sequence.
18
Edit Records
Make sure the phone is OFF (not in TALK mode).
Press the mute/menu OK button to go to the main menu.
Press CALLER ID-VOLUME ( 6 or 5) button to scroll to PHONEBOOK.
Press mute/menu OK button to enter PHONEBOOK menu.
Use the CALLER ID-VOLUME ( 6 or 5) button to scroll to EDIT RECORDS.
Press the mute/menu OK button to confirm, display will show the records.
Use the CALLER ID-VOLUME ( 6 or 5) button or key in alphabet to move to
desired record, press mute/menu OK button to confirm. ENTER NAME shows on
the display.
8. Repeat Steps 7 through 9 in “Add Records” section.
1. 2.
3.
4.
5. 6. 7. Delete Records
Make sure the phone is OFF (not in TALK mode).
Press the mute/menu OK button to go to the main menu.
Press CALLER ID-VOLUME ( 6 or 5) button to scroll to PHONEBOOK.
Press mute/menu OK button to enter PHONEBOOK menu.
Use the CALLER ID-VOLUME ( 6 or 5) button to scroll to DELETE RECORDS.
Press the mute/menu OK button to confirm, display will show the records.
Use the CALLER ID-VOLUME ( 6 or 5) button or key in alphabet to move to
desired record, press the delete/intercom/conf button. DELETE? shows on the
display.
8. Press the delete/intercom/conf button or mute/menu OK button again to confirm.
NOTE: If you don’t want to change or delete a record, simply
press the END/cancel button, or wait for one minute to exit
automatically.
1. 2.
3.
4.
5. 6. 7. 19
Dialing a Number from Internal Memory
Make sure the phone is OFF (not in TALK mode).
Press the mute/menu OK button to go to the main menu.
Press CALLER ID-VOLUME ( 6 or 5) button to scroll to PHONEBOOK.
Press mute/menu OK button to enter PHONEBOOK menu.
Use the CALLER ID-VOLUME ( 6 or 5) button to scroll to VIEW RECORDS.
Press the mute/menu OK button to confirm.
Use the CALLER ID-VOLUME ( 6 or 5) button or key in alphabet to move to the
desired number.
8. Press the TALK or SPEAKER buttons, the number dials automatically.
1. 2.
3.
4.
5. 6. 7. Room Monitor (applicable only with additional handsets)
1.
2.
3.
4.
Make sure your phone is OFF (not in TALK mode).
Press the mute/menu OK button to go to the main menu.
Press CALLER ID-VOLUME ( 6 or 5) button to scroll to ROOM MONITOR.
Press mute/menu OK button to enter ROOM MONITOR menu. ROOM MONITOR
EXTENSION? shows in the display.
5. Use the touch tone pad to enter the handset number to be monitored.
NOTE: When this phone system is expanded (up to 6 handsets by
purchase of optional Model 28801 handset with recharge cradle),
handsets are named HANDSET 1, HANDSET 2, HANDSET 3 and so on
respectively.
6. The receiving handset will turn on the microphone and the originating handset
will turn on the speakerphone to monitor sound from the receiving handset.
NOTE: For room monitoring mode to work, the originating handset
must NOT be on the cradle.
20
NOTE: While in room monitoring mode, the handsets will emit an
alert tone approximately every 5 seconds if there is an incoming
call. You may press the SPEAKER button to quit room monitor and
answer the call.
NOTE: While in room monitoring mode, the originating handset can be
switched to monitor by handset earpiece by pressing the TALK button once.
Switch back to speakerphone by pressing the SPEAKER button once.
NOTE: Press the END/cancel button on the handset to exit room
monitor mode.
Set Alarm Clock
Make sure your phone is OFF (not in TALK mode).
Press the mute/menu OK button to go to the main menu.
Press CALLER ID-VOLUME ( 6 or 5) button to scroll to ALARM.
Press mute/menu OK button to enter the submenu, ALARM 1ON 2OFF shows on
the display.
5. Use the touch-tone pad to enter the selection, or use the CALLER ID-VOLUME
( 6 or 5) button to scroll to 1ON or 2OFF.
6. If you select ON, press the mute/menu OK button to confirm and advance Set
Alarm Time sub-menu.
7. Use the number keys to enter the time, then use number key 2 to select AM and
number key 7 to select PM.
8. Press the mute/menu OK button to confirm and advance Set Cycle Time
sub-menu.
9. Use the CALLER ID-VOLUME ( 6 or 5) button to select Once or Daily. The default
setting is Once.
10.Press the mute/menu OK button to save your selection. You will hear a
confirmation tone.
NOTE: If you select Daily, the system will follow the current time
setting to turn on the alarm.
1. 2. 3. 4. 21
Handset Setup
1.
2.
3.
4.
Make sure your phone is OFF (not in TALK mode).
Press the mute/menu OK button to go to the main menu.
Press CALLER ID-VOLUME ( 6 or 5) button to scroll to HANDSET SETUP.
Press mute/menu OK button to confirm and you may program the following
items: Language, Handset Name, Ringer Tone, Ringer Volume, VIP Melody, Key
Tone, Set Day/Time, Equalizer, Area Code, Tone/Pulse, Registration, Deregistration
and Default Setting.
NOTE: During programming, you may press the END/cancel button
at any time to exit the sub-menu and return to the menu.
Language
From the Handset Setup Menu:
1. Press the CALLER ID-VOLUME ( 6 or 5) button to scroll to the SET LANGUAGE
sub-menu.
2. Press mute/menu OK button to enter the menu. SET LANGUAGE 1ENG 2FRA 3ESP
shows in the display.
3. Use the touch tone pad on the handset to select 1ENG, 2FRA, 3ESP, or use the
CALLER ID-VOLUME ( 6 or 5) button to scroll to the desired language. English is
the default setting.
4. Press the mute/menu OK button to save your selection. You will hear a
confirmation tone and the selected language shows in the display.
22
Handset Name
From the Handset Setup Menu:
1. Press the CALLER ID-VOLUME ( 6 or 5) button to scroll to the HANDSET
NAME sub-menu.
2. Press mute/menu OK button to enter the menu. HANDSET NAME shows in
the display.
3. Use the touch-tone pad to enter a name (up to 15 characters). More than one
letter is stored in each of the number keys. For example, to enter Bill Smith, press
the 2 key twice for the letter B. Press the 4 key 3 times for the letter I. Press the
5 key 3 times for the letter L. Press the 5 key 3 times for the second letter L, and
press the 1 key to insert a space between the first and last name. Press the 7 key
4 times for the letter S; press the 6 key once for the letter M; press the 4 key 3
times for the letter I; press the 8 key for the letter T; press the 4 key twice for the
letter H.
NOTE: If you make a mistake, use the delete/intercom/conf button
to backspace and delete one character at a time.
4. Press the mute/menu OK button to save your name. You will hear a confirmation
tone and the handset name shows in the display.
Ringer Tone
You may choose from ten different ringer tones and ten different melodies.
From the Handset Setup Menu:
1. Press the CALLER ID-VOLUME ( 6 or 5) button to scroll to the RINGER TONE
sub-menu.
2. Press mute/menu OK button to enter the menu. SET RINGER TONE 01 shows in
the display. 01 is default setting.
3. Use the CALLER ID-VOLUME ( 6 or 5) button to scroll to the desired setting (1
through 20). You will hear a sample of the ringer tone/melody you select.
4. Press the mute/menu OK button to save your selection. You will hear a
confirmation tone and the selected ringer tone shows in the display.
NOTE: You must have the Ringer Volume set to ON for ring tone to
signal an incoming call.
23
Ringer Volume
From the Handset Setup Menu:
1. Press the CALLER ID-VOLUME ( 6 or 5) button to scroll to the RINGER VOLUME
sub-menu.
2. Press mute/menu OK button to enter the menu. SET RINGER LEVEL 5 shows in the
display.
3. Use the CALLER ID-VOLUME ( 6 or 5) button to scroll to your selection. LEVEL 5 is
the default setting.
4. Press the mute/menu OK button to save your selection. You will hear a
confirmation tone and the new volume setting shows in the display.
NOTE: If you turn the ringer OFF, the ringer off icon shows in the
display.
VIP Melody
This features allows you to assign a specific melody to someone you want to get your
attention when the person calls. When a VIP melody is assigned and that person
calls, the unit rings the normal ring for the first ring and then follows with VIP melody
ring. You may choose from ten different polyphonic melodies and may store up to 10
VIP records.
NOTE: This feature ONLY works when the following conditions are
met.
1. You have subscribed to Caller ID.
2. You have your Caller ID record previously transferred to the
memory. (Refer to Storing CID Records in Internal Memory). NO
USER MEMORY will show in the display to remind the user to do CID
record transfer first.
24
Storing VIP Melody
From the Handset Setup Menu:
1. Press the CALLER ID-VOLUME ( 6 or 5) button to scroll to VIP MELODY sub-menu.
2. Press mute/menu OK button to select VIP melody feature and then display VIP
1 record.
- If VIP1 does NOT contain any specific number/records, it will display EMPTY.
3. Press CALLER ID-VOLUME ( 6 or 5) button to select the specific VIP melody
memory location (10 VIP locations) that does not contain any record.
4. Press mute/menu OK button to display SELECT MEMORY.
NOTE: If the memory location does not contain any CID memory records and you
are trying to mark a specific record as VIP MELODY, then SELECT MEMORY will
not be displayed. Instead, NO USER MEMORY will display in prompt to alert the
user.
5. Press CALLER ID-VOLUME ( 6 or 5) button to view the records from memory to be
selected as VIP.
6. Press mute/menu OK button to confirm and then display VIP MELODY 01 to wait
for the melody tone selection.
7. Press CALLER ID-VOLUME ( 6 or 5) button to select from melody 01 to melody 10
(a testing tone is generated while making melody selection).
8. Press mute/menu OK button to confirm.
NOTE: If the desired number/record was previously stored in any
one of the ten VIP melody records, DUPLICATE NUMBER shows in
the display.
25
Changing a Stored VIP Melody Record
Use the Storing VIP Melody procedure to change the number of a selected record and
replace the old phone number with new phone number.
When REPLACE VIP# ? shows in the display, you must press mute/menu OK button
on the handset to confirm replacement.
Reviewing And Deleting Stored VIP Melody Record
From the Handset Setup Menu:
1. Press the mute/menu OK button to enter to VIP MELODY menu.
2. Use the CALLER ID-VOLUME ( 6 or 5) button to scroll to the desired VIP
Melody Record.
3. If you want to delete the information, press the delete/intercom/conf button on
the handset while the entry displays. The display show DELETE VIP# ?.
4. Press delete/intercom/conf again to confirm. You will hear a confirmation tone
and VIP# DELETED shows in the display.
Key Tone
From the Handset Setup Menu:
1. Press the CALLER ID-VOLUME ( 6 or 5) button to scroll to the KEY TONE
sub-menu.
2. Press mute/menu OK button to enter the menu. SET KEY TONE 1ON 2 OFF shows
in the display.
3. Use the touch tone pad on the handset to select 1 or 2, or use the
CALLER ID-VOLUME ( 6 or 5) button to scroll to your selection. 1ON is the default
setting.
4. Press the mute/menu OK button to confirm and the key tone setting shows in
the display.
26
Set Day/Time
From the Handset Setup Menu:
1. Press the CALLER ID-VOLUME ( 6 or 5) button to scroll to the SET DAY/TIME
sub-menu.
2. Press mute/menu OK button to enter the menu. SET DAY MONDAY shows in the
display. MONDAY is default setting.
3. Press the CALLER ID-VOLUME ( 6 or 5) button to select from MONDAY to
SUNDAY.
4. Press mute/menu OK button to confirm your selection and advance SET TIME
sub-menu.
5. Use the number keys to enter the current hour and minute, then use number key
2 to select AM and number key 7 to select PM.
6. Press the mute/menu OK button to save your selection. You will hear a
confirmation tone and the current time shows in the display.
Equalizer
This feature lets you to adjust the audio quality.
From the Handset Setup Menu:
1. Press the CALLER ID-VOLUME ( 6 or 5) button to scroll to Equalizer.
2. Press the mute/menu OK button to enter the menu.
3. Use the CALLER ID-VOLUME ( 6 or 5) button to scroll to desired selection. The
default is Natural.
4. Press the mute/menu OK button to save your selection. You will hear a
confirmation tone.
27
Area Code
From the Handset Setup Menu:
1. Press the CALLER ID-VOLUME ( 6 or 5) button to scroll to the AREA CODE
sub-menu.
2. Press mute/menu OK button to enter the menu. SET AREA CODE - - - shows in
the display.
3. Use the touch-tone pad to enter your 3-digit area code.
4. Press the mute/menu OK button to confirm. You will hear a confirmation tone and
the new area code shows in the display.
NOTE: To restore the default setting to - - -, press and release delete/
intercom/conf when SET AREA CODE shows in the display.
Tone/Pulse
From the Handset Setup Menu:
1. Press the CALLER ID-VOLUME ( 5 or 6) button to scroll to the TONE PULSE
sub-menu.
2. Press mute/menu OK button to enter the menu. TONE/PULSE 41TONE 2PULSE
shows in the display. The default setting is “1 TONE”.
3. Use the touch-tone pad or CALLER ID-VOLUME ( 5 or 6) to enter 1 TONE or 2
PULSE.
4. Press the mute/menu OK button to confirm. You will hear a confirmation tone and
your selection shows in the display.
28
Registration
Your packaged handset(s) are pre-registered and ready to use. It is not recommended
that a handset be registered again unless absolutely necessary.
From the Handset Setup Menu:
1. Press the CALLER ID-VOLUME ( 6 or 5) button to scroll to the REGISTRATION
sub-menu.
2. Press the mute/menu OK button to enter the menu. REGISTRATION 1YES42NO
shows in the display. The default setting is 2NO.
3. Use the touch-tone pad to select 1 for YES or 2 for NO. Or use the
CALLER ID-VOLUME ( 6 or 5) button to scroll to 1YES or 2NO.
4. If you select 1YES, press the mute/menu OK button. HOLD BASE PAGE FOR 5
SECONDS, THEN PRESS HANDSET PROGRAM shows in the display. (Your handset
should be held near the base during registration process.)
5. Press and hold the find button on the base unit, the charge/in use voicemail
indicator flashes. Press the handset mute/menu OK button. REGISTERING shows
in the display. REGISTERED shows in the handset display, where X is the handset
number. You may now rename your handset. (Refer to Step 3 & 4 of Handset
Name Section)
NOTE: IF you are re-registering the handset through the handset
menu; to rename your handset you must go to the Handset Name
Section and start from the beginning step.
29
De-Registration
De-registration cancels registration. During the de-registration process, keep the
handset near the base.
From the Handset Setup Menu:
1. Press the CALLER ID-VOLUME ( 6 or 5) button to scroll to the DEREGISTRATION
sub-menu.
2. Press the mute/menu OK button to enter the menu. DEREGISTRATION 1YES42NO
shows in the display The default setting is "2NO".
3. Use the touch-tone pad to select 1 for YES or 2 for NO. Or use the
CALLER ID-VOLUME ( 6 or 5) button to scroll to 1YES or 2NO.
WARNING: It is not recommended that a handset be de-registered
unless absolutely necessary because once a handset is
de-registered, that handset’s telephone features cannot be used
until the handset is re-registered.
4. Select 2NO, if you do not want to de-register.
5. If you select 1YES, press the mute/menu OK button and MOVE NEAR TO BASE
displays for 2 seconds, then CONFIRM? 1YES 2NO appears in the display.
6. Press the touch-tone pad to select 1YES or 2NO, or use the CALLER ID-VOLUME
( 6 or 5) button to scroll to 1YES or 2NO.
7. If you select YES, press the mute/menu OK button to confirm. DE-REGISTER...
shows in the display. You will hear a confirmation tone. Then DEREGISTERED
shows in the display to confirm the handset is deregistered.
NOTE: When you complete the de-registration process, HANDSET
NEEDS REGISTRATION shows in the display. To use the handset, you
MUST re-register the handset using the Registration process.
30
Global De-registration
If one or more handsets becomes lost, you should de-register all handsets to ensure
proper system operation.
WARNING: It is not recommended that a handset be de-registered
unless absolutely necessary because once a handset is
de-registered, that handset’s telephone features cannot be used
until the handset is re-registered.
1. Disconnect power from the base by pulling the plug out of the back of the unit.
2. Press and hold the find button and while holding the find button reconnect the
power.
3. Continue to hold the find button until the charge/in use voicemail light flashes
rapidly.
4. Release the find button.
5. Press and release the find button on the base once. All handsets are de-registered
and HANDSET NEEDS REGISTRATION shows in the display.
Default Setting
As you become familiar with this system, you may prefer to use the system’s original
settings. Follow the steps below to return to the factory default settings.
From the Handset Setup Menu:
1. Press the CALLER ID-VOLUME ( 6 or 5) button to scroll to the DEFAULT SETTING
sub-menu.
2. Press the mute/menu OK button to enter the menu. DEFAULT SETTING 1YES 2NO
shows in the display. The default setting is 2NO.
3. Use the touch-tone pad to select 1YES or 2NO, or use the CALLER ID-VOLUME
( 6 or 5) button to move the cursor to 1YES or 2NO.
NOTE: If you choose YES all the settings in the programmable menu
are returned to factory default setting.
4. Press the mute/menu OK button to save your selection. You will hear a
confirmation tone.
31
Telephone Operation
Visual Indicators
Base
The charge/in use voicemail indicator on the base will flash to alert you to an
incoming call, during paging, or if you have a message waiting from your service
provider. The indicator will remain lit when a handset is in the base charging or when
the line is in use.
Handset
The TALK and SPEAKER indicator buttons flash when you receive a call and remain lit
during a call.
The keypad and CID will also light when a call is received.
VMWI / Visual Ringer Indicator on Handset
IMPORTANT: In order to use this unit’s Voice Mail Waiting Indicator
(VMWI) feature, you must subscribe to this service from your
phone company.
The VMWI indicator on the top of the handset flashes when you receive a new
message from your service provider. Also, it serves as a Visual Ringer function. It will
flash when there is an incoming call.
Speakerphone Operation.
NOTE: If you are using the speakerphone, remain close to handset
so the party you are speaking to can hear you.
If you are using the handset and want to switch to the speakerphone, press the
SPEAKER button, press END/cancel to end conversation.
If you are using the speakerphone and want to switch to the handset, press the TALK
button, press END/cancel again to end conversation.
32
Making a Call
1. Press the TALK or SPEAKER button. Dial the desired number.
- OR Dial the number first, then press the TALK or SPEAKER button.
- OR Press the CALLER ID-VOLUME ( 6 or 5) button to select the desired record, then
press the TALK or SPEAKER button.
2. When finished, press the END/cancel button to hang up.
NOTE: You may enter up to 25 pre-dial digits.
NOTE: If you want to delete the pre-dial number you entered, press
the delete/intercom/conf button until all of the digits are erased.
Answering Calls
1. When the phone rings, press the SPEAKER button on the handset.
- OR Pick up the handset and press the TALK button.
2. When finished, press END/cancel to hang up.
NOTE: Adjust the handset volume by pressing the
CALLER ID-VOLUME ( 6 or 5) button during a call.
Call Timer
After you press the TALK or SPEAKER button on the handset, the built-in call timer shows
on the display and counts the length of time of the call in minutes and seconds.
Auto Standby
If you place the handset in the cradle while the handset is off the hook (during a call),
the call is automatically disconnected.
33
Ringer Volume (Shortcut)
There are two ways to set the ringer volume. One is the traditional way as described
in the Programming Functions; Handset Setup; Ringer Volume menus. The other one
is this short cut to ringer menu.
1. Make sure the phone is OFF (not in TALK mode).
2. Press the #pause button to display SET RINGER LEVEL 5.
3. Use the CALLER ID-VOLUME (6 or 5) button to scroll to your selection. LEVEL 5 is
the default setting.
4. Press #pause button again to save and display the new selection for a few
seconds.
Flash/Call Waiting
If you subscribe to the combined Call Waiting Caller ID service from your local
telephone company, you will receive Caller ID information (if available) on Call Waiting
calls. During a phone call, you will hear a beep to indicate another call is waiting on the
line and Caller ID information for the waiting call shows on the handset display.
• To connect to the waiting call, press the TALK or SPEAKER button on the handset,
and your original call is put on hold.
• To switch between the two calls, press the TALK or SPEAKER button.
34
Last Number Redial
You may redial a number up to 25 digits long. To quickly redial the last number you
dialed:
1. Press the TALK or SPEAKER button.
2. Press the redial/format button.
-OR3. Press the redial/format button first, then use the CALLER ID-VOLUME ( 6 or 5)
button to select the desired redial number.
- Press the CALLER ID-VOLUME ( 5) to review the oldest call and scroll toward the
most recent calls (higher numbers).
- Press the CALLER ID-VOLUME ( 6 ) to review the newest call and scroll to older
calls (lower numbers).
NOTE: You may choose from three last dialed numbers.
4. Press the TALK or SPEAKER button. The number dials automatically.
If you get a busy signal and want to keep dialing the number, press the redial/format
button to quickly redial the number.
Exit
Press the END/cancel button to exit a menu function and return to the standby
screen.
Page
The page feature helps you locate a misplaced handset. To send and receive
pages, all handsets must be registered. If your handset is not registered, follow the
instructions in the Registration section of this manual.
35
Handset to Handset Paging
(applicable only with additional handsets)
1. Make sure the phone is OFF (not in TALK mode).
2. Press and release the delete/intercom/conf button on a handset. PAGING
EXTENSION? shows in the display.
3. Use the touch-tone pad to enter the handset number you want to page.
4. To cancel the page, press the END/cancel, delete/intercom/conf, or TALK button
on the originating handset, or press the END/cancel button on the receiving
handset.
Paging All Handsets from a Handset
(applicable only with additional handsets)
1. Make sure the originating phone is OFF (not in TALK mode).
2. Press and release the delete/intercom/conf button on a handset. PAGING
EXTENSION? shows in the display.
3. Use the touch-tone pad to enter the handset number you want to page. (1= to
page Handset 1, 2=to page handset 2, etc., and * tone=to page all handsets)
4. To cancel the page, press the END/cancel, delete/intercom/conf, or TALK button
on the originating handset, or press the END/cancel button on the receiving
handset.
Paging from the Base/Group Page
Use the base-only to page all registered handsets at the same time.
1. Press the find button on the base. All handsets beep for two minutes, and PAGING
FROM BASE shows on each handset’s display.
2. To cancel the page, press the find button on the base, or press the TALK button or
the END/cancel button on each handset.
Mute
To have a private, off-line conversation, use the MUTE feature. The party on the
telephone line cannot hear you, but you can hear them.
1. Press the mute/menu OK button. The handset display shows MUTE ON.
2. Press the mute/menu OK button to cancel and return to your phone conversation.
36
Receiver Volume Control
When the handset is ON (in TALK mode) you may adjust the receiver volume by
pressing the CALLER ID-VOLUME ( 6 or 5) button. There are five volume levels to
choose from. When the maximum or minimum volume level is reached, the phone
beeps twice. VOL 1 is minimum and VOL 5 is maximum.
Do Not Disturb (D-N-D)
This feature allows you to turn off all the handset ringer(s) at once, by pressing one
button at the base unit, even though the ringer volume of handset(s) has been preset.
1. In the standby mode, press the do not disturb button on the base.
2. The DND indicator will light and DO NOT DISTURB shows in each handset display.
3. To cancel, press the do not disturb button again.
NOTE: You can press the do not disturb button and activate the
function immediately, even when there is incoming call ringing in,
or during call screening after the call is taken by the answerer.
37
Intercom Operation
(applicable only with additional handsets)
The intercom feature allows you to have a conversation with another registered
handset without tying up the telephone line, allowing you to still receive incoming
calls.
Making an Intercom Call
1. Make sure the handset is OFF (not in TALK mode).
2. Press the delete/intercom/conf button on the handset.
3. Use the touch-tone pad to select the handset you want to page.
NOTE: To cancel page, press the delete/intercom/conf button again
or the END/cancel button on the sending handset.
4. Wait for the person at the receiving handset to press the delete/intercom/conf
button.
NOTE: If the receiving handset does not answer within two minutes,
the intercom call is automatically canceled. The originating
handset displays NO ANSWER.
5. When finished, press the END/cancel button or delete/intercom/conf button on
either handset to deactivate the intercom.
NOTE: The system is expandable up to 6 handsets (by purchase
of optional Model 28801 handset with recharge cradle). When
4 handsets are registered, the system can handle 2 separate
intercom operations at once, for example, 1st handset intercoms
with 2nd handset while 3rd handset intercoms with 4th handset.
Receiving an Intercom Call
When you receive an intercom call, your handset beeps. To answer the call press the
delete/intercom/conf button or TALK button.
38
Advanced Intercom Features
Receiving an Incoming Call During an Intercom Call
If you receive a telephone call during an intercom call, the intercom call is
immediately terminated and both handsets ring. Either handset user may press the
TALK or SPEAKER button to answer the call.
Using Intercom with External Telephone Calls
During a telephone call, you may use the intercom/paging function to page another
handset and have an off line, private (two-way) intercom conversation. You may also
have a three-way conversation between the external caller and the handsets, or you
may transfer the external telephone call to another handset.
NOTE: Before you intercom/page another handset, you must
decide whether you want to create a two-way or a three-way
conversation.
Two-Way Calling
1. During an external call, press the delete/intercom/conf button, and use the
touch-tone pad to enter the handset number you want to call.
NOTE: The receiving handset presses the delete/intercom/conf
button to answer the intercom call. Both intercom users may speak
privately. The external caller will not hear the intercom conversation.
2. When finished, press the END/cancel button or delete/intercom/conf button to
end the intercom call, return to the talk mode, and resume your original telephone
conversation.
39
Three-Way Calling
1. During an external call, press the delete/intercom/conf button. LINE ON HOLD
EXTENSION? shows in the display.
2. Use the touch-tone pad to select Handset #. You will hear a paging tone and
PAGING shows in the originating handset’s display.
NOTE: PAGING FROM... shows in the display on the receiving
handset, and the receiving handset presses the delete/intercom/conf
or TALK button to answer the intercom.
3. When the receiving handset connects, press the delete/intercom/conf button
on the originating handset to conference with the receiving handset and
the external caller. CONFERENCE shows in the display on the originating and
receiving handsets.
NOTE: A handset can enter conference mode directly by pressing
TALK or SPEAKER on the second handset during a call.
Transferring External Calls to Other Handsets
During an external call, you may transfer the external call to another handset.
1. Press the delete/intercom/conf button on the originating handset to put an
external call on hold, and then page the receiving handset.
2. Use the touch-tone pad on the handset to select Handset #. You will hear a
paging tone. PAGING shows on the originating handset’s display, and PAGING
FROM... shows on the receiving handset’s display.
3. When the receiving handset connects, press the TALK or SPEAKER button on the
originating handset to transfer the call.
-OR4. Press the TALK or SPEAKER button on the originating handset to transfer the
call. If the receiving handset does not answer within 30 seconds, the originating
handset rings back and displays CALLBACK. If the originating handset does not
answer within 30 seconds, the call is automatically dropped.
40
Caller ID (CID)
IMPORTANT: In order to use this unit’s Caller ID features, you must
subscribe to either the standard Name/Number Caller ID Service or
Call Waiting Caller ID Service. To know who is calling while you are on
the phone, you must subscribe to Call Waiting Caller ID Service.
This unit receives and displays information transmitted by your local phone company.
This information can include the phone number, date, and time; or the name, phone
number, date, and time.
NEW CALL
Call Waiting Caller ID
Provided you subscribe to Call Waiting Caller ID service from your phone company; if
you receive an incoming call and you are using the GE multi handset system, a beep
indicates the presence of a Call Waiting call on the line. The Call Waiting Caller ID
information will be displayed and stored in the history of all handsets in the system.
• When you hear the call waiting beep in the handset receiver, press the TALK or
SPEAKER button to put the current call on hold and answer the incoming call.
Press TALK or SPEAKER again to return to the original call.
Receiving CID Records
When you receive a call, the Caller ID information is transmitted between the first and
second ring. The Caller ID information appears on the display while the phone rings,
giving you a chance to monitor the information and decide whether or not to answer
the call.
41
Storing CID Records (In CID Memory)
If you are not at home or cannot answer, your telephone’s Caller ID memory stores
the data for the 40 most recent calls you received so you can see who called while
you were unavailable. When the 41st call is received, the oldest Caller ID record (1st
call) is automatically deleted.
You may review the stored information at any time. Calls received since your last
review show as NEW in the display. Calls that have not been previously reviewed but
were received from the same number more than once show as REPT in the display.
Reviewing CID Records
As calls are received and stored, the display is updated to let you know how many
calls have been received. To scroll CID records:
1. Make sure the phone is OFF (not in TALK mode).
2. Press the CALLER ID-VOLUME ( 6 ) button to review the newest CID record.
3. Press the CALLER ID-VOLUME ( 5 ) button to review the oldest CID record first.
42
Dialing a CID Number
1. Make sure the phone is OFF (not in TALK mode).
2. Use the CALLER ID-VOLUME ( 6 or 5) button to display the desired record.
3. Press the TALK or SPEAKER button. The number dials automatically.
NOTE: Depending on (a) how the incoming caller’s phone number is
formatted when it is received, and (b) whether or not you previously
pre-programmed your local area code into the set up menu, you
may need to adjust the format of the incoming caller’s stored
phone number before making the call, press the redial/format
button to adjust the number, and try again.
Available formats include:
Number of digits Explanation Example
Eleven digits
long distance code “1 ”
1-317-888-8888
+3-digit area code
+7-digit telephone number.
Ten digits3-digit area code +317-888-8888
7-digit telephone number.
Seven digits
7-digit telephone number.
888-8888
43
Storing CID Records in Internal Memory
You may also store CID information in the phone’s internal memory.
NOTE: It is important that you format CID records correctly BEFORE
storing in internal memory as you cannot reformat CID records
stored in memory.
1. Make sure the phone is OFF (not in TALK mode).
2. Use the CALLER ID-VOLUME ( 6 or 5) button to scroll to the desired CID record.
3. Press the mute/menu OK button to store the number. SAVED TO MEMORY shows
in the display.
NOTE: Press the END/cancel button once to keep the previous
setting (making no changes) and return to the menu.
NOTE: If the selected CID record contains any information that is
non-numeric, the unit will not allow this record to transfer to the
internal user memory. The handset will display UNABLE TO STORE.
Deleting a CID Record
1. Make sure the phone is OFF (not in TALK mode).
2. Use the CALLER ID-VOLUME ( 6 or 5) button to display the CID record you want
to delete.
3. Press the delete/intercom/conf button. The display shows DELETE CALL ID?
4. Press the delete/intercom/conf button to erase the record showing in the display.
The display shows DELETED.
NOTE: Press the END/cancel button to return to the standby mode
without deleting any CID records.
44
Deleting All CID Records
1. Make sure the phone is OFF (not in TALK mode).
2. Use the CALLER ID-VOLUME ( 6 or 5) button to display any Caller ID record.
3. Press and hold the delete/intercom/conf button until DELETE ALL? shows in the
display.
4. Press delete/intercom/conf button to erase all of the current CID records. The
display shows DELETED followed by NO CALLS.
NOTE: Press the END/cancel button to return to the standby mode
without deleting any CID records.
Belt Clip and Optional Headset
Connecting the Belt Clip
1. To attach the belt clip, insert the sides of the belt clip into the slots on each side of
the handset.
2. Snap the ends of the belt clip into place.
Connecting an Optional Headset to the Handset
Each handset can be used with an optional headset hands free operation.
1. Connect the headset to the headset jack on the side of the handset.
The handset receiver and microphone are disabled when the headset is
connected.
2. Adjust the headset to rest comfortably on top of your head and over your ear.
Move the microphone to approximately two to three inches from your mouth.
3. Press the TALK button to answer a call or make calls using the headset.
4. To return to normal operation, unplug the headset from the jack.
45
Changing the Battery
1.
2.
3.
4.
5.
6.
CAUTION: To reduce the risk of fire or personal injury, use only
the Thomson Inc. approved Model 5-2814 Nickel-metal Hydride
battery (Ni-MH), which is compatible with this unit.
Make sure the telephone is OFF (not in TALK mode) before you replace the battery.
Remove the battery compartment door.
Disconnect the battery plug from the jack inside the battery compartment and
remove the battery pack from the handset.
Insert the new battery pack and connect the cord to the jack inside the battery
compartment.
Put the battery compartment door back on.
Place handset in the base or handset charge cradle to charge. Allow the handset
battery to properly charge (for 16 hours) prior to first use or when you
install a new battery pack. If you do not properly charge the phone, battery
performance will be compromised.
Battery Safety Precautions
• Do not burn, disassemble, mutilate, or puncture. Like other batteries of this type,
toxic materials could be released which can cause injury.
• To reduce the risk of fire or personal injury, use only the Nickel-metal Hydride
battery listed in the User’s Guide.
• Keep batteries out of the reach of children.
• Remove batteries if storing over 30 days.
NOTE: The RBRC seal on the battery used in your Thomson Inc. product
indicates that we are participating in a program to collect and recycle the
rechargeable battery (or batteries).
For more information go to the RBRC web site at www.rbrc.org
or call 1-800-8-BATTERY or contact a local recycling center.
46
Display Messages
The following messages shows the status of the phone, provides Caller ID information,
or helps you set up and use your phone.
BLOCKED NUMBER
Indicates the person is calling from a number which
is blocked from transmission.
CHARGING...Indicates the handset needs to charge for a period
of time before it can resume normal function.
DELETE ALL?Prompt asking if you want to erase all CID records.
DELETE CALL ID?
Prompt asking if you want to erase the CID record
showing on the display.
DELETE?Prompt asking if you want to erase one of the 50
records stored in the phone’s memory.
DUPLICATE NUMBER
Under VIP melody feature, if the desired number/
record was selected in any one of TEN VIP melody
records before, DUPLICATE NUMBER shows in the
display.
END OF LISTIndicates that there is no additional information in
CID memory.
ENTER NAMEPrompt telling you to enter a name in one of the 50
memory locations.
ENTER TEL NUMBR
Prompt telling you to enter a telephone number in
one of the 50 memory locations.
NEWIndicates call or calls which have not been
reviewed.
HANDSET NAME Prompt telling you to enter the user name for the
registered handset.
HANDSET NEEDS
REGISTRATION
Indicates you must register a nonregistered handset prior to use.
47
INCOMPLETE DATA
Caller information is interrupted during transmission
or the phone line is excessively noisy. Indicates
no CID information was received, you are not
subscribed to CID service, or CID service is not
working.
LINE IN USEDisplays on handset while the line is in use.
LONG DISTANCE
Indicates CID record is from a long distance call.
LOW BATTERYIndicates the battery needs to be charged.
NEW VOICE MAIL
Indicates voice mail has not been retrieved from
service provider.
MSG WAITING OFF
Indicates voice mail has been retrieved from
service provider.
NEW CALL XX
XX represents the number of new CID records not
reviewed.
NO CALLSIndicates there are no CID records in memory.
NO USER MEMORY
Indicates the memory location contains no user
memories and the user is trying to mark a specific
user record for VIP MELODY.
OUT OF RANGE
May indicate handset is too far away from the base
or that the power has been interrupted. Move closer
and check connections.
PAGING orSomeone pressed the find button on the base
PAGING FROM
or delete/intercom/conf button on the handset.
REPTIndicates a repeat call message. Indicates a new
call from the same number was received more than
once.
SEARCHINGIndicates handset is searching for the base.
SPKRIndicates the handset is in speakerphone mode.
UNKNOWN CALLER/
NAME/NUMBER
48
Indicates incoming call is from an area not
serviced by CID or the CID information was not sent.
Handset Sound Signals
Signal
A long warbling tone
(with ringer on)
Meaning
Signals an incoming call
Three short beeps
(several times)
Page signal
One beep every 7 seconds
Low battery warning
49
Troubleshooting Guide
Telephone Solutions
No dial tone
• Check or repeat installation steps:
Make sure the base power cord is connected to a working electrical outlet.
Make sure the telephone line cord is connected to the base and the wall jack.
• Connect another phone to the same jack. If it doesn’t work, the problem might be
your wiring or local service.
• The handset may be out of range of the base. Move closer to the base.
• Make sure the battery is properly charged (for 16 hours).
• Make sure the battery pack (in the handset) is properly installed.
• The handset should beep when you press the TALK button, and the charge
indicator on the base should be lit when the handset rests in the cradle. If not, the
battery may need to be charged.
• Place handset in charge cradle for at least 20 seconds to reset the unit.
Handset does not ring
• Make sure the handset ringer software switch is set to on.
• The handset may be out of range of the base. Move closer to the base.
• You may have too many extension phones on your line. Try unplugging some
extensions.
• Check for a dial tone.
You experience static, noise, or fading in and out
• The handset may be out of range of the base. Move closer to base.
• Make sure base is not plugged into an electrical outlet with another household
appliance. If necessary, relocate the base.
• Charge the battery (for 16 hours).
Unit beeps
• Clean the charging contacts on the cordless handset and base charge cradle with
a soft cloth or an eraser.
• See solutions for “No dial tone ” on previous page.
• Replace the battery.
50
Memory dialing doesn’t work
• Did you program the memory location keys correctly?
• Did you follow proper dialing sequence?
Unit locks up and no communication between the base and cordless handset
• Unplug the power adaptor from the electrical outlet and the back of the base.
Remove the handset battery. Wait for 30 seconds and plug the power adaptor
back into the base and electrical outlet. Reconnect the battery and charge for 16
hours.
Caller ID Solutions
No Display
• Charge the battery (for 16 hours). Or replace the battery.
• Make sure the unit is connected to a non-switched electrical outlet. Disconnect
the power adaptor from the base and reconnect it.
Caller ID Error Message
• The unit displays this message if it detects anything other than valid Caller ID
information during the silent period after the first ring. This message indicates the
presence of noise on the line.
No Caller ID
• You must be subscribed to the standard Name/Number Caller ID service from
your local telephone company to receive CID information.
Battery Solutions
If you experience any of the following problems, even after recharging the battery,
you may need to replace the battery pack:
• Short talk time
• Poor sound quality
• Limited range
• Charge indicator fails to turn on
51
Causes of Poor Reception
•
•
•
•
•
•
•
•
•
•
Aluminum siding.
Foil backing on insulation.
Heating ducts and other metal construction that can shield radio signals.
You ’re too close to appliances such as microwaves, stoves, computers, etc.
Atmospheric conditions, such as strong storms.
Base is installed in the basement or lower floor of the house.
Base is plugged into AC outlet with other electronic devices.
Baby monitor is using the same frequency.
Handset battery is low.
You’re out of range of the base.
General Product Care
To keep your unit working and looking good, follow these guidelines:
• Avoid dropping the handset, as well as other rough treatment to the phone.
• Clean the phone with a soft cloth.
• Never use strong cleaning agents, paint thinner, abrasive powder, alcohol, or other
chemical products to clean the unit. Doing so will damage the finish.
• Retain the original packaging in case you need to ship the phone at a later date.
• Periodically clean the charge contacts on the handset and base with a clean
pencil eraser.
52
Warranty
Thomson Digital Technologies Ltd., warrants to the purchaser or gift recipient that
if any manufacturing defect becomes apparent in this product within 1 year from
the original date of purchase, it will be replaced free of charge, including return
transportation.
This warranty does not include damage to the product resulting from accidents,
misuse or leaking batteries.
Should your product not perform properly during the warranty period, either:
1. Return it to the selling dealer with proof of purchase for replacement,
OR
2. Call 1-800-522-0338 (English) or 1-800-522-0445 (French) for instructions
concerning where to mail the product.
The provisions of this written warranty are in addition to and not a modification of or
subtraction from the statutory warranties and other rights and remedies contained
in any applicable legislation, and to the extent that any such provisions purport
to disclaim, exclude or limit any such statutory warranties and other rights and
remedies, such provisions shall be deemed to be amended to the extent necessary
to comply therewith.
Attach your sales receipt to this booklet for future reference. This information is
required if service is needed during the warranty period.
PURCHASE DATE ________________________________________________________
NAME OF STORE ________________________________________________________
53
Accessory Information
DESCRIPTION
MODEL NO.
Handset Replacement Battery
5-2814
AC Power converter
5-2812
Belt Clip
Accessory Handset with Charge Cradle
5-2813
5-2811
To order, call the nearest distributor for your area;
Ontario: (905) 624-8516
Manitoba: (204) 783-2088
British Columbia: (604) 438-8001 Quebec: (514) 352-9071
A shipping and handling fee will be charged upon ordering. It is required
by law to collect appropriate sales tax for each individual state, country,
and locality to which the merchandise is being sent. Items are subject to
availability.
54
Index
A
C
Accessory Information 54
Add Records
18
Advanced Intercom
Features39
Answering Calls33
Area Code28
Auto Standby33
Call Timer33
Call Waiting Caller ID41
Caller ID (CID)41
Caller ID Solutions
51
Causes of Poor
Reception
52
Changing a Stored VIP
Melody Record26
Changing the Battery46
Connecting an Optional
Headset to the
Handset45
Connecting the Belt Clip45
B
Base32
Base Layout
13
Base Station
15
Battery Safety
Precautions46
Battery Solutions
51
Before You Begin
8
Belt Clip and Optional
Headset45
55
Index
D
Default Setting31
Delete Records
19
Deleting a CID Record44
Deleting All CID Records45
De-Registration30
Dialing a CID Number43
Dialing a Number from
Internal Memory20
Digital Security System 10
Display Messages47
Do Not Disturb 37
E
Edit Records
19
Equalizer27
Exit35
F
FCC RF Radiation Exposure
Statement4
Flash/Call Waiting34
56
G
General Product Care 52
Global De-registration31
GOOG411
16
H
Handset32
Handset Layout
12
Handset Name23
Handset Setup22
Handset Sound Signals49
Handset to Handset
Paging36
Hearing Aid Compatibility
(HAC)4
Index
I
M
Important Information2
Important Installation
Guidelines
11
Information for DECT
Product4
Inserting a Pause in the
Dialing Sequence 18
Installation 10
Installing the Handset
Battery
14
Installing the Phone
14
Intercom Operation38
Interference Information3
Introduction
8
Making a Call33
Making an Intercom Call38
Mute36
K
P
Page35
Paging All Handsets from a
Handset36
Paging from the Base/Group
Page36
Parts Checklist
8
Phone Book
17
Programming Functions 17
Programming the
Telephone
17
Key Tone26
L
Language22
Last Number Redial35
Licensing4
57
Index
R
Receiver Volume Control37
Receiving an Incoming Call
During an Intercom
Call39
Receiving an Intercom
Call38
Receiving CID Records41
Registration29
REN Number4
Review Records
17
Reviewing And Deleting
Stored VIP Melody
Record26
Reviewing CID Records42
Ringer Tone23
Ringer Volume24, 34
Room Monitor20
58
S
Set Alarm Clock21
Set Day/Time27
Speakerphone
Operation32
Standby Screen
17
Storing CID Records
(In CID Memory)42
Storing CID Records in
Internal Memory44
Storing VIP Melody25
Index
T
V
Telephone Jack
Requirements
9
Telephone Network
Information3
Telephone Operation32
Telephone Solutions
50
Three-Way Calling 40
Tone/Pulse28
Transferring External Calls
to Other Handsets40
Troubleshooting Guide 50
Two-Way Calling39
VIP Melody24
Visual Indicators32
VMWI / Visual Ringer
Indicator on
Handset32
U
W
Warranty
53
Using Intercom with External
Telephone Calls39
59
Visit the GE website at: www.GE.com/phones
Model 28811
00024631 (Rev 0 Can E/F)
08-02
Printed in China
Thomson Digital Technologies Ltd.
30 Eglinton Ave W., Suite 304
Mississauga, ON Canada L5R 3E7
© 2008 Thomson Digital Technologies Ltd.
Trademark(s) ® Registered
Marque(s) ® déposée(s)
Modèle: Série 28811 DECT
6.0 Combiné san fils de
Système Téléphonique
Reponduer/Haut-Parleur
Guide d’Utilisation
Votre nouveau système téléphonique GE est EXTENSIBLE
jusqu’à 6 combinés (avec l’achat du combiné optionnel
28801 avec socle de chargement)
Renseignements Importants
AVIS: Ce produit est conforme aux spécifications techniques applicables
d’Industrie Canada.
Son fonctionnement est soumis aux deux conditions suivantes : (1)
Cet appareil ne peut causer de l’interférence, et (2) Cet appareil doit
accepter toute interférence, y compris l’interférence pouvant entraîner le
fonctionnement non souhaitable de l’appareil.
Avant d’installer cet appareil, l’utilisateur doit vérifier s’il est permis de le
raccorder aux installations de la compagnie locale de télécommunications.
L’installation doit de plus respecter les méthodes de raccordement
approuvées. L’abonné doit savoir que le respect des conditions mentionnées
ci-dessus n’empêche pas nécessairement la détérioration du service dans
certaines situations.
La réparation des appareils certifiés doit être confiée à un service de
maintenance canadien dûment autorisé, désigné par le fournisseur. Toute
réparation ou modification effectuée par l’utilisateur peut amener la
compagnie à exiger le débranchement de l’installation.
Par mesure de sécurité, les utilisateurs doivent s’assurer du raccordement
réciproque des circuits de mise à la terre du service public d’énergie, des
lignes téléphoniques et — s’il y a lieu — des systèmes intérieurs de conduites
d’eau métalliques. Cette précaution peut s’imposer particulièrement dans les
régions rurales.
ATTENTION: Les utilisateurs ne doivent pas essayer de faire eux-mêmes
ces raccordements. Ils doivent communiquer avec le service d’inspection
compétent ou faire appel à un électricien, selon le cas.
NOTES: Cet appareil ne peut être utilisé pour le service payant (monnaie)
fourni par la compagnie de téléphone.
Renseignements sur L’interférence
Cet appareil produit et utilise l’énergie radiofréquence qui peut gêner la
réception radio et télévision résidentielle s’il n’est pas installé ou utilisé
conformément aux instructions contenues dans ce guide. Une protection
raisonnable est assurée contre une telle interférence, mais rien ne garantit
qu’un appareil donné ne produira pas d’interférence. Si on soupçonne et
confirme une interférence d’une ou plus des façons suivantes: réorienter
l’antenne du récepteur radio ou télévision, éloigner l’appareil du récepteur
ou brancher l’appareil et le récepteur dans des prises de circuits différents.
L’utilisateur peut aussi demander conseil à un technicien en radio-télévisìon
compétent. Cet appareil a été mis à l’essai et répond à toutes les limites
des appareils informatiques de Classe B, conformément à l’alinéa 15, des
Règlements de la FCC.
Cet appareil est conforme à la régle RSS-210 d’Industrie Canada.
Information sur le Réseau Téléphonique
Si cet appareil provoque des dérangements sur la ligne et, par conséquent,
sur le réseau téléphonique, la compagnie de téléphone signalera, s’il y a
lieu, qu’elle doit temporairement interrompre le service. Si elle est dans
l’impossibilité de le faire et que les circonstances dictent une telle mesure,
la compagnie de téléphone peut immédiatement interrompre le service
pendant un certain temps.
La compagnie de téléphone peut apporter des changements à ses
installations de télécommunications, à son équipement, à son exploitation ou
à ses politiques si la poursuite des affaires nécessite de tels changements. Si
l’on croit que ces changements influeront sur l’utilisation ou le rendement du
téléphone, la compagnie doit donner un préavis suffisant pour permettre de
maintenir le service.
Il faut aviser la compagnie de téléphone si l’on désire déconnecter son
téléphone de façon permanente.
Facteur D’équivalence de Sonnerie (REN)
L’étiquette sous cet appareil indique notamment le facteur d’équivalence de
sonnerie de l’appareil.
Le REN permet de déterminer le nombre d’appareils que vous pouvez
raccorder à votre ligne téléphonique et qui sonneront quand votre numéro
de téléphone est composé. Dans la plupart des régions (mais pas toutes),
la somme des REN de tous les appareils raccordés à une ligne ne doit pas
dépasser 5. Pour connaître le nombre d’appareils que vous pouvez raccorder
à votre ligne, compte tenu du REN, communiquez avec votre compagnie de
téléphone.
REN (facteur d’équivalence de sonnerie) SE TROUVE À LA BASE DE
L’APPAREIL.
Licensing
Sous license du brevet US 6,427,009.
Compatibilité avec les Prothèses Auditives
Ce téléphone est conforme aux normes FCC/Industrie Canada en matière de
compatibilité avec les prothèses auditives.
Énonce sur L’exposition au Rayonnement RF
de la FCC
Cet équipement est conforme aux limites d’exposition au rayonnement RF
de la FCC établies pour un environnement non contrôlé. Cet équipement doit
être installé et utilisé en maintenant une distance minimale de 20 centimètres
entre le radiateur et votre corps. Cet émetteur ne doit pas être placé ou utilisé
avec une autre antenne ou un autre émetteur.
Pour l’utilisation sur soi, ce téléphone a été mis à l’essai et est conforme aux
lignes directrices en matière d’exposition RF de la FCC lorsque utilisé avec
la pince-ceinture fournie avec ce produit. L’utilisation d’autres accessoires
peut ne pas être conforme avec les lignes directrices de la FCC en matière
d’exposition RF.
Renseignements sur le Produit DECT
Cet appareil est conforme à la norme DECT 6.0 qui utilise la
gamme de fréquences 1,92 à 1,93 GHz. L’installation de cet
appareil est sujette à la notification et à la coordination avec
l’UTAM. Tout déplacement de cet appareil doit être coordonné
avec et approuvé par l’UTAM. Vous pouvez communiquer
avec l’UTAM au 1-800-429-8826.
Table des Matieres
Renseignements Importants. ...........2
Renseignements sur
L’interférence. ...............................3
Information sur le Réseau
Téléphonique..................................3
Facteur D’équivalence de
Sonnerie (REN)..............................4
Licensing........................................4
Compatibilité avec les Prothèses
Auditives........................................4
Énonce sur L’exposition au
Rayonnement RF de la FCC............5
Renseignements sur le Produit
DECT.............................................5
Introduction..................................9
Avant de Commencer......................9
Liste de Pièces.................................. 9
Exigences de la Prise
Téléphonique............................... 10
Installation ................................ 11
Système de Sécurité
Numérique.................................11
Importantes Lignes Directrices sur
L’installation. ...........................12
Présentation du Combiné............. 13
Présentation de la Base............... 14
Installation du Téléphone. .......... 15
Installation de la Pile du
Combiné......................................15
Poste de Base.................................16
GOOG411.....................................17
Programmation du Telephone...... 18
Écran D’attente.............................18
Fonctions de Programmation. ....18
Annuaire. ........................................18
Affichage des Dossiers. ...............18
Insertion D’une Pause dans la
Sequence de Composition.......19
Édition des Dossiers.....................20
Suppression de Dossiers. .............20
Composition d’un Numéro de la
Mémoire Interne.......................21
Écoute à Distance.........................21
Réglage du Réveil. ........................22
Paramètres du Combiné.........23
Langue......................................23
Nom du Combiné.....................24
Tonalité de la Sonnerie.........24
Volume de la Sonnerie. .........25
Mélodie VIP.............................25
Mémorisation des Mélodies
VIP.............................................26
Modification d’un Dossier
Enregistré de Mélodie VIP....26
Rappel et Suppression d’un
Dossier Enregistré de Mélodie
VIP.............................................27
Tonalité du Clavier................27
Réglage de la
Date/de l’heure.......................27
Égalisateur...............................28
Code Régional.........................28
Tonalité/Impulsion. ................29
Table des Matieres
Enregistrement........................29
Desenregistrement..................30
Desenregistrement Global....31
Reglage par Defaut................31
Fonctionnement du Telephone..... 32
Témoins Visuels. ............................32
Base...........................................32
Combiné....................................32
Indicateur de Messages Vocaux
Reçus (IMVR)/Visuel de
Sonnerie sur le combiné........32
Fonctionnement du Haut-Parleur
du Combiné................................32
Faire un Appel.........................33
Appels De Réponse.................33
Minuterie D’appel..........................33
Attente Automatique....................33
Volume de la Sonnerie.................34
Flash/Appel en Attente...............34
Recomposition du Dernier
Numero......................................34
Quitter............................................35
Recherche.......................................35
Recherche de Combine a
Combine....................................35
Recherche de Tous les Combinés
d’un Combiné. ..........................36
Recherche a Partir de la Base/
Recherche de Groupe. ...........36
Silencieux........................................36
Commande de Volume du
Recepteur...................................36
Ne pas Déranger (DND) ............ 37
Fonctionnement de L’interphone. .37
Faire un Appel D’interphone....... 37
Reception d’un Appel
D’interphone............................. 38
Fonctions Avancees de
L’interphone.............................. 38
Recevoir un Appel Pendant un
Appel D’interphone................. 38
Utilisation de L’interphone Avec
les Appels Exterieurs............. 38
Appel a Deux............................ 39
Appel a Trois. .......................... 39
Renvoi D’appels Exterieurs a
D’autres Combines.................. 40
Afficheur (CID)............................41
Afficheur D’appel en Attente..... 41
Reception de Dossiers
D’appelants............................... 41
Memorisation de Dossiers
D’appelants............................... 42
Consultation des Dossiers
D’appelants............................... 42
Composition d’un Numéro
D’appelant................................. 43
Memorisation des Dossiers
D’appelants dans la Memoire
Interne. ...................................... 44
Suppression du Dossier
d’appelant.................................. 44
Suppression de Tous les Dossiers
D’appelants............................... 45
Table des Matieres
Pince-Ceinture et Casque en
Option. ........................................46
Raccordement de la
Pince-Ceinture. ........................ 46
Raccordement d’un Casque
Optionnel au Casque............... 46
Remplacement de la Pile...............47
Précautions à Prendre. ................47
Messages Affichés........................48
Guide de Depannage.....................50
Solutions-Telephone. ............ 50
Solutions- Afficheur............. 52
Soins et Entretien........................53
Causes de Mauvaise Réception. .....53
Garantie. .....................................54
Information pour Accessoires.......55
Index............................................56
ATTENTION:
AVERTISSEMENT:
AFIN D'ÉVITER LES
DANGERS
D'INCENDIE ET
D'ÉLECTROCUTION,
NE PAS EXPOSER
CET APPAREIL À LA
PLUIE NI À
L'HUMIDITÉ.
RISQUE DE CHOC ÉLECTRIQUE
NE PAS ENLEVER
LE SYMBOLE DE
L'ÉCLAIR ILLUSTRÉ
DANS UN TRIANGLE
EST UN AVERTISSEMENT INDIQUANT
UNE "TENSION
DANGEREUSE" À
L'INTÉRIEUR DE
L'APPAREIL.
ATTENTION:AFIN DE RÉDUIRE
LES RISQUES
D'ÉLECTROCUTION, NE PAS
ENLEVER LE COUVERCLE (NI LE
CÔTÉ ARRIÈRE). AUCUNE
PIÈCE INTÉRIEURE NE PEUT
ÊTRE RÉPARÉE PAR
L'UTILISATEUR. POUR TOUTE
RÉPARATION, CONSULTER DES
TECHINICIENS COMPÉTENTS.
LE POINT D’EXCLAMATION
ILLUSTRÉ DANS UN
TRIANGLE EST UN
AVERTISSEMENT
INDIQUANT QUE
L’APPAREIL EST FOURNI
AVEC DES INSTRUCTIONS
IMPORTANTES.
VOIR LES INSCRIPTIONS SOUS L'APPAREIL OU À L'ARRIÉRE DU BOÎTiER.
Introduction
ATTENTION : Vous devez respecter certaines règles de sécurité
lorsque vous utilisez un appareil téléphonique.
Reportez-vous aux INSTRUCTIONS IMPORTANTES DE SÉCURITÉ
qui accompagnent ce produit et conservez-les pour référence
ultérieure.
IMPORTANT: Étant donné que les téléphones sans cordon
fonctionnent à l’électricité, vous devriez disposer d’au moins un
téléphone avec cordon dans la maison, en cas de panne de courant.
Avant de Commencer
Liste de Pièces (pour le Modèle 28811)
Assurez-vous que la boîte contient les articles suivants.
Base
Couvercle du
compartiment
de pile
Adaptateur CA
Pince-ceinture
Bloc-pile de
combiné
Piédestal de
bâti de mur
Combiné
Cordon
téléphonique
Dans le cas du Modèle 28811XX2- A il y aura UN combiné supplémentaire, un socle
de chargement, une pince pour ceinture, une pile et un couvercle de plus que ce qui
est illustré plus haut.
REMARQUE: Si un haut-parleur est compris dans l’emballage, il
remplace un combiné, une pince pour ceinture, un bloc-pile et un
couvercle.
Dans le cas du Modèle 28811XX3- A il y aura DEUX combinés supplémentaires, deux
socles de chargement, deux pinces pour ceinture, deux piles et deux couvercles de
plus que ce qui est illustré plus haut.
Dans le cas du Modèle 28811XX4- A il y aura TROIS combinés supplémentaires, deux
socles de chargement, deux pinces pour ceinture, deux piles et deux couvercles de
plus que ce qui est illustré plus haut.
Dans le cas du Modèle 28811XX5- A il y aura QUATRE combinés supplémentaires,
deux socles de chargement, deux pinces pour ceinture, deux piles et deux couvercles
de plus que ce qui est illustré plus haut.
Dans le cas du Modèle 28811XX6- A il y aura CINQ combinés supplémentaires, deux
socles de chargement, deux pinces pour ceinture, deux piles et deux couvercles de
plus que ce qui est illustré plus haut.
Exigences de la Prise Téléphonique
Pour utiliser ce téléphone, vous devez disposer dans
la maison d’une prise téléphonique modulaire de
type RJ11C (CA11A), qui peut ressembler à celle
illustrée ici. Si aucune prise modulaire n’est installée,
en faire installer une par la compagnie de téléphone.
10
Placa de pared
Prise de ligne
téléphonique
modulaire
Installation
Système de Sécurité Numérique
Lorsque vous déposez le combiné sur la base, l’appareil vérifie son code de sécurité,
qui empêche les fausses sonneries d’autres téléphones sans cordon.
NOTE SUR L’INSTALLATION: Certains téléphones sans fil fonctionnent
à des fréquences qui peuvent causer ou subir de l’interférence
de téléviseurs, fours à micro-ondes et magnétoscopes situés
à proximité. Pour réduire ou éviter cette interférence, la base
de votre téléphone sans fil ne devrait pas être placée près ou
sur un téléviseur, un four à micro-ondes ou un magnétoscope.
Si l’interférence persiste, déplacez le téléphone sans fil à une
plus grande distance de ces appareils. D’autres appareils de
communications peuvent aussi utiliser la fréquence de 1.9 GHz pour
communiquer et si ces appareils ne sont pas installés correctement,
ils peuvent interagir entre eux et avec votre nouveau téléphone.
Si vous êtes aux prises avec de l’interférence, consultez les guides
d’utilisation de ces appareils sur la manière de paramétrer les
canaux afin d’éliminer l’interférence. Les appareils courants
susceptibles d’utiliser la fréquence de 1.9 GHz comprennent les
émetteurs sans fil audio/vidéo, les réseaux informatiques sans fil,
les systèmes téléphoniques sans fil avec postes multiples et certains
systèmes téléphoniques sans fil à grande portée.
11
Importantes Lignes Directrices sur L’installation
• Évitez les sources de bruit et de chaleur, comme les moteurs, les lampes
fluorescentes, les fours à micro-ondes, les appareils de chauffage et le soleil
direct.
• Évitez les endroits extrêmement poussiéreux, humides et froids.
• Évitez les autres téléphones sans cordon et les ordinateurs personnels.
• Ne jamais installer les câbles téléphoniques pendant un orage électrique.
• Ne jamais installer de prises téléphoniques dans des endroits humides, à moins
qu’elles soient spécialement conçue pour endroits humides.
• Ne jamais toucher les fils ou bornes téléphoniques non isolés, à moins que la
ligne téléphonique ait été débranchée de l’interface réseau.
• Installer ou modifier les lignes téléphoniques avec soin.
12
Présentation du Combiné
Indicateur de messages
vocaux reçus (IMVR)/
visuel de sonnerie
afficheur
TALK (bouton parler)
CALLER ID-VOLUME
6(bouton ID appelant/
volume)
SPEAKER
(bouton hautparleur)
CALLER ID-VOLUME
5(bouton ID appelant/
volume)
END/cancel (bouton
fin/annuler)
delete/intercom/conf
(bouton effacer/
interphone/conférence)
*tone (bouton
tonalité)
GOOG-411
(service d’assistance
annuaire gratuit de
Google à un bouton)
#pause
(bouton pause)
mute/menu OK
(bouton sourdine/
menu OK)
microphone
redial/format
(bouton
recomposition/
format)
13
Présentation de la Base
charge/in use voicemail
(indicateur charge/marche
vocaux)
14
do not disturb
find
(bouton ne pas
(bouton rechercher) déranger)
Installation du Téléphone
Installation de la Pile du Combiné
REMARQUE : Vous devez brancher la pile du combiné avant de
l’utiliser.
ATTENTION: Pour réduire le risque d’incendie ou de blessures,
utilisez seulement la batterie approuvé par Thomson Inc.
d’hydrure de Nickel-métal (Ni-MH) du Model 5-2814, qui est
compatible avec cette unité.
1. Repérez la pile et le couvercle du compartiment de la pile qui sont emballés
ensemble dans un sac de plastique séparément du combiné.
2. Repérez le compartiment de la pile à l’arrière du combiné.
3. Raccordez le connecteur de la pile dans la prise située à l’intérieur du
compartiment.
REMARQUE: Pour assurer une installation correcte de la pile, le
connecteur est claveté et ne peut être inséré que dans une seule
position.
PILE
APPUYEZ
FERMEMENT
FIL NOIR
FIL ROUGE
4. Insérez le bloc-piles.
5. Refermez le compartiment de la pile en poussant le couvercle vers le haut jusqu’à
ce qu’il s’enclenche.
15
Poste de Base
1. Choisissez un endroit près d’une prise de courant et d’une prise téléphonique
murale (RJ11C) et placez le téléphone sans fil sur une surface plane, comme un
bureau ou une table, ou fixez-le au mur.
2. Branchez une extrémité du cordon téléphonique dans la prise TEL LINE à l’arrière
de la base et l’autre extrémité dans une prise murale modulaire.
3. Branchez le adapteur d’alimentation c.a. dans la prise de courant et le connecteur
c.c. dans la prise à l’arrière de la base.
4. Placez le combiné sur le socle de la base. L’indicateur charge/marche vocaux
s’allume pour confirmer que la pile se charge.
5. Laissez le téléphone se charger pendant 16 heures avant l’utilisation initiale. Si
vous ne chargez pas correctement le téléphone, le rendement de la pile sera
compromis.
ATTENTION : Utilisez seulement l’adapteur modèle de la
puissance 5-2812 qui accompagne l’appareil. L’utilisation
d’autres adapteurs de puissance peut endommager l’unité. Le
adapteur de courant fourni avec cet appareil doit être placé
correctement en position verticale ou monté sur le sol.
16
GOOG411
GOOG-411 est le nouveau service 411 de Google. Avec GOOG-411, vous pouvez
trouver l’information sur les entreprises locales gratuitement, directement à partir
de votre téléphone. Lorsque vous achetez un téléphone GE, vous pouvez accéder au
service 1-800-GOOG-411 en tout temps en appuyant sur le bouton GOOG-411.
1. En mode d’attente ou de composition, appuyez sur le bouton GOOG-411; le
numéro préréglé du service GOOG-411 est immédiatement composé.
“GOOG-411: Free 411 by Google” s’affiche.
2. Parlez dans le téléphone et dites où vous êtes et ce que vous cherchez.
GOOG-411 vous branchera à l’entreprise que vous choisissez.
3. Lorsque vous avez terminé, appuyez sur le bouton END/cancel pour raccrocher.
En tout temps pendant l’appel:
• Pour revenir en arrière
dites “revenir en arrière”
• Pour recommencer
dites “recommencer” ou appuyez sur *
Lorsqu’on vous demande la ville et la province:
• Pour entrer la ville et la province
dites le nom complet
(par exemple, “Palo Alto California”)
• Pour entrer un code postal
dites-le ou entrez-le à l’aide du clavier
Lorsqu’on vous demande le nom de l’entreprise ou sa catégorie:
• Pour entrer le nom d’une dites le nom complet ou sa catégorie
entreprise (par exemple, “Joe’s Pizzaria” ou “Pizza”)
• Pour épeler le nom d’une entreprise appuyez sur la touche 1 et épelez-le avec le clavier
(par exemple, “JOUETS” (TOYS) serait 568387)
Lorsque vous écoutez les résultats:
• Pour naviguer entre les différents dites ou appuyez sur le numéro dans la résultats
liste
• Pour obtenir plus d’informations
dites “détails”
• Pour obtenir de l’aide
dites “aide”
17
Programmation du Telephone
Écran D’attente
Le combiné affiche le numéro du combiné et le nom de l’utilisateur.
USER NAME
HANDSET X
Fonctions de Programmation
Le système utilise un menu structuré pour vous permettre d’avoir accès à toutes
ses fonctionnalités. Vous pouvez programmer les caractéristiques suivantes à partir
du menu principal: Annuaire, Écoute à Distance, Réglage du Réveil, Paramètres du
Combiné.
Annuaire
Chaque combiné peut enregistrer jusqu’à 50 dossiers dans son annuaire pour la composition
rapide; chaque dossier peut avoir un numéro de 20 chiffres maximum ainsi qu’un nom de 15
caractères maximum.
Affichage des Dossiers
Assurez-vous que le téléphone est DÉSACTIVÉ (pas en mode conversation).
Appuyez sur le bouton mute/menu OK pour aller au menu.
Appuyez sur le bouton CALLER ID-VOLUME ( 6 ou 5) pour afficher PHONEBOOK.
Appuyez sur le bouton mute/menu OK pour entrer le menu PHONEBOOK.
Utilisez sur le bouton CALLER ID-VOLUME ( 6 ou 5) pour afficher VIEW
RECORDS.
6. Appuyez sur le bouton mute/menu OK pour confirmer, tous les dossiers sont
affichés en ordre alphabétique.
7. Appuyez sur le bouton CALLER ID-VOLUME ( 6 ou 5) ou entrez une lettre pour
afficher les dossiers.
1. 2.
3.
4.
5. 18
Ajout de Dossiers
Assurez-vous que le téléphone est DÉSACTIVÉ (pas en mode conversation).
Appuyez sur le bouton mute/menu OK pour aller au menu.
Appuyez sur le bouton CALLER ID-VOLUME ( 6 ou 5) pour afficher PHONEBOOK.
Appuyez sur le bouton mute/menu OK pour entrer le menu PHONEBOOK.
Utilisez sur le bouton CALLER ID-VOLUME ( 6 ou 5) pour afficher ADD RECORDS.
Appuyez sur le bouton mute/menu OK pour confirmer. ENTER NAME s’affiche.
Utilisez le clavier pour entrer un nom (jusqu’à 15 caractères). Chacune des
touches numériques comprend plus d’une lettre. Par exemple, pour entrer le nom
BILL SMITH, appuyez deux fois sur la touche 2 pour obtenir la lettre B. Appuyez
trois fois sur la touche 4 pour la lettre I. Appuyez trois fois sur la touche 5 pour la
lettre L. Appuyez trois fois sur la touche 5 pour la deuxième lettre L et appuyez sur
la touche 1 pour insérer un espace entre le prénom et le nom. Appuyez quatre fois
sur la touche 7 pour la lettre S, une fois sur la touche 6 pour la lettre M, trois fois
sur la touche 4 pour la lettre I, sur la touche 8 pour la lettre T et deux fois sur la
touche 4 pour la lettre H.
REMARQUE : Si vous faites une erreur, appuyez sur le bouton delete/
intercom/conf pour revenir en arrière et effacer le caractère ou le
chiffre incorrect.
8. Appuyez à nouveau sur le bouton mute/menu pour sauvegarder votre sélection.
Le message AJOUTER NUM TÉL s’affiche.
9. Utilisez le clavier du combiné pour entrer le numéro de téléphone (jusqu’à 20
chiffres, incluant les pauses) et appuyez sur le bouton mute/menu OK pour
confirmer. Les dossiers sont enregistrés en ordre alphabétique dans l’annuaire.
1. 2.
3.
4.
5. 6. 7. Insertion D’une Pause dans la Sequence de
Composition (D’un Numero Memorise)
Appuyez sur le bouton #pause du clavier numérique du combiné pour insérer une
pause dans la séquence de composition quand une pause est nécessaire pour
attendre un signal de manœuvre (par exemple, après avoir fait le 9 pour obtenir une
ligne extérieure ou pour attendre une tonalité d’accès à un ordinateur). Chaque pause
compte comme un chiffre dans la séquence de composition.
19
Édition des Dossiers
Assurez-vous que le téléphone est DÉSACTIVÉ (pas en mode conversation).
Appuyez sur le bouton mute/menu OK pour aller au menu.
Appuyez sur le bouton CALLER ID-VOLUME ( 6 ou 5) pour afficher PHONEBOOK.
Appuyez sur le bouton mute/menu OK pour entrer le menu PHONEBOOK.
Utilisez sur le bouton CALLER ID-VOLUME ( 6 ou 5) pour afficher EDIT RECORDS.
Appuyez sur le bouton mute/menu OK pour confirmer, les dossiers sont affichés.
Appuyez sur le bouton CALLER ID-VOLUME ( 6 ou 5) ou entrez une lettre pour
afficher les dossiers, appuyez sur le bouton mute/menu OK pour confirmer.
ENTER NAME s’affiche.
8. Reprenez les étapes 7 à 9 de la rubrique “Ajout de Dossiers”.
1. 2.
3.
4.
5. 6. 7. Suppression de Dossiers
1. 2.
3.
4.
5. 6. 7. 8. 9. 20
Assurez-vous que le téléphone est DÉSACTIVÉ (pas en mode conversation).
Appuyez sur le bouton mute/menu OK pour aller au menu.
Appuyez sur le bouton CALLER ID-VOLUME ( 6 ou 5) pour afficher PHONEBOOK.
Appuyez sur le bouton mute/menu OK pour entrer le menu PHONEBOOK.
Utilisez sur le bouton CALLER ID-VOLUME ( 6 ou 5) pour afficher DELETE
RECORDS.
Appuyez sur le bouton mute/menu OK pour confirmer, les dossiers sont affichés.
Appuyez sur le bouton CALLER ID-VOLUME ( 6 ou 5) ou entrez une lettre pour
afficher les dossiers, appuyez sur le bouton delete/intercom/conf. DELETE?
s’affiche.
Appuyez sur le bouton mute/menu OK pour entrer le menu PHONEBOOK.
Utilisez sur les boutons delete/intercom/conf ou mute/menu OK encore pour
confirmer.
REMARQUE: Si vous ne souhaitez pas changer ou supprimer
un dossier, appuyez simplement sur le bouton END/cancel, ou
attendez une minute avant de quitter automatiquement le mode de
consultation.
Composition d’un Numéro de la Mémoire Interne
Assurez-vous que le téléphone est DÉSACTIVÉ (pas en mode conversation).
Appuyez sur le bouton mute/menu OK pour aller au menu.
Appuyez sur le bouton CALLER ID-VOLUME ( 6 ou 5) pour afficher PHONEBOOK.
Appuyez sur le bouton mute/menu OK pour entrer le menu PHONEBOOK.
Utilisez sur le bouton CALLER ID-VOLUME ( 6 ou 5) pour afficher VIEW
RECORDS.
6. Appuyez sur le bouton mute/menu OK pour confirmer.
7. Utilisez sur le bouton CALLER ID-VOLUME ( 6 ou 5) ou entrez une lettre pour vous
déplacer jusqu’au numéro désiré.
8. Appuyez sur les boutons TALK ou SPEAKER, le numéro sera composé
automatiquement.
1. 2.
3.
4.
5. Écoute à Distance
(utilisable SEULEMENT avec des Combinés Supplémentaires)
1. Assurez-vous que le téléphone est DÉSACTIVÉ (pas en mode conversation).
2. Appuyez sur le bouton mute/menu OK pour aller au menu principal.
3. Appuyez sur le bouton CALLER ID-VOLUME (6 ou 5) pour afficher ROOM
MONITOR (Écoute à Distance).
4. Appuyez sur le bouton mute/menu OK pour ouvrir le menu ROOM MONITOR
(Écoute à Distance); le message ROOM MONITOR EXTENSION ? (Écoute à
Distance?) s’affiche.
5. Utilisez le clavier pour entrer le numéro du combiné qui sera sur écoute.
REMARQUE: Lorsque que ce système téléphonique est augmenté
(jusqu’à 6 combinés avec l’achat du combiné et socle de recharge
Modèle 28801, en option), les combinés sont nommés COMBINÉ 1,
COMBINÉ 2, COMBINÉ 3 et ainsi de suite respectivement.
21
6. Le combiné sur écoute (à distance) mettra le microphone en marche et le combiné
d’écoute (près de vous) mettra l’écouteur en fonction pour entendre le son du
combiné sur écoute.
REMARQUE: Pour que la fonction d’écoute à distance fonctionne, le
combiné sur écoute ne doit pas reposer sur le socle.
REMARQUE: En mode d’écoute à distance, les combinés émettront
une tonalité d’alerte aux 5 secondes s’il y a un appel entrant. Vous
pouvez appuyer sur le bouton SPEAKER pour quitter le mode d’écoute
à distance et prendre l’appel.
REMARQUE: En mode d’écoute à distance, le combiné d’écoute peut
fonctionner avec l’écouteur du combiné en appuyant une fois sur le
bouton TALK. Revenez en mode haut-parleur en appuyant une fois
sur le bouton SPEAKER.
REMARQUE: Appuyez sur le bouton END/cancel du combiné pour
mettre fin à l’écoute à distance.
Réglage du Réveil
Assurez-vous que le téléphone est DÉSACTIVÉ (pas en mode conversation).
Appuyez sur le bouton mute/menu OK pour aller au menu principal.
Appuyez sur le bouton CALLER ID-VOLUME (6 ou 5) pour afficher ALARM.
Appuyez sur le bouton mute/menu OK pour entrer le sous-menu. ALARM 1ON
2OFF s’affiche.
5. Utilisez les boutones du combiné pour faire une sélection ou utilisez le bouton
CALLER ID-VOLUME ( 6 ou 5) pour sélectionner 1MA ou 2ARRET.
6. Si vous choisissez ON, appuyez sur le bouton mute/menu OK pour confirmer et
avancer le sous-menu RÉGLER ALARME.
7. Utilisez des touches numériques pour entrer l’heure, et utilisez touche numérique
2 pour sélectionner AM et touche numérique 7 pour sélectionner PM.
8. Appuyez sur le bouton mute/menu OK pour confirmer et avancer le sous-menu
Set Cycle Time.
9. Utilisez le bouton CALLER ID-VOLUME ( 6 ou 5) pour sélectionner Once ou Daily.
Le paramètre par défaut est Once.
10.Appuyez sur le bouton mute/menu OK pour enregistrer votre sélection. Vous
entendrez une tonalité de confirmation.
1. 2. 3. 4. 22
REMARQUE : Si vous sélectionnez “Quotidiennement”, l’appareil
utilisera l’heure programmée pour l’activation de l’alarme.
Paramètres du Combiné
1. Assurez-vous que le téléphone est DÉSACTIVÉ (pas en mode conversation).
2. Appuyez sur le bouton mute/menu OK pour aller au menu principal.
3. Appuyez sur le bouton CALLER ID-VOLUME ( 6 ou 5) pour afficher HANDSET
SETUP (Paramètres du Combiné).
4. Appuyez sur le bouton mute/menu OK pour confirmer et pour programmer les
paramètres suivants: Langue, Nom du Combiné, Tonalité de Sonnerie, Volume
de Sonnerie, Mélodie VIP, Tonalité du Clavier, Réglage de la Date/de l’heure,
Égalisateur, Code Régional, Tone/Pulse, Enregistrement, Desenregistrement et
Paramètres par Défaut.
REMARQUE: Pendant la programmation, vous pouvez appuyer à tout
moment sur le bouton END/cancel pour quitter le sous-menu en
cours et revenir au menu.
Langue
Du Menu D’installation de Combiné:
1. Appuyez sur le bouton CALLER ID-VOLUME ( 6 ou 5) pour afficher le sous-menu
SET LANGUAGE (Sélection de la Langue).
2. Appuyez sur le bouton mute/menu OK pour ouvrir ce menu. Le message SET
LANGUAGE 1ENG 2FRA 3ESP (Sélection de la Langue 1Ang 2Fra 3Esp) s’affiche.
3. Utilisez les touches du combiné pour sélectionner 1ENG, 2FRA ou 3ESP ou utilisez le
bouton CALLER ID-VOLUME ( 6 ou 5) pour choisir la langue désirée. L’anglais est
la langue par défaut.
4. Appuyez sur le bouton mute/menu OK pour enregistrer votre sélection. Vous
entendrez une tonalité de confirmation et la langue sélectionnée s’affichera.
23
Nom du Combiné
Du Menu D’installation de Combiné:
1. Appuyez sur le bouton CALLER ID-VOLUME ( 6 ou 5) pour afficher le sous-menu
COMBINE NOM.
2. Appuyez sur le bouton mute/menu OK pour ouvrir ce menu. Le message COMBINE
NOM s’affiche.
3. Utilisez le clavier pour entrer un nom (jusqu’à 15 caractères). Chacune des
touches numériques comprend plus d’une lettre. Par exemple, pour entrer le nom
BILL SMITH, appuyez deux fois sur la touche 2 pour obtenir la lettre B. Appuyez
trois fois sur la touche 4 pour la lettre I. Appuyez trois fois sur la touche 5 pour la
lettre L. Appuyez trois fois sur la touche 5 pour la deuxième lettre L et appuyez sur
la touche 1 pour insérer un espace entre le prénom et le nom. Appuyez quatre fois
sur la touche 7 pour la lettre S, une fois sur la touche 6 pour la lettre M, trois fois
sur la touche 4 pour la lettre I, sur la touche 8 pour la lettre T et deux fois sur la
touche 4 pour la lettre H.
REMARQUE: Si vous faites une erreur, appuyez sur le bouton delete/
intercom/conf pour reculer en effaçant un caractère à la fois.
4. Appuyez sur le bouton mute/menu OK pour mémoriser le nom. Vous entendrez
une tonalité de confirmation et le nom du combiné s’affichera.
Tonalité de la Sonnerie
Vous avez le choix entre dix tonalités de sonnerie et entre dix mélodies différentes.
Du Menu D’installation de Combiné:
1. Appuyez sur le bouton CALLER ID-VOLUME ( 6 ou 5) pour afficher le sous-menu
TON SONNERIE.
2. Appuyez sur le bouton mute/menu OK pour ouvrir ce menu. Le message REGLER
TON SONN 01 s’affiche. Le paramètre par défaut est 01.
3. Utilisez le bouton CALLER ID-VOLUME ( 6 ou 5) pour afficher le réglage désiré (de
1 à 20). Vous entendrez un extrait de la tonalité ou de la mélodie sélectionnée.
4. Appuyez sur le bouton mute/menu OK pour enregistrer votre sélection. Vous
entendrez une tonalité de confirmation et la tonalité de sonnerie sélectionnée
s’affichera.
24
REMARQUE: Vous devez avoir le volume de sonnerie réglé à ON pour
que la tonalité d’anneau signale un appel d’arrivée.
Volume de la Sonnerie
Du Menu D’installation de Combiné:
1. Appuyez sur le bouton CALLER ID-VOLUME ( 6 ou 5) pour afficher le sous-menu
VOLUME SONNERIE.
2. Appuyez sur le bouton mute/menu OK pour ouvrir ce menu. Le message REGLAT
SONNERIE LEVEL 5 s’affiche.
3. Utilisez le bouton CALLER ID-VOLUME ( 6 ou 5) pour afficher votre sélection. Le
paramètre par défaut est LEVEL 5.
4. Appuyez sur le bouton mute/menu OK pour enregistrer votre sélection. Vous
entendrez une tonalité de confirmation et le nouveau volume de sonnerie
s’affichera.
REMARQUE: Si vous fermez la sonnerie, l’icône de sonnerie
désactivée s’affiche.
Mélodie VIP
Cette caractéristique permet d’assigner une mélodie spécifique à une personne
qui retient votre attention lorsque ce numéro appelle. Lorsqu’une mélodie VIP est
assignée et que cette personne appelle, l’appareil sonne normalement le temps
d’une sonnerie et enchaîne avec la mélodie VIP. Vous avez le choix entre dix mélodies
différentes et vous pouvez mémoriser 10 dossiers VIP.
REMARQUE: Cette caractéristique ne fonctionne que si les conditions
suivantes sont satisfaites:
1. Vous êtes abonné au service d’identification des appels.
2. Vous avez précédemment mémorisé le dossier d’identification de
l’appelant. Le message AUC MEM UTILIS s’affichera pour rappeler
à l’utilisateur de transférer d’abord le dossier d’identification de
l’appelant.
25
Mémorisation des Mélodies VIP
Du Menu D’installation de Combiné:
1. Appuyez sur le bouton CALLER ID-VOLUME ( 6 ou 5) pour afficher le sous-menu
MELODIE VIP.
2. Appuyez sur le bouton mute/menu OK pour sélectionner la fonction Mélodie VIP
et afficher le dossier VIP 1. - Si VIP 1 ne contient PAS de numéro ou de données
spécifiques, il affichera VIDE.
3. Appuyez sur le bouton CALLER ID-VOLUME ( 6 ou 5) pour sélectionner un
emplacement de mélodie VIP (Il y en a 10) qui ne contient aucune donnée.
4. Appuyez sur le bouton mute/menu OK pour afficher le message CHOISIR
MEMOIRE.
REMARQUE: Si l’emplacement de mémoire ne contient aucun dossier
d’identification de l’appelant et que vous essayez de marquer un
dossier sous VIP MELODY, le message CHOISIR MEMOIRE ne sera pas
affiché dans ce cas. En lieu et place, le message AUC MEM UTILIS
s’affichera pour aviser l’utilisateur.
5. Appuyez sur le bouton CALLER ID-VOLUME ( 6 ou 5) pour afficher les dossiers en
mémoire que vous voulez classer comme VIP.
6. Appuyez sur le bouton mute/menu OK pour confirmer et afficher MELODIE VIP 01
en vue de sélectionner la mélodie.
7. Appuyez sur le bouton CALLER ID-VOLUME ( 6 ou 5) pour sélectionner entre
Mélodie 01 et Mélodie 10 (un extrait est joué pendant la sélection).
8. Appuyez sur le bouton mute/menu OK pour confirmer.
REMARQUE: Si le numéro ou dossier désiré a été sélectionné
auparavant dans un des DIX dossiers de mélodie VIP, le message
COPIE NUMERO s’affiche.
Modification d’un Dossier Enregistré de Mélodie VIP
Utilisez le processus de mémorisation de mélodie VIP pour modifier le numéro
d’un dossier sélectionné et pour remplacer un numéro par un nouveau numéro de
téléphone.
Lorsque le message REMPLACER VIP# ? s’affiche, vous devez appuyer sur le bouton
mute/menu OK du combiné pour confirmer la modification.
26
Rappel et Suppression d’un Dossier Enregistré de Mélodie VIP
Du Menu D’installation de Combiné:
1. Appuyez sur le bouton mute/menu OK pour ouvrir le menu MELODIE VIP.
2. Appuyez sur le bouton CALLER ID-VOLUME ( 6 ou 5) pour afficher le dossier
Mélodie VIP désiré.
3. Si vous voulez supprimer l’information, appuyez sur le bouton delete/intercom/
conf du combiné quand l’information est affichée. Le message EFFACER VIP# ?
apparaît.
4. Appuyez de nouveau sur le bouton delete/intercom/conf pour confirmer. Vous
entendrez une tonalité de confirmation et le message VIP# EFFACE s’affichera.
Tonalité du Clavier
Du Menu D’installation de Combiné:
1. Appuyez sur le bouton CALLER ID-VOLUME ( 6 ou 5) pour afficher le sous-menu
TONALIT TOUCHE.
2. Appuyez sur le bouton mute/menu OK pour ouvrir ce menu. Le message REGL
TON TOUCHE 1MA 2ARRET s’affiche.
3. Utilisez les touches du combiné pour sélectionner 1 ou 2 ou utilisez le bouton CALLER
ID-VOLUME ( 6 ou 5) pour afficher votre sélection. Le paramètre par défaut est 1MA.
4. Appuyez sur le bouton mute/menu OK pour confirmer et le paramètre de
tonalité du clavier s’affiche.
Réglage de la Date/de l’heure
Du Menu D’installation de Combiné:
1. Appuyez sur le bouton CALLER ID-VOLUME (6 ou 5) pour afficher le sous-menu
RÉG. JOUR/HEURE.
2. Appuyez sur le bouton mute/menu OK pour aller au menu. SET DAY MONDAY
s’affiche. Le paramètre par défaut est MONDAY.
3. Appuyez sur le bouton CALLER ID-VOLUME ( 6 ou 5) pour sélectionner entre
MONDAY et SUNDAY.
4. Appuyez sur le bouton mute/menu OK pour confirmer votre sélection et avancer
le sous-menu RÉGLER HEURE.
27
5. Utilisez des touches numériques pour entrer l’heure et la minute courantes, et
utilisez touche numérique 2 pour sélectionner AM et touche numérique 7 pour
sélectionner PM.
6. Appuyez sur le bouton mute/menu OK pour enregistrer votre sélection. Vous
entendrez une tonalité de confirmation et le temps courant s’affiche.
Égalisateur
Cette fonction vous permet de régler la qualité du son.
Du Menu D’installation de Combiné:
1. Appuyez sur le bouton CALLER ID-VOLUME (6 ou 5) pour afficher Equalizer.
2. Appuyez sur le bouton mute/menu OK pour aller au menu.
3. Utilisez le bouton CALLER ID-VOLUME ( 6 ou 5) pour afficher votre sélection. Le
paramètre par défaut est Natural.
4. Appuyez sur le bouton mute/menu OK pour enregistrer votre sélection. Vous
entendrez une tonalité de confirmation.
Code Régional
Du Menu D’installation de Combiné:
1. Appuyez sur le bouton CALLER ID-VOLUME (6 ou 5) pour afficher le sous-menu
INDICATIF REG.
2. Appuyez sur le bouton mute/menu OK pour ouvrir ce menu. Le message REGLER
IND REGI - - - s’affiche. Le paramètre par défaut est “- - -”.
3. Utilisez le clavier pour entrer le code régional de 3 chiffres.
4. Appuyez sur le bouton mute/menu OK pour confirmer. Vous entendrez une
tonalité de confirmation et le nouveau code régional s’affichera.
REMARQUE: Pour revenir au réglage par défaut - - -, appuyez et
relâchez le bouton delete/intercom/conf quand le message REGLER
IND REGI est affiché.
28
Tonalité/Impulsion
Du Menu D’installation de Combiné:
1. Appuyez sur le bouton CALLER ID-VOLUME ( 5 ou 6) pour aller au sous-menu
TONE PULSE.
2. Appuyez sur le bouton mute/menu OK pour ouvrir ce menu. Le message
TONALITE/IMPUL 41TONE 2PUL s’affiche. Le paramètre par défaut est “1 TONE”.
3. Utilisez le pavé numérique ou le bouton CALLER ID-VOLUME ( 5 ou 6) pour
sélectionner 1 TONE ou 2 PUL.
4. Appuyez sur le bouton mute/menu OK pour confirmer. Vous entendrez une
tonalité de confirmation et la sélection s’affichera.
Enregistrement
Vous combiné(s) sont préenregistrés et prêts à être utilisés. On ne recommande pas
d’enregistrer de nouveau le combiné à moins que ce ne soit absolument nécessaire.
Du Menu D’installation de Combiné:
1. Si nécessaire, appuyez sur le bouton CALLER ID-VOLUME (6 ou 5) pour afficher
le sous-menu ENREGISTREMENT.
2. Appuyez sur le bouton mute/menu OK pour ouvrir ce menu. Le message
ENREGISTREMENT 1OUI 2NON s’affiche. Le paramètre par défaut est 2NON.
3. Utilisez le clavier numérique pour choisir 1 pour OUI ou 2 pour NON. Ou utilisez le
bouton CALLER ID-VOLUME (6 ou 5) our atteindre 1OUI ou 2NON.
4. Si vous sélectionnez 1OUI, appuyez sur le bouton mute/menu OK. Le message
TENEZ PAGE BASS ENFON CINQ MINS, PUIS APPUYEZ COMBINE PROGRAM
s’affiche. (Placez le combiné près de la base pendant l’enregistrement.)
5. Appuyez et gardez enfoncé le bouton find sur la base, l’indicateur charge/in use
vocaux clignote. Appuyez sur le bouton mute/menu OK du combiné. Le message
ENREGISTREMENT s’affiche. Le message ENREGISTRE s’affiche; X correspond au
numéro du combiné. Vous pouvez maintenant renommer le combiné. (Voir les
étapes 3 et 4 de la partie sur le changement de nom du combiné)
REMARQUE: Si vous enregistrez à nouveau le combiné par le menu
de celui-ci, vous devez aller à la partie concernant le changement de
nom du combiné et entreprendre la procédure depuis le tout début
afin de renommer le combiné.
29
Desenregistrement
Le désenregistrement annule l’enregistrement. Pendant le processus de
désenregistrement, gardez le combiné près de la base.
Du Menu D’installation de Combiné:
1. Si nécessaire, appuyez sur le bouton CALLER ID-VOLUME (6 ou 5) pour afficher
le menu DESENREGISTREM.
2. Appuyez sur le bouton mute/menu OK pour ouvrir ce menu. Le message
DESENREGISTREM 1OUI 2NON s’affiche. Le paramètre par défaut est 2NON.
3. Utilisez le clavier numérique pour choisir 1 pour OUI ou 2 pour NON. Ou utilisez le
bouton CALLER ID-VOLUME (6 ou 5) our atteindre 1OUI ou 2NON.
AVERTISSEMENT: Il n’est pas recommandé de désenregistrer un
combiné à moins que cela ne soit absolument nécessaire parce
qu’un combiné est désenregistré, que les fonctions du combiné sont
inutilisables tant que le combiné n’a pas été réenregistré.
4. Choisissez 2NON pour ne pas désenregistrer.
5. Si vous choisissez OUI, appuyez sur le bouton mute/menu OK; SE RAPPROCH BASE
est affiché pendant 2 secondes, puis CONFIRMER? 1OUI 2NON est affiché.
6. Appuyez sur le clavier numérique pour choisir 1OUI ou 2NON, ou utilisez le bouton
CALLER ID-VOLUME ( 6 ou 5) pour atteindre 1OUI ou 2NON.
7. Si vous choisissez OUI appuyez sur le bouton mute/menu OK pour confirmer.
DESENREGISTRE ... apparaît dans l’afficheur, suivi d’une tonalité de confirmation.
DESENREGISTRE est ensuite affiché pour confirmer que le combiné est
désenregistré.
REMARQUE: Une fois le désenregistrement terminé, BESOINS COMBIN
ENREGISTREMENT apparaît dans l’afficheur. Vous devez enregistrer le
combiné avant de l’utiliser.
30
Desenregistrement Global
Si un ou plusieurs des combinés sont perdus, vous devez désenregistrer tous les
combinés pour assurer le bon fonctionnement du système.
AVERTISSEMENT: Il n’est pas recommandé de désenregistrer un
combiné à moins que cela ne soit absolument nécessaire parce
qu’un combiné est désenregistré, que les fonctions du combiné sont
inutilisables tant que le combiné n’a pas été réenregistré.
1. Débranchez l’alimentation de la base en retirant la fiche de l’arrière de celle-ci.
2. Appuyez sur le bouton find et gardez-le enfoncé pendant que vous rebranchez
l’alimentation.
3. Continuez à appuyer sur le bouton find jusqu’à ce que le témoin indicateur
charge/marche vocaux clignote rapidement.
4. Relâchez le bouton find.
5. Appuyez une fois sur le bouton find de la base. Tous les combinés sont
désenregistrés et BESOINS COMBIN ENREGISTREMENT apparaît dans l’afficheur.
Reglage par Defaut
À mesure que vous vous familiariserez avec le système, vous préférerez peut-être
utiliser ses réglages initiaux. Suivez les étapes ci-dessous pour retourner aux réglages
par défaut de l’usine.
Du Menu D’installation de Combiné:
1. Appuyez sur le bouton CALLER ID-VOLUME (6 ou 5) pour afficher le sous-menu
REGLAGE DEFAUT.
2. Appuyez sur le bouton mute/menu OK pour ouvrir ce menu. Le message
REGLAGE DEFAUT 1OUI 2NON s’affiche.
3. Utilisez le clavier numérique pour choisir 1OUI ou 2NON, ou le bouton
CALLER ID-VOLUME ( 6 ou 5) pour placer le curseur à 1OUI ou 2NON. Le réglage
par défaut est 2NON.
REMARQUE: Si vous choisissez 1OUI, tous les réglages du menu
programmable retournent au réglages par défaut de l’usine.
4. Appuyez de nouveau sur le bouton mute/menu OK pour sauvegarder votre choix.
Vous entendrez une tonalité de confirmation.
31
Fonctionnement du Telephone
Témoins Visuels
Base
Le témoin indicateur charge/marche vocaux de la base clignote pour avertir d’un
appel entrant, pendant la recherche ou s’il y a un message en attente de votre
service de téléphone. Le témoin demeure allumé pendant la charge d’un combiné et
si la ligne est occupée.
Combiné
Les témoins TALK et SPEAKER clignotent lorsque vous recevez un appel externe t
demeurent allumés pendant un appel. Le clavier et l’indicateur CID s’allument lors
d’un appel entrant.
Indicateur de Messages Vocaux Reçus (IMVR)/Visuel de
Sonnerie sur le combiné
IMPORTANT : Vous devez vous abonner au service d’affichage de
message en attente de votre compagnie de téléphone pour utiliser
L’indicateur de Messages Vocaux Reçus (IMVR) de cet appareil.
L’indicateur de Messages Vocaux Reçus (IMVR) clignote lorsque vous recevez
un nouveau message de la compagnie de téléphone. Il sert aussi à la fonction
d’indicateur visuel de sonnerie. Il clignote lors d’un appel entrant.
Fonctionnement du Haut-Parleur du Combiné
REMARQUE: Si vous utilisez le haut-parleur, demeurez près du
combiné pour que la personne avec qui vous parlez puisse vous
entendre.
Si vous utilisez le combiné et que vous voulez passer en mode haut-parleur, appuyez
sur le bouton SPEAKER. Pour terminer l’appel, appuyez de nouveau sur END/cancel.
Si vous êtes en mode haut-parleur et que vous voulez passer en mode combiné,
appuyez sur le bouton TALK. Pour terminer l’appel, appuyez de nouveau sur END/
cancel.
32
Faire un Appel
1. Appuyez sur le bouton TALK ou SPEAKER . Composez le numéro désiré.
- OU Composez le numéro d’abord, puis appuyez sur le bouton TALK ou SPEAKER.
- OU Appuyez sur le bouton CALLER ID-VOLUME ( 6 ou 5) pour sélectionner le dossier
désiré, puis appuyez sur le bouton TALK ou SPEAKER.
2. Quand vous avez terminé, appuyez de nouveau sur le bouton END/cancel pour
raccrocher.
REMARQUE: Vous pouvez entrer jusqu’à 25 chiffres de
précomposition.
REMARQUE: Pour supprimer le numéro de précomposition entré,
appuyez sur le bouton delete/intercom/conf jusqu’à ce que tous les
chiffres soient effacé.
Appels De Réponse
1. Quand le téléphone sonne, appuyez sur le bouton SPEAKER du combiné.
- OU Décrochez le combiné et appuyez sur le bouton TALK.
2. Quand vous avez terminé, appuyez de nouveau sur le bouton END/cancel pour
raccrocher.
REMARQUE: Réglez le volume du combiné en appuyant sur le bouton
CALLER ID-VOLUME ( 6 ou 5) pendant un appel.
Minuterie D’appel
Après que vous avez appuyé sur le bouton TALK ou SPEAKER du combiné, la minuterie
d’appel intégrée apparaît dans l’afficheur et commence le décompte de la durée de
l’appel en minutes et en secondes.
Attente Automatique
Si vous déposez le combiné sur le socle pendant que le combiné est décroché
(pendant un appel), le combiné coupe automatiquement la communication.
33
Volume de la Sonnerie (Accès Rapide)
Il y a deux façons de régler le sélecteur de volume de la sonnerie. La première est
la procédure habituelle telle que décrite dans les menus de Programmation des
fonctions, de Paramètres du combiné et de Volume de la sonnerie. L’autre est un
accès rapide au menu de sonnerie.
1. Assurez-vous que le téléphone est DÉSACTIVÉ (pas en mode conversation).
2. Appuyez sur le bouton #pause pour afficher to REGLER SONNERIE LEVEL 5.
3. Utilisez le bouton CALLER ID-VOLUME ( 6 ou 5) pour afficher votre sélection. Le
paramètre par défaut est LEVEL 5.
4. Appuyez de nouveau sur le bouton #pause pour mémoriser et afficher la nouvelle
sélection pendant quelques secondes.
Flash/Appel en Attente
Si vous êtes abonné au service d’afficheur d’appel en attente combiné offert par la
compagnie de téléphone, vous recevrez l’information d’appelant (s’il y a lieu) lors des
appels en attente. Pendant un appel, vous entendrez un bip pour indiquer qu’un autre
appel est en attente sur la ligne et l’information de l’appelant en attente apparaît
dans l’afficheur du combiné.
• Pour prendre l’appel en attente, appuyez sur le bouton TALK ou SPEAKER du
combiné ; l’appel initial est alors mis en garde.
• Appuyez sur le bouton TALK ou SPEAKER pour passer d’un appel à l’autr.
Recomposition du Dernier Numero
Vous pouvez recomposer un numéro comptant jusqu’à 25 caractères.
Pour recomposer rapidement le dernier numéro composé :
1. Appuyez sur le bouton TALK ou SPEAKER.
2. Appuyez sur le bouton redial/format.
-OU3. Appuyez d’abord sur le bouton redial/format et utilisez le bouton
CALLER ID-VOLUME ( 6 ou 5) pour sélectionner le numéro à recomposer.
- Appuyez sur le bouton CALLER ID-VOLUME ( 5) pour rappeler l’appel le plus
ancien et faire défiler les numéros jusqu’au plus récent (numéro plus élevé).
34
- Appuyez sur le bouton CALLER ID-VOLUME ( 6 ) pour rappeler l’appel le plus
récent et faire défiler les numéros jusqu’au plus ancien (numéro moins élevé).
REMARQUE : Vous pouvez sélectionner un des trois derniers
numéros composés.
4. Appuyez sur le bouton TALK ou SPEAKER. Le numéro sera composé
automatiquement.
Si vous obtenez un signal d’occupation et souhaitez continuer de composer le
numéro, appuyez sur le bouton redial/format pour rapidement recomposer le
numéro.
Quitter
Appuyez sur le bouton END/cancel pour quitter une fonction de menu et retourner à
l’écran d’attente.
Recherche
La fonction de recherche aide à repérer un combiné égaré. Pour envoyer et recevoir
des signaux de recherche, il faut enregistrer tous les combinés. Si votre combiné n’est
pas enregistré, suivez les instructions à la section Enregistrement de ce guide.
Recherche de Combine a Combine
(utilisable SEULEMENT avec des combinés supplémentaires)
1. Assurez-vous que le téléphone est DÉSACTIVÉ (pas en mode conversation).
2. Appuyez sur le bouton delete/intercom/conf du combiné. RECHERCHE POSTE?
apparaît dans l’afficheur.
3. Utilisez le clavier numérique pour entrer le numéro du combiné que vous
souhaitez rechercher.
4. Pour annuler la recherche, appuyez sur le bouton END/cancel, delete/intercom/
conf, ou TALK sur le combiné d’origine ou appuyez sur le bouton END/cancel sur le
combiné récepteur.
35
Recherche de Tous les Combinés d’un Combiné
(utilisable SEULEMENT avec des combinés supplémentaires)
1. Assurez-vous que le téléphone est DÉSACTIVÉ (pas en mode conversation).
2. Appuyez sur le bouton delete/intercom/conf du combinét. RECHERCHE POSTE?
apparaît dans l’afficheur.
3. Utilisez le clavier numérique pour entrer le numéro du combiné que vous
souhaitez rechercher. (1 = recherche du combiné 1, 2 = recherche du combiné 2,
etc. et *tone = tous les combinés)
4. Pour annuler la recherche, appuyez sur le bouton END/cancel, delete/intercom/
conf, ou TALK sur le combiné d’origine ou appuyez sur le bouton END/cancel sur le
combiné récepteur.
Recherche a Partir de la Base/Recherche de Groupe
Utilisez la base seulement pour rechercher simultanément tous les combinés
enregistrés.
1. Appuyez sur le bouton find de la base. Tous les combinés émettent une tonalité
pendant deux minutes et le message RECHERCHE DE BASE s’affiche sur chacun
les combinés.
2. Pour annuler la recherche, appuyez sur le bouton find de la base, ou appuyez sur
le bouton TALK ou END/cancel sur chacun des combinés.
Silencieux
Utilisez la fonction SILENCIEUX pour converser en privé, hors ligne. La personne en
ligne ne peut vous entendre, mais vous pouvez l’entendre.
1. Appuyez sur le bouton mute/menu OK. Le combiné affiche SILENC ACTIVE.
2. Appuyez sur le bouton mute/menu OK pour annuler et retourner à votre
conversation téléphonique.
Commande de Volume du Recepteur
Lorsque le combiné est ACTIVÉ (en mode conversation), vous pouvez régler le
volume du récepteur en appuyant sur le bouton CALLER ID-VOLUME (6 ou 5). Vous
pouvez choisir parmi cinq niveaux d’écoute. Le téléphone émet deux bips quand
l’intensité maximale ou minimale est atteinte. VOL 1 est l’intensité minimale, VOL 5
l’intensité maximale.
36
Ne pas Déranger (DND)
Cette fonction vous permet de désactiver toutes les sonneries des combinés en
même temps, en appuyant sur un bouton de la base, même si le volume de la
sonnerie de chaque combiné a été réglé.
1. En mode d’attente, appuyez sur le bouton do not disturb de la base.
2. Le témoin DND s’allume et le message DO NOT DISTURB s’affiche sur chaque
combiné.
3. Pour annuler, appuyez de nouveau sur le bouton do not disturb.
REMARQUE: Vous pouvez appuyez sur le bouton do not disturb et
activer cette fonction immédiatement, même lorsqu’il y a un appel
entrant qui sonne ou pendant que vous filtrez un appel, après que le
répondeur ait pris l’appel.
Fonctionnement de L’interphone
(utilisable SEULEMENT avec des combinés supplémentaires)
La fonction d’interphone permet de converser avec une personne à un autre
combiné, sans occuper la ligne téléphonique, vous permettre de recevoir toujours des
appels d’arrivée.
Faire un Appel D’interphone
1. Assurez-vous que le téléphone est DÉSACTIVÉ (pas en mode conversation).
2. Appuyez sur le bouton delete/intercom/conf du combiné.
3. Utilisez le clavier numérique pour choisir le combiné que vous souhaitez
rechercher.
REMARQUE: Pour annuler la recherche, appuyez de nouveau sur le
bouton delete/intercom/conf ou sur le bouton END/cancel.
4. Attendez que la personne au combiné récepteur appuie sur le bouton delete/
intercom/conf.
REMARQUE: Si le combiné récepteur ne répond pas dans les deux
minutes, l’appel par interphone est automatiquement annulé. Le
combiné d’origine affiche AUCUNE REPONSE.
37
5. Quand vous avez terminé, appuyez sur le bouton END/cancel ou le bouton delete/
intercom/conf de l’un ou l’autre combiné pour désactiver l’interphone.
REMARQUE: Le système est extensible jusqu’à 6 combinés
(avec l’achat du combiné optionnel Modèle 28801 avec socle de
chargement). Lorsque 4 combinés sont enregistrés, le système peut
fonctionner comme 2 interphones séparés en même temps; par
exemple, le combiné 1 communique avec le combiné 2 pendant que
le combiné 3 communique avec le combiné 4.
Reception d’un Appel D’interphone
Votre combiné émet un signal lorsque vous recevez un appel d’interphone. Appuyez
sur le bouton delete/intercom/conf ou sur le bouton TALK pour répondre à l’appel.
Fonctions Avancees de L’interphone
Recevoir un Appel Pendant un Appel D’interphone
Si vous recevez un appel téléphonique pendant un appel d’interphone, ce dernier
est immédiatement interrompu et les deux combinés sonnent. L’un ou l’autre
interlocuteur peut appuyer sur le bouton TALK ou SPEAKER pour répondre à l’appel.
Utilisation de L’interphone Avec les Appels Exterieurs
Pendant un appel téléphonique, vous pouvez utiliser la fonction interphone/recherche
pour rechercher un autre combiné et converser à l’interphone, en privé et hors
ligne (deux sens). Vous pouvez aussi converser à trois avec l’appelant extérieur et
une personne à l’autre combiné, ou vous pouvez renvoyer l’appel extérieur à un
autre combiné.
REMARQUE: Avant de communiquer par interphone/rechercher un
autre combiné, vous devez décider si vous souhaitez converser à
deux ou à trois.
38
Appel a Deux
1. Pendant un appel extérieur, appuyez sur le bouton delete/intercom/conf et utilisez
le clavier numérique pour entrer le numéro du combiné (1 ou 2) à joindre.
REMARQUE : La personne au combiné récepteur doit appuyer
sur le bouton delete/intercom/conf pour répondre à l’appel par
interphone. Les deux personnes à l’interphone peuvent converser
en privé. L’appelant extérieur ne peut entendre la conversation par
l’interphone.
2. Quand vous avez terminé, appuyez sur le bouton END/cancel ou delete/intercom/
conf pour interrompre l’appel par interphone, retourner en mode de conversation
et poursuivre la conversation téléphonique initiale.
Appel a Trois
1. Pendant un appel extérieur, appuyez sur le bouton delete/intercom/conf. LIGNE
EN GARDE POSTE? apparaît dans l’afficheur.
2. Utilisez le clavier numérique pour choisir le Combiné 1 ou le Combiné 2. Vous
entendez une tonalité de recherche et RECHERCHE est affiché au combiné
d’origine.
REMARQUE : RECHERCHE DE . . . est affiché au combiné récepteur et
la personne à ce combiné doit appuyer sur le bouton delete/intercom/
conf ou TALK pour répondre à l’appel par interphone.
3. Lorsque le combiné récepteur est raccordé, appuyez sur le bouton delete/
intercom/conf du combiné d’origine pour effectuer un appel conférence avec le
combiné récepteur et l’appelant extérieur. CONFERENCE apparaît dans l’afficheur
du combiné d’origine et du combiné récepteur.
REMARQUE : Un combiné peut entrer directement en mode
conférence pendant un appel en appuyant sur TALK ou SPEAKER du
deuxième combiné.
39
Renvoi D’appels Exterieurs a D’autres Combines
Vous pouvez renvoyer un appel extérieur à un autre combiné pendant qu’il est en
cours.
1. Appuyez sur le bouton delete/intercom/conf du combiné d’origine pour mettre un
appel extérieur en garde, puis rechercher le combiné récepteur.
2. Utilisez le clavier numérique du combiné pour choisir Combiné 1 ou Combiné 2;
vous entendrez une tonalité de recherche. RECHERCHE apparaît dans l’afficheur
du combiné d’origine et RECHERCHE DE... apparaît dans celui du combiné
récepteur.
3. Quand le combiné récepteur entre en communication, appuyez sur le bouton
TALK ou SPEAKER du combiné d’origine pour renvoyer l’appel.
-OU4. Appuyez sur le bouton TALK ou SPEAKER du combiné d’origine pour renvoyer
l’appel. Si la personne au combiné récepteur ne répond pas dans les 30 secondes,
le combiné d’origine rappelle et affiche RAPPEL. Si la personne au combiné
d’origine ne répond pas dans les 30 secondes, l’appel est automatiquement
coupé.
40
Afficheur (CID)
IMPORTANT: Pour utiliser les dispositifs d’identification de visiteur de
cet appareil, vous devez être abonné au service d’afficheur de nom/
numéro standard ou au service d’afficheur d’appel en attente. Pour
savoir qui appelle pendant que vous êtes au téléphone, vous devez
être abonné au service d’afficheur d’appel en attente.
Cet appareil reçoit et affiche l’information transmise par la compagnie de téléphone.
Cette information peut comprendre le numéro de téléphone, la date et l’heure.
Afficheur D’appel en Attente
Dans la mesure où vous êtes abonné au service d’afficheur d’appel en attente offert
par la compagnie de telephone; si vous recevez un appel d’arrivée et vous emplyez
la GE fixez multi le système à la main, un signal sonore indique que la presence d’une
attente d’appel invitent la ligne. L’information d’identification de visteur d’attente
d’appel sera montrée et stocké dans l’histoire de tous les combines dans le système.
• Ai signal d’appel en attente dans le récepteur du combiné, appuyez sur le bouton
TALK ou SPEAKER pour mettre l’appel actuel em garde et répondre à l’appel en
attente. Appuyez sur le bouton TALK ou SPEAKER encore pour retourner à l’appel
original.
Reception de Dossiers D’appelants
Quand vous recevez un appel, l’information de l’appelant est transmise entre la
première et la deuxième sonneries. L’information d’appelant est affichée pendant que
le téléphone sonne, vous donnant ainsi la possibilité de consulter l’information et de
décider de prendre ou non l’appel.
41
Memorisation de Dossiers D’appelants
(Dans la Memoire de L’afficheur)
Si vous êtes absent ou ne pouvez répondre, la mémoire de l’afficheur mémorise les
données des 40 plus récents appels reçus pour vous indiquer qui a appelé pendant
que vous n’étiez pas disponible. À la réception du 41e appel, le plus ancien dossier
d’appelant (1er appel) est automatiquement supprimé.
Vous pouvez consulter l’information mémorisée en tout temps. Les appels reçus
depuis la dernière consultation sont indiqués comme étant NOUVEAU dans l’afficheur.
Les appels qui n’ont pas été écoutés précédemment mais qui proviennent du même
numéro plus d’une fois affichent REPT à l’écran.
Consultation des Dossiers D’appelants
À mesure que les appels sont reçus et mémorisés, l’afficheur est mis à jour pour vous
indiquer le nombre d’appels reçus. Pour faire défiler les dossiers d’appelants:
1. Assurez-vous que le téléphone est DÉSACTIVÉ (pas en mode TALK).
2. Appuyez sur le bouton CALLER ID-VOLUME ( 6 ) pour consulter le plus récent
dossier d’appelant.
3. Appuyez sur le bouton CALLER ID-VOLUME ( 5 ) pour consulter le plus ancien
dossier d’appelant.
42
Composition d’un Numéro D’appelant
1. Assurez-vous que le téléphone est DÉSACTIVÉ (pas en mode TALK).
2. Utilisez le bouton CALLER ID-VOLUME ( 6 ou 5) pour afficher le dossier désiré.
3. Appuyez sur TALK ou SPEAKER. Le numéro est composé automatiquement.
REMARQUE: Selon (a) le format du numéro de téléphone de l’appelant à
sa réception et (b) si vous avez déjà programmé votre indicatif régional
dans le menu de programmation, vous devrez peut-être régler le
format du numéro de téléphone mémorisé de l’appelant avant de faire
l’appel, appuyez sur le bouton redial/format pour régler le numéro et
essayez de nouveau.
Formats disponibles:
Nombre de chiffres Explication
Exemple
Onze chiffres
Dix chiffres
code d’interurbain “1 ”
1-317-888-8888
+ indicatif à 3 chiffres
+ numéro de téléphone à 7 chiffres
indicatif à 3 chiffres +317-888-8888
numéro de téléphone à 7 chiffres.
Sept chiffres
numéro de téléphone à 7 chiffres. 888-8888
43
Memorisation des Dossiers D’appelants dans la
Memoire Interne
Vous pouvez aussi mémoriser l’information d’appelant dans la mémoire interne du
téléphone.
REMARQUE: Il est important de formater correctement les dossiers
d’identification de l’appelant AVANT de les mémoriser parce qu’il est
impossible de les reformater lorsqu’ils sont déjà en mémoire.
1. Assurez-vous que le téléphone est DÉSACTIVÉ (pas en mode conversation).
2. Utilisez le bouton CALLER ID-VOLUME ( 6 ou 5) pour atteindre le dossier
d’appelant désiré.
3. Appuyez sur le bouton mute/menu OK pour stocker le nombre. SAVED TO MEMORY
s’affiche.
REMARQUE: Appuyez une fois sur le bouton END/cancel pour
conserver les paramètres précédents (sans modification) et revenir
au menu.
REMARQUE: Si l’information du dossier de l’appelant contient des
données non numériques, l’appareil ne permettra pas de transférer
ce dossier à la mémoire intégrée de l’utilisateur. Le combiné affichera
IMPOS MEMORISER.
Suppression du Dossier d’appelant
1. 2.
3.
4.
44
Assurez-vous que le téléphone est DÉSACTIVÉ (pas en mode conversation).
Utilisez le bouton CALLER ID-VOLUME ( 6 ou 5) pour atteindre le dossier désiré.
Appuyez sur delete/intercom/conf. L’afficheur indique EFF AFFICHEUR?
Appuyez de nouveau sur le bouton delete/intercom/conf pour effacer le dossier ; le
dossier d’appelant suivant apparaît dans l’afficheur. Vous entendrez une tonalité de
confirmation.
REMARQUE: Appuyez sur le bouton END/cancel pour revenir au mode
en attente sans effacer de dossiers d’identification de l’appelant.
Suppression de Tous les Dossiers D’appelants
1. Assurez-vous que le téléphone est DÉSACTIVÉ (pas en mode conversation).
2. Utilisez le bouton CALLER ID-VOLUME ( 6 ou 5) pour afficher un dossier
d’appelant.
3. Maintenez le bouton delete/intercom/conf enfoncé jusqu’à ce que EFFACER
TOUT? soit affiché.
4. Appuyez de nouveau sur delete/intercom/conf supprimer tous les dossiers. Vous
entendrez une tonalité de confirmation. L’afficheur indique PAS D’APPEL.
REMARQUE : Appuyez sur le bouton END/cancel pour revenir au mode en
attente sans effacer de dossiers d’identification de l’appelant.
45
Pince-Ceinture et Casque en Option
Raccordement de la Pince-Ceinture
1. Pour fixer la pince-ceinture, insérez les extrémités de la
pince-ceinture dans les fentes de chaque côté du combiné.
2. Enclenchez les extrémités de la pince-ceinture en place.
Raccordement d’un Casque Optionnel au Casque
Chaque combiné peut être utilisé avec un casque d’écoute en option pour un
fonctionnement mains libres.
1. Branchez le casque dans la prise casque sur le côté du combiné. Le récepteur du
combiné et le microphone sont désactivés quand le casque est branché.
2. Réglez le casque pour qu’il repose confortablement sur le dessus de la tête et sur
oreille. Placez le microphone à environ deux ou trois pouces de la bouche.
3. Appuyez sur le bouton TALK pour répondre ou faire un appel si vous utilisez le
casque.
4. Pour retourner au fonctionnement normal, débranchez le casque de la prise.
46
Remplacement de la Pile
1.
2.
3.
4.
5.
6.
ATTENTION: Pour réduire le risque d’incendie ou de blessures,
utilisez seulement la batterie approuvé par Thomson Inc.
d’hydrure de Nickel-métal (Ni-MH) du Model 5-2814, qui est
compatible avec cette unité.
Assurez-vous que le téléphone est DÉSACTIVÉ (pas en mode TALK) avant de
remplacer la pile.
Retirez la porte du logement à pile.
Débranchez la fiche de pile de la prise dans le logement à pile et retirez la pile du
combine.
Insérez la nouvelle pile et rebranchez la fiche.
Remettez la porte du logement à pile en place.
Placez le combiné sur la base ou le socle de chargement pour charger la pile. Si
vous ne chargez pas correctement la pile du combiné (pendant 16 heures) au
moment de l’installation initiale du téléphone et/ou quand vous installez un
bloc-pile neuf, le rendement à long terme de la pile sera compromi.
Précautions à Prendre
• Ne pas brûler, démonter, mutiler ni percer la pile. Comme d’autres piles de ce type,
des produits toxiques peuvent s’échapper et causer des blessures.
• Afin de réduire les risques d’incendie ou de blessure, utilisez seulement la pile
d’hydrure de Nickel-métal (Ni-MH) indiquée dans le Guide de l’utilisateur.
• Garder les piles hors de la portée des enfants.
• Retirez les piles si vous rangez l’appareil pour plus de 30 jours.
REMARQUE : Le sceau RBRC (Société de recyclage des piles rechargeables)
sur la pile de cet appareil Thomson signale que nous participons à un
programme de collecte et de recyclage des piles rechargeables.
Pour plus de renseignements, allez sur le site www.rbrc.org/cellarecycler/,
appelez au 1-800-8-BATTERY ou contactez votre centre de recyclage.
47
Messages Affichés
Les messages suivants indiquent l’état du téléphone ou vous aident à programmer et
à utiliser le téléphone.
NUMERO BLOQUE
La transmission du nom et du numéro de l’appelant est
bloquée.
CHARGING...
Indique que le combiné doit facturer une période avant
qu’il puisse reprendre la fonction normale.
EFFACER TOUT?
Demande si vous souhaitez effacer tous les dossiers
d’appelants.
EFFACER DOSSIER?
Demande si vous souhaitez effacer le dossier
d’appelant affiché.
EFFACER?
Demande si vous souhaitez effacer l’un des 50 dossiers
émorisés dans la mémoire du téléphone.
DUPLICATION
DE NUMERO Conformément à la fonction mélodie VIP, si
le numéro ou dossier désiré a été sélectionné
auparavant dans un des DIX dossiers de mélodie VIP, le
message DUPLICATE NUMBER s’affiche.
FIN DE LISTE
Indique qu’il n’y a plus d’information dans la mémoire
d’afficheur.
ENTRER NOM
Demande d’entrer un nom dans l’un des 50
emplacements-mémoire.
ENTRER NUMTEL
Message indiquant d’entrer un numéro de téléphone
dans l’un des 50 emplacements-mémoire.
NOUVEAU
Indique qu’un ou des appels n’ont pas été écoutés.
COMBINE NOM Indique d’entrer le nom de l’utilisateur du combiné
enregistré.
BESOINS COMBIN
ENREGISTREMENT Indique que vous devez enregistrer un
combiné non enregistré avant de l’utiliser.
48
DONNEES INCOMPL
L’information de l’appelant a été interrompue en
cours de transmission ou la ligne téléphonique
est excessivement bruyante. Indique qu’aucune
information d’appelant n’a été reçue, que vous n’êtes
pas abonné au service d’afficheur ou que le service
d’afficheur ne fonctionne pas.
LIGNE OCCUPEE Affiché au combiné pendant que la ligne est utilisée.
INTERURBAIN
Signifie que le dossier ILA est associé à une appel
interurbain.
PILE FAIBLE
Message indiquant qu’il faut charger la pile.
NOUV MESS VOCA
Indique que la messagerie vocale n’a pas été
téléchargée du fournisseur de service.
APPEL ATT ARRET
Indique qu’audio-messagerie a été recherché du
fournisseur de service.
NOUVEL APPEL XX
XX représente le nombre de nouveaux dossiers
d’appelant non consultés.
PAS D’APPEL
Indique que la mémoire ne contient aucun dossier
d’appelant.
AUCUNE MÉMOIRE
D’UTILISATEUR Indique que l’emplacement de mémoire
ne contient pas de mémoire utilisateur et que celui-ci
essaie de marquer un dossier spécifique comme VIP
MELODY.
HORS PORTEE
Le combiné est trop éloigné de la base. Rapprochezvous de la base.
RECHERCHE ou
RECHERCHE DE BASE Quelqu’un a appuyé sur le bouton find
sur la base ou delete/intercom/conf sur le combiné.
REPT
Indique un appel répété. Indique qu’un nouvel appel du
même numéro a été reçu plus d’une fois.
RECHERCHE
Indique que le combiné recherche la base.
SPKR
Indique que le combiné est en mode de speakerphone.
49
APPEL INCONNU/
NOM INCONNU/
NUMERO INCONNU L’appel provient d’une région non
desservie par le service d’afficheur ou
l’information n’a pas été envoyée.
Signaux Sonores du Combiné
Signal
Un long ronflement
(sonnerie en marche)
Trois courts bips (plusieurs fois)
Un bip aux 7 secondes Guide de Depannage
Signification
Vous recevez un appel
Signal de recherche
Avertissement de pile faible
Solutions-Telephone
Aucun signal de manœuvre
• Vérifiez ou répétez les étapes d’installation :
Le cordon d’alimentation de la base est-il branché dans une prise sous tension ?
Le cordon téléphonique est-il branché dans la base et la prise murale ?
• Branchez un autre téléphone dans la même prise. S’il ne fonctionne pas, le
problème se situe peut-être au niveau du câblage ou du service local.
• Le combiné est-il hors de la portée de la base ? Rapprochez-vous de la base.
• Assurez-vous que la pile est correctement chargée (16 heures).
• Assurez-vous que le bloc-pile (du combiné) est correctement installé.
• Le combiné doit émettre un signal quand vous appuyez sur le bouton TALK,
et l’indicateur de chargement de la base doit être allumé quand le combiné
repose sur le socle.
• Placez le combiné dans le socle de chargement pendant au moins 20 secondes
pour rétablir l’appareil.
50
Le combiné ne sonne pas
• Assurez-vous que l’interrupteur de sonnerie du combiné est activé.
• Sinon, il faut peut-être charger la pile. Rapprochez-vous de la base.
• Il y a peut-être trop de postes sur la même ligne. Essayez de débrancher
quelques postes téléphoniques.
• Vérifiez le signal de manœuvre.
Électricité statique, bruit ou fluctuations
• Le combiné est-il hors de la portée de la base ? Rapprochez-vous de la base.
• Assurez-vous que la base n’est pas branchée dans une prise de courant avec un
autre appareil ménager. Au besoin, déplacez la base.
• Chargez la pile (pendant 16 heures).
L’unité émet un signal
• Nettoyez les contacts de chargement du combiné sans fil et du socle de
chargement avec un chiffon doux ou une gomme à effacer.
• Voir les solutions pour “Aucun signal de manœuvre” à la page précédente.
• Remplacez la pile.
La composition-mémoire ne fonctionne pas
• Avez-vous programmé les touches d’emplacement-mémoire correctement ?
• Avez-vous suivi la bonne séquence de composition?
L’appareil bloque et aucune communication entre la base et le combiné sans cordon
• Débranchez l’alimentation de la prise de courant et à l’arrière de la base. Retirez
la pile du combiné. Attendez 30 secondes et rebranchez l’alimentation dans la
base et la prise murale. Rebranchez la pile et chargez-la pendant 16 heures.
51
Solutions- Afficheur
Aucun affichage
• Chargez la pile (pendant 16 heures). Ou remplacez la pile.
• Assurez-vous que l’appareil est branché dans une prise de courant non
commutée. Débranchez l’alimentation de la base et rebranchez-la.
Message d’erreur d’afficheur
• L’unité affiche ce message si elle détecte autre chose que l’information
d’appelant valide durant le silence qui suit la première sonnerie. Ce message
indique la présence de bruit sur la ligne.
Aucun afficheur
• Vous devez être abonné au service d’afficheur de nom/numéro offert par la
compagnie de téléphone pour recevoir l’information d’appelant.
Si vous éprouvez l’un ou l’autre des problèmes suivants, même après avoir rechargé
complètement la pile, vous devrez peut-être remplacer la pile:
• Courte période de conversation
• Mauvaise qualité du son
• Portée limitée
• Indicateur de chargement/recherche ou d’antenne de combiné ne s’allume pas
52
Soins et Entretien
Voici quelques conseils simples pour préserver le bon fonctionnement et l’apparence
de ce téléphon:
• Éviter de placer le téléphone près d’un appareil de chauffage ou d’un appareil
produisant du bruit électrique (ex. : moteurs, lampes fluorescentes, etc.).
• Ne pas exposer le téléphone directement au soleil ou à l’humidité.
• Éviter d’échapper le combiné et de l’utiliser abusivement.
• Ne jamais utiliser un nettoyeur puissant ou une poudre abrasive afin de ne pas
endommager le fini.
• Conserver l’emballage original pour utilisation ultérieure.
Causes de Mauvaise Réception
• Parements en aluminium.
• Endos métallique d’isolation.
• Conduites de chauffage et autre construction métallique pouvant bloquer les
signaux radio.
• Trop près d’appareils comme un four micro-ondes, une cuisinière, un ordinateur,
etc.
• Conditions atmosphériques, comme un orage électrique.
• Base installée au sous-sol ou à l’étage inférieur de la maison.
• Base branchée dans une prise c.a. avec d’autres appareils électroniques.
• Un écouteur de surveillance de bébé utilise la même fréquence.
• Pile de combiné faible.
• Hors de la portée de la base.
53
Garantie
Thomson Digital Technologies Ltd., garantit à l’acheteur de cet appareil ou à la
personne qui le recevrait en cadeau, que si cet appareil présente un défaut de
fabrication pendant l’année suivant la date d’achat, il sera remplacé sans frais. Les
frais de transport de retour sont payés.
Cette garantie ne couvre pas les dommages attribuables aux accidents, à une
mauvaise utilisation ni à des piles qui fuient.
Si cet appareil ne fonctionne pas convenablement pendant qu’il est sous garantie:
1. Le retourner au marchand vendeur avec la preuve d’achat pour être remplacé.
OU
2. Appelez 1-800-522-0338 (l’anglais) ou 1-800-522-0445 (Français) pour des
instructions au sujet d’où expédier le produit.
Les dispositions de cette garantie s’ajoutent (sans les modifier ni les restreindre) aux
garanties légales et autres droits ou recours prévus par toute législation applicable;
pour autant que ces dispositions tendront à rejeter, exclure ou limiter toute garantie
légale ou tout autre droit et recours, elles seront considérées comme modifiées dans
la mesure nécessaire pour s’y conformer.
Joindre le reçu de caisse à ce guide pour référence ultérieure. Cette information
pourrait être demandée s’il faut faire réparer l’appareil pendant qu’il est sous
garantie.
DATE D’ACHAT __________________________________________________________
NOM DU MAGASIN ______________________________________________________
54
Information pour Accessoires
DESCRIPTION
Pile de remplacement pour combiné
Adapteur de courant c.a./gris
Pince-ceinture
Combiné supplémentaire No. PIÈCE
5-2814
5-2812
5-2813
5-2811
avec socle de chargement
Pour commande, appelez le distributeur le plus proche pour votre secteur;
Ontario: (905) 624-8516 Manitoba: (204) 783-2088
British Columbia: (604) 438-8001 Quebec: (514) 352-9071
Des frais d’expédition et de manutention seront ajoutés au montant de la
commande.
Nous sommes tenus par la loi de percevoir la taxe de vente appropriée pour
chaque province dans laquelle la marchandise est expédiée. Les articles sont
assujettis à la disponibilité des stocks.
55
Index
A
D
Affichage des Dossiers
18
Afficheur (CID)41
Afficheur D’appel en Attente41
Annuaire
18
Appel a Deux39
Appel a Trois39
Appels De Réponse33
Attente Automatique33
Avant de Commencer
9
Desenregistrement30
Desenregistrement Global31
B
Base32
C
Causes de Mauvaise Réception 53
Code Régional28
Combiné32
Commande de Volume du
Recepteur36
Compatibilité avec les Prothèses
Auditives4
Composition d’un Numéro
D’appelant43
Composition d’un Numéro de la
Mémoire Interne21
Consultation des Dossiers
D’appelants42
56
E
Écoute à Distance21
Écran D’attente
18
Édition des Dossiers20
Égalisateur28
Énonce sur L’exposition au
Rayonnement RF de la FCC 5
Enregistrement29
Exigences de la Prise
Téléphonique
10
F
Facteur D’équivalence de Sonnerie
(REN)4
Faire un Appel33
Faire un Appel D’interphone37
Flash/Appel en Attente34
Fonctionnement de
L’interphone37
Fonctionnement du Haut-Parleur du
Combiné32
Fonctionnement du Telephone32
Fonctions Avancees de
L’interphone38
Fonctions de Programmation 18
Index
G
Garantie
GOOG411
Guide de Depannage
L
54
17
50
Langue23
Licensing4
Liste de Pièces
9
I
M
Importantes Lignes Directrices sur
L’installation
12
Indicateur de Messages Vocaux
Reçus (IMVR)/Visuel de Sonnerie
sur le combiné32
Information pour Accessoires 55
Information sur le Réseau
Téléphonique3
Insertion D’une Pause dans la
Sequence de Composition 19
Installation 11
Installation de la Pile du
Combiné
15
Installation du Téléphone
15
Introduction
9
Mélodie VIP25
Memorisation de Dossiers
D’appelants42
Memorisation des Dossiers
D’appelants dans la Memoire
Interne44
Mémorisation des Mélodies VIP26
Messages Affichés48
Minuterie D’appel33
Modification d’un Dossier
Enregistré de Mélodie VIP26
N
Ne pas Déranger (DND) 37
Nom du Combiné24
57
Index
P
Paramètres du Combiné23
Pince-Ceinture et Casque en
Option46
Poste de Base
16
Précautions à Prendre47
Présentation de la Base
14
Présentation du Combiné
13
Programmation du Telephone 18
Q
Quitter35
R
Raccordement d’un Casque
Optionnel au Casque46
Raccordement de la
Pince-Ceinture46
Rappel et Suppression d’un Dossier
Enregistré de Mélodie VIP27
Reception d’un Appel
D’interphone38
Reception de Dossiers
D’appelants41
Recevoir un Appel Pendant un
Appel D’interphone38
Recherche35
Recherche a Partir de la Base/
Recherche de Groupe36
58
Recherche de Combine a
Combine35
Recherche de Tous les Combinés
d’un Combiné36
Recomposition du Dernier
Numero34
Réglage de la Date/de l’heure27
Réglage du Réveil22
Reglage par Defaut31
Remplacement de la Pile47
Renseignements Importants2
Renseignements sur
L’interférence3
Renseignements sur le Produit
DECT
5
Renvoi D’appels Exterieurs a
D’autres Combines40
Index
S
Silencieux36
Soins et Entretien
53
Solutions- Afficheur
52
Solutions-Telephone
50
Suppression de Dossiers20
Suppression de Tous les Dossiers
D’appelants45
Suppression du Dossier
d’appelant44
Système de Sécurité Numérique11
T
Témoins Visuels32
Tonalité de la Sonnerie24
Tonalité du Clavier27
Tonalité/Impulsion29
U
Utilisation de L’interphone Avec
les Appels Exterieurs38
V
Volume de la Sonnerie25, 34
59
Visitez le site Web GE à: www.GE.com/phones
Modèle 28811
00024631 (Rev 0 Can E/F)
08-02
Imprimé en Chine
Thomson Digital Technologies Ltd.
30 Eglinton Ave W., Suite 304
Mississauga, ON Canada L5R 3E7
© 2008 Thomson Digital Technologies Ltd.
Trademark(s) ® Registered
Marque(s) ® déposée(s)