1
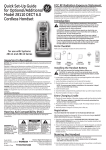
Quick Set-Up Guide
for Optional/Additional
Model 28106 Slim DECT 6.0
Cordless Handset
Installing the Handset Battery
Introduction
Important Information
NOTICE: This product meets the applicable Industry Canada technical specifications.
Operation is subject to the following two conditions: (1) This device may not cause
interference, and (2) This device must accept any interference, including interference that
may cause undesired operation of the device.
The equipment must be installed using an acceptable method of connection. The
customer should be aware that compliance with the above conditions may not prevent
degradation of service in some situations.
Repairs to certified equipment should be made by an authorized Canadian maintenance
facility designated by the supplier. Any repairs or alterations made by the user to this
equipment, or equipment malfunctions, may give the telecommunications company
cause to request the user to disconnect the equipment.
Users should ensure for their own protection that the electrical ground connections of
the power utility, telephone lines and internal metallic water pipe systems, if present, are
connected together. This precaution may be particularly important in rural areas.
CAUTION: Users should not attempt to make such connections themselves, but should
contact the appropriate electric inspection authority, or electrician, as appropriate.
NOTES: This equipment may not be used on coin service provided by the telephone
company.
CAUTION: When using telephone equipment, there are basic
safety instructions that should always be followed. Refer to
the IMPORTANT SAFETY INSTRUCTIONS provided with this
product and save them for future reference.
IMPORTANT: Because cordless phones operate on electricity, you
should have at least one phone in your home that isn’t cordless,
in case the power in your home goes out.
If you have purchased an extra handset apart from your original
purchased unit you may find a detailed description of its functions
in the User’s Guide provided with your original purchased unit.
If you have purchased an extra handset that is not of the same
type as your original handset you may still use the original User’s
Guide to help explain the new handsets basic functions and
options.
NOTE: You must connect the handset battery before use.
CAUTION: To reduce the risk of fire or personal injury, use
only the Thomson Inc. approved Lithium battery model 52770 or 5-2762, which is compatible with this unit.
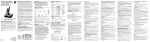
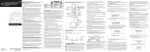
1.Locate battery and battery door which are packaged together inside a plastic
bag and are separate from the handset.
2.Locate the battery compartment on the back of the handset.
3.Plug the battery pack cord into the jack inside the compartment.
NOTE: To ensure proper battery installation, the connector is
keyed and can be inserted only one way.
for use with Systems
28115 and 28118 Series
4.Insert the battery pack.
5. Close the battery compartment by pushing the door up until it snaps into
place.
Hearing Aid Compatibility (HAC)
Extra Charging Cradle
This telephone system meets FCC/Industry Canada standards for Hearing Aid
Compatibility.
FCC RF Radiation Exposure Statement
1.Plug the AC power converter of the extra charging cradle into the electrical
outlet.
NOTE: This power adaptor is intended to be correctly orientated
in a vertical or floor mount position.
Parts Checklist
Make sure your package includes the items shown here.
This equipment complies with FCC RF radiation exposure limits set forth for an
uncontrolled environment. This equipment should be installed and operated with
a minimum distance of 20 centimeters between the radiator and your body. This
transmitter must not be co-located or operated in conjunction with any other antenna or
transmitter.”
2.Place the handset in the extra charging cradle. The charge indicator turns on,
verifying the battery is charging.
3.Allow the phone to charge for 12 hours prior to first use.
Registration
Charge
Cradle
Handset
battery
pack
Battery
compartment
cover
CAUTION:
Model 28106
00019387 (Rev. 0 CAN E/F)
07-15
Printed in China
Thomson Digital Technologies Ltd.
© 2007 Thomson Digital Technologies Ltd.
Trademark(s) ® Registered
Marque(s) ® déposée(s)
THE LIGHTNING
FLASH AND ARROW
HEAD WITHIN THE
TRIANGLE IS A
WARNING SIGN
ALERTING YOU OF
“DANGEROUS
VOLTAGE” INSIDE
THE PRODUCT.
CAUTION: TO REDUCE THE
RISK OF ELECTRIC SHOCK, DO
NOT REMOVE COVER (OR
BACK). NO USER
SERVICEABLE PARTS INSIDE.
REFER SERVICING TO
QUALIFIED SERVICE
PERSONNEL.
YOU MUST REGISTER THE HANDSET TO THE MAIN BASE BEFORE USE!
After the optional handset has charged for 12 hours on the extra charger,
HANDSET NEEDS REGISTRATION shows in the display.
1.Press the menu ok/mute button. HOLD BASE PAGE FOR 5 SECONDS, THEN
PRESS HANDSET MENU OK shows in the display. (Your handset should be
held near the base during registration process.)
2.Press and hold the page button on the base unit until the in use indicator
flashes. Press the handset the menu ok/mute button. REGISTERING shows in
the display. HANDSET X REGISTERED shows in the handset display, where X is
the handset number. You may now rename your handset.
Naming the Handset
1.Use the touch-tone pad to enter a name (up to 15 characters).
NOTE: If you make a mistake, use the del/conf/intercom button to
backspace and delete one character at a time.
RISK OF ELECTRIC SHOCK
DO NOT OPEN
WARNING: TO
PREVENT FIRE OR
ELECTRICAL SHOCK
HAZARD, DO NOT
EXPOSE THIS
PRODUCT TO RAIN
OR MOISTURE.
Handset
THE EXCLAMATION
POINT WITHIN THE
TRIANGLE IS A
WARNING SIGN
ALERTING YOU OF
IMPORTANT
INSTRUCTIONS
ACCOMPANYING
THE PRODUCT.
SEE MARKING ON BOTTOM / BACK OF PRODUCT
De-registration cancels registration. During the de-registration
process, keep the handset near the base.
From the Handset Setup Menu:
1.Press the vol/CID ( 6 or 5) button to scroll to the DEREGISTRATION sub-menu.
2.Press the menu ok/mute button to enter the menu. DEREGISTRATION 1YES
42NO shows in the display The default setting is 2NO.
3. Use the touch-tone pad to select 1 for YES or 2 for NO. Or use the vol/CID
( 6 or 5) button to scroll to 1YES or 2NO.
WARNING: It is not recommended that a handset be de-registered
unless absolutely necessary because once a handset is deregistered, that handset’s telephone features cannot be used until
the handset is re-registered.
4.Select NO, if you do not want to de-register.
5.If you select YES, press the menu ok/mute button and MOVE NEAR TO BASE
displays for 2 seconds, then CONFIRM? 1YES 2NO appears in the display.
6. Press the touch-tone pad to select 1 for YES or 2 for NO, or use the vol/CID (
6 or 5) button to scroll to 1YES or 2NO.
7.If you select YES, press the menu ok/mute button to confirm. DE-REGISTER...
shows in the display. You will hear a confirmation tone. Then HANDSET X
DEREGISTERED shows in the display to confirm the handset is deregistered.
NOTE: When you complete the de-registration process, HANDSET
NEEDS REGISTRATION shows in the display. To use the handset,
you MUST re-register the handset using the Registration process.
Interference Information
This equipment generates and uses radio frequency energy which may interfere
with residential radio and television reception if not properly installed and used in
accordance with instructions contained in this manual. Reasonable protection against
such interference is ensured, although there is no guarantee this will not occur in a
given installation. If interference is suspected and verified by switching this equipment
on and off, the user is encouraged to try to correct the interference by one or more of
the following measures: Reorient the radio/television receiver’s antenna, relocate the
equipment with respect to the receiver, plug the equipment and receiver into separate
circuit outlets. The user may also wish to consult a qualified radio/television technician
for additional suggestions. This equipment has been fully tested and complies with all
limits for Class B computing devices pursuant to part 15 FCC Rules and Regulations.
De-Registration
2. Press the menu ok/mute button to save your name. You will hear a
confirmation tone and the handset name shows in the display.
Global De-registration
5.When finished, press the end button or del/conf/intercom button on either
handset to deactivate the intercom.
NOTE: The system is expandable up to 6 handsets (by purchase
of optional Model 28106 handset with recharge cradle). When
6 handsets are registered, the system can handle 2 separate
intercom operations at once, for example, 1st handset intercoms
with 2nd handset while 3rd handset intercoms with 4th handset.
Receiving an Intercom Call
When you receive an intercom call, your handset beeps. To answer the call
press the del/conf/intercom button, talk or speaker button.
Advanced Intercom Features
Receiving an Incoming Call During an Intercom
Call
If you receive a telephone call during an intercom call, the intercom call is
immediately terminated and both handsets ring. Either handset user may press
the talk or speaker button to answer the call.
Using Intercom with External Telephone Calls
During a telephone call, you may use the intercom/paging function to page
another handset and have an off line, private (two-way) intercom conversation.
You may also have a three-way conversation between the external caller
and the handsets, or you may transfer the external telephone call to another
handset.
NOTE: Before you intercom/page another handset, you must
decide whether you want to create a two-way or a three-way
conversation.
If one or more handsets becomes lost, you should de-register all handsets
to ensure proper system operation. Follow the steps below to de-register all
handsets at the same time.
WARNING: It is not recommended that a handset be de-registered
unless absolutely necessary because once a handset is deregistered, that handset’s telephone features cannot be used until
the handset is re-registered.
Two-Way Calling
1.Disconnect power from the base by pulling the plug out of the back of the
unit.
2.Press and hold the page button and while holding the page button reconnect
the power.
3.Continue to hold the page button until the in use indicator flashes rapidly.
4.Release the page button.
5.Press and release the page button on the base once. All handsets are deregistered and HANDSET NEEDS REGISTRATION shows in the display.
2.When finished, press the end button to end the intercom call, return to the
talk mode, and resume your original telephone conversation.
Intercom Operation
The intercom feature allows you to have a conversation with another registered
handset without tying up the telephone line, allowing you to still receive
incoming calls.
Making an Intercom Call
1.Make sure the handset is OFF (not in talk mode).
2. Press the del/conf/intercom button on the handset.
3. Use the touch-tone pad to select the handset you want to page.
NOTE: To cancel page, press the del/conf/intercom button again
or the end button on the sending handset.
4.Wait for the person at the receiving handset to press the del/conf/intercom
button.
NOTE: If the receiving handset does not answer within two
minutes, the intercom call is automatically canceled. The
originating handset displays NO ANSWER.
1.During an external call, press the del/conf/intercom button, and use the
touch-tone pad to enter the handset number you want to call.
NOTE: The receiving handset presses the del/conf/intercom
button to answer the intercom call. Both intercom users may
speak privately. The external caller will not hear the intercom
conversation.
Three-Way Calling
1.During an external call, press the del/conf/intercom button. LINE ON HOLD
EXTENSION? shows in the display.
2.Use the touch-tone pad to select Handset #. You will hear a paging tone and
PAGING shows in the originating handset’s display.
NOTE: PAGING FROM... shows in the display on the receiving
handset, and the receiving handset presses the del/conf/
intercom or talk button to answer the intercom.
3.When the receiving handset connects, press the del/conf/intercom button
on the originating handset to conference with the receiving handset and
the external caller. CONFERENCE shows in the display on the originating and
receiving handsets.
NOTE: A handset can enter conference mode directly by pressing
talk or speaker on the second handset during a call.
Battery Safety Precautions
• Do not burn, disassemble, mutilate, or puncture. Like other batteries of this
type, toxic materials could be released which can cause injury.
• To reduce the risk of fire or personal injury, use only the Lithium battery
listed in the User’s Guide.
• Keep batteries out of the reach of children.
• Remove batteries if storing over 30 days.
NOTE: The RBRC seal on the battery used in your Thomson Inc. product
indicates that we are participating in a program to collect and recycle the
rechargeable battery (or batteries).
For more information go to the RBRC web site at www.rbrc.org
or call 1-800-8-BATTERY or contact a local recycling center.
Service
Thomson Digital Technologies Ltd., warrants to the purchaser or gift recipient
that if any manufacturing defect becomes apparent in this product within
1 year from the original date of purchase, it will be replaced free of charge,
including return transportation.
This warranty does not include damage to the product resulting from accidents,
misuse or leaking batteries.
Should your product not perform properly during the warranty period, either:
1.Return it to the selling dealer with proof of purchase for replacement,
OR
2.Remove the batteries (where applicable), and pack product complete with
accessories in the original carton (or equivalent).
— Mail prepaid (with proof of purchase) and insured to:
Thomson Digital Technologies Ltd.
6200 Edwards Boulevard
Mississauga, Ontario
Canada L5T 2V7
The provisions of this written warranty are in addition to and not a modification
of or subtraction from the statutory warranties and other rights and remedies
contained in any applicable legislation, and to the extent that any such
provisions purport to disclaim, exclude or limit any such statutory warranties
and other rights and remedies, such provisions shall be deemed to be
amended to the extent necessary to comply therewith.
If you are unable to find a qualified servicer for out of warranty service, you
may write to:
Thomson Digital Technologies Ltd.
c/o Thomson Inc.
P.O. Box 0944
Indianapolis, Indiana, U.S.A., 46206-0944
Attach your sales receipt to this booklet for future reference. This information is
required if service is needed during the warranty period.
PURCHASE DATE ____________________________________________
NAME OF STORE ____________________________________________
Guide Rapide de
Configuration
du Optionnel/Supplémentaire
Modèle 28106 DECT 6.0
Combiné Mince
Renseignements Importants
Introduction
AVIS: Ce produit est conforme aux spécifications techniques applicables d’Industrie
Canada.
Son fonctionnement est soumis aux deux conditions suivantes : (1) Cet appareil ne peut
causer de l’interférence, et (2) Cet appareil doit accepter toute interférence, y compris
l’interférence pouvant entraîner le fonctionnement non souhaitable de l’appareil.
Avant d’installer cet appareil, l’utilisateur doit vérifier s’il est permis de le raccorder
aux installations de la compagnie locale de télécommunications. L’installation doit de
plus respecter les méthodes de raccordement approuvées. L’abonné doit savoir que
le respect des conditions mentionnées ci-dessus n’empêche pas nécessairement la
détérioration du service dans certaines situations.
La réparation des appareils certifiés doit être confiée à un service de maintenance
canadien dûment autorisé, désigné par le fournisseur. Toute réparation ou modification
effectuée par l’utilisateur peut amener la compagnie à exiger le débranchement de
l’installation.
Par mesure de sécurité, les utilisateurs doivent s’assurer du raccordement réciproque des
circuits de mise à la terre du service public d’énergie, des lignes téléphoniques et — s’il y
a lieu — des systèmes intérieurs de conduites d’eau métalliques. Cette précaution peut
s’imposer particulièrement dans les régions rurales.
ATTENTION: Les utilisateurs ne doivent pas essayer de faire eux-mêmes ces
raccordements. Ils doivent communiquer avec le service d’inspection compétent ou faire
appel à un électricien, selon le cas.
NOTES: Cet appareil ne peut être utilisé pour le service payant (monnaie) fourni par la
compagnie de téléphone.
Installation de la Pile du Combiné
ATTENTION : Vous devez respecter certaines règles de sécurité
lorsque vous utilisez un appareil téléphonique. Reportezvous aux INSTRUCTIONS IMPORTANTES DE SÉCURITÉ qui
accompagnent ce produit et conservez-les pour référence
ultérieure.
IMPORTANT: Étant donné que les téléphones sans cordon
fonctionnent à l’électricité, vous devriez disposer d’au moins
un téléphone avec cordon dans la maison, en cas de panne de
courant.
REMARQUE: Si vous avez acheté un combiné supplémentaire pour
votre système original, vous trouverez une description de ses
fonctionnalités dans le livret d’instructions accompagnant votre
appareil d’origine.
Si vous avez acheté un combiné supplémentaire pour votre
système original, vous trouverez une description de ses
fonctionnalités dans le livret d’instructions accompagnant votre
appareil d’origine.
FIL BLANC
BLOC-PILE
DE COMBINE
CONNECTEUR
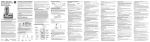
4. Insérez le bloc-piles.
5. Refermez le compartiment de la pile en poussant le couvercle vers le haut
jusqu’à ce qu’il s’enclenche.
Compatibilité avec les Prothèses Auditives
Énonce sur L’exposition au Rayonnement RF
de la FCC
1. Repérez la pile et le couvercle du compartiment de la pile qui sont emballés
ensemble dans un sac de plastique séparément du combiné.
2. Repérez le compartiment de la pile à l’arrière du combiné.
3. Raccordez le connecteur de la pile dans la prise située à l’intérieur du
compartiment.
REMARQUE : Pour assurer une installation correcte de la pile, le
connecteur est claveté et ne peut être inséré que dans une seule
position.
FIL ROUGE
Cet appareil produit et utilise l’énergie radiofréquence qui peut gêner la réception radio
et télévision résidentielle s’il n’est pas installé ou utilisé conformément aux instructions
contenues dans ce guide. Une protection raisonnable est assurée contre une telle
interférence, mais rien ne garantit qu’un appareil donné ne produira pas d’interférence.
Si on soupçonne et confirme une interférence d’une ou plus des façons suivantes:
réorienter l’antenne du récepteur radio ou télévision, éloigner l’appareil du récepteur ou
brancher l’appareil et le récepteur dans des prises de circuits différents. L’utilisateur peut
aussi demander conseil à un technicien en radio-télévisìon compétent. Cet appareil a
été mis à l’essai et répond à toutes les limites des appareils informatiques de Classe B,
conformément à l’alinéa 15, des Règlements de la FCC.
Ce téléphone est conforme aux normes FCC/Industrie Canada en matière de
compatibilité avec les prothèses auditives.
ATTENTION: Pour réduire le risque d’incendie ou de blessures,
utilisez seulement la batterie approuvé par Thomson
Inc. de pile au lithium du model 5-2770 ou 5-2762, qui est
compatible avec cette unité.
FIL NOIR
Renseignements sur L’interférence
pour utilisation avec les
Systèmes de Sèries 28115 et 28118
REMARQUE : Vous devez brancher la pile du combiné avant de
l’utiliser.
Liste de Pièces
Socle de chargement de combiné
Assurez-vous que la boîte contient les articles suivants.
1.Branchez le cordon d’alimentation CA du socle de recharge supplémentaire à
une prise électrique.
REMARQUE: Le adapteur de courant fourni avec cet appareil doit
être placé correctement en position verticale ou monté sur le sol.
Cet équipement est conforme aux limites d’exposition au rayonnement RF de la FCC
établies pour un environnement non contrôlé. Cet équipement doit être installé et utilisé
en maintenant une distance minimale de 20 centimètres entre le radiateur et votre
corps. Cet émetteur ne doit pas être placé ou utilisé avec une autre antenne ou un autre
émetteur.
2.Placez le combiné sur le socle de recharge supplémentaire. L’indicateur de
charge s’allume pour vérifier si la pile se recharge.
3.Prévoyez un temps de charge de 12 heures avant la première utilisation.
Enregistrement
Socle de
chargement
de combiné
Couvercle du
compartiment
de pile
ATTENTION:
AVERTISSEMENT:
AFIN D'ÉVITER LES
DANGERS
D'INCENDIE ET
D'ÉLECTROCUTION,
NE PAS EXPOSER
CET APPAREIL À LA
PLUIE NI À
L'HUMIDITÉ.
Modèle 28106
00019387 (Rév. 0 CAN E/F)
07-15
Imprimé en Chine
Thomson Digital Technologies Ltd.
© 2007 Thomson Digital Technologies Ltd.
Trademark(s) ® Registered
Marque(s) ® déposée(s)
RISQUE DE CHOC ÉLECTRIQUE
NE PAS ENLEVER
LE SYMBOLE DE
L'ÉCLAIR ILLUSTRÉ
DANS UN TRIANGLE
EST UN AVERTISSEMENT INDIQUANT
UNE "TENSION
DANGEREUSE" À
L'INTÉRIEUR DE
L'APPAREIL.
ATTENTION:AFIN DE RÉDUIRE
LES RISQUES
D'ÉLECTROCUTION, NE PAS
ENLEVER LE COUVERCLE (NI LE
CÔTÉ ARRIÈRE). AUCUNE
PIÈCE INTÉRIEURE NE PEUT
ÊTRE RÉPARÉE PAR
L'UTILISATEUR. POUR TOUTE
RÉPARATION, CONSULTER DES
TECHINICIENS COMPÉTENTS.
LE POINT D’EXCLAMATION
ILLUSTRÉ DANS UN
TRIANGLE EST UN
AVERTISSEMENT
INDIQUANT QUE
L’APPAREIL EST FOURNI
AVEC DES INSTRUCTIONS
IMPORTANTES.
VOIR LES INSCRIPTIONS SOUS L'APPAREIL OU À L'ARRIÉRE DU BOÎTiER.
VOUS DEVEZ ENREGISTRER LES DEUX COMBINÉS SUR LE POSTE DE
BASE AVANT DE LES UTILISER!
Bloc-pile de
combiné
Combiné
Après le combiné facultatif a facturé 12 heures sur le chargeur supplémentaire,
BESOINS COMBIN ENREGISTREMENT apparaît dans l’afficheur.
1.Appuyez sur le bouton menu ok/mute. TENEZ PAGE BASS ENFON CINQ MINS,
PUIS APPUYEZ COMBINE MENU OK apparaît dans l’afficheur. (Votre combiné
devrait être tenu près de la base pendant le procédé d’enregistrement.)
2.Appuyez et gardez enfoncé le bouton page sur la base jusqu’à ce que
l’indicateur in use clignote. Appuyez sur le bouton menu ok/mute. Le message
COMBINÉ X ENREGISTRE s’affiche; X correspond au numéro du combiné.
Vous pouvez maintenant renommer le combiné.
Nom du Combiné
1.Utilisez le clavier pour entrer un nom (jusqu’à 15 caractères).
REMARQUE: Si vous faites une erreur, appuyez sur le bouton
del/conf/intercom pour reculer en effacez le character(s) ou les
nombres faux.
2. Appuyez sur le bouton menu ok/mute pour sauvegarder. Vous entendrez une
tonalité de confirmation et les expositions de nom de combiné dans l’affichage.
Desenregistrement
Le désenregistrement annule l’enregistrement. Pendant le processus de
désenregistrement, gardez le combiné près de la base.
Du menu d’installation de combiné:
1.Appuyez sur le bouton vol/CID ( 6 ou 5) pour obtenir le sub-menu
DÉSENREGISTREMENT.
2.Appuyez sur le bouton menu ok/mute DESENREGISTREM 1OUI 42NON - - apparaît dans l’afficheur. Le réglage par défaut est “2NON".
3. Utilisez le clavier numérique pour choisir 1 pour OUI ou 2 pour NON. Ou
utilisez le bouton vol/CID ( 6 ou 5) pour atteindre 1OUI ou 2NON.
AVERTISSEMENT : Il n’est pas recommandé de désenregistrer un
combiné à moins que cela ne soit absolument nécessaire parce
qu’un combiné est désenregistré, que les fonctions du combiné
sont inutilisables tant que le combiné n’a pas été réenregistré.
4.Choisissez NON pour ne pas désenregistrer.
5.Si vous choisissez 1OUI, appuyez sur le bouton menu ok/mute; SE RAPPROCH
BASE est affiché pendant 2 secondes, puis CONFIRMER? 1 OUI 2 NON
est affiché.
6.Appuyez sur le clavier numérique pour choisir 1 pour OUI ou 2 pour NON, ou
utilisez le bouton vol/CID ( 6 ou 5) pour atteindre 1OUI ou 2NON.
7.Si vous choisissez OUI, appuyez sur le bouton menu ok/mute pour confirmer.
DESENREGISTRE...est affiché. Vous entendrez une tonalité de confirmation.
COMBINE X DESENREGISTRE est ensuite affiché pour confirmer que le
combiné est désenregistré.
REMARQUE : Une fois le désenregistrement terminé, BESOINS
COMBIN ENREGISTREMENT apparaît dans l’afficheur. Vous devez
enregistrer le combiné avant de l’utiliser.
Desenregistrement Global
Si un ou plusieurs des combinés sont perdus, vous devez désenregistrer tous les combinés
pour assurer le bon fonctionnement du système. Suivez les étapes ci-dessous pour
désenregistrer les deux combinés en même temps.
AVERTISSEMENT : Il n’est pas recommandé de désenregistrer un
combiné à moins que cela ne soit absolument nécessaire parce
qu’un combiné est désenregistré, que les fonctions du combiné
sont inutilisables tant que le combiné n’a pas été réenregistré.
1.Débranchez l’alimentation de la base en retirant la fiche de l’arrière de celleci.
2.Appuyez sur le bouton page et gardez-le enfoncé pendant que vous
rebranchez l’alimentation.
3.Continuez à appuyer sur le bouton page jusqu’à ce que le témoin in use
clignote rapidement.
4.Relâchez le bouton page.
5.Appuyez une fois sur le bouton page de la base. Tous les combinés sont
désenregistrés et BESOINS COMBIN ENREGISTREMENT apparaît dans
l’afficheur.
Fonctionnement de L’interphone
La fonction d’interphone permet de converser avec une personne à un autre
combiné, sans occuper la ligne téléphonique. Puisque la ligne téléphonique n’est
pas utilisée, vous pouvez toujours recevoir les appels.
Faire un Appel D’interphone
1.Assurez-vous que le téléphone est DÉSACTIVÉ (pas en mode conversation).
2. Appuyez sur le bouton del/conf/intercom du combiné.
3. Utilisez le clavier numérique pour choisir le combiné que vous souhaitez
rechercher.
REMARQUE : Pour annuler la recherche, appuyez de nouveau sur
le bouton del/conf/intercom ou sur le bouton end.
4.Attendez que la personne au combiné récepteur appuie sur le bouton del/
conf/intercom.
REMARQUE : Si le combiné récepteur ne répond pas dans les deux
minutes, l’appel par interphone est automatiquement annulé. Le
combiné d’origine affiche AUCUNE REPONSE.
5. Quand vous avez terminé, appuyez sur le bouton end ou le bouton del/conf/
intercom de l’un ou l’autre combiné pour désactiver l’interphone.
REMARQUE : Lorsque 6 combinés sont enregistrés, le système
peut fonctionner comme 2 interphones séparés en même temps;
par exemple, le combiné 1 communique avec le combiné 2
pendant que le combiné 3 communique avec le combiné 4.
Reception d’un Appel D’interphone
Votre combiné émet un signal lorsque vous recevez un appel d’interphone.
Appuyez sur le bouton del/conf/intercom, talk ou speaker pour répondre
à l’appel.
Fonctions Avancees de L’interphone
Recevoir un Appel Pendant un Appel D’interphone
Si vous recevez un appel téléphonique pendant un appel d’interphone, ce
dernier est immédiatement interrompu et les deux combinés sonnent. L’un ou
l’autre interlocuteur peut appuyer sur le bouton talk ou speaker pour répondre
à l’appel.
Utilisation de L’interphone Avec les Appels
Exterieurs
Pendant un appel téléphonique, vous pouvez utiliser la fonction interphone/
recherche pour rechercher un autre combiné et converser à l’interphone,
en privé et hors ligne (deux sens). Vous pouvez aussi converser à trois avec
l’appelant extérieur et une personne à l’autre combiné, ou vous pouvez renvoyer
l’appel extérieur à un autre combiné.
REMARQUE : Avant de communiquer par interphone/rechercher
un autre combiné, vous devez décider si vous souhaitez converser
à deux ou à trois.
Appel a Deux
1.Pendant un appel extérieur, appuyez sur le bouton del/conf/intercom et
utilisez le clavier numérique pour entrer le numéro du combiné (1 ou 2) à
joindre.
REMARQUE : La personne au combiné récepteur doit appuyer
sur le bouton del/conf/intercom pour répondre à l’appel par
interphone. Les deux personnes à l’interphone peuvent converser
en privé. L’appelant extérieur ne peut entendre la conversation
par l’interphone.
2.Quand vous avez terminé, appuyez sur le bouton end ou int pour interrompre
l’appel par interphone, retourner en mode de conversation et poursuivre la
conversation téléphonique initiale.
Appel a Trois
1.Pendant un appel extérieur, appuyez sur le bouton del/conf/intercom. LIGNE
EN GARDE POSTE? apparaît dans l’afficheur.
2.Utilisez le clavier numérique pour choisir le Combiné 1 ou le Combiné 2. Vous
entendez une tonalité de recherche et RECHERCHE est affiché au combiné
d’origine.
REMARQUE : RECHERCHE DE . . . est affiché au combiné récepteur
et la personne à ce combiné doit appuyer sur le bouton del/conf/
intercom ou talk pour répondre à l’appel par interphone.
3.Lorsque le combiné récepteur est raccordé, appuyez sur le bouton del/conf/
intercom du combiné d’origine pour effectuer un appel conférence avec
le combiné récepteur et l’appelant extérieur. CONFERENCE apparaît dans
l’afficheur du combiné d’origine et du combiné récepteur.
REMARQUE : Un combiné peut entrer directement en mode
conférence pendant un appel en appuyant sur talk ou speaker du
deuxième combiné.
Battery Safety Precautions
• Do not burn, disassemble, mutilate, or puncture. Like other batteries of this
type, toxic materials could be released which can cause injury.
• To reduce the risk of fire or personal injury, use only the Lithium battery
listed in the User’s Guide.
• Keep batteries out of the reach of children.
• Remove batteries if storing over 30 days.
REMARQUE : Le sceau RBRC (Société de recyclage des piles rechargeables)
sur la pile de cet appareil Thomson signale que nous participons à un
programme de collecte et de recyclage des piles rechargeables.
Pour plus de renseignements, allez sur le site www.rbrc.org/cellarecycler/,
appelez au 1-800-8-BATTERY ou contactez votre centre de recyclage.
Service Après-vente
Thomson Digital Technologies Ltd., garantit à l’acheteur de cet appareil ou à la personne
qui le recevrait en cadeau, que si cet appareil présente un défaut de fabrication pendant
l’année suivant la date d’achat, il sera remplacé sans frais. Les frais de transport de
retour sont payés.
Cette garantie ne couvre pas les dommages attribuables aux accidents, à une mauvaise
utilisation ni à des piles qui fuient.
Si cet appareil ne fonctionne pas convenablement pendant qu’il est sous garantie:
1.
Le retourner au marchand vendeur avec la preuve d’achat pour être
remplacé.
OU
2.
Retirer les piles (s’il y a lieu) et emballer l’appareil et les accessoires dans la
boîte originale (ou l’équivalent).
— Le faire parvenir port payé (avec la preuve d’achat) et assuré à :
Thomson Digital Technologies Ltd.
6200 Edwards Boulevard
Mississauga, Ontario
Canada L5T 2V7
Les dispositions de cette garantie s’ajoutent (sans les modifier ni les restreindre) aux
garanties légales et autres droits ou recours prévus par toute législation applicable; pour
autant que ces dispositions tendront à rejeter, exclure ou limiter toute garantie légale ou
tout autre droit et recours, elles seront considérées comme modifiées dans la mesure
nécessaire pour s’y conformer.
S’il est impossible de trouver un réparateur qualifié pour effectuer une réparation non
garantie, écrire à :
Thomson Digital Technologies Ltd.
c/o Thomson Inc.
B.P. 0944
Indianapolis, Indiana, É.-U., 46206-0944
Joindre le reçu de caisse à ce guide pour référence ultérieure. Cette information pourrait
être demandée s’il faut faire réparer l’appareil pendant qu’il est sous garantie.
PURCHASE DATE ______________________________________________________
NAME OF STORE ______________________________________________________