1
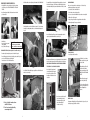
• Hold the bottom lid as shown in Fig 4 and pull the tab marked “PULL TO REMOVE BAG”
REMOVING THE CLEANER FROM THE POOL
• Slowly pull the blue cord to get the cleaner to the pool surface and near
the edge of the pool. DO NOT PULL THE CLEANER OUT OF THE POOL BY
THE CORD.
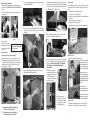
• To reattach the filter to the bottom lid, turn the filter bag right-side-out. Start at the
back where the filter bag says “PUSH” and insert the filter bead into the channel, so
that the tabs are holding the bag in near the label with the word “PUSH”, as shown in
Fig 7.
CABLE MAINTENANCE
In the course of using your Nitro, the cord may begin to coil. Excessive coiling
can lead to improper cleaning coverage of your pool.
• To uncoil the cord, it is best that the cable is wet.
• Place the cleaner on the ground as shown below.
• Reach down and grasp the handle of the cleaner and remove it from the
pool as shown below.
• Be sure to use a clear area that will allow the cord to stretch out in a straight line.
• Pull the cable so it is off the ground
• Using your fingers, roll the cable in the opposite direction that it is coiled in.
• When straight, wrap cable for storage as shown below.
FIGURE 4
• Turn filter bag inside out and hose off all debris as shown in Fig 5. If very dirty it may
be washed in your washing machine, inside out, with cold water, mild detergent, and
by itself.
FIGURE 7
• Press the filter bead down all the way around the perimeter making sure that it is
completely seated and behind all the tabs as shown in Fig 7a.
FIGURE 2: Lift from Pool by Handle
FIGURE 1: Grasping Handle
• Clean filter bag.
• Store the cleaner on the optional
caddy, if available.
• Loosely coil the cable for storage.
The unit should be stored in an area that
will afford some protection from the
elements to insure that it retains its finish.
CLEANING THE FILTER BAG (Filter Bag Should Be Cleaned After Every Use.)
STORING THE CABLE
• Turn cleaner upside down and place on ground so the bottom lid is exposed.
• Loosely loop the cable as shown below.
• Turn red locking pegs (by wheel area) to the unlocked position as shown in Fig 3. Next
press the two red locking clips near the roller brush in
towards the center of the unit. Lift the bottom lid out.
FIGURE 7A
FIGURE 5
• Hose all debris off the bottom lid being sure to get all dirt out of the fine filters on the
intake doors as shown in Fig 6.
B A
Hold the cord close to the cleaner.
Make a roughly two foot loop with
the cord as shown.
• Pick up the bottom lid and turn it over so the bag hangs below it. Place the bottom lid
back into the cleaner being careful to feed the filter bag into the body of the cleaner.
MAKE SURE ALL FILTER MATERIAL IS INSIDE THE CLEANER OTHERWISE
THE LID WILL NOT CLOSE AND LATCH PROPERLY.
When making loop, roll the cable
slightly in a counter clockwise
manner to maintain form. DO NOT
WRAP THE CORD TIGHTLY AROUND
OBJECTS.
• Once the bottom lid is properly seated,
turn the red locking clips in the opposite
direction of the arrows embossed on the
bottom lid until it locks between the two
raised locks.
When cable is properly wrapped
place it on the optional caddy.
If you do not have a caddy, store the
unit in a protected location where it
will not be damaged by the
elements.
FIGURE 7B
CLICK
• Press the rear section of the bottom lid
into the cleaner while pushing the
locking clips towards the edge of the
cleaner until an audible click
is heard as shown in Fig 7c.
FIGURE 3
A: Press the red tabs inward as shown
and lift lid off cleaner
B: Turn levers inward as indicated by
arrows imprinted on lid
FIGURE 6
2
WINTER STORAGE
If temperatures will regularly be below 45 degrees Fahrenheit or 5 degrees Celsius, the
cleaner and power supply should be stored indoors.
FIGURE 7C
3