1
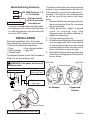
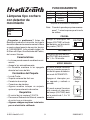
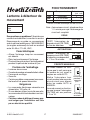
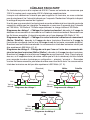
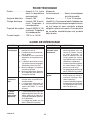
Mode Switching Summary
TEST
AUTO
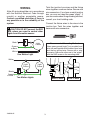
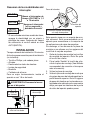
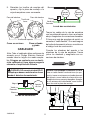
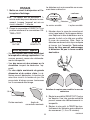
This fixture comes with a universal mounting
bracket. It is pre-assembled on the fixture to
fit the majority of junction box applications.
However, if the slots on the mounting plate
do not line up with the junction box screw
holes:
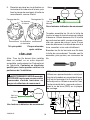
1. Remove the fixture mounting screws from
the mounting plate. Note: Do not remove
the ground screw.
2. Attach ground wire “pigtail” to ground
screw on mounting plate (See
Recommended Grounding Method for
additional information).
3. Flip the mounting plate over.
4. Rotate the mounting plate so the wire path
is on the upper right. Note: The wire path
on the mounting plate must be located
as shown below to allow the wires on the
back of the fixture to pass through.
5. Reinstall the fixture mounting screws and
attach the mounting plate to the junction
box as shown.
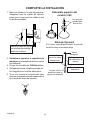
ON-TIME Switch at 1, 5,
or 10 minutes
MANUAL MODE
Flip light switch
off for one second
then back on*
* If you get confused while switching modes,
turn the power off for one minute, then back
on. After the calibration time the control will
be in the AUTO mode.
INSTALLATION
Estimated Installation Time: 30 minutes
Items needed for installation (not included):
• Phillips and flathead screwdrivers
• Pliers
• Wire strippers/cutters
• Safety glasses • Light bulb
• Silicone caulk
For best performance, mount the fixture about
6 feet (1.8 m) above the ground.
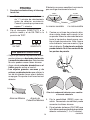
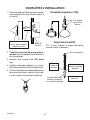
Wire Path
WARNING: Turn power off at circuit
breaker or fuse.
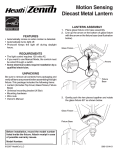
1. Remove two nuts.
Wire Path
Ground Screw
2. Remove
Mounting Plate.
3. Tighten screws
finger tight.
Fixture Screws
As Shipped
Wire Path
Flipped and
Rotated
Ground Screw
4. Attach mounting plate to junction box.
2
204028-02