1
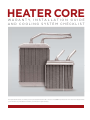
H EAT ER CORE INSTAL L ATI O N GU I D E
When installing this new replacement heater core, it is important to
remember that heater core installations vary from car to car, and the
following is intended only as a guide. Consult the owner’s manual or
vehicle specific repair manual for detailed instructions.
The basic tools required for the typical installation of your new
heater core are a screwdriver, a set of open-end wrenches and a pair
of pliers. We highly recommend that you replace your heater core
hoses, hose clamps, thermostat and radiator cap.
CAUTION: NEVER REMOVE THE PRESSURE CAP WHILE THE
ENGINE AND COOLANT ARE STILL HOT. ONCE THE ENGINE HAS
COOLED REMOVE THE CAP SLOWLY!! IMPORTANT!! FIND OUT
THE ROOT CAUSE FOR THE HEATER CORE FAILURE BEFORE
INSTALLING THE NEW HEATER!
1 :: REM OVA L A ND I NSTA LLAT I ON T I P S
2 :: COOLI NG SYST EM“ T U NE-U P ” CHECK L IST
3 :: LI M I T ED WA RRA NT Y
4 :: I T EM S T HAT WI LL VOI D YOU R WA RR AN TY
1 :: R EM OVA L A N D I N STA L L AT I O N T I PS
1 After removing the failed heater core from the
vehicle, find out why it failed: is it the original
heater core? Was it replaced before? If so, how
long ago? If the heater core has been replaced
within the last 6 months, you may be looking
at a cooling system problem, not a heater core
problem. What is the condition of the coolant:
color? pH?, any residue in the radiator fill neck?
The color should not be muddied or “rusty” in
appearance. The pH should be in the range of
7.7 – 11.0. And the mix should be 50/50. Test the
heater core for leaks: pin hole leaks in the core
could be a sign of Electrolysis. This condition is
usually a result of add on equipment - stereo
amplifiers, alarm systems, plow lifts, etc. - that
have not been properly grounded to the vehicle.
You can test for this by using a DC voltmeter to
submerge the positive lead into the radiator fill
neck and ground the negative lead at the battery.
This should be done with the radiator cap off and
the engine running. You should not read any more
that 0.1-volt. Any higher reading is cause for alarm
and the offending component must be found and
grounded properly. Stray excessive electrical cur-
rent can destroy an aluminum heat exchanger in a
very short time.
Once you have determined that the system is
OK, it is strongly recommended that you flush
the cooling system thoroughly and aggressively
before you install the new heater core. Multiple
flushing’s are not out of the question to assure
proper system chemical balance, especially if
you suspect poor coolant condition was the root
cause of the previous failure. A flush machine is
preferred, but flush aggressively to the best of
your ability.
2
3 Carefully re-install the heater core following the
removal and additional steps listed above.
CAUTION!! Heater pipes that are long can create
destructive forces to the connection joint at the
tank, if excessive force is applied to these pipes
during the installation process. Be careful when
inserting the heater core into the mounting housing to avoid over stressing the connection joints.
4
Fill the system with a new 50/50 solution of
the proper coolant and deionized or distilled water
as recommended by the vehicle manufacturer.
Coolant pre-mixes may also be used. Be sure to
replace your coolant with the same kind that was
removed (refer to your owner’s manual to identify
the coolant used in your vehicle). Tap water is lethal to aluminum components in a cooling system.
Replace the pressure cap.
5 Start engine and check for leaks. After the
engine has idled long enough to open the thermostat (engine should reach it’s normal operating
temperature), turn the engine off. Make sure the
cooling system has cooled down before slowly
removing the pressure cap to check the coolant
level: add the 50/50 mix or pre-mix as needed
to bring the coolant level to the bottom of the fill
neck or to the appropriate level in the overflow
tank. Replace the pressure cap.
6 Check the coolant recovery reservoir the next
few times you drive the vehicle, and, if necessary, add enough coolant mix to bring it up to the
proper level.
2 :: CO O LIN G SYST E M“T U N E -U P” C H EC K L I ST
CAUTION: NEVER REMOVE THE RADIATOR
PRESSURE CAP WHILE THE ENGINE AND
COOLANT ARE STILL HOT. ONCE THE ENGINE
HAS COOLED, REMOVE THE CAP VERY
SLOWLY!!
Your vehicle’s cooling system protects your engine
against heat generated during normal operations
by keeping the engine operating within the correct
temperature range. If the cooling system is not
operating properly and the temperature range is
exceeded the engine can be damaged. Regular
2
HEATER CORE INSTALLATION GUIDE
checks and maintenance help assure long life
of vulnerable engine parts. The cooling system
maintenance schedule recommended by the
vehicle manufacturer should be followed. Here are
some of the basic steps in proper cooling system
maintenance:
1 Check the condition of water pump by inspecting for coolant leaks and by checking the pump
shaft for “play” which may indicate excessive
wear. If either of these conditions exists you may
need to replace the water pump.
2
Inspect the radiator for leaks and corrosion.
3 Be sure your radiator coolant level is maintained at the manufacturer’s recommended level.
CAUTION: Never open or remove the pressure
cap when engine is hot.
4 Look for leaking hoses, fittings, and connections. Tighten loose clamps.
5 Inspect condition of hoses. Cracked, mushy or
otherwise deteriorated hosesvshould be replaced.