1
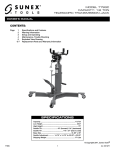
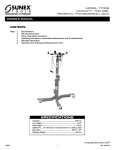
MODEL 7793B (Rev. E) CAPACITY: 1/2 TON TELESCOPIC TRANSMISSION JACK OWNER/USER RESPONSIBILITY The owner and/or user must have a thorough understanding of the manufacturer’s operating instructions and warnings before using the transmission jack. Personnel involved in the use and operation of equipment shall be careful, competent, trained, and qualified in the safe operation of the equipment and its proper use when servicing motor vehicles and their components. Warning information should be emphasized and understood. If the operator is not fluent in English, the manufacturer’s instructions and warnings shall be read to and discussed with the operator in the operator’s native language by the purchaser/owner, making sure that the operator comprehends its contents. Owner and/or user must study and maintain for future reference the manufacturer’s instructions and pertinent warning information. Owner and/or user is responsible for keeping all warning labels and instruction manua ls legible and intact. Replacement labels and literature are available from the manufacturer. INSPECTION Visual inspection should be made before each use of the transmission jack, checking for leaking hydraulic fluid and damaged, loose or missing parts. Each jack must be inspected by a manufacturer’s repair facility immediately if accidentally subjected to an abnormal load or shock. Any jack which appears to be damaged in any way, found to be badly worn, or operates abnormally MUST BE REMOVED FROM SERVICE until necessary repairs are made by a manufacturer’s authorized repair facility. It is recommended that an annual inspection of the jack be made by a manufacturer’s authorized repair facility and that any defective parts, decals or warning labels be replaced with manufacturer’s specified parts. A list of authorized repair facilities is available from the manufacturer. SETUP PLEASE REFER TO THE EXPLODED VIEW DRAWING IN THIS MANUAL IN ORDER TO IDENTIFY PARTS. 1. Place hydraulic unit in an upright position and bolt the (2) index #33 leg assemblies to the index #41 pump base using index #37 hex bolts, index #36 lock washers and index #35 flat washers as shown in the exploded view drawing on page 6. 2. Assemble the (2) index #40 locking caster assemblies and (2) index #34 non-locking casters to the ends of each index #33 leg as shown in the exploded view drawing, using the index #39 spring washers and index #38 nuts provided. 3. Secure the index #S20 bracket of the complete saddle assembly to the top of the index #6 secondary cylinder plunger with the index #S19 bolt. 4. Secure the (4) index #S02 fingers to the top of the index #S03 saddle plate using the index #S01 carriage bolts, index #S04 washers and index #S05 wing nuts as shown in the exploded view drawing on page 7. 5. Secure one end of the index #S28 chain to the index #S03 saddle plate with the index #S29 bolt, index #S27 washers and index #S26 nut as shown in the exploded view drawing. 6. Secure the index #S07 hook seat to the index #S03 saddle plate with the index #S24 washer and index #S25 nut as shown in the exploded view drawing. Feed the threaded end of the index #S06 hook through the hole in the index #S07 hook seat and secure it with the index #S08 wing nut. IMPORTANT! BEFORE USING... 7.Open reservoir vent screw index #26 that is located on the reservoir and below the product label by turning the screw counterclock wise two (2) full turns. NOTE: JACK WILL NOT OPERATE PROPERLY UNLESS THE VENT SCREW IS OPENED. If the jack has been used without first opening the reservoir vent screw or the jack has been handled or shipped in different positions, air may be trapped in the hydraulic system. An air trapped system is identified by insufficient incremental pump strokes and failure to extend the telescopic rams to maximum height. FOLLOW THESE INSTRUCTIONS TO PURGE AIR FROM THE SYSTEM: If the transmission jack is not able to raise the load or raises it very slowly, there may be air in the piston core that needs to be bled as follows: 1. Loosen the #26 bleeding bolt. 2. Loosen the M6x5 inner hexagon screw counter clockwise shown in Figure 1 on page 4. 3. Pump #47 foot pedal 2 or 3 times until you see oil coming out of screw hole. 4. Hold pressure on the #47 foot pedal and re-tighten the M6x5 inner hexagon screw clockwise at the same time. 5. Retighten the #26 bleeding bolt and #53 release valve. Then pump the #47 foot pedal to check correct function. If not functioning properly, repeat the process’s 1, 2, 3, 4 again. If the transmission jack can raise load but is not traveling smoothly, there may be air trapped in the second stage cylinder that needs to be bled as following; 1. Loosen the #26 bleeding bolt. 2. Tighten the release valve #53 clockwise and keep pumping the #47 foot pedal until the 2 stage cylinder rods fully extend. 3. Loosen the M8x10 inner hexagon screw counter clockwise shown in Figure 2 on page 4. 4. Pump #47 foot pedal 2 or 3 times until you see oil coming out of the screw hole. 5. Retighten the #26 bleeding bolt and M8x10 inner hexagon screw clockwise. 6. Loosen the release valve #53 counter clockwise to check that unit descends properly. If yes, retighten the release valve #53 clockwise and pump #47 foot pedal to check that it raises properly. If not, please repeat the process’s 1, 2, 3, 4, 5 again. 7793B Rev. E 3 rev. 7/23/15