1
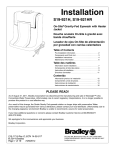
Installation
S19-921, S19-921H, S19-921HR
ON
Th
e
cle eye
anl
199 inewash
fi
sol 8, andss andstatio
uti
n
is
oveon levactivapropersho
r fou el ted soluld
r mois bel mo uti be vis
nth on
ual
nth ow
ly
To
s oldthe to level ly ins
re
, the15-miensureper pec
•
fil
AN
Dr
l
tan nut pro SI ted we
ain th
•
k mue fill per Sta ekl
Cle the e ey
st lin ope nda y for
•
an
tan e
be e,
rat rd
Rin the k com wa
ref or ion Z3
•
se
tan
sh
ille wh . Wh58.
Re the
k wit ple
1d. en
fill
tely tan
the en
Co the tank
h soa of k
sol the
nce
Co ntr tan thorou p
any
uti
and
on
unu
yountact ate k wit ghl
(K
h
r loc Bra it a y. hot wa sed
mi
al dley #S19ter. soluti
xtu
Bra Fix
on.
dle tur899 re of
y rep es inc pot
res Corp.ludes able
ent
con wa
ativ at 1-8
204
cen ter
e.
-497
00- tra and
BR te, Bra
AD cap dle
LE and y
Y
or liner)
U.S
cal .
. Pa
l
-S
IT
E
MA
IN
TE
NA
NC
E
On-Site® Gravity-Fed Eyewash and
optional Heater Jacket
ten
t No
. D4
38,
983
To
•
op
era
ON-
SI
Beg te
fi
autoin opeeye
mat rati wa
Hol
ical on
sh
and d eye ly by
acti pul unit
eye fort lids
ope vate ling
s h
the dow
See sim to ens n
k medulta urewith wat n the
neo
thu er
ical uslya com mb spra tray
CA
atte for plet s and y. . Thi
in UT
s acti
ntio a mine rins fore
ION
n imm imu e. fing
Allthe ope :
on
All
sho
self per nedDo
edia m of ow ers.
uld
not
-co son
tely 15 wat Rot
nta s mupos lean
afte min er toate
ine st itio
eye
on
d embe n. Dam
r use utes bath
s bac
the
.
.
ergtraine age eye
e bot
k
enc d
h
was
y eyein to uni
h
the
was prot matray
h. per y wh
res en
use ult.
204of
this
498
•
•
TE
OPE
Douche oculaire On-Site® à gravité
avec bande chauffante facultative
RA
TI
ON
Certif
Modeied
Z358. l
1-199
8
Lavador de ojos On-Site® de
alimentación por gravedad
Table of Contents
Pre-Installation Information ......................................2
Components and Parts List .......................................3
Installation Instructions..........................................4-5
Maintenance Information ..........................................6
Optional Heater Jacket Junction Box........................7
Retrofit Heater Jacket (S19-921HR)
Installation Instructions .......................................7
Pull
ON-SITEfi
To opera
te eye
wash
Table des matières
OPERAT
ION
• Begin
unit
operatio
action should n by pulling
the front
automa
• Hold
flap down
tically activate
eyelids
the water and out. This
and forth open with
spray.
to ensure thumbs and
eyes simulta
a comple
forefing
ers.
te rinse.
neously
• Seek
Allow waterRotate eyes back
for a minimu
medica
to
m
l attentio
n immedi of 15 minutes bathe both
.
ately after
CAUTI
use.
ON:
in the openedDo not lean
All person position. on the eye
Damag wash tray
self-con s must be trained
e to unit
when
tained
may result.
in the proper
emerge
ncy eyewas
use of this
WARN
h.
ING: Always
immed
iately after unplug
unit when
use.
empty.
Refill
Information avant installation ...................................8
Composantes et liste des pièces ................................9
Instructions d'installation ...................................10-11
Directives d'entretien...............................................12
Boîte de connexion de bande chauffante
en option ............................................................13
Instructions d'installation pour de bande
chauffante modification (S19-921HR) ..............13
EMER
GENCY
Eye W
ash
Certified
Model
Z358.1-1998
Contenido
Certified
Model
Z358.1-2004
215-1546 Rev. C; ECN 07-525
© 2007 Bradley Corporation
Page 1 of 19 9/12/07
Información previa a la instalación.........................14
Componentes y lista de piezas ................................15
Instrucciones de instalación ...............................16-17
Instrucciones de mantenimiento..............................18
Caja de conexiones para la camisa
calentadora opcional ..........................................19
Instrucciones de instalación para la camisa
calentadora modificación (S19-921HR) ............19
P.O. Box 309, Menomonee Falls, WI USA 53052-0309
PHONE 1-800-BRADLEY FAX (262) 251-5817
http://www.bradleycorp.com
S19-921, S19-921H, S19-921HR
Installation
Pre-Installation Information
Overview
This self-contained gravity-fed eyewash flushes eyes for 15 minutes at a minimum of 0.4 gallons/minute by using
only 7 gallons of water. It can be transported when empty but should be placed in a fixed location when completely
assembled and filled with fluid. The On-Site® complies with ANSI standard Z358.1-2004.
Components
Tank: Tank is made of transparent yellow polycarbonate.
Pedestal: Pedestal is made of opaque yellow polyethylene, with a black polyethylene pull-down arm.
Concentrate: Contents of the 8 oz. bottle of water preservative concentrate is mixed with 7 gallons of potable water
in the eyewash tank.
Wall Bracket: Wall bracket is made of stainless steel and is used for mounting the unit to the wall (optional).
Heater Jacket: Yellow insulated/waterproof heater jacket is made of 200-denier foam-backed nylon with clear vinyl
pocket. 121-watt tank heater and 60-watt tube heater are made of silicone rubber with PSA adhesive backing.
Thermostat is 75°F +/- 5°normal operation in series with 90°F +/- 5° high limit, manually reset thermostat.
WARNING
Installation
ON-SITE
The
eye
cleanliness
1998, wash
?
solution
and andstation
is
activated
propershould
over level
four is
solution
monthly be visually
below
months
level
To
to
old,the 15-minute
ensureper inspected
refill
the
ANSI
Drain the
tank
proper
weekly
Standard
mustfill
eye
Clean the
line, operation. for
tank
be
wash
Rinse the
or
Z358.1refilled.
tank completely
when
When
Refill the
tank
tank with
the
Concentrate
the
the
soap of
solution
Contact tank thoroughly. any
and
unused
with
your
hot
(Kit
Bradley
a mixture
local
water. solution.
#S19-899
Bradley
Fixtures
of
includes
potable
representative.
Corp.
MAINTENANC
E
204-497
U.S.
Patent
water
at concentrate,
1-800-BRADLEY
and
Bradley
cap
and
or liner).
call
No.
D438,983
To
ON-SITE
operate
Begin
eye
automatically
?
operation
wash
Hold
and eyelids
by
unit
activate
pulling
eyesforth
to open
Seek simultaneously
ensurewiththe down
water
the
medical
thumbs spray.
a complete
tray.
CAUTION:attention
This
for
and
in
a minimum
rinse.forefingers.action
Allthe opened
immediately Allow
persons Do
should
self-contained
not
of
position.
15 waterRotate
must lean
after minutes.to
eyes
on
be
bathe
use.
emergency
Damage
the
trained
back
eye
both
wash
in to unit
eyewash.
the
tray
proper
may
when
result.
use
OPERATION
204-498
of
this
Certified
Model
Z358.1-1998
Packing List
IS
TH
SIDE
UP
•
•
•
•
Read this installation manual completely to ensure proper installation, then keep
it with the emergency fixture. Compliance and conformity to drain requirements
and other local codes and ordinances is the responsibility of the installer.
Separate parts from packaging and make sure all parts are accounted for before
discarding any packaging material. If any parts are missing, do not begin
installation until you obtain the missing parts.
Emergency eye wash unit shall be placed in accessible locations that require no
more than ten seconds to reach and should be within a travel distance no greater
than 30.5 m (100 ft) from the hazard (ANSI Z358.1). It is recommended that a
waste container be placed under the eye wash unit during use/testing to collect
spent water. This will help keep the floor dry and provide easy waste disposal.
When drilling into tile, masonry or other materials which make installing wall
anchors difficult, be sure to wear safety goggles to prevent eye injuries.
Da
Da te
Da tum
te
Sig ned
Sig ned
ned
P.O
TES
. Box
DIE
ESS SEST THI
309
Tes AI
S
, Me
Rep t-op HEBGER UNI
Ven ort
nom
DO ÄT T EAC
1ST
dur til(e anyera
te MA
one
H
Tes ch )
val DAI WÖ WE
e
sig
Un wö ma ve( RE CHE EK
Fal
un ne t le
ters che lfun s)
ls,
NTL
rap en fon
WI
chr ntli ctio eac
ICH
por basctio
530
ns h
ift. ch
t imm. nne
ZU
immwe
Jeg im
51
S'il
ek
me
PRÜ
Tes
edi and
édi y à nt lich
tbe
FEN
Sig
ate
ate que des e Stö
trie
Un ned
.
ly. sig
me lqu val
n
Sig ter
nt. e ves run b prü
bel
g
cho
ne sch
ow
sof fen
rift
.
se cha
ort , bes
qui que
Da
me
ne sem ldetäti
Da te
va ain n. gt
Da te
pas e
te
Sig
fait et
R
Solvent-based cleaners may cause plastic parts to degrade which will affect their
performance. Review the materials listed in the "Components" section of this
installation manual with your cleaner's manufacturer prior to use.
P.O. BOX 309, MENOMONEE FALLS, WI 53052-0309 USA
TEL: 1-800-BRADLEY FAX: (262-251-5817)
http://www.bradleycorp.com
114-051
The inspection and testing results of this equipment should be recorded weekly
to verify proper operation. This equipment should be inspected annually to
ensure compliance with ANSI Z358.1. Keep the inspection tag with the eyewash.
Workers who may come in contact with potentially hazardous materials should
be trained regarding the placement and proper operation of emergency
equipment per ANSI Z358.1.
This product meets ANSI Z358.1-2004 as a self-contained “gravity-fed” eye wash.
All ANSI approved eye washes must provide a minimum 15-minute water flush
treatment at a minimum of 0.4 GPM.
For questions regarding the operation or installation of this product, visit
www.bradleycorp.com or call 1-800-BRADLEY. Product warranties may also be
found under ”Product Information” on our web site at www.bradleycorp.com.
2
9/12/07
Bradley Corporation • 215-1546 Rev. C; ECN 07-525
Installation
S19-921, S19-921H, S19-921HR
Components
TANK
(133-140)
Pull
ON-SITEfi
To opera
te eye
OPERAT
ION
wash unit
• Begin
operatio
action should n by pulling
the front
automa
• Hold
flap down
tically activate
eyelids
the water and out. This
and forth open with
spray.
to ensure thumbs and
eyes simulta
a comple
forefing
ers.
te rinse.
neously
• Seek
Allow waterRotate eyes back
for a minimu
medica
to
m
l attentio
n immedi of 15 minutes bathe both
.
ately after
CAUTI
use.
ON:
in the openedDo not lean
All person position on the eye
. Damag wash tray
s
must
self-con
tained be trained ine to unit may when
emerge
the proper result.
ncy eyewas
use of this
WARN
h.
ING: Always
immed
iately after unplug
unit when
use.
empty.
Refill
EYE WASH
PRESERVATIVE
(S19-865)
EMER
GENCY
Eye W
ash
Certified
Model
Z358.1-1998
CAP WITH HOLE
(136-036)
HEATER JACKET
(269-1627)
JUNCTION BOX
(S83-162)
P.O. BOX 309, MENOMONEE FALLS, WI 53052-0309 USA
TEL: 1-800-BRADLEY FAX: (262-251-5817)
http://www.bradleycorp.com
LINER
(269-1379)
qty. 3
114-051
SAFETY SIGN
(114-051)
HOOK-AND-LOOP
FASTENER KIT
(269-1781)
contains 5 sets
PIERCE
(152-064)
CHECK VALVE/GROMMET
REPLACEMENT KIT
(S45-2192)
R
P.O. Box 309, Menomonee Falls, WI 53051
TEST THIS UNIT EACH WEEK
DIESES GERÄT 1ST WÖCHENTLICH ZU PRÜFEN.
ESSAI HEBDOMADAIRE
Test-operate valve(s) each week and sign below.
Report any malfunctions immediately.
Ventil(e) wöchentlich im Testbetrieb prüfen, bestätigt
durch Unterschrift. Jegliche Störung sofort melden.
Test le fonctionnement des valves chaque semaine et
signe en bas. S'il y à quelque chose qui ne va pas fait
un rapport immédiatement.
Date
Datum
Date
Signed
Unterschrift
Signe
Date
Date
Date
Signed
Signed
Signed
GASKET
REPLACEMENT
KIT
(S45-2193)
TUBE
(269-1385)
INSPECTION
TAG
(204-421)
CLAMP
(146-072)
ARM
(133-133)
LATCH
REPLACEMENT
KIT
(S45-2194)
(includes latch,
clamp and
mounting rivets)
SPRAYHEAD ASSEMBLY
REPLACEMENT KIT
(S45-2195)
(includes screw, O-ring,
spider and filter) (part no.
for filter 269-1378)
PEDESTAL
(101-020)
Bradley Corporation • 215-1546 Rev. C; ECN 07-525
9/12/07
3
S19-921, S19-921H, S19-921HR
Installation
Installation
Step 1: Mount eye wash pedestal to wall (optional)
CAUTION: Eye wash station weighs 60 lbs when filled to capacity. Assistance from
another individual may be required to safely install the unit. Mounting bracket
screws and wall anchors must be strong
enough to support the filled unit.
Figure 1
1. To mount the pedestal to the wall, follow the procedure
outlined below:
• Secure the mounting bracket to the wall with screws and
wall anchors (provided by installer).
• Attach the pedestal to the mounting bracket at the handles
on the back of the unit (see Figure 1).
NOTE: When mounting the eye wash unit to the mounting
bracket, make sure the unit is level and the sprayheads are at
a height of 33-45" from the floor and situated at least 6"
from the wall or nearest obstruction (ANSI Z358.1-2004).
WALL
BRACKET
Step 2: Fill and mount tank
1. Pour clean, potable room temperature water
into the tank; continue pouring until the tank
Turn cap to close
CAP WITH HOLE
is 1/3 to 1/2 full.
2. Pour entire contents of the water preservative
LINER
(insert liner into cap before
bottle (supplied) into the eye wash tank.
attaching cap to tank)
3. Add clean, potable room temperature water to
the tank until the water level reaches the fill
line.
TANK
4. Insert one liner into the cap (with hole) and
attach the cap to the top of the tank (see
Figure 2a).
Figure 2a
5. OPTIONAL HEATER JACKET: Place the
pedestal into the heater jacket. For ease of
tank installation, loosen the jacket around the pedestal. Insert the tube from the drain hole at the
bottom of the pedestal through the hole in the back of the heater jacket. Drain hole location is shown
in Figure 2b on page 5.
NOTE FOR TANK INSTALLATION: To ensure proper installation, the tank should be placed on the
pedestal from the front of the unit.
6. Invert the tank and place it on top of the pedestal as shown in Figure 2b found on page 5. A slight
adjustment to the position of the tank may be required for proper placement of the tank on the
pedestal. The pierce on the pedestal will puncture a hole in the cap liner and allow solution to flow.
7. Raise the arm to snap fit in an upright position.
8. Secure the tank to the pedestal using the side tank clamps. Make sure the latches are pulled down tight
to the pedestal (see Figure 2b, page 5).
9. OPTIONAL HEATER JACKET: Insert the 5-pin connector into the mating socket on the junction box
and screw tight. Slide the heater jacket up to cover the tank and secure the jacket with the hook-andloop fasteners. Slide the arm into pocket of the jacket flap.
NOTE: After the tank is mounted to the pedestal, minor spillage could occur. Allow the fluid to stabilize
completely before inspecting the unit for leaks.
4
9/12/07
Bradley Corporation • 215-1546 Rev. C; ECN 07-525
Installation
S19-921, S19-921H, S19-921HR
TANK
CAP
CLAMP
PEDESTAL
LATCH
DRAIN HOLE
Figure 2b
Step 3: Test eye wash unit
1. After completing installation, test the eye wash station for
proper operation by pulling down the tray (see Figure 3).
Visually inspect the eye wash unit weekly for cleanliness
and proper solution level (per ANSI Standard Z358.1-2004).
When the water level drops below the 15-minute fill line,
the tank must be emptied and then refilled. To refill the eye
wash tank, follow the procedures outlined in Step 2 found
on page 4.
OPTIONAL UNIT WITH HEATER JACKET: Test the unit
by pulling the front flap down and all the way out. This
action should activate the water spray. Check the sprayheads
for proper water flow and look for possible water leakage
throughout the unit. Visually inspect all areas of the heater
jacket to verify proper operation of the heating element.
2. Attach the eye wash inspection tag (supplied) to the eye
wash unit. This tag is to be used for weekly inspection
documentation. Hook-and-loop fasteners are provided to
attach the tag to the unit.
3. If the eye wash unit is not working properly, remove it from
the hazard area and contact Bradley Corporation
immediately.
Bradley Corporation • 215-1546 Rev. C; ECN 07-525
Figure 3
9/12/07
5
S19-921, S19-921H, S19-921HR
Installation
Maintenance
WARNING: Water preservatives protect potable water from bacteria, fungi and algae growth
for up to four months. If a water preservative is not used with this eye wash, it
is recommended that the tank be cleaned weekly or as often as needed.
Infection, loss of vision or other serious injury may result from misuse. DO
NOT use expired, cloudy, colored or contaminated solution. DO NOT open
preservative bottle if safety seal is broken. DO NOT save unused solution.
Step 1: Inspect eye wash unit
1. Visually inspect the eye wash unit weekly for cleanliness and proper solution level (per ANSI
Standard Z358.1-2004).
2. Activate the eye wash unit each time the solution is replaced to ensure proper operation. If the unit
is not working properly, remove it from the hazard area and contact Bradley Corporation
immediately.
• Check the sprayheads’ water spray pattern for an even, continuous flow. The sprayheads are
attached to the arm with screws and can be detached from the tray for cleaning or obstruction
removal, if necessary, and reattached (use a 9/64" hex-head Allen wrench to remove and reinstall
the sprayheads).
• Check the water supply hose at the basin of the eye wash unit for cracks, leaks or wear.
• Check the entire unit for possible water leakage.
• Check the solution for contamination and replace with fresh solution, if necessary.
Step 2: Clean eye wash unit
1. Carefully remove the eye wash tank from the pedestal and drain the water solution from the tank
(dispose of the solution properly). For ease of draining, the pedestal has a drain hole which will
accept a 1/2" I.D. tube at the underside of the hole (tube supplied by others) (see Figure 2b on
page 5 for drain hole location).
2. Clean the inside of the tank using warm water and a mild soap product; rinse thoroughly.
3. Refill the eye wash tank following the procedures outlined in Step 2 found on page 4.
• To order additional bottles of potable water preservative, contact your Bradley representative or
local distributor and ask for Bradley On-Site® Refill Kit S19-899 (kit includes bottle of
preservative, cap and liners).
4. Reinstall the eye wash tank following the procedure outlined in Step 2 found on page 4.
To operate eye wash unit
1. Begin operation by pulling down the tray. OPTIONAL UNIT
WITH HEATER JACKET: pull the front flap down and all the
way out. This action should automatically activate the water
spray (Figure 4).
2. Hold eyelids open with thumbs and forefingers. Rotate eyes
back and forth to ensure a complete rinse. Allow water to bathe
both eyes simultaneously for a minimum of 15 minutes.
3. Seek medical attention immediately after use.
CAUTION:
6
Figure 4
Do not lean on the eye wash tray when in the
opened position. Damage to unit may result.
9/12/07
Bradley Corporation • 215-1546 Rev. C; ECN 07-525
Installation
S19-921, S19-921H, S19-921HR
Optional Heater Jacket Junction Box
LED Light
Green Light: an indication that the unit has power.
Amber Light: an indication that the heater is in operation and heating the unit. The light will be on
only while the heater is operating (heating the unit).
Red Light: an indication that the thermostat needs to be reset. To reset the thermostat, follow the
procedure outlined below.
a. Remove the top of the heater jacket.
b. Find the “reset” button on the thermostat (located on the tank) and press the button.
• After pressing the button, check to be sure that the red light is off and that the green light is
on (the amber light will be on only if the heater is operating). If the red light is still on,
press the “reset” button again.
c. Replace the top of the heater jacket.
Retrofit Heater Jacket Installation Instructions (S19-921HR)
1. Remove the backing from the heater pad and place it onto the pedestal as shown in Figure 5.
2. Continue with the heater jacket installation instructions on page 4.
POSITION HEATER PAD
EVENLY AROUND DRAIN HOLE.
DO NOT BLOCK DRAIN HOLE.
TOP VIEW OF PEDESTAL
Figure 5
Bradley Corporation • 215-1546 Rev. C; ECN 07-525
9/12/07
7
S19-921, S19-921H, S19-921HR
Installation
Information avant installation
Description
La On-Site® est une douche oculaire à gravité d'un seul bloc. Elle permet un traitement à grande eau à un rythme minimum de
1,5 litres (0,4 gallons) par minute, n'utilisant que 26,5 litres (7 gallons) d'eau. Portative lorsque vide, cette douche oculaire doit
être fixe lorsqu'elle est entièrement assemblée et remplie de liquide. La On-Site® est conforme à la norme ANSI Z358.1-2004.
Composantes
Réservoir : Le réservoir est fabriqué en polycarbonate transparent jaune.
Socle : Le socle est fabriqué en polyethylène opaque jaune, avec un manchon rabattable en polyethylène noir.
Concentré : Le contenu de la bouteille de 235 ml (8 oz) de préservatif pour l'eau est mélangé à 26,5 litres
(7 gallons) d'eau potable dans le réservoir de la douche oculaire.
Support mural : Le support mural est fabriqué d'acier inoxydable et est utilisé pour installer l'unité de douche oculaire au mur
(en option).
Bande chauffante : La bande chauffante isolée et étanche de couleur jaune est fabriquée de nylon à doublure de mousse de 200
denier, avec logement en vinyle transparent. Le chauffe-réservoir de 121 watt et le chauffe-tube de 60 watt sont fabriqués en
caoutchouc de silicone, avec endos adhésif autocollant. En mode d'opération normal, le thermostat à réenclenchement manuel
indique 24ºC ±2,5ºC (75ºF ±5º) en série, avec limite à 32ºC ±2,5ºC (90ºF ±5º).
AVERTISSEMENT
Installation
The
ON-SITE
eye
cleanliness
1998, wash
?
solution
and andstation
is
activated
propershould
over level
four is
solution
monthly be visually
below
months
level
To
to
old,the 15-minute
ensureper inspected
refill
the
ANSI
Drain the
tank
proper
weekly
Standard
mustfill
eye
Clean the
line, operation. for
tank
be
wash
Rinse the
or
Z358.1refilled.
tank completely
when
When
Refill the
tank
tank with
the
Concentrate
the
the
soap of
solution
Contact tank thoroughly. any
and
unused
with
your
hot
(Kit
Bradley
a mixture
local
water. solution.
#S19-899
Bradley
Fixtures
of
includes
potable
representative.
Corp.
water
at concentrate,
1-800-BRADLEY
and
Bradley
cap
and
or liner).
U.S.
call
MAINTENANC
E
204-497
Patent
No.
D438,983
To
ON-SITE
operate
Begin
eye
automatically
?
operation
wash
Hold
and eyelids
by
unit
activate
pulling
eyesforth
to open
Seek simultaneously
ensurewiththe down
water
the
medical
thumbs spray.
a complete
tray.
CAUTION:attention
This
for
and
in
a minimum
rinse.forefingers.action
Allthe opened
immediately Allow
persons Do
should
self-contained
not
of
position.
15 waterRotate
must lean
after minutes.to
eyes
on
be
bathe
use.
emergency
Damage
the
trained
back
eye
both
wash
in to unit
eyewash.
the
tray
proper
may
when
result.
use
OPERATION
204-498
of
this
Certified
Model
Z358.1-1998
Packing List
IS
TH
SIDE
UP
•
•
•
•
Lire ce manuel d'installation dans son intégralité pour garantir une installation appropriée.
Une fois celle-ci terminée, conserver ce manuel près de la douche de secours. L'installateur
est responsable de la conformité de l'installation aux codes pour des drain et codes et
règlements en vigueur.
Assurez-vous que toutes les pièces sont incluses dans l’emballage et qu’il n’en manque
aucune avant de jeter l’emballage. Ne commencez pas l’assemblage avant de recevoir les
pièces manquantes.
L'unité de douche oculaire de secours doit être placée dans un lieu facilement accessible,
pouvant être atteint en moins de dix secondes et située à moins de 30,5 mètres (100 pieds)
de distance du risque (ANSI Z358.1). On recommande de placer un conteneur sous l'unité de
douche oculaire durant l'utilisation ou les tests, afin de recueillir l'eau utilisée. Le plancher
restera au sec et l'enlèvement des rebuts sera plus facile.
En forant la tuile, la maçonnerie ou les autres matériaux qui rendent l'installation d'un
d'ancrage mural plus difficile, porter des lunettes de sécurité pour éviter les blessures aux
yeux.
Da
Da te
Da tum
te
Sig ned
Sig ned
ned
P.O
TES
. Box
DIE
ESS SEST THI
309
Tes AI
S
, Me
Rep t-op HEBGER UNI
Ven ort
nom
DO ÄT T EAC
1ST
dur til(e anyera
te MA
one
H
Tes ch )
val DAI WÖ WE
e
sig
Un wö ma ve( RE CHE EK
Fal
un ne t le
ters che lfun s)
ls,
NTL
rap en fon
WI
chr ntli ctio eac
ICH
por basctio
530
ns h
ift. ch
t imm. nne
ZU
immwe
Jeg im
51
S'il
ek
me
PRÜ
Tes
edi and
édi y à nt lich
tbe
FEN
Sig
ate
ate que des e Stö
trie
Un ned
.
ly. sig
me lqu val
n
Sig ter
nt. e ves run b prü
bel
g
cho
ne sch
ow
sof fen
rift
.
se cha
ort , bes
qui que
Da
me
ne sem ldetäti
Da te
va ain n. gt
Da te
pas e
te
Sig
fait et
R
Les produits nettoyants à base de solvant peuvent causer une dégradation des pièces en
plastique et altérer leur fonctionnement. Examiner les matières figurant dans la section «
Composants » de ce manuel d'installation avec le fabricant du produit nettoyant avant emploi.
P.O. BOX 309, MENOMONEE FALLS, WI 53052-0309 USA
TEL: 1-800-BRADLEY FAX: (262-251-5817)
http://www.bradleycorp.com
Inspectez et testez cet équipement une fois par semaine pour en assurer le bon
fonctionement. Notez les dates d’inspection. Ce matériel doit être inspecté une fois par an
pour assurer sa conformité à la norme ANSI Z358.1. Conserver l'étiquette d'inspection près
de la douche de secours.
Les ouvriers susceptibles d'entrer en contact avec des matières potentiellement
dangereuses doivent recevoir une formation sur la mise en place et le bon fonctionnement
du matériel d'urgence conformément à la norme ANSI Z358.1.
114-051
Ce produit est conforme à la norme ANSI Z358.1-2004, comme douche oculaire à gravité
d'un seul bloc. Toute douche oculaire approuvée par le ANSI doit fournir un traitement à
grande eau d'une durée minimum de 15 minutes, à un rythme minimum de 1,5 litres (0,4
gallons) par minute.
Pour toute question concernant le fonctionnement ou l'installation de ce produit, consulter le
site www.bradleycorp.com ou appeler le 1-800-BRADLEY. Les garanties de produits figurent
sous la rubrique « Informations techniques » sur notre site Internet à www.bradleycorp.com.
8
9/12/07
Bradley Corporation • 215-1546 Rev. C; ECN 07-525
Installation
S19-921, S19-921H, S19-921HR
Composantes
RÉSERVOIR
133-140)
Pull
ON-SITEfi
To opera
te eye
BOUTEILLE DE
PRÉSERVATIF
(S19-865)
OPERAT
ION
wash unit
• Begin
operatio
action should n by pulling
the front
automa
• Hold
flap down
tically activate
eyelids
the water and out. This
and forth open with
spray.
to ensure thumbs and
eyes simulta
a comple
forefing
ers.
te rinse.
neously
• Seek
Allow waterRotate eyes back
for a minimu
medical
to
m
attentio
n immedi of 15 minutes bathe both
.
ately after
CAUTI
use.
ON:
in the openedDo not lean
All person position on the eye
. Damag wash tray
self-con s must be trained
e to unit
when
tained
may result.
in the proper
emerge
ncy eyewas
use of this
WARN
h.
ING: Always
immed
iately after unplug
unit when
use.
empty.
Refill
EMER
GENCY
Eye W
ash
Certified
Model
Z358.1-1998
BOUCHON PERFORÉ
(136-036)
P.O. BOX 309, MENOMONEE FALLS, WI 53052-0309 USA
TEL: 1-800-BRADLEY FAX: (262-251-5817)
http://www.bradleycorp.com
COUPE-DÉBIT
(269-1379)
qté. 3
114-051
ENSEIGNE DE
SÉCURITÉ
(114-051)
PAQUET D’ATTACHES DE TISSU POUR
ATTACHER L’ETIQUETTE Á L’UNITÉ
(269-1781)
contient 5 ensembles
R
P.O. Box 309, Menomonee Falls, WI 53051
BANDE CHAUFFANTE
(269-1627)
BOÎTE DE CONNEXION
(S83-162)
PERFORATEUR
(152-064)
PAQUET D’VANNES ET
L’BOUCHONS DE RECHANGE
(S45-2192)
TEST THIS UNIT EACH WEEK
DIESES GERÄT 1ST WÖCHENTLICH ZU PRÜFEN.
ESSAI HEBDOMADAIRE
Test-operate valve(s) each week and sign below.
Report any malfunctions immediately.
Ventil(e) wöchentlich im Testbetrieb prüfen, bestätigt
durch Unterschrift. Jegliche Störung sofort melden.
Test le fonctionnement des valves chaque semaine et
signe en bas. S'il y à quelque chose qui ne va pas fait
un rapport immédiatement.
Date
Datum
Date
Signed
Unterschrift
Signe
Date
Date
Date
Signed
Signed
Signed
PAQUET D’JOINT
DE RECHANGE
(S45-2193)
TUBE
(269-1385)
PINCE
(146-072)
ÉTIQUETTE
D’URGENCE
(204-421)
MANCHON
(133-133)
PAQUET
D’ATTACHE DE
RECHANGE
(S45-2194)
PAQUET D’GICLEURS
DE RECHANGE
(S45-2195)
(avec vis, bague,
pieuvre et filtre) (pièce
nº 269-1378 de filtre)
SOCLE
(101-020)
Bradley Corporation • 215-1546 Rev. C; ECN 07-525
9/12/07
9
S19-921, S19-921H, S19-921HR
Installation
Installation
Étape 1 : Installer la douche oculaire au mur (en option)
ATTENTION : Le poste de douche oculaire a un poids de 27,5 kg (60 livres) lorsque plein. L'aide d'une
autre personne peut s'avérer nécessaire pour installer l'unité en toute sécurité. Les supports et
l'ancrage mural doivent être assez solide pour supporter l'unité lorsqu'elle est pleine.
1. Pour installer le socle au mur, suivre les procédures suivantes :
• Installer le support de douche au mur, à l'aide des vis et de l'ancrage mural (fournis par
l'installateur).
• Fixer le socle au support, avec les crochets pour
installation murale, à l'arrière de l'unité (voir Figure 1).
NOTE : En fixant la douche oculaire au support mural,
s'assurer que les gicleurs sont à une hauteur située entre 84 et
114 cm (33 et 45 po) du plancher et à au moins 15,5 cm (6 po)
du mur ou de l'obstruction la plus près (ANSI Z358-1-2004).
Figure 1
Étape 2 : Remplir et installer le réservoir
1. Remplir le réservoir avec de l'eau potable à température
SUPPORT
MURAL
ambiante, et arrêter entre le tiers et la moitié environ.
2. Verser le contenu en entier de la bouteille
de préservatif pour l'eau (fourni) dans le
Tourner le bouchon
réservoir de la douche oculaire.
BOUCHON PERFORÉ
pour fermer
3. Continuer de remplir le réservoir avec de
l'eau potable à température ambiante,
COUPE-DÉBIT
(insérer le coupe-débit avant de
jusqu'à ce qu'il atteigne la “pleine” ligne.
fixer le bouchon sur le réservoir)
4. Insérer le coupe-débit dans le bouchon
perforé et visser le bouchon sur le réservoir RÉSERVOIR
(voir Figure 2a).
5. BANDE CHAUFFANTE FACULTATIVE :
Placez le socle dans la bande chauffante.
Pour simplifier l'accès lors de l'installation,
Figure 2a
desserrer la bande chauffante facultative
autour du socle. Insérer le tube de trou de
drainage au fond du socle par le trou dans
l'arrière de la bande chauffante. Le trou de drainage est indiqué sur la Figure 2b, page 10.
NOTE RELATIVE À L'INSTALLATION DU RÉSERVOIR : Pour assurer une installation appropriée, le
réservoir doit être placé sur le socle du devant de l'unité.
6 Inverser le réservoir sur le socle, tel qu'indiqué sur la Figure 2b de la page 10. Il faudra peut-être
procéder à un léger réglage de la position du réservoir pour obtenir un bon emplacement de ce dernier
sur le socle. Le perforateur du socle perforera le coupe-débit du bouchon, permettant au mélange de
s'écouler.
7. Relever le manchon pour l'enclencher en position relevé.
8. Aux côté pinces, fixer le réservoir au socle (fixez les attaches au socle, tel qu'indiqué sur la Figure 2b,
page 10).
9. BANDE CHAUFFANTE FACULTATIVE : Insérer le connecteur à 5 broches dans l'embase
homologue de la boîte de jonction, et serrer à fond. Glissez la bande chauffante de réchauffeur jusqu'à
le réservoir et fixez la bande avec les attaches de crochet-et-boucle. Glisser la tige dans le logement du
plateau de la bande.
NOTE : Lorsque le réservoir est installé sur le socle, une légère fuite peut se produire. Laisser le liquide se
stabiliser complètement avant de procéder à la vérification des fuites sur l'unité.
10
9/12/07
Bradley Corporation • 215-1546 Rev. C; ECN 07-525
Installation
S19-921, S19-921H, S19-921HR
RÉSERVOIR
BOUCHON
PINCE
SOCLE
ATTACHE
TROU DE DRAINAGE
Figure 2b
Étape 3 : Tester la douche oculaire
1. Une vérification du fonctionnement de la douche oculaire
peut être fait en abaissant le plateau (voir Figure 3).
Inspection visuelle hebdomadaire de la douche oculaire pour
la propreté et pour le niveau approprié de mélange (selon la
norme ANSI Z358.1-2004). Lorsque le niveau de solution est
en deçà de la ligne de remplissage de 15 minutes, le réservoir
doit être vidé et rempli à nouveau. Remplir le réservoir de la
douche oculaire selon les directives décrites à l'étape 2 de la
page 9.
UNITÉ AVEC BANDE CHAUFFANTE FACULTATIVE :
Tester l'unité en abaissant le plateau avant. Cette action
activera les gicleurs d'eau. Vérifier le débit d'eau des gicleurs
et examiner si l'unité a des fuites. Inspectez visuellement la
bande chauffante pour vérifier l'opération appropriée de
l'élément de chauffe.
2. Attacher l'étiquette d'inspection (étiquette incluse) à la
douche oculaire. Cette étiquette sera utilisée comme
documentation hebdomadaire. Des attaches sont fournies pour
attacher l'étiquette à l'unité.
3. En cas de mauvais fonctionnement de la douche oculaire,
l'enlever de la zone à risques et contacter immédiatement
Bradley Corporation.
Bradley Corporation • 215-1546 Rev. C; ECN 07-525
Figure 3
9/12/07
11
S19-921, S19-921H, S19-921HR
Installation
Entretien
AVERTISSEMENT : Les préservatifs pour l'eau protègent l'eau potable contre les bactéries,
les mycoses et les pousses d'algues jusqu'à 4 mois. Si un préservatif n'est pas utilisé avec
la douche oculaire, nettoyer le réservoir hebdomadairement ou aussi souvent que
nécessaire. Des infections, la perte de la vision ou autres blessures sérieuses peuvent
résulter d'une mauvaise utilisation de la douche. NE PAS utiliser un mélange passé date,
trouble, coloré ou souillé. NE PAS ouvrir la bouteille de préservatif si le sceau de sécurité
est brisé. NE PAS conserver les mélanges non utilisés.
Étape 1 : Inspection de la douche oculaire
1. Inspection visuelle hebdomadaire de la douche oculaire pour la propreté et pour le niveau approprié de
mélange (selon la norme ANSI Z358.1-2004).
2. Faire fonctionner la douche oculaire chaque fois que le mélange est remplacé, pour s'assurer de son
bon fonctionnement. En cas de mauvais fonctionnement de la douche oculaire, l'enlever de la zone à
risques et contacter immédiatement Bradley Corporation.
• Vérifier si le jet d'eau des gicleurs est uniforme, avec un débit régulier. Les gicleurs sont reliés au
manchon par des vis et si nécessaire, ils peuvent être enlevés pour les nettoyer ou enlever les
obstructions, puis réinstallés (utiliser une clé Allen hexagonale 9/64" pour enlever et remettre les
gicleurs en place).
• Examiner le boyau d'approvisionnement en eau du bassin, pour déceler les fissures, les fuites ou l'usure.
• Examiner l'unité en entier pour déceler les fuites d'eau possible.
• Examiner le mélange afin de savoir s'il est contaminé, le remplacer avec un nouveau mélange
si nécessaire.
Étape 2 : Nettoyage de la douche oculaire
1. Enlever doucement le réservoir de la douche oculaire de son socle et drainer le mélange d'eau du
réservoir (disposer du mélange de façon appropriée). Pour faciliter le drainage, le socle a un trou de
drainage et un boyau de 1,2 cm (1/2") peut être relié sous le côté du trou (boyau non fourni par
Bradley) (voir l'emplacement du trou de drainage à la Figure 2b sur la page 10).
2. Nettoyer l'intérieur du réservoir avec de l'eau chaude et un savon doux; rincer complètement.
3. Remplir le réservoir de la douche oculaire selon les directives décrites à l'étape 2 de la page 9.
• Pour commander des bouteilles de préservatif pour l'eau supplémentaires, contacter votre représentant
Bradley ou un distributeur local et demander la trousse de remplissage On-Site® S19-899 de
Bradley (comprend le préservatif, bouchon et coupe-débit).
4. Réinstaller le réservoir de la douche oculaire selon les directives décrites à l'étape 2 de la page 9.
Pour faire fonctionner la douche oculaire
1. Débuter en abaissant le plateau. UNITÉ AVEC BANDE CHAUFFANTE FACULTATIVE : Abaisser
le plateau avant. Cette action devrait activer les jets d'eau
(Figure 4).
Figure 4
2. Garder les paupières ouvertes, à l'aide du pouce et de l'index.
Bouger les yeux en tous sens pour assurer un rinçage complet.
Laisser l'eau baigner les deux yeux simultanément pendant au
moins 15 minutes.
3. Voir un médecin immédiatement après utilisation.
ATTENTION :
12
Ne pas s'appuyer sur la douche oculaire
pendant son fonctionnement. Des
dommages pourraient en résulter.
9/12/07
Bradley Corporation • 215-1546 Rev. C; ECN 07-525
Installation
S19-921, S19-921H, S19-921HR
Boîte de connexion de bande chauffante en option
DEL
Voyant vert : indique que l'unité est sous tension.
Voyant jaune : indique que le chauffage fonctionne et chauffe l’unité de douche oculaire. Le voyant
ne sera allumé que lorsque le chauffage fonctionne (et chauffe l’unité de douche oculaire).
Voyant rouge : indique que le thermostat doit être réenclenché. Pour réenclencher le thermostat,
suivre la procédure indiquée ci-dessous.
a. Retirer le dessus de la bande chauffante.
b. Trouver le bouton de réenclenchement sur le thermostat et appuyer sur le bouton.
• Une fois le bouton enfoncé, s'assurer que le voyant rouge est éteint et que le voyant vert est
allumé (le voyant jaune ne sera allumé que lorsque le chauffage fonctionne). Si le voyant
rouge est toujours allumé, appuyer de nouveau sur le bouton de réenclenchement.
c. Remettre le dessus de la bande chauffante en place.
Instructions d'installation pour de bande chauffante modification (S19-921HR)
1. Enlevez le papier de la tampon du chauffante et placez la tampon sur le socle (Figure 5).
2.Continuez les instructions d'installation pour de bande chauffante de la page 10.
Placez le
tampon du
chauffante
POSITION
HEATER
PAD
même
autour
du trouDRAIN
de drainage.
EVENLY
AROUND
HOLE.
DO NOT
BLOCK
HOLE.
Ne bloquez
pas
le trouDRAIN
de drainage.
vue VIEW
supérieure
de socle
TOP
OF PEDESTAL
Figure 5
Bradley Corporation • 215-1546 Rev. C; ECN 07-525
9/12/07
13
S19-921, S19-921H, S19-921HR
Installation
Información previa a la instalación
Generalidades
El lavador de ojos On-Site® es un lavador de ojos portátil, integral de alimentación por gravedad. Lava los ojos durante 15
minutos con un mínimo de 1,5 litros (0,4 galones) por minuto usando solamente 26,5 litros (7 galones) de agua. Se puede
transportar vacía, pero se debe colocar en una posición fija una vez armada y llena de fluido. El lavador de ojos On-Site®
satiface la norma ANSI Z358.1-2004.
Componentes
Tanque: El tanque está hecho de policarbonato amarillo transparente.
Pedestal: El pedestal está hecho de polietileno amarillo opaco, con una palanca que se empuja hacia abajo, de polietileno negra.
Concentrado: El contenido de la botella de 235 ml (8 oz) del preservativo para el agua se mezcla con 26,5 litros (7 galones) de
agua potable en el tanque del lavador de ojos.
Soporte de pared: El soporte de pared está hecho de acero inoxidable y se usa para montar la unidad lavadora de ojos en la
pared (opcional).
Camisa calentadora: La camisa calentadora impermeable y aislada de color amarillo está fabricada de nilón con forro de
espuma de denier 200 con un bolsillo de vinilo transparente. El calentador del tanque de 121 vatios y el calentador del tubo de 60
vatios están fabricados de caucho de silicona con un respaldo adhesivo sensible a la presión. En el modo de operación normal, el
termostato de restablecimiento manual indica 24ºC ±2,5ºC (75ºF ±5º) en serie, con un límite superior de 32ºC ±2,5ºC (90ºF ±5º).
ADVERTENCIA
Installation
ON-SITE
The
eye
cleanliness
1998, wash
?
solution
and andstation
is
activated
propershould
over level
four is
solution
monthly be visually
below
months
level
To
to
old,the 15-minute
ensureper inspected
refill
the
ANSI
Drain the
tank
proper
weekly
Standard
mustfill
eye
Clean the
line, operation. for
tank
be
wash
Rinse the
or
Z358.1refilled.
tank completely
when
When
Refill the
tank
tank with
the
Concentrate
the
the
soap of
solution
Contact tank thoroughly. any
and
unused
with
your
hot
(Kit
Bradley
a mixture
local
water. solution.
#S19-899
Bradley
Fixtures
of
includes
potable
representative.
Corp.
MAINTENANC
E
204-497
U.S.
Patent
water
at concentrate,
1-800-BRADLEY
and
Bradley
cap
and
or liner).
call
No.
D438,983
To
ON-SITE
operate
Begin
eye
automatically
?
operation
wash
Hold
and eyelids
by
unit
activate
pulling
eyesforth
to open
Seek simultaneously
ensurewiththe down
water
the
medical
thumbs spray.
a complete
tray.
CAUTION:attention
This
for
and
in
a minimum
rinse.forefingers.action
Allthe opened
immediately Allow
persons Do
should
self-contained
not
of
position.
15 waterRotate
must lean
after minutes.to
eyes
on
be
bathe
use.
emergency
Damage
the
trained
back
eye
both
wash
in to unit
eyewash.
the
tray
proper
may
when
result.
use
OPERATION
204-498
of
this
Certified
Model
Z358.1-1998
Packing List
IS
TH
SIDE
UP
•
•
•
•
Lea en su totalidad este manual de instalación para garantizar una instalación adecuada. Una
vez que termine la instalación, mantenga este manual con la unidad de emergencia. Es
responsabilidad de quien instale el equipo cumplir con los códigos para desagüe y otra
códigos y ordenanzas locales.
Separar todas las piezas del material de embalaje y asegurarse que todas las piezas estén
incluídas antes de desechar cualquier material de embalaje. Si faltase alguna pieza, no
intentar instalar la unidad combinada Bradley hasta obtener las piezas faltantes.
La unidad lavadora de ojos de emergencia debe estar localizada en un lugar accesible que
no requiera más de 10 segundos para llegar allí y debe estar a una distancia no mayor de
30,5 m (100 pies) del lugar de riesgo (ANSI Z358.1). Se recomienda que un envase de
desechos se coloque debajo de la unidad lavadora de ojos, cuando se usa o se prueba, para
recolectar el agua que se usó. Esto ayudará a mantener el piso seco y proporciona un fácil
manejo de los desechos.
Al usar el taladro para perforar superficies de azulejos, de mampostería u otros materiales
que hagan difícil la instalación de los pernos de anclaje en la pared, asegúrese de usar gafas
de seguridad para prevenir lesiones de los ojos.
Dat
Dat e
Dat um
e
Sig ned
Sig ned
ned
P.O
TES
. Box
DIE
ESS SEST THI
309
Tes AI
S
, Men
Rep t-op HEBGER UNI
Ven ort
DOMÄT T EAC
om
1ST
dur til(e anyera
te
one
ADA
H
Tes ch )
WÖ WE
valv
e
sig
IRE CHE EK
Unt wöc ma
Fall
un ne t le
ers hen lfun e(s
s,
NTL
rap en fon
WI
chr tlic ctio ) eac
ICH
por basctio
530
ns h
ift. h
t imm. nne
ZU
immwee
Jeg im
51
S'il
me
PRÜ
Tes
edi k and
édi y à nt lich
tbe
FEN
Sig
ate
ate que des e Stö
trie
Un ned
.
ly. sig
me lqu valv
n
run b
Sig ters
nt. e
bel
g prü
cho es
ne chr
ow.
sof fen
se cha
ift
ort , bes
qui que
Dat
me
ne sem ldetäti
Dat e
va ain n. gt
Dat e
pas e
e
Sig
fait et
R
Los limpiadores basados en solventes podría causar que las piezas de plástico se degraden,
lo cual podría afectar su desempeño. Revise los materiales indicados en la sección
"Componentes" de este manual de instalación con su fabricante de limpiadores antes de usar.
P.O. BOX 309, MENOMONEE FALLS, WI 53052-0309 USA
TEL: 1-800-BRADLEY FAX: (262-251-5817)
http://www.bradleycorp.com
114-051
Este equipo se debe inspeccionar, probar y anotar semanalmente para mantener un
funcionamiento adecuado. Se debe revisar este equipo anualmente para asegurarse de que
cumpla con la norma ANSI Z358.1. Mantenga la etiqueta de inspección con la unidad de
emergencia.
Los trabajadores que puedan tener contacto con materiales potencialmente peligrosos
deben recibir capacitación sobre la ubicación y operación adecuada de los equipos de
emergencia en conformidad con la norma ANSI Z358.1.
Este producto satiface la norma ANSI Z358.1-2004 para los lavadores de ojos, integrales y
alimentados por gravedad. Todos los lavadores de ojos aprobados por ANSI tienen que
proveer un tratamiento de lavado con agua durante un mínimo de 15 minutos con un flujo
mínimo de 1,5 litros (0,4 galones) por minuto.
Para consultas sobre la operación o instalación de este producto, visite
www.bradleycorp.com o llame al 1-800-BRADLEY. Las garantías del producto se pueden
encontrar en "Información del producto" o en nuestro sitio Web, www.bradleycorp.com.
14
9/12/07
Bradley Corporation • 215-1546 Rev. C; ECN 07-525
Installation
S19-921, S19-921H, S19-921HR
Componentes
TANQUE
133-140)
Pull
ON-SITEfi
To opera
te eye
BOTELLA DEL
PRESERVATIVO
(S19-865)
OPERAT
ION
wash unit
• Begin
operatio
action should n by pulling
the front
automa
• Hold
flap down
tically activate
eyelids
the water and out. This
and forth open with
spray.
to ensure thumbs and
eyes simulta
a comple
forefing
ers.
te rinse.
neously
• Seek
Allow waterRotate eyes back
for a minimu
medica
to
m
l attentio
n immedi of 15 minutes bathe both
.
ately after
CAUTI
use.
ON:
in the openedDo not lean
All person position on the eye
. Damag wash tray
self-con s must be trained
e to unit
when
tained
may result.
in the proper
emerge
ncy eyewas
use of this
WARN
h.
ING: Always
immed
iately after unplug
unit when
use.
empty.
Refill
EMER
GENCY
Eye W
ash
Certified
Model
Z358.1-1998
TAPA PERFORADA
(136-036)
contiene cinco ganchos y
cinco lazos
P.O. BOX 309, MENOMONEE FALLS, WI 53052-0309 USA
TEL: 1-800-BRADLEY FAX: (262-251-5817)
http://www.bradleycorp.com
114-051
TAPAFLUJO
(269-1379)
ctd: 3
R
P.O. Box 309, Menomonee Falls, WI 53051
TEST THIS UNIT EACH WEEK
DIESES GERÄT 1ST WÖCHENTLICH ZU PRÜFEN.
ESSAI HEBDOMADAIRE
Test-operate valve(s) each week and sign below.
Report any malfunctions immediately.
LETRERO DE
SEGURIDAD
(114-051)
PAQUETE DE SUJETADORES DE LA TELA
PARA ASOCIAR LA ETIQUETA A LA UNIDAD
(269-1781)
contiene 5 conjuntos
CAMISA CALENTADORA
(269-1627)
CAJA DE CONEXIONES
(S83-162)
PERFORADOR
(152-064)
PAQUETE DE VÁLVULA Y
TAPÓN DEL REEMPLAZO
(S45-2192)
Ventil(e) wöchentlich im Testbetrieb prüfen, bestätigt
durch Unterschrift. Jegliche Störung sofort melden.
Test le fonctionnement des valves chaque semaine et
signe en bas. S'il y à quelque chose qui ne va pas fait
un rapport immédiatement.
Date
Datum
Date
Signed
Unterschrift
Signe
Date
Date
Date
Signed
Signed
Signed
PAQUETE DE
JUNTA DEL
REEMPLAZO
(S45-2193)
TUBO
(269-1385)
ÉTIQUETA DE
EMERGENCIA
(204-421)
ABRAZADERA
(146-072)
PALANCA
(133-133)
PAQUETE DEL
PESTILLO DEL
REEMPLAZO
(269-1782)
PAQUETE DE ÉTIQUETAS
TRADUCIDAS
(S45-1798)
PAQUETE DE LOS ROCIADORES
DEL REEMPLAZO
(S45-2195)
(con tornillo, arosello, disco
perforado y filtro) (pieza nº 2691378 del filtro)
PEDESTAL
(101-020)
Bradley Corporation • 215-1546 Rev. C; ECN 07-525
9/12/07
15
S19-921, S19-921H, S19-921HR
Installation
Instalación
Paso 1: Montaje del pedestal del lavador de ojos a la pared (opcional)
PRECAUCION: La estación lavadora de ojos pesa 27,5 kg (60 lbs) cuando está completamente llena.
La ayuda de otra persona puede ser necesaria para poder instalar la unidad de manera segura.
Los tornillos y los pernos de anclaje del soporte de pared deben ser lo suficientemente fuertes
para soportar el peso de la unidad cuando esté totalmente llena.
1. Para montar el pedestal a la pared, siga el procedimiento siguiente:
• Fije el soporte de montaje a la pared con tornillos y pernos
de anclaje (provistos por el instalador).
• Enganche el pedestal por las ranuras de montaje que se
encuentran en la parte posterior de la unidad al soporte de
montaje en la pared (vea Figura 1).
NOTA: Al montar el lavador de ojos en el soporte de montaje,
asegúrese de que los rociadores se encuentren a una altura de 84114 cm (33-45 pulg.) del piso y situados a una distancia mínima de
15,5 cm (6 pulg.) de la pared o del obstáculo más cercano (ANSI
Z358.1-2004).
Paso 2: Llenado y montaje del tanque
Figura 1
SOPORTE
DE PARED
1. Vierta agua potable y limpia a temperatura
ambiente dentro del tanque; continúe
Gire la tapa para cerrar
TAPA PERFORADA
vertiendo agua hasta que llene el tanque hasta
un 30% ó 50% de su capacidad.
TAPAFLUJO
2. Vierta todo el contenido de la botella del
(inserte el tapaflujo dentro de la
tapa antes de colocarle la tapa al
preservativo para el agua (incluída) en el
tanque)
tanque del lavador de ojos.
3. Vierta más agua potable y limpia a
TANQUE
temperatura ambiente en el tanque hasta que
el agua llegue al la línea "lleno."
4. Inserte un tapaflujo en la tapa perforada y
colóquele la tapa a la parte superior del
Figura 2a
tanque del lavador de ojos (vea Figura 2a).
5. CAMISA CALENTADORA OPCIONAL:
Coloque el pedestal en la camisa calentadora. Para obtener mejor acceso para la instalación del tanque,
afloje la camisa calentadora opcional de alrededor del pedestal. Inserte el tubo del orificio de drenaje en el
fondo del pedestal en el orificio en la parte posterior de la camisa calentadora. La ubicación del orificio de
drenaje se muestra en la Figura 2b, página 15.
NOTA ACERCA DE LA INSTALACIÓN DEL TANQUE: Para asegurar una instalación correcta, el tanque debe
ser colocado sobre el pedestal desde el frente de la unidad.
6. Invierta el tanque y colóquelo encima del pedestal (vea Figura 2b, página 15). Puede ser necesario un leve
ajuste de la posición del tanque para obtener la colocación correcta del mismo sobre el pedestal. El
perforador en el pedestal hará un orificio en el tapaflujo de la tapa del tanque para permitir el flujo de la
solución.
7. Suba la palanca hasta cuando se coloque en posición vertical.
8. Monte el tanque al pedestal usando las abrazaderas del tanque. Asegure los pestillos al pedestal (vea Figura
2b, página 15).
9. CAMISA CALENTADORA OPCIONAL: Deslice el brazo dentro del bolsillo de la solapa de la camisa.
Resbale la camisa hasta el tanque y asegure la chaqueta con los sujetadores del gancho-y-bucle. Inserte el
conector de 5 pins en el receptáculo correspondiente en la caja de unión y apriete bien.
NOTA: Una vez que el tanque esté montado en el pedestal, puede ocurrir algún derrame menor. Permita que se
estabilice completamente el fluido antes de inspeccionar la unidad en busca de fugas.
16
9/12/07
Bradley Corporation • 215-1546 Rev. C; ECN 07-525
Installation
S19-921, S19-921H, S19-921HR
TANQUE
TAPA
ABRAZADERA
PEDESTAL
PESTILLO
Figura 2b
ORIFICIO DE DRENAJE
Paso 3: Ponga a prueba la unidad lavadora de ojos
1. Pruebe la estación lavadora de ojos para verificar su
funcionamiento adecuado empujando hacia abajo la bandeja
(vea Figura 3). Inspeccione semanalmente la unidad lavadora
de ojos para verificar su limpieza y el nivel de solución
adecuado (según la norma ANSI Z358.1-2004). Cuando el
nivel de solución caiga bajo la línea de llenado de 15 minutos,
se debe vaciar y volver a llenar el tanque. Llene el tanque del
lavador de ojos siguiendo el procedimiento descrito en el Paso
2 de la página 14.
UNIDAD CON CAMISA CALENTADORA OPCIONAL:
Pruebe la unidad tirando de la solapa frontal hacia abajo y
hacia afuera. Esta acción debe activar el rociador de agua
automáticamente. Verifique el flujo de agua de los rociadores y
revise si existen fugas de agua en toda la unidad. Inspeccione
la camisa calentadora visualmente para verificar la operación
correcta del elemento de la calefacción.
2. Fije la etiqueta de inspección (incluída) a la unidad lavadora de
ojos. Esta etiqueta debe usarse para documentar la inspección
semanal del lavador de ojos. Los sujetadores se proporcionan
para asociar la etiqueta a la unidad.
3. Si la unidad lavadora de ojos no está funcionando
adecuadamente, retírela del área de riesgo y póngase en
contacto con Bradley Corporation inmediatamente.
Bradley Corporation • 215-1546 Rev. C; ECN 07-525
Figura 3
9/12/07
17
S19-921, S19-921H, S19-921HR
Installation
Mantenimiento
ADVERTENCIA
Los preservativos para el agua protegen el agua potable de bacteria, hongos y crecimiento
de algas por un período máximo de quatro meses. Si no se usa un preservativo para el
agua en el lavador de ojos, se recomienda que se limpie el tanque semanalmente o con la
frecuencia que sea necesaria. Con el uso indebido puede ocurrir infección, pérdida de la
visión u otra lesión grave. NO utilice la solución si expiró, si está turbia, con color o contaminada. NO abra la botella del preservativo si el sello de seguridad se encuentra roto. NO
guarde la solución que no utilizó.
Paso 1: Inspección de la unidad lavadora de ojos
1. Inspeccione semanalmente la unidad lavadora de ojos para verificar su limpieza y el nivel de
solución adecuado (según la norma ANSI Z358.1-2004).
2. Ponga a funcionar la unidad lavadora de ojos cada vez que se reemplazca la solución para asegurarse
de que funcione adecuadamente. Si la unidad lavadora de ojos no está funcionando adecuadamente,
retírela del área de riesgo y póngase en contacto con Bradley Corporation inmediatamente.
• Revise el flujo de agua de los rociadores y procure tener un flujo uniforme y continuo. Los rociadores
están unidos a la palanca con tornillos y pueden desmontarse de la bandeja para su limpieza o para
eliminar alguna obstrucción, si es necesario (utilize una llave hexagonal Allen de 9/64" para
desmontar e instalar nuevamente los rociadores).
• Revise la manguera del suministro de agua que se encuentra en la parte inferior de la unidad lavadora
de ojos y busque posibles grietas, fugas de agua o desgaste.
• Revise toda la unidad en busca de posibles fugas de agua.
• Revise que la solución no esté contaminada y reemplácela con una solución nueva, si es necesario.
Paso 2: Limpieza de la unidad lavadora de ojos
1. Separe cuidadosamente el tanque del pedestal y drene la solución del tanque (disponga de la solución
apropiadamente). Para facilitar el drenaje, el pedestal tiene un orificio de drenaje que recibe un tubo
de 1/2" de diámetro interior en la parte inferior del orificio (el tubo no está incluído) (vea Figura 2b de
la página 15 para la ubicación del orificio de drenaje).
2. Limpie la parte interior del tanque usando agua tibia y un jabón suave; enjuague abundantemente.
3. Llene el tanque del lavador de ojos siguiendo el procedimiento descrito en el Paso 2 de la página 14.
• Para ordenar botellas adicionales del preservativo para el agua potable, póngase en contacto con su
representante de Bradley o su distribuidor local y pregunte por el Juego de Rellenado On-Site® de
Bradley S19-899 (incluye una botella del preservativo para el agua, tapa y tapaflujo).
4. Instale nuevamente el tanque del lavador de ojos siguiendo el procedimiento descrito en el Paso 2 de
la página 14.
Funcionamiento de la unidad lavadora de ojos
1. Inicie la operación empujando la bandeja hacia abajo. UNIDAD CON
CAMISA CALENTADORA OPCIONAL: Tire de la solapa frontal
hacia abajo y hacia afuera. Esta acción debe activar los rociadores de
agua automáticamente (Figura 4).
2. Use los dedos índice y pulgar para mantener los ojos abiertos. Gire los
ojos hacia adelante y atrás para enjuagar completamente los ojos. Deje
que el agua le enjuague ambos ojos simultáneamente por un mínimo
de 15 minutos.
3. Después de su uso, busque atención médica inmediatamente.
PRECAUCION: No se apoye en la bandeja del lavador de ojos
cuando se encuentre abierta. Se puede dañar la unidad.
18
9/12/07
Figura 4
Bradley Corporation • 215-1546 Rev. C; ECN 07-525
Installation
S19-921, S19-921H, S19-921HR
Caja de conexiones para la camisa calentadora opcional
Luz Indicadora
Luz verde: indica que la unidad tiene corriente.
Luz amarilla: indica que el calentador está funcionando y calentando la unidad lavadora de ojos. La
luz estará encendida sólo cuando el calentador esté encendido (calentando la unidad lavadora de
ojos).
Luz roja: indica que hay que reestablecer el termostato. Para reestablecer el termostato, siga el
procedimiento descrito a continuación.
a. Quite la parte superior de la camisa calentadora.
b. Localice el botón de reestablecimiento en la caja el termostato.
• Después de presionar el botón, revise para verificar que la luz roja esté apagada, y la verde
encendida (la luz amarilla estará encendida sólo cuando el calentador esté encendido). Si la
luz roja está todavía encendida, presione de nuevo el botón de reestablecimiento.
c. Vuelva a colocar la parte superior de la camisa calentadora en su lugar.
Instrucciones de instalación para la camisa calentadora modificación (S19-921HR)
1. Quite el papel de el almohadilla del calentador y coloque el almohadilla en el pedestal (Figura 5.
2. Continúe con las instrucciones de instalación para la camisa calentadora en la página 16.
Coloque
el almohadilla
del
POSITION
HEATER PAD
calentador
EVENLY
AROUNDuniformemente
DRAIN HOLE.
DO NOTdel
BLOCK
DRAIN
HOLE.
alrededor
orificio
de drenaje.
No bloquee del orificio de drenaje.
vista
superior
pedestal
TOP VIEW
OF del
PEDESTAL
Figura 5
Bradley Corporation • 215-1546 Rev. C; ECN 07-525
9/12/07
19