Download Manuel d`installation
Transcript
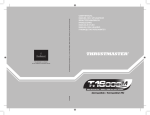
How to use The tablet can be used in the same way as your ordinary mouse, only you hold it as a pen and you can define how you want to control the Windows arrow on your screen. You can choose relative or absolute control in the tablet configuration software. Double click the tablet icon in the system tray. Absolute (best setting to use with the pen). The tablet surface pretends as if it is the monitor screen, where you put the pen on the tablet the Windows arrow will be on your monitor. Relative (exactly how your ordinary mouse works) The tablet surface is independent from the monitor screen, no matter where you put the pen the Windows arrow start off from the point on your monitor screen. Left “mouse” button Press the pen down = left “mouse” button. Upper button at the side of the pen = left double mouse click. Right “mouse” button This is the lower button on the pen. How to draw images or edit pictures Drawing images or editing pictures you do in the same way you would normally do. You pick up the pen (instead of your mouse) Open photo editing software, for example Microsoft Paint Open your picture or new template and choose the pen or brush tool you would normally choose. Open Microsoft Paint Use the tools in the left of the window and start drawing. Note: Note: MS Paint is a standard MS application which is installed together with Windows it can be found in Start – Programs – Accessories – Paint The tablets support the “Wintab“ standard, to know if your application fully supports the tablet with the pressure sensitivity check with the software supplier How to write, make a signature or draw in Microsoft Word Open Microsoft Word Open View – Toolbars – Select “ Drawing “ Open Autoshapes – lines – select freeform Start drawing. Pressing the pen = freehand Not pressing = point to point line You can use the image field as you would with your text field. Wireless Tablet Series TABLET TB-1100 / TB2100 TABLET TB-3100 / TB-4200 Wireless Tablet Series 1 B A 2 3 4 5 A 6 7 B TABLET TB-2100-3100-4200 Wireless Tablet Series 8 9 C B 10 11 A D 12 Wireless Tablet Series A B 13 14 C 15 16 17 18 Wireless Tablet Series Produktinformationen A: Anzeige B: Funktionstasten C: Stifthalter D: Arbeitsfläche E: Stiftspitze F: Stifttaste G: Stifttaste+ Akkustandanzeige Diese Anzeige leuchtet, wenn das tablet richtig installiert wurde. Sie haben dieselbe Funktion wie die Funktionstasten der Tastatur. Damit diese Tasten benutzt werden können, muss unbedingt der Treiber installiert sein. Zur Aufbewahrung des Stiftes, wenn er nicht gebraucht wird. Auf dieser Fläche können Sie zeichnen. Entspricht der linken Maustaste. Entspricht der mittleren Maustaste. Entspricht der rechten Maustaste. Nur für Tablet TB-2100, TB-3100, TB-4200. H: Linke Maustaste I: Mittlere Maustaste (TB-4200: +scroll) J: Rechte Maustaste Installation 1 2 3 4 5 6 7 8 A: Fügen Sie die Batterie in den Stift ein. B: Fügen Sie die Batterie in die Maus ein ( nur bei Tablet TB-2100, TB-3100, TB-4200). Schalten Sie den PC ein. Legen Sie die CD-ROM in das CD-Laufwerk ein. Klicken Sie auf "Treiber installieren" (Install driver). Klicken Sie auf "Weiter" (Next). A: Wählen Sie "Ja, ich will meinen Computer jetzt neu starten" (Yes, I want to restart my computer now). Klicken Sie auf "Weiter" (Next). Schließen Sie das Grafiktablett an den PC an. Klicken Sie auf "Ja" (Yes), um den PC neu zu starten. Konfiguration Doppelklicken Sie auf das Grafiktablett-Symbol auf der Taskleiste. 9 10 Klicken Sie auf die Registerkarte "Tasten" (Buttons). 11 12 13 14 A: Konfiguriert die Funktion der Taste 1. C: Stellt die Standardeinstellungen wieder her. B: Konfiguriert die Funktion der Taste 2. D: Konfiguriert den Klickdruck des Stifts. Klicken Sie auf "Test", um die Einstellungen des Stifts zu testen. - Klicken Sie auf "Test", um den Klickdruck des Stifts zu testen. - Klicken Sie auf das "X" in der oberen rechten Ecke, um das Fenster zu schließen. - Klicken Sie auf die Registerkarte "Maus" (Mouse). A: Mauszeigergeschwindigkeit C: Funktion der mittleren Maustaste B: Konfiguration für links- oder rechtshändigen Gebrauch Klicken Sie auf die Registerkarte "Steuerung" (Control). Beim Einstellen der Arbeitsoberfläche können Sie zwischen Zentimetern (cm) und Zoll (inch) wählen. Klicken Sie auf die Registerkarte "Funktionstaste" (Function Key). 1 DE Wireless Tablet Series 15 Nicht alle Grafiktablettmodelle haben dieselbe Anzahl an Funktionstasten. Modell TB-1100: F1 bis F8 / Modell TB-2100, TB-3100: F1 bis F12, TB-4200 F1 bis F24 Die Funktionstasten entsprechen den Funktionstasten auf Ihrer Tastatur. Klicken Sie auf die Schaltfläche "Seite nach unten" (Page Down), um die Funktionstasten F9 bis F24 anzuzeigen. Neudefinieren der Funktionstasten 16 17 18 Klicken Sie auf die Schaltfläche einer der Funktionstasten. "Windows Messenger" dient hier als Beispiel. Selbstverständlich können Sie auch ein anderes Programm verwenden. Klicken Sie auf das "Windows Messenger"-Symbol und danach auf "Öffnen" (Open). Klicken Sie auf "OK", um die Einstellungen zu speichern. Hinweis Unter www.trust.com/12050 (Tablet TB-1100) / www.trust.com/12052 (Tablet TB-2100) www.trust.com/12579 (Tablet TB-3100) oder www.trust.com/14070 (Tablet TB-4200) finden Sie aktuelle FAQs, Bedienungsanleitungen und weitere Informationen. • • • Sicherheitshinweise Öffnen Sie das Gerät nicht, und führen Sie keine Reparaturen an diesem Gerät aus. Das Gerät darf nicht in einer feuchten Umgebung verwendet werden. Das Gerät entspricht den grundlegenden Anforderungen und anderen relevanten Bedingungen der geltenden europäischen Richtlinien. Die Konformitätserklärung (DoC) finden Sie unter www.trust.com/12050/ce (Tablet TB-1100); www.trust.com/12052/ce (Tablet TB-2100); www.trust.com/12579/ce (Tablet TB-3100); www.trust.com/14070/ce (Tablet TB-4200). • Geben Sie das Gerät wenn möglich bei einem Recyclingcenter ab. Das Gerät darf nicht zusammen mit dem normalen Haushaltsabfall entsorgt werden. Garantie und Urheberrecht • Für dieses Gerät gilt eine Herstellergarantie von zwei Jahren, die Garantiefrist beginnt mit dem Datum des Kaufs. Weitere Informationen finden Sie unter www.trust.com/warranty. • Die vollständige oder auszugsweise Vervielfältigung dieser Anleitung ohne die Genehmigung von Trust International B.V ist untersagt. 2 Wireless Tablet Series Informations sur les produits A : témoin Celui-ci s’allume lorsque la tablet est installée correctement. Ces boutons ont la même fonction que les boutons de fonction du clavier. Le pilote doit être installé pour pouvoir utiliser ces boutons. Emplacement pour ranger le stylo lorsqu’il n’est pas C : porte-stylo utilisé. surface sur laquelle tracer un dessin. D : zone de travail Equivalent au bouton gauche de la souris. E : pointe de stylo Equivalent au bouton central de la souris. F : bouton de stylo G : bouton de stylo+ témoin de charge des Equivalent au bouton droit de la souris. piles B : boutons de fonction Uniquement pour les tablettes TB-2100, TB-3100, TB-4200. H : bouton gauche de la souris I : bouton central de la souris (TB-4200: +scroll) J : bouton droit de la souris Installation A : Insérez la pile dans le stylo. 1 B : Insérez les piles dans la souris ( Uniquement pour les tablettes TB-2100, TB-3100, TB-4200). Allumez l’ordinateur. 2 Insérez le CD-ROM dans le lecteur de CD. 3 Cliquez sur « Installer le pilote » (install driver). 4 Cliquez sur « Suivant » (next). 5 A : sélectionnez « oui, je veux redémarrer mon ordinateur maintenant » (Yes, I want to restart my computer now). 6 B : cliquez sur « Suivant » (next). Connectez la tablette sur l’ordinateur. 7 Cliquez sur « Oui » (yes) pour redémarrer le PC. 8 Configuration Double-cliquez sur le pictogramme de tablette dans la barre des tâches. 9 10 Sélectionnez l’onglet « Boutons » (Buttons). 11 12 13 A : configure la fonction du bouton 1. C : restaure les paramètres par défaut. B : configure la fonction du bouton 2. D : configure la pression de clic du stylo. Cliquez sur « Test » pour tester les paramètres du stylo. - Cliquez sur « Test » pour tester la pression de clic du stylo. - Cliquez sur le ‘X‘ dans le coin supérieur droit pour fermer la fenêtre. - Cliquez sur l'onglet « Souris » (Mouse). A : vitesse du pointeur de la souris Fonction du bouton central de la souris 1 FR Wireless Tablet Series B : configuration pour utilisateurs droitiers ou gauchers Sélectionnez l’onglet « Commande » (control). Pour configurer la surface de travail, vous avez le choix entre centimètres (cm) et pouces (inch). 14 Sélectionnez l’onglet « Touche de fonction » (Function Key). 15 Tous les modèles de tablette n’ont pas le même nombre de boutons de fonction. Modèle TB-1100 : F1 à F8 / Modèles TB-2100 / TB-3100 : F1 à F12 / Modèle TB-4200 : F1 à F24 Les boutons de fonctions sont les même que les boutons de fonction sur votre clavier. Cliquez sur le bouton « Page bas » (page down) pour voir les boutons de fonction F9 à F24. Redéfinition des touches de fonction 16 17 18 Cliquez sur le bouton d’un des boutons de fonction « Windows Messenger » est utilisé ici à titre d’exemple. Bien entendu, vous pouvez toujours utiliser un autre programme. Cliquez sur le pictogramme « Windows Messenger », puis sur « Ouvrir » (open). Cliquez sur « OK » pour enregistrer les paramètres. Note Rendez-vous sur www.trust.com/12050 (Tablette TB-1100) / www.trust.com/12052 (Tablette TB-2100) / www.trust.com/12579 (Tablette TB-3100) / www.trust.com/14070 (Tablette TB4200) pour les mises à jour de la FAQ et des manuels d’instructions et pour plus d’informations. • • • Mesures de sécurité N’ouvrez et ne réparez jamais cet appareil vous-même. N’utilisez pas cet appareil dans un environnement humide. Ce produit répond aux principales exigences et autres dispositions pertinentes des directives européennes en vigueur. La Déclaration de Conformité (DoC) est disponible aux adresses suivantes : www.trust.com/12050/ce (Tablette TB-1100) ; www.trust.com/12052/ce (Tablette TB-2100); www.trust.com/12579/ce (Tablette TB-3100); www.trust.com/14070/ce (Tablette TB-4200). • Si possible, mettez l’appareil au rebut dans un centre de recyclage. N’éliminez pas l’appareil avec les déchets ménagers. Garantie et copyright 2 Wireless Tablet Series • Ce produit bénéficie d’une garantie de deux ans valable à compter de la date d’achat. Pour plus d’informations, rendez-vous sur www.trust.com/warranty. • Toute reproduction de ce manuel ou d’une partie de ce manuel est interdite sans autorisation préalable de Trust International B.V. FR 3 Wireless Tablet Series Product information A: Indicator B: Functions buttons C: Pen holder D: Work area E: Pen point F: Pen button G: Pen button +Battery-low indicator LED This is lit when the tablet has been installed correctly. These have the same function as the keyboard function buttons. The driver must be installed in order to use these buttons. Holder for the pen when it is not in use. Area for making a drawing The same as the left mouse button The same as the middle mouse button The same as the right mouse button Only for Tablet TB-2100, TB-3100 and TB-4200 H: Left mouse button I : Middle mouse button (TB-4200: +scroll) J: Right mouse button Installation A: Insert the battery into the pen 1 B: Insert the battery into the mouse ( Only for Tablet TB-2100, TB-3100 and TB-4200) Turn on PC 2 Insert CD-ROM into the CD drive 3 Click ‘Install driver’ 4 Click ‘Next’ 5 A: Select “Yes, I want to restart computer now” 6 B: Click ‘Next’ Connect tablet to PC 7 Click ‘Yes’ to restart PC 8 Configuration Double-click on the tablet icon in the taskbar 9 10 Click “Buttons” tab. 11 12 13 14 A: Configures the function of button 1 C: Restores the default settings B: Configures the function of button 2 D: Configures the pen’s click pressure Click ‘Test’ to test Pen settings - Click on ‘Test’ to test the pen’s click pressure - Click on the ‘X‘ in the top right-hand corner to close the window - Click 'Mouse' tab A: Mouse pointer speed C: Function of the middle mouse button B: Configuration for left-handed or right-handed use Click 'Control' tab The work surface can be configured to use centimetres (cm) or inches (inch), Click 'Function Key' tab 1 UK Wireless Tablet Series 15 Not all the tablet models have the same number of function buttons. Model TB-1100: F1 to F8 / Model TB-2100 and TB-3100: F1 to F12 / Model TB-4200: F1 to F24 The function buttons are the same as the function buttons on your keyboard. Click ‘Page Down’ button to see function buttons F9 to F24 Re-define Function Keys 16 17 18 Click on the button of one of the function buttons ‘Windows Messenger’ is used here as an example. You may, of course, use a different program. Click on the ‘Windows Messenger’ icon and then on ‘Open’ Click ‘OK’ to save settings Note Go to www.trust.com/12050 (Tablet TB-1100) / www.trust.com/12052 (Tablet TB-2100) / www.trust.com/12579 (Tablet TB-3100) or www.trust.com/14070 (Tablet TB-4200) for up-todate FAQs, instruction manuals and more information. • • • Safety instructions Never open or repair this device yourself. Do not use this device in a damp environment. This device meets the essential requirements and other relevant conditions of the applicable European directives. The Declaration of Conformity (DoC) is available at www.trust.com/12050/ce (Tablet TB-1100); www.trust.com/12052/ce (Tablet TB-2100); www.trust.com/12579/ce (Tablet TB-3100); www.trust.com/14070/ce (Tablet TB-4200). • If possible, dispose of the device at a recycling centre. Do not dispose of the device with the household waste. Warranty & copyright • This device has a two-year product warranty, which is valid from the date of purchase. Go to www.trust.com/warranty for more information. • It is forbidden to reproduce any part of this instruction manual without the permission of Trust International B.V. 2