1
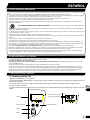
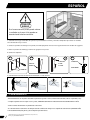
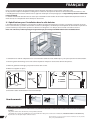
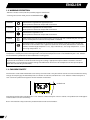
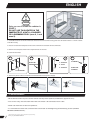
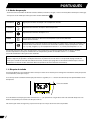
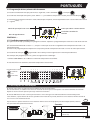
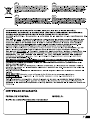
ENGLISH
1.4. TIME SETTING AND HOURLY PROGRAMMING
and function
1) Hold down the ON/standby
buttons simultaneously for at least 3 seconds.
.
2) The hour digits begin to flash. Use + and – to set the current hour and confirm by pressing the function button
3) Set the minutes and day in the same way. The day is marked by a dot on the vertical numbered scale (1= Monday,.....).
Chrono mode icon
Dot indicating day of the week
Numbered scale for the days of the
week
Time setting bar
CONTINUE....
1.5. Programmation (Function Chrono)
4) After setting the time, go on to weekly programming. Set a sequence for each hour and each day of the week. Use the +
and – buttons to make selections. The + button indicates high temperature regulation for that time and the – button
indicates low temperature regulation. The segments on the time setting bar correspond to high temperature and the
empty space corresponds to low temperature.
5) Press the function button
to save the day’s settings, then start the same procedure for the next day.
For example, a program might be, from Monday to Sunday:
- Comfort from 05:00 to 10:00 h and from 17:00 to 23 has selected comfort temperature.
The remaining hours in economy, economy temperature selected.
Pressing the buttons: - - - - - - + + + +
- - - - - - - + + + + + +
Comfort
or
Economy
COMFORT
-
FINAL
COMFORT
2. INSTRUCTIONS FOR THE INSTALLATION
The heater must not be installed just underneath a mains socket.
The heater must never be installed in a bathroom in a position in which the switches or other controls can be touched by a
person in the bath or shower.
The RCB heater operates by natural air convection. In order to achieve correct performance with uniform heat distribution,
when installed on a wall, the lower part of the heater must a minimum of 10 cm and a maximum of 30 cm from the floor.
There must be a minimum distance of 15 cm from any wall or object (furniture and curtains etc), both to the sides and
above, to ensure adequate heating performance.
Wire colour connection
WARNINGS
Brown
Phase
Blue or Grey Neutral
Black
Pilot-wire or not connected
13
E