1
MODEL 74050, 74051
LED FLAT PANEL FIXTURE INSTRUCTIONS
CAUTION
GENERAL
TURN OFF THE MAIN POWER
AT THE CIRCUIT BREAKER
BEFORE INSTALLING THE
FIXTURE, IN ORDER TO
PREVENT POSSIBLE SHOCK.
All electrical connections must be in accordance with local and National Electrical Code
(N.E.C.) standards. If you are unfamiliar with
proper electrical wiring connections obtain
the services of a qualified electrician.
Remove
thethe
mounting
package
Removethe
thefixture
fixtureand
and
mounting
from
the box
andthe
make
no parts
package
from
boxsure
andthat
make
sure are
that
missing
referencing
the referencing
illustrations on
no partsbyare
missing by
thethe
installation
illustrationsinstructions.
on the installation instructions.
PARTS INCLUDED:
1.
2.
3.
4.
5.
6.
7.
MOUNTING INSTRUCTIONS
READ IMPORTANT SAFETY INFORMATION FIRST ON REVERSE SIDE OF THIS SHEET.
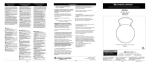
1. To attach the Mounting Bracket to the Junction box in the Ceiling, follow these steps:
a) Twist and unlock the Mounting
Bracket from the round LED flat panel
fixture to remove.
b) Determine if the ground wire is inside
the junction box. If not, then secure
ground wire provided to the Mounting
Bracket as shown.
c) Identify all three wires (Black-line
voltage, White-common, Greenground) from ceiling and make them
accessible for easy connections.
Mounting Bracket
Lamp unit
#8-32 x 1 screws
Ground wire
Ground screw
Plastic anchors
Wire nuts
White
Green
i) Use a pencil to mark the two hole positions for the
plastic anchors going in the ceiling.
Black
ii) Remove the bracket and install plastic anchors
provided where marked. Use a 1/8” drill bit to make
a hole and insert plastic anchor into each hole by
tapping gently.
iii) Screw mounting bracket into the junction box and
plastic anchors until secure
2. Connect the wires by raising the lamp Unit up to the ceiling in two steps (Notes: For larger fixtures a second person may be needed to hold the Lamp unit)
a) Hook up support wire as shown to hold fixture while
you make the electrical connections
1
1
4
1
1
2
3
d) Secure the bracket to the junction box
using the Junction box screws
provided. If securing the bracket with
anchors is also desired, follow steps i
to iii. Otherwise, proceed to step 2
Ground screw
Ground Wire
QTY
b) Feed lamp Unit wire through mounting bracket
center holes, using the wire nut connectors
provided connect the 3 wires coming from the
j-box as show (Black-line voltage, White-common, Green- ground)
Wire Nuts
Support Wire
SAVE THESE INSTRUCTIONS.
FEIT ELECTRIC COMPANY | PICO RIVERA, CA | (800) 543-3348 | FAX (562) 908-6360 | www.feit.com
LED FLAT PANEL FIXTURE INSTRUCTIONS
3. Now as you raise the lamp unit up into the Mounting Bracket, Push/feed the electrical wire up into the junction box.
a) Match up alignment arrows (1-1) indicated on the
Mounting Bracket and the lamp Unit
b) Twist and lock the lamp Unit into the mounting
bracket in the “Lock direction to match up alignment
arrows (1-2)
c) Once locked in place remove the stickers and gently
align the lamp unit and mounting Bracket for best fit.
WARNING!! IF NOT LOCKED IN PLACE THE
FIXTURES MAY FALL AND CAUSE SERIOUS
INJURY!!
1
2
1
IMPORTANT SAFETY INFORMATION
1. WARNING: RISK OF SHOCK House electric current
can cause painful shock or serious injury unless
handled properly. For your safety, always remember to:
A. Turn off the power Supply at the fuse or circuit
breaker box before you install the fixture.
B. Ground the fixture to avoid potential electric shocks
and to ensure reliable starting.
C. Double-check all connections to be sure they are
tight and correct.
D. Wear rubber soled shoes and work on a sturdy
wooden ladder.
2. This fixture is designed for use in a circuit protected
by a fuse or circuit breaker. It is also designed to
be installed in accordance with local electrical codes.
If you are unsure about your wiring, consult a qualified
electrician or local electrical inspector, and check your
local electrical code.
3. WARNING: RISK OF CUTS Some metal parts in the
fixture may have sharp edges. To prevent cuts and
scrapes, wear gloves when handling the parts.
4. Account for small parts and destroy packing material,
as these may be hazardous to children.
CAUTION
WARNING: Risk of fire. Use only on 120 volt 60Hz circuits. Suitable for damp locations. Before installing your lighting fixture,
thoroughly review enclosed installation manual. If you do not have sufficient electrical wiring experience, please refer to a
do-it-yourself wiring handbook or have your fixture installed by a qualified licensed electrician. All electrical connections
must be in accordance with Local and National Electrical Code (NEC) Standards. Reliable operating temperature is 0˚F
–120˚F. If flickering occurs in low level dimming, increase light level. Compatible with most dimmers including Leviton
6681-IW, Lutron S-600P and Lutron DVCL-153. Dimmable to 10% with most dimmers. For more information including
dimmer compatibility visit www.feit.com or call our toll free number 1-866-326-BULB.
This device complies with part 15 of the FCC Rules.
Operation is subject to the following two conditions:
(1) This device may not cause harmful interference, and
(2) this device must accept any interference received,
including interference that may cause undesired operation.
Note: This equipment has been tested and found to comply
with the limits for a Class B digital device, pursuant to part
15 of the FCC Rules. These limits are designed to provide
reasonable protection against harmful interference in a
residential installation. This equipment generates, uses
and can radiate radio frequency energy and, if not installed
and used in accordance with the instructions, may cause
harmful interference to radio communications. However,
there is no guarantee that interference will not occur in a
particular installation. If this equipment does cause harmful
interference to radio or television reception, which can be
determined by turning the equipment off and on, the user
is encouraged to try to correct the interference by one or
more of the following measures: Reorient or relocate the
receiving antenna. Increase the separation between the
equipment and receiver. Connect the equipment into an
outlet on a circuit different from that to which the receiver
is connected. Consult the dealer or an experienced radio/TV
technician for help.
LIMITED WARRANTY
This product is warranted to be free from
defects in workmanship and materials for up
to 5 years from date of purchase. If it fails to
do so, please contact Feit Electric at info@
feit.com or call 1-866 326-BULB (2852) for
instructions on replacement. Do not return
the product to the store.
For comments please write to:
FEIT ELECTRIC
Customer Service Department
4901 Gregg Road, Pico Rivera, CA 90660
SAVE THESE INSTRUCTIONS.
FEIT ELECTRIC COMPANY | PICO RIVERA, CA | (800) 543-3348 | FAX (562) 908-6360 | www.feit.com
GUIDE D’INSTALLATION DE L’APPAREIL D’ÉCLAIRAGE DEL À PANNEAU PLAT
3. Maintenant que vous soulevez l'unité de la lampe vers le haut dans le support de montage, Push / alimenter le fil électrique vers le haut dans la boîte de jonction.
a) correspondre alignement flèches (1-1) indiqués sur
l'Unité de la lampe et de support de montage
b) Twist et verrouiller l'unité de la lampe dans le
support de montage dans le «sens de verrouillage de
faire correspondre les flèches d'alignement (1-2)
c) Une fois verrouillé en place enlever les autocollants et
alignez délicatement l'unité de lampe et le support de
montage pour le meilleur ajustement.
ATTENTION !! SI PAS VERROUILLÉ EN PLACE LES
APPAREILS POURRAIENT TOMBER ET PROVOQUER
BLESSURES GRAVES !!
1
2
1
CONSIGNES DE SÉCURITÉ IMPORTANTES
1.
AVERTISSEMENT: RISQUE DE DÉCHARGE ÉLECTRIQUE: Le courant électrique des domiciles peut
causer des chocs douloureux ou des blessures
graves, sauf s’il est bien géré. Pour votre sécurité,
n’oubliez jamais de :
2.
Cet appareil doit être utilisé dans un circuit protégé par
un fusible ou un disjoncteur. Il est aussi conçu pour être
installé conformément aux codes électriques locaux. Si
vous n’êtes pas sûr de votre câblage, veuillez consulter un
électricien qualifié ou un inspecteur d’appareils électriques
local, et vérifiez votre code électrique local.
A.
Couper l’alimentation au niveau de la boîte de
fusibles ou du boîtier de disjoncteurs avant d’installer
l’appareil.
Reliez l’appareil à la terre pour éviter d’éventuelles
décharges électriques et pour assurer une mise en
marche fiable.
Vérifiez tous les branchements pour vous assurer
qu’ils sont bien effectués et corrects.
Portez des chaussures à semelles de caoutchouc
travaillez sur une échelle en bois solide.
3.
AVERTISSEMENT: RISQUE DE COUPURES: Certaines
pièces métalliques de l’appareil peuvent avoir des bords
coupants. Pour empêcher les coupures et les écorchures,
portez des gants lorsque vous manipulez ces pièces.
4.
Comptabilisez les petites pièces et détruisez le matériel
d’emballage, puisqu’ils pourraient représenter un danger
pour les enfants.
B.
C.
D.
ATTENTION
Risque d'incendie. Utiliser uniquement sur les circuits 120 volts 60Hz. Convient aux endroits humides. Avant d'installer votre
appareil d'éclairage, examiner attentivement le manuel d'installation ci-joint. Si vous ne avez pas d'expérience de câblage
électrique suffisante, se il vous plaît se référer à un manuel do-it-yourself câblage ou demandez à votre luminaire installé par
un électricien agréé qualifié. Toutes les connexions électriques doivent être conformes au Code électrique local et national
(NEC) des normes. Température de fonctionnement fiable est 0 ˚F -120˚F. Si le scintillement se produit en basse gradation de
niveau, augmenter le niveau de lumière. Compatible avec la plupart des variateurs y compris Leviton 6681-IW, Lutron S-600P
et Lutron DVCL-153. Dimmable à 10% avec la plupart des variateurs. Pour plus d'informations, y compris www.feit.com visite
gradateur compatibilité ou appelez notre numéro sans frais 1-866-326-BULB.
Cet appareil est conforme à la section 15 des normes de la
FCC. Son fonctionnement est sujet aux deux conditions suivantes : (1) Cet appareil ne doit pas causer d’interférence
nuisible, et (2) il doit accepter toute interférence venant de
l’extérieur, y compris celle pouvant entraîner un mauvais
fonctionnement. Note : Cet appareil a été mis à l’essai et
il est jugé conforme aux limites établies pour un appareil
numérique de classe B, selon la section 15 des normes de
la FCC. Ces limites sont conçues pour offrir une protection
raisonnable contre les interférences nuisibles dans une installation résidentielle. Cet appareil génère, utilise et peut
émettre une énergie radioélectrique et, s’il n’est pas installé
correctement et utilisé en conformité avec ces instructions,
il peut causer une interférence nuisible aux communica-
tions radio. Il n’est toutefois pas garanti que l’interférence
ne se produira pas dans une installation particulière. Si
cet appareil perturbe la réception du signal radio ou télé,
interférence qui peut être établie en mettant l’appareil en
marche puis en l’arrêtant, l’utilisateur est encouragé à essayer de corriger l’interférence en prenant une ou plusieurs
des mesures suivantes : Réorienter ou déplacer l’antenne
de réception. Augmenter la distance entre l’appareil et le
récepteur. Branchez l’appareil sur une prise murale qui se
trouve sur un circuit autre que celui sur lequel le récepteur
est branché. Consultez le détaillant ou un technicien radio
et de télévision pour obtenir de l’aide.
GARANTIE RESTREINTE
La garantie de ce produit indique qu’il ne doit
comporter ni erreur d’exécution, ni défaut de
matériau pendant 5 ans à compter de la date
d’achat. Dans le cas contraire, veuillez contacter
Feit Electric par courriel à l’adresse [email protected]
ou appeler le numéro 1-866 326-BULB (2852)
pour recevoir des instructions de remplacement.
Ne retournez pas le produit au magasin.
Pour des remarques, veuillez écrire à:
FEIT ELECTRIC
CService à la clientèle
4901 Gregg Road, Pico Rivera, CA 90660
CONSERVEZ CES DIRECTIVES
FEIT ELECTRIC COMPANY | PICO RIVERA, CA | (800) 543-3348 | FAX (562) 908-6360 | www.feit.com
MODÈLE 74050, 74051
GUIDE D’INSTALLATION DE L’APPAREIL D’ÉCLAIRAGE DEL À PANNEAU PLAT
GÉNÉRALITÉS
MISE EN GARDE
Tous les branchements électriques doivent se faire
COUPEZ L’ALIMENTATION PRINCIPALE
AU NIVEAU DU DISJONCTEUR AVANT
D’INSTALLER L’APPAREIL D’ÉCLAIRAGE,
POUR ÉVITER TOUTE DÉCHARGE ÉLECTRIQUE ÉVENTUELLE.
conformément aux normes du Code national de
l’électricité (CNE). Si vous ne connaissez pas bien
les règles à observer concernant le câblage électrique, veuillez engager un électricien qualifié.
Retirer
l’appareil
et le and
paquet
montage de la
Remove
the fixture
thedemounting
boîte
et assurez-vous
queand
ne manque
aucune
package
from the box
make sure
that
pièce
en référençant
surthe
les
no parts
are missinglesbyillustrations
referencing
instructions
illustrationsd’installation.
on the installation instructions.
PIÈCES INCLUSES:
1.
2.
3.
4.
5.
6.
7.
GUIDE D’INSTALLATION
LISEZ D’ABORD LES INFORMATIONS DE SÉCURITÉ IMPORTANTES AU VERSO DE CETTE PAGE.
1. Pour fixer le support de montage à la boîte de jonction dans le plafond, procédez comme suit:
a) Twist et déverrouiller le support de
montage de l 'appareil à écran plat
LED ronde à enlever.
b) Déterminer si le fil de terre est
l'intérieur de la boîte de jonction. Si
non, puis fixez le fil de terre fourni au
support de montage comme indiqué.
c) Identifier tous les trois fils (NoirTension de la ligne, blanc-Commune,
Vert-Terre) du plafond et les rendre
accessibles pour les connexions
faciles.
Vis de terre
Support de montage
Unité de la lampe
#8-32 x 1 vis
Fil de terre
Vis de terre
Chevilles en plastique
Serre-fils
i) Utilisez un crayon pour marquer les deux positions
des trous pour les chevilles en plastique allant dans le
plafond.
noir
ii) Retirez le support et installer les ancrages en
plastique fournis aux endroits marqués. Utilisez un
"mèche de 1/8 pour faire un trou et insérer ancrage
en plastique dans chaque trou en tapotant
doucement.
iii) Vissez le support de montage dans la boîte de
jonction et en plastique ancres jusqu'à sécurisé
Connecter les fils en augmentant l'Unité de la lampe au plafond en deux étapes (Notes: Pour les grands luminaires une deuxième personne peut être nécessaire pour
maintenir l'unité de la lampe)
a) Branchez fil de support comme indiqué pour tenir l
'appareil pendant que vous faites les connexions
électriques
1
1
4
1
1
2
3
d) Fixez le support à la boîte de jonction
en utilisant les vis de la boîte de
jonction fournies. Si vous fixez le
support avec des ancres est
également souhaité, suivez les étapes
i à iii. Sinon, passez à l'étape 2
blanc
vert
fil de terre
QTY
b) Nourrir lampe fil de parts grâce trous de montage des centres de
support, en utilisant les connecteurs de noix de fils fournis
connecter les 3 fils venant de la boîte de j comme le montrent
(Noir- Tension de la ligne, blanc-Commune, Vert-Terre).
Serre-fils
Support Wire
CONSERVEZ CES DIRECTIVES
FEIT ELECTRIC COMPANY | PICO RIVERA, CA | (800) 543-3348 | FAX (562) 908-6360 | www.feit.com