1
POUND LOAD LIMIT.
CAUTION: If Pilot hole is used with the wood thread
hook, the pilot hole should be drilled no larger than
the minor diameter of the screw threads on the hook.
Do not put lubricant on the “J” hook. At least 11/2” of
the screw threads should be inserted into the
structural wood joist. When the threaded bolt hook
is used, be careful to secure tightly with supplied
lockwashers and nuts. Attach the hook as instructed
and hang the fan.
Assembly
This fan includes a “secondary support” safety cable feature that complies with existing C.S.A. (Canadian
Standards Association) requirements and all other
proposed safety regulations for overhead air movement
equipment. To insure proper installation of this important
safety feature, please read and follow these instructions
carefully.
1. Carefully unwrap the coiled safety cable and motor
lead wires.
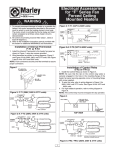
2. At the motor yoke assembly (A), remove the cotter pin
and loosen the hexagon nut. Carefully remove spring
washer and the hexagon screw (E). (See Figure 1)
3. Slide the upper canopy cover (B) (bell shaped) up the
rod. Slide the lower canopy cover (C) up to rod.
4. Feed the three motor lead wires and the safety cable
through the center hole in the steel yoke above the
motor housing and then continue feeding wires and
cable through the downrod until the wires and cable
come out at the upper (shackle) end.
5. Reconnect the downrod to the steel yoke and replace
the hexagon screw. Secure the spring washer, hexagon nut, and the cotter pin making sure cotter pin is
spread to secure in place.
WIRE
METAL BEAM
WOOD JOIST
STYLES
HOOK
RUBBER
ROLLER
(D) UPPER SHACKLE ASSEMBLY
CAUTION: Leave 1/4” clearance
between upper canopy
and ceiling.
(B) UPPER CANOPY COVER
(F) SET SCREW
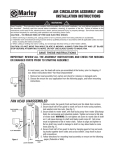
Figure 1 - Assembly
DOWNROD
(C) LOWER CANOPY COVER
NOTICE: The safety cable should be taped to one side
of the yoke with electrical tape to prevent the cable from
resting on top of motor during running operation.
COTTER PIN
(See Figure 2)
MOTOR YOKE
ASSEMBLY
STEEL YOKE
CAPACITOR
6. Slide the lower canopy (C) to allow a 1/4” minimum
height above the motor.
CAUTION: Do not allow the permanently installed
lower canopy to touch the revolving motor as damage will occur. Make sure all wires are securely
placed to avoid rubbing against the motor.
HEX BOLT
LOCKWASHER
BLADE
PLASTIC PAD
MOTOR HOUSING
7. Attach the three blades, curved side down to the motor
with the insulation pad mounted between the blade
and the motor (See Figure 5). Make sure blade holder is flat against motor platform when tightening blade
nuts for secure fit.
CAUTION: Never adjust the
lower shaft bolt assembly which
is precision secured during the
manufacture of this fan.
CAUTION: Make sure that blades are attached as
shown.
CAUTION: Blades must be fastened to the motor as
shown in Figure 1. DO NOT reverse blades when
installing.
9. This fan is equipped with the required “secondary
support” cable. This cable must be affixed to the
beam structures and securely clamped in such a manner to support the weight of the fan in the event the
mounting hook or other parts fail. After wrapping cable
around a structural member that will support 300
lbs., secure cable with supplied cable clamps as
illustrated in Figure 3. (Note: Any additional materials
needed for specific installations may be purchased
from your local distributor.)
NOTE: Blades are weight balanced per set. DO NOT mix
on multiple fan installations.
NOTE:Do not bend fan blade brackets.
WARNING: DISCONNECT CIRCUIT POWER BEFORE
MAKING ANY ELECTRICAL CONNECTIONS.
CAUTION: To reduce the risk of personal injury,
install the primary mounting directly from building
structure and use only the hardware provided with
the fan.
NOTICE: Leave approximately 3” but no more than 5” of
slack on this safety cable to allow for possible fan
movement. Do not exceed more than 5” total slack.
8. Before attaching the appropriate “J” hook to the
building structure member note the following:
IMPORTANT. WHEN MOUNTING THIS FAN, THE
SUPPORT BEAM MUST BE SUITABLE FOR A 50
CAUTION: Leave 1/4” clearance
between lower canopy
and motor housing.
(E) MOUNTING HEX BOLT SET
2
IMPORTANT CAUTION: The safety cable must not be
placed between the rubber roller and hook but as
illustrated in Figure 3.