1
ENGLISH
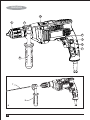
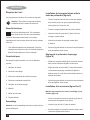
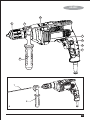
Features
•
Set the depth stop (7) to the desired position. The
maximum drilling depth is equal to the distance between
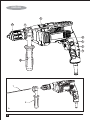
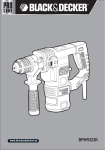
This tool includes some or all of the following features.
the tip of the drill bit and the front end of the depth stop.
1. Variable speed switch
•
2. Lock-on button
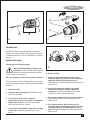
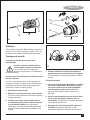
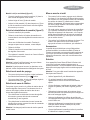
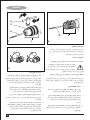
Fitting an accessory (fig. B & C)
3. Variable speed control knob
Keyless chuck with spindle lock (Where supplied)
4. Forward/reverse switch
5. Drilling mode selector
Tighten the side handle by turning the grip clockwise.
(fig. B)
•
Open the chuck by turning the sleeve (9)
counterclockwise.
6. Chuck
•
Insert the bit shaft (10) into the chuck.
7. Depth stop
•
Tighten the chuck by turning the sleeve clockwise.
8. Side handle
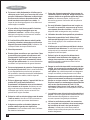
Keyed chuck (Where supplied) (fig. C)
Assembly
•
Warning! Before assembly, make sure that the tool is
switched off and unplugged.
•
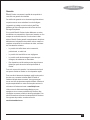
Fitting the side handle and depth stop (fig. A)
•
•
Turn the grip counterclockwise until you can slide the
side handle (8) onto the front of the tool.
•
Rotate the side handle into the desired position.
•
Insert the depth stop (7) into the mounting hole as
Set the drilling depth as described below.
•
Tighten the side handle by turning the grip clockwise.
Insert the bit shaft (10) into the chuck.
Insert the chuck key (12) into each hole (13) in the side
of the chuck and turn clockwise until tight.
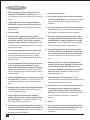
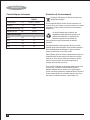
Removing and refitting the chuck (fig. D)
•
•
Open the chuck as far as possible.
Remove the chuck retaining screw, located in the chuck,
by turning it clockwise using a screwdriver.
shown.
•
Open the chuck by turning the sleeve (11)
counterclockwise.
•
Tighten an Allen key into the chuck and strike it with a
hammer as shown.
•
Remove the Allen key.
Setting the drilling depth (fig. A)
•
Remove the chuck by turning it counterclockwise.
•
•
To refit the chuck, screw it onto the spindle and secure it
Slacken the side handle (8) by turning the grip
counterclockwise.
6
with the chuck retaining screw.