Download 1 - Motorisation Plus
Transcript
D811598 00100_02 09-01-09
027908
348494
ISTRUZIONI DI INSTALLAZIONE
INSTALLATION MANUAL
INSTRUCTIONS D’INSTALLATION
MONTAGEANLEITUNG
INSTRUCCIONES DE INSTALACION
INSTALLATIEVOORSCHRIFTEN
FOTOCOSTA
PHOTOCELL SAFETY EDGE
LINTEAU PHOTOCELLULE
FOTOLEISTE
CANTO CON FOTOCÉLULA
FOTOGEVOELIGE RAND
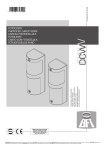
DCW
DCW
8
Attenzione! Leggere attentamente le “Avvertenze” all’interno! Caution! Read “Warnings” inside carefully! Attention! Veuillez lire attentivement les Avertissements qui se trouvent à l’intérieur! Achtung! Bitte lesen Sie
aufmerksam die „Hinweise“ im Inneren! ¡Atención¡ Leer atentamente las “Advertencias” en el interior! Let op! Lees de “Waarschuwingen”tigre aan de binnenkant zorgvuldig!
2 - DCW
D811598 00100_02
D811598 00100_02
ITALIANO
A
DCW TX
ENGLISH
400÷600 mm
DCW RX
B
DCW RX
DCW TX
2
DCW TX
DCW RX
FRANÇAIS
1
$MR N NFMRMA MNCL ACJJ MST DMRMX ?SD DMRMA ?N --> OFF
DCW TX
DCW RX
DCW TX
DEUTSCH
DCW RX
3
DCW TX
DCW TX
DCW RX
DCW TX - DCW RX
DCW RX
2A
C
ESPAÑOL
1
2B
3B
NEDERLANDS
DCW - 3
D
Ø6
1A
V1
1
V1
1B
4,8
32
DCW TX
*
E
*
*
1A
1B
V2
1
V2
3,9
13,5
4 - DCW
*
Non in dotazione / Not supplied /
Ne sont pas fournis / Nicht im lieferumfang /
No asignadas en el equipamiento base/ Niet meegeleverd.
D811598 00100_02
DCW RX
1
Con funzione di costa e fotocellula verificate.
With tested safety edge and photocell feature.
Avec fonction de linteau et de photocellule vérifiées.
Mit überprüfter Funktion Leiste und Fotozelle.
Con función de canto y fotocélula comprobadas.
Met functie van rand en fotocel als “trusted devices”.
PHOT
FaultPHOT
Com.PHOT
VSAFE +
4
9
8
7
6
BAR
5
4
Com.BAR
3
24V~(-)
2
1
LD5
LD4
LD2
LD1
24V~(+)
Marrone Sensore RX
4
Verde Sensore RX
2
1
Ø 9 X 0,50
Con funzione di fotocellula verificata.
With tested photocell feature.
Avec fonction de photocellule vérifiée.
Mit überprüfter Funktion Fotozelle.
Con función de fotocélula comprobada.
Met functie van fotocel als “trusted device”.
*
*1
BiancoSensoreRX *2
Bianco SensoreTX *3
Marrone SensoreTX *4
5
3
*
2
Con costa ottica.
With optical safety edge.
Avec linteau optiquea.
Mit optischer Leiste.
Con canto óptico.
Met optische rand.
+
LD3
FaultBAR
F
DCW TX
Selezionare Costa Ottica - Posizione A Optical safety edge setting - Position A Sélection Linteau optique - Position A Auswahl optische Leiste - Position A Selección Canto óptico - Posición A Selectie Optische rand - Positie A -
D811598 00100_02
DCW RX
Brown RX sensor, Marron capteur Rx, Braun Sensor RX,
Marrón sensor RX, Bruin sensor RX.
*1 Green RX sensor, Vert capteur Rx, Grün Sensor RX,
Verde sensor RX, Groen sensor RX.
*2 White RX sensor, Blanc Capteur Px, Weiß Sensor RX,
Blanco Sensor RX, Wit sensor RX.
*3 White TX sensor, Blanc Capteur Tx,
Weiß Sensor TX, Blanco sensor TX, Wit sensor TX.
PHOT
FaultPHOT
Com.PHOT
VSAFE +
*4 Brown TX sensor, Marron Capteur Tx,
9
8
7
6
Braun Sensor TX, Marrón Sensor TX, Bruin sensor TX.
LD5
LD4
LD3
5
LD2
LD1
4
Ø 6 X 0,50
3
24V~(-)
24V~(+)
2
1
5
3
Con funzione di fotocellula non verificata.
With non-tested photocell feature.
Avec fonction de photocellule non vérifiée.
Mit nicht überprüfter Funktion Fotozelle.
Con función de fotocélula no comprobada.
Met functie van fotocel anders dan “trusted device”.
Con costa 8K2.
With 8K2 safety edge.
Avec linteau 8K2.
Mit Leiste 8K2.
Con canto 8K2.
Met rand 8K2.
+
5
4
3
2
1
PHOT
FaultPHOT
Com.PHOT
Safety edge
Safety edge
8K2 Ω
9
8
7
6
LD5
LD4
LD3
5
LD2
LD1
4
3
24V~(-)
24V~(+)
2
1
Ø 5 X 0,50
Selezionare Resistiva - Posizione A Resistive setting -Position ASélection Résistif -Position A Auswahl Widerstand -Position ASelección Resistiva-Posición ASelectie Resistief-Positie A-
DCW - 5
LD1
LD2
LD1
Distancia máx / Max. afstand
*
OFF
1
G
LD3
x5
2
3
OFF
ON
OK!
KO!
4
5
6
Frequenza lampeggio veloce=allineamento OK!
alignment OK!
Fréquence du clignotement rapide = alignement OK! Schnelles Blinken = ausrichtung OK!
Frecuencia parpadeo rápido = alineación OK! Frequentie snel knipperen= uitlijning OK!
LD5
LD5
LD4
LD4
LD3
LD3
LD2
LD2
LD1
OK!
LD1
DCW RX
DCW RX
7
DCW TX
DCW RX
LD4
LD3
LD2
LD1
V1
R1
V1
3
10
R1
8
6 - DCW
9
6
3,5
1
10
D811598 00100_02
LD4
distanza / Max. distance
* Max.
Distance maxi / Max. Abstand
D811598 00100_02
H
DCW RX
Led segnalazione batteria scarica. / Battery low warning LED.
Del de signalisation que la batterie est déchargée / LED Anzeige Batterie leer.
Led señalización batería descargada / Signaleringsled lege batterij.
N.O.
FOTOCELLULA (a riposo)*
N.C.
FOTOCELLULA*1 COM
(a riposo)*2
VSAFE
7
6
N.O. COSTA
5
N.C. COSTA
4
COM COSTA
3
24V~/- 24V
2
1
24V~/+ 24V
*
Centratura / Centring / Centrage / Zentrierung / Centrado / Centrering.
9
8
Non utilizzato/ Not used/ Non utilisé/ Nicht verwendet / No utilizado/ Niet gebruikt.
LD5
Led segnalazione Stato fotocellula. / Photocell status indicator LED.
Del de signalisation de l’état de la Photocellule. / LED Anzeige Status Fotozelle.
Led señalización Estado fotocélula. / Signaleringsled Status fotocel.
LD4
LD6
LD3
LD2
LD1
PHOTOCELL (on standby), PHOTOCELLULE (au repos),
FOTOZELLE (in Ruhestellung), FOTOCÉLULA (en reposo),
FOTOCEL (in ruststand).
*1 PHOTOCELL, PHOTOCELLULE, FOTOZELLE,
FOTOCÉLULA, FOTOCEL.
*2 (on standby), (au repos), (in Ruhestellung), (en reposo), (in ruststand).
Led segnalazione Stato costa. / Safety edge status indicator LED.
Del de signalisation de l’état du linteau. / LED Anzeige Status Leiste.
Led señalización estado canto. / Signaleringsled status rand.
Presenza tensione, acceso con alimentazione presente.
Power indicator, lit when power is on.
Présence de tension, allumé avec alimentation présente.
Spannung vorhanden, Zugang bei vorhandender Speisung.
Presencia tensión, encendido con alimentación presente.
Aanwezigheid spanning, ingeschakeld bij aanwezige spanning.
Ponticello centratura. / Centring jumper.
Pont centrage. / Jumper Zentrierung.
Puente centrado. / Brug centrering.
DCW TX
JP1: Aperto portata 7m. Chiuso Portata 15m. / Open range 7m. Closed Range 15m.
Ouvert portée 7m. Fermé Porte 15m. / Offen Reichweite 7m Geschlossen Reichweite 15m.
Abierto capacidad 7m. Cerrado Capacidad 15m. / Open reikwijdte 7m. Dicht Reikwijdte 15m.
LED segnalazioneinserimento batteria. / Battery power ON indicator LED.
DEL de signalisation engagement batterie. / LED Anzeige Einschaltung Batterie.
LED señalización activación batería. / Signaleringsled plaatsing batterij.
+
5
4
3
2
1
Marrone Sensore Ottico RX. / Brown RX Optical Sensor / Marron Capteur Optique Rx
Braun Sensor Optik RX. / Marrón Sensor Óptico RX. / Bruin Optische Sensor RX.
Verde Sensore Ottico RX. / Green RX Optical sensor. / Vert Capteur Optique Rx.
Grün Sensor Optik RX. / Verde Sensor óptico RX. / Groen Optische sensor RX.
Bianco Sensore Ottico RX. / White RX Optical Sensor. / Blanc Capteur Optique Rx.
Weiß Braun Sensor Optik RX. / Blanco Sensor Óptico RX. / Wit Optische Sensor RX.
Bianco Sensore Ottico TX-Costa resistiva 8k2. / White TX Optical Sensor-8K2 resistive safety edge.
Blanc Capteur Optique Tx – Linteau résistif 8K2. / Weiß Sensor Optik TX-Widerstandsleiste 8K2.
Blanco Sensor Óptico TX-Canto resistivo 8K2. / Wit Optische Sensor TX-Resistieve rand 8K2.
Marrone Sensore Ottico TX-Costa resistiva 8k2. / Brown TX Optical Sensor-8K2 resistive safety edge.
Marron Capteur Optique Tx – Linteau résistif 8K2. / Braun Sensor Optik TX-Widerstandsleiste 8K2.
Marrón Sensor Óptico TX-Canto resistivo 8K2. / Bruin Optische Sensor TX-Resistieve rand 8K2.
JP2: (Fig.F Rif.4) Posizione A-Costa ottica. / Position A-Optical safety edge. / Position A - Linteau Optique.
Position A-Optische Leiste. / Posición A-Canto Óptico. / Positie A-Optische Rand.
JP2: (Fig.F Rif.5) Posizione B-Costa resistiva 8K2. / Position B-8K2 resistive safety edge. / Position B – Linteau résistif 8K2.
Position B-Widerstandsleiste 8K2. / Posición B-Canto resistivo 8K2. / Positie B-Resistieve rand 8K2.
DCW - 7
OPERATING AND INSTALLATION INSTRUCTIONS
Nel ringraziarVi per la preferenza accordata a questo prodotto, la Ditta è
certa che da esso otterrete le prestazioni necessarie al Vostro uso. Leggete attentamente l’opuscolo ”Libretto istruzioni” che lo accompagna
in quanto esso fornisce importanti indicazioni riguardanti la sicurezza,
l’installazione, l’uso e la manutenzione.
Questo prodotto risponde alle norme riconosciute della tecnica e delle
disposizioni relative alla sicurezza. Confermiamo che esso è conforme
alle seguenti direttive europee: 2004/108/CEE.
Il dispositivo è di tipo C secondo EN12453-5.5.1 può essere utilizzato
anche come rilevatore di presenza, quindi come dispositivo di tipo D
secondo EN12453, in entrambi i modi di utilizzo esso risulta conforme
alla direttiva 98/37/CEE solo se collegato a un quadro di controllo del
medesimo costruttore dotato di circuito di verifica di guasto nei circuiti
di sicurezza e ad un elemento sensibile conforme.
Thank you for buying this product. Our company is sure that you will be
more than satisfied with the product’s performance.
Carefully read the “INSTRUCTION BOOKLET” which is supplied together
with this product, since they provide important information regarding
the safety, installation, use and maintenance of the product.
This product complies with recognised technical standards and safety
regulations. We declare that this product is in conformity with the following European Directives: 2004/108/EEC.
This is a type C device according to EN 12453-5.5.1. It can also be used
as a presence detector, hence as a type D device according to EN 12453.
For both purposes, it will only be in conformity with directive 98/37/EEC
provided it is connected to a control panel from the same manufacturer
equipped with a test circuit that looks for faults in the safety circuits and
with a conforming safety edge.
ATTENZIONE:
- nelle operazioni di cablaggio ed installazione riferirsi alle norme vigenti
e in ogni caso ai principi di buona tecnica.
- modifiche al dispositivo o alla configurazione dell’apparato senza la
consultazione del fabbricante possono determinare situazioni di pericolo.
WARNING:
- when carrying out connection and installation operations always
refer to the current legislation in force, as well as to good technical
principles.
- making changes to the device or to the unit’s configuration without
consulting the manufacturer may result in hazardous situations.
USO DEL DISPOSITIVO
Tenere le aree che danno accesso al dispositivo di sicurezza libere da ostacoli. In particolare controllare che rami e arbusti non interrompano il raggio emesso dalla trasmittente.
Nel caso di intervento del dispositivo di sicurezza non sono necessarie operazioni di riarmo o riattivazione in quanto il ripristino del
normale funzionamento del cancello avverrà automaticamente.
USING THE DEVICE
Keep areas that lead to the safety device clear of obstacles. More specifically, make sure that no branches or shrubs break the beam emitted
by the transmitter. If the safety device is triggered, no resetting or reenabling is required since the gate’s regular operation will be restored
automatically.
MANUTENZIONE E DEMOLIZIONE
Su DCW RX è presente un led LD6 di segnalazione batteria scarica,
quando il led LD6 inizia a lampeggiare DCW TX ha circa un mese di autonomia, provvedere alla sostituzione della batteria. Quando il dispositivo è collegato a un quadro di controllo del medesimo costruttore
dotato di circuito di verifica di guasto nei circuiti disicurezza non necessita di manutenzione in quanto il controllo viene eseguito automaticamente ad ogni manovra (intervalli di prova in conformità all’analisi di
rischio o EN12453). Nel caso non si utilizzi il circuito di verifica di guasto
nei circuiti di sicurezza bisogna far verificare da personale qualificato la
funzionalità del dispositivo ad intervalli non maggiori di 6 mesi.
I materiali costituenti l’apparecchiatura e il suo imballo vanno smaltiti
secondo le norme vigenti. In caso di mal funzionamento rivolgersi a
personale qualificato.
Tutte le operazioni di regolazione, sia meccaniche che elettriche,
devono essere eseguite solo da personale autorizzato in accordo con le regole di sicurezza e con le istruzioni del fabbricante
Si raccomanda di verificare periodicamente:
- che la costa sensibile non presenti danni o deformazioni permanenti;
diversamente far sostituire da personale qualificato;
- che il LED di segnalazione di batteria scarica (LD6) non lampeggi;
per la sostituzione si faccia riferimento alla tabella 2) e al precedente
paragrafo;
- che la marcatura del dispositivo sia presente e e sia leggibile;
Nel caso in cui eccessivo sporco si depositi sulla superficie delle fotocellule
pulire con un panno le lenti della fotocellula.
AVVERTENZE
Il buon funzionamento è garantito solo se vengono rispettati i dati
riportati in questo manuale. La Ditta non risponde dei danni causati
dall’inosservanza delle norme di installazione e delle indicazioni riportate in questo manuale.
Le descrizioni e le illustrazioni del presente manuale non sono impegnative. Lasciando inalterate le caratteristiche essenziali del
prodotto, la Ditta si riserva di apportare in qualunque momento le
modifiche che essa ritiene convenienti per migliorare tecnicamente,
costruttivamente e commercialmente il prodotto, senza impegnarsi
ad aggiornare la presente pubblicazione.
8 - DCW
MAINTENANCE AND SCRAPPING
DCW RX features a battery low warning LED LD6. When LD6 starts flashing,
it means DCW TX has about one month’s battery life left: replace the
battery. When the device is connected to a control panel from the same
manufacturer, provided with a fault-finding circuit in safety circuits, it
requires no maintenance, since testing is carried out automatically with
each manoeuvre (test intervals conforming to risk analysis or EN12453).
In the case where the fault-finding circuit in safety circuits is not used, get
qualified personnel to check the device function at intervals not longer
than 6 months. The materials making up the appliance and its packing
must be disposed of according to current regulations.
In case of malfunction, request the assistance of qualified personnel.
All adjustments, whether mechanical or electrical, must be carried out
by authorized personnel only in accordance with the safety rules and
instructions issued by the manufacturer. You are advised to check at
regular intervals:
- that the safety edge is not damaged or permanently misshapen;
otherwise, have it replaced by qualified personnel;
- that the battery low warning LED (LD6) is not flashing; refer to table
2) and the previous section for replacement instructions;
- that the device features legible markings;
If excessive amounts of dirt build up on the surface of the photocell,
clean the photocell lenses with a cloth.
WARNING!
Correct operation is only ensured when the data contained in the
present manual are observed. The company is not to be held responsible for any damage resulting from failure to observe the installation standards and the instructions contained in the present
manual.
The descriptions and illustrations contained in the present manual
are not binding. The Company reserves the right to make any alterations deemed appropriate for the technical, manufacturing
and commercial improvement of the product, while leaving the
essential product features unchanged, at any time and without
undertaking to update the present publication.
D811598 00100_02
AVVERTENZE D’USO E D’INSTALLAZIONE
D811598 00100_02
AVERTISSEMENTS SUR L’UTILISATION ET L’INSTALLATION
Nous vous remercions pour avoir choisi ce produit. Nous sommes sûrs
qu’il vous rendra le service nécessaire à vos besoins. Lire attentivement
le “Manuel d’instructions” qui accompagne ce produit puisqu’il
fournit d’importantes indications concernant la sécurité, l’installation, l’utilisation et l’entretien.
Ce produit est conforme aux normes reconnues de la technique et aux
dispositions concernant la sécurité. Nous confirmons sa conformité aux
directives européennes suivantes: 2004/108/CEE.
Le dispositif de type C conformément à la norme EN12453-5.5.1 peut
faire office de détecteur de présence et donc de dispositif de type D conformément à la norme EN12453 ; dans les deux cas il n’est conforme à la
directive 98/37/CEE que s’il est branché sur un tableau de commande du
même fabricant équipé de circuit de vérification des pannes survenant
aux circuits de sécurité et sur un élément sensible conforme.
ATTENTION:
- pendant les opérations de câblage et d’installation, suivre les normes
en vigueur ou en tous les cas les principes de bonne technique.
- les modifications apportées au dispositif ou à la configuration de
l’appareil sans avoir consulté le fabricant risquent de créer des situations de danger.
UTILISATION DU DISPOSITIF
Libérez de tous les obstacles les aires d’accès au dispositif de sécurité.
Vérifiez en particulier si aucun arbuste et/ou branche n’interrompt le
rayon émis par l’émetteur. Si le dispositif de sécurité intervient aucune
opération de réarmement/réactivation n’est nécessaire car le rétablissement du fonctionnement normal du portail est automatique.
ENTRETIEN ET DÉMOLITION
La Del LD6, qui équipe le DCW RX, signale si la batterie est déchargée :
lorsque la Del commence à clignoter le DCW TX dispose d’environ un
mois d’autonomie avant qu’il ne soit nécessaire de remplacer la batterie. Lorsque le dispositif est branché à un tableau de contrôle du même
fabricant qui est équipé du circuit de vérification de panne dans les
circuits de sécurité, il n’a pas besoin d’entretien car le contrôle est réalisé automatiquement à chaque manœuvre (les intervalles d’essai sont
appliqués conformément à l’analyse du risque ou selon EN12453). Si
le circuit de vérification de panne dans les circuits de sécurité n’est pas
utilisé, il faut faire vérifier par un personnel qualifié le bon fonctionnement du dispositif à des intervalles qui ne dépassent pas les 6 mois.
Les matériaux qui constituent l’appareil et son emballage doivent être
éliminés selon les normes en vigueur.
S’adresser à un personnel qualifié en cas de mauvais fonctionnement.
Toutes les opérations de réglage, mécaniques et électriques, ne doivent
être accomplies que par du personnel autorisé, conformément aux
règlements de sécurité et aux instructions du fabricant.
Nous recommandons de vérifier périodiquement:
- si le linteau sensible ne présente aucune trace de dommage et/ou
déformation permanente, si c’est le cas faites-le remplacer par du
personnel qualifié;
- si la DEL signalant que la batterie est déchargée (LD6) ne clignote
pas, pour la remplacer consultez le tableau 2) et le paragraphe précédent;
- si l’estampille du dispositif est présente et lisible.
Si la surface des photocellules est trop sale nettoyez avec un chiffon les
verres de la photocellule.
AVERTISSEMENT
Le bon fonctionnement n’est assuré que si les données fournies
dans ce manuel sont respectées. La firme décline toute responsabilité en cas de dommages provoqués par le non respect des normes d’installation et des indications fournies dans ce manuel.
Les descriptions et les figures de ce manuel ne sont pas engageantes. Tout en laissant inchangées les caractéristiques essentielles
du produit, la firme se réserve la faculté d’apporter à n’importe
quel moment les modifications qu’elle jugera nécessaires pour
améliorer le produit du point de vue technique, commercial et de
la construction, sans pour autant s’engager à mettre à jour cette
publication.
HINWEISE ZUR BENUTZUNG UND ZUR INSTALLATION
Wir danken Ihnen für den Kauf dieses Produkts und sind sicher, daß
seine Leistungen Sie bei der von Ihnen vorgesehenen Anwendung
zufriedenstellen werden.
Bitte lesen Sie aufmerksam die Broschüre “WARNHINWEISE” und die “BEDIENUNGSANLEITUNG”, die mit der Maschine geliefert werden, da sie wichtige
Hinweise zur Sicherheit, Installierung, Anwendung und Wartungenthalten.
Dieses Produkt entspricht den anerkannten technischen und die Sicherheits vorrichtungen betreffenden Vorschriften. Wir bestätigen, daß es überein
stimmt mit den folgenden Europäischen Richtlinien: 2004/108/EWG.
Die Vorrichtung entspricht Typ C gemäß EN12453-5.5.1 und kann als
Anwesenheitsmelder eingesetzt werden, das heißt als Vorrichtung vom
Typ D gemäß EN12453; in beiden Benutzungsweisen entspricht sie nur
dann der EU-Richtlinie 98/37, wenn sie an eine Steuerung des gleichen
Herstellers mit Fehlerprüfungsschaltung in der Sicherheitsschaltung und
einem zugelassenen sensiblen Element ausgestattet ist.
ACHTUNG:
- bei Verkabelung und Installation halten Sie sich bitte an die geltenden
Vorschriften und die anerkannten technischen Regeln.
- Änderungen der Vorrichtungen oder der Konfigurierung ohne vorausgehende Konsultation des Herstellers können zu Gefahrensituationen führen.
BENUTZUNG DER VORRICHTUNG
Halten Sie die Zugangsbereiche zur Sicherheitsvorrichtung frei von
Hindernissen. Stellen Sie vor allem sicher, dass keine Zweige und Sträucher den Aktionsradius des Senders einschränken. Bei Eingriffen der
Sicherheitsvorrichtung sind keine Eingriffe zur Rückstellung erforderlich,
da die Rückstellung der normalen Betriebsweise automatisch erfolgt.
INSTANDHALTUNG UND VERSCHROTTUNG
Die Vorrichtung DCW RX weist eine LED LD6 für die Anzeige des Ladestands der Batterie auf; wenn die LED LD6 zu blinken beginnt, hat die
DCW TX noch eine Batterierestladung für ca. einen Monat. Wechseln
Sie die Batterie aus. Wenn die Einrichtung an eine Steuerung desselben Herstellers angeschlossen ist, deren Sicherheitsschaltkreise über
eine Fehlerprüfschaltung verfügen, bedarf sie keiner Wartung, weil die
Prüfung automatisch bei jedem Betriebsvorgang vorgenommen wird
(Prüfintervalle gemäß Risikoanalyse oder EN12453). Falls die Fehlerprüfschaltung in den Sicherheitsschaltkreisen nicht verwendet wird,
muss die Funktionsfähigkeit der Einrichtung turnusmäßig spätestens
jedes halbe Jahr von Fachleuten überprüft werden. Die Werkstoffe, aus
denen das Gerät und seine Verpackung bestehen, müssen nach den
geltenden Vorschriften entsorgt werden.
Bei Fehlfunktionen bitte Fachleute hinzuziehen.
Alle mechanischen und elektronischen Einstellarbeiten müssen von dazu
befugtem Personal unter Beachtung der Sicherheitsbestimmungen und
der Anweisungen des Herstellers vorgenommen werden.Stellen Sie in
regelmäßigen Abständen sicher:
- das die druckempfindliche Leiste keine Beschädigungen oder bleibende
Verformungen aufweist; lassen Sie sie anderenfalls von qualifiziertem
Personal auswechseln;
- dass die LED für die Anzeige des Batterieladestands (LD6) nicht blinkt;
nehmen Sie für die Ersetzung auf Tabelle 2) sowie den vorausgehenden
Abschnitt Bezug;
- dass die Kennzeichnung der Vorrichtung vorhanden und lesbar ist.
Reinigen Sie die Linsen der Fotozellen mit einem Tuch, falls sie stark
verschmutzt sind.
HINWEISE
Der einwandfreie Betrieb ist nur dann gewährleistet, wenn die
Angaben in diesem Handbuch beachtet werden. Die Firma haftet
nicht für Schäden, die zurückzuführen sind auf die Mißachtung
der Installationsanweisungen und der in diesem Handbuch enthaltenen Ausführungen.
Die Erläuterungen und Bilddarstellungen in diesem Handbuch
sind unverbindlich. Unter der Voraussetzung, daß die wesentlichen
Produkteigenschaften nicht verändert werden, behält sich die Firma das Recht vor, jederzeit Änderungen anzubringen, die sie für
die technische, konstruktive und kommerzielle Verbesserung des
Produktes für notwendig erachtet, ohne verpflichtet zu sein, auch
diese Veröffentlichung auf den neuesten Stand zu bringen.
DCW - 9
INSTRUCTIES VOOR GEBRUIK EN INSTALLATIE
Al agradecerle la preferencia que ha manifestado por este producto, la
empresa está segura de que de él obtendrá las prestaciones necesarias
para sus exigencias.
Lea atentamente el “Manual de Instrucciones” que lo acompaña, pues
proporciona importantes indicaciones referentes a la seguridad, la
instalación, el uso y el mantenimiento.
Este producto cumple los requisitos establecidos por las normas
reconocidas de la técnica y las disposiciones relativas a la seguridad.
Confirmamos su conformidad con las siguientes directivas europeas:
2004/108/CEE.
El dispositivo es de tipo C según EN12453-5.5.1 puede ser utilizado también como detector de presencia, por lo tanto como dispositivo de tipo D
según EN12453, en ambos modos de uso el mismo presenta conformidad
con la directiva 98/37/CEE sólo si está conectado a un cuadro de control
del mismo fabricante, equipado con circuito de control de avería en los
circuitos de seguridad y a un elemento sensible conforme.
Wij danken u ervoor dat u de voorkeur hebt gegeven aan dit product.
Wij als bedrijf zijn er zeker van dat dit product de voor uw gebruik noodzakelijke prestaties kan leveren. De folder ”Instructieboekje” die met dit
product meegeleverd wordt aandachtig lezen, omdat hierin belangrijke
aanwijzingen worden gegeven over de veiligheid, de installatie, het
gebruik en het onderhoud.
Dit product voldoet aan de erkende normen van de techniek en van de
bepalingen betreffende de veiligheid. Wij bevestigen dat het product
conform is aan de volgende Europese richtlijnen: 2004/108/CEE.
De inrichting is van het type C volgens EN12453-5.5.1 en kan ook als
aanwezigheidsdetector worden gebruikt, dus als inrichting van het type
D volgens EN12453; bij beide gebruikswijzen voldoet het product alleen
aan de richtlijn 98/37/CEE, als het is aangesloten op een schakelbord van
dezelfde fabrikant dat is uitgerust met circuit voor controle van storing
in de veiligheidscircuits en op een conform gevoelig element.
¡ATENCION:
- en las operaciones de cableado e instalación, deben respetarse las normas vigentes y, en cualquier caso, los principios de buena técnica.
- modificar el dispositivo o la configuración del aparato, sin consultar
con el fabricante, puede ocasionar determinadas situaciones de peligro.
OPGELET:
- bij de bekabelings- en installatiewerkzaamheden de geldende normen
en in ieder geval de principes van goed gebruik raadplegen;
- wijzigingen aan de inrichting of aan de configuratie van het apparaat zonder de fabrikant te raadplegen, kunnen leiden tot gevaarlijke
situaties.
USO DEL DISPOSITIVO
Mantener las áreas de acceso al dispositivo de seguridad libres de obstáculos. En particular, controlar que ramas y arbustos no interrumpan
el rayo emitido por la unidad transmisora.
Si se acciona el dispositivo de seguridad no son necesarias operaciones
de rearme o reactivación, ya que el funcionamiento normal de la cancela
se restaurará de forma automática.
MANTENIMIENTO Y DEMOLICION
DCW RX cuenta con un led LD6 de señalización de batería descargada,
cuando el led LD6 comienza a parpadear a DCW TX le queda aproximadamente un mes de autonomía, por lo tanto sustituir la batería. Cuando
el dispositivo se conecta a un cuadro de control del mismo constructor
dotado de circuito de control de averías en los circuitos de seguridad,
no necesita mantenimiento ya que el control se ejecuta automáticamente en cada maniobra (intervalos de prueba de conformidad con la
Directiva sobre el análisis de los riesgos o EN12453). En caso de que no
se utilice el circuito de control de averías en los circuitos de seguridad,
es necesario hacer controlar por personal cualificado la funcionalidad
del dispositivo a intervalos no superiores a 6 meses. Los materiales que
constituyen el equipo y su embalaje deben eliminarse de conformidad
con las normas vigentes.
En caso de mal funcionamiento, diríjase a personal cualificado.
Todas las operaciones de regulación, mecánicas y eléctricas, deben ser
realizadas sólo por personal autorizado conforme a las reglas de seguridad y las instrucciones del fabricante
Se recomienda controlar periódicamente:
- que el canto sensible no presente daños ni deformaciones permanentes;
de lo contrario hacerlo sustituir por personal cualificado;
- que el LED de señalización de batería descargada (LD6) no parpadee,
para la sustitución consultar la tabla 2) y el apartado anterior;
- que el marcado del dispositivo esté presente y sea legible.
En caso de que la suciedad excesiva se deposite en la superficie de las
fotocélulas, limpiar las lentes de la fotocélula con paño.
ADVERTENCIAS
El buen funcionamiento está garantizado únicamente si se respetan los datos indicados en este manual. La empresa no responde
de los daños causados por el incumplimiento de las normas de instalación y de las indicaciones contenidas en este manual.
Las descripciones y las ilustraciones del presente manual tienen carácter indicativo. Dejando inalteradas las características
esenciales del producto, la Empresa se reserva la posibilidad de
aportar, en cualquier momento, las modificaciones que considere
oportunas para mejorar técnica, constructiva y comercialmente el
producto, sin obligación de actualizar la presente publicación.
10 - DCW
GEBRUIK VAN DE INRICHTING
De zones die toegang geven tot de veiligheidsinrichting vrijhouden
van obstakels. Met name controleren of takken en struiken de door het
zendtoestel afgegeven straal niet onderbreken. In geval van activering
van de veiligheidsinrichting zijn er geen werkzaamheden tot blokkeringsopheffing of heractivering noodzakelijk, aangezien het herstel van
de normale werking van het hek automatisch plaatsvindt.
ONDERHOUD EN SLOOP
Op DCW RX is een led LD6 aanwezig ter signalering van lege batterij;
wanneer de led LD6 begint te knipperen, heeft DCW TX ongeveer een
maand autonomie; zorgen voor de vervanging van de batterij. Wanneer
de inrichting is aangesloten op een schakelbord van dezelfde fabrikant
uitgerust met circuit voor controle van storing in de veiligheidscircuits
heeft de inrichting geen onderhoud nodig, aangezien de controle automatisch bij iedere manoeuvre wordt uitgevoerd (testintervallen overeenkomstig de risicoanalyse of EN12453). Als het circuit voor controle van
storing in de veiligheidscircuits niet gebruikt wordt, is het noodzakelijk
de functionaliteit van de inrichting door gekwalificeerd personeel te
laten controleren met intervallen van max. 6 maanden.
De materialen waaruit het apparaat en de verpakking ervan bestaan,
moeten volgens de geldende normen verwerkt worden. In geval van
storing dient u zich te wenden tot gekwalificeerd personeel.
Alle afstellingswerkzaamheden, zowel mechanisch als elektrisch, mogen
alleen worden uitgevoerd door geautoriseerd gekwalificeerd personeel
volgens de veiligheidsregels en de instructies van de fabrikant. Het wordt
aanbevolen periodiek te controleren:
- of de detector geen schade of permanente vervormingen vertoont;
anders laten vervangen door gekwalificeerd personeel;
- of de signaleringsled voor lege batterij (LD6) niet knippert; voor de
vervanging tabel 2) en de vorige paragraaf raadplegen
- of de markering van de inrichting aanwezig en leesbaar is;
Mocht er buitengewoon veel vuil neerslaan op het oppervlak van de
fotocellen, de lenzen van de fotocel met een doek schoonmaken.
WAARSCHUWINGEN
Het goed functioneren is alleen gegarandeerd, als de in deze handleiding vermelde gegevens worden nageleefd. Het Bedrijf is niet
gehouden zich te verantwoorden voor de schade veroorzaakt door
het niet in acht nemen van de installatienormen en de aanwijzingen vermeld in deze handleiding.
De beschrijvingen en illustraties van deze handleiding zijn niet
bindend. Terwijl de hoofdkenmerken van het product ongewijzigd
blijven, behoudt het Bedrijf zich het recht voor om op ieder willekeurig moment die wijzigingen aan te brengen die zij geschikt acht
om het product technisch, constructief en commercieel gezien te
verbeteren, zonder deze publicatie te hoeven bijwerken.
D811598 00100_02
ADVERTENCIAS DE USO Y DE INSTALACIÓN
D811598 00100_02
1) GENERALITÁ
DCW è un dispositivo che può essere impiegato su cancelli scorrevoli
e consente di risolvere il problema del collegamento tra i bordi sensibili posti sull’anta mobile e la centrale di comando dell’anta. DCW
è composto da due unità ricetrasmittenti che comunicano tra di loro
attraverso segnali a raggi infrarossi, la comunicazione è codificata con
tecniche di sicurezza tali che l’intero dispositivo risponde alla categoria
2 di sicurezza ai guasti secondo la norma EN954-1 ed è quindi utilizzabile in sistemi PSPE conformi alla norma EN 12978.
DCW è costituito da 2 unità:
7) COLLAUDO Fig. G-H
Al termine del collaudo, eseguire alcune manovre di prova e verificare
che:
a) Quando il bordo sensibile viene premuto l’automazione reagisca
correttamente.
b) Quando si interrompe la comunicazione tra DCW RX e DCW TX interponendo un ostacolo l’automazione reagisca correttamente.
c) Quando non verificano le precedenti 2 condizioni la manovra viene
completata correttamente.
- DCW TX, alimentata con una batteria a lunga durata, va posta sull’anta
mobile e ad essa può essere collegato il bordo sensibile che può essere
di tipo ottico (con accessorio STR + profilo in gomma max. 2,5m) o di
tipo resistivo con resistenza costante 8k2.
ATTENZIONE!
Per il collegamento dei contatti dei relè al circuito di verifica di guasto è necessario riferirsi agli schemi di collegamento dei dispositivi
verificati riportati nel manuale di istruzioni della centrale che si sta utilizzando.
- DCW RX va posta nella parte fissa ed è cablata alla centrale di comando del cancello.
DCW è progettata per essere collegata come dispositivo verificato. Il
dispositivo, oltre a funzionare come sistema di collegamento tra un
bordo sensibile e la centrale di comando, può essere utilizzato anche
come rilevatore di presenza e quindi come dispositivo di categoria D
secondo la norma EN 12453. Per utilizzare DCW come dispositivo di
tipo D è sufficiente che la comunicazione tra DCW TX e DCW RX avvenga attraverso il varco (Vedi Fig. B Rif.1).
2) DATI TECNICI
DCW TX
Alimentazione
Durata Batteria
Tempo di risposta dopo la
pressione della costa
ATTENZIONE!
La presenza di altri dispositivi che utilizzano i raggi infrarossi (fotocellule) può causare disturbi nella comunicazione. Non si può installare
più di una coppia di DCW per controllare la stessa area. Nel caso che
il segnale di comunicazione di DCW sia disturbato da un altro segnale
infrarosso DCW porta l’automazione in uno stato di sicurezza aprendo
entrambi i contatti.
8) ELEMENTO SENSIBILE COLLEGABILE A DCW TX
COSTA OTTICA
Sensori
STR
Lunghezza massima costa
2,5m
3,6V Batteria al Litio tipo C. Capacità 7,5Ah
COSTA RESISTIVA
5 anni
Resistenza nominale
8k2
Soglia di scatto superiore
>22000 Ω
Resistenza massima a riposo
18000 Ω
Soglia di scatto inferiore
< 2200 Ω
Resistenza minima a riposo
4700 Ω
(Durata stimata su installazione con corsa
di 4m alla velocità di 9 m/min 10 S di TCA 30
man/giorno con costa ottica fino a 2,5m e
temperatura di +20°C).
<35mS
DCW RX
Tensione di alimentazione
24 V~/=
Corrente Assorbita
20mA a riposo / 36mA max
Portata contatti
30V, 1A
DCW TX + DCW RX
Grado di protezione
IP45
Temperatura di esercizio
-20/+55°C
Portata Utile
7m con ponticello JP1 aperto,
15m con ponticello JP1 chiuso
Dimensioni
130X45X43 (HxLxD)
Categoria secondo la EN954-1
Cat 2
3) CORRETTO ALLINEAMENTO Fig. A - B
4) FORATURA PER INSTALLAZIONE Fig. C
5) PASSAGGIO CAVI DCW RX (Fig. D) e DCW TX (Fig. E):
- attraverso il foro posteriore Rif. 1A
- attraverso il pressacavo Rif. 1B
Fissare il bordo sensibile al profilo dell’anta seguendo le indicazioni riportate nel manuale di istruzioni del bordo sensibile utilizzato.
6) COLLEGAMENTI Fig. F
Il collegamento di DCW come dispositivo non verificato causa un
consumo anomalo della batteria.
Nel caso non si utilizzi il circuito di verifica di guasto nei circuiti di sicurezza far verificare da personale qualificato la funzionalità del dispositivo ad intervalli non maggiori di 6 mesi.
DCW - 11
ITALIANO
MANUALE PER L’INSTALLAZIONE
ENGLISH
1) FOREWORD
DCW is a device that can be used on sliding gates and provides a solution to the problem of connecting safety edges located on the moving
leaf with the door’s control unit. DCW comprises two transceiver units
that communicate with each other through infrared signals. Communication is coded using special safety techniques so that the whole device gets a category 2 fault detection rating according to standard EN
954-1 and can therefore be used in PSPE systems in conformity with
standard EN 12978.
DCW comprises 2 units:
- DCW TX, which is powered by a long-life battery, should be attached
to the moving leaf and can be connected with the safety edge, which
can either be optical (using the STR accessory = rubber profile max.
2.5m) or resistive with a constant 8k2 resistance.
- DCW RX should be attached to the fixed part and is wired to the gate’s
control unit.
DCW is designed to be connected as a tested device. In addition to
working as a connection system between a safety edge and the control
unit, the device can also be used as a presence detector and hence as
a category D device according to standard EN 12453. To use DCW as
a type D device, DCW TX and DCW RX merely have to communicate
across the opening (See Fig. B Ref.1).
2) TECHNICAL SPECIFICATIONS
DCW TX
Power supply
Battery life
5 years
(Life estimated based on installation
with 4m travel at speed of 9 m/min,
TCA 10 S, 30 operations/day with optical safety edge up to 2.5 m and temperature of +20°C).
Response time from when safety
<35mS
edge is pressed
DCW RX
Supply voltage
24 V~/=
Current demand
Standby 20mA / max. 36mA
Contact capacity
30V, 1A
DCW TX + DCW RX
IP45
Operating temperature
-20/+55°C
Operating range
7m with jumper JP1 open,
15m with jumper JP1 closed
Dimensions
130X45X43 (HxLxD)
Category according to EN 954-1
Cat 2
3) CORRECT ALIGNMENT Fig. A - B
4) HOLES FOR INSTALLATION Fig. C
5) RUNNING DCW RX (Fig. D) and DCW TX (Fig. E) CABLES:
- through hole in back Ref. 1A
- through cable clamp Ref. 1B
Fasten the safety edge to the edge of the leaf following the directions
given in the instruction manual for the safety edge being used.
6) WIRING Fig. F
Connecting DCW as a non-tested device causes the battery to run
down quicker than usual.
If no safety circuit fault test circuit is being used, qualified personnel
must be brought in to check that the device is in proper working order
at least once every 6 months.
12 - DCW
WARNING!
To connect the relay contacts to the fault test circuit, you must refer
to the wiring diagrams of the tested devices given in the instruction
manual for the control unit being used.
WARNING!
If other devices using infrared beams (photocells) are present, they
may interfere with communication. You cannot install more than one
pair of DCW devices to control the same area. In the event the DCW
communication signal is affected by interference from another DCW
infrared signal, switch the automated system to a safe state by opening
both contacts.
8) SAFETY EDGE THAT CAN BE CONNECTED TO DCW TX
OPTICAL SAFETY EDGE
Sensors
STR
Maximum safety edge length
2,5m
RESISTIVE SAFETY EDGE
3.6V Type C lithium battery. Capacity
7.5Ah
Protection rating
7) INSPECTION Fig. G-H
Once inspection is complete, perform a few test cycles and check that:
a) When the safety edge is pressed, the automated system reacts as it
should.
b) When communication is broken between DCW RX and DCW TX by
placing an obstacle between them, the automated system reacts as
it should.
c) When the previous 2 operating conditions are not encountered,
the operation is completed correctly.
Rated resistance
8k2
Upper trigger threshold
>22000 Ω
Maximum standby resistance
18000 Ω
Lower trigger threshold
< 2200 Ω
Minimum standby resistance
4700 Ω
D811598 00100_02
INSTALLATION MANUAL
D811598 00100_02
MANUEL D’INSTALLATION
1) GÉNÉRALITÉS
DCW peut être utilisé sur les portails coulissants pour résoudre le problème de connexion entre les linteaux sensibles placés sur le vantail
mobile et la centrale de commande du vantail. DCW est formée par
deux émetteurs/récepteurs communiquant entre eux par des signaux
infrarouges ; la communication est cryptée grâce à des techniques de
sécurité si bien que le dispositif appartient à la catégorie à 2 sécurités
contre les pannes, conformément à la norme EN954-1 et peut donc
être utilisé dans les systèmes PSPE conformes à la norme EN12978.
DCW est formé par 2 unités :
-
DCW TX, alimentée par une batterie longue durée, doit être placée
sur le vantail mobile et on peut y connecter le bord sensible, qui
peut être du type optique (avec accessoire STR + profilé en caoutchouc maxi 2,5m) ou de type résistif avec une résistance constante
8k2.
-
DCW RX doit être placée dans la partie fixe et câblée sur la centrale
de commande du portail.
2) DONNÉES TECHNIQUES
DCW TX
Alimentation
3,6 V Batterie au lithium type C Capacité 7,5 Ah
Durée Batterie
5 ans
(Durée estimée sur installation avec linteau
de 4 m à la vitesse de TCA 30 man/jour avec
liteau optique jusqu’à 2,5 m et température
de +20°C.
Temps de réponse après la
pression du linteau
<35mS
ATTENTION !
Pour brancher les contacts des relais sur le circuit de vérification des
pannes consultez les schémas de connexion des dispositifs vérifiés qui
se trouvent dans le manuel d’instruction de la centrale que vous utilisez.
ATTENTION !
La présence d’autres dispositifs utilisant des rayons infrarouges (photocellules) peut nuire à la communication. Vous ne pouvez installer
qu’une paire de DCW pour contrôler la même aire. Si le signal de communication de DCW est dérangé par un autre signal infrarouge, DCW
place l’automatisation en situation de sécurité en ouvrant les deux
contacts.
8) ÉLÉMENT SENSIBLE À BRANCHER SUR DCW TX
LINTEAU OPTIQUE
Capteurs
STR
Longueur maximum du linteau
2,5m
FRANÇAIS
DCW est conçue pour être branchée comme un dispositif vérifié. Le dispositif, faisant office de système de connexion entre un bord sensible
et la centrale de commande, peut aussi servir de détecteur de présence et donc de dispositif de catégorie D, conformément à la norme EN
12453. Pour utiliser DCW comme un dispositif de type D il suffit que
la communication entre DCW TX et DCW RX s’accomplisse à travers le
passage (cf. Fig. B Rif. 1).
7) ESSAI Fig. G-H
A la fin de l’essai, accomplissez quelques manœuvres pour vérifier si:
a) Lorsque l’on appuie sur le bord sensible l’automatisation réagit correctement;
b) Si lorsque l’on interrompt la communication entre DCW RX et DCW
TX en plaçant un obstacle l’automatisation réagit correctement;
c) Lorsque les 2 conditions précédentes ne sont pas remplies, la
manœuvre est accomplie correctement.
LINTEAU RÉSISTIF
Résistance nominale
8k2
Seuil de déclenchement supérieur
>22000 Ω
Résistance maximum au repos
18000 Ω
Seuil de déclenchement inférieur
< 2200 Ω
Résistance minimum au repos
4700 Ω
DCW RX
Tension d’alimentation
24 V~/=
Courant Absorbé
20mA au repos / 36mA maxi
Portée contacts
30V, 1A
DCW TX + DCW RX
Degré de protection
IP45
Température de service
-20/+55°C
Portée Utile
7m avec pont JP1 ouvert
15m avec pont JP1 fermé
Dimensioni
130X45X43 (HxLxD)
Catégorie conformément
à EN954-1
Cat 2
3) ALIGNEMENT CORRECT Fig. A - B
4) PERCEMENT POUR INSTALLATION Fig. C
5) PASSAGE CÂBLES DCW RX (Fig. D) et DCW TX (Fig. E)
- à travers le trou arrière Réf. 1A
- à travers le presse-câble Réf. 1B
Fixez le bord sensible sur le profilé du vantail en suivant les indications
données dans le manuel d’instruction du bord sensible utilisé.
6) CONNEXIONS Fig. F
La connexion de DCW comme dispositif non vérifié provoque une
consommation anormale de la batterie.
Si vous n’utilisez pas le circuit de vérification des pannes dans les circuits de sécurité faites vérifier par du personnel qualifié le bon fonctionnement du dispositif au maximum tous les 6 mois.
DCW - 13
1) ALLGEMEINES
DCW ist eine Vorrichtung die zusammen mit Schiebetoren eingesetzt
werden kann und gestattet die Lösung des Problems des Anschlusses
der druckempfindlichen Leisten am beweglichen Torflügel und dem
Steuergerät des Tors. DCW besteht aus zwei Sende- und Empfangseinheiten, die miteinander Infrarotsignale austauschen; die Kommunikation ist mit Sicherheitstechniken kodiert, die bewirken, dass die gesamte Vorrichtung der Fehlersicherheitskategorie 2 gemäß Norm EN954-1
entspricht und sie kann daher mit PSPE-Systemen gemäß Norm EN
12978 eingesetzt werden.
DCW besteht aus zwei Einheiten:
- DCW TX, gespeist von einer Batterie mit langer Lebensdauer, montiert
am beweglichen Torflügel, mit Möglichkeit des Anschlusses einer sensiblen Leiste, entweder optisch (mit Zubehör STR + Gummiprofil max.
2,5 m) oder Widerstandsleiste mit konstantem Widerstand 8k2.
- DCW RX wird am feststehenden Teil montiert mit dem Steuergerät
des Tors verkabelt.
DCW wurde für den Anschluss als überprüfte Vorrichtung konzipiert.
Die Vorrichtung kann als Verbindungssystem zwischen einer sensiblen
Leiste und einem Steuergerät eingesetzt werden und außerdem auch
als Anwesenheitsmelder, das heißt als Vorrichtung vom Typ D gemäß
Norm EN 12453. Für den Einsatz von DCW als Vorrichtung vom Typ D ist
es ausreichend, dass die Kommunikation zwischen DCW TX und DCW
RX über den Zwischenraum erfolgt (siehe Ab. B Pos.1).
2) TECHNISCHE DATEN
Lebenszeit der Batterie
DEUTSCH
8) DRUCKEMPFINDLICHE ELEMENTE, DIE AN DCW TX ANGESCHLOSSEN WERDEN KÖNNEN
Sensoren
STR
Max. Länge der Leiste
2,5m
5 Jahre
WIDERSTANDSLEISTE
(Geschätzte Lebenszeit bei Installation mit
4 m Hub und Geschwindigkeit von 9 m/min
10 S TCA 30 Man./Tag mit optischer Leiste bis
zu 2,5 m und Temperatur von +20°C).
DCW RX
24 V~/=
Stromaufnahme
20mA Standby / max. 36mA
Leistung Kontakte
30V, 1A
DCW TX + DCW RX
Schutzgrad
IP45
Betriebstemperatur
-20/+55°C
Reichweite
7 m mit offenem Jumper JP1,
15 m mit geschlossenem Jumper JP1
Abmessungen
130X45X43 (HxLxT)
Kategorie gemäß EN954-1
Kat 2
3) KORREKTE AUSRICHTUNG Abb. A - B
4) BOHRUNG FÜR INSTALLATION Abb. C
5) KABELDUCHFÜHRUNG DCW RX (Abb. D) und DCW TX (Abb. E):
- durch hintere Öffnung Pos. 1A
- durch Kabeldurchlass Pos. 1B
Die druckempfindliche Leiste am Profil des Flügels anbringen und dabei die Anweisungen im Handbuch der verwendeten druckempfindlichen Leisten beachten.
6) ANSCHLÜSSE Abb. F
Der Anschluss der Vorrichtung DCW als nicht überprüfte Vorrichtung führt zu einem anomalen Batterieverbrauch.
Lassen Sie den Betrieb der Vorrichtung in Intervallen von nicht mehr
als 6 Monaten von qualifiziertem Personal überprüfen, falls die Fehlerprüfungsschaltung nicht verwendet wird.
14 - DCW
ACHTUNG!
Das Vorhandensein anderer Vorrichtungen (Fotozellen), die Infrarotstrahlen benutzen, kann zu Störungen der Kommunikation führen.
Es ist nicht möglich, ein Paar DCW zu installieren, um den gleichen
Bereich zu überwachen. Falls das DCW-Kommunikationssignal durch
ein anderes Infrarotsignal gestört wird, stellt DCW die Automatisierung
durch Öffnung beider Kontakte in einen Sicherheitsstatus.
3,6V Lithiumbatterie Typ C. Kapazität 7,5Ah
Reaktionszeit nach Drücken
<35mS
der Leiste
Betriebsspannung
ACHTUNG!
Für den Anschluss der Kontakte der Relais der Fehlerprüfungsschaltung muss auf die Schaltpläne der überprüften Vorrichtungen Bezug
genommen werden, die im Handbuch des verwendeten Steuergeräts
angegeben werden.
OPTISCHE LEISTE
DCW TX
Stromversorgung
7) CABNAHMEPRÜFUNG Abb. G-H
Führen Sie am Ende der Abnahmeprüfung einige Manöver aus und
prüfen Sie:
a) dass die Automatisierung korrekt reagiert, wenn die druckempfindliche Leiste gedrückt wird;
b) dass die Automatisierung korrekt reagiert, wenn die Kommunikation zwischen DCW RX und DCW TX von einem Hindernis unterbrochen wird;
c) dass das Manöver in den beiden vorausgehenden Fällen ordnungsgemäß abgeschlossen wird.
Nennwiderstand
8k2
Obere Auslöseschwelle
>22000 Ω
Max. Widerstand in Standby
18000 Ω
Untere Auslöseschwelle
< 2200 Ω
Min. Widerstand in Standby
4700 Ω
D811598 00100_02
MONTAGEANLEITUNG
D811598 00100_02
MANUAL DE INSTALACIÓN
1) GENERALIDADES
DCW es un dispositivo que puede ser utilizado en cancelas correderas
y permite solucionar el problema de la conexión entre los cantos sensibles colocados en la hoja móvil y la central de mando de la hoja. DCW
está compuesto por dos unidades transmisoras-receptoras que comunican entre sí a través de señales con rayos infrarrojos, la comunicación
está codificada con técnicas de seguridad tales que todo el dispositivo
responde a la categoría 2 de seguridad contra defectos conforme a la
norma EN954-1 y, por lo tanto, se puede utilizar con sistemas PSPE conformes a la norma EN 12978.
DCW está formado por 2 unidades:
- DCW TX, alimentada con una batería de larga duración, se debe colocar en la hoja móvil y a la misma se puede conectar el canto sensible
que puede ser de tipo óptico (con accesorio STR + perfil de goma
máx. 2,5m) o de tipo resistivo con resistencia constante 8k2.
- DCW RX se debe colocar en la parte fija y está cableada a la central de
mando de la cancela.
DCW está diseñada para ser conectada como dispositivo comprobado.
El dispositivo, además de funcionar como sistema de conexión entre
un canto sensible y la central de mando, puede ser utilizado también
como detector de presencia y, por lo tanto, como dispositivo de categoría D según la norma EN 12453. Para utilizar DCW como dispositivo
de tipo D basta que la comunicación entre DCW TX y DCW RX se produzca a través del pasaje (Véase Fig. B Ref.1).
2) DATOS TÉCNICOS
DCW TX
7) PRUEBA DE ENSAYO Fig. G-H
Una vez finalizada la prueba de ensayo, realizar algunas maniobras de
prueba y comprobar que:
a) Cuando el canto sensible es presionado, la automatización reaccione correctamente.
b) Cuando se interrumpe la comunicación entre DCW RX y DCW TX
interponiendo un obstáculo, la automatización reaccione correctamente.
c) Cuando no se producen las 2 condiciones anteriores, la maniobra
es completada correctamente.
¡ATENCIÓN!
Para la conexión de los contactos de los relés al circuito de control
de avería es necesario, consultar los esquemas de conexión de los dispositivos comprobados indicados en el manual de instrucciones de la
central que se está utilizando.
¡ATENCIÓN!
La presencia de otros dispositivos que utilizan los rayos infrarrojos (fotocélulas) puede causar interferencias en la comunicación. No se puede instalar más de un par de DCW para controlar la misma área. Si la
señal de comunicación de DCW es interferida por otra señal infrarroja,
DCW pone a la automatización en un estado de seguridad abriendo
ambos contactos.
8) ELEMENTO SENSIBLE CONECTABLE A DCW TX
CANTO ÓPTICO
Sensores
STR
Longitud máxima del canto
2,5m
CANTO RESISTIVA
3,6V Batería de Litio tipo C. Capacidad
7,5Ah
Alimentación
Duración de la Batería
5 años
(Duración estimada en instalación con
carrera de 4m a la velocidad de 9 m/min
10 S de TCA 30 man/día con canto óptico
de hasta 2,5m y temperatura de +20°C).
Resistencia nominal
8k2
Umbral de disparo superior
>22000 Ω
Resistencia máxima en reposo
18000 Ω
Umbral de disparo inferior
< 2200 Ω
Resistencia mínima en reposo
4700 Ω
Tiempo de respuesta tras la
<35mS
presión del canto
DCW RX
Tensión de alimentación
24 V~/=
Corriente Absorbida
20mA en reposo / 36mA máx.
Capacidad contactos
30V, 1A
DCW TX + DCW RX
Grado de protección
Temperatura
miento
de
IP45
funciona-
Capacidad Útil
-20/+55°C
7m con puente JP1 abierto,
15m con puente JP1 cerrado
130X45X43 (HxLxD)
Categoría según EN954-1
Cat 2
ESPAÑOL
Dimensiones
3) CORRECTA ALINEACIÓN Fig. A - B
4) PERFORACIÓN PARA INSTALACIÓN Fig. C
5) PASO DE CABLES DCW RX (Fig. D) y DCW TX (Fig. E):
- a través del orificio posterior Ref. 1A
- a través del prensacable Ref. 1B
Fijar el canto sensible al perfil de la hoja siguiendo las indicaciones reproducidas en el manual de instrucciones del canto sensible utilizado.
6) CONEXIONES Fig. F
La conexión de DCW como dispositivo no comprobado causa un
consumo anómalo de la batería.
Si se utiliza el circuito de control de avería en los circuitos de seguridad,
hacer controlar por personal cualificado el funcionamiento del dispositivo con intervalos no superiores a 6 meses.
DCW - 15
NEDERLANDS
INSTALLATIEHANDLEIDING
4) ALGEMEEN
DCW is een inrichting die kan worden gebruikt op schuifhekken en het
mogelijk maakt het probleem op te lossen van de aansluiting tussen de
detectoren op de beweegbare vleugel en de bedieningscentrale van
de vleugel. DCW bestaat uit twee zendtoestellen die onderling communiceren via signalen met infrarode stralen; de communicatie wordt
gecodificeerd met dusdanige veiligheidstechnieken dat de volledige
inrichting voldoet aan veiligheidscategorie 2 voor storingen volgens
de norm EN954-1 en dus bruikbaar is in PSPE-systemen conform aan
de norm EN 12978.
DCW bestaat uit 2 eenheden:
3) JUISTE UITLIJNING Fig. A - B
4) PERFORATIE VOOR INSTALLATIE Fig. C
5) KABELDOORGANG DCW RX (Fig. D) en DCW TX (Fig. E):
- via de achterste opening Ref. 1A
- via de kabelklem Ref. 1B
De detector aan het profiel van de vleugel bevestigen, door het volgen
van de aanwijzigen vermeld in de instructiehandleiding van de gebruikte detector.
6) AANSLUITINGEN Fig. F
- DCW TX, gevoed door een batterij met lange levensduur, moet worden aangebracht op de beweegbare vleugel en daarop kan de detector worden aangesloten die van het optische type kan zijn (met accessoire STR + rubber profiel max. 2,5m) of van het resistieve type met
constante weerstand 8k2
- DCW RX moet worden aangebracht in het vaste deel en is via kabels
verbonden aan de bedieningscentrale van het hek.
DCW is ontworpen om als “trusted device” te worden aangesloten.
Naast te werken als verbindingssysteem tussen een detector en de
bedieningscentrale, kan de inrichting ook worden gebruikt als aanwezigheidsdetector en dus als inrichting van categorie D volgens de
norm EN 12453. Om DCW als inrichting van het type D te gebruiken, is
het voldoende dat de communicatie tussen DCW TX en DCW RX plaatsvindt via de passage (Zie Fig. B Ref.1).
2) TECHNISCHE GEGEVENS
DCW TX
Voeding
3,6V Lithiumbatterij type C. Vermogen 7,5Ah
Duur Batterij
5 jaar
(Duur geschat op installatie met werkslag
van 4m met snelheid van 9 m/min 10 S
van TCA 30 man/dag met optische rand
tot 2,5mm en temperatuur van +20°C).
Reactietijd na drukken op de rand
<35mS
DCW RX
Voedingsspanning
24 V~/=
Absorptiestroom
20mA in ruststand / 36mA max.
Capaciteit contacten
30V, 1A
De aansluiting van DCW anders dan “trusted device” zorgt voor
een abnormaal verbruik van de batterij.
Als het circuit voor controle van storing in de veiligheidscircuits niet
gebruikt wordt, de functionaliteit van de inrichting door gekwalificeerd personeel laten controleren met intervallen van max. 6 maanden.
7) KEURING Fig. G-H
Aan het einde van de keuring, enkele testmanoeuvres uitvoeren en controleren of:
a) het automatiseringssysteem juist reageert, wanneer er op de detector gedrukt wordt;
b) het automatiseringssysteem juist reageert, wanneer de communicatie tussen DCW RX en DCW TX onderbroken wordt door een
obstakel ertussen aan te brengen;
c) de manoeuvre juist voltooid wordt, wanneer de 2 eerdergenoemde condities niet optreden.
OPGELET!
Voor de aansluiting van de contacten van de relais op het circuit voor
controle van storing is het noodzakelijk de aansluitschema’s van de
“trusted devices” te raadplegen, te vinden in de instructiehandleiding
van de centrale die u gebruikt.
OPGELET!
De aanwezigheid van andere inrichtingen die gebruik maken van infrarode stralen (fotocellen) kan interferenties in de communicatie veroorzaken. Het is niet mogelijk meer dan één paar DCW’s te installeren om
hetzelfde gebied te controleren. Mocht het DCW-communicatiesignaal
verstoord worden door een ander infrarood signaal, dan brengt DCW
het automatiseringssysteem in een veiligheidstoestand door beide
contacten te openen.
8) GEVOELIG ELEMENT, AANSLUITBAAR OP DCW TX
OPTISCHE RAND
DCW TX + DCW RX
IP45
Sensoren
STR
Bedrijfstemperatuur
-20/+55°C
Maximumlengte rand
2,5m
Nuttig Vermogen
7m met brug JP1 open,
15m met brug JP1 dicht
RESISTIEVE RAND
Nominale weerstand
8k2
Afmetingen
130X45X43 (HxLxD)
Bovenste schakeldrempel
>22000 Ω
Categorie volgens EN954-1
Cat 2
Maximumweerstand in ruststand
18000 Ω
Onderste schakeldrempel
< 2200 Ω
Minimumweerstand in ruststand
4700 Ω
Beschermingsgraad


