1
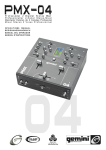
Professional 2 Channel Stereo Mixer
P r o f e s s i o n e l l e r 2 - K a n a l St e r e o - M i x e r
Mezclador Estereo de 2 Canales Profesional
Mixer Stereo 2 Voies Professionnel
OPERATIONS
MANUAL
BEDIENUNGSHANDBUCH
MANUAL DEL OPERADOR
MANUEL D’INSTRUCTIONS
MULTI LANGUAGE INSTRUCTIONS
ENGLISH.................................................................................................................................................................................................................PAGE 4
DEUTSCH...............................................................................................................................................................................................................PAGE 5
ESPAÑOL.........................................................................................................................................................................................................................................................................................PAGE 6
FRANCAIS......................................................................................................................................................................................................................................................................................PAGE 7
PLEASE READ BEFORE USING APPLIANCE, IMPORTANT WARNING & SAFETY INSTRUCTIONS!
CAUTION
RISKOFELECTRICALSHOCKDONOTOPEN!
CAUTION: This product satisfies FCC regulations when shielded cables and con
nectors are used to connect the unit to other equipment. To prevent electromag
netic interference with electric appliances such as radios and televisions, use
shielded cables and connectors for connections.
The exclamation point within an equilateral triangle is intended to alert the user to
the presence of important operating and maintenance (servicing) instructions in
the literature accompanying the appliance.
The lightning flash with arrowhead symbol, within an equilateral triangle, is
intended to alert the user to the presence of uninsulated “dangerous voltage”
within the product’s enclosure that may be of sufficient magnitude to constitute a
risk of electric shock to persons.
READ INSTRUCTIONS: All the safety and operating instructions should be read
before the product is operated.
RETAIN INSTRUCTIONS: The safety and operating instructions should be retained
for future reference.
HEED WARNINGS: All warnings on the product and in the operating instructions
should be adhered to.
FOLLOW INSTRUCTIONS: All operating and use instructions should be followed.
CLEANING: The product should be cleaned only with a polishing cloth or a soft dry
cloth. Never clean with furniture wax, benzine, insecticides or other volatile liquids
since they may corrode the cabinet.
ATTACHMENTS: Do not use attachments not recommended by the product manu
facturer as they may cause hazards.
to provide some protection against voltage surges and built-up static charges.
Article 810 of the National Electrical Code, ANSI/NFPA 70, provides information
with regard to proper grounding of the mast and supporting structure, grounding of
the lead-in wire to an antenna discharge unit, size of grounding conductors, loca
tion of antenna-discharge unit, connection to grounding electrodes, and require
ments for the grounding electrode. See Figure B.
LIGHTNING: For added protection for this product during a lightning storm, or when
it is left unattended and unused for long periods of time, unplug it from the wall out
let and disconnect the antenna or cable system. This will prevent damage to the
product due to lightning and power-line surges.
POWER LINES: An outside antenna system should not be located in the vicinity of
overhead power lines or other electric light or power circuits, or where it can fall
into such power lines or circuits. When installing an outside antenna system,
extreme care should be taken to keep from touching such power lines or circuits
as contact with them might be fatal.
OVERLOADING: Do not overload wall outlets, extension cords, or integral conven
ience receptacles as this can result in a risk of fire or electric shock.
OBJECT AND LIQUID ENTRY: Never push objects of any kind into this product
through openings as they may touch dangerous voltage points or short-out parts
that could result in a fire or electric shock. Never spill liquid of any kind on the
product.
SERVICING: Do not attempt to service this product yourself as opening or removing
covers may expose you to dangerous voltage or other hazards. Refer all servicing
to qualified service personnel.
WATER AND MOISTURE: Do not use this product near water, for example, near a
bathtub, wash bowl, kitchen sink, or laundry tub; in a wet basement; or near a
swimming pool; and the like.
DAMAGE REQUIRING SERVICE: Unplug this product from the wall outlet and refer
servicing to qualified service personnel under the following conditions:
ACCESSORIES: Do not place this product on an unstable cart, stand, tripod, brack
et, or table. The product may fall, causing serious injury to a child or adult, and seri
ous damage to the product. Use only with a cart, stand, tripod, bracket, or table
recommended by the manufacturer, or sold with the product. Any mounting of the
product should follow the manufacturer’s instructions, and should use a mounting
accessory recommended by the manufacturer.
•
If liquid has been spilled, or objects have fallen into the product.
•
If the product has been exposed to rain or water.
•
If the product does not operate normally by following the operating instructions.
Adjust only those controls that are covered by the operating instructions as an
improper adjustment of other controls may result in damage and will often require
extensive work by a qualified technician to restore the product to its normal oper
ation.
•
If the product has been dropped or damaged in any way.
•
When the product exhibits a distinct change in performance, this indicates a need
for service.
CART: A product and cart combination should be moved with care. Quick stops,
excessive force, and uneven surfaces may cause the product and cart combina
tion to overturn. See Figure A.
VENTILATION: Slots and openings in the cabinet are provided for ventilation and to
ensure reliable operation of the product and to protect it from overheating, and
these openings must not be blocked or covered. The openings should never be
blocked by placing the product on a bed, sofa, rug, or other similar surface. This
product should not be placed in a built-in installation such as a bookcase or rack
unless proper ventilation is provided or the manufacturer’s instructions have been
adhered to.
POWER SOURCES: This product should be operated only from the type of power
source indicated on the marking label. If you are not sure of the type of power sup
ply to your home, consult your product dealer or local power company.
LOCATION: The appliance should be installed in a stable location.
NON-USE PERIODS: The power cord of the appliance should be unplugged from the
outlet when left unused for a long period of time.
•
REPLACEMENT PARTS: When replacement parts are required, be sure the service
technician has used replacement parts specified by the manufacturer or have the
same characteristics as the original part. Unauthorized substitutions may result in
fire, electric shock, or other hazards.
SAFETY CHECK: Upon completion of any service or repairs to this product, ask the
service technician to perform safety checks to determine that the product is in
proper operating condition.
WALL OR CEILING MOUNTING: The product should not be mounted to a wall or ceil
ing.
HEAT: The product should be situated away from heat sources such as radiators,
heat registers, stoves, or other products (including amplifiers) that produce heat.
GROUNDING OR POLARIZATION:
•
If this product is equipped with a polarized alternating current line plug (a plug
having one blade wider than the other), it will fit into the outlet only one way. This
is a safety feature. If you are unable to insert the plug fully into the outlet, try
reversing the plug. If the plug should still fail to fit, contact your electrician to
replace your obsolete outlet. Do not defeat the safety purpose of the polarized
plug.
•
If this product is equipped with a three-wire grounding type plug, a plug having a
third (grounding) pin, it will only fit into a grounding type power outlet. This is a
safety feature. If you are unable to insert the plug into the outlet, contact your
electrician to replace your obsolete outlet. Do not defeat the safety purpose of the
grounding type plug.
When the power-supply cord or plug is damaged.
POWER-CORD PROTECTION: Power-supply cords should be routed so that they
are not likely to be walked on or pinched by items placed upon or against them,
paying particular attention to cords at plugs, convenience receptacles, and the
point where they exit from the product.
OUTDOOR ANTENNA GROUNDING: If an outside antenna or cable system is
connected to the product, be sure the antenna or cable system is grounded so as
(2)
(3)
INTRODUCTION:
Congratulations on purchasing a MX-01 2 channel mixer from
Gemini. This state of the art mixer is backed by a three year
warranty, excluding the crossfader. The crossfader is separately backed by a 90 day warranty. Prior to use we suggest that you
carefully read all the instructions.
FEATURES:
-
2 Stereo Channels
2 phono & 2 line inputs
Gain Control for each channel
Cue Section
Master, Cue and Mic Volume Rotary Control
Front panel 1/4" Microphone and Headphone Jacks
Dual Ground Screws for Easy Connectivity
CAUTIONS:
1. All operating instructions should be read before using this
equipment.
2. To reduce the risk of electrical shock, do not open the unit.
Please refer servicing to a qualified service technician.
In the USA ~ if you experience problems with
this unit call Gemini Customer Service at: 1 (732) 7389003. Do not attempt to return this equipment to your
dealer.
3. Do not expose this unit to direct sunlight or to a heat source
such as a radiator or stove.
4. This unit should be cleaned only with a damp cloth. Avoid solvents or other cleaning detergents.
5. When moving this equipment, it should be placed in its original
carton and packaging. This will reduce the risk of damage during transit.
6. DO NOT EXPOSE THIS UNIT TO RAIN OR MOISTURE.
7. DO NOT USE ANY SPRAY CLEANER OR LUBRICANT ON
ANY CONTROLS OR SWITCHES.
CONNECTIONS:
1. Located on the rear panel is the AC IN (2) adapter jack, used
to plug in the power cord. Before plugging the adapter in, make
sure the POWER SWITCH (1) located on the rear panel is
turned off.
2. The MX-01 has MASTER OUTPUT (3) jacks to connect to the
main amplifier with RCA cables.
3. Located on the rear panel are 2 PHONO (PH) RCA INPUTS
(5,7), and 2 LINE (LN) RCA INPUTS (4,6). The RCA inputs for
Channel (CH) 1 (16) & CH 2 (19) allow PH and LN level equipment to be connected to the mixer. The PH INPUTS only accept
turntables with a magnetic cartridge. When using (a)
turntable(s), you will need to ground the unit(s) by screwing in
the grounding fork(s) to the DUAL GROUNDING SCREWS (8)
located in the back panel of the MX-01 mixer. The stereo LN
INPUTS only accept line level inputs such as a CD, DAT,
MiniDisc, etc.
NOTE: WHEN USING TURNTABLES, NOT ATTACHING A GROUND MAY CAUSE
A SYSTEM "HUM."
4. Headphones may be plugged into the face-plate located 1/4"
HEADPHONE JACK (10).
5. The MIC 1 (9) input (located on the front panel) is a 1/4" connector. The mic input accepts balanced and unbalanced microphones.
OPERATIONS:
1. Once all of your connections have been made in the rear panel,
turn on the mixer by pressing the POWER SWITCH (1) and the
POWER LED will illuminate. Turn off the mixer by flipping the
switch when not in use.
2. CHANNEL 1: To bring this channel into PROGRAM OUTPUT
(PGM), you must first decide which line will be in use. Use the
LN SWITCH (14) to toggle from PH1 (7) to LN 1 (6) on this
channel. Slowly raise the CH 1 SLIDE CONTROL (16) to a comfortable level, once you've selected the proper line. You can fur-
(4
4)
ther modify the sound output of this channel by adjusting the
rotary GAIN (15), controls located above the CH 1 SLIDE CONTROL (16).
3. CHANNEL 2: To bring this channel into PGM, you must first
decide which line will be in use. Use the LN SWITCH (17) to toggle from PH2 (5) to LN2 (4) on this channel. Slowly raise the CH
2 SLIDE CONTROL (19) to a comfortable level, once you've
selected the proper line. You can further modify the sound output of this channel by adjusting the rotary GAIN (18) controls
located above the CH 2 SLIDE CONTROL (19).
4. CUE: By connecting a set of headphones to the HEADPHONE
(10) jack, you can monitor any or all channels. Use the rotary
CUE CONTROL (12) to adjust the cue volume without changing
the overall mix. By moving the CUE SWITCH (21) to the LEFT
you will be able to monitor CH 1. Moving the control to the
RIGHT allows you to monitor CH 2.
5. CROSSFADER SECTION: The CROSSFADER (20) allows
you to mix from one channel to another. The CROSSFADER
(20) in your unit is removable and if the need arises can be easily replaced.
REPLACEABLE CROSSFADER:
1. Unscrew the outside FADER plate screws (B).
- Do not touch INSIDE
SCREWS (C).
2. Carefully remove old
Crossfader and unplug CABLE
(D).
3.Plug new Crossfader into
CABLE (D) and place back into
mixer.
4. Screw Crossfader to mixer
with the FADER PLATE
SCREWS (B).
6. OUTPUT SELECTION CONTROL: Once you are comfortable
with the sound level of your music you may adjust the volume
with the MASTER (11) rotary control.
7. MIC SECTION: Plug your main mic into the MIC 1 1/4" INPUT
(9) located on the front panel. The MIC 1 (9) rotary volume control (13) adjust the decibel level of MIC 1 (9).
SPECIFICATIONS:
INPUTS:
Phono...................................................................................3 mv, 47 kOhm
Line...................................................................................200 mV, 22 kOhm
OUTPUTS:
Amp.................................................................................0 dB 1 V, 400 Ohm
Max..................................................................................15 V Peak to Peak
GENERAL:
Gain (Channels 1-2)....................................................................0 to -60 dB
Frequency Response................................................20Hz - 20 kHz +/- 2 dB
Distortion.............................................................................less than 0.09%
S/N Ratio...........................................................................better than 60 dB
Headphone Impedance....................................................................32 Ohm
Power Source.................................115V/9V AC 12W (or 230V/9V AC 12W)
Dimensions......................10.61 " x 3.45" x 7" (269.5 x 87.63 x 177.8 mm)
Weight..............................................................................3.64 lbs. (1.65 kg)
Specifications and designs are subject to change without notice
for the purpose of improvement.
EINLEITUNG:
Vielen Dank, daß Sie sich für einen MX-01 2-Kanal Mixer von
GEMINI entschieden haben. Dieser Mixer ist nach dem
neuesten Stand der Technik hergestellt und mit einer Garantie
von drei Jahren versehen, ausschließlich Cross fader. Vor
Inbetriebnahme lesen Sie bitte alle Anweisungen sorgfältig
durch.
AUSSTATTUNG:
- 2 Stereo Kanäle
- 2 Phono & 2 Line Cincheingänge
- Gaindrehregler pro Kanal
- Cue Sektion
- Master, Cue und Mic Volume Drehregler
- 6,3mm Klinkenbuchsen für Kopfhörer und Mikrofon an der
Vorderseite
- Zwei Erdungsschrauben für einfache Masseverbindung
VORSICHTSMAßNAHMEN:
1. Vor Anwendung dieses Geräts bitte alle Anweisungen sorgfältig
durchlesen.
2. Das Gerät nicht öffnen, um das Risiko eines elektrischen
Schocks zu vermeiden. Die Wartung darf nur von befähigten
Wartungstechnikern durchgeführt werden.
3. Das Gerät nicht direktem Sonnenlicht oder einer Wärmequelle
wie Heizkörper oder Ofen aussetzen.
4. Dieses Gerät darf nur mit einem feuchten Tuch gesäubert werden. Keine Lösungs- oder Reinigungsmittel benutzen.
5. Bei Umzügen sollte das Gerät in seinem ursprünglichen
Versandkarton und Verpackungsmaterial verpackt werden.
Dadurch verhindert man, daß das Gerät während des ransportes beschädigt wird.
6. DIESES GERÄT NICHT REGEN ODER FEUCHTIGKEIT
AUSSETZEN.
7. AN DEN REGLERN ODER SCHALTERN KEIN SPRAYREINIGUNGSMITTEL ODER SCHMIERMITTEL BENUTZEN.
ANSCHLÜSSE:
1. An der Rückseite befindet sich die Anschlußbuchse AC IN (2)
zum Anschluß des Steckernetzteils. Versichern Sie sich vor dem
Anschließen, daß der Ein/Aus-Schalter (1) (Rückseite) ausgeschaltet ist.
2. Der MX-01 einen MASTER OUTPUT (3) mit Cinchbuchsen
zum Anschluß an den Hauptverstärker.
3. Weiterhin befinden sich an der Rückseite 2 Phono
Cincheingänge (5,7) und 2 Line Cincheingänge (4,6).Diese
Buchsen sind die Eingänge für Kanal 1 (16) und Kanal 2 (19).
An die Phonobuchsen können nur Plattenspieler mit
Magnettonabnehmer angeschlossen werden. Beim Anschluß
von Plattenspielern muß der Erdungsanschluß an die
Erdungsschrauben (ground screw (8)) angeschlossen werden. Die Lineeingänge sind für den Anschluß von CD-Playern,
DAT-Recordern usw. vorgesehen.
ANMERKUNG: WENN DIE ERDUNG NICHT ANGESCHLOSSEN WIRD, KANN
EIN BRUMMSIGNAL AUFTRETEN.
4. Kopfhörer können an die 6,3mm Klinkenbuchse Headphone
Jack (10) an der Vorderseite angeschlossen werden.
5. Die 6,3mm Klinkenbuchse MIC 1 (9) auf der Vorderseite dient
zum Anschließen eines Mikrofons mit symmetrischem oder
unsymmetrischen Kabel.
BEDIENUNG:
1. Nachdem alle Ein- und Ausgänge, sowie das Steckernetzteil
angeschlossen sind, schalten Sie den MX-01 mit dem Ein/AusSchalter (1) ein und die LED Power leuchtet auf. Wenn Sie
Ihren Mixer nicht benutzen, schalten sie ihn bitte aus.
2. Kanal 1: Wählen sie mit dem Schalter (14) PH1 (7) oder LN1
(6) aus. Dann drehen sie den Gaindrehregler (15) auf ca.
75%(hängt von der Höhe des Eingangssignals ab). Nun können
Sie mit dem Kanalfader (16) den gewünschten Pegel einstellen.
3. Kanal 2: Wählen sie mit dem Schalter (17) PH1 (5) oder LN1
(5)
(4) aus. Dann drehen sie den Gaindrehregler auf ca.
75%(hängt von der Höhe ddes Eingangssignals ab). Nun können Sie mit dem Kanalfader (19) den gewünschten Pegel einstellen.
4. CUE: Nach Anschluß eines Kopfhörers an die Buchse HEADPHONE (10) können Sie die Kanäle vorhören. Mit dem
Drehregler CUE (12) stellen Sie die Kopfhörerlautstärke ein
ohne Ihren Mix zu beeinflussen.Durch Umschalten des
Schalters Cue (21) von links (Kanal 1) nach rechts (Kanal
2)können sie wählen sie den abzuhörenden Kanal aus.
5. CROSSFADER SEKTION: Der cross fader (20) dient zum
Überblendden von einem Kanal zum Anderen. Der Crossfader
in diesem Mixer ist wie folgt leicht austauschbar.
AUSTAUSCH DES CROSSFADERS :
- Die äußeren SCHRAUBEN DER CROSSFADERPLATTE (B)
losschrauben. Nicht die INNENSCHRAUBEN (C) losschrauben.
- Den Überblender vorsichtig
anheben und das KABEL (D)
abziehen.
- Das Kabel auf den neuen
Fader stecken und wieder in
das Mischpult setzen.
- Den neuen Crossfader mit
den Schrauben am Mischpult
befestigen.
6. AUSGANGSSEKTION: Wenn Sie mit Ihrem Mix zufrieden
sind, regeln Sie den Ausgangspegel mit dem Drehregler MASTER OUTPUT(11).
7. MIC SEKTION: Schließen sie ein Mikrofon an die Buchse MIC
1 (9) an der Vorderseite an und stellen sie mit dem Drehregeler
MIC 1 (13) die gewünschte Mikrofonlautstärke ein.
TECHNISCHE DATEN:
EINGÄNGE:
Phono...................................................................................3 mv, 47 kOhm
Line..................................................................................200 mV, 22 kOhm
AUSGÄNGE:
Amp...............................................................................0 dB 1 V, 400 Ohm
Max...............................................................................15 V Spitze - Spitze
ALLGEMEIN:
Gain (Kanäle 1-2).......................................................................0 to -60 dB
Frequenzbereich.....................................................20Hz - 20 kHz +/- 2 dB
Klirrfaktor............................................................................less than 0.09%
Geräuschspannungsabstand...........................................better than 60 dB
Kopfhörerimpedanz.........................................................................32 Ohm
Spannungsversorgung............................Steckernetzteil :230V/9V AC 12W
Abmessungen.................................................269.5 x 87.63 x 177.8 mm
Gewicht............................................................................................1.65 kg
DIE SPEZIFIKATIONEN KÖNNEN ZU VERBESSERUNGSZWECKEN OHNE
VORHERIGE BEKANNTGABE GEÄN DERT WERDEN.
INTRODUCCIÓN:
Felicidades por comprar su mezclador de 2 canales Gemini
MX-01. Este mezclador de diseño esta cubierto por 3 años de
garantía, excluyendo el crossfader. El crossfader está cubierto
por una garantía de 90 días. Antes de utilizar la unidad, le rogamos lea detenidamente estas instrucciones.
CARACTERISTICAS:
-
2 canales estéreo
2 phono & 2 línea
Control de ganancia por canal
Sección Cue
Control rotativo de Master, Cue y Micrófono
Jack de 1/4" para Micrófono y auriculares en panel frontal
Doble toma de masa para mejor conectividad
PRECAUCIONES:
1. Deberán leerse todas las instrucciones de operación antes de
usar el equipo.
2. Para reducir el riesgo de shock eléctrico, no abra esta unidad.
Por favor, refiera la reparación a un técnico de servicio calificado.
3. No exponga la unidad a la luz solar directa ni a una fuente de
calor, por ejemplo, un radiador o estufa.
4. Esta unidad sólo deberá limpiarse con un paño húmedo. Evite
el uso de disolventes u otros detergentes de limpieza.
5. Para mover este equipo, colóquelo en la caja y embalaje original, a fin de reducir el riesgo de daños durante el transporte.
6. NO DEJE ESTA UNIDAD EXPUESTA A LLUVIA O
HUMEDAD.
7. NO USE LIMPIADORES DE SPRAY O LUBRICANTES EN
CUALQUIERA DE LOS CONTROLES O INTERRUPTORES.
CONEXIONES:
1. En el panel trasero se encuentra el AC IN (2) toma de conexión para conectar el cable de alimentación. Antes de conectarlo, asegúrese que el INTERRUPTOR GENERAL (1) está
apagado.
2. El MX-01 tiene conexión de MASTER OUTPUT (3) de salida
principal de tipo RCA.
3. En el panel trasero hay 2 entradas RCA Phono (PH) (5,7), y
2 RCA línea (LN) (4,6). Las entradas RCA para el canal (CN)
1 (16) & CN 2 (19) permite conectar niveles de Phono y Línea
al mezclador. Las entradas Phono solo aceptan giradiscos con
cápsulas magnéticas. Cuando utilice giradiscos, necesitara
conectar a masa la unidad atornillando los terminales de
masa a los TORNILLOS DE MASA (8) en el panel trasero de
su MX-01. Las entradas estéreo de Línea solo aceptan niveles
de entrada tipo CD, DAT, MiniDisc, etc.
NOTA: AL USAR GIRADISCOS, EL NO CONECTAR LA TOMA DE MASA
PUEDE CAUSAR ZUMBIDOS.
4. Los auriculares deben conectarse en el conector HEADPHONE JACK (10) de 1/4" ubicado en el panel frontal.
5. La entrada MIC 1 (9) (en el panel frontal) es de jack 1/4". La
entrada de micrófono acepta micrófonos balanceados y no
balanceados.
MODO DE EMPLEO:
1. Una vez realizadas todas las conexiones en el panel trasero,
encienda el mezclador pulsando el interruptor general (1) y
el LED de encendido se iluminará. Apague el mezclador pulsando de nuevo el interruptor general.
2. CANAL 1: Para conectar este CN a la salida de programa
(PGM), debe decidir que tipo de entrada va a utilizar. Use el
control (14) para elegir entre PH1 (7) ó LN1 (6) en este CN.
Suavemente deslice el fader de canal (16) hasta un nivel de
escucha adecuado. También pude variar el nivel de salida de
este canal ajustando el control rotativo GAIN (15), que se
encuentra encima de el fader de canal (16).
3. CANAL 2: Para conectar este canal a la salida de PGM, debe
decidir que tipo de entrada va a utilizar. Use el control (17) para
(6)
elegir entre PH2 (5) ó LN2 (4) en este canal. Suavemente
deslice el fader de canal (19) hasta un nivel de escucha adecuado. También pude variar el nivel de salida de este canal ajustando el control rotativo GAIN (18), que se encuentra encima
de el fader de canal (19).
4. CUE: Conectando unos auriculares a la toma HEADPHONE
(10), usted puede monitorizar alguno o todos los canales. Use
el control rotativo CUE (12) para ajustar el volumen de preescucha sin cambiar la salida final. Moviendo el control CUE (21)
hacia la izquierda se monitorizará el CN1. Moviendo el control
hacia la derecha se monitorizará el CN2.
5. SECCIÓN CROSS FADER: El CROSS FADER (20) permite
mezclar de un canal a otro. El CROSS FADER (20) en esta
unidad es intercambiable y fácilmente reemplazable.
CROSSFADER REEMPLAZABLE:
1. Destornillar los tornillos de la chapa del FADER(B). No tocar
los tornillos interiores (C).
2. Con cuidado extraer el cross
fader antiguo y desconectar
el cable(D).
3.Conectar el cable al nuevo
crossfader(D) y colocarlo de
nuevo en el mezclador.
4. Atornille el Crossfader al
mezclador con los tornillos de
FADER PLATE SCREWS (B).
6. CONTROL DE SALIDA: Una vez ha ajustado el nivel del canal
a su gusto, puede ajustar el volumen principal de salida con el
control rotativo MASTER (11).
7. SECCIÓN MICRO: Conecte su micro en la entrada de jack
1/4" MIC 1 (9) en el panel frontal. El control rotativo de VOLUMEN(13) del MIC 1 (9) ajusta el nivel del MIC 1 (9).
ESPECIFICACIONES:
ENTRADAS:
Phono..................................................................................3 mV, 47 kOhm
Línea...............................................................................200 mV, 22 kOhm
SALIDAS:
Amp................................................................................0 dB 1 V, 400 Ohm
Max.................................................................................15 V Peak to Peak
GENERAL:
Ganancia (Canal 1-2).................................................................0 to -60 dB
Respuesta de frecuencia........................................20Hz - 20 kHz +/- 2 dB
Distorsión..........................................................................menor de 0.09%
Relación S/N.......................................................................mayor de 60 dB
Impedancia auriculares...................................................................32 Ohm
Alimentación..................................115V/9V AC 12W(or 230V/9V AC 12W)
Dimensiones..................................................................10.61 " x 3.45" x 7"
...................................................................(269.5 x 87.63 x 177.8 mm)
Peso................................................................................3.64 lbs. (1.65 kg)
LAS ESPECIFICACIONES Y DISEÑOS ESTÁN SUJETOS A CAMBIOS SIN PREVIO AVISO CON PROPÓSITO DE MEJORA.
INTRODUCTION:
Félicitations concernant l'achat de votre console de mixage
GEMINI MX-01. Cet appareil, doté des caractéristiques et technologies les plus récentes, est couvert par une garantie de 3
ans (-Limitée à 3 mois pour le crossfader-). Nous vous
recommandons de lire soigneusement la notice d'utilisation.
CARACTERISTIQUES:
-
2 Voies Stéréo
2 phonos & 2 lignes
Réglage de gain sur chaque voie
Section Préécoute
Réglages séparés: volume Master, Préécoute casque & Micro
Connections micro & casque en face avant sur Jack 6.35mm
2 vis pour mise à la terre des platines vinyles
ATTENTION:
1. Toutes les instructions doivent être lues avant utilisation de l'appareil.
2. Afin de prévenir tout risque de choc électrique, ne pas démonter l'appareil.
En cas de problème merci de contacter votre
revendeur ou le service technique de votre pays
(France: +33 1 69 79 97 79).
3. Ne pas exposer cet appareil directement au soleil ni à toute
autre source de chaleur tel qu'un radiateur.
4. Toute poussière, saleté ou débris peut altérer le bon fonctionnement de l'appareil. Conserver cet appareil à l'abri de la poussière et recouvrer le en cas de non utilisation. Nettoyez le
régulièrement avec un produit non corrosif.
5. Lorsque que vous transportez votre matériel, veillez à replacer
celui-ci dans son emballage d'origine afin de ne pas l'abîmer.
6. NE PAS EXPOSER CET APPAREIL A LA PLUIE ET L'HUMIDITE.
7. NE PAS UTILISER DE SPRAY NETTOYANT, NI DE LUBRIFIANT, SUR L'ENSEMBLE DES BOUTONS ET INTERRUPTEURS.
CONNECTIONS:
1. Vous trouverez à l'arrière de l'appareil l'embase AC IN (2) permettant de relier l'alimentation externe de l'appareil. Avant de
mettre votre console de mixage sous tension, assurez vous que
l'interrupteur POWER SWITCH (1) situé en face en arrière est
en position off.
2. La console de mixage MX-01 possède une sortie MASTER
OUTPUT (3) stéréo équipée de connecteurs RCA situés en
face arrière.
3. Les 2 entrées PHONO (PH) (5,7) et les 2 entrées Ligne (4,6)
situées en face arrière sont équipées de connecteurs RCA. Les
voies 1 (16) & 2 (19) acceptent des sources phono et ligne. Les
entrées PH n'acceptent que les platines vinyles équipées de
cellule magnétique. Lorsque vous utilisez des platines vinyles il
vous faut impérativement relier celles-ci aux deux vis de masse
situées (8) à l'arrière de l'appareil. Les entrées lignes acceptent
des sources telles que lecteur CD/DVD/MP3, DAT, MiniDisc,
etc.
ATTENTION: NE PAS RELIER LA MASSE DES PLATINES VINYLES PROVOQUERA UN "BOURDONNEMENT" DÉSAGRÉABLE.
4. Le casque se connecte en face avant à la prise Jack 6.35mm
HEADPHONE JACK (10).
5. Le micro se connecte en face avant à la prise Jack 6.35mm
MIC 1 (9). Cette entrée accepte les micros symètriques &
asymétriques.
INSTRUCTIONS D'UTILISATION:
1. Lorsque l'ensemble des connections a été effectué, mettez l'appareil sous tension en appuyant sur l'interrupteur POWER
SWITCH (1), la LED power s'allume. Eteignez l'appareil en
appuyant sur ce même interrupteur en cas de non utilisation.
(7
7)
2. VOIE 1: Vous devez sélectionner la source que vous souhaitez
écouter avant de monter le volume de la voie. Utilisez le commutateur (14) afin de choisir entre PHONO 1 (7) ou LIGNE 1
(6). Augmentez doucement le volume de la VOIE 1 jusqu'au
niveau souhaité après avoir sélectionner la source à écouter.
Vous pouvez modifier le gain de la voie 1 à l'aide du potentiomètre GAIN (15) situé au dessus du fader VOIE 1 (16).
3. VOIE 2: Vous devez sélectionner la source que vous souhaitez
écouter avant de monter le volume de la voie. Utilisez le commutateur (17) afin de choisir entre PHONO 2 (5) ou LIGNE 2
(4). Augmentez doucement le volume de la voie 2 jusqu'au
niveau souhaité après avoir sélectionner la source à écouter.
Vous pouvez modifier le gain de la VOIE 2 (19) à l'aide du
potentiomètre GAIN (18) situé au dessus du fader VOIE 2 (19).
4. PRÉÉCOUTE CASQUE: En reliant un casque à la prise
HEADPHONE (10), vous pouvez pré-écouter chacune des
voies individuellement ou simultanément. Utilisez le potentiomètre CUE control (12) afin de régler le volume du casque
sans modifier le volume général de votre mix. En poussant l'interrupteur CUE (21) à gauche vous entendrez la VOIE 1, en le
poussant à droite, vous entendrez la VOIE 2.
5. CROSS FADER SECTION: Le cross fader (20) permet de
passer d'une voie à l'autre. Il est amovible afin de le remplacer
facilement .
REMPLACEMENT DU CROSSFADER:
1. Dévissez les vis situées aux extrémités du CROSSFADER
(B). Ne touchez pas aux vis (C).
2. Soulevez soigneusement le
crossfader et débranchez le
CABLE (D).
3. Branchez le nouveau crossfader au CABLE (D) et
replacez-le dans la console
de mixage.
4. Remettez en place les vis
(B).
6. REGLAGE DU NIVEAU DE SORTIE: Lorsque vous avez
régler le niveau des entrées, vous pouvez ajuster le niveau de
sortie général à l'aide du potentiomètre MASTER (11).
7. SECTION MICRO: Connectez votre micro à la prise Jack
6.35mm MIC 1 (9) située en face avant. Vous pouvez régler le
niveau du micro à l'aide du potentiomètre rotatif MIC (13).
CARACTERISTIQUES TECHNIQUES:
ENTREES:
Phono................................…………...................................3 mv, 47 kOhms
Ligne...........................…….............................................200 mV, 22 kOhms
NIVEAU DE SORTIE:
Amplificateur.......……...................................................0 dB 1 V, 400 Ohms
Max...........…………...........................................................15 V Crête/Crête
GENERAL:
Gain (Voies 1 & 2)…....................................................................0 to -60 dB
Bande passante……................................................20Hz - 20 kHz +/- 2 dB
Distortion.........………………….......................................................< 0.09%
Rapport Signal/Bruit…......................................................................> 60 dB
Impédance sortie casque............................................................…32 Ohms
Alimentation…………........................................................115V/9V AC 12W
...................................................................................(or 230V/9V AC 12W)
Dimensions......................10.61 " x 3.45" x 7" (269.5 x 87.63 x 177.8mm)
Poids….............................................................................3.64 lbs. (1.65 kg)
DANS LE CADRE D'UN SOUCI CONSTANT D'AMÉLIORATION DE NOS PRODUITS, LES SPÉCIFICATIONS TECHNIQUES PEUVENT ÊTRE MODIFIÉES
SANS PRÉAVIS.
IN THE USA: IF YOU EXPERIENCE PROBLEMS WITH
THIS UNIT, CALL 1-732-738-9003 FOR
GEMINI CUSTOMER SERVICE. DO NOT ATTEMPT TO
RETURN THIS EQUIPMENT TO YOUR DEALER.
Parts of the design of this product may be protected by worldwide patents.
Information in this manual is subject to change without notice and does not
represent a commitment on the part of the vendor. Gemini Sound Products
Corp. shall not be liable for any loss or damage whatsoever arising from the
use of information or any error contained in this manual. No part of this manual may be reproduced, stored in a retrieval system or transmitted, in any
form or by any means, electronic, electrical, mechanical, optical, chemical,
including photocopying and recording, for any purpose without the express
written permission of Gemini Sound Products Corp. It is recommended that
all maintenance and service on this product is performed by Gemini Sound
Products Corp. or its authorized agents. Gemini Sound Products Corp. will
not accept liability for loss or damage caused by maintenance or repair performed by unauthorized personnel.
Worldwide Headquarters • 120 Clover Place, Edison, NJ 08837 • USA
Tel: (732) 738-9003 • Fax: (732) 738-9006
France • Gemini France (GSL) • 1, Allee d’Effiat, Parc de l’evénement, 91160 Longjumeau, France
Tél: + 33 1 69 79 97 70 • Fax: + 33 1 69 79 97 80
Germany • Gemini Sound Products GmbH • Liebigstr. 16, Haus B - 3.0G, 85757 Karlsfeld, Germany
Tel: 08131 - 39171-0 • Fax: 08131 - 39171-9
UK • Gemini Sound Products • Unit C4 Hazleton Industrial Estate, P08 9JU Waterlooville , UK
Tel: 087 087 00880 • Fax: 087 087 00990
Spain • Gemini Sound Products S.A. • Rosello, 516, 08026 Barcelona, Spain,
Tel: 349-3435-0814 • Fax: 3493-347-6961
___________________________________________________
© Gemini Sound Products Corp. 2004 All Rights Reserved.