1
AGES
16+
CAUTION: THIS AIRGUN CAN CAUSE SERIOUS INJURY OR DEATH. READ
AND FOLLOW THE INSTRUCTIONS CAREFULLY. DO NOT LOAD A PELLET INTO
THE AIRGUN UNTIL YOU ARE READY TO SHOOT. IF YOU DO LOAD A PELLET AND
THEN DECIDE NOT TO SHOOT, REMOVE IT EITHER MANUALLY OR BY SHOOTING
THE AIRGUN AT A SAFE TARGET. AN UNLOADED, UNCOCKED AIRGUN IS SAFEST.
ACCIDENTS HAPPEN FAST. PLEASE SHOOT SAFELY.
Airguns differ in their operation and you are never ready to fire any gun
until you are thoroughly familiar with it. Read the following operating
instructions thoroughly prior to operating.
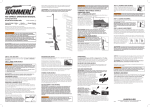
Operation Manual 800 Express
High Velocity Air Pistol
CAUTION: FAILURE TO FOLLOW THE INSTRUCTIONS AND
RECOMMENDATIONS IN THIS OWNER’S MANUAL MAY RESULT IN BODILY INJURY
INCLUDING FACE, EYE, AND EAR INJURY, BLINDNESS, OR DEAFNESS.
CAUTION: YOU AND OTHERS WITH YOU MUST WEAR SHOOTING GLASSES
TO PROTECT YOUR EYES. IF YOU WEAR READING GLASSES, YOU MUST WEAR
SAFETY GLASSES INTENDED FOR USE OVER NORMAL OPTICAL READING GLASSES.
FRONT SIGHT
REAR SIGHT
BARREL
Shoots Lead Pellets
Velocity: 700 FPS - .177 cal, 600 FPS - .22 cal
Danger Distance: 475 yards
MUZZLE
SAFETY
Read this owner’s operation manual completely. This airgun is not a toy.
Treat it with the same respect you would a firearm. Always carefully follow
the safety instructions found in this owner’s manual and keep this manual
in a safe place for future use.
TRIGGER
GUARD
NOT A TOY. ADULT SUPERVISION REQUIRED.
MISUSE OR CARELESS USE MAY CAUSE
SERIOUS INJURY OR DEATH. MAY BE DANGEROUS UP TO 475 YARDS (434
METERS).
THIS IS A HIGH POWERED AIRGUN FOR USE BY THOSE 16 YEARS OF AGE OR
OLDER. READ ALL INSTRUCTIONS BEFORE USING. THE PURCHASER AND USER
SHOULD CONFORM TO ALL LAWS GOVERNING THE PURCHASE, USE, AND
OWNERSHIP OF AIRGUNS.
WARNING:
IF A PELLET DOES NOT FIRE AFTER
COMPLETING THE OPERATION STEPS, THE
AIRGUN MAY BE JAMMED. AN UNFIRED PROJECTILE IN THE BARREL CAN BE A
DANGEROUS SITUATION. KEEP THE AIRGUN POINTED IN A SAFE DIRECTION AND
REPEAT ALL OPERATION STEPS EXCEPT STEP 2. IF A PROJECTILE STILL DOES
NOT FIRE, DO THE FOLLOWING:
1. Cock the airgun and leave the barrel open. The safety will
automatically engage in the “ON SAFE” position.
2. Clear barrel by running a cleaning rod through from breech end.
3. Repeat operation steps 3 through 6.
WARNING:
CAUTION: NEVER LOOK INTO THE MUZZLE.
NOTE: Many factors affect air pistol performance and velocity, including
brand of projectile, type of projectile, lubrication, barrel condition, and
temperature.
SIGHT ADJUSTMENT
The Browning Air Pistol is equipped with fiber optic sights. If the air pistol
shoots low, turn the screw (D) clockwise (“UP”) (See Fig. 7). If the air
pistol shoots high, turn the screw (D) counterclockwise. If the air pistol
shoots right turn the screw (E) counterclockwise. If the air pistol shoots
left turn the screw (E) clockwise.
TRIGGER ADJUSTMENT
D
The 800 Express' trigger is adjustable for
first stage travel only and does not affect
pull weight. Turn the screw in front of the
trigger clockwise to shorten trigger travel or
counterclockwise to increase trigger travel.
GRIP
Fig. 1
COCKING ASSIST
HANDLE
If you are going to store your airgun for an extended length of time be
sure the barrel is protected. This can be accomplished by coating the
bore with a good acid-free and resin-free oil or grease (RWS Spring
Cylinder Oil works well). Always use a soft brush and insert the cleaning
rod from the breech end on break barrel air pistols. Remove the oil/
grease completely before the next use.
MODIFICATION
CAUTION: THE COMPONENTS OF THIS AIRGUN WERE ENGINEERED AND
MANUFACTURED TO DELIVER OPTIMUM PERFORMANCE. ANY MODIFICATION OR
TAMPERING WITH AN AIRGUN MAY CAUSE A MALFUNCTION, VOID YOUR WARRANTY
AND MAY MAKE IT UNSAFE TO USE. ANY CHANGE IN PERFORMANCE (SUCH AS A
LOWERED TRIGGER PULL FORCE AND SHORTENED TRIGGER TRAVEL) INDICATES
POSSIBLE MODIFICATION, TAMPERING AND/OR WEAR. SUCH AIRGUN SHOULD BE
INSPECTED, REPLACED OR PROPERLY REPAIRED BY ONLY QUALIFIED UMAREX USA
PERSONNEL. ANY AIRGUN THAT HAS BEEN DROPPED SHOULD BE CHECKED BY
QUALIFIED PERSONNEL TO ENSURE THAT ITS FUNCTION HAS NOT BEEN AFFECTED.
AN AIRGUN THAT IS NOT OPERATING
PROPERLY MAY BE DANGEROUS. IT SHOULD
BE KEPT SAFELY FROM USE BY ANYONE UNTIL REPAIRED OR DESTROYED. DO
NOT TRY TO TAKE THE AIRGUN APART. IT IS DIFFICULT TO REASSEMBLE AND
IMPROPER DISASSEMBLY OR REASSEMBLY CAN CAUSE SERIOUS INJURY OR
DEATH.
WARNING:
AMMUNITION
Your Browning air pistol is designed to fire lead pellets only. We
recommend the use of RWS Pellets because of their superb accuracy
and dimensional uniformity. The correct caliber is clearly stamped on the
barrel near the breech block or on the breech block.
CAUTION: ALWAYS CHECK TO MAKE SURE
THE AIR PISTOL IS UNLOADED WHEN GETTING
FROM STORAGE OR FROM ANOTHER PERSON.
TRIGGER
Fig. 7
E
STORAGE
NEVER STORE A LOADED OR COCKED AIRGUN. Unload pellet from
the air pistol. Keep air pistol away from children and untrained shooters.
Store pellets separately from the air pistol to keep them from untrained
shooters. Protect your air pistol from moisture and dirt; clean airgun and
wrap it in a smooth, dry cloth, or store the airgun in its original packaging.
NEVER DRY FIRE YOUR AIR PISTOL
If the air pistol is fired without a lead pellet or cleaning pellet in the
breech, it will cause the piston to bottom out in the cylinder which can
permanently damage the air pistol.
CAUTION: DO NOT ATTEMPT TO REUSE PELLETS THAT HAVE BEEN FIRED
OR ARE DEFORMED. DO NOT USE BUCK SHOT, DARTS, BALL BEARINGS, OR OTHER
FOREIGN OBJECTS BECAUSE THEY CAN CAUSE INJURY TO YOU OR SOMEONE ELSE
OR MAY DAMAGE AND/OR JAM THE AIR PISTOL. USE OF ANYTHING OTHER THAN
CORRECTLY SIZED PELLETS WILL VOID THE WARRANTY.
OPERATING INSTRUCTIONS
The 800 Express is equipped with an
automatic safety, but can be manually
operated. To put the air pistol "ON
SAFE" pull the safety back toward the
trigger until it stops. To put the air pistol
"OFF SAFE" push the safety forward
(away from the trigger) until it stops.
SAFETY “OFF”
(FIRE)
Fig. 2a
SAFETY “ON”
Fig. 2b
NEVER ASSUME THAT BECAUSE THE AIR
PISTOL NO LONGER FIRES A PROJECTILE
THAT A PROJECTILE IS NOT LODGED IN THE BARREL. ALWAYS TREAT THE AIR
PISTOL AS THOUGH IT IS LOADED AND WITH THE SAME RESPECT YOU WOULD
A FIREARM.
WARNING:
STEP 1. COCK
CAUTION: ALWAYS POINT THE MUZZLE IN A SAFE DIRECTION. NEVER
PLACE YOUR HAND IN FRONT OF THE MUZZLE.
Slide the cocking assist
handle over the muzzle.
The front sight fits in the
slot of the handle. Avoid
contact with the trigger.
COCK
Hold the pistol firmly, grasp
the cocking handle, pull the
Fig. 3
handle and barrel all the way
down and under the air pistol
until you reach the end of the
cocking stroke. You will hear a click
indicating the spring piston has been
locked into position and the barrel
will move freely without tension. Be mindful of pinch points (See Fig 5).
Cocking the air pistol automatically engages the safety.
CAUTION: NEVER PULL THE TRIGGER WHILE THE BARREL IS DOWN.
STEP 2. LOAD
Insert the correct caliber lead pellet carefully
into the chamber of the breech end which
is now exposed (See Fig 4). Be sure to
seat the pellet flush with the breech. Avoid
damaging the pellet skirt. Look on the
breech block to be sure of the pellet size.
PINCH
POINT
Firmly grasp the cocking handle, return the
barrel to its original closed and latched position.
CAUTION: BE CAREFUL TO KEEP FINGERS
CLEAR OF COCKING MECHANISM. (SEE "PINCH
POINTS", FIG. 5) GRASP THE COCKING ASSIST HANDLE
FIRMLY AS YOU COCK IT AND CLOSE IT TO PREVENT
IT FROM SNAPPING BACK AND POSSIBLY CAUSING
INJURY.
PINCH
POINT
PINCH
POINT
Fig. 5
STEP 4. AIM AT A SAFE TARGET
CAUTION: YOUR BACKSTOP SHOULD BE INSPECTED FOR WEAR BEFORE
AND AFTER EACH USE. DISCONTINUE USE IF THE BACKSTOP SURFACE SHOWS
SIGNS OF FAILURE. ALWAYS PLACE THE BACKSTOP IN A LOCATION THAT WILL BE
SAFE SHOULD THE BACKSTOP FAIL. DISCONTINUE THE USE OF A BACKSTOP IF A
PROJECTILE REBOUNDS OR RICOCHETS.
The air pistol is correctly aimed when the red dot on the front sight blade
is positioned exactly in the notch of the rear sight. The top of the front
sight blade should be even with the top of the notch in the rear sight. The
bullseye should appear to rest on the top of the front sight (see Fig. 6).
STEP 5. PUT “OFF SAFE”
Too Low
Too High
Perfect
Fig. 6
Push the safety lever to the foreward position (See Fig. 2a).
CAUTION: LIKE ALL MECHANICAL DEVICES, AN AIR PISTOL SAFETY CAN
FAIL, EVEN WHEN THE SAFETY IS "ON SAFE". YOU SHOULD CONTINUE TO HANDLE
THE AIR PISTOL SAFELY. NEVER POINT THE AIR PISTOL AT ANYTHING YOU DO NOT
INTEND TO SHOOT.
STEP 6. FIRE
BREECH
LEAD PELLET
(Solid End Forward)
Make certain that you are aimed at a safe target. Pull the trigger.
UNLOAD PELLET
Fire the pellet at a safe target to unload the airgun. If this is not practical,
cock the airgun to open the barrel and push the pellet from the chamber
by running a cleaning rod through the breech end. Insert a felt cleaning
pellet and discharge into a safe target.
Fig. 4
CARE AND MAINTENANCE
CAUTION: BEFORE ANY CARE, CLEANING, OR MAINTENANCE, ALWAYS BE
SURE YOUR AIR PISTOL IS UNCOCKED AND UNLOADED. KEEP IT POINTED IN A SAFE
DIRECTION. IT IS IMPORTANT TO PERFORM ROUTINE INSPECTIONS AND MAINTAIN
YOUR AIR PISTOL PROPERLY.
WORKING PARTS: The piston requires lubrication at 1000 shot intervals.
Two drops of RWS Chamber Lube applied to the piston seal is sufficient.
The lube is easily applied through the compression chamber port with a
3 ½” applicator needle. (See Fig. 8). The wearing surfaces at the barrel
hinge and trigger mechanism should be lubricated. (See Fig. 9) RWS
Spring Cylinder Oil works fine for this application. Remember, a little is
good – a lot is not better.
BARREL: In day to day use, dirt or residue will
accumulate in the bore. This can be removed by
using soft felt RWS Cleaning Pellets. Note: Good
quality RWS lead pellets not only increase accuracy,
they leave very little lead deposit. At intervals during
periods of regular use the bore of the barrel should
be cleaned by means of a felt wad or cleaning rod
Fig. 8
with a wool mop and RWS Bore Cleaner. Wire
brushes should not be used. Insert rod from breech
end, do not remove barrel seal.
SURFACE: The exposed metal parts (receiver,
screw heads, etc.) are a gun blue finish and MUST
be wiped clean using a slightly oiled cloth after
handling to prevent rust. Use light acid free and resin
free oil. RWS Spring Cylinder Oil is excellent for this.
Fig. 9
CAUTION: OILS THAT CONTAIN ACID OR RESIN CAN DAMAGE THE SEALS
AND POSSIBLY THE AIR PISTOL FINISH.
NEVER CARRY YOUR AIR PISTOL WHILE
COCKED AND/OR WHILE LOADED. IT IS BEST
TO COCK THE AIR PISTOL ONLY BEFORE
SHOOTING. UNDER NO CIRCUMSTANCES SHOULD YOUR AIR PISTOL BE CARRIED
COCKED AND LOADED.
WARNING:
STEP 3. CLOSE BARREL
DO NOT BRANDISH OR DISPLAY THIS AIR
PISTOL IN PUBLIC - IT MAY CONFUSE PEOPLE
AND MAY BE A CRIME. POLICE AND OTHERS MAY THINK IT IS A FIREARM. DO
NOT CHANGE THE COLORATION AND MARKINGS TO MAKE IT LOOK MORE LIKE A
FIREARM. THAT IS DANGEROUS AND MAY BE A CRIME.
WARNING:
WARRANTY & REPAIR
STANDARD 1-YEAR WARRANTY
NOTE: Retain a copy of
your purchase receipt
with your airgun.
This product is warranted to the retail consumer for one (1) year from date of
purchase against defects in material and workmanship and is not transferable.
WHAT IS COVERED: Replacement parts and labor.
WHAT IS NOT COVERED: Shipping charges to Umarex USA for defective product
and damages caused by abuse or failure to perform normal maintenance as well
as any other expense. Consequential damages, or incidental expenses, including
damage to property. Some states do not allow the exclusion or limitation of
incidental or consequential damages, so the above limitation or exclusion may not
apply to you.
WARRANTY CLAIMS: Warranty Claims and Repair for U.S. and Canadian
customers only. Call Umarex USA (479)-646-4210 and ask for the Service
Department. If it is determined a return is necessary, you will be issued a Return
Authorization Number. Write this number boldly on the box and return the product
prepaid to Umarex USA (Canadian customers will be provided with the address
of an authroized Canadian Repair Facility). Your name, address, phone number
and a note explaining the defect found must be included in the package. A copy of
the original purchase receipt must accompany the return. U.S. customers, include
a check made to Umarex USA in the amount provided by Umarex USA’s service
department to cover shipping and handling.
IMPLIED WARRANTIES
Any implied warranties, including the implied warranties of merchantability and
fitness for a particular purpose, are limited in duration to 1 (one) year from date of
retail purchase. SOME STATES DO NOT ALLOW LIMITATIONS ON HOW LONG
AN IMPLIED WARRANTY LASTS, SO THE ABOVE LIMITATIONS MAY NOT
APPLY TO YOU. TO THE EXTENT ANY PROVISION OF THIS WARRANTY IS
PROHIBITED BY FEDERAL, STATE, OR MUNICIPAL LAW WHICH CANNOT BE
PREEMPTED, IT SHALL NOT BE APPLICABLE. THIS WARRANTY GIVES YOU
SPECIFIC LEGAL RIGHTS AND YOU MAY ALSO HAVE OTHER RIGHTS WHICH
VARY FROM STATE TO STATE AND COUNTRY TO COUNTRY.
Browning® trademarks licensed from Browning
08R11
7700 Chad Colley Boulevard, Fort Smith, Arkansas 72916 USA
Phone: 1-479-646-4210 www.UmarexUSA.com
©2011
AGÉES
16+
MISE EN GARDE :
CETTE CARABINE PEUT CAUSER DES BLESSURES
GRAVES OU LA MORT. LISEZ ET SUIVEZ ATTENTIVEMENT LES INSTRUCTIONS. NE
PLACEZ PAS UN PROJECTILE DANS L'ARME AVANT D'ÊTRE PRÊT À TIRER. SI
VOUS METTEZ EN PLACE UN PROJECTILE ET QUE VOUS DÉCIDEZ DE NE PAS TIRER,
ENLEVEZ-LE MANUELLEMENT OU EN TIRANT VERS UNE CIBLE SÉCURITAIRE. UNE
ARME NON CHARGÉE ET NON ARMÉE EST LA PLUS SÉCURITAIRE. LES ACCIDENTS
SURVIENNENT RAPIDEMENT. S.V.P., TIREZ DE FAÇON SÉCURITAIRE.
Le fonctionnement de chaque arme à air est différent et vous n’êtes pas prêt
à tirer une arme tant que vous n’êtes pas familier avec son fonctionnement.
Lisez les instructions qui suivent en totalité avant l’utilisation.
Manuel d’instructions 800 Express
Pistolet à air de grande vélocité
MISE EN GARDE : SI VOUS NE SUIVEZ PAS LES INSTRUCTIONS ET LES
RECOMMANDATIONS DE CE MANUEL DU PROPRIÉTAIRE, IL POURRAIT EN RÉSULTER
DES DOMMAGES CORPORELS INCLUANT DES BLESSURES AU VISAGE, AUX YEUX ET
AUX OREILLES, LA CÉCITÉ ET LA SURDITÉ.
MISE EN GARDE : VOUS ET LES PERSONNES QUI VOUS ACCOMPAGNENT
DEVEZ PORTER DES LUNETTES DE TIR AFIN DE PROTÉGER VOS YEUX. SI VOUS
PORTEZ DES LUNETTES POUR LA VUE, VOUS DEVEZ UTILISER DES LUNETTES
DE TIR QUI SONT CONÇUES POUR ÊTRE PORTÉES PAR-DESSUS DES LUNETTES
CONVENTIONNELLES POUR LA VUE.
Tire des projectiles de plomb
Vélocité: 700 pi/s - 0,177, 600 pi/s - 0,22
Distance dangereuse: 475 verges (434 mètres)
GUIDON
Lisez complètement ce manuel d'instructions s'adressant au propriétaire.
Cette carabine à air n'est pas un jouet. Traitez-la de la même façon
que vous traiteriez une arme à feu. Suivez toujours attentivement les
instructions de ce manuel du propriétaire et conservez ce manuel dans
un endroit sûr pour l'utiliser dans l'avenir.
PAS UN JOUET. LA
SUPERVISION D’UN ADULTE
EST NÉCESSAIRE. UNE
MAUVAISE UTILISATION OU UN MANQUE DE PRUDENCE PEUVENT ENTRAÎNER
DES BLESSURES GRAVES OU LA MORT. CETTE ARME PEUT ÊTRE DANGEREUSE
JUSQU'À 475 VERGES (434 MÈTRES).
CETTE ARME EST UNE CARABINE À AIR DE FORTE PUISSANCE RECOMMANDÉE
POUR DES PERSONNES DE 16 ANS ET PLUS. LISEZ TOUTES LES INSTRUCTIONS
AVANT D'UTILISER CE PRODUIT. L'ACHETEUR ET L'UTILISATEUR DEVRAIENT SE
CONFORMER À TOUTES LES LOIS CONCERNANT L'ACHAT, L'UTILISATION ET LA
POSSESSION D'ARMES À AIR.
BOUCHE
CRAN DE
SÛRETÉ
AVERTISSEMENT :
SI UN PROJECTILE NE PEUT ÊTRE
TIRÉ APRÈS AVOIR SUIVI LES
ÉTAPES MENTIONNÉES, L’ARME À AIR PEUT S’ÊTRE ENRAYÉE. UN PROJECTILE NON
TIRÉ DANS LE CANON PEUT ÊTRE DANGEREUX. GARDEZ L’ARME À AIR POINTÉE
DANS UNE DIRECTION SÉCURITAIRE ET RÉPÉTEZ TOUTES LES ÉTAPES MENTIONNÉES
À L’EXCEPTION DE L’ÉTAPE 2. SI UN PROJECTILE NE PEUT ENCORE ÊTRE TIRÉ,
EFFECTUEZ LES OPÉRATIONS SUIVANTES:
1. Armez l’arme à air et laissez le canon ouvert. Le cran de sûreté se mettra
automatiquement en place dans la position "ON SAFE".
2. Nettoyez le canon en utilisant une baguette insérée dans la culasse.
3. Répétez les étapes 3 à 6.
AVERTISSEMENT :
DÉCHARGEZ UN PROJECTILE
MISE EN GARDE :
PONTET
DÉTENT
POINÉE
illustration 1
POIGNÉE
FACILITANT
NOTEZ BIEN: Plusieurs facteurs peuvent influencer les performances
d’une arme et la vélocité des projectiles, incluant la marque des projectiles,
le type de projectiles, la lubrification, l’état du canon et la température.
Tirez le projectile vers une cible sécuritaire pour décharger l’arme à air. Si cette
méthode ne convient pas, armez l’arme à air pour ouvrir le canon et poussez le
projectile hors de la chambre en passant une baguette dans la culasse. Insérez
un projectile de nettoyage en feutre et tirez vers une cible sécuritaire.
RÉGLAGE DES MIRES
Le pistolet à air Browning est muni de mires en
fibres optiques. Si le pistolet à air tire trop bas,
tournez la vis (D) dans le sens des aiguilles
d’une montre ("UP") (voir illustration 7). Si le
pistolet tire trop haut, tournez la vis (D) dans le
sens contraire des aiguilles d’une montre. Si le
pistolet tire vers la droite, tournez la vis (E) dans
le sens contraire des aiguilles d’une montre. Si
le pistolet tire vers la gauche, tournez la vis (E)
dans le sens des aiguilles d’une montre.
D
REMISAGE
NE REMISEZ JAMAIS UNE ARME À AIR CHARGÉE OU ARMÉE.Déchargez
les projectiles du pistolet à air. Gardez le pistolet à air loin des enfants et des
tireurs sans entraînement. Rangez les projectiles à part, dans un autre endroit
que le pistolet à air, pour qu’ils ne soient pas à la portée des tireurs sans
entraînement. Protégez votre pistolet à air de l’humidité et de la poussière;
nettoyez votre pistolet à air et enveloppez-le dans un chiffon doux et sec ou
rangez-le dans l’emballage d’origine. Si vous rangez votre arme à air pour
une longue période de temps, assurez-vous que le canon est protégé. Vous
pouvez accomplir cette tâche en recouvrant l’âme à l’aide d’une bonne huile
ou d’une bonne graisse exemptes d’acide et de résine (l’huile RWS Spring
Cylinder Oil est efficace). Servez-vous toujours d’une brosse douce et insérez
la baguette dans la culasse des pistolets à air à canon basculant. Enlevez
complètement l’huile ou la graisse avant l’utilisation.
MISE EN GARDE : LES COMPOSANTES DE CETTE ARME À AIR ONT ÉTÉ
CONÇUES ET FABRIQUÉES POUR VOUS OFFRIR DES PERFORMANCES OPTIMALES.
TOUTE MODIFICATION OU ALTÉRATION D’UNE ARME À AIR PEUT CAUSER UN MAUVAIS
FONCTIONNEMENT, ANNULER LA GARANTIE ET PEUT RENDRE SON UTILISATION
DANGEREUSE. TOUT CHANGEMENT DES PERFORMANCES (COMME UN POIDS DE
DÉPART PLUS BAS OU UNE COURSE MOINS LONGUE DE LA DÉTENTE) INDIQUE UNE
MODIFICATION POSSIBLE, UNE ALTÉRATION ET/OU DE L’USURE. UNE TELLE ARME
DEVRAIT ÊTRE INSPECTÉE, REMPLACÉE OU RÉPARÉE ADÉQUATEMENT PAR LE
PERSONNEL QUALIFIÉ D’UMAREX USA UNIQUEMENT. TOUTE ARME À AIR QUI A ÉTÉ
ÉCHAPPÉE DEVRAIT ÊTRE INSPECTÉE PAR DU PERSONNEL QUALIFIÉ POUR VOUS
ASSURER QUE SON FONCTIONNEMENT N’EST PAS ALTÉRÉ.
UNE ARME À AIR QUI NE
FONCTIONNE PAS BIEN PEUT
ÊTRE DANGEREUSE. ELLE DEVRAIT ÊTRE RANGÉE SÉCURITAIREMENT ET NE PAS
ÊTRE UTILISÉE JUSQU’À CE QU’ELLE SOIT RÉPARÉE OU DÉTRUITE. NE TENTEZ
PAS DE DÉMONTER CETTE ARME À AIR. ELLE EST DIFFICILE À REMONTER ET UN
DÉMONTAGE OU UN MONTAGE FAUTIF PEUVENT CAUSER DES BLESSURES GRAVES
OU LA MORT.
illustration 7
La détente du modèle 800 Express est réglable
pour la première partie du mouvement de départ seulement et ce réglage
n’affecte pas le poids de départ. Tournez la vis à l’avant de la détente dans
le sens des aiguilles d’une montre pour diminuer la course de la détente ou
dans le sens contraire des aiguilles d’une montre pour augmenter la course
de la détente.
MISE EN GARDE : EFFECTUEZ TOUJOURS UNE VÉRIFICATION POUR
VOUS ASSURER QUE LE PISTOLET À AIR EST DÉCHARGÉ LORSQUE VOUS LE SORTEZ
DU REMISAGE OU LORSQU’UNE AUTRE PERSONNE VOUS LE DONNE.
CRAN DE
SÛRETÉ
Le modèle 800 Express est muni d’un
cran de sûreté qui est automatique
mais qui peut aussi fonctionner
manuellement. Pour placer le pistolet à
air dans la position "ON SAFE", tirez le
cran de sûreté vers la détente jusqu’à
illustration 2b
l’arrêt. Pour placer le pistolet à air dans illustration 2a
la position "OFF SAFE", poussez le cran
de sûreté vers l’avant (dans la direction opposée à la détente) jusqu’à l’arrêt.
PARCE QUE LE PISTOLET À AIR
NE TIRE PLUS DE PROJECTILE,
NE PRÉSUMEZ JAMAIS QU’UN
PROJECTILE NE PEUT ÊTRE COINCÉ DANS LE CANON. CONSIDÉREZ TOUJOURS LE
PISTOLET À AIR COMME CHARGÉ ET TRAITEZ-LE AVEC LE MÊME RESPECT QUE VOUS
ACCORDERIEZ À UNE ARME À FEU.
AVERTISSEMENT :
MISE EN GARDE : POINTEZ TOUJOURS LE CANON DANS UNE DIRECTION
SÉCURITAIRE. NE PLACEZ JAMAIS VOTRE MAIN DEVANT LE CANON.
ÉTAPE 1. ARMER
LE PISTOLET
Glissez la poignée
facilitant l’armement
sur le canon. Le guidon
ARMEZ
s’insère dans la rainure de la
poignée. Évitez tout contact
avec la détente. Tenez le
pistolet fermement, saisissez
la poignée, tirez la poignée et le
canon complètement vers le bas,
sous le pistolet, jusqu’à la fin de la
course du mouvement d’armement.
Vous entendrez un "clic" qui indique que le
piston à ressort est bloqué en position et
que le canon peut bouger sans tension. Ne
vous pincez pas (voir illustration 5). Armer le
pistolet à air met automatiquement en place
le cran de sûreté.
MISE EN GARDE :
NE TIREZ JAMAIS
SUR LA DÉTENTE LORSQUE LE CANON EST BASCULÉ.
MUNITIONS
Votre pistolet à air Browning est conçu pour tirer uniquement des projectiles
de plomb. Nous vous suggérons les projectiles RWS à cause de leur grande
précision et de l’uniformité de leur dimension. Le bon calibre est clairement
estampillé sur le canon près du bloc de culasse ou sur le bloc de culasse.
N’EFFECTUEZ JAMAIS UN COUP À SEC AVEC VOTRE
ARME À AIR
Si vous tirez avec votre pistolet à air sans projectile de plomb ou sans
projectile de nettoyage dans la culasse, le piston frappera le fond du cylindre,
ce qui peut endommager de façon permanente le pistolet à air.
Assurez-vous de placer le projectile pour qu’il
affleure la culasse. Évitez d’endommager la jupe
du projectile. Regarder sur le bloc de culasse
pour vous assurer du bon calibre des projectiles.
ZONE DE
PINCEMEN
ÉTAPE 3. REFERMER LE CANON
Saisissez bien la poignée d’armement, retournez
le canon dans sa position fermée et bloquée
comme à l’origine.
ZONE DE
PINCEMENTS
MISE EN GARDE :
ZONE DE
PINCEMENTS
SOYEZ SÛR DE GARDEZ
illustration 5
VOS DOIGTS LOIN DU MÉCANISME D’ARMEMENT. (VOIR
"ZONE DE PINCEMENT" ILLUSTRATION 5) SAISISSEZ BIEN LA POIGNÉE FACILITANT
L’ARMEMENT LORSQUE VOUS ARMEZ LE PISTOLET ET QUE VOUS FERMEZ LA
POIGNÉE POUR L’EMPÊCHER DE REVENIR EN POSITION ORIGINALE SUBITEMENT ET
DE POSSIBLEMENT CAUSER DES BLESSURES.
ÉTAPE 4. VISER UNE CIBLE SÉCURITAIRE
MISE EN GARDE : VOTRE PARE-BALLES DEVRAIT ÊTRE INSPECTÉ POUR
Y DÉTECTER DES SIGNES D’USURE AVANT ET APRÈS CHAQUE UTILISATION. N’UTILISEZ
PLUS VOTRE PARE-BALLES SI SA SURFACE MONTRE DES SIGNES DE FAIBLESSE. PLACEZ
TOUJOURS LE PARE-BALLES DANS UN ENDROIT QUI SERA SÉCURITAIRE SI CELUI-CI VIENT
QU’À ÊTRE DÉFECTUEUX. N’UTILISEZ PLUS VOTRE PARE-BALLES SI UN PROJECTILE
REBONDIT OU S’IL SE PRODUIT UN RICOCHET.
Vous visez bien à l’aide de votre pistolet à air lorsque le point rouge du
guidon est placé dans l’encoche de la hausse. Le dessus du guidon devrait
être égal avec le dessus de l’encoche de la hausse. Le centre de la cible
devrait sembler reposer sur le dessus du guidon (voir illustration 6).
Trop
Trop
Parfait
illustration 6
illustration 3
CULASSE
PROJECTILE DE
PLOMB (Partie
dure vers l'avant)
illustration 4
Insérez prudemment un projectile de plomb du bon calibre dans la
chambre de la culasse qui est maintenant visible (voir illustration 4).
AVERTISSEMENT :
E
CRAN DE
SÛRETÉ "OFF"
(TIREZ)
ÉTAPE 2. CHARGER LE PISTOLET
MODIFICATION
NE REGARDEZ JAMAIS DANS LE CANON DE L’ARME.
RÉGLAGE DE LA DÉTENTE
HAUSSE
CANON
INSTRUCTIONS POUR LE
FONCTIONNEMENT
SOINS ET ENTRETIEN
MISE EN GARDE :
NE TENTEZ PAS DE RÉUTILISER DES PROJECTILES QUI
ONT ÉTÉ TIRÉS OU QUI SONT DÉFORMÉS. N’UTILISEZ PAS DE LA CHEVROTINE, DES
DARDS, DES BILLES DE ROULEMENT OU D’AUTRES OBJECTS DIVERS CAR ILS PEUVENT
VOUS CAUSER DES BLESSURES OU EN CAUSER À D’AUTRES PERSONNES OU PEUVENT
ENDOMMAGER ET/OU ENRAYER VOTRE PISTOLET À AIR. L’UTILISATION DE TOUT AUTRE
PROJECTILE QUE CEUX DU BON CALIBRE ANNULERA LA GARANTIE.
MISE EN GARDE :
AVANT DE PRODIGUER DES
SOINS, D’ENTRETENIR OU DE NETTOYER VOTRE PISTOLET,
ASSUREZ-VOUS TOUJOURS QU’IL N’EST PAS ARMÉ ET QU’IL
EST DÉCHARGÉ. GARDEZ VOTRE ARME POINTÉE DANS UNE
DIRECTION SÉCURITAIRE. IL EST IMPORTANT D’INSPECTER
VOTRE ARME RÉGULIÈREMENT ET DE L’ENTRETENIR
CORRECTEMENT.
PIÈCES ACTIVES: Le piston nécessite une lubrification
à tous les 1000 coups. Deux gouttes d’huile RWS
illustration 8
Chamber Lube appliquées sur le joint de piston sont
suffisantes. L’huile peut être appliquée facilement par
l’orifice de la chambre de compression à l’aide d’une
aiguille d’injection de 3 1/2" (voir illustration 8). Les
surfaces d’usure au niveau de la charnière du canon et
du mécanisme de la détente devraient être lubrifiées.
(voir illustration 9). L’huile RWS Spring Cylinder Oil
fonctionne bien à ces endroits. Rappelez-vous qu’un peu
d’huile, c’est bien–beaucoup d’huile, ce n’est pas mieux.
illustration 9
CANON: Lors d’une utilisation journalière, des saletés
ou des résidus s’accumuleront dans l’âme du canon.
Ils peuvent être enlevés en utilisant des projectiles de nettoyage en feutre
RWS Cleaning Pellets. Notez bien: les projectiles de bonne qualité RWS
n’augmentent pas seulement la précision, ils laissent derrière eux très
peu de résidus de plomb. À des intervalles réguliers, lors d’une utilisation
constante, l’âme du canon devrait être nettoyée à l’aide d’un tampon de
feutre ou d’une baguette garnie de laine et de nettoyant pour l’âme RWS
Bore Cleaner. Les brosses métalliques ne devraient pas être utilisées.
Insérez la baguette dans la culasse et n’enlevez pas le joint du canon.
SURFACES: Les pièces métalliques visibles (boîte de culasse, vis, etc.)
sont bleuies et DOIVENT être essuyées et nettoyées à l’aide d’un chiffon
légèrement imbibé d’huile après avoir été manipulées pour éviter la rouille.
Utilisez une huile légère exempte d’acide et de résine. L’huile RWS Spring
Cylinder Oil convient parfaitement.
MISE EN GARDE : LES HUILES QUI CONTIENNENT DE L’ACIDE OU DE
LA RÉSINE PEUVENT ENDOMMAGER LES JOINTS ET POSSIBLEMENT LE FINI DU
PISTOLET À AIR.
ÉTAPE 5. PLACER DANS LA POSITION "ON SAFE"
Poussez le cran de sûreté vers l’avant (voir illustration 2a).
MISE EN GARDE : COMME TOUS LES MÉCANISMES, LE CRAN DE SÛRETÉ
D’UN PISTOLET À AIR PEUT FAIRE DÉFAUT. MÊME LORSQUE LE CRAN DE SÛRETÉ
EST DANS LA POSITION "ON SAFE", VOUS DEVRIEZ CONTINUER À MANIPULER LE
PISTOLET À AIR DE FAÇON SÉCURITAIRE. NE POINTEZ JAMAIS LE PISTOLET À AIR
VERS UN OBJET SUR LEQUEL VOUS NE VOULEZ PAS TIRER.
ÉTAPE 6. TIRER
Assurez-vous que vous visez une cible sécuritaire. Pressez la détente.
NE TRANSPORTEZ JAMAIS
VOTRE PISTOLET À AIR S’IL EST
ARMÉ ET/OU CHARGÉ. IL EST PRÉFÉRABLE D’ARMER LE PISTOLET SEULEMENT
AVANT DE TIRER. VOUS NE DEVEZ, DANS AUCUNE CIRCONSTANCE, TRANSPORTER
VOTRE PISTOLET ARMÉ ET CHARGÉ.
AVERTISSEMENT :
NE BRANDISSEZ PAS ET NE
MONTREZ PAS VOTRE PISTOLET À
AIR EN PUBLIC. LES GENS PEUVENT SE MÉPRENDRE ET CELA PEUT ÊTRE UN CRIME.
LES POLICIERS ET D’AUTRES PERSONNES PEUVENT PENSER QUE C’EST UNE ARME À
FEU. NE CHANGEZ PAS LA COULEUR ET LES PARTICULARITÉS DE VOTRE ARME POUR
LA FAIRE RESSEMBLER À UNE ARME À FEU. CELA EST DANGEREUX ET PEUT ÊTRE
UN CRIME.
AVERTISSEMENT :
GARANTIE ET RÉPARATIONS
GARANTIE CONVENTIONNELLE D’UNE AN
Notez bien: Gardez une
copie de votre facture
avec votre arme à air.
Pour l’acheteur au détail, ce produit est garanti pour une période d’un an (1) à partir
de la date d’achat contre les défauts de fabrication et de matériaux et cette garantie
n’est pas transférable.
CE QUI EST COUVERT PAR LA GARANTIE: Les pièces de remplacement et la
main-d’œuvre.
CE QUI N’EST PAS COUVERT: Les frais de transport d’un produit défectueux vers
Umarex USA et les dommages causés par un usage abusif ou un entretien normal non
effectué, en plus de toute autre dépense. Les dommages indirects et les dommages
accessoires, incluant les dommages à la propriété. Certains états ne permettent pas
l’exclusion ou les limites imposées aux dommages indirects ou accessoires, donc les
limites et les exclusions ci-dessus peuvent ne pas s’appliquer à vous.
DEMANDES DE RÉPARATION SOUS GARANTIE: Demandes de réparation
sous garantie et réparation pour les clients des U.S.A et du Canada seulement.
Communiquez par téléphone avec Umarex USA au (479)-646-4210 et demandez
le service. Si nous jugeons qu‘un retour du produit est nécessaire, vous obtiendrez
un numéro d‘autorisation de retour. Écrivez ce numéro en gros caractères sur le
colis et retournez-nous le produit port payé à Umarex USA. (On donnera aux clients
canadiens l’adresse d’une centre de service canadien agréé). Incluez dans l’envoi
votre nom, votre adresse, votre numéro de téléphone et une note expliquant la
défectuosité. Une copie de la facture originale doit aussi accompagner l‘envoi. Clients
des É.-U., doivent inclure un chèque au nom d’Umarex USA au montant fourni par le
service à la clientèle Umarex USA afin de couvrir les frais d’envoi et de manutention.
GARANTIE TACITE: Toute garantie tacite, comprenant la garantie tacite de qualité
marchande et de bon fonctionnement dans un but particulier, est limitée à une
période d’une année (1) à partir de la date d’achat au détail. CERTAINS ÉTATS
NE PERMETTENT PAS DE LIMITER LA DURÉE DES GARANTIES TACITES,
DONC LES LIMITES CI-DESSUS PEUVENT NE PAS S’APPLIQUER À VOUS.
SI UNE PARTIE DE CETTE GARANTIE CONTREVIENT À UNE LOI FÉDÉRALE,
PROVINCIALE OU MINICIPALE QUI NE PEUT ÊTRE PRÉEMPTÉE, ELLE NE
SERA PAS APPLIQUABLE. CETTE GARANTIE VOUS DONNE DES DROITS
LÉGAUX SPÉCIFIQUES ET VOUS POUVEZ AUSSI AVOIR D’AUTRES DROITS
QUI PEUVENT VARIER D’UN ÉTAT À UN AUTRE ET D’UN PAYS À UN AUTRE.
Les marques de commerce Browning sont autorisées par Browning