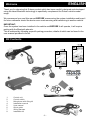
1
Installation Instructions
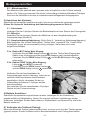
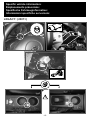
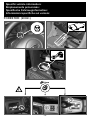
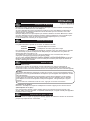
2.3 - Microphone location:
The microphone should be located on the top of the upper steering column surround or
similar location using the adhesive pad provided ensuring it is pointing directly towards the
driver.
Ensure the surface is clean and dry by wiping with the alcohol swab provided in the kit and
face the microphone towards the driver.
3) Connecting the system components: (Refer to diagram - Page 2)
Once all the components have been installed, they can be connected together:
3.1: Microphone:
Plug the microphone harness connector into the small connector of the main radio harness.
3.2: Control Button:
Plug the control button wiring harness connector into the control unit.
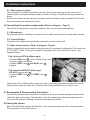
3.3: Main wiring harness: (Refer to diagram - Page 2)
Before connecting the main audio wiring harness it is important to determine if the audio has
a "TEL MUTE" input. This input is usually a separate wire on the rear of the radio - see
example below.
3.3a: Vehicles WITH the Mute input:
- Connect PINK wire D to the Tel Mute input wire
using a suitable connector.
- Connect GREY wire A and BLUE wire C
together.
3.3b: Vehicles WITHOUT Mute input:
- DO NOT connect wire D
- Connect GREY wire A and GREY wire
together.
TEL MUTE input
B
Interconnect the 14-Way white connectors of the main wiring harness between the vehicle
wiring harness and the radio unit. Plug the main wiring harness into the control unit.
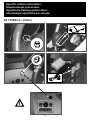
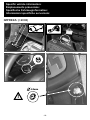
4) Reassembly & Reconnecting the battery:
Once all the components have been connected, tidy up any excess wiring and secure with
cable ties where necessary. Reassemble all the trim panels and vehicle components and
reconnect the battery following normal reconnection procedures.
5) Pairing the phone:
Before the Bluetooth system will function, it will need to be paired to the customers phone.
See procedure in the User manual
-5-