1
EN
Contents
1x BLINK (DARK) 12 V / 1.5 W
Dimensions Ø 100 mm / 3.9 inches, depth 48 mm / 1.9 inches
1x diffuse lens
1x Easy-Lock
2x screws
1x Torx key
1x template
Material
Aluminium housing
Polycarbonate lens
Please read the following instructions before installing. You are
advised to keep these installation instructions in a safe place.
Use
Wall-mounted light fixture for installation near steps, sunken sitting
area, fence, etc.
Lamp
The fixture is equipped with a high-quality LED lamp. These lamps
have a long life and a high light output and their power consumption
and the heat produced are extremely low.
EN
Important!
Never connect the low-voltage cable directly to a 100-240 V power
source. It is only suitable for use in combination with a 12 V low-voltage
system. This product should only be used within the in-lite system. Use
of products other than those made by in-lite will invalidate the warranty.
Enjoy the lighting in your yard.
Connecting the fixture to 12 V
The already installed lamp means the fixture is immediately ready for
use. Therefore you do not need to install the lamp first.
When mounting the fixture you can choose to use the transparant or
the diffuse lens.
General Installation Guideline
During installation, make sure that all components are easily
accessible for replacement.
Step 1
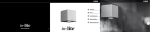
Remove the Torx screw (A), (Fig. 1a). Remove the cover in the direction
of the arrow (Fig. 1b). Also remove the plastic lens. Ensure that there is
a hole of at least 13 mm / 0.5 inch Ø in the wall to lead the cable
through. Make this hole at a place where the lower half of the fixture
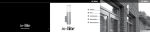
will cover it. You can use the supplied template. (Fig. 2) Attach the back
of the fixture to the wall with the screws provided (B). (Fig. 3)
Step 2
Replace one of the plastic lenses in the fixture and reinstall the cover.
Tighten the Torx screw.
Step 3
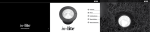
Join the Easy-Lock connector to the main cable. (Fig. 4)
a. There are two cable grips. The grip with the wider recess fits the
10/2 main cable, the grip with the narrower recess fits the 14/2
main cable. Clamp the correct cable grip over the main cable.
b. Put the cable grip (with the cable underneath) in the Easy-Lock
connector.
c. Tighten the threaded cap on the Easy-Lock connector. This will
cause the contacts to be pushed through the insulation on the
cable. In tightening the cap, a little gel is applied to the contacts in
the Easy-Lock connector. This serves to protect the contacts
against moisture. A little gel may possibly come out of the EasyLock connector: so after installation (and/or before a meal), wash
your hands with soap and water, and avoid the gel coming into
contact with your eyes.
Step 4
Connect the main cable to the fixture by connecting the miniconnector. (Fig. 5)
If the lamp does not work correctly, check that the Easy-Lock connector is properly connected to the main cable. Do the same for the miniconnector. Repeat steps 3 and 4. When the fixture is connected to the
main cable also check that the contacts of the Easy-Lock connector
are not bent. If you have any problems, contact your dealer.
General maintenance advice
We advise wiping the fixture down at least once a year using a clean
cloth and warm water.