1
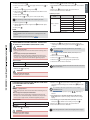
and lightly lubricated O-ring 21 on
spindle.
→→Insert pistons 22 and supporting washer 24 .
→→Wet spindle thread 2 with special adhesive LOCTITE 274 and
screw on nut 25 .
→→Mount position indicator 26 .
→→Insert new O-ring 30 into the groove of the actuator body.
→→Screw in nipple 6 with actuator in valve body 1 .
→→For actuator size G (100 mm) and H (125 mm): Insert washer
40 .
→→Mount cover 31 and screw tightly with special wrench.
→→Check the valve for function and leaks.
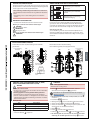
Tightening torques
Material of nipple
thread
Do not damage sealing edges when replacing the seal!
→→Replace graphite seal 5 .
→→Only for VA body: Lubricate nipple thread
6 with Klüber paste
UH1 96-402.
→→Clamp body
Brass or stainless
steel
1 .
Note!
Conversion from control function
A (CFA) to control function I (CFI)
Danger!
Danger – high pressure!
•Turn off the pressure and vent the lines before loosening lines or
valves.
Risk of injury from improper maintenance!
•Maintenance may be performed by authorized technicians only!
•To screw on or unscrew valve body or actuator, use an open-end
wrench, never a pipe wrench, and observe tightening torques.
Required parts:
Item
Description
30
1 O-ring
Procedure:
→→Mount valve
Tab. 1:
DN
Tightening torques
15
45
20
50
25
60
32
65
40
65
50
70
65
70
Valve body tightening torques
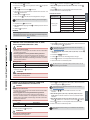
→→Release cover
31 with special wrench until the springs are
completely relaxed, holding up the actuator body 12 against the
hexagon.
For information about the special wrench, see Chapter
“Installation tools”.
→→For actuator size G (100 mm) and H (125 mm): Remove
washer 40 .
→→Remove pressure springs 28 29 .
→→Insert O-ring 30 into the groove of the actuator body.
→→Mount cover 31 and screw tightly with special wrench.
→→Check the valve for function and leaks.
For control function I (CFI) connect both control air connections
to the control lines.
1 on the body.
Caution!
Danger through taut springs!
•Carefully open piston actuator!
Conversion from flow above the seat
to flow below the seat
Danger!
Danger – high pressure!
•Turn off the pressure and vent the lines before loosening lines or
valves.
Risk of injury from improper maintenance!
•Maintenance may be performed by authorized technicians only!
•To screw on or unscrew valve body or actuator, use an open-end
wrench, never a pipe wrench, and observe tightening torques.
Required parts:
Item
Description
28, 29
1 or 2 Pressure springs
Procedure:
→→Mount valve
→→Release cover
31 with special wrench until the springs are
completely relaxed, holding up the actuator body 12 against the
hexagon.
For information about the special wrench, see Chapter
“Installation tools”.
→→Remove and / or insert pressure springs 28
29 depending on
actuator.
→→For actuator size C (40 mm), D (50 mm), E (63 mm) and
F (80 mm): Remove pressure springs and insert new, stronger
springs.
→→For actuator size G (100 mm) and H (125 mm): Install new
outer spring 29 in addition to the existing inner spring 28 .
→→Mount cover 31 and screw tightly with special wrench.
→→Check the valve for function and leaks.
1 on the body.
Caution!
Danger through taut springs!
•Carefully open piston actuator!
Note changed direction of flow and changed pressure range!
English
English
Damage to the seat contour!
•During installation, take care that there is no damage to the seat
contour.
•Observe tightening torques according to “Tab. 1”.
English
→→Insert pressure springs 35 .
→→Place intermediate washer 20