1
4
SET-UP/OPERATION
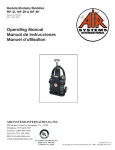
LOW PRESSURE WHISTLE
INLET PRESSURE GAUGE
PRESSURE REGULATOR
CGA CONNECTION
BLEEDER VALVE
OUTLET PRESSURE GAUGE
QUICK CONNECT COUPLING
RELIEF VALVE
Step 1)
Install cylinders on the MULTI-PAKTM cart. Secure cylinders by tightening straps at the buckle, and mate the
Velcro® sections to prevent slipping.
MP-2L and MP-2LCYL - 2216 PSI (153 bar) cylinders.
MP-2H, MP-2HCYL, MP-4H, and MP-4HCYL - 4500 PSI (310 bar) or 2216 PSI (153 bar) cylinders.
Step 2)
Models MP-2L and MP-2LCYL:
Install CGA-346 wrench tight nuts to the cylinder valves and tighten.
Step 2A)
Model MP-2H, MP-2HCYL, MP-4H, and MP-4HCYL:
Install universal CGA-347 hand tight nuts to the cylinder valves and tighten. Insure both bleeder valves are
closed by turning fully clockwise.
Step 3)
Open one cylinder. At this time the low pressure warning alarm will sound until it sets itself at approximately
1000 PSI (69 bar). Check reading on gauge to verify cylinder is full. Close the cylinder.
Step 4)
low pressure alarm test
Set the required respirator pressure with the regulator control knob and bleed the pressure at either the relief
valve, or by partially engaging a male plug into one of the respirator couplings. This depressurizes the manifold
and simulates low cylinder pressure. The low pressure warning alarm will sound at approximately 500 PSI (35
bar).
Step 5)
Open the other cylinder. Check reading on gauge to verify cylinder is full.
Step 6)
Attach desired respirator(s) and hose(s) to the quick connect coupling(s) and readjust pressure regulator to
conform to respirator manufacturer’s requirements if necessary. The system is now operational.