1
3/4”
(20mm)
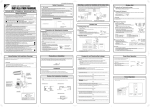
• Check the strength and level of the installation surface so that the unit does not cause
any operating vibration or noise after installation.
• In accordance with the foundation drawing, fix the unit securely by means of the
foundation bolts. (Prepare 4 sets of M12 foundation bolts, nuts and washers; all
separately available.)
• It is best to screw in the foundation bolts until their ends are 3/4 inch (20mm) from the
foundation surface.
English
Precautions on Installation
Outdoor Unit Installation Drawings
CAUTION
• Do not connect the embedded branch piping and the outdoor unit when only carrying out piping work without connecting the
indoor unit in order to add another indoor unit later.
Make sure no dirt or moisture gets into either side of the embedded branch piping.
Refer to “7. Refrigerant Piping Work” on page 11 for details.
• It is impossible to connect the indoor unit for one room only. Be sure to connect at least 2 rooms.
Cut thermal insulation pipe to
an appropriate length and
wrap it with tape, making sure
that no gap is left in the
insulation pipe’s cut line.
Wrap the insulation pipe
with finishing tape from
bottom to top.
Allow 11-13/16” (300mm) of work
space below the ceiling surface.
Allow space for piping
and electrical servicing.
9-13/16 (250) from
wall
Service lid
Where there is a danger of the
unit falling, use foot bolts, or
wires.
Stop valve cover
In sites with poor drainage, use
block bases for the outdoor unit.
Adjust foot height until the unit is
level. Otherwise, water leakage
or pooling of water may occur.
)
46
(3 le
/8 t-ho
5
- l
13 t bo )
o ters
o
(F en
c
23-5/8
(600)
lt-hole
centers
(Foot
bo
unit : inch (mm)
)
Level mounting base
(available separately)
Also insulate the connection on the outdoor unit.
Clamping material
Insulation tube
Tape
■English
01_EN_3P379970-4.indd 4
Stop valve cover
Use tape or insulating material on all connections to prevent air
from getting in between the copper piping and the insulation
tube.
Be sure to do this if the outdoor unit is installed above.
4
11/4/2014 2:50:07 PM