1
2.3.2 Gas filters
Each gas filter is designed to provide respiratory protection
against specific contaminants. A gas filter absorbs and/or
adsorbs specific vapours and gases from a contaminated
atmosphere. This process continues until the absorbent becomes saturated and allows the contaminant to
break through.
We recommend that the gas filter/combined filter should be
changed in accordance with the results of measurements
carried out at the worksite. If this is impossible, change
the filter every week or earlier if you can smell or taste
the pollutants or if you experience any other discomfort.
A filter exposed to strong press or impact or with visible
damage must immediately be scrapped.
2.3.3 Combined filters
In environments in which both gases and particles occur,
such as in spray painting, gas and particle filters must
be combined.
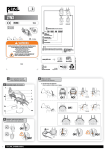
• Place the particle filter on top of the cartridge. Grasp
both protective elements.
• Squeeze hard until you hear the particle filter snap
onto the gas filter. Fig. 1a.
• Place a pre-filter into the pre-filter holder.
• Snap the pre-filter holder on the filter or cartridge.
Note. The particle filter will always be snapped on the gas
filter, but the gas filter will not snap onto the particle filter.
The gas filter will always be inserted into the respirator.
Note. Particle filter SR 610 cannot be combined with
a gas filter.
To separate the combined gas- and particle filter
• Place a coin it in the space between the lower lip of
the particle filter and the small tab moulded into the
side of the gas filter.
• Push firmly and twist the coin until the filter pops off.
Fig 1b.
2.3.4 Pre-filter SR 221
The Sundström pre-filter SR 221 is not a protective
element and can never be used as primary protection
or as a substitute for a particle filter. It is designed to
prevent nuisance particles from reaching the filters. This
increases the life span of the primary filter. The pre-filter
holder protects the main filter against handling damage.
2.4 Compressed air attachment/fan unit
When the SR 200 with compressed air attachment SR
307 or fan units SR 500/SR 500 EX or SR 700 is used,
the user instructions for the relevant equipment must
be followed.
3. Donning/Doffing
3.1 To fit the filter in a mask
• Check that you have selected the right filter and that
the use-by date has not been passed. (Specified on
the filter and is valid provided that the filter packaging
is unopened.)
• Check that the filter is in good condition and intact.
• Fit the filter/combined filter in the mask so that the
arrows on the filter point towards the user’s face. Carefully check that the edge of the filter is in the internal
groove of the filter mounting all around.
• Fit pre-filter SR 221 in the pre-filter holder and press
it into place on the filter.
See also the user instructions for the relevant filter.
3.2 Inspection before use
• Check that the mask is complete, correctly assembled
and thoroughly cleaned.
• Check the mask body, membranes, valve seats and
head harness for wear, cuts, cracks, missing parts,
and other defects.
• Check that the appropriate filter is intact and installed
properly.
3.3 Putting the mask on
• Fit the filter.
• Slacken the four elastic straps by moving the strap
holders forward, at the same time pulling the straps.
Fig. 2.
• Slacken the upper two inelastic straps by opening the
buckles.
• Move the head harness upwards, place your chin in
the facepiece chin support and pull the head harness
over your head. Fig. 3.
• Tension the elastic straps in pairs by pulling the free
strap ends towards the rear. Fig. 4.
• Adjust the fit of the mask on your face, so that it fits
firmly but comfortably.
• Adjust the lengths of the upper pair of straps and fix
by means of the buckles.
3.4 Fit check
Use the pre-filter holder to check if the mask is tight.
• Place the pre-filter holder to the filter.
• Put the mask on.
• Place the palm of your hand lightly over the hole on
the pre-filter holder to make it tight. Fig. 18.
NOTE! Do not push so hard that the respirator´s shape
is affected.
• Take a deep breath and hold your breath for about
10 s.
If the mask is tight, it will be pressed against your face.
If any leakage is detected, check the inahalation and
exhalation valves or adjust the straps of head harness.
Repeat the fit check until there is no leakage.
3.5 Taking the mask off
Do not take off the mask until clear of the hazardous area.
• Slacken the four elastic straps in pairs by moving the
strap holders forward. The two inelastic straps need
not be released. Fig. 5.
• Pull the head harness forward over your head and
remove the mask.
Clean and store the mask as required.
29