1
M
em
dB
'oe
d
p
id
e
n
li·unm
u
g
·n
tsU
a
g
en
a
ilsneural
Assembly · Aufbau · Montage
Assembling and handling your Obsession couldn't be easier. Still you
should read these instructions carefully before your first flight.
The kite is supplied with a leading edge rod in two pieces. To assemble,
insert the thinner carbon fibre rod into the aluminium tube underneath
the connector for the bottom spreader (see fig...). Now pull the tension
cord at the wing tip and lever the knot into the notch of the split cap at
the end of the rod (fig: new split cap). When you do this the carbon fibre
rod will bend, pulling the sail tight. There is a tension cord sewn into
the trailing edge of the sail. Put the loop at the end of this cord in the
notch as well.
Specifikation
Technische Daten
Description du Prodouct
Wingspan/Spannweite/Envergure:
Height/Standhöhe/Taille:
Weight/Gewicht/Poids:
Rec. line/empf. Schnur/Lignes conseillées:
Wind range/Windbereich/Plage de vent:
Sail fabric/Segelmaterial/Voilure:
Leading Edge/Leitkante/Bord d'attaque:
Top spreader/obere Spreize/Traverse avant:
Bot. spreader/unt. Spreize/Traverse arrière:
keel rod/Kielstab/Barre de quiell :
inner Stand-off/Whisker:
outer Stand-off/Whisker:
196 cm, 77.2 in.
100 cm, 39.4 in.
280 g, 9.9 oz.
25-70 kp, 50-150 lbs
6-40 km/h, 4-25 mph 2-6 Bft.
VENTEX (31g/m2 Polyester)
carbon 6 mm (2 x 96 cm)
carbon 4 mm (2 x 45 cm)
carbon 6 mm (50 cm)
carbon 6 mm (2 x 72,5 cm)
carbon 6 mm (72,5 cm)
carbon 3 mm (24.5 cm)outer
glass fibre 2.1 mm (21,5 cm)
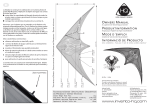
Your new Obsession is a stunt kite which manages not only radical
stunts, but also "soft" moves. The strongly curved wing tips mean that
it is very easy to start belly and back stunts and the "turbo" bridle makes
the kite easy to control and adjust. The wing tips are curved with solid
carbon fibre rods which are extremely elastic, so they can take a few
hard knocks on the ground. So relax - even if the wings bend dramatically
during a cartwheel....
Ihr neuer Obsession ist ein radikaler Trickdrachen, der auch die
“weichen” Moves beherrscht. Durch die stark gekrümmten Flügelspitzen
sind Bauch- und Rückentricks sehr einfach auszulösen, durch seine
“Turbo”- Waage ist der Drachen in allen Situationen gut zu kontrollieren
und einfach einzustellen. Die Flügelspitzen sind aus massiven
Kohlefaserstäben gebogen, die über eine hervorragende Elastizität
verfügen und daher so manch unsanften Bodenkontakt verkraften. Also,
nur Mut, auch wenn sich die Flügel bei einem Cartwheel
tüchtig verbiegen...
Le nouvel Obsession est un cerf-volant de freestyle qui non seulement
éxecute les figures radicales, mais aussi les figures plus coulées. Les
bouts d'aile très arqués permettent de déclencher les figures ventrales et
dorsales avec une facilité étonnante, le bridage turbo assure un excellent
contrôle du cerf-volant dans toutes les situations ainsi qu'un réglage
simple. Les pointes d'aile arquées sont fabriquées dans des joncs très
élastiques et très résistantes aux contacts, même appuyés, avec le sol.
Allez-y franchement, même si les pointes se courbent pendant un
twist/certaines figures.
The HQ split cap makes it easier to spread the leading edge using a
tensioning cord. After assembly, the knots and cord ends are tucked
away inside recesses specially provided for this purpose, so that you
achieve a clean finish. There's also a neat way of attaching a trick cord
here.
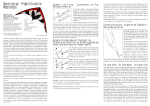
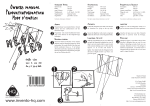
Step 1: Slip the loop of the hem tensioning
cord (if there is one) into the slot in the
split cap. Then pull the short tensioning
cord through the hole in the cap so that
knot 1 disappears inside the recess. Now
put the other end through the knot on the
leading edge, as shown in the drawing.
Step 2: Stretch the leading edge with the
tensioning cord so that knot 2 locks into
the bottom of the slot.
Step 3: Now you can attach a trick cord
to the free end of the tensioning cord
behind knot 3 using a lark's wing.
Design: Christoph Fokken
The right to make technical alterations is reserved!
Technische Änderungen vorbehalten!
Tous droits de modifications techniques réservés
Spreading the leading edge with the HQ split cap ·
Das Spannen der Leitkante mit der HQ-Splittkappe
· Mise sous tension du bord d'attaque avec l'embout
fendu HQ
Aufbau und Handhabung Ihres Obsession ist denkbar einfach. Lesen
Sie trotzdem die nachfolgende Anleitung vor dem ersten Flug aufmerksam
durch. Der Drachen wird mit einem geteilten Leitkantenstab ausgeliefert.
Zur Montage stecken sie den dünneren Kohlefaserstab in das
Aluminiumröhrchen unterhalb des Verbinders für die untere Querspreize
(siehe Abb.). Ziehen Sie nun die Spannschnur an der Flügelspitze an
und hebeln Sie den Knoten in die Kerbe der Splitkappe am Ende des
Stabes (Abb: neue Splitkappe). Hierbei biegt sich der Kohlefaserstab
stark durch, das Segel zieht sich stramm. In der Schleppkante des Segels
ist eine Spannschnur mit eingenäht, hängen Sie die Schlaufe am Ende
dieser Schnur ebenfalls in die Kerbe.
L'assemblage et la manipulation de l'Obsession sont très simples. Nous
vous conseillons néanmoins de lire attentivement la notice avant le
premier vol.
Le cerf-volant est livré avec la barre de bord d'attaque pliée. Introduisez
le jonc de carbone dans le raccord alu situé sous le connecteur de la
traverse arrière (voir illustration....). Prenez à présent le nerf de chute à
la pointe de l'aile et placez le nœud dans l'encoche de l'embout fendu
situé au bout de la barre (ill: nouvel embout fendu). Les joncs du bord
d'attaque se plie fortement et la voile se tend. Un nerf de chute est cousu
dans le bord de fuite, accrochez également la boucle du nerf de chute
dans l'encoche de l'embout fendu.
Step 4: You can attach the trick cord as
shown in the picture in the split cap at the
end of the tail rod. If you have a velcro
strip here instead of a cap, simply open
it and place the trick cord through this
strip at the end of the tail rod.
Die HQ-Splittkappe erleichtert das
Spannen der Leitkante mittels
Spannschnur. Knoten und überstehende
Schnurenden verschwinden nach der
Montage in speziell angebrachten
Vertiefungen, so daß ein sauberes Finish
entsteht. Auch das Anbringen einer
Trickschnur findet eine saubere Lösung.
Schritt 1: Hängen Sie, falls vorhanden, die Schlaufe der Saumspannschnur
in den Spalt der Splittkappe ein. Ziehen Sie dann die kurze Spannschnur
so durch das Loch in der Kappe, daß der Knoten 1 in der Vertiefung
verschwindet. Das andere Ende fädeln Sie nun gezeigt, durch die Schlaufe
an der Leitkante.
Schritt 2: Spannen Sie nun die Leitkante so mit der Spannschnur, daß
sich der Knoten 2 in der Vertiefung des Schlitzes festsetzen kann.
Schritt 3: An dem überstehendem Ende der Spannschnur können Sie
nun hinter Knoten 3 eine Trickschnur mittels Buchtknoten anbringen.
Schritt 4: Die Trick-schnur kann wie auf dem Bild in der Splittkappe
am Ende des Kielstabes befestigt werden. Ist hier anstelle der Kappe
eine Lasche aus Häkchen- und Flauschband, öffnen Sie diese und legen
Sie die Trickschnur einfach am Ende des Kielstabes mit durch die
Verschlußlasche.
L'embout fendu HQ facilite la mise sous tension du bord d'attaque avec
le fil de jonglage. Les nœuds et les bouts de ligne disparaissent après
l'assemblage dans les creux prévus à cet effet, ce qui améliore
considérablement la finition du travail. Il en est de même pour la fixation
du fil de jonglage.
1ère étape: Accrochez la boucle du nerf de chute (le cas échéant) dans
la fente de l'embout fendu. Faites ensuite passer la ligne de jonglage
courte dans l'embout à travers le trou de manière à ce que le nœud 1
disparaisse dans le creux. Passez l'autre extrémité de la ligne à travers
la boucle du bord d'attaque comme l'indique l'illustration.
2ème étape: tendez le bord d'attaque avec la ligne de jonglage de manière
à ce que le nœud 2 se fixe dans le creux de la fente.
3ème étape: fixez le fil de jonglage avec une tête d'alouette sur le bout
libre de la ligne de jonglage derrière le nœud 3.
4ème étape: comme l'indique le croquis, le fil de jonglage peut être fixé
dans l'embout fendu au bout de la barre de quille. Si votre cerf-volant
a un rabat en velcro au lieu d'un embout, passez le fil de jonglage à
travers le rabat et fixez-le au bout de la barre de quille.
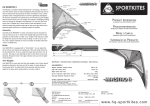
The turbo bridle · Die Turbo-Waage · Le bridage turbo
The turbo bridle is a dynamic bridle system that permits additional
settings beyond those possible with a standard bridle. It allows you to
modify the setting angle of the kite in a loop and - within certain limits
- adapt to different wind speeds. The kite has a flatter setting angle when
you fly it straight than when you fly curving flight paths. This makes
it possible to fly loops very tightly, which is important especially at the
edge of the wind window.
As with a standard bridle, you can adjust the setting angle of the kite to
trim it to various wind conditions. To do this loosen the knot A on the
outer, uninterrupted bridle line and in light winds slide it towards the
nose. (This makes the setting angle flatter). In strong winds slide it
towards the wing tip (making the setting angle steeper).
If the kite "overpowers" in strong wind, i.e. if it flies with a jerky motion
and the wing tips flap, you can reduce the pressure on the kite by
shortening the upper bridle leg again - in other words, slide the knot A
towards the nose. But remember to note the wind range specified for the
kite !Adjusting the connection loops (knot B) mainly changes the turning
behaviour of the kite. If you move them outwards you achieve larger
and slower spins, while if you move them inwards the spins become
smaller and faster. If your kite does not stop turning soon enough, you
can counteract this by shifting the connection point (knot B) outwards
or by shifting the knot A towards the kite nose.
Die Turbowaage ist ein dynamisches Waagesystem, und bietet gegenüber
der Standardwaage zusätzliche Einstellmöglichkeiten. Sie ermöglicht es
den Anstellwinkel des Drachens im Loop zu verändern, und paßt sich
– i n n e rh a l b b e s t i m m t e n G re n z e n – u n t e r s c h i e d l i c h e n
Windgeschwindigkeiten an. Der Drachen hat im Geradeausflug einen
flacheren Anstellwinkel als im Kurvenflug. Loops können dadurch sehr
eng geflogen werden, was besonders am Windfensterrand wichtig ist.
Wie bei einer Standardwaage auch, kann man den Anstellwinkel des
Drachens einstellen, um ihn auf verschiedene Windverhältnisse zu
trimmen. Dazu lösen Sie den Knoten A auf der äußeren durchgehenden
Waageleine und schieben Sie ihn bei wenig Wind in Richtung Nase (der
Anstellwinkel wird flacher) oder bei viel Wind in Richtung Flügelspitze
(der Anstellwinkel wird steiler).
Sollte der Drachen bei viel Wind "überpowern", d.h. er neigt zum Ruckeln
und die Flügelspitzen schlagen, können Sie den Druck des Drachen
reduzieren, indem Sie den oberen Waageschenkel wieder verkürzen –
also den Konten A in Richtung Nase schieben. Beachten Sie dennoch
den für den Drachen angegebenen Windbereich!
Eine Verstellung der Anknüpfschlaufe (Knoten B) verändert in erster
Linie das Drehverhalten. Weiter nach außen: größere und langsamere
Spins; weiter nach innen: kleinere und schnellere Spins. Sollte Ihr
Drachen zu stark nachdrehen, können Sie dem durch das Verschieben
des Anknüpfpunktes (Knoten B) nach außen oder durch Verschieben des
Knotens A in Richtung Drachennase entgegenwirken.
Le bridage turbo est un système de bridage dynamique permettant des
réglages supplémentaires par rapport au bridage classique. Il permet
entre autre de modifier l'angle d'incidence dans le virage et s'adapte dans
une certaine limite à différentes forces de vent. Le cerf-volant a un angle
d'incidence plus plat en vol droit que dans les virages. Ceci permet de
prendre les virages plus serrés, ce qui est particulièrement important sur
les bords de la fenêtre de vol.
Tout comme dans le cas d'un bridage classique, il est également possible
de modifier l'angle d'incidence du cerf-volant pour l'adapter aux différentes
forces de vent. Desserrez le nœud central (A) sur la bride externe et
remontez-le (max. 1,5 cm) vers le nez si le vent est faible (vous réduisez
l'angle d'attaque) ou vers le bout de l'aile si le vent est fort (vous augmentez
l'angle d'attaque).
Si le cerf-volant a trop de traction par vent fort, c-a-d qu'il tend à vibrer
et que les pointes des ailes battent, réduisez la traction en remontant le
nœud central vers le nez. N'oubliez pas de tenir compte de la plage de
vent recommandée pour le cerf-volant.
Le réglage des points d'attache (B) permet de modifier le comportement
dans les virages. Déplacez le nœud vers l'extérieur pour décrire des
virages plus lents et plus grands; déplacez-le vers l'intérieur pour décrire
des virages plus rapides et plus petits. Si votre cerf-volant a trop tendance
à survirer, déplacez les deux points d'attache (B) vers l'extérieur ou
remontez le nœud A vers le nez.
Owners manual
Produktinformation
Mode d ' emploi
© In Vento GmbH
D-26180 Rastede
http://www.invento-hq.com
US Distribution by:
Nova Design Group
West Hurley, NY 12491
Phone: (914)3310977
http://www.novadesigngroup.com
InVento GmbH
D 26180 Rastede
Germany
http://www.invento-hq.com