Download BC-307
Transcript
BC-307
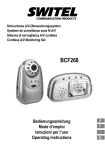
Babyphone- Interphone bébé - Babyphone - Baby phone
Bedienungsanleitung - Mode d’emploi - Istruzioni per l'uso - Operating Instructions
BC-307
Bedienungsanleitung ________________________________ 3
Mode d’emploi _____________________________________ 21
Istruzioni per l'uso _________________________________ 39
Operating Instructions ______________________________ 57
Declaration of Conformity ___________________________ 74
2
- Inhaltsverzeichnis 1 Allgemeine Sicherheitshinweise............................................................................................................................................. 4
2 Bedienelemente ........................................................................................................................................................................ 6
3 Inbetriebnahme......................................................................................................................................................................... 8
3.1 Elterneinheit............................................................................................................................................................................ 8
3.2 Babyeinheit............................................................................................................................................................................. 9
4 Bedienung ............................................................................................................................................................................... 10
4.1 Displayanzeigen und Ihre Bedeutung................................................................................................................................... 10
4.2 Aufstellort der Babyeinheit.................................................................................................................................................... 10
4.3 Ein-/Auschalten der Babyeinheit .......................................................................................................................................... 10
4.4 Ein-/Auschalten der Elterneinheit ......................................................................................................................................... 11
4.5 Lautstärken einstellen........................................................................................................................................................... 11
4.6 Übertragungsempfindlichkeit einstellen................................................................................................................................ 12
4.7 Schlaflieder abspielen .......................................................................................................................................................... 13
4.8 Gegensprechfunktion zum Baby .......................................................................................................................................... 14
4.9 Temperaturüberwachung ..................................................................................................................................................... 14
4.10 Warnton ein-/ausschalten..................................................................................................................................................... 16
4.11 Nachtlicht ein- ausschalten................................................................................................................................................... 16
4.12 Suchen der Elterneinheit ...................................................................................................................................................... 17
4.13 Überwachung des Funkkontaktes ........................................................................................................................................ 17
4.14 Auf Werkseinstellungen zurücksetzen.................................................................................................................................. 17
5 Wichtige Informationen.......................................................................................................................................................... 18
5.1 Fehlersuche.......................................................................................................................................................................... 18
5.2 Technische Daten................................................................................................................................................................. 19
3
- Allgemeine Sicherheitshinweise -
1
Allgemeine Sicherheitshinweise
Mit dem BC-307 Babyphone haben Sie ein Qualitätsprodukt aus dem Hause SWITEL erworben. Bitte lesen Sie diese
Bedienungsanleitung sorgfältig durch, um alle Möglichkeiten kennen zu lernen. Öffnen Sie das Gerät in keinem Fall selbst und
führen Sie keine eigenen Reparaturversuche aus. Bei Gewährleistungsansprüchen wenden Sie sich bitte an Ihren Fachhändler.
Zum Lieferumfang gehören
eine Elterneinheit inklusive Gürtelclip
eine Babyeinheit
2 wiederaufladbare Standard-Akkus für die Elterneinheit
Ladestation für Elterneinheit inklusive Steckernetzteil
Steckernetzteil für Babyeinheit
eine Bedienungsanleitung
Bestimmungsgemäße Verwendung
Das Gerät ist für die Übertragung von Sprachsignalen, wie z.B. Kindergeräuschen entwickelt worden. Warn- oder Signaltöne von
Atmungs- oder Herztonüberwachungsgeräten können NICHT übertragen werden.
ACHTUNG: Die Verwendung des Gerätes kann die persönliche Beaufsichtigung eines Kindes oder einer anderen
pflegebedürftigen Person NICHT ersetzen. Jede Haftung außerhalb der gesetzlichen Bestimmungen ist ausgeschlossen.
Sicherheitshinweise
• Das Gerät ist nicht für einen medizinischen Einsatz geeignet.
• Verwenden Sie die Geräte mit einem Sicherheitsabstand von
mindestens einem Meter.
• Verwenden Sie nur hochwertige Batterien.
• Verwenden Sie aus Sicherheitsgründen nur die mitgelieferten
original Netzteile. Bei der Verwendung von nicht passenden
Netzteilen können die Geräte in Brand geraten.
• Achten Sie beim Betrieb mit einem Netzteil auf den
einwandfreien Zustand der Kabel und Stecker. Abgeknickte
oder durchgescheuerte Kabel können Kurzschlüsse
erzeugen. Achtung! Brandgefahr.
• Sorgen Sie während des Betriebs für eine ausreichende
Belüftung aller Komponenten. Legen Sie keine Kissen oder
Handtücher auf die Geräte.
4
• Verwenden Sie die Geräte nicht in explosionsgefährdeten
Bereichen.
• Die Geräte sind für den Betrieb in geschützten Räumen mit
einem Temperaturbereich von 10 °C bis 30 °C ausgelegt. Die
Geräte dürfen nicht in Feuchträumen wie Bad oder
Waschküche aufgestellt werden. Vermeiden Sie die Nähe zu
Wärmequellen wie Heizkörpern, und setzen Sie das Gerät
keiner direkten Sonnenbestrahlung aus.
• Ist die Gebrauchszeit der gesamten Anlage abgelaufen,
entsorgen Sie diese bitte umweltfreundlich gemäß den
gesetzlichen Bestimmungen.
• Die max. Reichweite beträgt bis zu 300 Meter im Freien und
bis zu 50 Meter innerhalb von Gebäuden.
- Allgemeine Sicherheitshinweise Wiederaufladbare Standard-Akkus/Batterien
•
Verwenden Sie für die Babyeinheit als Stromausfallsicherung oder bei Batteriebetrieb nur hochwertige Batterien.
•
Verwenden Sie für die Elterneinheit nur Standard-Akkus des Typs AA 1,2V 1300mAh.
•
Wechseln Sie immer alle Standard-Akkus/Batterien gleichzeitig aus.
•
Standard-Akkus/Batterien nicht ins Feuer werfen oder ins Wasser tauchen.
•
Sollten Sie die Geräte über einen längeren Zeitraum nicht benutzen, entnehmen Sie bitte die Standard-Akkus/Batterien. Das
längere Lagern mit eingebauten Standard-Akkus/Batterien kann zum Auslaufen der Standard-Akkus/Batterien führen.
•
Alte oder defekte Standard-Akkus/Batterien nicht mit dem normalen Hausmüll entsorgen. Sie sind gesetzlich verpflichtet alte
Batterien und Akkus an geeigneten Sammelstellen zurückzugeben.
Aufstellort
Stellen Sie die Geräte nicht in die unmittelbare Umgebung von anderen elektronischen Geräten wie z. B. Mikrowellen oder HIFIGeräten, da es sonst zu gegenseitiger Beeinflussung kommen kann. Der Aufstellort hat einen entscheidenden Einfluss auf einen
einwandfreien Betrieb.
Stellen Sie die Geräte auf eine ebene und rutschfeste Fläche. Normalerweise hinterlassen die Füße keine Spuren auf der
Aufstellfläche. Wegen der Vielzahl der verwendeten Lacke und Oberflächen kann es jedoch nicht ausgeschlossen werden, dass
durch die Gerätefüße Spuren auf der Abstellfläche entstehen.
Reinigung und Pflege
Die Gehäuseoberflächen können mit einem trockenen, weichen und fusselfreien Tuch gereinigt werden. Niemals Reinigungsmittel
oder gar aggressive Lösungsmittel verwenden. Außer einer gelegentlichen Gehäusereinigung ist keine weitere Pflege erforderlich.
Die Gummifüße des Babyphones sind nicht gegen alle Reinigungsmittel beständig. Der Hersteller kann daher nicht für evtl.
Schäden an Möbeln o. ä. haftbar gemacht werden.
5
- Bedienelemente -
2
Bedienelemente
1
2
3
4
Babyeinheit
1
2
3
4
5
6
7
8
9
10
11
Nachtlicht Ein-/Ausschalten
Temperaturfühler
Suchen der Elterneinheit mit der Paging-Taste
Lautstärke einstellen
Beleuchtetes Display
Start/Stopp zum Abspielen der Wiegenlieder
Pause-Taste beim Abspielen der Wiegenlieder
Mikrofon
Ein-/Ausschalten
Zum Auswählen der Wiegenlieder
Optische Anzeige, ob eine Verbindung zur Elterneinheit besteht
Rückseite
12 Batteriefach
13 Anschluss Steckernetzteil
11
5
12
10
9
13
6
8
6
7
- Bedienelemente Elterneinheit
14
15
16
17
18
19
20
21
Taste für die Gegensprechfunktion zur Babyeinheit
Ein-/Ausschalten
Beleuchtetes Display
Bestätigungstaste bei Menüfunktionen
Optische Anzeige, ob eine Verbindung zur Babyeinheit besteht
Taste Menü
Lautstärke einstellen/Auswahl von Menüfunktionen
Visuelle Anzeige der Babyüberwachung
21
20
19
18
14
15
16
17
Rückseite
22 Gürtelclip
23 Batteriefach
Ladestation für die Elterneinheit
24 Ladekontrollleuchte, leuchtet beim Laden der Elterneinheit
22
24
23
7
- Inbetriebnahme -
3
3.1
Inbetriebnahme
Elterneinheit
Standard-Akkus einbauen
Öffnen Sie das Batteriefach an der Elterneinheit, indem Sie den Batteriefachdeckel am unteren Ende nach oben schieben. Ist der
Gürtelclip angebracht, muss dieser zuerst entfernt werden. Legen Sie nun die Standard-Akkus ein und achten Sie auf die richtige
Polung. Schließen Sie den Batteriefachdeckel.
ACHTUNG:
Verwenden Sie keine normalen, nicht wiederaufladbaren Batterien in der Elterneinheit.
Verwenden Sie die Elterneinheit niemals ohne Standard-Akkus auf der Ladestation.
Gürtelclip anbringen oder entfernen
Um den Gürtelclip anzubringen, stecken Sie das obere Ende in
die Elterneinheit und drücken Sie dann den Gürtelclip nach
unten. Soll der Gürtelclip entfernt werden, drücken Sie mit
einem Schraubenzieher auf die Halterung im Innern des
Gürtelclips und ziehen den Gürtelclip nach oben.
Clip anbringen
Clip entfernen
Anschließen der Ladestation
Das Steckernetzteil ist fest mit der Ladestation verbunden. Stecken Sie das Steckernetzteil in eine vorschriftsmäßig installierte
Netzsteckdose mit 230V.
8
- Inbetriebnahme Laden der Elterneinheit
Stellen Sie die Elterneinheit mit dem Display nach vorne für mindestens 16 Stunden auf die Ladestation. An der Ladestation
leuchtet die Ladekontrollleuchte und im Display wird das Laden durch eine laufende Anzeige des Batteriesymbols signalisiert. Ist
die Elterneinheit voll aufgeladen, zeigt das Display ein vollständiges Batteriesymbol im Display. Die wiederaufladbaren StandardAkkus besitzen eine Betriebszeit bei Zimmertemperatur von max. 12 bis 24 Stunden.
Die aktuelle Batteriekapazität wird im Display angezeigt:
Voll
Halb
Schwach
Ist die Batteriekapazität zu gering, erscheint im Display eine entsprechende Meldung und Sie hören jede Minute einen Warnton.
Nach dem ersten Warnton ist die Elterneinheit noch für 1 Stunde zu benutzen.
3.2
Babyeinheit
Netzteil anschließen
Verwenden Sie das mitgelieferte Steckernetzteil für die Babyeinheit. Stecken Sie den kleinen runden Stecker in die vorgesehene
Buchse (13) auf der Rückseite der Babyeinheit an und das Netzteil in eine Steckdose (230V/50Hz). Achten Sie auf eine
ausreichende Belüftung des Steckernetzteils.
Batterien zur Stromausfallsicherung oder Batteriebetrieb einbauen (nicht im Lieferumfang)
Die Babyeinheit ist zum Betrieb mit dem mitgelieferten Steckernetzteil ausgelegt. Als Stromausfallsicherung oder kurzzeitigen
Batteriebetrieb kann die Babyeinheit mit vier 1.5V AA Alkaline Batterien betrieben werden. Die Babyeinheit ist in diesem Fall mit
neuen Batterien für 16 Stunden betriebsbereit und im Display erscheint die Meldung BATTERIE.
Ist die Batteriekapazität zu gering, erscheint im Display eine entsprechende Meldung und Sie hören jede Minute einen Warnton.
Nach dem ersten Warnton ist die Babyeinheit noch für 1 Stunde zu benutzen.
Öffnen Sie das Batteriefach auf der Rückseite mit einer Münze und setzen Sie die Batterien ein. Achten Sie dabei auf die richtige
Polung und schließen Sie das Batteriefach.
9
- Bedienung -
4
Bedienung
4.1
Displayanzeigen und Ihre Bedeutung
1.
2.
3.
4.
5.
Kapazität der Batterie
Anzeige der aktuellen Temperatur
Nachtlicht ist eingeschaltet
Es wird ein Schlaflied abgespielt
Unterschiedliche Menüanzeigen
4.2
Aufstellort der Babyeinheit
1
2
3
Lullaby1
4
5
Plazieren Sie die Babyeinheit in der Nähe des Babys. Beachten Sie den Mindestabstand von einem Meter. Für eine optimale
Übertragung sollte das eingebaute Mikrofon (8) in Richtung des Kindes zeigen. Beachten Sie die weiteren Sicherheitshinweise im
Kapitel 1 dieser Bedienungsanleitung.
Hinweis: Bitte verwenden Sie die Elterneinheit nicht zu nah an der Babyeinheit, da es ansonsten zu lauten Pfeifgeräuschen
kommen kann. Entfernen Sie sich in diesem Fall von der Babyeinheit oder reduzieren Sie die Lautstärke.
4.3
Ein-/Auschalten der Babyeinheit
Sie schalten die Babyeinheit ein, indem Sie die Ein/Aus-Taste (9) für eine Sekunde drücken. Nun wird die Elterneinheit gesucht
und nach einigen Sekunden leuchtet die Anzeige (11) grün. Sollte die Babyeinheit die Elterneinheit nicht finden, blinkt die Anzeige
(11) rot.
Möchten Sie die Babyeinheit ausschalten, halten Sie die Ein/Aus-Taste (9) für eine Sekunde gedrückt.
10
- Bedienung 4.4
Ein-/Auschalten der Elterneinheit
Sie schalten die Elterneinheit ein, indem Sie die Ein/Aus-Taste (15) für eine Sekunde drücken. Nun wird die Babyeinheit gesucht
und nach einigen Sekunden leuchtet die Anzeige (18) grün. Sollte die Babyeinheit die Elterneinheit nicht finden, blinkt die Anzeige
(18) rot.
Möchten Sie die Elterneinheit ausschalten, halten Sie die Ein/Aus-Taste (15) für eine Sekunde gedrückt.
Hinweis: Die Elterneinheit kann auch benutzt werden, wenn die Elterneinheit auf der Ladestation steht. Die Standard-Akkus
werden hierbei weiterhin geladen, jedoch dauert das vollständige Laden länger.
4.5
Lautstärken einstellen
Babyeinheit
Die Lautstärke an der Babyeinheit kann in fünf Stufen über die Tasten
und
(4) eingestellt werden. Die eingestellte
Lautstärke betrifft das Abspielen der Schlaflieder und gleichzeitig die Lautstärke für die Gegensprechfunktion. Siehe dazu
Kapitel 4.8.
Elterneinheit
Die Lautstärke an der Elterneinheit lässt sich in fünf Stufen mit den Tasten
Lautsprecher auch ganz abgeschaltet werden (VOLUME OFF).
und
(20) einstellen. Zusätzlich kann der
Neben der akustischen Übertragung über den Lautsprecher, werden die Geräusche auch visuell über fünf grüne und drei rote
Anzeigen (21) dargestellt. So können Sie auch bei reduzierter oder ganz abgeschalteter Lautstärke eine Überwachung
vornehmen.
Hinweise:
•
Ist die Lautstärke an der Elterneinheit ausgeschaltet, kann Sie auch ein Warnton auf Geräusche des Babys hinweisen. Siehe
dazu Kapitel 4.10.
•
Die Lautstärke an der Elterneinheit wird automatisch wieder auf eine mittlere Lautstärke gesetzt, wenn die
Gegensprechfunktion benutzt wird und die Lautstärke vorher abgeschaltet war.
11
- Bedienung 4.6
Übertragungsempfindlichkeit einstellen
Die Übertragungsempfindlichkeit von der Babyeinheit zur Elterneinheit kann in 5 Stufen eingestellt werden. Bei der Stufe 5 sind
auch sehr leise Geräusche an der Elterneinheit zu hören. Bei der Stufe 1 sind nur laute Geräusche hörbar. Möchten Sie sicher
sein, dass Sie alle Geräusche hören, verwenden Sie die Stufe 5.
Hinweis: Diese Einstellung hat keinen Einfluss auf die visuelle Anzeige der Geräusche an der Elterneinheit.
1.
Taste MENÜ (19) drücken.
2.
Wählen Sie mit der Taste
(20) den Menüpunkt SENSITIVITY.
3.
Drücken Sie einmal die Taste
4.
Wählen Sie nun mit den Tasten
5.
6.
Bestätigen Sie mit der Taste
(17). Das Display zeigt kurz SAVED und dann den Menüpunkt SENSITIVITY.
Drücken Sie die Taste MENÜ, um die Programmierung zu verlassen.
12
(17). Das Display zeigt die aktuell eingestellte Empfindlichkeit in 5 Stufen an.
und
(20) die gewünschte Empfindlichkeit.
- Bedienung 4.7
Schlaflieder abspielen
Damit Ihr Baby ruhig einschlafen kann, sind fünf Schlaflieder mit einer jeweiligen Länge von 30 Sekunden gespeichert. Die
Spielzeit beträgt mit mehreren Wiederholungen ca. 5 Minuten. Das Abspielen der Schlaflieder kann über die Babyeinheit und auch
über die Elterneinheit erfolgen.
Schlaflieder an der Babyeinheit bedienen
Durch mehrmaliges Drücken der Taste
(10) können Sie das gewünschte SCHLAFLIED 1 bis 5 oder ALLE SPIELEN
aussuchen. Bei der Einstellung ALLE SPIELEN werden alle Schlaflieder für 5 Minuten nacheinander abgespielt.
Durch drücken der Taste
(6) können Sie das Abspielen starten und stoppen. Mit der Taste
Abspielen unterbrechen, um dann der gleichen Taste
(7) können Sie das
(7) fortzufahren.
Schlaflieder an der Elterneinheit bedienen
1. Drücken Sie die Taste MENÜ (19).
2.
Wählen Sie mit der
3.
Bestätigen Sie mit der Taste
4.
(20) den Menüpunkt LULLABY.
Drücken Sie erneut die Taste
(17). Das Display zeigt PLAY?.
(17), und das zuletzt abgespielte Schlaflied wird erneut abgespielt. Möchten Sie ein
anderes Schlaflied aussuchen, drücken Sie vorher die Taste
(20). Im Display erscheint SELECT NEW.
5.
Bestätigen Sie mit der Taste
6.
Wählen Sie nun mit den Tasten
7.
Bestätigen Sie mit der Taste
(17) und das gewählte Schlaflied wird abgespielt. Bei der Einstellung PLAY ALL werden
alle Schlaflieder für 5 Minuten nacheinander abgespielt.
8.
9.
Die Taste
(17) kann während des Abspielens als PAUSE-Taste benutzt werden.
Um das Abspielen zu stoppen, drücken Sie die Taste MENÜ (19). Das Display zeigt STOP LULLABY?.
10. Bestätigen Sie mit der Taste
(17).
und
(20) das gewünschte Schlaflied aus. Oder wählen Sie PLAY ALL.
(17) und das Abspielen wird gestoppt.
13
- Bedienung Hinweise:
•
Während des Abspielens der Schlaflieder, erscheint im Display der Babyeinheit und auch der Elterneinheit die Anzeige
und der Name des gerade gespielten Schlafliedes. So können Sie von der Elterneinheit überwachen, ob gerade ein
Schlaflied abgespielt wird.
•
•
•
Wird das Abspielen auf Pause geschaltet, blinkt in beiden Displays die Anzeige
.
Die Pause darf nicht länger als 60 Sekunden betragen. Danach wird das Abspielen der Schlaflieder automatisch gestoppt.
Sie können das komplette Menü an der Elterneinheit auch während des Abspielens von Schlafliedern komplett nutzen.
4.8
Gegensprechfunktion zum Baby
Um das Baby zu beruhigen, können Sie mit der Gegensprechfunktion zum Baby sprechen. Halten Sie dazu die Taste TALK (14)
an der Elterneinheit gedrückt, und sprechen Sie. Nach dem Loslassen der Taste TALK (14) können Sie wieder das Baby hören.
Während Sie sprechen, blinkt an der Eltern- und Babyeinheit jeweils die Kontrollleuchte (11/18).
Hinweis: Ist die Lautstärke an der Elterneinheit ausgeschaltet, wird diese automatisch wieder auf eine mittlere Lautstärke gesetzt.
4.9
Temperaturüberwachung
Die Temperatur im Kinderzimmer wird auf beiden Displays permanent angezeigt. Achten Sie darauf, dass der Temperaturfühler
nicht von irgendwelchen Gegenständen bedeckt ist.
Zusätzlich kann ein einstellbarer Temperaturbereich überwacht werden. Sollte dieser Bereich unter- oder überschritten werden,
hören Sie an der Elterneinheit bei jeder Über- oder Unterschreitung einen kurzen Signalton, und im Display blinkt die
Temperaturanzeige. Steigt oder sinkt die Temperatur weiter, hören Sie bei jeder Veränderung diesen kurzen Signalton.
Hinweis: Normalerweise ertönt der Signalton bei jedem Grad einer weiteren Unter- oder Überschreitung des eingestellten
Temperaturbereichs. Durch das Drücken einer beliebigen Taste an der Elterneinheit können Sie den Bereich um 2°C Grad nach
oben oder unten verlegen, sodass erst bei der übernächsten Über- oder Unterschreitung ein Signalton ertönt.
14
- Bedienung Temperaturbereich einstellen
1. Taste MENÜ (19) drücken.
2.
Wählen Sie mit der Taste
3.
Drücken Sie zweimal die Taste
(20) den Menüpunkt TEMPERATURE.
4.
Wählen Sie nun die gewünschte Minimum-Temperatur mit den Tasten
5.
Bestätigen Sie mit der Taste
Temperatur.
6.
Wählen Sie nun die gewünschte Maximum-Temperatur mit den Tasten
7.
8.
Bestätigen Sie mit der Taste
(17). Das Display zeigt kurz SAVED und dann den Menüpunkt TEMPERATURE.
Drücken Sie die Taste MENÜ, um die Programmierung zu verlassen.
(17). Das Display zeigt die aktuell eingestellte Minimum-Temperatur.
und
(20). Einstellbereich 10 bis 19°C.
(17). Das Display zeigt kurz SAVED und dann die aktuell eingestellte Maximumund
(20). Einstellbereich 22 bis 30°C.
Temperaturüberwachung ein-/ausschalten
1. Taste MENÜ (19) drücken.
2.
Wählen Sie mit der Taste
3.
Drücken Sie einmal die Taste
(20) den Menüpunkt TEMPERATURE.
4.
Wählen Sie nun mit den Tasten
5.
Bestätigen Sie mit der Taste
(17). Ist die Überwachung ausgeschaltet, zeigt das Display ALERT ON?. Bei
ausgeschalteter Überwachung zeigt das Display ALERT OFF?.
6.
7.
Bestätigen Sie mit der Taste
(17). Das Display zeigt kurz SAVED und dann den Menüpunkt TEMPERATURE.
Drücken Sie die Taste MENÜ (19), um die Programmierung zu verlassen.
(17). Das Display zeigt den Menüpunkt RANGE.
und
(20) den Menüpunkt ALERT ON/OFF.
15
- Bedienung 4.10
Warnton ein-/ausschalten
Ist die Lautstärke an der Elterneinheit ausgeschaltet, kann Sie auch ein Warnton auf Geräusche des Babys hinweisen. Ist die
zweitletzte Stufe der visuellen Anzeige erreicht, ertönt der Warnton und im Display erscheint die Anzeige SOUND ALERT.
Erhöhen Sie dann die Lautstärke, um Ihr Baby zu hören.
Hinweis: Bei eingeschalteter Lautstärke ist der Hinweiston automatisch ausgeschaltet.
1.
Taste MENÜ (19) drücken.
2.
Wählen Sie mit der Taste
3.
Bestätigen Sie mit der Taste
(17). Ist der Hinweiston ausgeschaltet, zeigt das Display ALERT ON?. Bei
ausgeschaltetem Hinweiston zeigt das Display ALERT OFF?.
4.
5.
Bestätigen Sie mit der Taste
(17). Das Display zeigt kurz SAVED und dann den Menüpunkt SOUND ALERT.
Drücken Sie die Taste MENÜ (19), um die Programmierung zu verlassen.
4.11
(20) den Menüpunkt SOUND ALERT.
Nachtlicht ein- ausschalten
Mit der Taste
(1) können Sie das Nachtlicht an der Babyeinheit ein- und ausschalten. Bei eingeschaltetem Nachtlicht
erscheint in beiden Displays die Anzeige . So können Sie auch über die Elterneinheit kontrollieren, ob das Nachtlicht ein- oder
ausgeschaltet ist. Das Nachtlicht kann zusätzlich auch über die Elterneinheit geschaltet werden.
Nachtlicht über das Elternteil einschalten
1. Taste MENÜ (19) drücken.
2. Ist das Nachtlicht ausgeschaltet, erscheint im Display LIGHT ON?.
3.
Bestätigen Sie mit
(17). Das Nachtlicht ist eingeschaltet und im Display erscheint die Anzeige
.
Nachtlicht über das Elternteil ausschalten
1. Taste MENÜ (19) drücken.
2. Ist das Nachtlicht eingeschaltet, erscheint im Display LIGHT OFF?.
3.
16
Bestätigen Sie mit
(17). Das Nachtlicht ist ausgeschaltet und im Display erscheint die Anzeige
.
- Bedienung 4.12
Suchen der Elterneinheit
Wenn Sie sich nicht mehr erinnern können, wo Sie die Elterneinheit liegen gelassen haben, drücken Sie die Taste PAGE (3) der
Babyeinheit. Sie werden für 2 Minuten die Rufsignale der Elterneinheit hören und es so leicht wiederfinden. Mit einer beliebigen
Taste am Eltern- oder Mobilteil können Sie die Tonsignale vorher beenden.
Hinweis: Ist die Lautstärke an der Elterneinheit ausgeschaltet, wird diese automatisch wieder auf eine mittlere Lautstärke gesetzt.
4.13
Überwachung des Funkkontaktes
Der Funkkontakt zwischen der Elterneinheit und der Babyeinheit wird ständig überwacht. Bei einer guten Verbindung leuchtet an
der Eltern- und Babyeinheit die grüne Kontrollleuchte LINK (18/11).
Haben Sie sich mit der Elterneinheit zu weit von der Babyeinheit entfernt oder ist die Babyeinheit ausgeschaltet, blinkt die grüne
Kontrollleuchte und Sie hören alle 30 Sekunden einen Warnton. Danach blinkt die Kontrollleuchte in roter Farbe, es erscheint die
Displaymeldung NOT LINKED und Sie hören alle 30 Sekunden einen Warnton.
Hinweis: Der Warnton beim Abbrechen des Funkkontaktes kann nicht abgeschaltet werden. Durch das Drücken einer beliebigen
Taste an der Elterneinheit lässt sich der Warnton jedoch für 3 Minuten abschalten.
4.14
Auf Werkseinstellungen zurücksetzen
Die Werkseinstellungen können individuell an der Eltern- und Babyeinheit zurückgesetzt werden.
Schalten Sie die Eltern- oder Babyeinheit ein.
Während alle Anzeigen leuchten, halten Sie sofort die Lautstärketaste
erscheint. Nach einigen Sekunden ist der Reset durchgeführt.
Werkseinstellungen Babyeinheit
Lautstärke: Stufe 3
Wiegenlied: 1
Temperaturüberwachung: Minimum 14°C, Maximum 23°C
(4/20) gedrückt, bis im Display die Anzeige RESET
Werkseinstellungen Elterneinheit
Lautstärke: Stufe 1
Empfindlichkeit: Stufe 5
Warnton: Ein
Temperaturüberwachung: Aus
17
- Wichtige Informationen -
5
5.1
Wichtige Informationen
Fehlersuche
Haben Sie Probleme mit Ihrem Produkt, kontrollieren Sie bitte zuerst die folgenden Hinweise. Bei Garantieansprüchen wenden Sie
sich bitte an Ihren Fachhändler. Die Garantiezeit beträgt 2 Jahre. Für die wiederaufladbaren Batterien gilt eine Garantiezeit von
12 Monaten.
Problem
Kontrollleuchte (18/11) blinkt rot.
Pfeifton
Keine Übertragung
Mögliche Ursache
Elterneinheit oder Babyeinheit sind nicht
eingeschaltet.
Der Abstand zwischen dem Eltern- und
Babyeinheit ist zu gering.
Die Lautstärke ist zu hoch.
Die Lautstärke an der Elterneinheit ist zu
gering.
Die Empfindlichkeit ist zu niedrig
eingestellt.
Die Reichweite ist überschritten.
Elterneinheit lässt sich nicht einschalten.
Elterneinheit ist nicht geladen.
Akkus der Elterneinheit werden nicht
geladen.
Anzeige LOW BATTERY an der
Babyeinheit.
Die Standard-Akkus haben das Ende
ihrer Lebensdauer erreicht.
Die Batterien in der Babyeinheit sind
verbraucht.
18
Abhilfe
Einschalttaste drücken.
Entfernen Sie sich mit der Elterneinheit
von der Babyeinheit.
Verringern Sie die Lautstärke.
Die Lautstärke der Elterneinheit
erhöhen.
Empfindlichkeit über die Elterneinheit
erhöhen.
Gehen Sie mit der Elterneinheit näher
zur Babyeinheit.
Laden Sie die Elterneinheit auf der
Ladestation.
Standard-Akkus austauschen.
Batterien in der Babyeinheit
austauschen.
- Wichtige Informationen 5.2
Technische Daten
Standard
Kanalzahl
Reichweite
Reichweite
Standby Elterneinheit
Stromversorgung Elterneinheit
Stromversorgung Ladestation Elterneinheit
Stromversorgung Babyeinheit
Stromausfallsicherung Babyeinheit
Standby Babyeinheit bei Batteriebetrieb
Zulässige Umgebungstemperatur
Zulässige relative Luftfeuchtigkeit
DECT
120 Kanäle zwischen 1880 bis 1990 MHz
Innen bis zu 50m
Außen bis zu 300m
ca. 12 bis 24 Stunden
2 x AA 1,2V 1300mAh Standard-Akkus
Steckernetzteil DC 9.0V/300mA fest mit der
Ladestation verbunden
Steckernetzteil DC 9.0V/300mA
4 x 1.5V AA Alkaline Batterien
bis zu 16 Stunden
10°C bis 30°C
20 bis 75%
19
20
- Sommaire 1 Consignes générales de sécurité ..................................................................................................................................... 22
2 Éléments de commande .................................................................................................................................................... 24
3 Mise en service ................................................................................................................................................................... 26
3.1 Module parents............................................................................................................................................................. 26
3.2 Module bébé................................................................................................................................................................. 27
4 Utilisation ............................................................................................................................................................................ 28
4.1 Affichages d’écran et leur signification ......................................................................................................................... 28
4.2 Lieu d’installation du module bébé ............................................................................................................................... 28
4.3 Mise en marche/arrêt du module bébé......................................................................................................................... 28
4.4 Mise en marche/arrêt du module parents..................................................................................................................... 29
4.5 Régler le volume........................................................................................................................................................... 29
4.6 Régler la sensibilité de transmission ............................................................................................................................ 30
4.7 Déclencher les berceuses ............................................................................................................................................ 31
4.8 Fonction interphone avec le bébé ................................................................................................................................ 32
4.9 Surveillance de la température..................................................................................................................................... 32
4.10 Activer/désactiver le signal d’avertissement................................................................................................................. 34
4.11 Activation/désactivation de la veilleuse ........................................................................................................................ 34
4.12 Chercher le module parents ......................................................................................................................................... 35
4.13 Surveillance du contact radio ....................................................................................................................................... 35
4.14 Restaurer les réglages par défaut ................................................................................................................................ 35
5 Informations importantes .................................................................................................................................................. 36
5.1 Recherche de défauts .................................................................................................................................................. 36
5.2 Caractéristiques techniques ......................................................................................................................................... 37
21
- Consignes générales de sécurité -
1
Consignes générales de sécurité
En achetant l’interphone bébé BC-307 , vous avez acquis un produit de qualité de la société SWITEL. Veuillez lire attentivement
en entier le présent mode d’emploi afin de découvrir toutes les possibilités offertes par votre appareil. N’ouvrez en aucun cas
l’appareil vous-même et ne tentez pas d’effectuer vous-même des réparations. Veuillez vous adresser à votre revendeur en cas
de droits découlant de la garantie.
Le contenu de l’emballage
un module parents avec clip-ceinture
un module bébé
2 batteries standard rechargeables pour le module parents
chargeur pour le module parents avec bloc d’alimentation
bloc d’alimentation pour le module bébé
un mode d’emploi
Usage conforme
L’appareil est conçu pour la transmission de signaux vocaux tels que, par exemple, des bruits effectués par un enfant. Les sons
d’avertissement ou les signaux sonores d’appareils de surveillance de la respiration ou des battements du cœur ne peuvent PAS
être transmis.
ATTENTION : L’utilisation de l’appareil ne peut PAS se substituer à une surveillance en personne d’un enfant ou d’une
personne nécessitant des soins. Toute responsabilité en dehors des prescriptions légales est exclue.
Consignes de sécurité
• L’appareil ne convient pas pour une utilisation médicale.
• Utilisez les appareils en respectant une distance de sécurité d’au moins un
mètre.
• Utilisez uniquement des piles de bonne qualité.
• Par sécurité, utilisez uniquement les blocs d’alimentation originaux fournis.
Les appareils risqueraient de prendre feu si vous utilisez des blocs
d’alimentation inadéquats.
• Lorsque vous faites fonctionner l’appareil avec un bloc d’alimentation,
veillez à ce que le câble et la fiche soient en parfait état. Les câbles
rompus en pliant ou usés peuvent provoquer des courts-circuits. Attention !
Risque d’incendie.
• Durant le fonctionnement, veillez à assurer une aération suffisante de tous
les composants. Ne placez pas de coussins ou de serviettes sur les
appareils.
22
• N’utilisez pas les appareils dans des zones menacées d’explosion.
• Les appareils sont conçus pour une utilisation dans des locaux abrités
avec une plage de températures comprise entre 10°C et 30°C. Les
appareils ne doivent pas être installés dans des pièces humides telles que
la salle de bains ou la buanderie. Évitez de placer l’appareil à proximité de
sources de chaleur telles que les radiateurs et évitez une exposition
directe au soleil.
• Lorsque l’installation entière arrive en fin de vie, veuillez l’éliminer en
respectant l’environnement conformément aux dispositions légales.
• La portée max. peut atteindre jusqu’à 300 mètres à l’extérieur et jusqu’à
50 m à l’intérieur de bâtiments.
- Consignes générales de sécurité Batteries standards rechargeables/piles
•
Utilisez pour le module bébé uniquement des piles de bonne qualité comme sécurité en cas de panne de courant et pour un
fonctionnement sur piles.
•
Pour le module parents, utilisez uniquement des batteries standard de type AA 1,2V 1300mAh.
•
Changez toujours toutes les batteries standard/piles en même temps.
•
Ne pas jeter les batteries standard/piles au feu, ni les plonger dans l’eau.
•
Veuillez retirer les batteries standard/piles des appareils si vous ne les utilisez pas durant une période prolongée. Les
batteries standards/piles risquent de couler si vous les laissez en place longtemps dans l’appareil.
•
Ne pas jeter les batteries standard/piles usées ou défectueuses en même temps que les ordures ménagères normales. Vous
êtes tenu par la loi de déposer les piles et les batteries usées dans des endroits de collecte appropriés.
Lieu d’installation
N’installez pas les appareils à proximité directe d’autres appareils électroniques tels que par ex. les fours à micro-ondes ou les
chaînes hi-fi car cela pourrait provoquer des perturbations mutuelles. Le lieu d’installation a une grande influence sur le parfait
fonctionnement.
Placez les appareils sur une surface plane et antidérapante. Normalement, les pieds ne marquent pas la surface sur laquelle
l’appareil est posé. La multitude de vernis et de surfaces utilisés ne permet cependant pas d’exclure l’éventualité de traces
laissées par les pieds de l’appareil sur la surface sur laquelle il est posé.
Nettoyage et entretien
Vous pouvez utiliser un chiffon sec, doux et non-pelucheux pour nettoyer les surfaces du boîtier. Ne jamais utiliser de produits
nettoyants ou de solvants agressifs. Aucun entretien n’est nécessaire hormis le nettoyage du boîtier de temps en temps. Les pieds
en caoutchouc de l’interphone bébé ne sont pas résistants à tous les produits nettoyants. Par conséquent, le fabricant ne peut pas
être tenu responsable d’éventuelles détériorations survenant aux meubles ou autres.
23
- Éléments de commande -
2
Éléments de commande
1
2
3
4
Module bébé
1
2
3
4
5
6
7
8
9
10
11
Activation/désactivation de la veilleuse
Capteur de température
Recherche du module parents avec la touche Paging
Régler le volume
Écran d’affichage éclairé
Activation/désactivation des berceuses
Touche pause lors de l’écoute de berceuses
Micro
Mise en marche/arrêt
Pour sélectionner les berceuses
Signalisation visuelle indiquant si une liaison existe avec le module parents
Face arrière
12 Compartiment des piles
13 Raccordement du bloc d’alimentation
11
5
12
10
9
13
24
8
6
7
- Éléments de commande Module parents
14
15
16
17
18
19
20
21
Touche de la fonction interphone avec le module bébé
Mise en marche/arrêt
Écran d’affichage éclairé
Touche de validation pour les fonctions de menu
Signalisation visuelle indiquant si une liaison existe avec le module bébé
Touche menu
Réglage du volume/sélection des fonctions de menu
Signalisation visuelle de la surveillance du bébé
21
20
19
18
14
15
16
17
Face arrière
22 Clip ceinture
23 Compartiment des piles
Chargeur du module parents
24 Voyant de contrôle de charge allumé lorsque le module parents se charge
22
24
23
25
- Mise en service -
3
3.1
Mise en service
Module parents
Mettre les batteries standard en place
Ouvrez le compartiment des piles sur le module parents en exerçant une légère pression sur l’extrémité inférieure du couvercle
tout en le faisant coulisser vers le haut. Vous devez d’abord enlever le clip-ceinture s’il est déjà fixé. Mettez ensuite les batteries
standard sur le chargeur en place en respectant la polarité adéquate. Refermez le compartiment des piles.
ATTENTION :
N’utilisez pas de piles normales non rechargeables dans le module parents.
N’utilisez jamais le module parents sans batteries standard sur le chargeur.
Installer ou enlever le clip-ceinture
Pour installer le clip-ceinture, enfoncez l’extrémité supérieure dans le module parents et pressez ensuite le clip-ceinture vers le
bas. Si vous devez l’enlever, appuyez à l’aide d’un tournevis sur le support à l’intérieur du clip-ceinture et tirez le clip-ceinture
vers le haut.
Installer le clip
Retirer le clip
Raccordement du chargeur
Le bloc d’alimentation est relié fixement au chargeur. Enfoncez le bloc d’alimentation dans une prise de courant de 230 V installée
conformément aux dispositions réglementaires.
26
- Mise en service Charge du module parents
Laissez le module parents en place sur le chargeur avec l’écran tourné vers l’avant durant au moins 16 heures. Le voyant de
contrôle de charge est allumé sur le chargeur et le processus de charge est signalé sur l’écran par un affichage continu de l’icône
de pile. Si le module parents est entièrement chargé, l’écran affiche une icône de pile entièrement chargée. Les batteries
standard rechargeables ont une durée de fonctionnement à température ambiante de max. 12 à 24 heures.
La capacité de pile actuelle est affichée à l’écran :
Pleine
Moitié
Faible
Si la capacité des piles est trop faible, l’écran affiche un message correspondant et un signal sonore retentit toutes les minutes.
Après le premier signal sonore, le module parents peut encore être utilisé durant 1 heure.
3.2
Module bébé
Raccorder le bloc d’alimentation
Utilisez le bloc d’alimentation fourni pour le module bébé. Branchez la petite fiche ronde dans la prise (13) prévue à cet effet sur la
face arrière du module bébé et le bloc d’alimentation dans une prise de courant (230V/50Hz). Veillez à assurer une aération
suffisante du bloc d’alimentation.
Mettre en place des piles comme sécurité en cas de panne de courant ou pour un fonctionnement sur piles
(Non fournies)
Le module bébé est conçu pour fonctionner avec le bloc d’alimentation fourni. Le module bébé peut être utilisé avec quatre piles
alcalines AA de 1,5V en guise de sécurité contre les pannes de courant ou pour un bref fonctionnement sur piles. Le module bébé
est dans ce cas opérationnel avec des piles neuves pour une durée de 16 heures et le message PILE s’affiche à l’écran.
Si la capacité des piles est trop faible, l’écran affiche un message correspondant et un signal sonore retentit toutes les minutes.
Après le premier signal sonore, le module bébé peut encore être utilisé durant 1 heure.
Ouvrez le compartiment des piles situé sur la face arrière à l’aide d’une pièce de monnaie et mettez les piles en place en
respectant la polarité adéquate, puis refermez le compartiment des piles.
27
- Utilisation -
4
Utilisation
4.1
Affichages d’écran et leur signification
1.
2.
3.
4.
5.
Capacité de la pile
Affichage de la température actuelle
Veilleuse activée
Une berceuse est activée
Divers affichages de menu
4.2
Lieu d’installation du module bébé
1
2
3
Lullaby1
4
5
Placez le module bébé à proximité du bébé en respectant une distance minimale d’un mètre. Afin d’obtenir une transmission
optimale, le micro intégré (8) doit être dirigé vers l’enfant. Tenez compte des autres consignes de sécurité du chapitre 1 du
présent mode d’emploi.
Remarque : N’utilisez pas le module parents à une trop grande proximité du module bébé car cela risque de provoquer de forts
sifflements. Dans ce cas, éloignez-vous du module bébé ou baissez le volume.
4.3
Mise en marche/arrêt du module bébé
Mettez le module bébé en marche en appuyant sur la touche marche/arrêt (9) durant une seconde. Le module parents est à
présent recherché et au bout de quelques secondes la signalisation (11) s’allume en vert. Si le module bébé ne trouve pas le
module parents, la signalisation (11) clignote en rouge.
Si vous souhaitez désactiver le module bébé, appuyez sur la touche marche/arrêt (9) durant une seconde.
28
4.4
- Utilisation Mise en marche/arrêt du module parents
Mettez le module parents en marche en appuyant sur la touche marche/arrêt (15) durant une seconde. Le module bébé est à
présent recherché et au bout de quelques secondes la signalisation (18) s’allume en vert. Si le module bébé ne trouve pas le
module parents, la signalisation (18) clignote en rouge.
Si vous souhaitez désactiver le module parents, appuyez sur la touche marche/arrêt (15) durant une seconde.
Remarque : Le module parents peut aussi être utilisé lorsqu’il est posé sur le chargeur. Les batteries standard continuent à se
charger, mais elles mettront plus de temps à se charger intégralement.
4.5
Régler le volume
Module bébé
Le volume sur le module bébé peut être réglé sur cinq niveaux à l’aide des touches
berceuses et en même temps la fonction interphone. Voir à cet effet le chapitre 4.8.
et
(4). Le volume réglé concerne les
Module parents
Le volume sur le module parents peut être réglé sur cinq niveaux à l’aide des touches
peut être entièrement désactivé (VOLUME OFF).
et
(20). En plus, le haut-parleur
Outre la transmission sonore par le haut-parleur, les bruits sont également indiqués visuellement par cinq signalisations vertes et
trois rouges (21). Vous pouvez ainsi opérer une surveillance également lorsque le volume est baissé ou entièrement désactivé.
Remarques :
•
Si le volume sur le module parents est désactivé, un signal d’avertissement peut également vous signaler les bruits du bébé.
Voir à cet effet le chapitre 4.10.
•
Le volume sur le module parents se règle automatiquement à nouveau sur un volume moyen lorsque la fonction d’interphone
est utilisée et que le volume était auparavant désactivé.
29
- Utilisation 4.6
Régler la sensibilité de transmission
La sensibilité de transmission du module bébé vers le module parents peut être réglée sur 5 niveaux. Sur le niveau 5, les bruits
même très faibles peuvent être entendus sur le module parents. Seuls des bruits forts sont audibles sur le niveau 1. Si vous
souhaitez être sûr d’entendre tous les bruits, utilisez le niveau 5.
Remarque : Ce réglage n’a pas d’influence sur la signalisation visuelle des bruits sur le module parents.
1.
Appuyez sur la touche MENU (19).
2.
Sélectionnez à l’aide de la touche
3.
Appuyez sur la touche
4.
Sélectionnez à présent la sensibilité souhaitée à l’aide des touches
5.
6.
Validez à l’aide de la touche
(17). L’écran affiche brièvement SAVED, puis l’élément de menu SENSITIVITY.
Appuyez sur la touche MENU pour quitter la programmation.
30
(20) l’élément de menu SENSITIVITY.
(17). L’écran affiche le réglage actuel de la sensibilité sur 5 niveaux.
et
(20).
- Utilisation 4.7
Déclencher les berceuses
Pour que votre bébé puisse s’endormir paisiblement, cinq berceuses durant chacune 30 secondes sont enregistrées. La durée
des berceuses avec plusieurs répétitions est d’env. 5 minutes. Le déclenchement des berceuses peut s’opérer sur le module
bébé et également sur le module parents.
Déclencher les berceuses sur le module bébé
En appuyant plusieurs fois sur la touche
(10), vous pouvez rechercher la BERCEUSE 1 à 5 de votre choix ou DÉCLENCHER
TOUTES. Avec le réglage DÉCLENCHER TOUTES, tous les berceuses se déclenchent l’une à la suite de l’autre pour une durée
de 5 minutes.
En appuyant sur la touche
(6), vous pouvez démarrer et arrêter les berceuses. La touche
la berceuse et de poursuivre en appuyant sur la même touche
(7) vous permet d’interrompre
(7).
Déclencher les berceuses sur le module parents
1. Appuyez sur la touche MENU (19).
2.
Sélectionnez à l’aide de la touche
3.
Validez à l’aide de la touche
(20) l’élément de menu LULLABY.
4.
Appuyez de nouveau sur la touche
(17). L’écran affiche PLAY?.
(17) et la dernière berceuse déclenchée se déclenche à nouveau. Si vous
souhaitez rechercher une autre berceuse, appuyez avant sur la touche
(20). L’écran affiche le message SELECT NEW.
5.
Validez à l’aide de la touche
6.
Sélectionnez à présent la berceuse de votre choix à l’aide des touches
7.
Validez à l’aide de la touche
(17) et la berceuse sélectionnée se déclenche. Avec le réglage PLAY ALL, tous les
berceuses se déclenchent l’une à la suite de l’autre pour une durée de 5 minutes.
8.
9.
La touche
(17) peut être utilisée comme touche PAUSE durant la berceuse.
Pour arrêter la berceuse, appuyez sur la touche MENU (19). L’écran affiche STOP LULLABY?.
10. Validez à l’aide de la touche
(17).
et
(20). Ou sélectionnez PLAY ALL.
(17) et la berceuse s’arrête.
31
- Utilisation Remarques :
•
Pendant la berceuse, l’icône
s’affiche à l’écran sur le module bébé et sur celui du module parents ainsi que le nom de la
berceuse qui passe actuellement. Cela vous permet de contrôler sur le module parents si une berceuse est déclenchée.
•
•
•
Si la berceuse est mise sur pause, l’icône
clignote à l’écran des deux modules.
La pause ne doit pas excéder 60 secondes. Ensuite, les berceuses s’arrêtent automatiquement.
Vous pouvez utiliser intégralement le menu entier sur le module parents également pendant le déclenchement des
berceuses.
4.8
Fonction interphone avec le bébé
Pour apaiser votre bébé, vous pouvez lui parler grâce à la fonction interphone. Maintenez à cet effet la touche TALK (14)
enfoncée sur le module parents et parlez. Après avoir relâché la touche TALK (14), vous pouvez entendre à nouveau votre bébé.
Pendant que vous parlez, le voyant de contrôle (11/18) clignote sur le module parents et sur le module bébé.
Remarque : Si le volume sur le module parents est désactivé, celui-ci se règle automatiquement à nouveau sur un volume
moyen.
4.9
Surveillance de la température
La température dans la chambre d’enfant est affichée en permanence sur les deux écrans. Veillez à ce que le capteur de
température ne soit pas recouvert par des objets quelconques.
En plus, une plage de températures réglable peut être surveillée. Si cette plage est dépassée ou non atteinte, un signal sonore
bref retentit sur le module parents à chaque fois qu’elle est dépassée ou non atteinte et l’indication de température clignote à
l’écran. Si la température continue à augmenter ou à diminuer, un signal sonore bref retentit à chaque modification.
Remarque : Normalement, le signal sonore retentit à chaque nouveau dépassement vers le haut ou vers le bas de la plage de
températures réglée. En appuyant sur une touche quelconque sur le module parents, vous pouvez décaler la plage de 2°C vers le
haut ou vers le bas de manière à ce qu’un signal sonore ne retentisse que lors du deuxième prochain dépassement vers le haut
ou le bas.
32
- Utilisation Régler la plage de températures
1. Appuyez sur la touche MENU (19).
2.
Sélectionnez à l’aide de la touche
3.
Appuyez deux fois sur la touche
(20) l’élément de menu TEMPERATURE.
4.
Sélectionnez à présent la température minimum de votre choix à l’aide des touches
comprise entre 10 et 19°C.
5.
Validez à l’aide de la touche
réglée.
6.
Sélectionnez à présent la température maximum de votre choix à l’aide des touches
comprise entre 22 et 30°C.
7.
8.
Validez à l’aide de la touche
(17). L’écran affiche brièvement SAVED, puis l’élément de menu TEMPERATURE.
Appuyez sur la touche MENU pour quitter la programmation.
(17). L’écran affiche la température minimum actuellement réglée.
et
(20). Plage de réglage
(17). L’écran affiche brièvement SAVED, puis la température maximum actuellement
et
(20). Plage de réglage
Activer/désactiver la surveillance de la température
1. Appuyez sur la touche MENU (19).
2.
Sélectionnez à l’aide de la touche
3.
Appuyez une fois sur la touche
(20) l’élément de menu TEMPERATURE.
4.
Sélectionnez à présent à l’aide des touches
5.
Validez à l’aide de la touche
(17). Si la surveillance est désactivée, l’écran affiche ALERT ON?. Si la surveillance
est désactivée, l’écran affiche ALERT OFF?.
6.
7.
Validez à l’aide de la touche
(17). L’écran affiche brièvement SAVED, puis l’élément de menu TEMPERATURE.
Appuyez sur la touche MENU (19) pour quitter la programmation.
(17). L’écran affiche l’élément de menu RANGE.
et
(20) l’élément de menu ALERT ON/OFF.
33
4.10
- Utilisation Activer/désactiver le signal d’avertissement
Si le volume sur le module parents est désactivé, un signal d’avertissement peut également vous signaler les bruits du bébé. Si
deuxième dernier niveau de la signalisation visuelle est atteint, le signal d’avertissement retentit et le message SOUND ALERT
s’affiche à l’écran. Augmentez alors le volume pour écouter votre bébé.
Remarque : Lorsque le volume est activé, le signal d’avertissement est automatiquement désactivé.
1.
Appuyez sur la touche MENU (19).
2.
Sélectionnez à l’aide de la touche
3.
Validez à l’aide de la touche
(17). Si le signal d’avertissement est désactivé, l’écran affiche ALERT ON?. Si le
signal d’avertissement est désactivé, l’écran affiche ALERT OFF?.
4.
5.
Validez à l’aide de la touche
(17). L’écran affiche brièvement SAVED, puis l’élément de menu SOUND ALERT.
Appuyez sur la touche MENU (19) pour quitter la programmation.
4.11
(20) l’élément de menu SOUND ALERT.
Activation/désactivation de la veilleuse
Vous pouvez activer et désactiver la veilleuse sur le module bébé à l’aide de la touche
(1). Lorsque la veilleuse est allumée,
l’icône
s’affiche sur les deux écrans. Vous pouvez ainsi contrôler également sur le module parents si la veilleuse est allumée
ou non. La veilleuse peut en plus être également allumée sur le module parents.
Allumer la veilleuse sur le module parents
1. Appuyez sur la touche MENU (19).
2. Si la veilleuse est éteinte, le message LIGHT ON? s’affiche à l’écran.
3.
Validez à l’aide de la touche
(17). La veilleuse est allumée et l’icône
s’affiche à l’écran.
Éteindre la veilleuse sur le module parents
1. Appuyez sur la touche MENU (19).
2. Si la veilleuse est allumée, le message LIGHT OFF? s’affiche à l’écran.
3.
34
Validez à l’aide de la touche
(17). La veilleuse est éteinte et l’icône
s’affiche à l’écran.
- Utilisation 4.12
Chercher le module parents
S’il vous est impossible de vous souvenir de l’endroit où se trouve le module parents, appuyez sur la touche PAGE (3) du module
bébé. Le module parents émet durant 2 minutes des signaux sonores qui vous permettront ainsi de le retrouver aisément. Vous
pouvez interrompre prématurément les signaux sonores en appuyant sur une touche quelconque du module parents ou du
module bébé .
Remarque : Si le volume sur le module parents est désactivé, celui-ci se règle automatiquement à nouveau sur un volume
moyen.
4.13
Surveillance du contact radio
Le contact radio entre le module parents et le module bébé est constamment surveillé. Si la liaison est bonne, le voyant de
contrôle vert LINK (18/11) est allumé sur le module parents et sur le module bébé.
Si vous vous êtes trop éloigné avec le module parents du module bébé ou si le module bébé est désactivé, le voyant de contrôle
vert clignote et un signal d’avertissement retentit toutes les 30 secondes. Ensuite, le voyant de contrôle clignote en rouge, l’écran
affiche le message NOT LINKED et un signal d’avertissement retentit toutes les 30 secondes.
Remarque : Le signal d’avertissement en cas de rupture du contact radio ne peut pas être désactivé. Vous pouvez toutefois
désactiver le signal d’avertissement pour une durée de 3 minutes en appuyant sur une touche quelconque sur le module parents.
4.14
Restaurer les réglages par défaut
Vous pouvez restaurer individuellement les réglages par défaut sur le module parents et sur le module bébé.
Mettez le module parents ou le module bébé en marche.
Pendant que toutes les signalisations sont allumées, appuyez immédiatement sur la touche du volume
le message RESET s’affiche à l’écran. La réinitialisation est effectuée au bout de quelques secondes.
Réglages par défaut du module bébé
Volume : niveau 3
Berceuse : 1
Surveillance de la température : minimum 14°C, maximum 23°C
(4/20) jusqu’à ce que
Réglages par défaut du module parents
Volume : niveau 1
Sensibilité : niveau 5
Signal d’avertissement : activé
Surveillance de la température : désactivée
35
- Informations importantes -
5
5.1
Informations importantes
Recherche de défauts
Si vous avez des problèmes avec votre produit, veuillez d’abord contrôler les indications ci-après. Veuillez vous adresser à votre
revendeur en cas de droits découlant de la garantie. La garantie dure 2 ans. La période de garantie dure 2 ans. Les batteries
rechargeables bénéficient d’une garantie de 12 mois.
Problème
Le voyant de contrôle (18/11) clignote en
rouge.
Sifflement
Pas de transmission
Impossible de mettre en marche le
module parents.
Les batteries du module parents ne se
chargent pas.
Le message LOW BATTERY s’affiche
sur le module bébé.
36
Cause possible
Module parents ou module bébé pas
allumé.
Le module parents n’est pas assez
éloigné du module bébé.
Le volume est trop fort.
Le volume est trop faible sur le module
parents.
La sensibilité est réglée trop basse.
La portée est dépassée.
Le module parents n’est pas chargé.
Les batteries standard sont arrivées en
fin de vie.
Les piles du module bébé sont usées.
Remède
Appuyer sur la touche de mise en
marche.
Éloignez-vous avec le module parents
du module bébé.
Réduisez le volume sonore.
Augmenter le volume du module
parents.
Augmenter la sensibilité sur le module
parents.
Rapprochez-vous avec le module
parents du module bébé.
Chargez le module parents sur le
chargeur.
Remplacer les batteries standard.
Remplacer les piles du module bébé.
- Informations importantes 5.2
Caractéristiques techniques
Standard
Nombre de canaux
Portée
Portée
Autonomie en veille module parents
Alimentation en courant module parents
Alimentation en courant chargeur module
parents
Alimentation en courant module bébé
Sécurité en cas de panne de courant module
bébé
Autonomie en veille module bébé lors d’un
fonctionnement sur piles
Température ambiante admissible
Humidité ambiante relative admissible
DECT
120 canaux compris entre 1880 et 1990 MHz
jusqu’à 50m à l’intérieur
jusqu’à 300m à l’extérieur
env. de 12 à 24 heures
2 batteries standard AA de 1,2V 1300mAh
Bloc d’alimentation DC 9.0V/300mA relié
fixement au chargeur
Bloc d’alimentation DC 9.0V/300mA
2 piles alcalines AA de 1,5V
jusqu’à 16 heures
10°C à 30°C
20 à 75%
37
38
- Indice 1 Informazioni di sicurezza generali .................................................................................................................................... 40
2 Elementi di comando ......................................................................................................................................................... 42
3 Messa in funzione............................................................................................................................................................... 44
3.1 Unità genitori ................................................................................................................................................................ 44
3.2 Unità bebè .................................................................................................................................................................... 45
4 Impiego ................................................................................................................................................................................ 46
4.1 Visualizzazioni sul display e loro significato ................................................................................................................. 46
4.2 Luogo d'installazione dell'unità bebè ............................................................................................................................ 46
4.3 Inserimento/disinserimento dell'unità bebè .................................................................................................................. 46
4.4 Inserimento/disinserimento dell'unità genitori............................................................................................................... 47
4.5 Regolazione del volume ............................................................................................................................................... 47
4.6 Regolazione della sensibilità di trasmissione ............................................................................................................... 48
4.7 Riproduzione dei brani ninnananna.............................................................................................................................. 49
4.8 Funzione interfonica verso il bebè................................................................................................................................ 50
4.9 Monitoraggio della temperatura.................................................................................................................................... 50
4.10 Attivazione/disattivazione del segnale acustico............................................................................................................ 52
4.11 Inserimento/disinserimento della luce notturna ............................................................................................................ 52
4.12 Ricerca dell'unità genitori ............................................................................................................................................. 53
4.13 Monitoraggio del contatto radio .................................................................................................................................... 53
4.14 Ripristino alle impostazioni di fabbrica ......................................................................................................................... 53
5 Informazioni importanti...................................................................................................................................................... 54
5.1 Individuazione di errori ................................................................................................................................................. 54
5.2 Dati tecnici .................................................................................................................................................................... 55
39
- Informazioni di sicurezza generali -
1
Informazioni di sicurezza generali
Con il BC-307 Babyphone avete acquistato un prodotto di qualità della casa SWITEL. Si prega di leggere attentamente le
presenti istruzioni per l'uso, per apprendere tutte le possibilità. Non aprire in nessun caso l'apparecchio su propria iniziativa, per
tentare di effettuare da soli delle riparazioni. Per le richieste di garanzia Vi preghiamo di rivolgerVi al Vostro rivenditore di fiducia.
La dotazione comprende
una unità genitori, incluso clip per cintura
una unità bebè
2 accumulatori standard ricaricabili per unità genitori
stazione di carica per unità genitori, incluso alimentatore di rete
alimentatore di rete per unità bebè
istruzioni per l'uso
Impiego conforme allo scopo previsto
L'apparecchio è concepito per la trasmissione di segnali vocali, per esempio rumori di bambini. NON possono essere trasmessi
segnali d'allarme o segnali acustici, quali ad esempio di apparecchi per il monitoraggio della respirazione o della frequenza
cardiaca.
ATTENZIONE: L'utilizzo di questo apparecchio NON può rimpiazzare la sorveglianza personale di un bambino o di una
persona che richiede cure. Si esclude qualsiasi responsabilità al di fuori delle disposizioni di legge.
Informazioni di sicurezza
• L'apparecchio non è adatto per applicazioni medicali.
• Utilizzare gli apparecchi da una distanza di sicurezza di almeno un metro.
• Utilizzare esclusivamente batterie pregiate.
• Per motivi di sicurezza, si raccomanda di utilizzare esclusivamente gli
alimentatori originali forniti in dotazione. Nell'utilizzo di alimentatori di rete
non adatti, possono incendiarsi gli apparecchi.
• Durante il funzionamento attraverso un alimentatore di rete, si raccomanda
di accertarsi dello stato perfetto dei cavi d'alimentazione e delle spine. I cavi
piegati oppure graffiati possono provocare dei cortocircuiti. Attenzione!
Pericolo d'incendio.
• Durante il funzionamento è necessario provvedere ad una sufficiente
ventilazione di tutti i componenti. Non appoggiare dei cuscini oppure
asciugamani sugli apparecchi.
40
• Non utilizzare mai gli apparecchi in zone esposte al pericolo di
deflagrazioni.
• Gli apparecchi sono concepiti per funzionare in ambienti protetti in un
campo di temperatura di 10 °C fino 30 °C. Gli apparecchi non devono
essere installati in ambienti umidi, come ad esempio in bagno o nella
lavanderia. Evitare possibilmente fonti di calore, quali ad esempio
riscaldamenti, termosifoni, ecc. e non esporre l'apparecchio direttamente ai
raggi solari.
• Una volta che la durata utile dell'intero impianto si è esaurita, occorre
provvedere ad uno smaltimento appropriato e conforme alle prescrizioni
vigenti per la protezione ambientale.
• La portata massima corrisponde a 300 metri all'aperto e a 50 metri
all'interno di edifici.
- Informazioni di sicurezza generali Accumulatori/batterie standard ricaricabili
•
Per l'unità bebè si raccomanda di utilizzare esclusivamente batterie pregiate contro la mancanza di corrente.
•
Per l'unità genitori sono invece da utilizzare esclusivamente accumulatori standard del tipo AA 1,2V 1300mAh.
•
Sostituire sempre contemporaneamente tutti di accumulatori/batterie standard.
•
Non gettare mai gli accumulatori/ ricaricabili standard nel fuoco o immergerle nell'acqua.
•
Qualora gli apparecchi non venissero più utilizzati per un periodo prolungato, si raccomanda di rimuovere gli
accumulatori/batterie standard. Una custodia con gli accumulatori/batterie standard integrati per un periodo prolungato può
avere la conseguenza di una fuoriuscita di acido dagli stessi.
•
Gli accumulatori/batterie ricaricabili standard vecchi o difettosi non devono mai essere smaltiti nei normali rifiuti urbani. La
legge prescrive di restituire gli accumulatori/batterie vecchi agli appositi centri di raccolta.
Luogo d'installazione
Non disporre gli apparecchi nelle immediate vicinanze di apparecchi elettronici, quali ad esempio forni a microonde o impianti
stereofonici, poiché in questa circostanza non sarebbero da escludere delle interferenze reciproche. Il luogo d'installazione ha un
influsso determinante per garantire un funzionamento perfetto ed irreprensibile.
Disporre gli apparecchi sopra una superficie piana e non scivolante. Normalmente i piedini di gomma dell'apparecchio non
lasciano alcune tracce sulla superficie d'appoggio. A causa degli innumerevoli tipi di smalto utilizzati sulle superfici, non è, tuttavia,
possibile escludere sempre, che sulla superficie d'appoggio rimangano delle tracce dei piedini di gomma dell'apparecchio.
Pulizia e manutenzione
Le superfici del contenitore possono essere pulite con un panno pulito, asciutto e privo di peluria. Non utilizzare mai dei detergenti
o delle soluzioni aggressive. Oltre ad una pulizia occasionale del contenitore dell'apparecchio non è necessaria alcuna particolare
manutenzione. I piedini di gomma del Babyphone non sono comunque resistenti contro tutti i tipi di detergenti. Pertanto, il
costruttore non potrà assumersi alcuna responsabilità per eventuali danni causati ai mobili o simili.
41
- Elementi di comando -
2
Elementi di comando
1
2
3
4
Unità bebè
1
2
3
4
5
6
7
8
9
10
11
inserimento/disinserimento della luce notturna
termosonda
ricerca dell'unità genitori tramite il tasto Paging
regolazione del volume
display illuminato
avvio/stop per la riproduzione dei brani ninnananna
tasto pausa durante la riproduzione dei brani ninnananna
microfono
inserimento/disinserimento
per la selezione dei brani ninnananna
spia di controllo per il collegamento con l'unità genitori
Parte posteriore
12 alloggiamento batterie
13 collegamento alimentatore di rete
11
5
12
10
9
13
42
8
6
7
- Elementi di comando Unità genitori
14
15
16
17
18
19
20
21
tasto per la funzione interfonica con l'unità bebè
inserimento/disinserimento
display illuminato
tasto di conferma delle funzioni menu
spia di controllo per il collegamento con l'unità bebè
tasto menu
regolazione del volume / selezione delle funzioni menu
visualizzatore per il monitoraggio bebè
21
20
19
18
14
15
16
17
Parte posteriore
22 clip per cintura
23 alloggiamento batterie
Stazione di carica per l'unità genitori
24 spia di controllo, si illumina durante la carica dell'unità genitori
22
24
23
43
- Messa in funzione -
3
3.1
Messa in funzione
Unità genitori
Inserimento delle batterie ricaricabili standard
Aprire l’alloggiamento delle batterie dell'unità genitori, spostando verso l'alto il coperchio dello scomparto batterie dall’estremità
inferiore. Se vi fosse fissato il clip alla cintura, sarà dapprima necessario rimuoverlo. Introdurre a questo punto gli accumulatori
standard e rispettare la corretta polarità. Chiudere infine lo il coperchio scompartimento delle batterie.
ATTENZIONE:
Non utilizzare batterie normali, vale a dire non ricaricabili, nell'unità genitori.
Non utilizzare mai l'unità genitori senza accumulatori standard sulla stazione di carica.
Applicazione e rimozione del clip della cintura
Per applicare il clip della cintura, inserire l'estremità superiore nell'unità genitori e premere successivamente il clip della cintura
verso al basso. Se si desidera rimuovere il clip della cintura, premere con un cacciavite sul sostegno all'interno del clip della
cintura e spingerlo quindi verso l'alto.
Applicazione del clip
Rimozione del clip
Collegamento della stazione di carica
L'alimentatore di rete è collegato in modo fisso alla stazione di carica. Inserire l'alimentatore di rete in una presa di corrente da
230V che sia installata conformemente alle prescrizioni vigenti sul luogo.
44
- Messa in funzione Carica dell'unità genitori
Appoggiare l'unità genitori con il display rivolto in avanti per almeno 16 ore sulla stazione di carica. Nella stazione di carica si
illumina la spia di controllo, mentre il ciclo di carica viene segnalato tramite un'indicazione continua del simbolo della batteria nel
display. Una volta che è stata completamente caricata l'unità genitori, il display visualizza un simbolo completo della batteria. Gli
accumulatori ricaricabili standard possiedono una capacità di funzionamento a temperatura ambiente di massimo 12 fino 24 ore.
La capacità attuale delle batterie viene indicata nel display.
carica
semicarica
debole
Nel caso in cui la capacità della batteria dovesse essere troppo bassa, sul display viene visualizzata una rispettiva segnalazione e
ogni minuto si sente un segnale acustico d'avvertimento. Dopo il primo segnale acustico d'avvertimento, l'unità genitori potrà
essere utilizzate ancora per 1 ora.
3.2
Unità bebè
Collegamento dell'alimentatore di rete
Utilizzare l'alimentatore di rete fornito in dotazione per l'unità bebè. Inserire la piccola spina circolare nella boccola (13)
appositamente prevista nella parte posteriore dell'unità bebè e l'alimentatore di rete in una presa di corrente (230V/50Hz).
Accertarsi che l'alimentatore di rete sia sempre ben ventilato.
Inserimento delle batterie contro la mancanza di corrente (non comprese in dotazione)
L'unità bebè è concepita per il funzionamento in combinazione con l'alimentatore di rete fornito in dotazione. Come protezione
contro la mancanza di corrente oppure un breve funzionamento a batterie, si può utilizzare l'unità bebè con quattro batterie
alcaline da 1,5 V del tipo. In questo caso l'unità bebè con delle batterie nuove potrà funzionare per 16 ore e nel display viene
visualizzata la segnalazione BATTERIE.
Nel caso in cui la capacità della batteria dovesse essere troppo bassa, sul display viene visualizzata una rispettiva segnalazione e
ogni minuto si sente un segnale acustico d'avvertimento. Dopo il primo segnale acustico d'avvertimento, l'unità bebè potrà essere
utilizzate ancora per 1 ora.
Aprire l'alloggiamento delle batterie nella parte posteriore con una moneta e inserire quindi le batterie. Introdurre a questo punto le
batterie, rispettando la corretta polarità, e chiudere di nuovo l'alloggiamento.
45
- Impiego -
4
Impiego
4.1
Visualizzazioni sul display e loro significato
1.
2.
3.
4.
5.
capacità delle batterie
indicazione della temperatura attuale
luce notturna accesa
viene riprodotta una ninnananna
diverse e visualizzazioni menu
4.2
Luogo d'installazione dell'unità bebè
1
2
Lullaby1
3
4
5
Piazzare l'unità bebè in prossimità del bebè. Rispettare una distanza di almeno un metro. Per garantire una trasmissione
ottimale il microfono (8) dovrebbe essere rivolto verso il bebè. Osservare le ulteriori informazioni di sicurezza riportate al capitolo
1 delle presenti istruzioni per l'uso.
Nota: Si raccomanda di non utilizzare l'unità genitori in una posizione troppo vicina all'unità bebè, poiché in tal caso potrebbero
verificarsi dei forti rumori di fischio dovuti a saturazione acustica. In questo caso si raccomanda di distanziarsi dall'unità bebè o di
ridurre il volume.
4.3
Inserimento/disinserimento dell'unità bebè
L'unità bebè viene inserita mantenendo premuto per un secondo il tasto ON/OFF (9). A questo punto viene cercata l'unità genitori
e dopo alcuni secondi si illumina in verde la spia di controllo (11). Qualora l'unità bebè non dovesse trovare l'unità genitori,
lampeggia in rosso l'indicazione (11).
Se si desidera spegnere unità bebè, mantenere premuto per un secondo il tasto ON/OFF (9).
46
4.4
- Impiego Inserimento/disinserimento dell'unità genitori
L'unità genitori viene inserita mantenendo premuto per un secondo il tasto ON/OFF (15). A questo punto viene cercata l'unità bebè
e dopo alcuni secondi si illumina in verde la spia di controllo (18). Qualora l'unità bebè non dovesse trovare l'unità genitori,
lampeggia in rosso l'indicazione (18).
Se si desidera spegnere unità genitori, mantenere premuto per un secondo il tasto ON/OFF (15).
Nota: L'unità bebè può essere utilizzata anche nel caso in cui l'unità genitori sia appoggiata sulla stazione di carica. Gli
accumulatori standard vengono ulteriormente caricati, tuttavia, l'intero procedimento di carica dura più a lungo.
4.5
Regolazione del volume
Unità bebè
e
(4). Il volume regolato riguarda la
Il volume dell'unità bebè può essere regolato in cinque livelli attraverso i tasti
riproduzione dei brani ninnananna e contemporaneamente il volume della funzione interfonica. si veda a tal fine al capitolo
.
Unità genitori
Il volume dell'unità genitori può essere regolato altrettanto in cinque livelli tramite i tasti
disinserire completamente l'altoparlante (VOLUME OFF).
e
(20). Inoltre, è anche possibile
Oltre alla trasmissione acustica attraverso l'altoparlante, i rumori vengono rappresentati anche visualmente attraverso cinque spie
verdi e tre spie rosse (21). In tal modo è possibile garantire un monitoraggio anche con il volume ridotto o completamente
disinserito.
Note:
•
Se è stato disattivato il volume dell'unità genitori, anche un segnale acustico può avvisare sui rumori del bebè. si veda a tal
fine al capitolo 4.10.
•
Il volume dell'unità genitori viene automaticamente riportato al livello medio, mentre viene utilizzata la funzione interfonica e
quando il volume è stato in precedenza disattivato.
47
4.6
- Impiego Regolazione della sensibilità di trasmissione
La sensibilità di trasmissione dell'unità bebè verso l'unità genitori può essere regolata in 5 livelli. Nel livello 5 si possono sentire
anche i rumori molto bassi dell'unità genitori. Mentre nel volume 1 si possono sentire soltanto i rumori forti. Per accertarsi di
sentire anche tutti i rumori, si raccomanda di utilizzare il livello 5.
Nota: Questa regolazione non ha alcun influsso sulla visualizzazione dei rumori nell'unità genitori.
1.
Premere il tasto MENU (19).
2.
Selezionare attraverso il tasto
3.
Premere una volta il tasto
4.
Selezionare ora la sensibilità desiderata tramite i tasti
5.
Confermare tramite il tasto
(17). Sul display viene visualizzato brevemente SAVED e successivamente il punto menu
SENSITIVITY.
Premere il tasto MENU, per uscire dal livello di programmazione.
6.
48
(20) il punto menu SENSITIVITY.
(17). Nel display viene visualizzata la sensibilità attualmente regolata in 5 livelli.
e
(20).
- Impiego 4.7
Riproduzione dei brani ninnananna
Affinché il vostro bebè possa addormentarsi tranquillamente, negli apparecchi sono memorizzati cinque brani ninnananna aventi
rispettivamente una durata di 30 secondi. La durata di riproduzione in parecchie ripetizioni corrisponde a ca. 5 minuti. La
riproduzione dei brani ninnananna può avvenire attraverso l'unità bebè come pure attraverso l'unità genitori.
Impiego dei brani ninnananna nell'unità bebè
Premendo ripetutamente il tasto
(10), si può selezionare il brano NINNANANNA 1 fino 5 oppure RIPRODUCI TUTTO.
Nell'impostazione RIPRODUCI TUTTO vengono riprodotti consecutivamente tutti i brani ninnananna per la durata di 5 minuti.
Premendo il tasto
(6) si può avviare ovvero fermare la riproduzione. Tramite il tasto
riproduzione, e proseguirla nuovamente attraverso lo stesso tasto
(7) si può interrompere la
(7).
Impiego dei brani ninnananna nell'unità genitori
1. Premere il tasto MENU (19).
2.
Selezionare attraverso il tasto
3.
Confermare tramite il tasto
4.
Premere nuovamente il tasto
(20) il punto menu LULLABY.
(17). Sul display viene visualizzata l'indicazione PLAY?.
(17), dopodiché viene riprodotto nuovamente l'ultimo brano ninnananna riprodotto in
precedenza. Se desiderate selezionare un altro brano ninnananna, occorre premere innanzitutto il tasto
display viene visualizzato il messaggio SELECT NEW.
5.
Confermare tramite il tasto
(20). Nel
(17).
6.
Selezionare ora il brano ninnananna desiderato tramite i tasti
7.
Confermare con il tasto
(17) e successivamente viene riprodotta la ninnananna selezionata. Nell'impostazione PLAY
ALL vengono riprodotti consecutivamente tutti i brani ninnananna per la durata di 5 minuti.
8.
9.
Durante la riproduzione il tasto
(17) può essere utilizzato anche come tasto PAUSA.
Per terminare la riproduzione, premere il tasto MENU (19). Sul display viene visualizzata l'indicazione STOP LULLABY?.
10. Confermare con il tasto
e
(20). Oppure selezionare l'opzione PLAY ALL.
(17) e la riproduzione viene quindi fermata.
49
- Impiego Note:
•
Durante la riproduzione dei brani ninnananna, nel display dell'unità bebè e anche nel display dell'unità genitori viene
visualizzato il simbolo
e il nome della ninnananna attualmente riprodotta. In tal modo potrete verificare attraverso l'unità
genitori se attualmente viene riprodotta una ninnananna.
•
•
•
4.8
Se la riproduzione viene commutata su pausa, in ambedue i display lampeggia il simbolo
.
Tuttavia, la pausa non deve corrispondere a più di 60 secondi. Successivamente la riproduzione dei brani ninnananna viene
fermata automaticamente.
Praticamente si può utilizzare il menu completo nell'unità genitori anche durante la riproduzione dei brani ninnananna.
Funzione interfonica verso il bebè
Per tranquillizzare il bebè, potete parlargli attraverso la funzione interfonica. A tal fine occorre mantenere premuto il tasto TALK
(14) nell'unità genitori e parlare nel microfono. Dopo aver rilasciato il tasto TALK (14), potere di nuovo ascoltare il bebè. Mentre
parlate, nell'unità genitori e nell'unità bebè lampeggia rispettivamente la spia di controllo (11/18).
Nota: Se è stato disattivato il volume dell'unità genitori, questi verrà di nuovo regolato automaticamente al livello medio.
4.9
Monitoraggio della temperatura
La temperatura nella camera dei bambini viene permanentemente visualizzata su ambedue i display. Accertarsi che la
termosonda non sia coperta da qualche oggetto.
Inoltre, è anche possibile monitorare un campo di temperatura impostabile. Nel caso in cui si dovesse superare o stare al di sotto
di questo campo, nell'unità genitori si sente un breve segnale acustico d'avvertimento e nel display lampeggia l'indicazione della
temperatura. Se la temperatura aumenta o si abbassa di nuovo, in ogni variazione si sente questo breve segnale acustico.
Nota: Normalmente il segnale acustico si attiva in ogni grado ossia nel caso in cui venisse registrato un valore al di sopra o al di
sotto del campo di temperatura impostato. Premendo un tasto qualsiasi nell'unità genitori si può spostare in su oppure in giù il
campo di rispettivamente 2°C, in maniera tale che il segnale acustico venga attivato solo alla prossima registrazione di un valore
al di sopra o al di sotto del campo impostato.
50
- Impiego Impostazione del campo di temperatura
1. Premere il tasto MENU (19).
2.
Selezionare attraverso il tasto
3.
Premere due volte il tasto
4.
Selezionare a questo punto la temperatura minima desiderata attraverso i tasti
da 10 fino 19°C.
5.
Confermare tramite il tasto
(17). Sul display viene brevemente visualizzato SAVED e quindi la temperatura
massima eventualmente impostata.
6.
Selezionare a questo punto la temperatura massima desiderata attraverso i tasti
da 22 fino 30°C.
7.
Confermare tramite il tasto
(17). Sul display viene visualizzato brevemente SAVED e successivamente il punto
menu TEMPERATURE.
Premere il tasto MENU, per uscire dal livello di programmazione.
8.
(20) il punto menu TEMPERATURE.
(17). Sul display viene visualizzata la temperatura minima attualmente impostata.
e
(20). Campo di regolazione
e
(20). Campo di regolazione
Attivazione/disattivazione del monitoraggio della temperatura
1. Premere il tasto MENU (19).
2.
Selezionare attraverso il tasto
3.
Premere una volta il tasto
4.
Selezionare ora tramite i tasti
5.
Confermare tramite il tasto
(17). Se il monitoraggio è attivato, sul display viene visualizzato ALERT ON?. Se
invece il monitoraggio è disattivato, sul display viene visualizzato ALERT OFF?.
6.
Confermare tramite il tasto
(17). Sul display viene visualizzato brevemente SAVED e successivamente il punto
menu TEMPERATURE.
Premere il tasto MENU (19), per uscire dal livello di programmazione.
7.
(20) il punto menu TEMPERATURE.
(17). Nel display viene visualizzato il punto menu RANGE.
e
(20) il punto menu ALERT ON/OFF.
51
4.10
- Impiego Attivazione/disattivazione del segnale acustico
Se è stato disattivato il volume dell'unità genitori, anche un segnale acustico può avvisare sui rumori del bebè. Una volta raggiunto
il penultimo livello del visualizzatore si sente un segnale acustico e nel display viene visualizzata l'indicazione SOUND ALERT. In
questo caso occorre aumentare il volume, per poter ascoltare il bebè.
Nota: Con il volume attivato il segnale d'avvertimento è automaticamente disattivato.
1.
Premere il tasto MENU (19).
2.
Selezionare attraverso il tasto
3.
Confermare tramite il tasto
(17). Se il segnale acustico è attivato, sul display viene visualizzato ALERT ON?. Se
invece il segnale acustico è disattivato, sul display viene visualizzato ALERT OFF?.
4.
Confermare tramite il tasto
(17). Sul display viene visualizzato brevemente SAVED e successivamente il punto
menu SOUND ALERT.
Premere il tasto MENU (19), per uscire dal livello di programmazione.
5.
4.11
(20) il punto menu SOUND ALERT.
Inserimento/disinserimento della luce notturna
Tramite il tasto
(1) potete accendere e spegnere la luce notturna nell'unità bebè. Con la luce notturna accesa in ambedue i
display viene visualizzato il simbolo
. In questo modo è possibile controllare anche attraverso l'unità genitori se la luce notturna
è accesa oppure spenta. La luce notturna può essere accesa ossia spenta anche attraverso l'unità genitori.
Inserimento della luce notturna attraverso l'unità genitori
1. Premere il tasto MENU (19).
2. Se la luce notturna è spenta, nel display viene visualizzato LIGHT ON?.
3.
Confermare con il tasto
(17). La luce notturna è accesa e nel display viene visualizzato il simbolo
.
Disinserimento della luce notturna attraverso l'unità genitori
1. Premere il tasto MENU (19).
2. Se la luce notturna è accesa, nel display viene visualizzato LIGHT OFF?.
3.
52
Confermare con il tasto
(17). La luce notturna è spenta e nel display viene visualizzato il simbolo
.
- Impiego 4.12
Ricerca dell'unità genitori
Se qualche volta vi siete dimenticati, dove avete lasciato per ultimo l'unità genitori, basta semplicemente premere il tasto PAGE
(3) dell'unità bebè. Dopodiché sentirete per 2 minuti i segnali di chiamata dell'unità genitori, che vi consentirà di ritrovarla
facilmente. Mediante un qualsiasi tasto a piacere nell'unità genitori o mobile si possono disattivare anticipatamente i segnali
acustici di localizzazione.
Nota: Se è stato disattivato il volume dell'unità genitori, questi verrà di nuovo regolato automaticamente al livello medio.
4.13
Monitoraggio del contatto radio
Il contatto radio tra l'unità genitori e l'unità bebè viene monitorato in continuazione. In un buon contatto radio nell'unità genitori e
nell'unità bebè si illumina la spia di controllo verde LINK (18/11).
Se vi siete allontanati eccessivamente con l'unità genitori dall'unità bebè, o nel caso in cui l'unità bebè fosse spenta, lampeggia la
spia di controllo verde e ogni 30 secondi si sente un segnale acustico d'avvertimento. Dopodiché la spia di controllo lampeggia di
nuovo in color rosso e quindi viene visualizzata la segnalazione display NOT LINKED e ogni 30 secondi si sente un segnale
acustico d'avvertimento.
Nota: Il segnale acustico d'avvertimento per segnalare l'interruzione del contatto radio non può essere disattivato. Premendo un
qualsiasi tasto a piacere nell'unità genitori si può disattivare per 3 minuti il segnale acustico d'avvertimento.
4.14
Ripristino alle impostazioni di fabbrica
Il ripristino alle impostazioni di fabbrica può essere eseguito individualmente sia nell'unità genitori che nell'unità bebè.
Accendere a tal fine l'unità genitori o l'unità bebè.
Mentre si illuminano tutte le spie e indicazioni, mantenere immediatamente premuto il tasto del volume
display viene visualizzata l'indicazione RESET. Il reset è completato dopo alcuni secondi.
Impostazioni di fabbrica dell'unità bebè
Volume: Livello 3
Ninnananna: 1
Monitoraggio della temperatura: Minimo 14°C, massimo 23°C
(4/20), finché nel
Impostazioni di fabbrica dell'unità genitori
Volume: Livello 1
Sensibilità: Livello 5
Segnale acustico: ON
Monitoraggio della temperatura: OFF
53
- Informazioni importanti -
5
5.1
Informazioni importanti
Individuazione di errori
Nel caso di eventuali complicazioni con il Vostro prodotto, si prega di attenersi innanzitutto alle seguenti istruzioni. Per le richieste
di garanzia Vi preghiamo di rivolgerVi al Vostro rivenditore di fiducia. La validità della garanzia corrisponde a 2 anni. Per le
batterie ricaricabili si concede una garanzia di 12 mesi.
Problema
La spia di controllo lampeggia (18/11) in
rosso.
Segnale fischiante
Nessuna trasmissione
L'unità genitori non può essere accesa.
Gli accumulatori dell'unità genitori non
vengono caricati.
Indicazione LOW BATTERY nell'unità
bebè.
54
Possibile causa
Unità genitori oppure unità bebè spenta.
Rimedio
Premere il tasto d'accensione.
La distanza tra l'unità genitori e l'unità
bebè è troppo breve.
Il volume è troppo alto.
Il volume nell'unità genitori è troppo
basso.
La sensibilità è regolata ad un valore
troppo basso.
È stata superata la portata.
L'unità genitori non è caricata.
Allontanarsi con l'unità genitori dall'unità
bebè.
Ridurre il volume.
Aumentare il volume delle unità.
Aumentare la sensibilità attraverso
l'unità genitori.
Avvicinarsi con l'unità genitori all'unità
bebè.
Caricare l'unità genitori sulla stazione di
carica.
Sostituire gli accumulatori standard
Gli accumulatori standard hanno
superato la loro durata utile.
Le batterie dell'unità bebè sono esaurite.
Sostituire le batterie dell'unità bebè.
- Informazioni importanti 5.2
Dati tecnici
Standard
Numero canale
Raggio d'azione
Raggio d'azione
Standby unità genitori
Alimentazione elettrica dell'unità genitori
Alimentazione elettrica della stazione di carica
per l'unità genitori
Alimentazione elettrica dell'unità bebè
Protezione contro la mancanza di corrente
nell'unità bebè
Standby unità bebè durante il funzionamento a
batterie
Temperatura ambientale ammessa
Relativa umidità d'aria ammessa
DECT
120 canali compresi tra 1880 e 1990 MHz
in edifici fino a 50m
all'aperto fino a 300m
ca. 12 fino a 24 ore
2 accumulatori standard del tipo AA 1,2V
1300mAh
alimentatore di rete DC 9.0V/300mA collegato
in modo fisso con la stazione di carica
alimentatore di rete DC 9.0V/300mA
4 batterie alcaline 1,5V del tipo AA
fino a 16 ore
10°C fino 30°C
20 fino 75%
55
56
- Contents 1 General safety information .................................................................................................................................................... 58
2 User controls .......................................................................................................................................................................... 60
3 Setting up ................................................................................................................................................................................ 62
3.1 Parent unit ............................................................................................................................................................................ 62
3.2 Baby unit............................................................................................................................................................................... 63
4 Operation................................................................................................................................................................................. 64
4.1 Display indicators and their meaning.................................................................................................................................... 64
4.2 Position for the baby unit ...................................................................................................................................................... 64
4.3 Switching the baby unit on and off........................................................................................................................................ 64
4.4 Switching the parent unit on and off ..................................................................................................................................... 65
4.5 Adjusting the volume ............................................................................................................................................................ 65
4.6 Setting the transmission sensitivity....................................................................................................................................... 66
4.7 Playing lullabies.................................................................................................................................................................... 67
4.8 Intercom function to the baby ............................................................................................................................................... 68
4.9 Temperature monitoring ....................................................................................................................................................... 68
4.10 Switching the warning tone on and off.................................................................................................................................. 70
4.11 Switching the nightlight on/off............................................................................................................................................... 70
4.12 Searching for the parent unit ................................................................................................................................................ 71
4.13 Monitoring the radio contact ................................................................................................................................................. 71
4.14 Restoring factory settings ..................................................................................................................................................... 71
5 Important information ............................................................................................................................................................ 72
5.1 Troubleshooting.................................................................................................................................................................... 72
5.2 Technical data ...................................................................................................................................................................... 73
57
- General safety information -
1
General safety information
With the BC-307 Babyphone you have purchased a quality SWITEL product. Please read these operating instructions carefully in
order to learn about all the options. Under no circumstances open the unit yourself and do not try to carry out your own repairs. For
any claims under the warranty, please refer to your dealer.
The following items are supplied
one parent unit including belt clip
one baby unit
2 rechargeable standard batteries for parent unit
charging station for parent unit including power supply
Plug-in power supply for baby unit
one instruction manual
Intended use
The unit is designed for transmitting speech signals such as noises made by children. Warning or signal tones from breathing or
heartbeat monitors CANNOT be transmitted.
NOTE: The use of this unit CANNOT replace the personal supervision of a child or other person requiring care. No
liability that falls outside the statutory regulations can be accepted.
Safety Information
• The unit is not suitable for medicinal applications.
• Maintain a safe distance of at least one metre when using the
unit.
• Use only high-quality batteries.
• For safety reasons, use only the original power supplies
provided. The unit may set on fire if unsuitable power supplies
are used.
• When using a power supply, make sure that the cable and
plug are in perfect condition. Kinked or chafed cables can
cause a short-circuit. Note: Fire hazard.
• Ensure that all components are adequately ventilated during
operation. Do not place pillows or towels on the units.
58
• Do not use the units in areas where there is a risk of
explosion.
• The units are designed for use in protected rooms with a
temperature range of 10 °C to 30 °C. The units must not be
installed in damp rooms such as a bathroom or laundry room.
Avoid proximity to sources of heat such as radiators and do
not expose the unit to direct sunlight.
• If the useful life of the complete equipment has expired,
please dispose of it carefully in accordance with the statutory
requirements and in a manner friendly to the environment.
• The maximum range is up to 300 metres outdoors and up to
50 metres indoors.
- General safety information Rechargeable standard batteries/ordinary batteries
•
Use only high-quality batteries for the baby unit as a backup in the case of supply failure or in battery mode.
•
For the parent unit, use only standard rechargeable batteries, Type AA 1.2V 1300mAh.
•
Always change all standard rechargeable batteries/ordinary batteries at the same time.
•
Do not throw standard rechargeable batteries/ordinary batteries into the fire or immerse in water.
•
If you are not using the units over an extended period, please remove the standard rechargeable batteries/ordinary batteries.
Long-term storage with the standard rechargeable batteries/ordinary batteries fitted can cause the batteries to leak.
•
Do not dispose of old or defective standard rechargeable batteries/ordinary batteries with the normal household waste. You
are legally obliged to return all batteries and rechargeable batteries to suitable collection points.
Position
Do not set up the units in the immediate vicinity of other electrical equipment such as microwaves or hi-fi systems, as this may
result in mutual interference. The location has a decisive influence on trouble-free operation.
Place the units on a flat and non-slip surface. The feet do not normally leave any marks on the surface. However, due to the large
number of varnishes and surfaces in use, it may not be possible to prevent marks occurring on the surface due to the feet of the
unit.
Cleaning and care
The surface of the case can be cleaned with a soft, dry, lint-free cloth. Never use cleaning agents, particularly aggressive solvents.
No attention is necessary apart from cleaning the case occasionally. The rubber feet of the Babyphone are not resistant to all
cleaning agents. The manufacturer can therefore not accept any liability for possible damage to furniture or the like.
59
- User controls -
2
User controls
1
2
3
4
Baby unit
1
2
3
4
5
6
7
8
9
10
11
Nightlight on/off
Temperature probe
Search for parent unit with the Page button
Volume adjustment
Illuminated display
Start/Stop for playing back lullabies
Pause button when playing back lullabies
Microphone
On/Off
For selecting lullabies
Visual indicator that there is a connection to the parent unit
Back
12 Battery compartment
13 Connection for power supply
11
5
12
10
9
13
60
8
6
7
- User controls Parent unit
14
15
16
17
18
19
20
21
Button for intercom function to baby unit
On/Off
Illuminated display
Confirmation button for menu functions
Visual indicator that there is a connection to the baby unit
Menu button
Volume adjustment/Selection of menu functions
Visual indication of baby monitoring
21
20
19
18
14
15
16
17
Back
22 Belt clip
23 Battery compartment
Charging station for parent unit
24 Charge monitoring light; illuminates when parent unit is being charged
22
24
23
61
- Setting up -
3
3.1
Setting up
Parent unit
Fitting standard batteries
Open the battery compartment on the parent unit by pushing up the battery compartment cover by its bottom end. If the belt clip
has been fitted, this must be removed first. Now insert the standard rechargeable batteries taking care to ensure that the polarity is
correct. Close the battery compartment cover.
NOTE:
Do not use normal, non-rechargeable batteries in the parent unit.
Never use the parent unit on the charging station without standard rechargeable batteries.
Fitting or removing the belt clip
To fit the belt clip, place the top end into the parent unit and then
press the belt clip downwards. To remove the belt clip, use a
screwdriver to press on the retainer inside the clip and pull the
belt clip upwards.
Fitting the clip
Removing the clip
Connecting the charging station
The plug-in mains power supply is permanently connected to the charging station. Plug the power supply into a properly installed
230 V mains socket.
62
- Setting up Charging the parent unit
Place the parent unit in the charging station with the display to the front for at least 16 hours. The charge monitoring light on the
charging station will come on and charging will be indicated by a cycling display of the battery symbol. When the parent unit is fully
charged, the display will show a complete battery symbol. The standard rechargeable batteries have an operating time of max. 12
to 24 hours at room temperature.
The current battery capacity is shown in the display.
Full
Half
Low
If the battery capacity is too low, an appropriate message will appear in the display and you will hear a warning tone every minute.
The parent unit must only be used for a further 1 hour after the first warning tone.
3.2
Baby unit
Connecting the power supply
Use the plug-in mains power supply provided for the baby unit. Insert the small round plug into the socket provided on the rear of
the baby unit (13) and plug the power supply into a mains socket (230V/50Hz). Ensure that the plug-in mains power supply is
adequately ventilated.
Fitting batteries as a backup in the case of supply failure or for battery mode (not included)
The baby unit is designed for operation with the plug-in mains power supply provided. The baby unit can be operated with four
1.5V AA alkaline batteries as a backup in the case of supply failure or for short-term operation in battery mode. In this case, the
baby unit can be used for 16 hours with new batteries and the message BATTERY will appear in the display.
If the battery capacity is too low, an appropriate message will appear in the display and you will hear a warning tone every minute.
The baby unit can be used for a further 1 hour after the first warning tone.
Open the battery compartment on the rear using a coin and insert the batteries. When doing so, take care to ensure that the
polarity is correct and close the battery compartment.
63
- Operation -
4
Operation
4.1
Display indicators and their meaning
1.
2.
3.
4.
5.
Battery capacity
Indication of current temperature
Nightlight is switched on.
A lullaby is being played
Different menu displays
4.2
Position for the baby unit
1
2
Lullaby1
3
4
5
Position the baby unit near to the baby. Please observe the minimum distance of one metre. For best transmission, the integral
microphone (8) should be pointing towards the child. Please pay attention to the additional safety information in Chapter 1 of
these operating instructions.
Note: Please do not use the parent unit too close to the baby unit, as this can lead to loud whistling noises. In this case, move
further away from the baby unit or reduce the volume.
4.3
Switching the baby unit on and off
Switch the baby unit on by pressing the On/Off button (9) for one second. A search will now be made for the parent unit and after a
few seconds the indicator (11) will light up green. If the baby unit does not find the parent unit, the indicator (11) will flash red.
If you want to switch the baby unit off, press and hold the On/Off button (9) for one second.
64
- Operation 4.4
Switching the parent unit on and off
Switch the parent unit on by pressing the On/Off button (15) for one second. A search will now be made for the baby unit and after
a few seconds the indicator (18) will light up green. If the baby unit does not find the parent unit, the indicator (18) will flash red.
If you want to switch the parent unit off, press and hold the On/Off button (15) for one second.
Note: The parent unit can also be used when it is sitting on the charging station. In this case, the standard rechargeable batteries
will continue to be charged, but full charging will take longer.
4.5
Adjusting the volume
Baby unit
and
(4). The volume that is set relates
The volume on the baby unit can be adjusted in five steps by means of the buttons
to the playing of lullabies and, at the same time, to the volume for the intercom function. For more information see Chapter 4.8.
Parent unit
The volume on the parent unit can be set in five steps by means of the buttons
also be switched off completely (VOLUME OFF).
and
(20). In addition, the loudspeaker can
As well as audible transmission via the loudspeaker, noises are also displayed visually by means of five green and three red
indicators (21). Monitoring can therefore be carried out even when the volume has been reduced or switched off altogether.
Note:
•
When the volume on the parent unit is switched off, it can still sound a warning tone if the baby makes a noise. For more
information see Chapter 4.10 .
•
The volume on the parent unit will automatically be reset to a medium volume when the intercom function is used and the
volume was previously switched off.
65
- Operation 4.6
Setting the transmission sensitivity
The transmission sensitivity from the baby unit to the parent unit can be adjusted in 5 steps. In Step 5, even very quiet noises can
be heard at the parent unit. In Step 1, only loud noises can be heard. If you want to be sure that you will hear all noises, use
Step 5.
Note: This setting has no effect on the visual indication of noise on the parent unit.
1.
Press the MENU button (19).
2.
Select SENSITIVITY from the menu with the
button (20).
3.
Press the
4.
Now select the required sensitivity using the
5.
6.
Confirm with the
button (17). The display will briefly show SAVED and then the menu item SENSITIVITY.
Press the MENU button to exit programming.
66
button (17). The display will show the sensitivity that is currently set in 5 steps.
and
buttons (20).
- Operation 4.7
Playing lullabies
Five lullabies, each with a length of 30 seconds, have been stored to help your baby fall asleep peacefully. With several repeats,
the playing time amounts to approximately 5 minutes. Lullabies can be played both via the baby unit and via the parent unit.
Playing lullabies from the baby unit
You can find the required LULLABY 1 to 5 or select PLAY ALL by repeatedly pressing the
setting, all lullabies will be played one after the other for 5 minutes.
You can start and stop the playback by pressing the
then continue with the same button
button (10). In the PLAY ALL
button (6). You can pause playback by pressing the
button (7) and
(7).
Playing lullabies from the parent unit
1. Press the MENU button (19).
2.
Select LULLABY from the menu with the
3.
Confirm with the
4.
Press the
button (17) once more and the lullaby that was last played will be played again. If you want to select a
different lullaby, first press the
5.
button (20).
button (17). The display will show PLAY?.
Confirm with the
button (20). The message SELECT NEW will appear in the display.
button (17).
6.
Now select the required lullaby using the
7.
Confirm with the
button (17) and the selected lullaby will be played. In the PLAY ALL setting, all lullabies will be played
one after the other for 5 minutes.
8.
9.
The
button (17) can be used as a PAUSE button during playback.
To stop playback, press the MENU button (19). The display will show STOP LULLABY?.
10. Confirm with the
and
buttons (20). Or select PLAY ALL.
button (17) and playback will be stopped.
67
- Operation Note:
•
While the lullabies are being played, the
indicator and the name of the lullaby currently being played will appear in the
display of the baby unit and also of the parent unit. In this way, you can tell from the parent unit whether a lullaby is being
played.
•
•
•
If playback is switched to Pause, then the
indicator will flash in both displays.
The pause must not be longer than 60 seconds. After this, playing of the lullaby will be stopped automatically.
You can make full use of the entire menu on the parent unit even when lullabies are being played.
4.8
Intercom function to the baby
You can speak to the baby in order to calm it by using the intercom function. To do this, press and hold the TALK button (14) on
the parent unit and speak. You will be able to hear the baby again when you release the TALK button (14). The indicator light
(11/18) on both the parent and baby unit will flash while you are speaking.
Note: If the volume on the parent unit is switched off, this will be automatically reset to a medium volume.
4.9
Temperature monitoring
The temperature in the baby's room is shown continuously on both displays. Make sure that the temperature probe is not covered
by any objects.
An adjustable temperature range can also be monitored. If the temperature falls outside this range, you will hear a short signal
tone at the parent unit each time this occurs and the temperature indication will flash in the display. If the temperature rises or falls
further, you will hear these short signal tones each time it changes.
Note: Normally, the signal tone will sound for every degree that the temperature rises or falls outside the set temperature range.
You can offset the range by 2°C up or down by pressing any button on the parent unit so that the signal tone will only sound the
next but one time the temperature moves out of the range.
68
- Operation Setting the temperature range
1. Press the MENU button (19).
2.
Select TEMPERATURE from the menu with the
3.
Press the
button (20).
4.
Now select the required minimum temperature using the
19°C.
5.
Confirm with the
temperature.
6.
Now select the required maximum temperature using the
30°C.
7.
8.
Confirm with the
button (17). The display will briefly show SAVED and then the menu item TEMPERATURE.
Press the MENU button to exit programming.
button (17) twice. The display will show the currently selected minimum temperature.
and
buttons (20). The adjustment range is from 10 to
button (17). The display will briefly show SAVED and then the currently selected maximum
und
buttons (20). The adjustment range is from 22 to
Switching temperature monitoring on/off
1. Press the MENU button (19).
2.
Select TEMPERATURE from the menu with the
3.
Press the
button (20).
button (17) once. The display will show the menu item RANGE.
4.
Now select ALERT ON/OFF from the menu using the
5.
Confirm with the
button (17). If the monitoring is switched off, the display will show ALERT ON?. When the
monitoring is switched off, the display will show ALERT OFF?.
and
buttons (20).
6.
7.
Confirm with the
button (17). The display will briefly show SAVED and then the menu item TEMPERATURE.
Press the MENU button (19) to exit programming.
69
- Operation 4.10
Switching the warning tone on and off
When the volume on the parent unit is switched off, it can still sound a warning tone if the baby makes a noise. When the second
last step of the visual indicator has been reached, the warning tone will sound and the SOUND ALERT indicator will appear in the
display. Then increase the volume so that you can hear your baby.
Note: When the volume is switched on, the warning tone is automatically deactivated.
1.
Press the MENU button (19).
2.
Select SOUND ALERT from the menu with the
3.
Confirm with the
button (17). If the warning tone is switched off, the display will show ALERT ON?. When the
warning tone is switched off, the display will show ALERT OFF?.
4.
5.
Confirm with the
button (17). The display will briefly show SAVED and then the menu item SOUND ALERT.
Press the MENU button (19) to exit programming.
4.11
button (20).
Switching the nightlight on/off
You can switch the nightlight on the baby unit on and off by means of the
button (1). When the nightlight is switched on, the
indicator appears in both displays. You can therefore also check from the parent unit whether the nightlight is switched on or
off. The nightlight can also be switched from the parent unit.
Switching the nightlight on from the parent unit
1. Press the MENU button (19).
2. If the nightlight is switched off, LIGHT ON? will appear in the display.
3.
Confirm with
(17). The nightlight will be switched on and the
indicator will appear in the display.
Switching the nightlight off from the parent unit
1. Press the MENU button (19).
2. If the nightlight is switched on, LIGHT OFF? will appear in the display.
3.
70
Confirm with
(17). The nightlight will be switched off and the
indicator will appear in the display.
- Operation 4.12
Searching for the parent unit
If you cannot remember where you have left the parent unit, press the PAGE button (3) on the baby unit. You will hear the call
signals from the parent unit for 2 minutes and thus be able to find it again easily. You can cancel the audible signals prematurely
by pressing any button on the parent or baby unit.
Note: If the volume on the parent unit is switched off, this will be automatically reset to a medium volume.
4.13
Monitoring the radio contact
The radio contact between the parent unit and the baby unit is monitored continuously. When there is a good connection, the
green LINK indicator light (18/11) on the parent and baby unit illuminates.
If you have moved the parent unit too far away from the baby unit or if the baby unit is switched off, the green indicator light will
flash and you will hear a warning tone every 30 seconds. After this, the indicator light will flash red, the message NOT LINKED will
appear in the display and you will hear a warning tone every 30 seconds.
Note: The warning tone for loss of radio contact cannot be switched off. However, the warning tone can be silenced for 3 minutes
by pressing any button on the parent unit.
4.14
Restoring factory settings
The factory settings can be reset individually on the parent and baby unit.
Switch on the parent or baby unit.
While all the indicators are on, press the volume button
be carried out after a few seconds.
Factory settings, baby unit
Volume: Step 3
Lullaby: 1
Temperature monitoring: Minimum 14°C, Maximum 23°C
(4/20) immediately until RESET appears in the display. The reset will
Factory settings, parent unit
Volume: Step 1
Sensitivity Step 5
Warning tone: On
Temperature monitoring: Off
71
- Important information -
5
5.1
Important information
Troubleshooting
If you have problems with your product, please check the following points first. For any claims under the warranty, please refer to
your dealer. The warranty period is 2 years. The rechargeable batteries are covered by a 12 months warranty.
Problem
Indicator light (18/11) flashes red.
Whistling sound
No transmission
Possible cause
Parent unit or baby unit not switched on
The parent and baby unit are too close
together.
The volume is too high.
The volume on the parent unit is too low.
The sensitivity is set too low.
The range has been exceeded.
The parent unit cannot be switched on.
The parent unit is not charged.
The batteries in the parent unit are not
charged.
LOW BATTERY display on the baby
unit.
The standard rechargeable batteries
have reached the end of their life.
The batteries in the baby unit are flat.
72
Remedy
Press ON button.
Move the parent unit further away from
the baby unit.
Reduce the volume.
Increase the volume on the parent unit.
Increase the sensitivity via the parent
unit.
Move the parent unit nearer to the baby
unit.
Charge the parent unit on the charging
station.
Change the standard batteries.
Change the batteries in the baby unit.
- Important information 5.2
Technical data
Standard
Number of channels
Range
Range
Standby, parent unit
Power supply, parent unit
Power supply, charging station, parent unit
Power supply, baby unit
Backup in case of supply failure, baby unit
Standby, baby unit in battery mode
Permissible ambient temperature
Permissible relative humidity
DECT
120 channels between 1880 and 1990 MHz
Indoors up to 50 m
Outdoors up to 300 m
ca. 12 to 24 hours
2 x AA 1.2V 1300mAh standard rechargeable
batteries
Plug-in mains power supply DC 9.0V/300mA
permanently connected to the charging station
Plug-in mains power supply DC 9.0V/300mA
4 x 1.5V AA alkaline batteries
up to 16 hours
10°C to 30°C
20 to 75%
73
- Declaration of Conformity WE
Of
TELGO AG
Route d'Englisberg 11
CH-1763 Granges Paccot
Declare under our sole responsibility that the product
Model:
Description:
BC-307
Baby Phone
Is in conformity with directives: R&TTE Directive (1999/5/EC)
Compliance is achieved by conformity to the following:
EN 301 406
Test Reports G0M20402-8501-T-61, G0M20402-8501-T-62
EN 301 489-1/-3
Test Reports G0M20402-8501-E-12, G0M20402-8501-E-16
EN 60950
Test Report: G0M20402-8501-L
Authorised signatory:
Signature:
Name:
Position in the company:
Date of issue:
______________________
Selim Dusi
Managing Director
20. July 2004
Copies of this document will be held on file for a period of 10 years after the last production.
Supplier:
Product:
CE0681
74
TELGO AG, Route d'Englisberg 11, CH-1763 Granges Paccot
SWITEL BC-307
75
www.switel.com
This document in other languages
- français: SWITEL BC307
- Deutsch: SWITEL BC307
- italiano: SWITEL BC307


